DIY Book Sleeve | How to Make a Book Sleeve
Today, we're going to learn how to make a book sleeve!
Are you a book lover who likes to take their reading material everywhere with them? If so, then you must have faced the problem of carrying your books in a safe and secure way. A DIY Book Sleeve is the perfect solution to this problem. Not only does it keep your books safe, but it also adds a personal touch to your reading experience. In this blog post, we will guide you through the process of making your own Book Sleeve. We'll cover everything from understanding the different sizes of book sleeves, to selecting the right fabric, tools needed for this project, and even finishing touches to make it look professional. So, let's get started on creating a beautiful and practical DIY Book Sleeve that you can use for years to come!
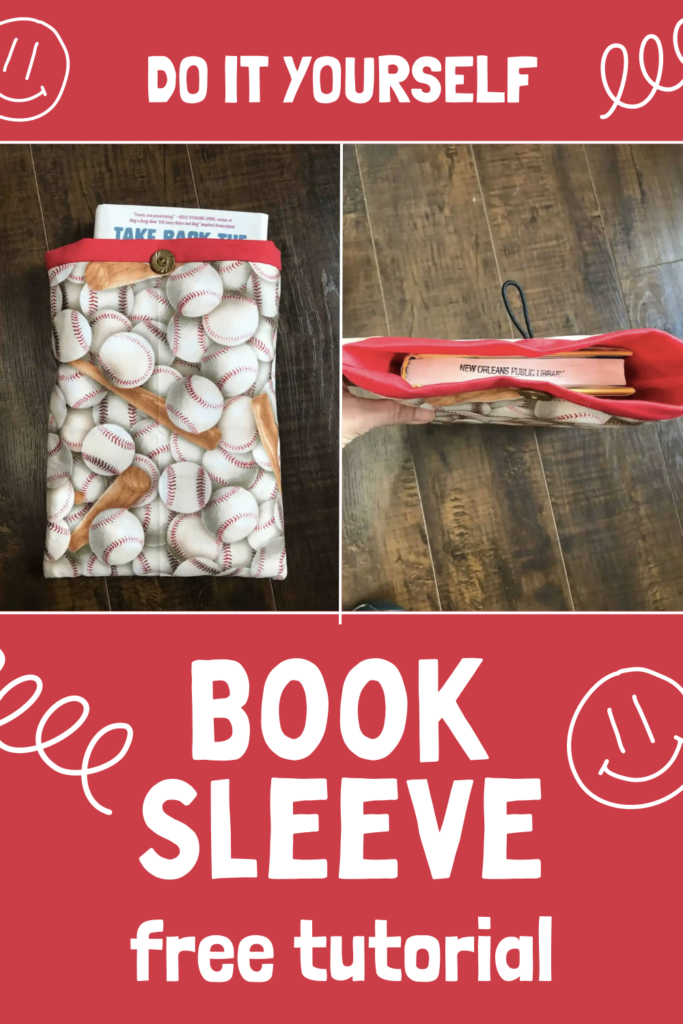
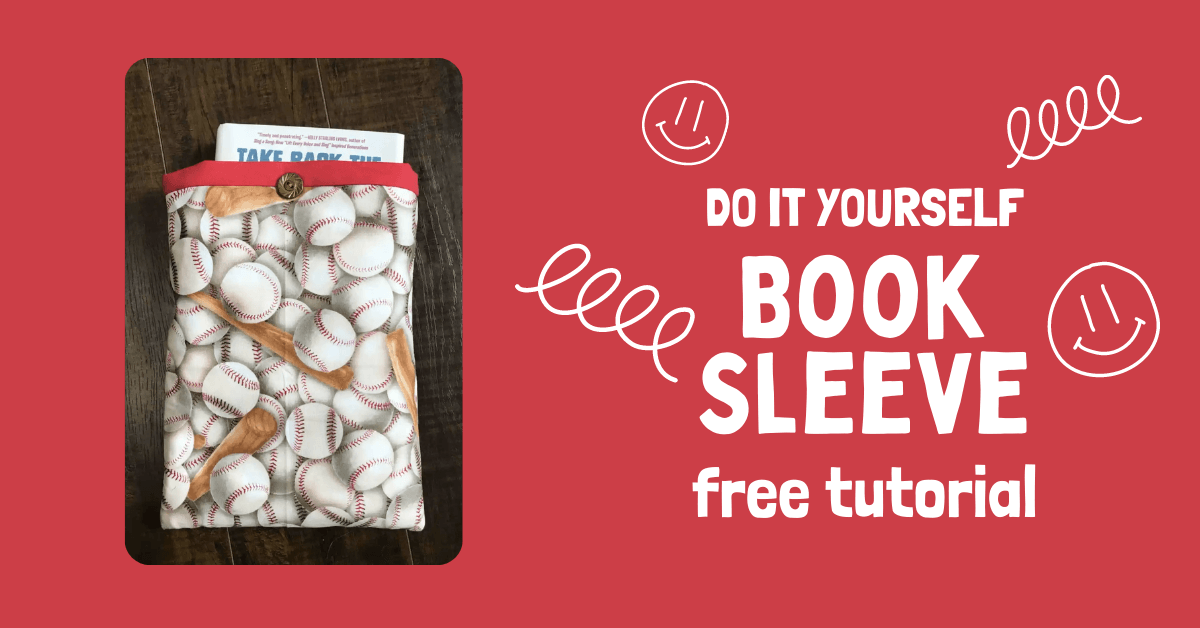
DIY Book Sleeve: Free Tutorial
Sometimes, it can be the simplest things to get kids interested in reading for the summer. Earlier in the month, we shared how to keep track and encourage your young readers with a blog on summer reading program ideas. Today, I’m going to show you one way to protect those precious books by making a diy book sleeve!
How to Make DIY Book Sleeves
This project is so easy, that you can get your kiddos involved in making their own! WIN WIN!
Book Sleeve Fabric & Supplies
To create your DIY book sleeve, you will need a few essential materials. Start by selecting a sturdy fabric that can protect against scratches and damage. You'll also need batting or interfacing to add padding to the sleeve and keep your book safe. Additionally, gather a sewing machine or needle and thread for stitching the fabric together. Use a measuring tape or ruler to ensure you cut the fabric to the correct size and scissors or a rotary cutter to cut the fabric and batting. Finally, an iron will be necessary to press and fold the fabric.

Note: finished measurement is approximately 8.5″x11″; the quilting cotton fabric and batting listed below will make 2 book sleeves. Just double the other supplies for the second one.
- 1 fat quarter of quilting cotton for the outside (best if it’s non-directional)
- 25″ or 3/4 yard of quilting cotton for the lining
- 21″ scrap of batting or fusible fleece
- Hair tie or 3″ piece of Fold Over Elastic or other narrow width elastic
- 1 button
Choosing the Right Fabric
When choosing the fabric for your book sleeve, consider its intended use. Opt for durable and easy-to-clean fabrics that can withstand regular handling. Make sure the fabric complements the design and style of the books you'll be using it for. Take into account the size and thickness of the books to ensure a proper fit. Additionally, think about the environment in which the book sleeve will be used and select a fabric appropriate for that setting. By carefully selecting the right fabric, you can enhance both the functionality and aesthetics of your DIY book sleeve.
Understanding Book Sleeve Sizes
Different book sleeve sizes cater to various book dimensions, ensuring a snug and secure fit. Available in small, medium, and large sizes, book sleeves can be customized to accommodate specific book sizes. This understanding plays a vital role in protecting your books while on the go. By choosing the right size, you can provide optimal protection for your favorite paperbacks or hardcovers. Whether you have a small novella or a hefty textbook, there's a book sleeve size that suits your needs.
Book Sleeve Cut and Prep
Outer fabric: Start by cutting your fat quarter of outer fabric into 2 pieces measuring 9″x21″ (Fat quarters measure 18″x21″ so you can cut it in half…but be sure you’re cutting it the proper direction!!). You will only need one of the pieces, so put the other piece on the side to make another book sleeve for a friend!
Batting: cut the same as your outer fabric – 9″x21″.
Lining: cut your lining fabric 9″x25″
Elastic/Hair tie: Cut to 3″
DIY Book Sleeve instructions
Seam allowance is 1/4″ unless otherwise stated.
Book Sleeve Outer Layer and Batting


Book Sleeve Step 1: First, lay the batting on your cutting mat. Next, place the outer fabric on top of it, the right side facing up. Fold one short edge to meet the other short edge, so the outer fabric print is folded right sides touching. Sew the side edges (do not sew along the short top edge or you will sew the sleeve shut!).
Book Sleeve Step 2: Next, lay the lining fabric on the cutting mat. Now, fold one short edge over to meet the other short edge (as done in the previous step). However, before sewing, cut the bottom folded edge along the fold.


Book Sleeve Step 3: Sew the side seams and the bottom seam, but leave a 2″-3″ opening along the middle of the bottom.
DIY Book Sleeve Elastic Loop Placement

Center the elastic loop

Sandwich the loop between the lining fabric and the outer fabric
Book Sleeve Step 4: Turn the lining right side out and slide it into the main part (the outer fabric and batting combo). Match the side seams and pin. Lay the sleeve flat and find the center on one side (so basically 4″ from the side) and mark it with a straight pin.
Form a loop with the elastic and sandwich it at that marked spot between the outer fabric and the lining fabric. The raw edges of the elastic should line up with the raw edges of the fabric with the loop towards the body of the sleeve. Pin this in place.
Joining the Lining and Outer Fabrics
Book Sleeve Step 5: Bring the sleeve to the sewing machine and sew around the entire top, backstitching over the elastic.

Opening in the bottom of the lining for turning the sleeve right side out

Book Sleeve Step 6: Reach into the sleeve and turn the sleeve right side out through the opening created in the bottom of the lining. Press the lining away from the body of the bag.
Book Sleeve Step 7: To close the opening in the lining, use 1/4″ Steam A Seam or you can simply use a straight stitch on your machine to close it (it will not be seen since it’s tucked inside the bag). Alternately, you can use a whip stitch or latter stitch to hand sew the opening shut. (I forgot to get a picture of this step).
Book Sleeve Step 8: Push the lining inside the bag taking time to get everything nice and lined up along the sides and bottom. The lining fabric will peek out about 1/2″ at the top of the sleeve.

DIY Book Sleeve Button Placement
The elastic loop will be on the back of the sleeve. Fold it over the top to find the precise placement for the button. Sew the single button on the front of the diy book sleeve either by machine or by hand.


Now grab your favorite book from your summer reading list and let the fun begin!!!
Oh and here’s a heads up…the DIY book sleeve makes GREAT teacher gifts!
For other teacher gifts you might take a look at these:
- DIY Tote Bag: Stephanie put together a Teacher Tote here where she embroidered the tote bag to look like writing paper. It’s a great and simple tutorial so take a look.
- DIY Lanyard: This DIY Lanyard is the perfect teacher gift. Teachers love a lanyard and this is a simple and easy sewing project and great for a gift.
Thank you for joining us today to learn how to make a book sleeve. By following the steps outlined in this blog, you can make a book sleeve that perfectly fits your favorite books and protects them from wear and tear. Remember to choose the right fabric and gather all the necessary tools before you begin. The most challenging part of creating your DIY book sleeve may be assembling all the pieces together, but with patience and careful stitching, you can achieve a professional-looking result. Once your book sleeve is complete, don't forget to take care of it by cleaning it regularly and storing it in a safe place.
Before you leave, make sure to join our Facebook Group, join our e-mail list below, and follow us on Instagram. Happy sewing!