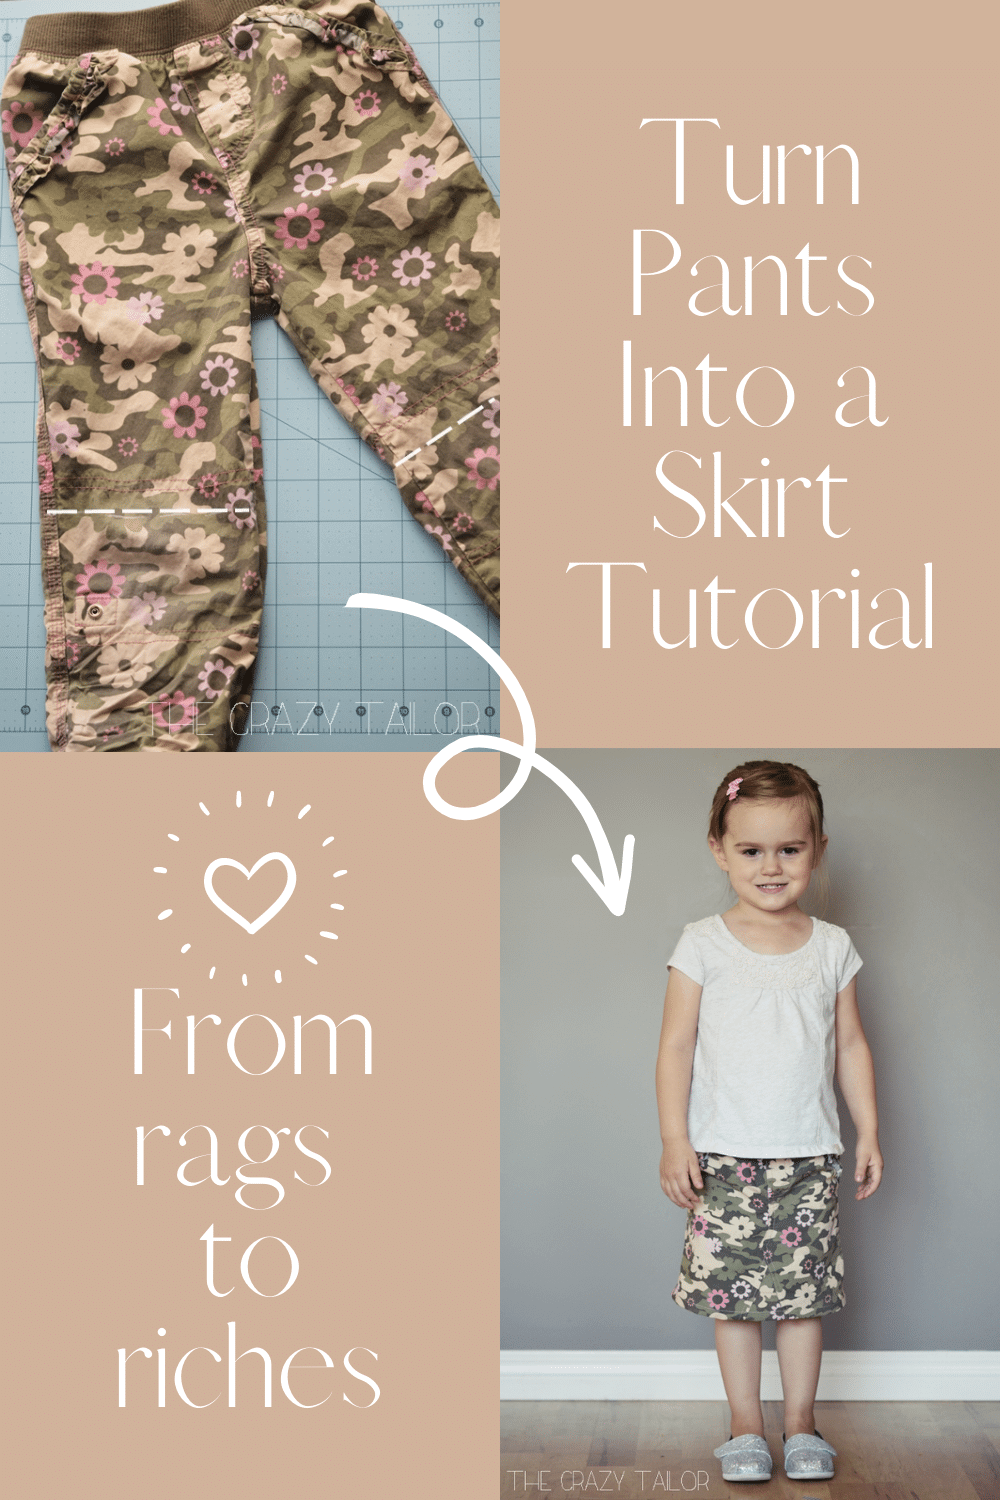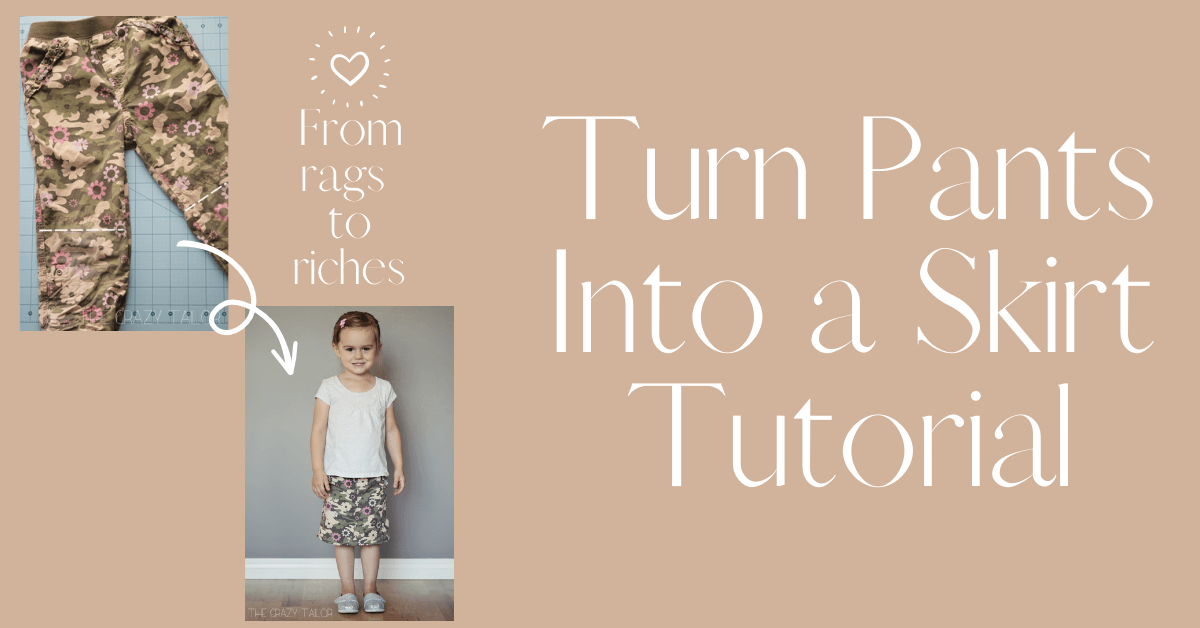
Turn Pants Into a Skirt Tutorial {From Rags to Riches}
Turn Pants Into a Skirt Tutorial {From Rags to Riches}
Lets learn how to turn pants into a skirt. If you find your little girl with a pair of old jeans or pants that no longer fit or she's just tired of wearing them, why not turn them into a stylish skirt? You can transform your old pants into a fashionable and unique skirt with a few simple steps and some basic sewing skills. In this blog post, we'll guide you through the process of turning pants into a skirt, from choosing the right pair of pants to adding finishing touches. So grab your sewing machine and let's get started on this fun and creative project!
Turn Pants Into a Skirt Tutorial
Hey there! I’m so excited to be here sharing a fun little tutorial for something I’ve been doing for ages! Although I’ve always made these for myself, let me tell you, it’s WAY easier for little kids with a chicken butt and no curves!
How to Turn Pants Into a Skirt Supplies
- 1 pair of pants/jeans that still fit the waist, but are too short
- the usual sewing supplies: machine, serger (optional), matching thread, scissors, chalk or a washable fabric marker, pins
- a model – just for checking the length since we’re not using a pattern (or a skirt with a length that you like, to compare the outseam)
Instructions on How to Turn Pants Into a Skirt
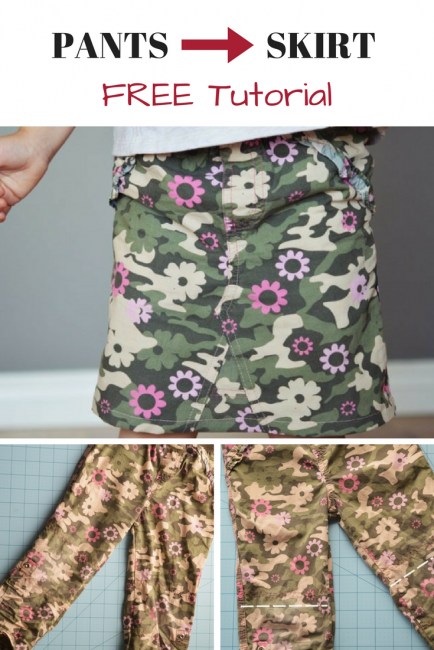
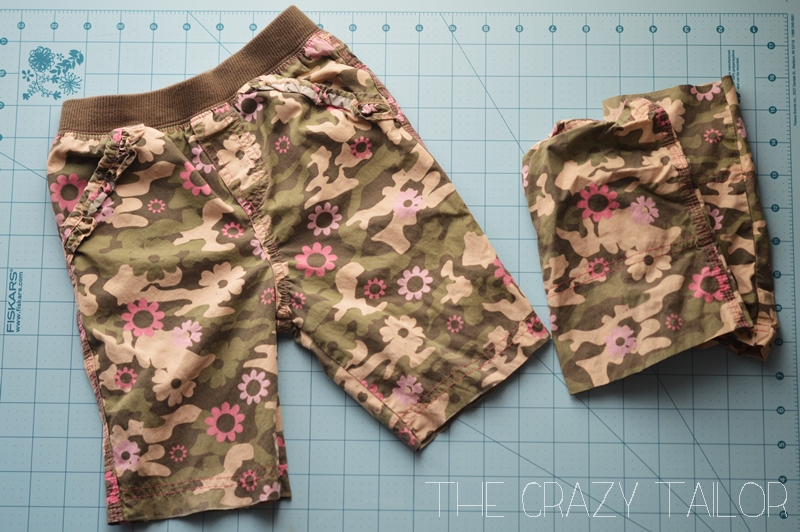
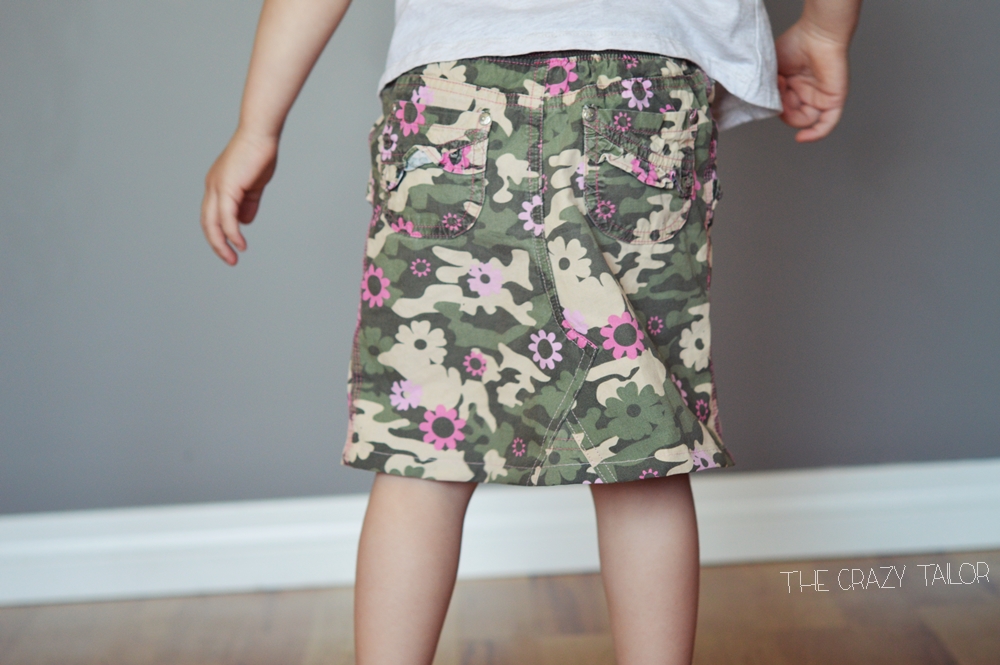
I started off with this pair of too short pants, with the knees worn out.
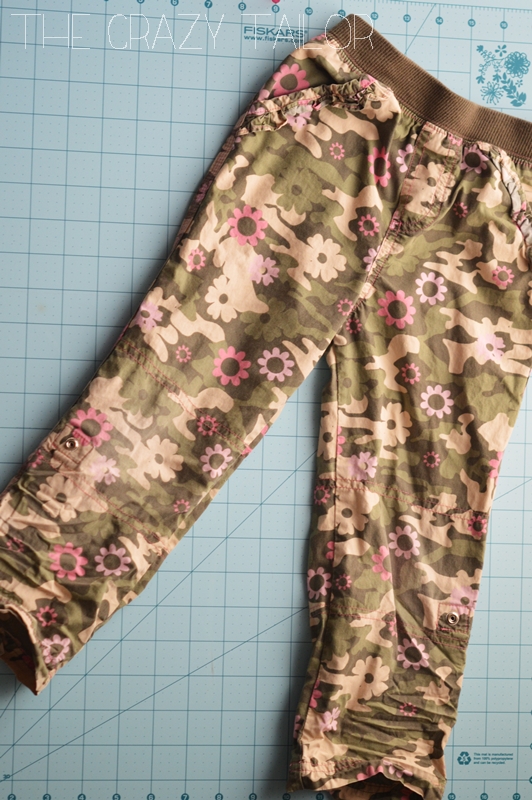
I loved the comfy waist band, and it’s usually never a problem with clothes not fitting in the waist for my daughter – she can still wear size 18mos skirts! Also, the camo-ish print is something I knew hubby would like to see more of, so I decided these would live another life as a skirt!
Start by finding a good spot to cut the legs off – perhaps eyeball it by holding up to your child and seeing where you would like the skirt to hit, plus hem allowance (I added 1″) or compare the outseam on a skirt that fits well for length (the outseam is the seam along the outside of the garment, from waist/hip to hem). Also, avoid the worn-out knees 🙂
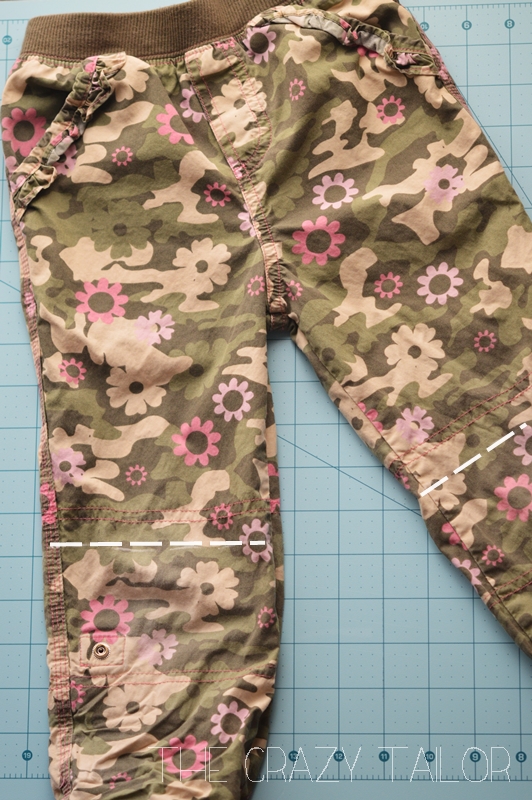
Cut those off and keep the ends! You’ll be using those later.
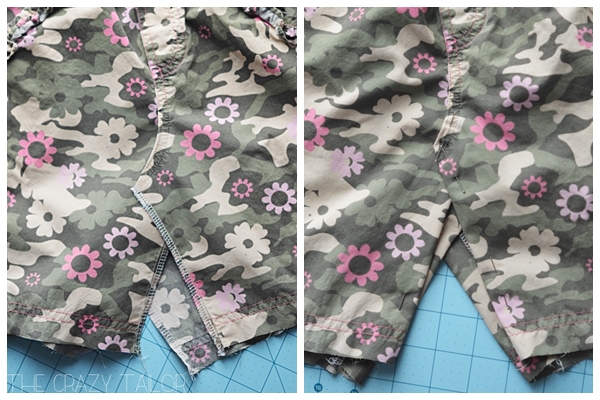
Next, unpick the inseam.
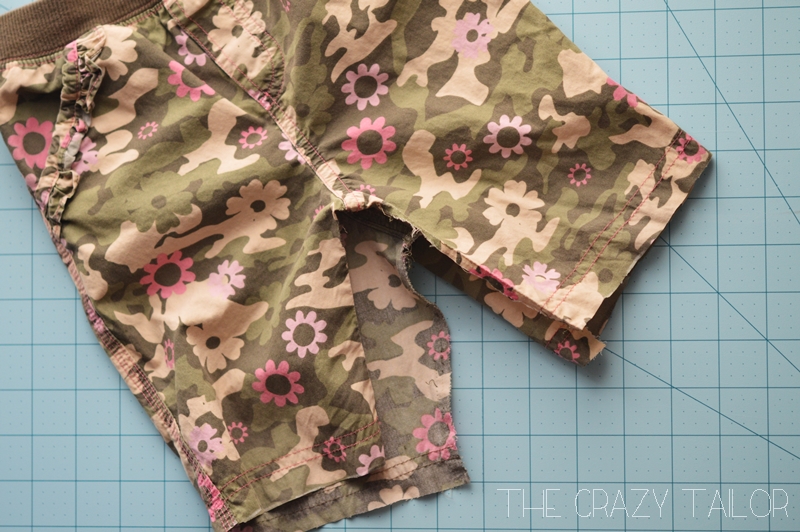
Now you want to carefully look at the front and back seams and mark where the curve begins.
Unpick those flat-felled seams (right up to your mark) very carefully, because you’ll be using the original topstitching lines as your sewing guide in a bit!
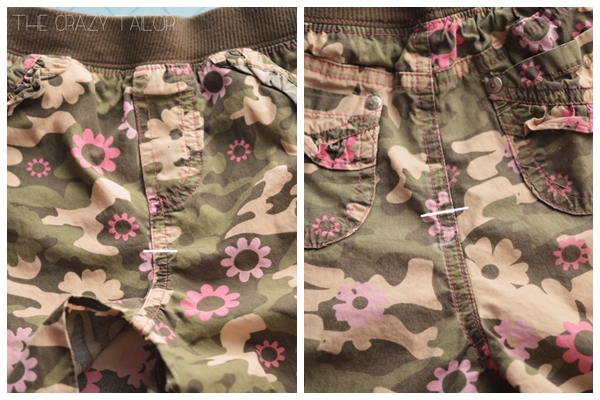
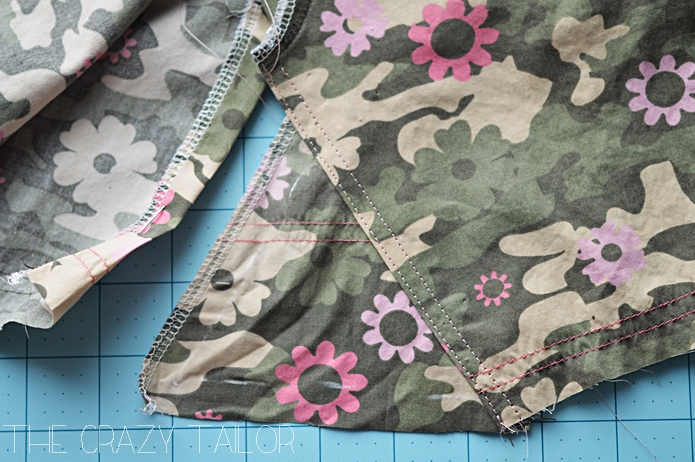
You’ll notice that the seams now naturally lay one over the other. Give the inseam legs an iron and serge (or zigzag) any raw edges. Then fold and pin the inseams on both the front and back. You can fold under a good 1/2″. Also, arrange the curved seams one over the other so they lay flat and pin.
Next, take those pieces you cut off, and open them up at one of the side seams. If there is any decorative stitching that you would like to incorporate, be sure to leave it intact. Iron them nice and flat and then slide one of them under the front gap in your pants.
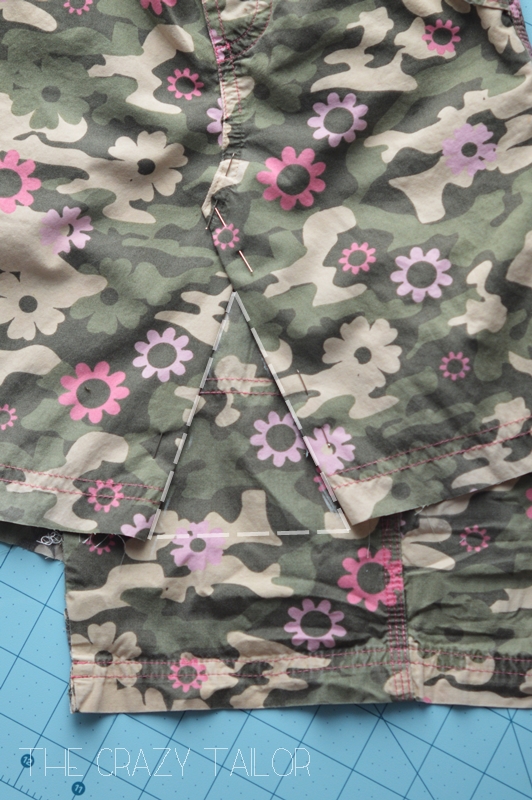
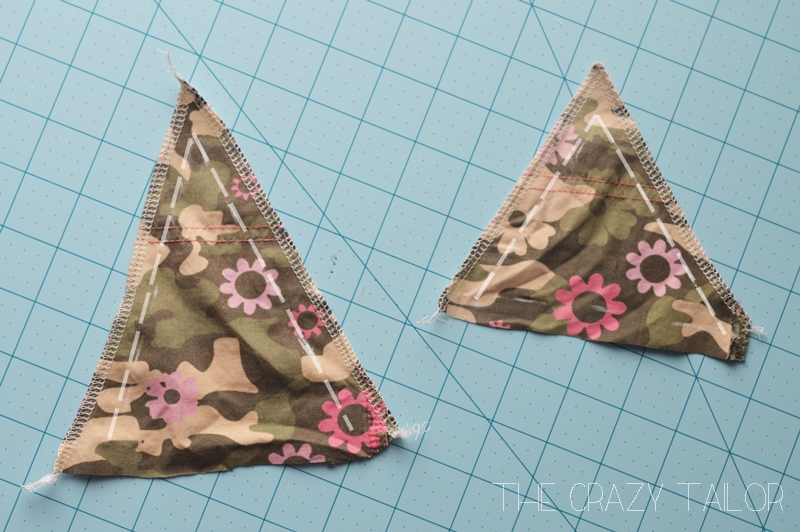
Once it’s in a good place that gives you some seam allowance around the triangle shape, use your chalk or fabric marker to mark the inside of the triangle piece, as indicated in the photo above. That will give you a pattern for cutting. Do the same with the back. Cut out with a good 1/2″ seam allowance and finish the two sides of these triangle inserts by serging or using your zigzag stitch.
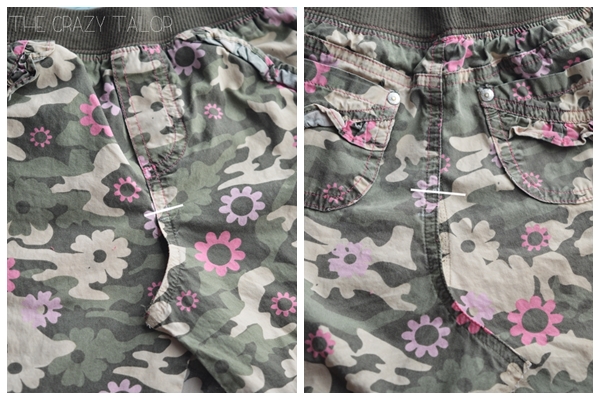
Starting with the back, pin the triangle to the underneath leg inseam:
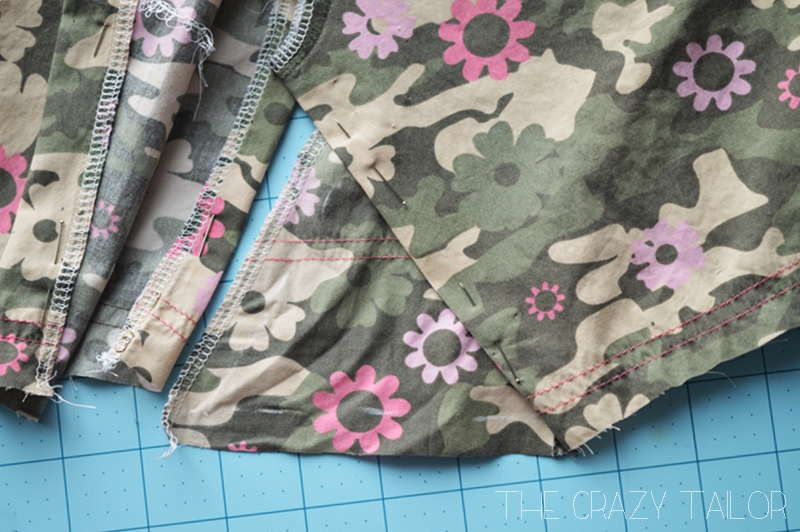
Double-check that all is straight, and that your seam allowance is even all around the triangle by laying the top leg over to be sure.
Then sew the part that is pinned. You can do a double-topstitch for a more professional look.
Then arrange the top leg over the triangle and pin just as before.
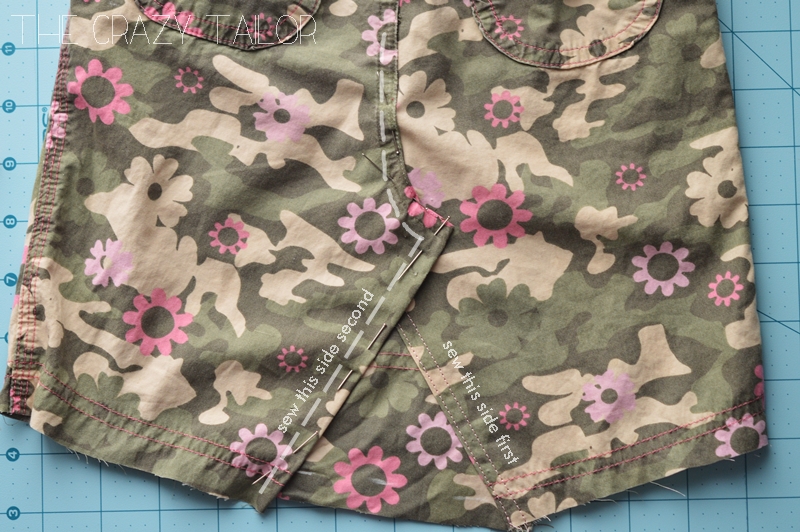
Then, starting at the top where you finishing unpicking the felled seam, start your topstitching again, beginning with the line closest to the fold. Follow the old stitch line down the curve and then pivot and go down the leg seam. Then go back and do the double stitch line, again starting at the top.
Do the exact same thing with the front of the pants (as you can see, the overlap will be the opposite of the back).
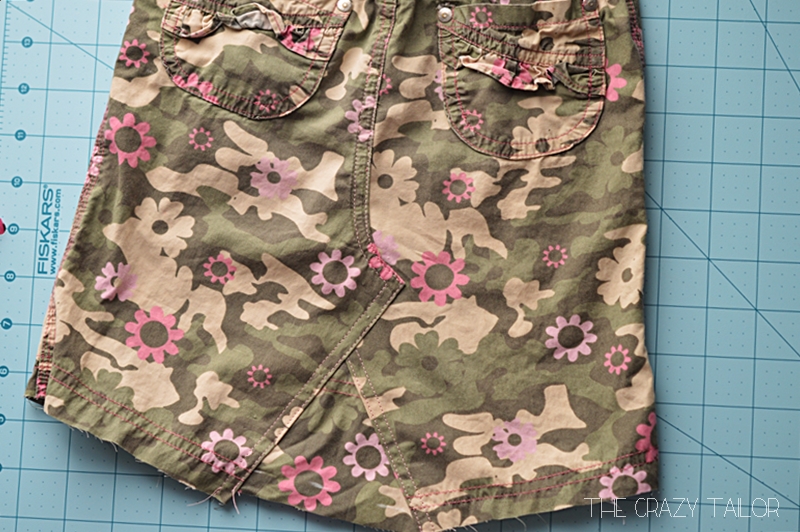
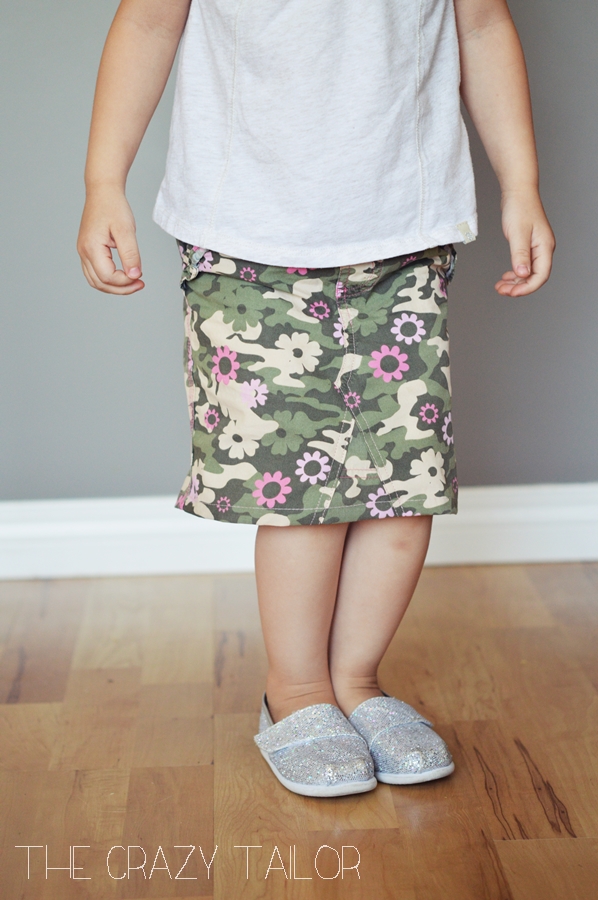
Even out your hemline and trim off any extra from the insert. Then fold your hem up a 1/2″ and then another 1/2″ (like a typical jean hem) and hem.
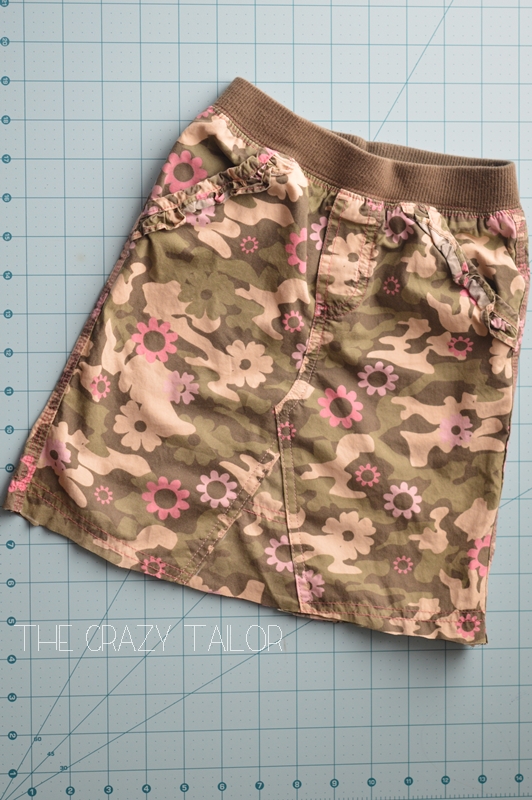
Give it a quick press and you’re done!
Wouldn’t this be fun to do with a pair of jeans and some contrasting fabric? Or add some ruffles to the insert before sewing it in? Lots of possibilities here 🙂
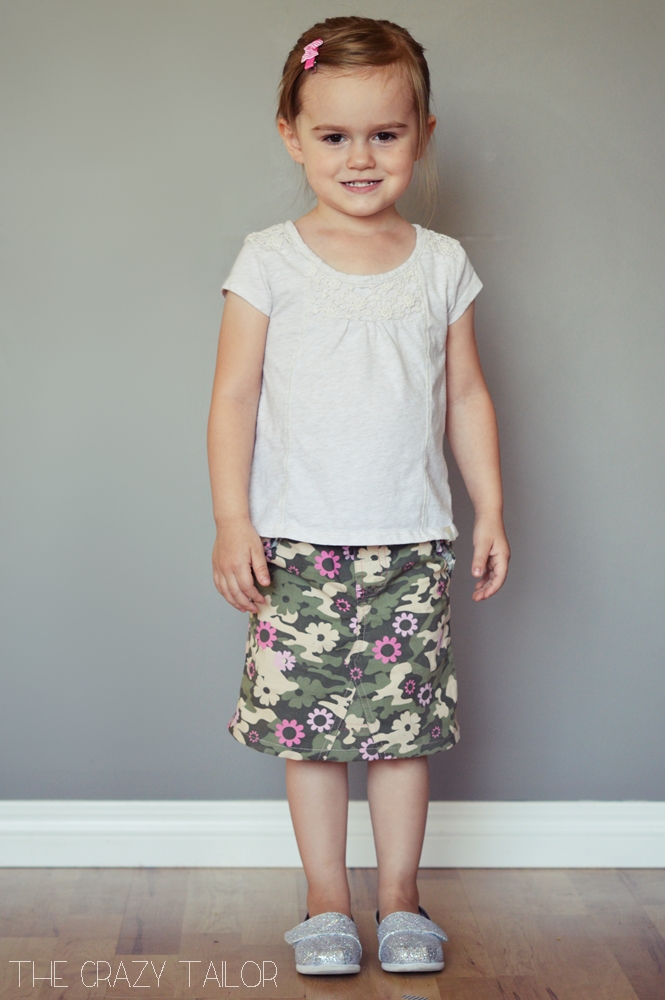
Now you have the tips and tricks to turn pants into a skirt. Transforming a pair of pants into a skirt is a fun and creative way to breathe new life into your wardrobe. By following the steps outlined in this blog, you can easily convert your pants into a stylish and unique skirt that suits your personal style. Whether you're looking to upcycle old clothing or simply try something new, this DIY project is worth giving a shot. So gather your materials, get creative, and start transforming those pants into a fabulous skirt that you'll love to wear. You can create a variety of fun jean skirts, denim skirts, and more with just an old pair of jeans or pants.
Thanks again for joining us today. Before you leave, make sure to stay in touch by joining us on social media. You can join our Facebook Sewing Group or follow us on Instagram. Also, make sure sign-up for our email newsletter below. Happy Sewing!