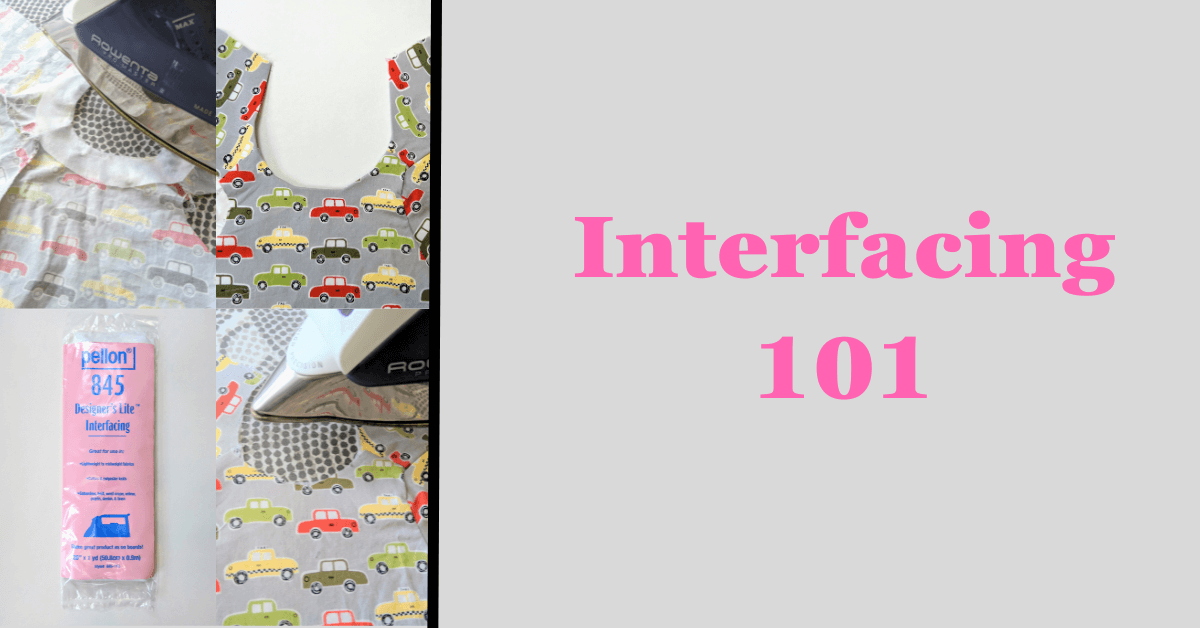
Sewing Interfacing | A Beginner's Guide to Using Interfacing
Are you confused about sewing interfacing? Don't worry, we've got you covered. Interfacing is an important material used in sewing that adds structure, stability, and support to your fabric. Choosing the right type of interfacing for your project can be overwhelming with so many options available in the market. In this blog, we will cover all the basics of sewing interfacing, including different types of interfacing (fusible, sew-in, woven vs. non-woven, and knit), how to apply fusible interfacing step-by-step, common mistakes while using it and their solutions, and where you can buy high-quality interfacing. Let's get started!
Understanding the Basics of Sewing Interfacing
Sewing interfacing can be a game-changer in your sewing projects, but understanding the basics is crucial. Interfacing is like glue for fabric, providing structure and stability to cuffs, waistbands, and collars. Place it between fabric layers or under fabric to add that structure and stability.
There are different types of interfacing, such as fusible, sew-in, and knit interfacing. Fusible interfacing is the most common, as it can be easily applied with an iron - we have a step-by-step tutorial below to show you how it's done. Choosing the right interfacing for your project is important, considering factors like fabric weight and desired durability. When applying interfacing, make sure to match the right side of the fabric with the adhesive side of the interfacing, and use an ironing board to protect your surface. Lightweight fabrics may require multiple layers of fabric to prevent any wrinkles or bubbling. Remember, proper interfacing application can make a big difference in the success of your sewing project.
What is interfacing?
Interfacing is a layer of fabric placed between the main fabric and lining that adds stability, shape, and support to garments. It comes in different weights and thicknesses. Fusible interfacing has an adhesive side activated with heat, while sew-in interfacing is stitched to the fabric.
Different Types of Interfacing
When it comes to sewing interfacing, there are different types to choose from depending on the needs of your project. Lightweight interfacing is perfect for delicate fabrics and lightweight garments, providing just the right support without adding bulk. On the other hand, medium-weight interfacing offers moderate support and structure, making it versatile for a range of projects. Heavyweight interfacing is the way to go if you're working with sturdy fabrics or areas that require extra reinforcement. Knit interfacing, designed specifically for stretchy fabrics, helps maintain flexibility while providing stability. And if you prefer to sew directly into the garment for added stability, non-fusible interfacing is a great option. By understanding the different types of interfacing available, you can choose the right one to enhance the quality and durability of your sewing projects.
Fusible Interfacing
Fusible interfacing is a popular choice when it comes to adding stability and structure to your garments. It has an adhesive side that is activated with heat, allowing it to bond seamlessly with your fabric. One of the key advantages of fusible interfacing is its ease of use. Simply place the fusible side of the interfacing onto the wrong side of your fabric, cover it with a pressing cloth, and apply heat with an iron. The adhesive will melt and adhere the interfacing to the fabric, creating a strong bond.

When selecting fusible interfacing, consider the weight and type of fabric you are working with. Lightweight fabrics may require a lighter weight interfacing, while heavy fabrics may benefit from a heavier weight interfacing. Additionally, there are different types of fusible interfacing available, such as polyester, organza, and fusible fleece, each with its own specific properties. We primarily sew clothing around here, but if you are looking for interfacing for a large project like a quilt, they make it in large rolls that you can purchase.
To ensure a successful application, it's important to follow the manufacturer's instructions and use the appropriate heat setting on your iron. Remember to always test a small scrap piece of fabric before applying interfacing to your project. Fusible interfacing is a versatile tool that can be used in a variety of sewing projects, including cuffs, waistbands, buttonholes, and more. By choosing the right interfacing and applying it correctly, you can achieve professional-looking results in your garments.
Sew-in Interfacing
Sew-in interfacing is an alternative to fusible interfacing that is sewn directly into your garment for added stability and structure. It is a great option for beginners or those who prefer not to use heat or adhesive. When using sew-in interfacing, you will need to baste or hand-sew it to the fabric before assembling your project. This type of interfacing is commonly used for lightweight fabrics, such as organza or lace, where glue or ironing may not be suitable. Sew-in interfacing can also be used for cuffs, waistbands, quilting, and other areas that require extra reinforcement. It is important to choose the right interfacing for your project, considering factors like fabric weight and desired level of support. By following a tutorial or pattern instructions, you can easily incorporate sew-in interfacing into your sewing projects.

Woven v. Non-Woven Interfacing
When it comes to choosing between woven and non-woven interfacing for your sewing projects, there are a few key differences to consider. Woven interfacing is made from woven fibers, similar to fabric, and provides stability and support without adding too much bulk. It is ideal for lightweight fabrics and can be used for collars, cuffs, and waistbands.
On the other hand, non-woven interfacing is made from synthetic fibers that are fused together. It is generally lighter in weight than woven interfacing and is great for adding structure to medium to heavyweight fabrics, such as quilting or upholstery fabric. Woven interfacing behaves and looks like fabric, whereas non-woven interfacing is more akin to paper and can be cut in any direction. They make non-woven interfacing in both fusible (iron-on) and non-fusible varieties.
Non-woven interfacing is often used for buttonholes, zipper plackets, and hemming. Both types of interfacing can be applied using heat from an iron or by sewing it in place. While woven interfacing is more durable and has a longer lifespan, non-woven interfacing is easier to work with and provides a smoother finish. Ultimately, the choice between woven and non-woven interfacing depends on the specific needs of your project and the weight of your fabric. So, make sure to consider these factors before making a decision.

Knit Interfacing
For knit fabrics, using knit interfacing is essential to maintain the fabric's stretch and drape. Knit interfacing is a lightweight option that provides support without compromising the elasticity of the fabric. It is commonly used in t-shirts, jersey dresses, and other garments made from knit fabrics. When applying knit interfacing, it is important to choose the right type based on the weight of your fabric. Fusible knit interfacing can be easily ironed onto the wrong side of the fabric, ensuring a secure bond. This type of interfacing is available in different weights, allowing you to select the appropriate one for your project. Alternatively, sew-in knit interfacing can be hand-stitched or machine-sewn into place. It offers more flexibility and is a great option for delicate or sheer fabrics. So whether you're working on a cozy sweater or a fitted dress, knit interfacing will provide the stability you need while maintaining the integrity of your knit fabric.

Step-by-Step Guide: How to Apply Fusible Interfacing
To begin applying fusible interfacing, start by prepping your fabric and the interfacing. Ensure that you have the correct side of the interfacing facing the wrong side of the fabric. A pressing cloth is essential to protect your fabric from the heat of the iron. Apply even pressure with the iron onto the interfacing, making sure to cover all areas. Once you've finished pressing, allow the fabric to cool before moving or sewing. These steps will ensure a secure bond between the fabric and interfacing, providing stability and structure to your project. Remember to choose the right interfacing for your project, as there are different types available, such as lightweight fabrics for delicate materials like organza or lace, and heavier options for cuffs, waistbands, or quilting.
Here's a little project I did. This step-by-step tutorial is perfect for beginners looking to achieve professional-looking results.
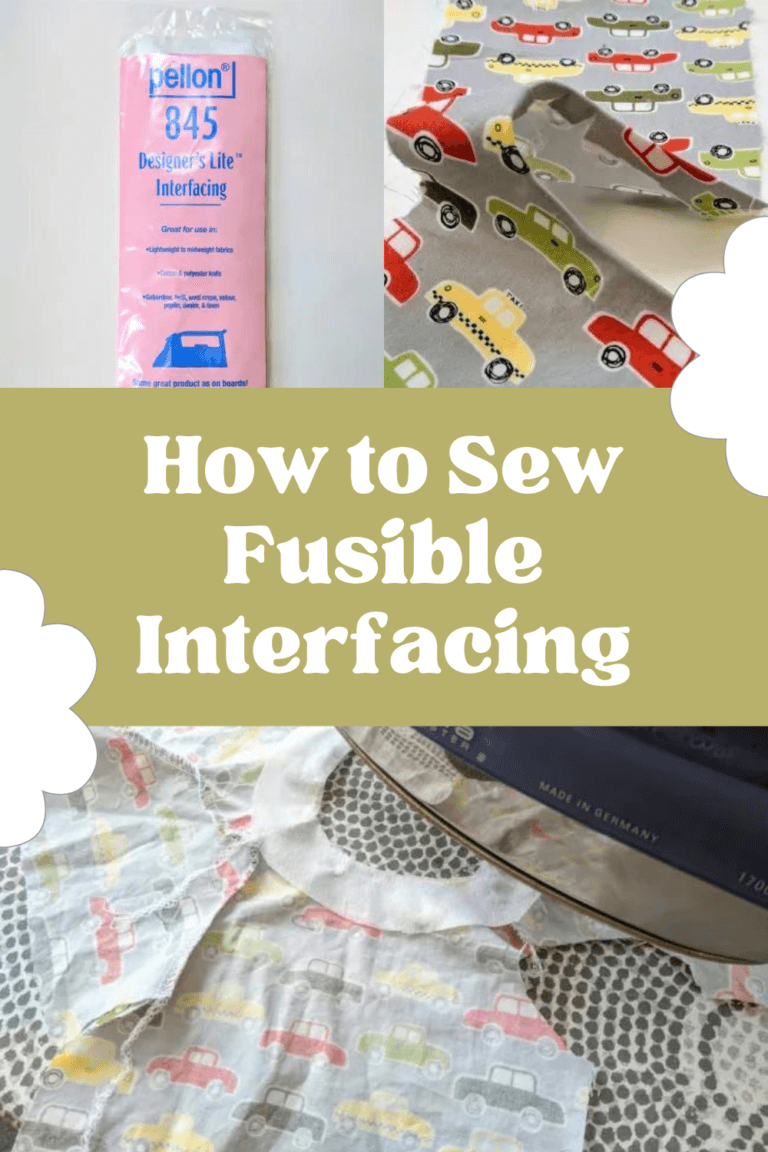
Sewing Interfacing Step 1:
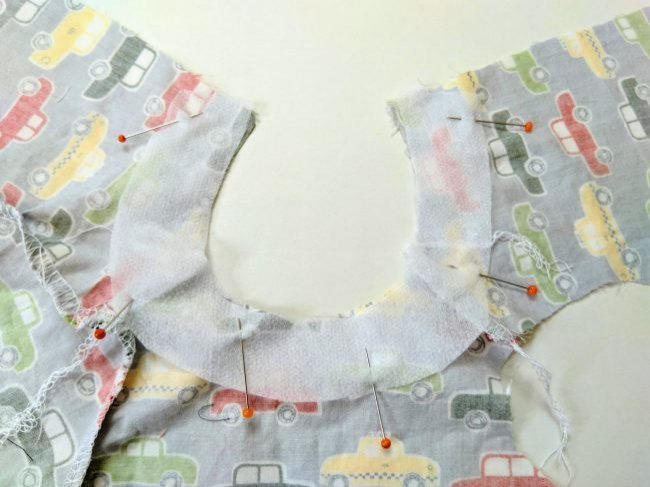
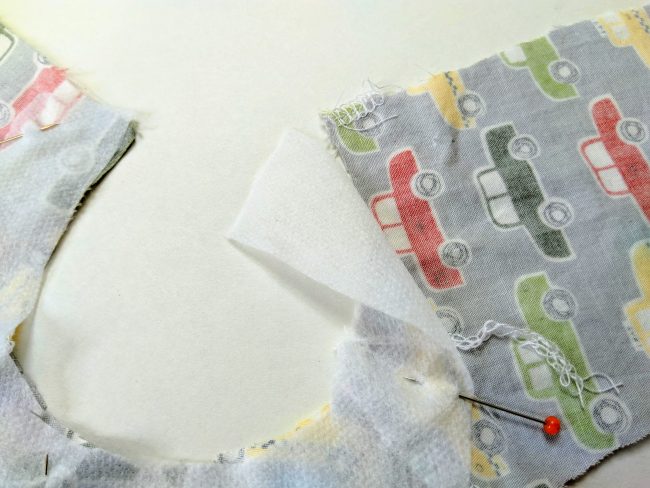
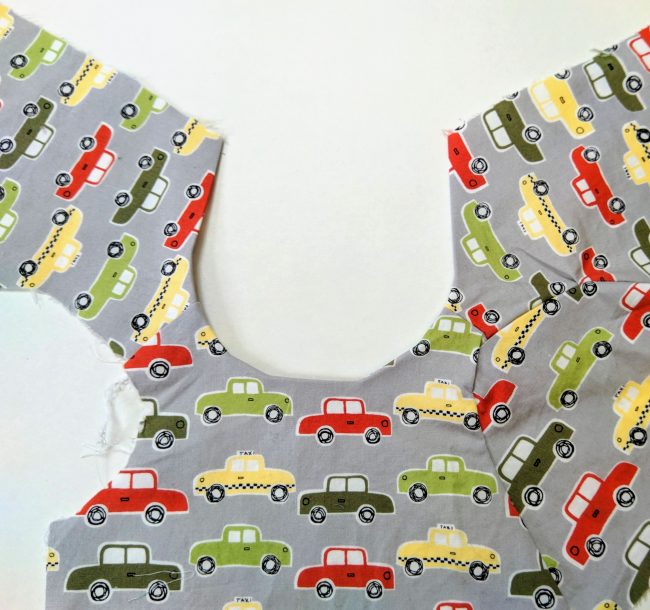
This is a doll shirt my daughter is working on. The pattern calls for interfacing to be applied to the neckline, to make it crisp and neat looking. I cut the interfacing piece to match the neckline:

To begin applying fusible interfacing, I placed the rough side of the interfacing against the wrong side of the neckline. I pinned it in place around the outside of the curve because next, I will steam-baste the inside of the curve away from the pins. This ensures that I have it exactly where I need it to be before I fuse it to the project.
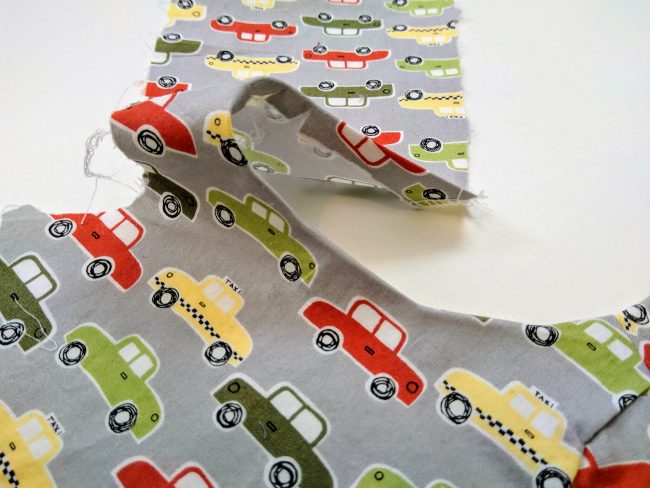
Step 2: Seam Baste
Next, I steam-basted the inner curve. This means that I am using a steam setting on the iron to steam above the interfacing, not directly on it. I set my iron to wool/silk to ensure the iron wasn't too hot. Always double-check to make sure the rough side of the interfacing is down and not facing up toward the iron!

Sewing Fusible Interfacing Step 3: Fuse the Interfacing
Using a very damp press cloth (100% cotton) and a gliding motion, I pressed and fused the interfacing to the wrong side. As you go, check to ensure the edges have fused to the fabric. If not, keep pressing using the gliding motion.
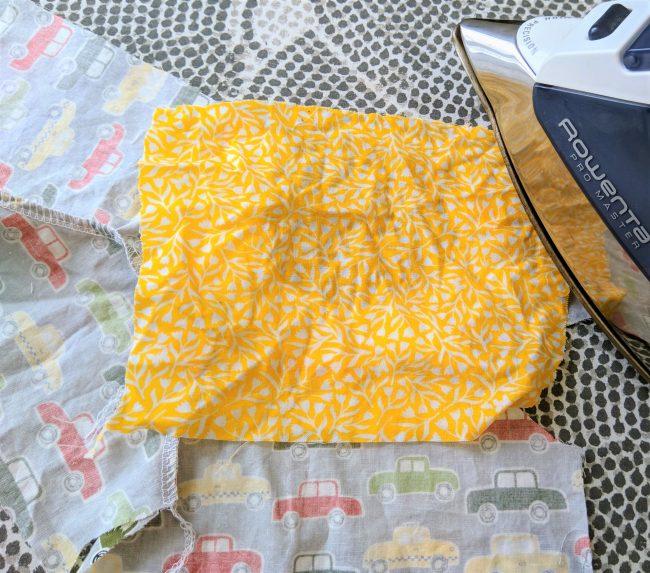
Turn the project over and press on the fabric again.

With the interfacing properly applied, the neckline has a crisp finished look and more structure than it did originally.
Common Mistakes While Using Fusible Interfacing and their Solutions
When working with fusible interfacing, avoiding high heat on delicate fabrics is important, as this can cause damage. Another common mistake is not properly aligning the grainline of the interfacing and fabric, which can affect the drape of the finished garment. Applying too much pressure when ironing the interfacing can result in stiffness, so it's important to use moderate pressure. Using the wrong type of interfacing for the fabric can also lead to poor results, so be sure to choose the appropriate type based on the weight and characteristics of the fabric. Lastly, failing to cut the interfacing accurately can affect the fit of the garment, so take your time and cut the interfacing according to the pattern pieces. These are some of the common mistakes to avoid when working with fusible interfacing, along with their solutions.
Where Can You Buy High-Quality Interfacing?
Finding high-quality interfacing for your sewing projects is important to achieve professional-looking results. There are several places where you can purchase top-notch interfacing. Local fabric stores often carry a variety of options, allowing you to see and feel the interfacing before buying. Online retailers, such as Amazon or Etsy, offer a wide selection and the convenience of shopping from home. Some sewing machine manufacturers or specialty shops may also sell interfacing. Remember to check customer reviews and compare prices to ensure you're getting the best quality at the right price.
Can I Make My Own Interfacing?
Yes, you can make your own interfacing! It is possible to create your own interfacing at home using materials like muslin or fusible webbing. Making your own interfacing allows you to customize the weight and stiffness of the fabric to suit your specific project needs. However, it's important to note that creating your own interfacing may require some experimentation and testing to achieve the desired results. Also - no guarantee that this is a money save since interfacing is cheap and you'll have to buy some other material to make it homemade....but, if you're feeling adventurous and want to try something new, go ahead and give making your own interfacing a try!
Conclusion
To achieve professional-looking results in your sewing projects, understanding and using the right type of interfacing is crucial. Interfacing provides structure, stability, and support to fabrics, ensuring that your garments or crafts hold their shape and withstand wear and tear. Different types of interfacing serve different purposes, so it's essential to choose the right one for your project. Whether you need fusible interfacing for quick and easy application or sew-in interfacing for a more permanent bond, investing in high-quality interfacing will make all the difference in the final result. Look for trusted suppliers and retailers who offer a wide range of interfacing options to suit your needs. Happy sewing!