How to Sew PUL 101 | Tutorial on Sewing Polyurethane Laminate
I am really excited to share some tips on how to sew PUL (Polyurethane laminate). Are you tired of your sewing projects getting ruined by water damage? If so, it's time to start incorporating PUL fabric into your work. PUL, or polyurethane laminate, is a waterproof and breathable fabric that can be used in a variety of projects. In this blog post, we will take a deep dive into all things PUL. We'll cover the composition of the fabric, how to identify the right and wrong side, and what tools you'll need to get started. We'll also walk you through the process of sewing with PUL, including expert tips on how to handle the fabric while sewing. Finally, we'll discuss some common uses for PUL and provide tips for caring for it after your project is complete. Say goodbye to water-damaged projects and hello to seamless waterproof layers with PUL!
A little background about myself I started a sewing business over five years ago where I sew cloth diapers and cloth diaper accessories that I made. Before even venturing into sewing with PUL I did extensive research on the fabric and learned so much about the dos and don ts through trial and error. I would love to share some quick tips with you here.
How to Sew PUL (Polyurethane Laminate)
Understanding PUL Fabric
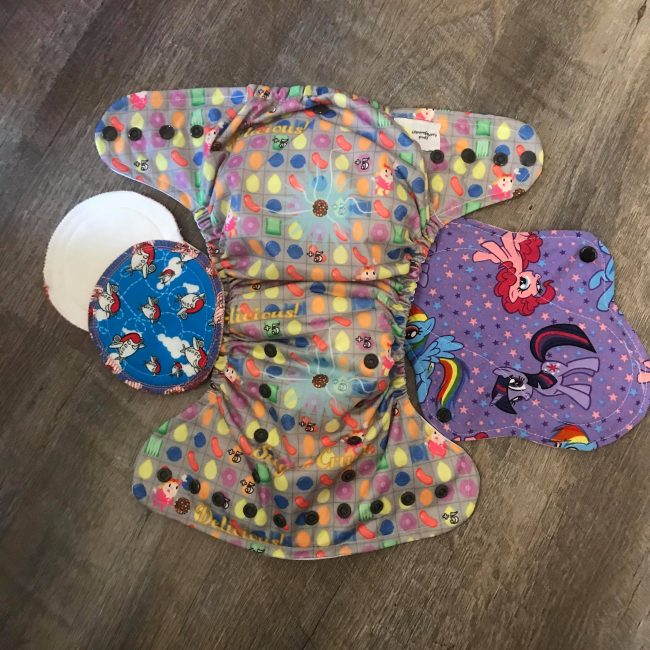
PUL fabric, used for creating waterproof layers, is composed of a polyester textile with a layer of polyurethane laminate (PUL). This laminate provides an effective barrier against liquids, making PUL fabric ideal for various applications. Commonly used in making wet bags, diapers, bibs, and mattress covers, PUL fabric offers a reliable waterproof solution.
Sewing with PUL fabric requires some special techniques due to its unique properties. The laminate layer of PUL fabric can withstand high heat and repeated washing, making it durable and long-lasting. When working with PUL fabric, it's important to choose the right stitch selection to ensure a secure and durable seam.
To enhance the NLP in the content, it's worth mentioning that PUL fabric is available in a variety of colors, but white PUL is often used for its versatility. Additionally, PUL fabric is typically made with a knit construction, allowing for easy stretch and flexibility. So, if you're looking to create a waterproof layer, PUL fabric is definitely worth considering.
How to Determine the Right Side of the Fabric?
To determine the right side of PUL fabric, look for a shinier and smoother surface compared to the wrong side. Gently rubbing the fabric with tissue paper can help - it should glide smoothly over the right side but slightly drag on the wrong side. In case of confusion, mark the right side with a temporary marker or pin. Always keep the right side facing outwards while sewing.
Creating Waterproof Layers with PUL
PUL fabric, known for its waterproof properties, is an excellent choice when creating waterproof layers in sewing projects. The polyurethane laminate layer of PUL fabric acts as a barrier, preventing liquids from penetrating through the fabric. To maintain waterproof integrity, ensuring proper seams while sewing with PUL fabric is important. Additionally, the layer of laminate in PUL fabric provides high heat resistance, making it suitable for various applications. With its ability to repel water, PUL fabric is perfect for projects like cloth diapers, menstrual pads, bibs, and wet bags. Enhancing the fabric's versatility, PUL comes in different colors and patterns, including white PUL, allowing you to create aesthetically pleasing waterproof layers.
Needle Size and Pinning to Sew PUL Fabric
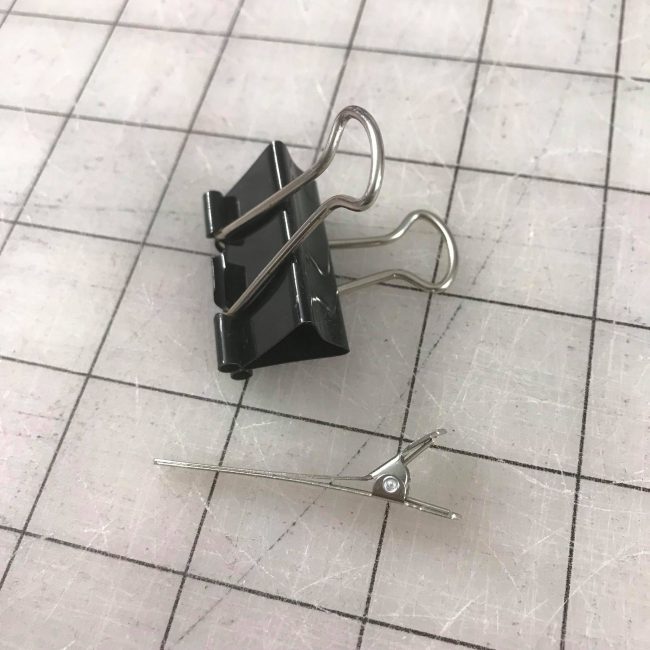
Because you generally use PUL for things that require it to be waterproof, you definitely don’t want to use pins to pin or mark the fabric. I personally use single-prong metal clips to pin them in place. I got mine at Sally Beauty Supply. You can also purchase wonder clips which also work really well. As far as needle size, you are going to want to use a ballpoint needle just like you would with knit. I like to use a size 11. When I am done sewing the items I like to heat seal them but throw them in my dryer on high for about 5-10 minutes. Note: you would NOT want to put the PUL in the dryer on high any other time.
By carefully choosing the appropriate needles and pins, you can ensure that your sewing project with PUL fabric goes smoothly and results in reliable waterproof layers. Remember to handle the fabric with care and be mindful of the placement and use of pins to achieve the best results.
Proper Sewing Feet and Polyester Thread for Sewing PUL Fabric
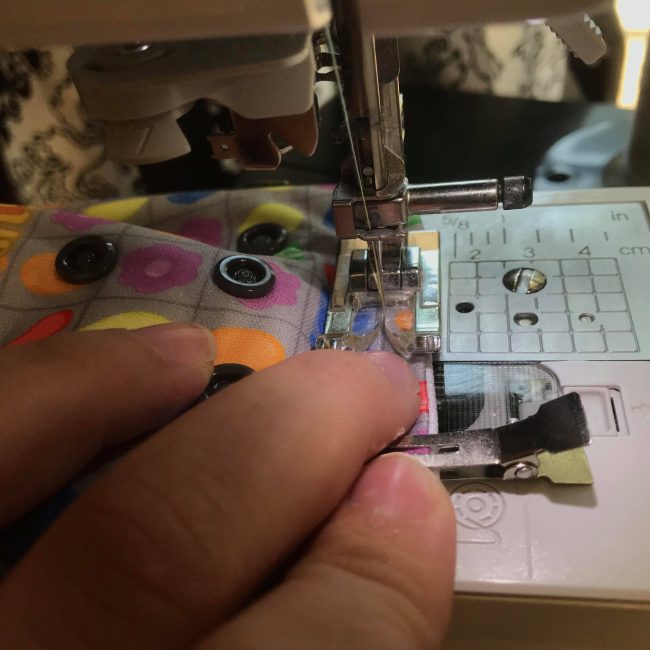
Some people have a hard time with the fabric slipping. I use a teflon foot when sewing PUL and I feel like it is a must! When I had a metal foot, I would take a piece of tape and place it on the bottom of the sewing foot and it would glide the fabric through with no issue. If you really want to invest, get a walking foot for your sewing machine.
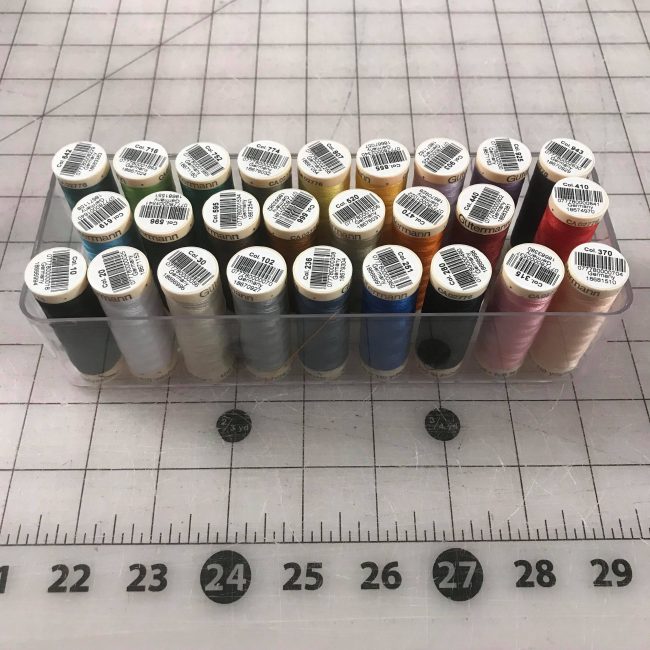
I haven’t ever needed one but I know some people swear by them. You will want to use polyester thread since a cotton one can cause the item you make to leak at the seams. * Having the wrong size needle can cause that too. I really like the polyester gutterman thread you can find at your local Joann’s store.
Stitch Selection for PUL
When sewing PUL fabric, it is important to choose the right stitch that ensures a secure seam without compromising its waterproof properties. You can opt for either a straight stitch or a narrow zigzag stitch. A straight stitch with a slightly longer stitch length is recommended, as it provides a strong and durable seam while maintaining the integrity of the fabric's waterproof layer. If you prefer using a zigzag stitch, make sure to select a narrow width to prevent excessive stretching of the PUL fabric. To ensure the chosen stitch maintains the fabric's waterproof integrity, it's always advisable to test it on a scrap piece of PUL fabric before sewing the actual project. Avoid using wide or decorative stitches, as they may create perforations in the fabric that could compromise its waterproof qualities. Remember, when sewing PUL, it's crucial to prioritize its waterproof properties above all else.
Washing PUL Fabric
I recommend washing pul on cold/warm water with a softener-free detergent and either air drying or drying on low. DO NOT dry your PUL on high heat it will cause it to eventually crack and break the laminate and sometimes it will melt it depending on how hot your dryer gets.
Expert Tips for Sewing with PUL
When working with PUL fabric, there are expert tips that can help ensure a successful sewing experience. One helpful technique is to pin the PUL fabric with tissue paper. This prevents the fabric from getting stuck under the presser foot, allowing for smooth stitching. Additionally, reducing the pressure of the presser foot will prevent flattening or distorting of the fabric layers.
To maintain the integrity of the fabric, it's important to sew slowly and smoothly. This allows the machine to feed the fabric without pulling or stretching it. For added waterproofing, consider using a seam sealant or tape along the seam allowance. This extra step can provide further protection against leaks.
Before starting your final project, always test your sewing techniques on scrap fabric. This will help you familiarize yourself with the material and ensure that you achieve the desired results. By following these expert tips, you can confidently sew with PUL fabric and create waterproof layers for various projects.
There you have it! I hope this information is a good start for you to tackle your first PUL project. I promise it isn’t hard, just new and exciting material to work with if you have not already done so.
How to Handle PUL While Sewing?
When sewing PUL fabric, it's important to handle it carefully to avoid any damage. Use a new needle and thread specifically designed for PUL. Instead of using pins, opt for clips or Wonder Tape to hold the fabric in place. Sew slowly and steadily to prevent stretching.
Conclusion
In conclusion, sewing with PUL fabric may seem intimidating at first, but with the right tools and techniques, it can be a rewarding experience. Remember to always identify the right and wrong side of the fabric before starting your project, and use the appropriate needles, pins, and thread for sewing PUL. When stitching, opt for a straight stitch or a narrow zigzag stitch to ensure a waterproof seal. Additionally, handle the fabric gently to avoid puncturing or stretching it. PUL fabric has a wide range of uses, especially in creating waterproof layers for items like diapers, wet bags, and mattress protectors. Finally, when caring for your finished projects, follow the recommended laundering and maintenance tips to preserve the waterproof properties of the PUL fabric.
Before you leave, make sure to join our Facebook Group and follow us on Instagram. Happy sewing!