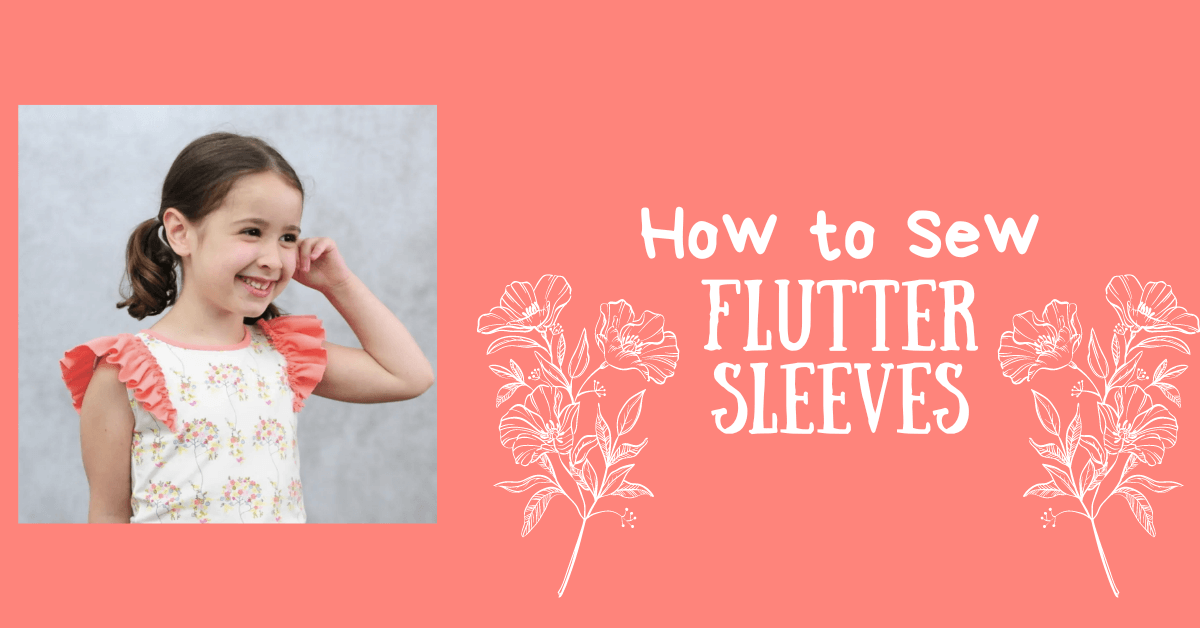
How to Make Flutter Sleeves Easily
I hope you’re ready to learn how to make flutter sleeves. Flutter sleeves add a feminine touch to any garment, and they're surprisingly easy to make! Whether you're looking to spruce up an old dress or create a new top from scratch, flutter sleeves are a great way to add some flair. In this blog post, we will cover everything you need to know about flutter sleeves - from understanding what they are and their various uses to gathering the right materials and creating your pattern. We will also provide tips for stitching your flutter sleeves and how the choice of fabric can affect the final outcome. With our step-by-step guide, you’ll be able to learn how to make flutter sleeves with ease!
What are Flutter Sleeves?
Flutter sleeves, resembling butterfly wings with their short, wide, and unstructured design, add a soft, fluttering movement to garments. They gracefully drape over the shoulders and can be attached to the neckline or armhole, offering an elegant touch of whimsy. Flutter sleeves bring a delicate, feminine touch to clothing with their loose, flowing silhouette. Commonly found in blouses, dresses, and tops, they effortlessly create a romantic, ethereal look. Flutter sleeves are versatile and can be customized to suit various styles, making them perfect for adding a touch of elegance to any garment. Whether for a casual or formal look, mastering flutter sleeves can elevate your sewing projects to the next level.
Sewing Flutter Sleeves
How to Make Flutter Sleeves
If your girl is anything like mine, she’s got a thing for flutter sleeves. This kid will pick out a shirt with flutter sleeves without even looking at the rest of it. And last winter, she started asking me to add them when I was sewing up long sleeve shirts and dresses for her, too. So the DIY Flutter Sleeves were born.
As the fall clothing catalogs have been arriving in my mailbox, I’m seeing these little sleeves EVERYWHERE in ready-to-wear (RTW) styles. It’s high time for a sleeve tutorial about how to add these sweet little embellishments, don’t you think?!
Flutter Sleeve Pattern Instructions
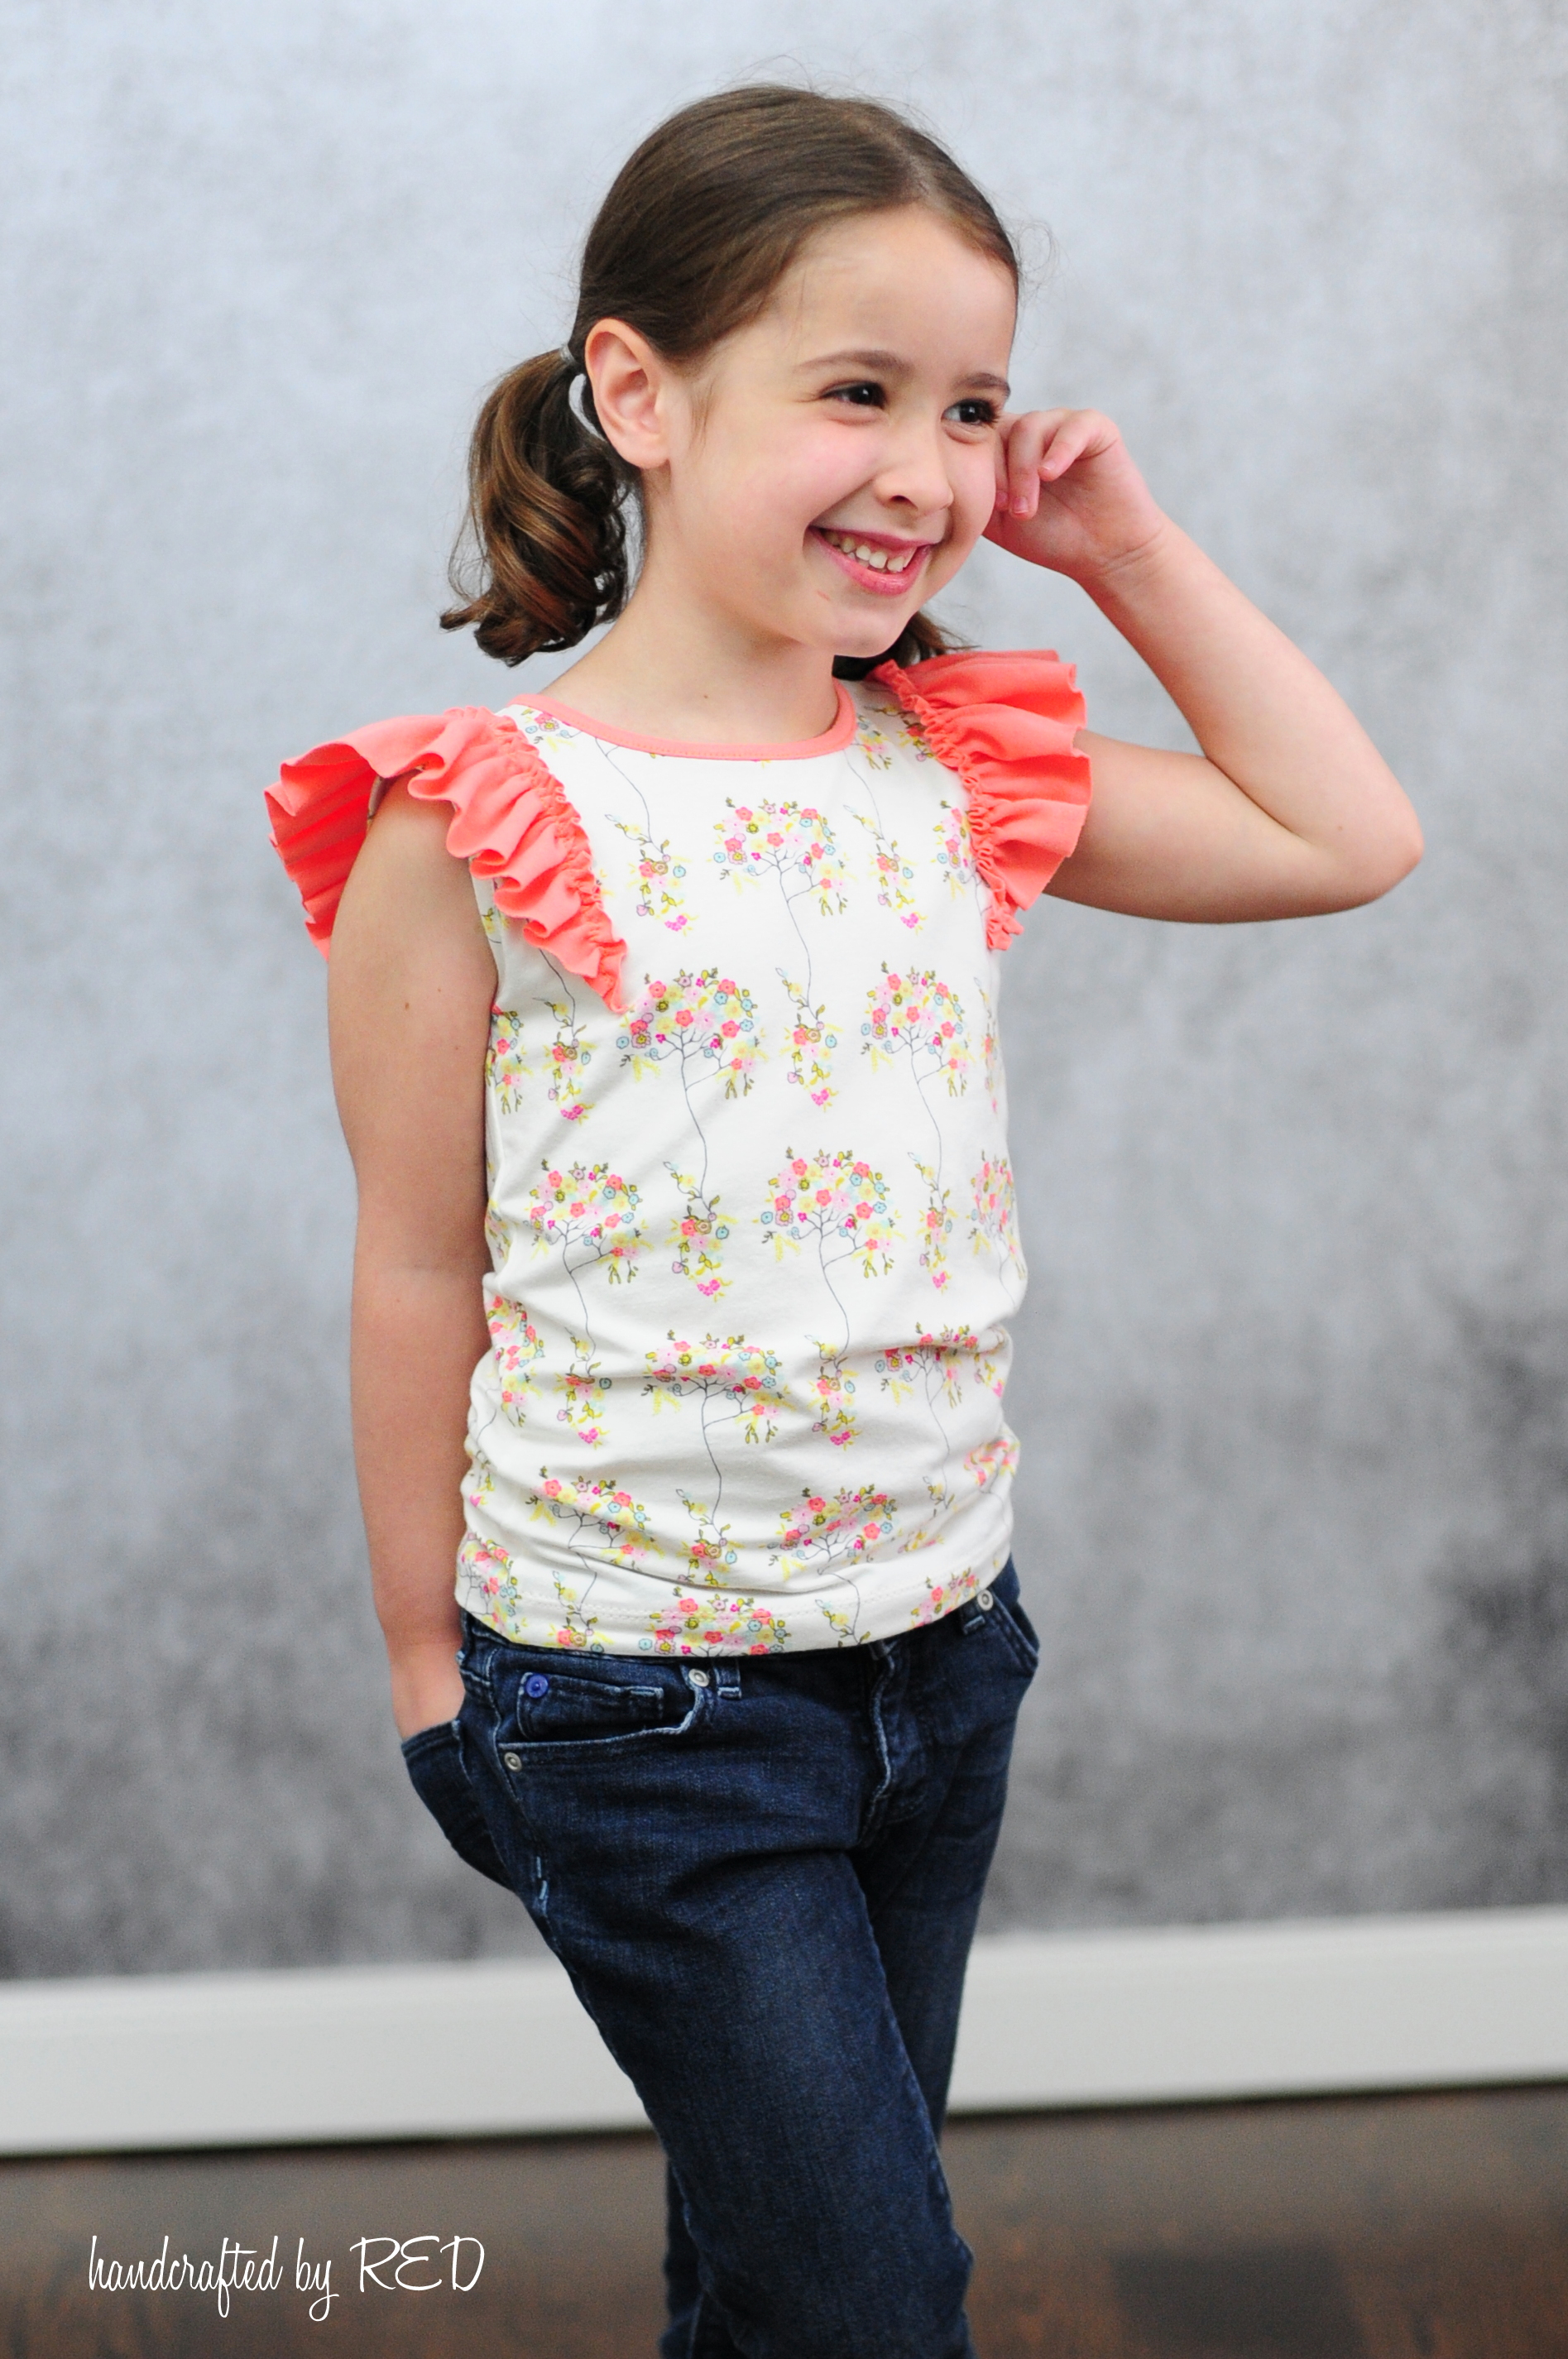
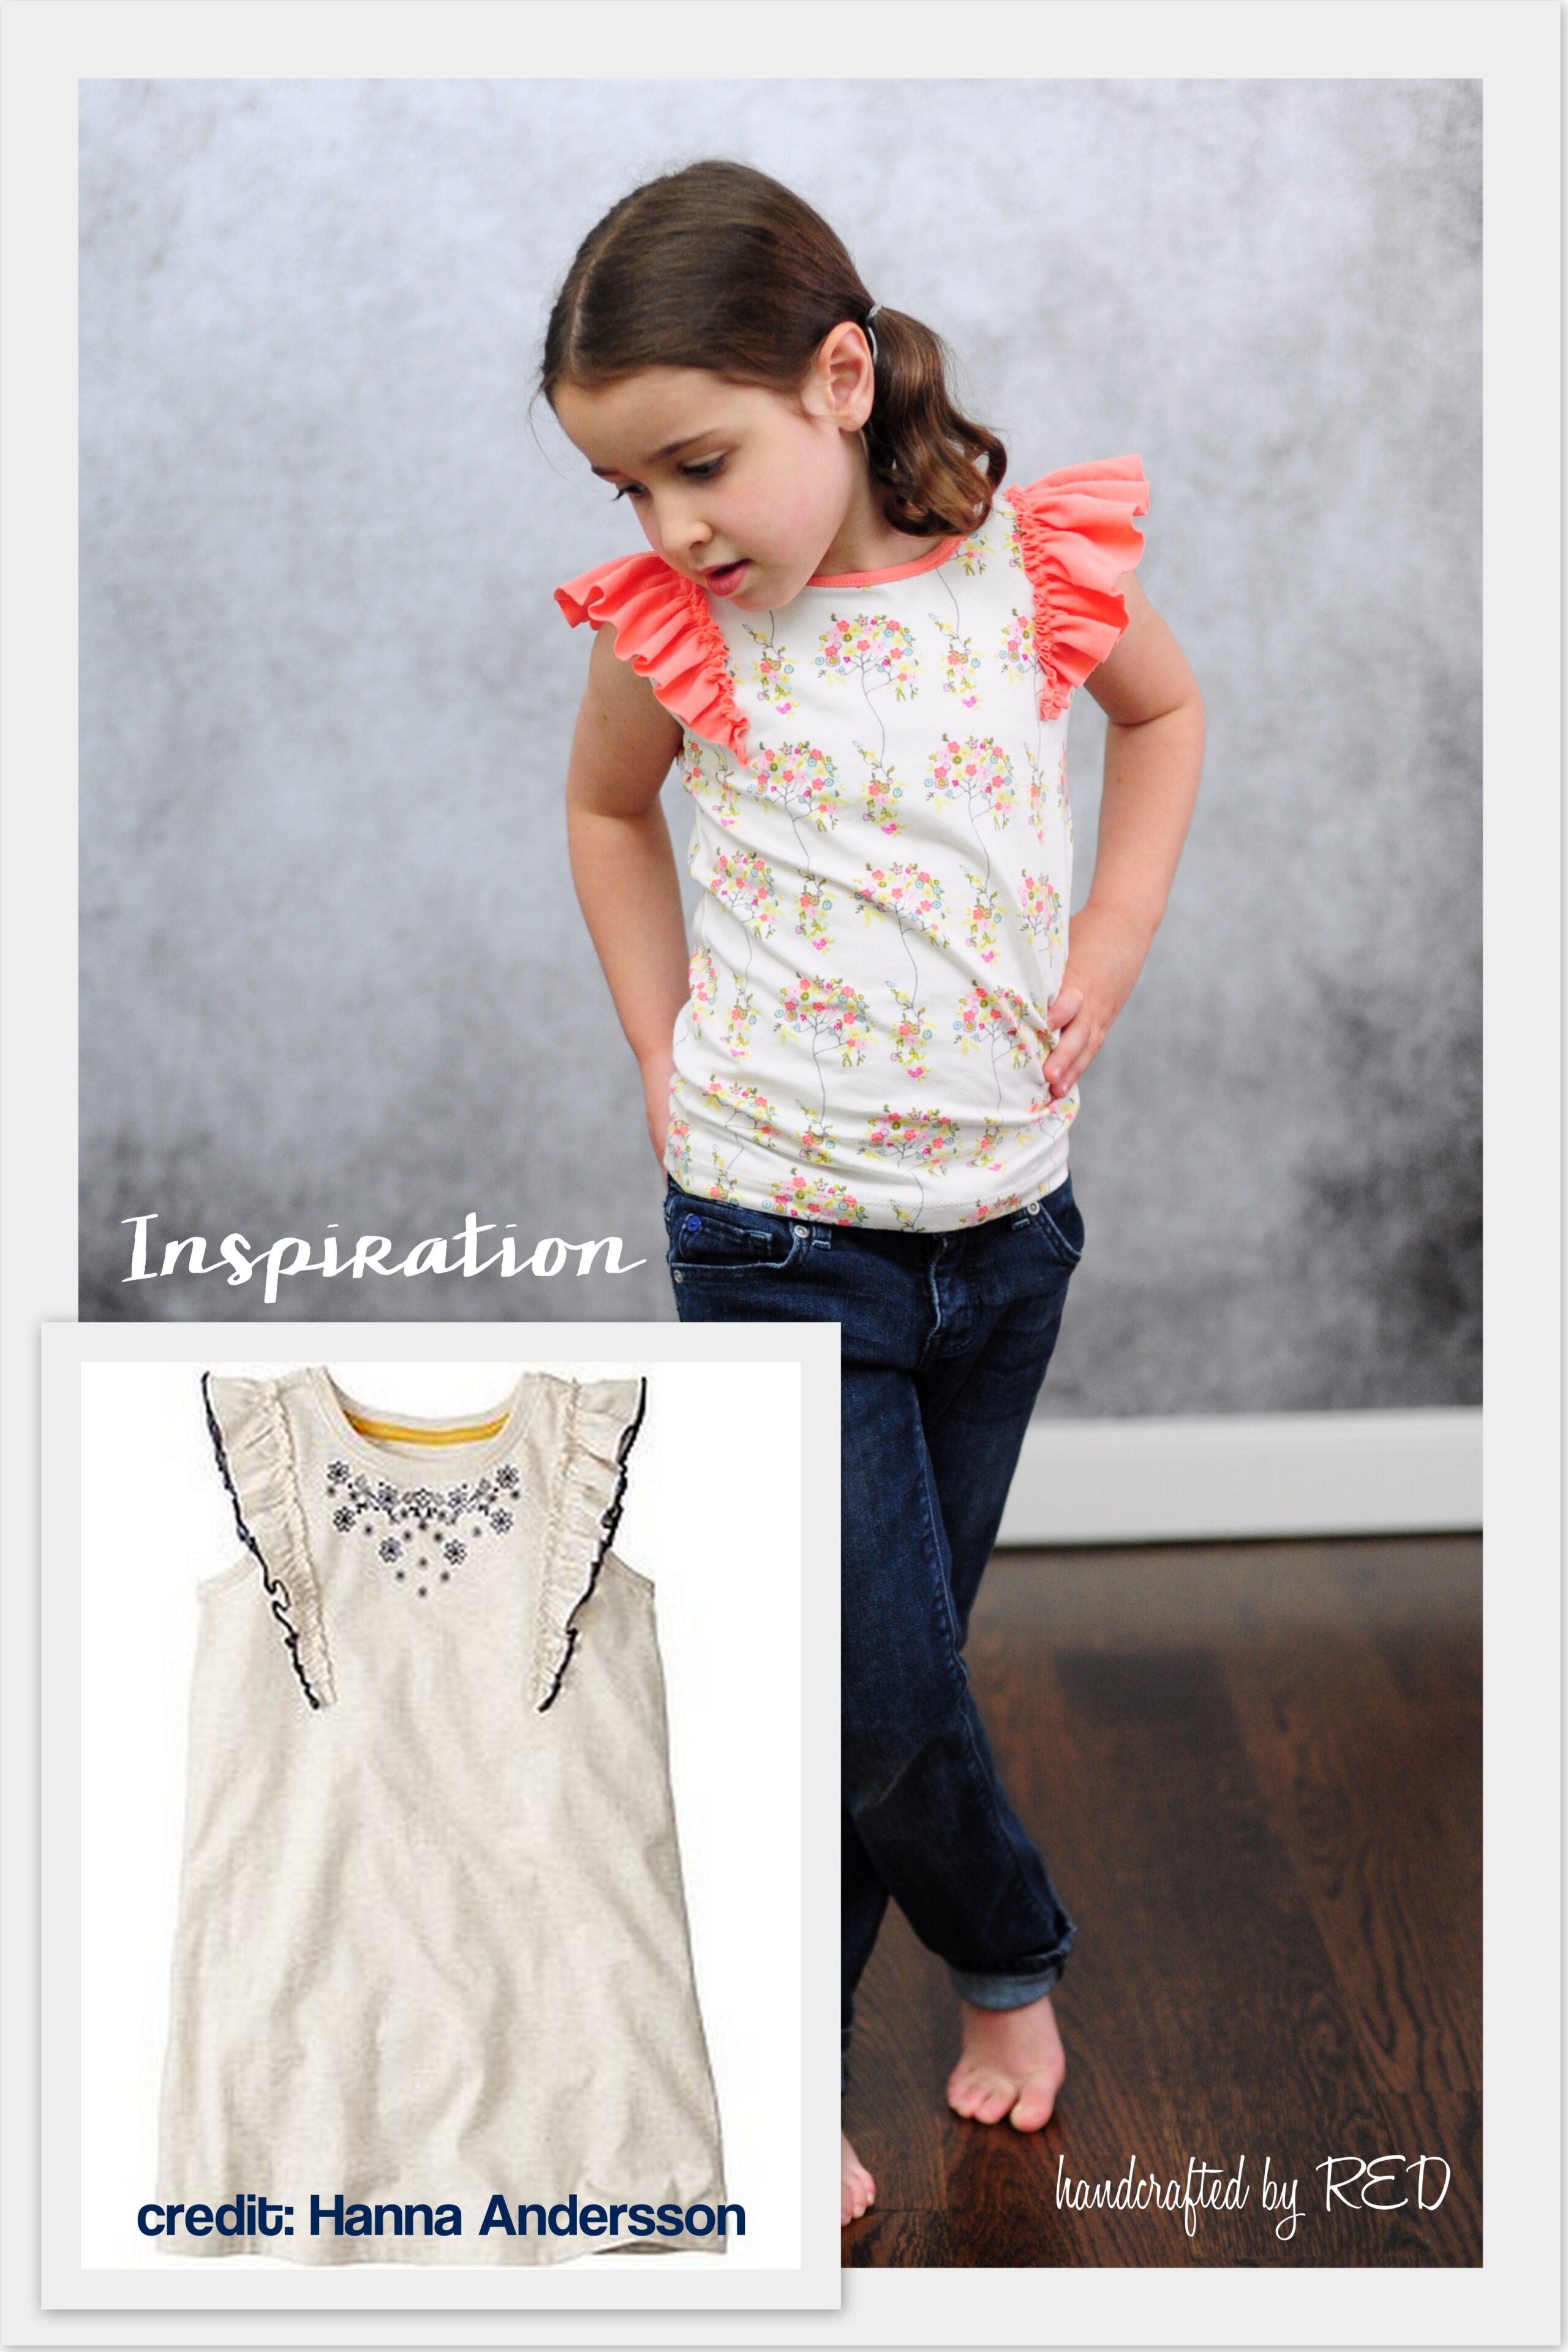
Let’s start with the easiest option of how to make flutter sleeves – attaching a flutter sleeve piece ONTO the bodice of your shirt. While I was working on this tutorial, I sewed up 4 shirts for Miss P and I used the Alex and Anna Summer and Winter PJs patterns for all of them. Since the top runs really slim (in keeping with pajama regulations in the US), I sized up one size for a daywear look.
I might even go up another size next time; these tops were still a little more slim than she usually wears her shirts. For the version above, I “borrowed” the sleeve from the Sugar and Spice dress pattern. It’s a great oversized flutter that was perfect for this look – I found an inspiration pic in the latest Hanna Andersson catalog and went from there:
For my look, I used the tank version of the Alex and Anna pjs, and bound the neckline and armholes using a binding method rather than the bands/cuffs from the pattern. I used the same measurements that were indicated by the pattern, but applied the strips this way:
In this example. I sewed the front and back bodices together at the shoulders and left the side seams open. I attached the arm bindings flat (as shown in the images above), and sewed the neck binding piece together at the short ends to make a loop so I could attach that in the round. Next. I gathered up my flutter sleeves like this:

And pinned them to my tank, making sure the center the flutter over the shoulder seam.
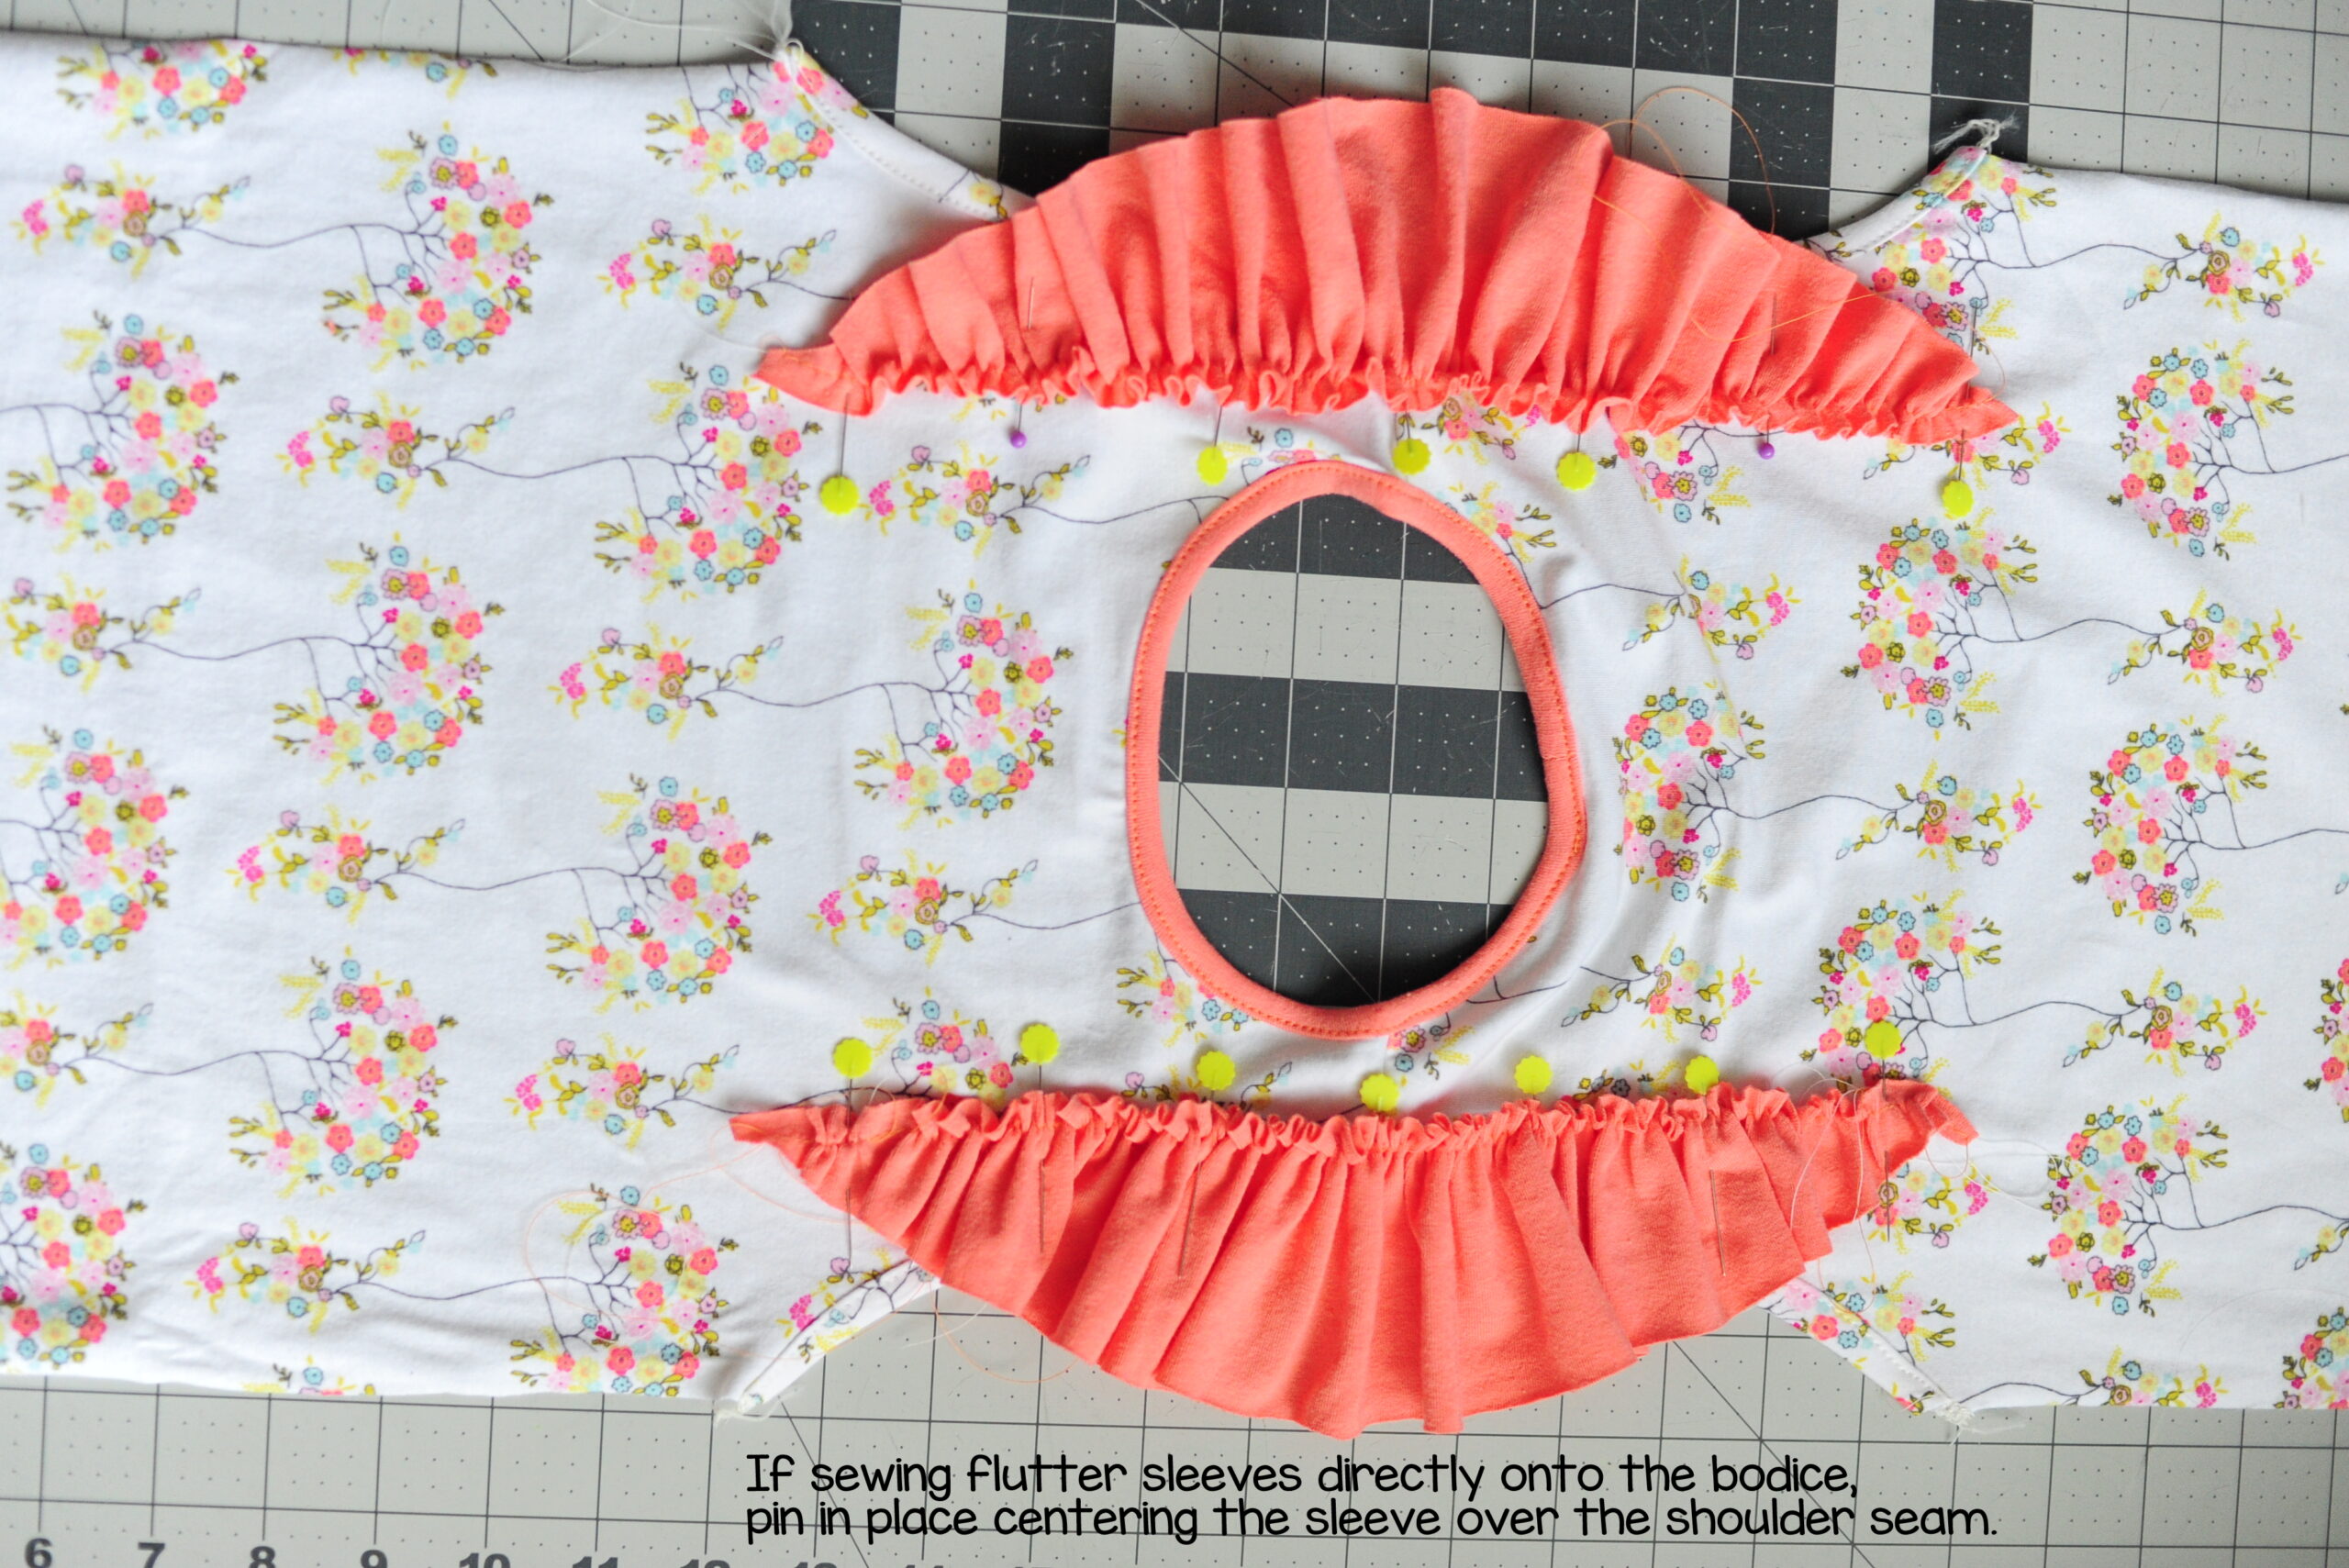
I sewed the flutter sleeves right onto the bodice, sewing along my gathering stitches and making sure to backstitch well at the beginning and end of each flutter. Then, I sewed up the side seams.
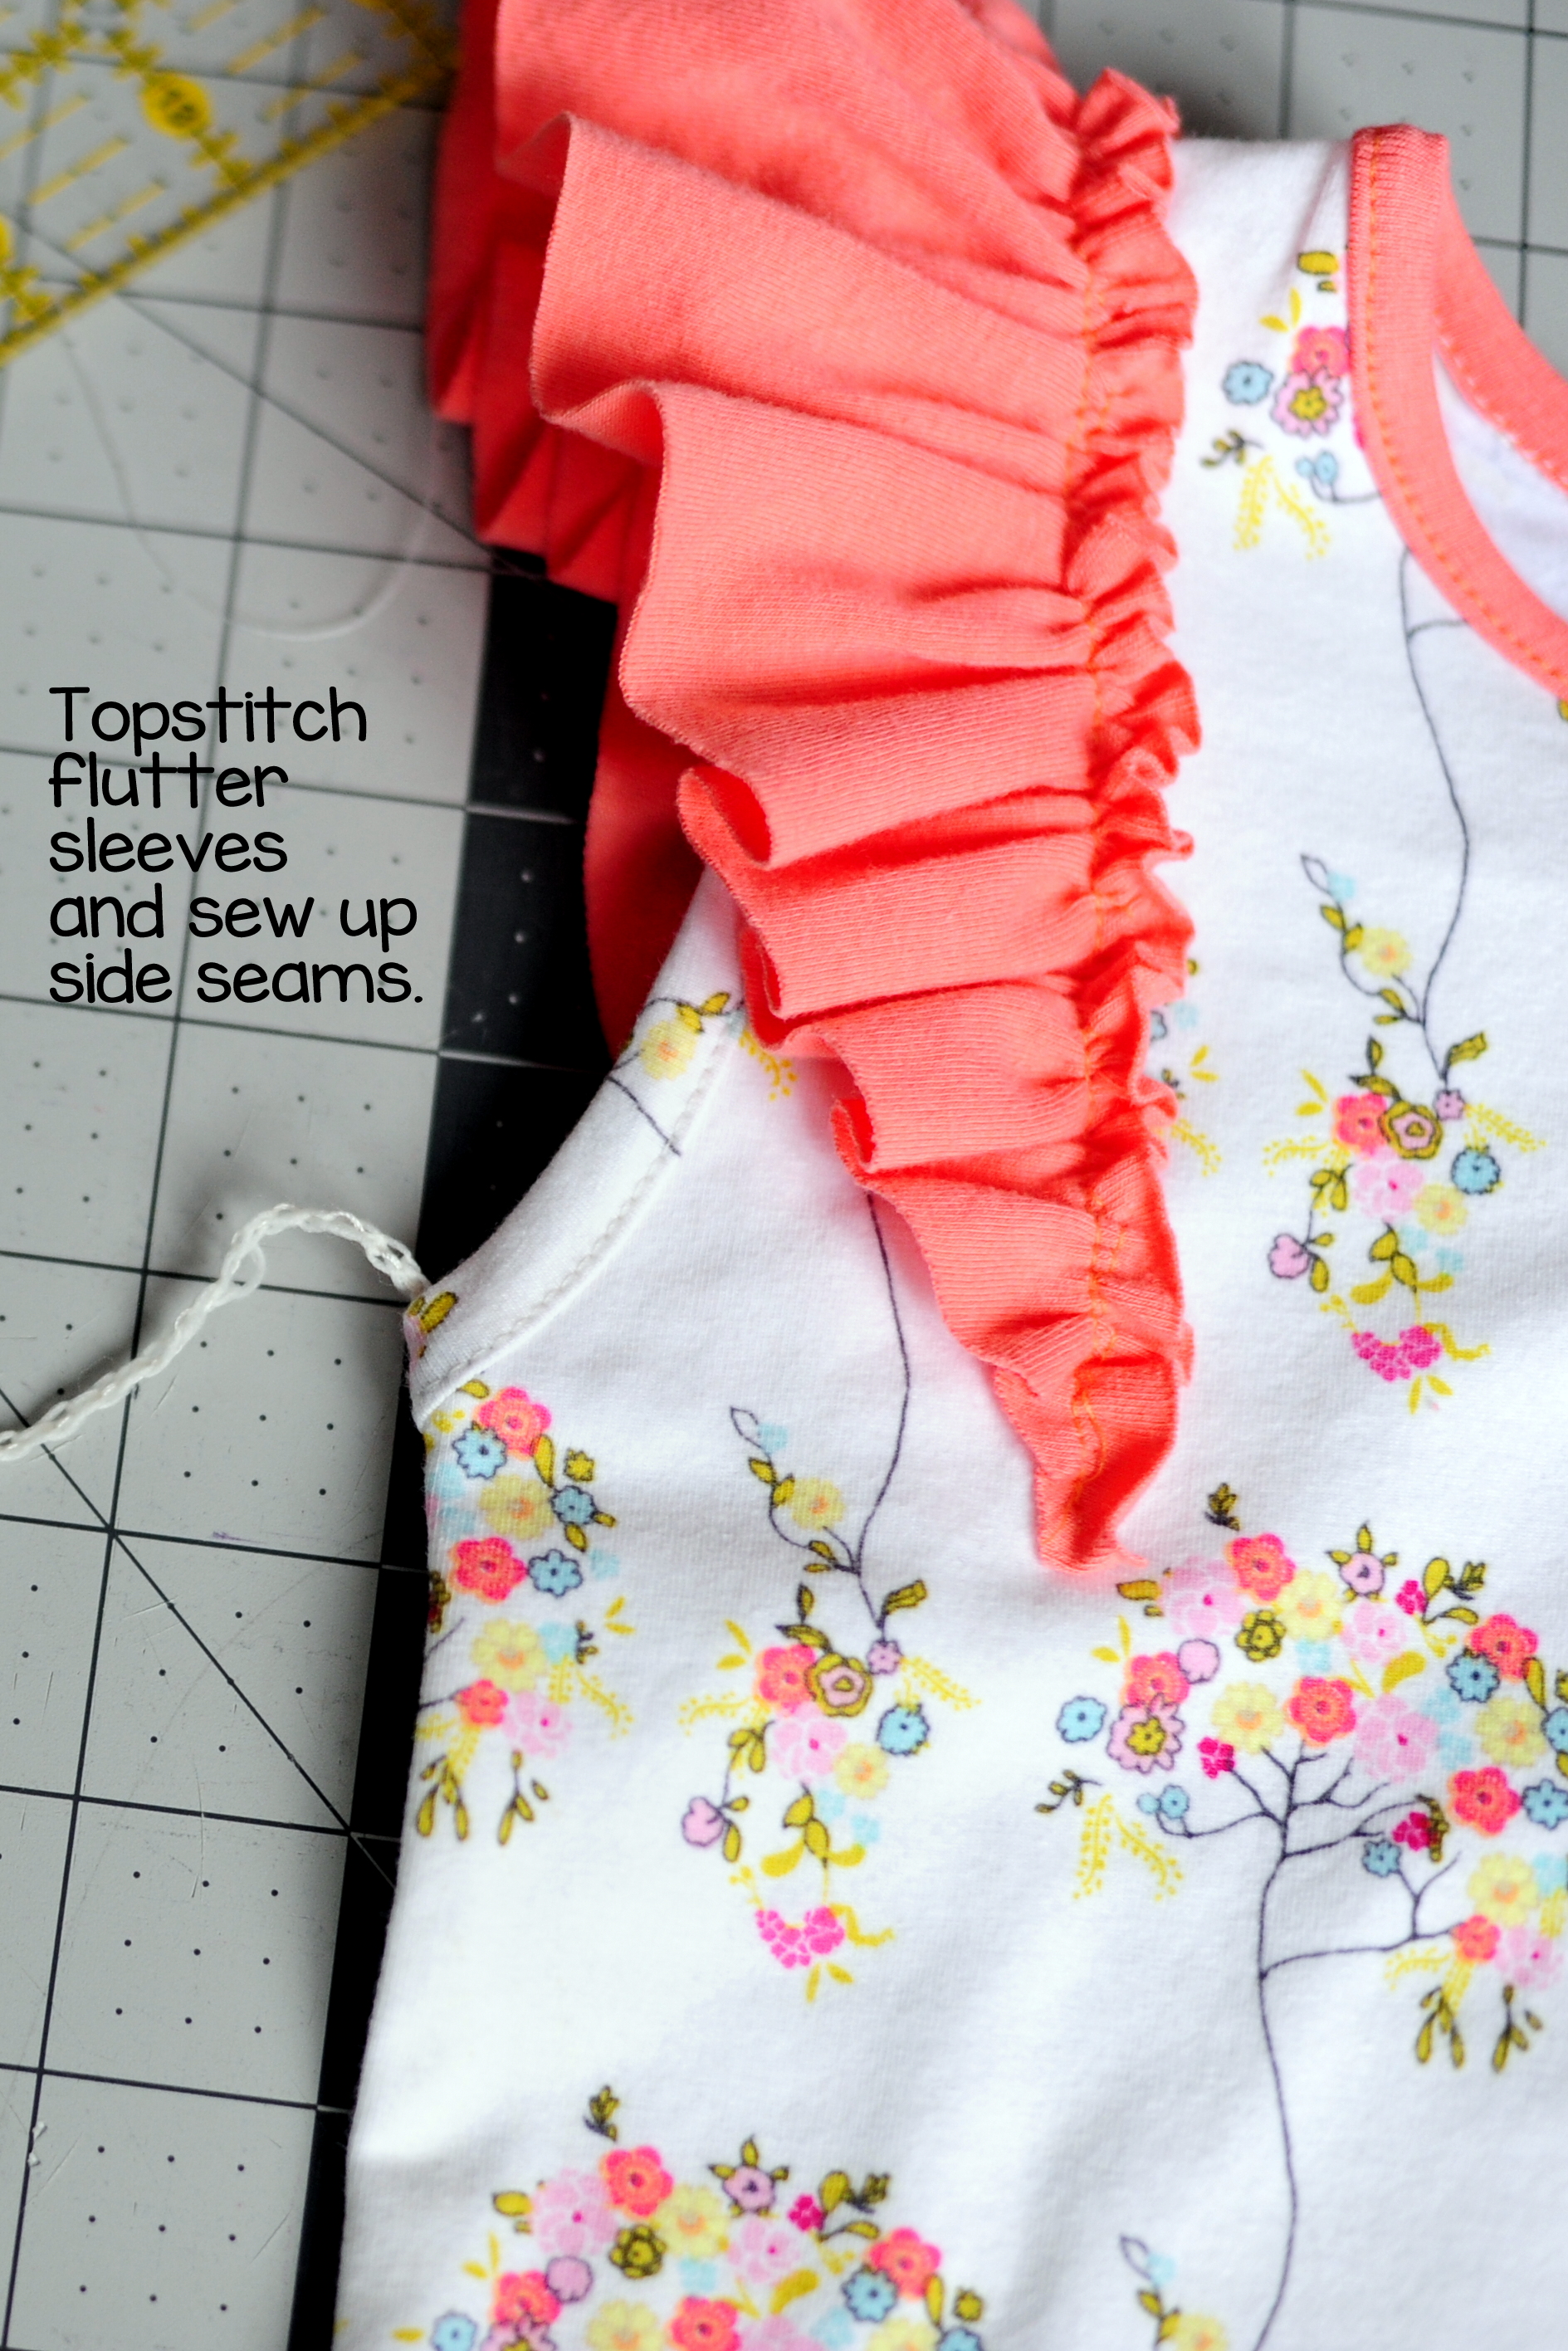
To deal with my serger tails, I used a tapestry needle to thread the tail back into the stitching about an inch, and then trimmed the remaining tail. I used a bartack stitch right at the underarm to press the seam to the back of the shirt so it doesn’t bother Miss P under her arms.
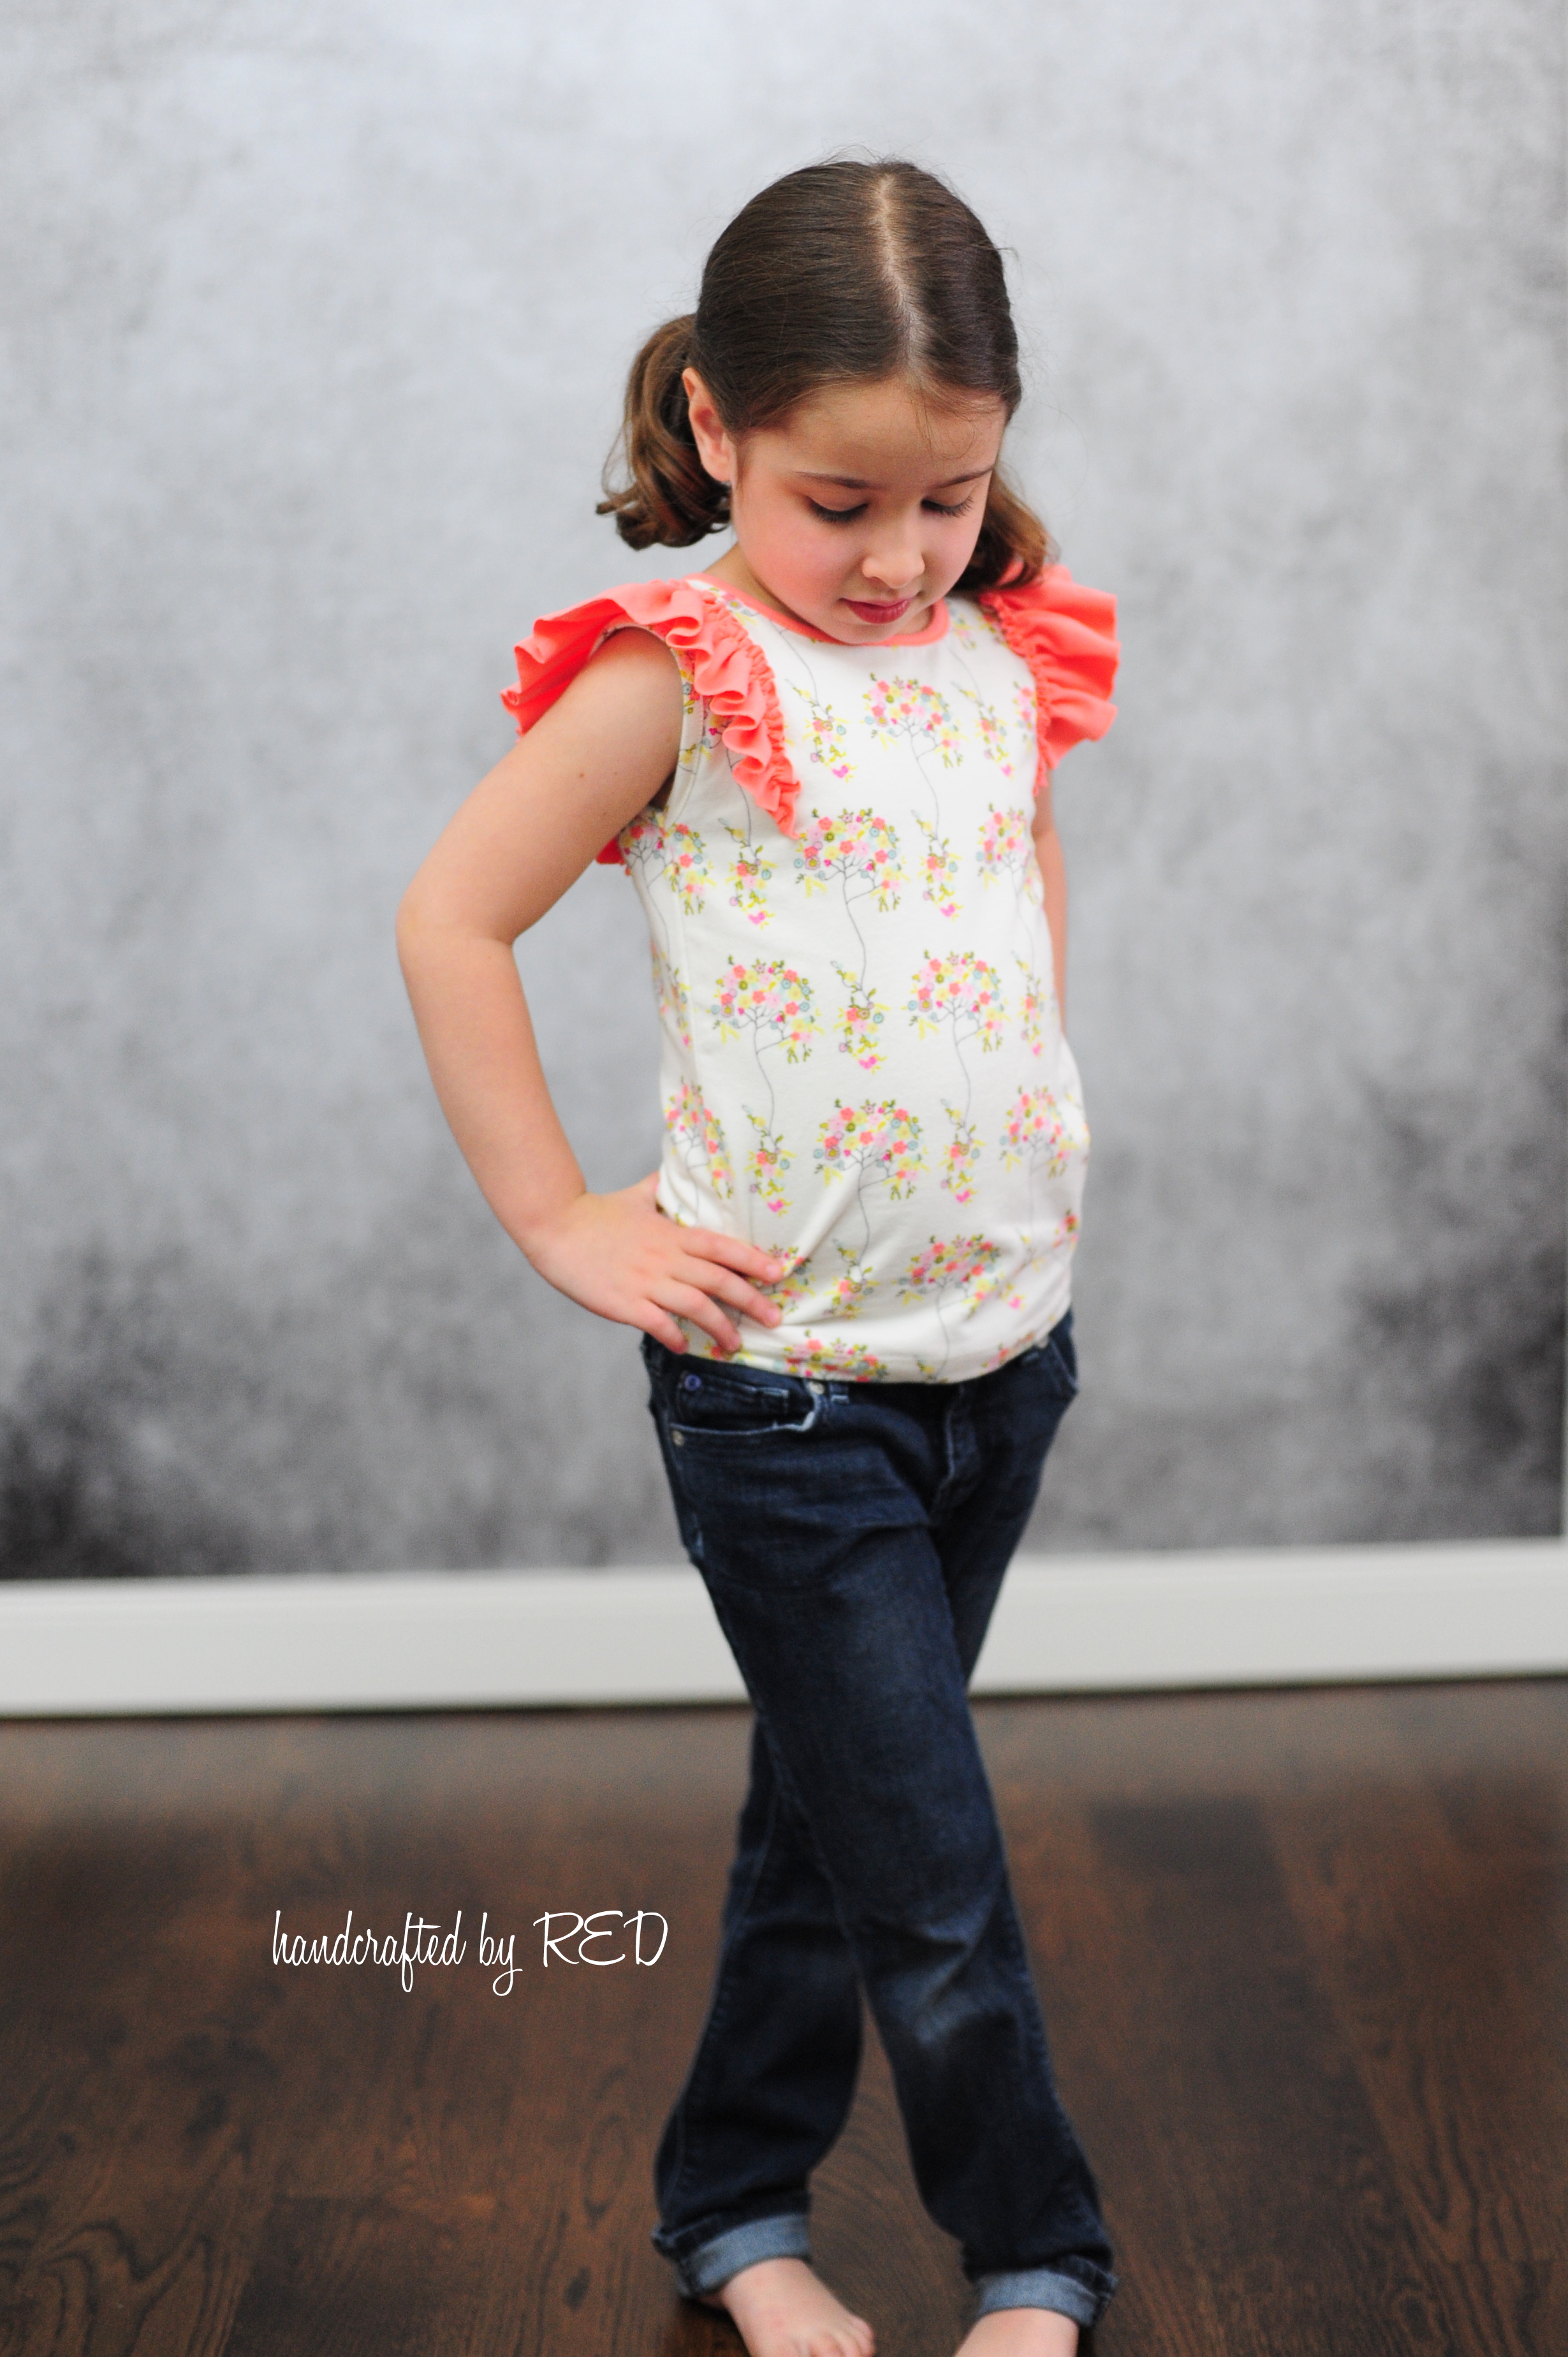
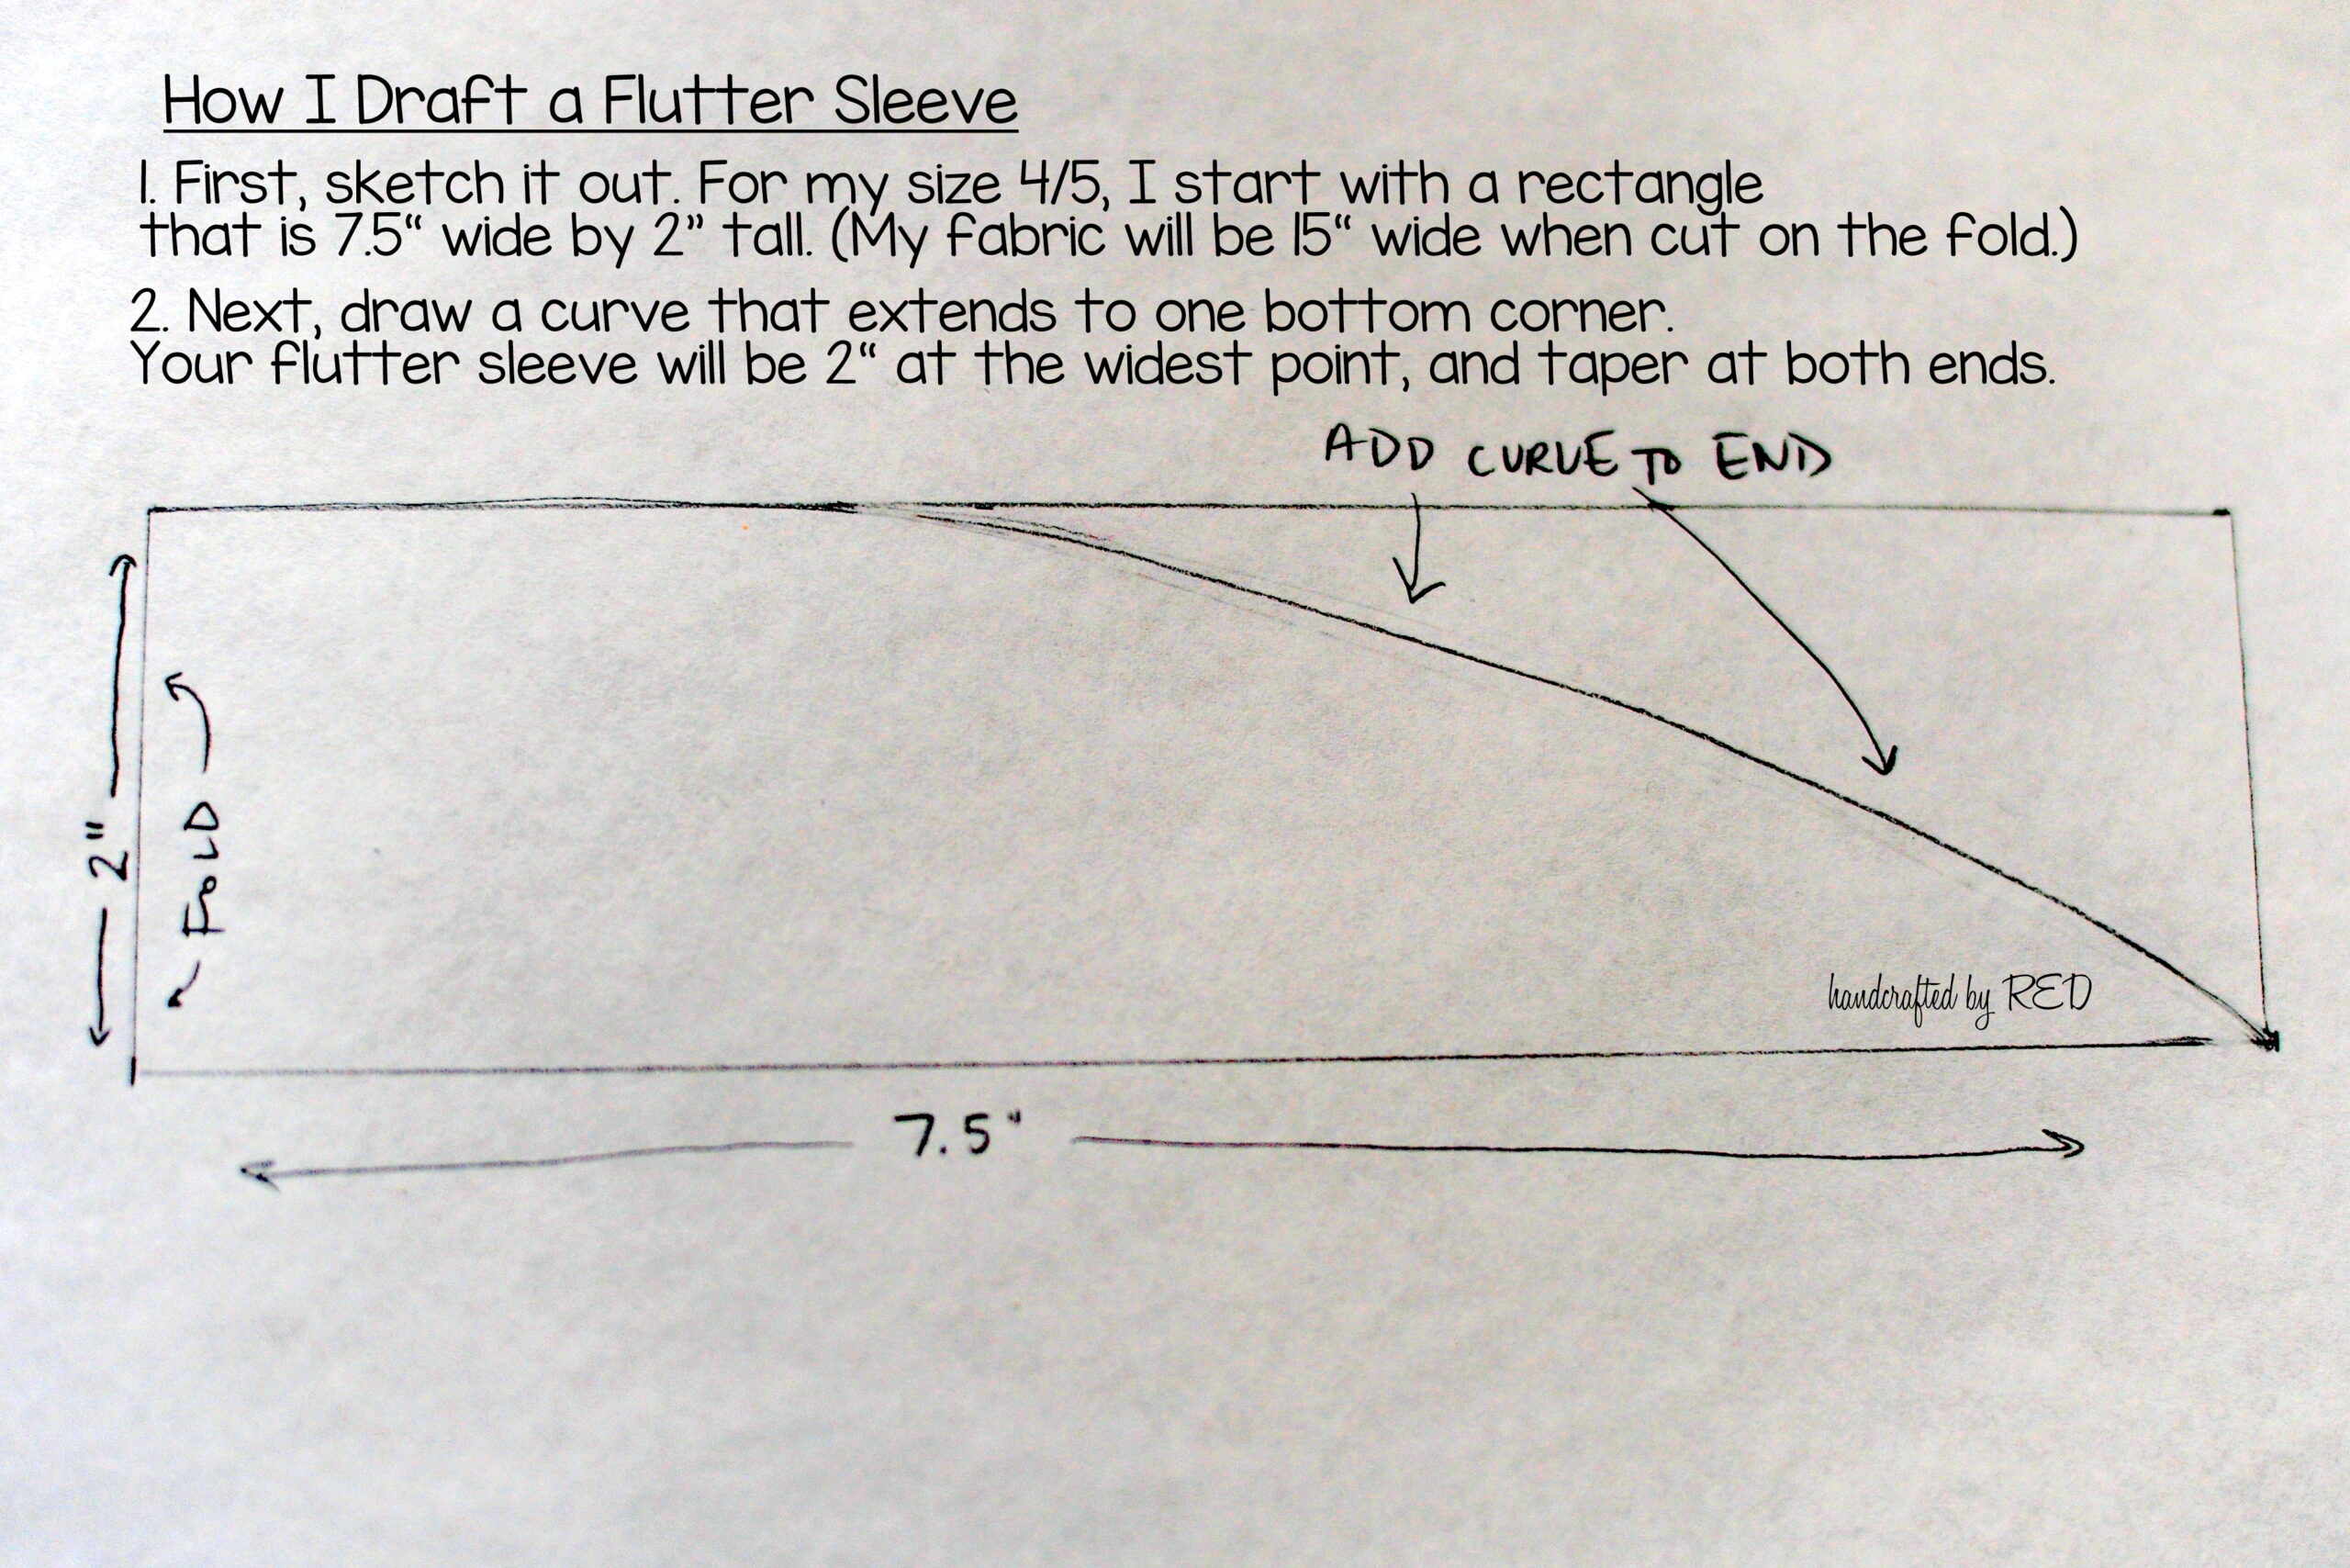
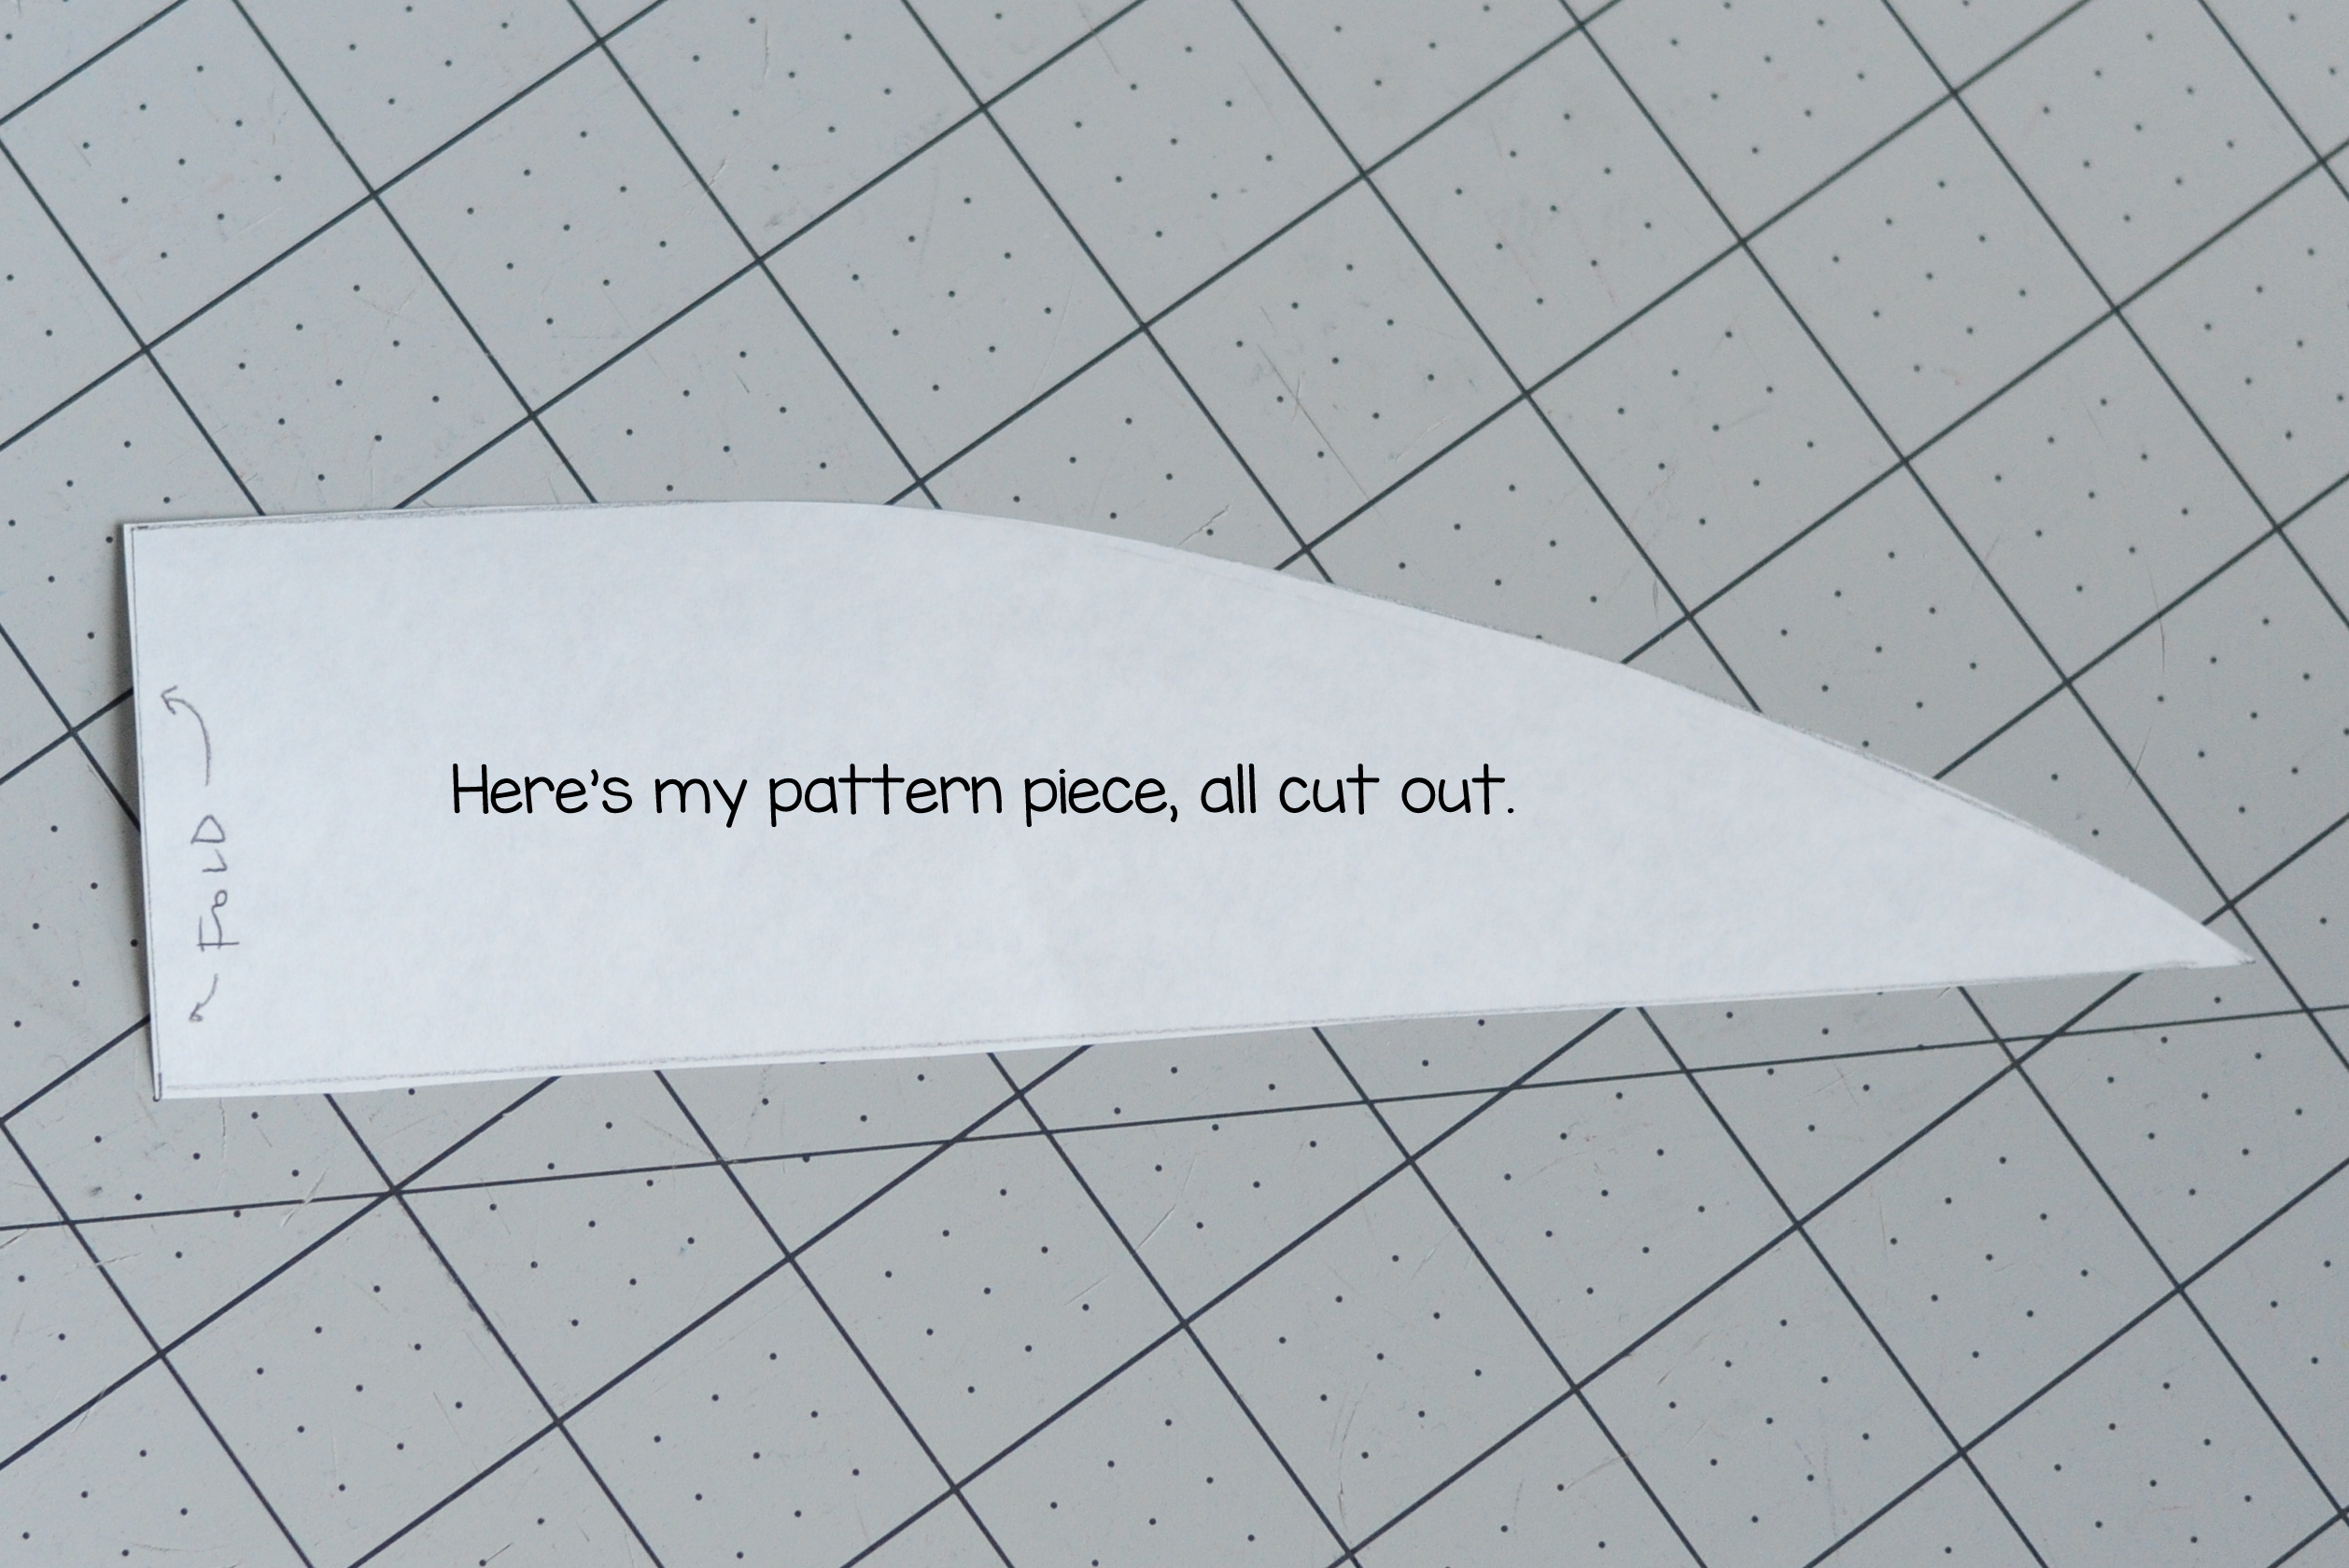
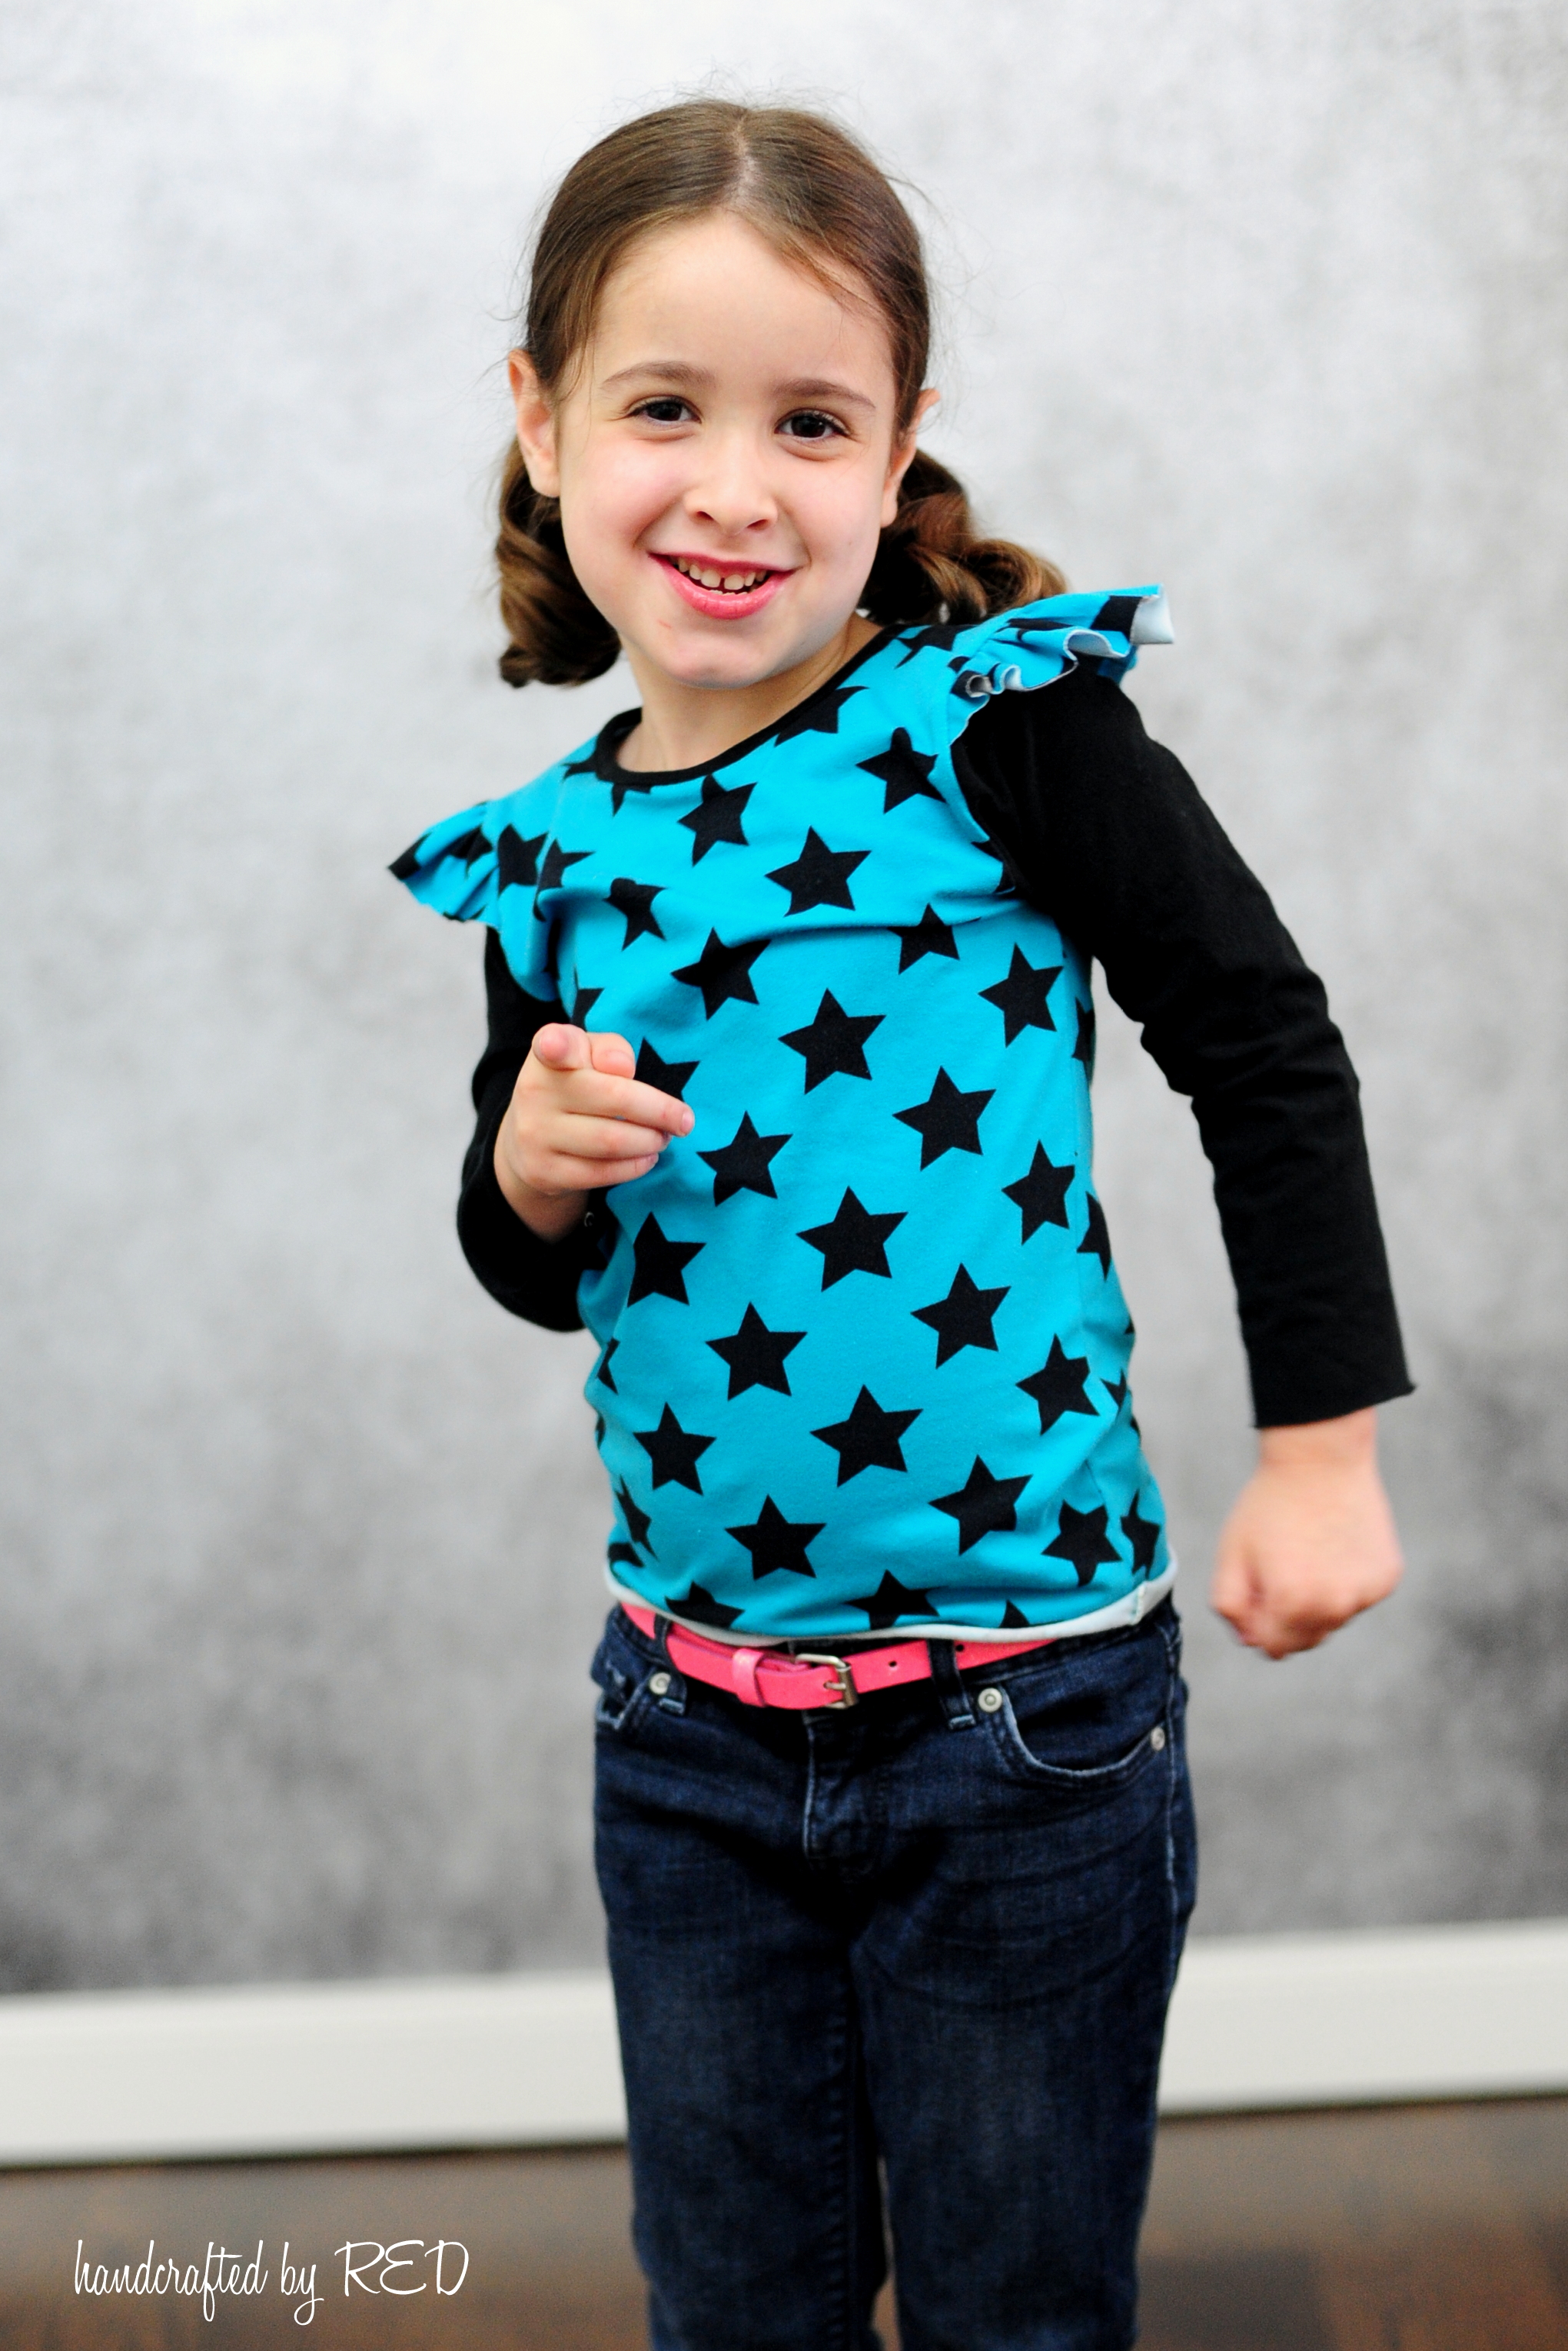
This version was super simple, and would be easy to modify to make the flutter larger or smaller, wider or more narrow. The next flutter I wanted to tackle was one sewn into the armscye (armhole) along with a long sleeve for a layered look. To do this, I needed to draft a smaller flutter that would nestle nicely into place atop Miss P’s shoulders.
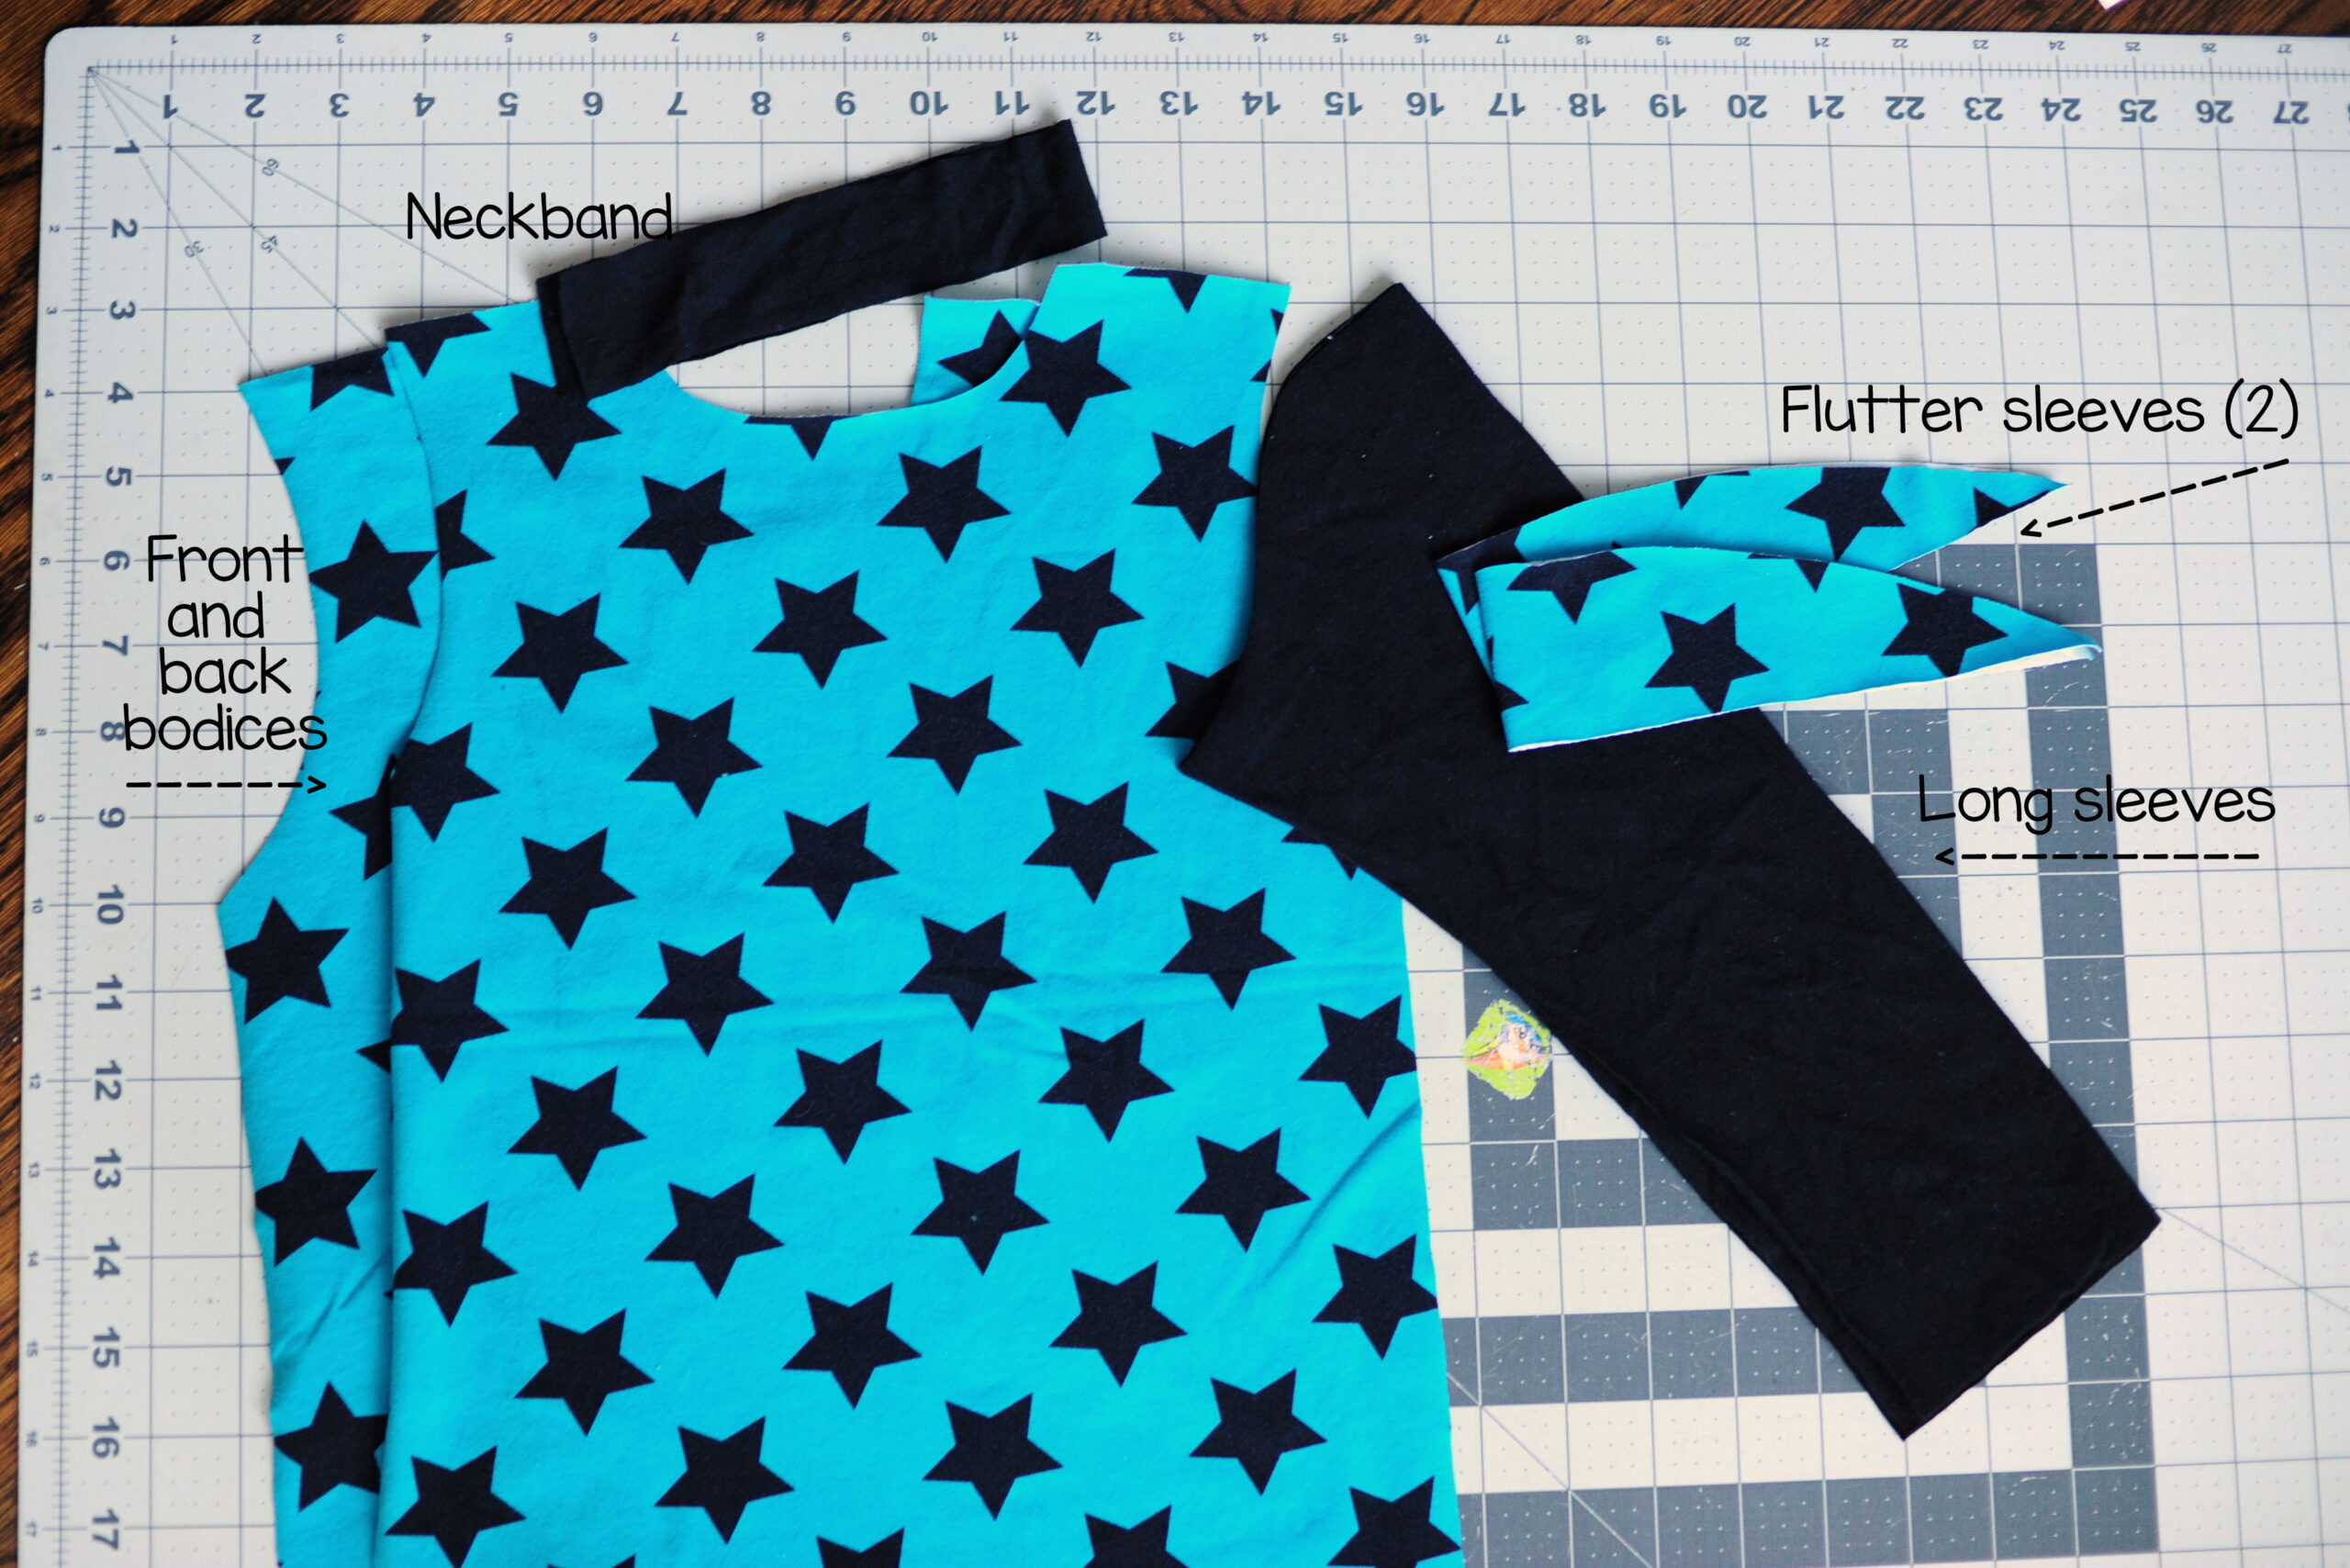
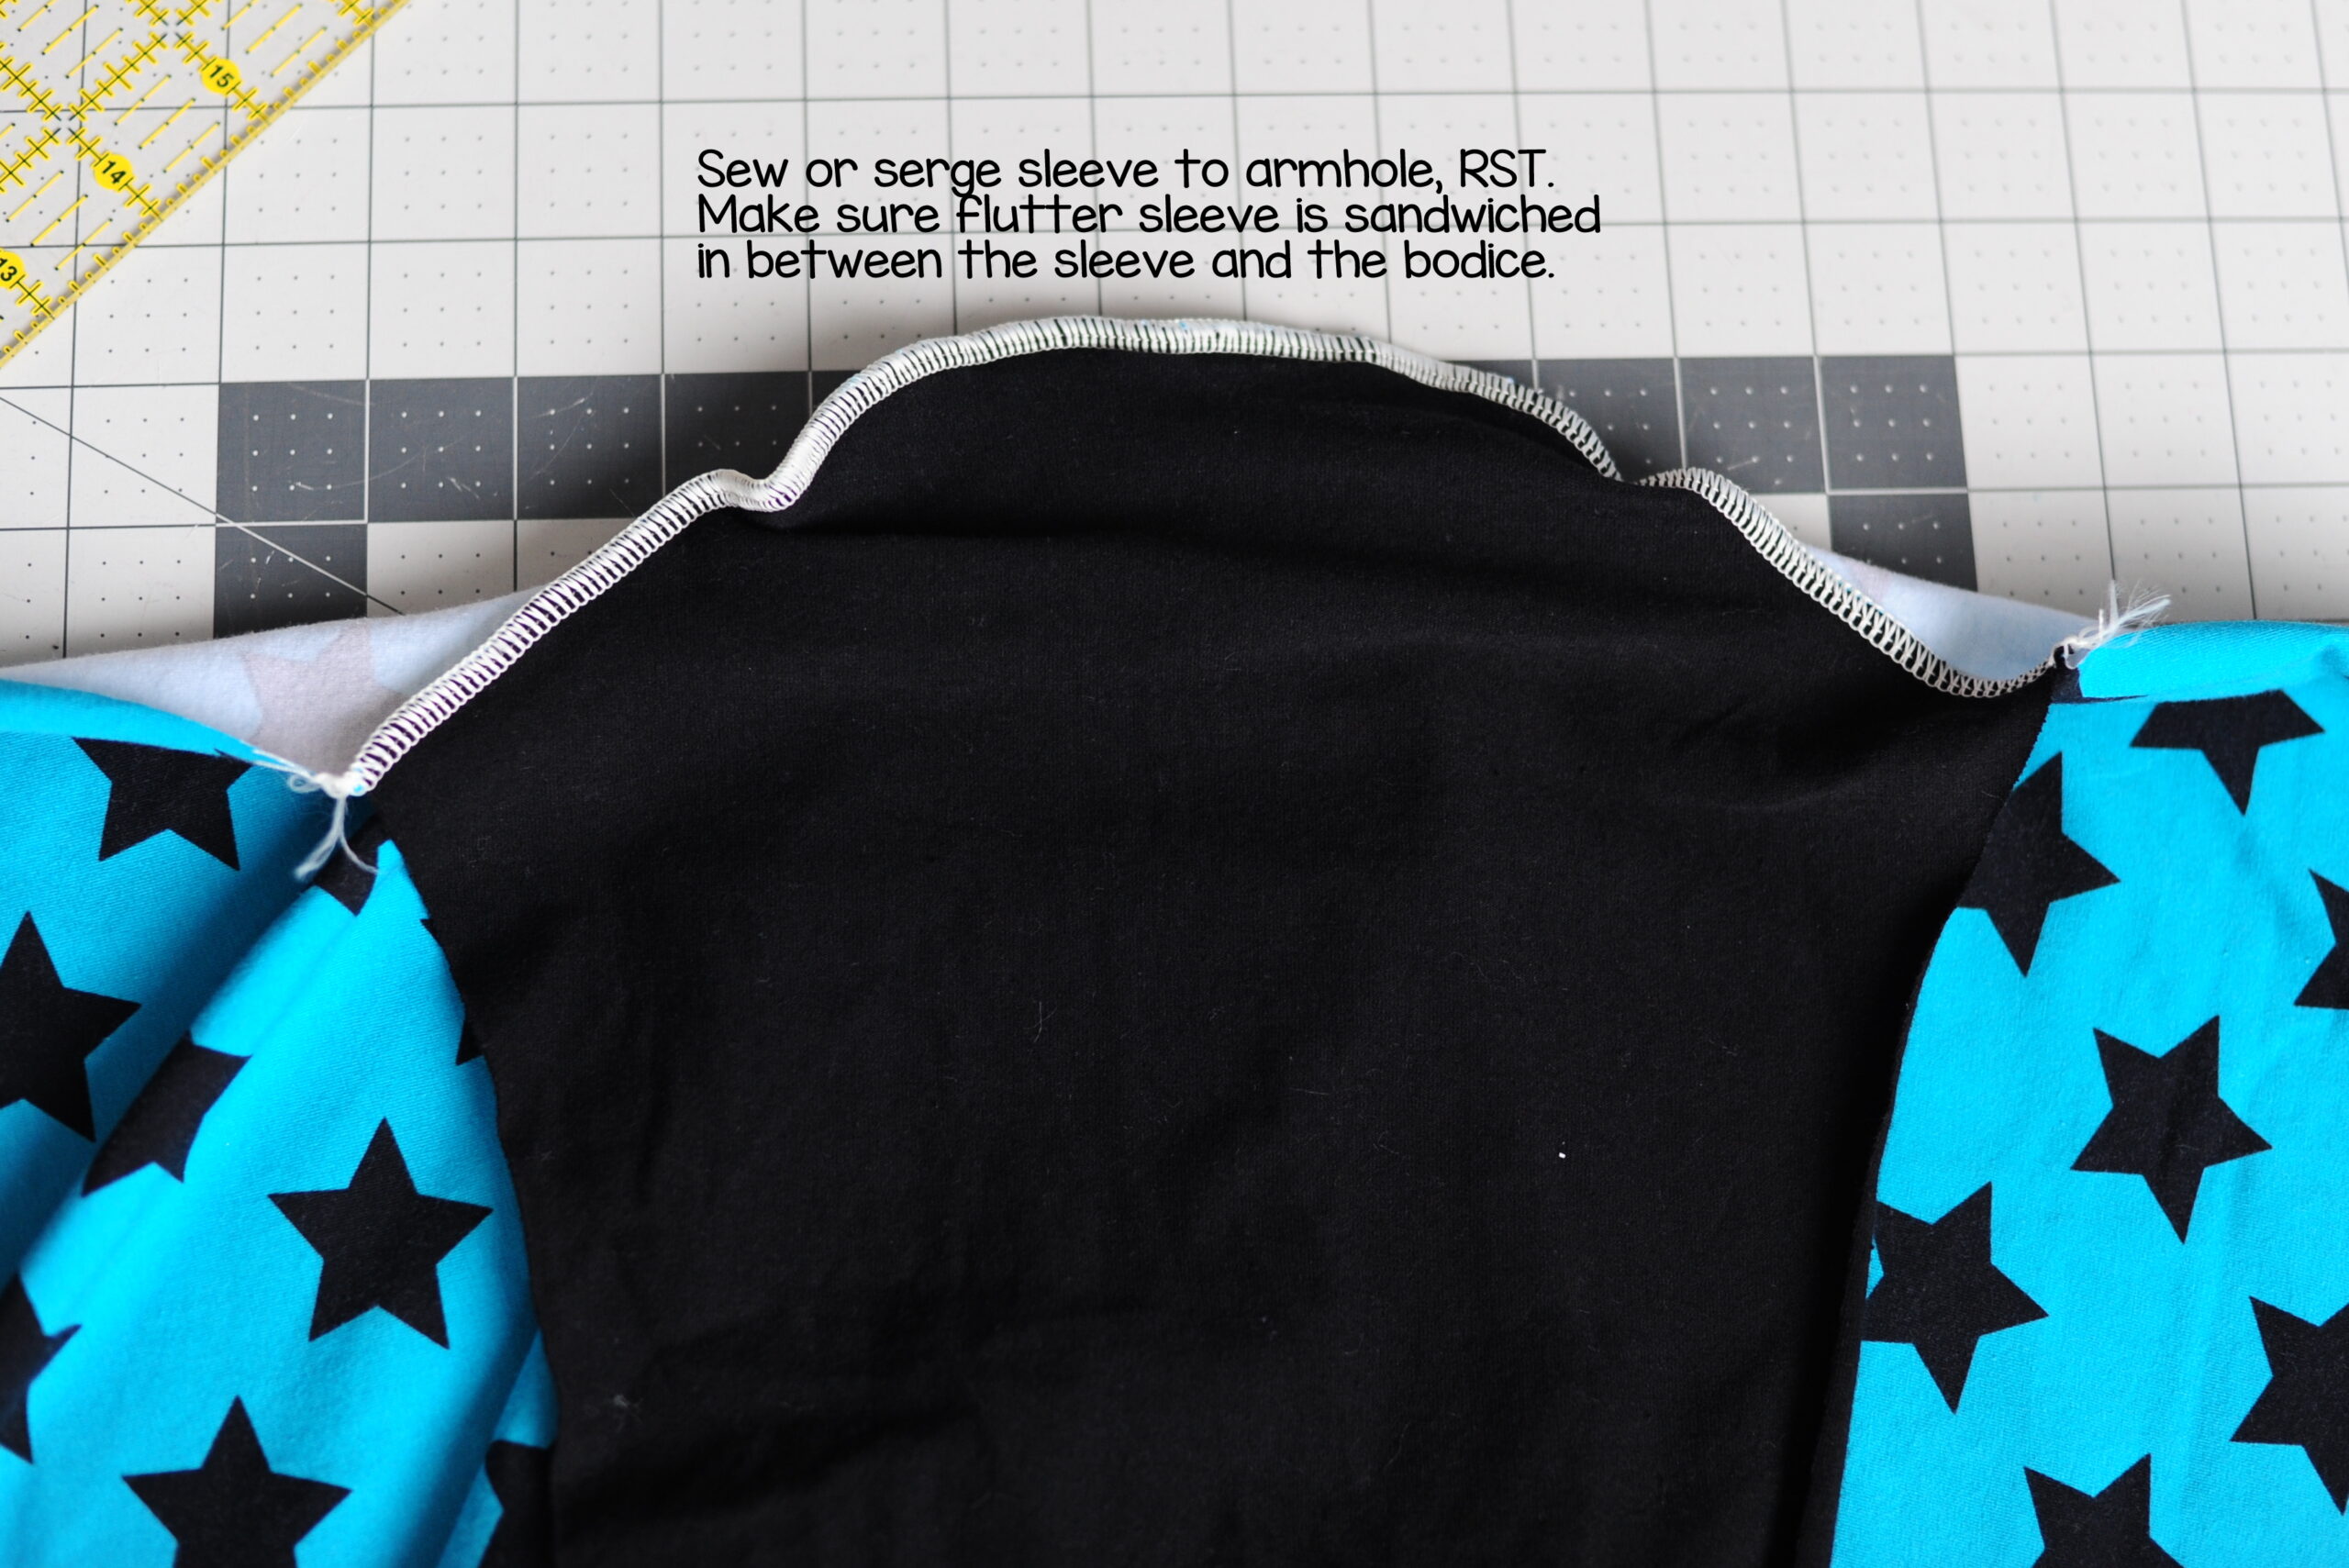
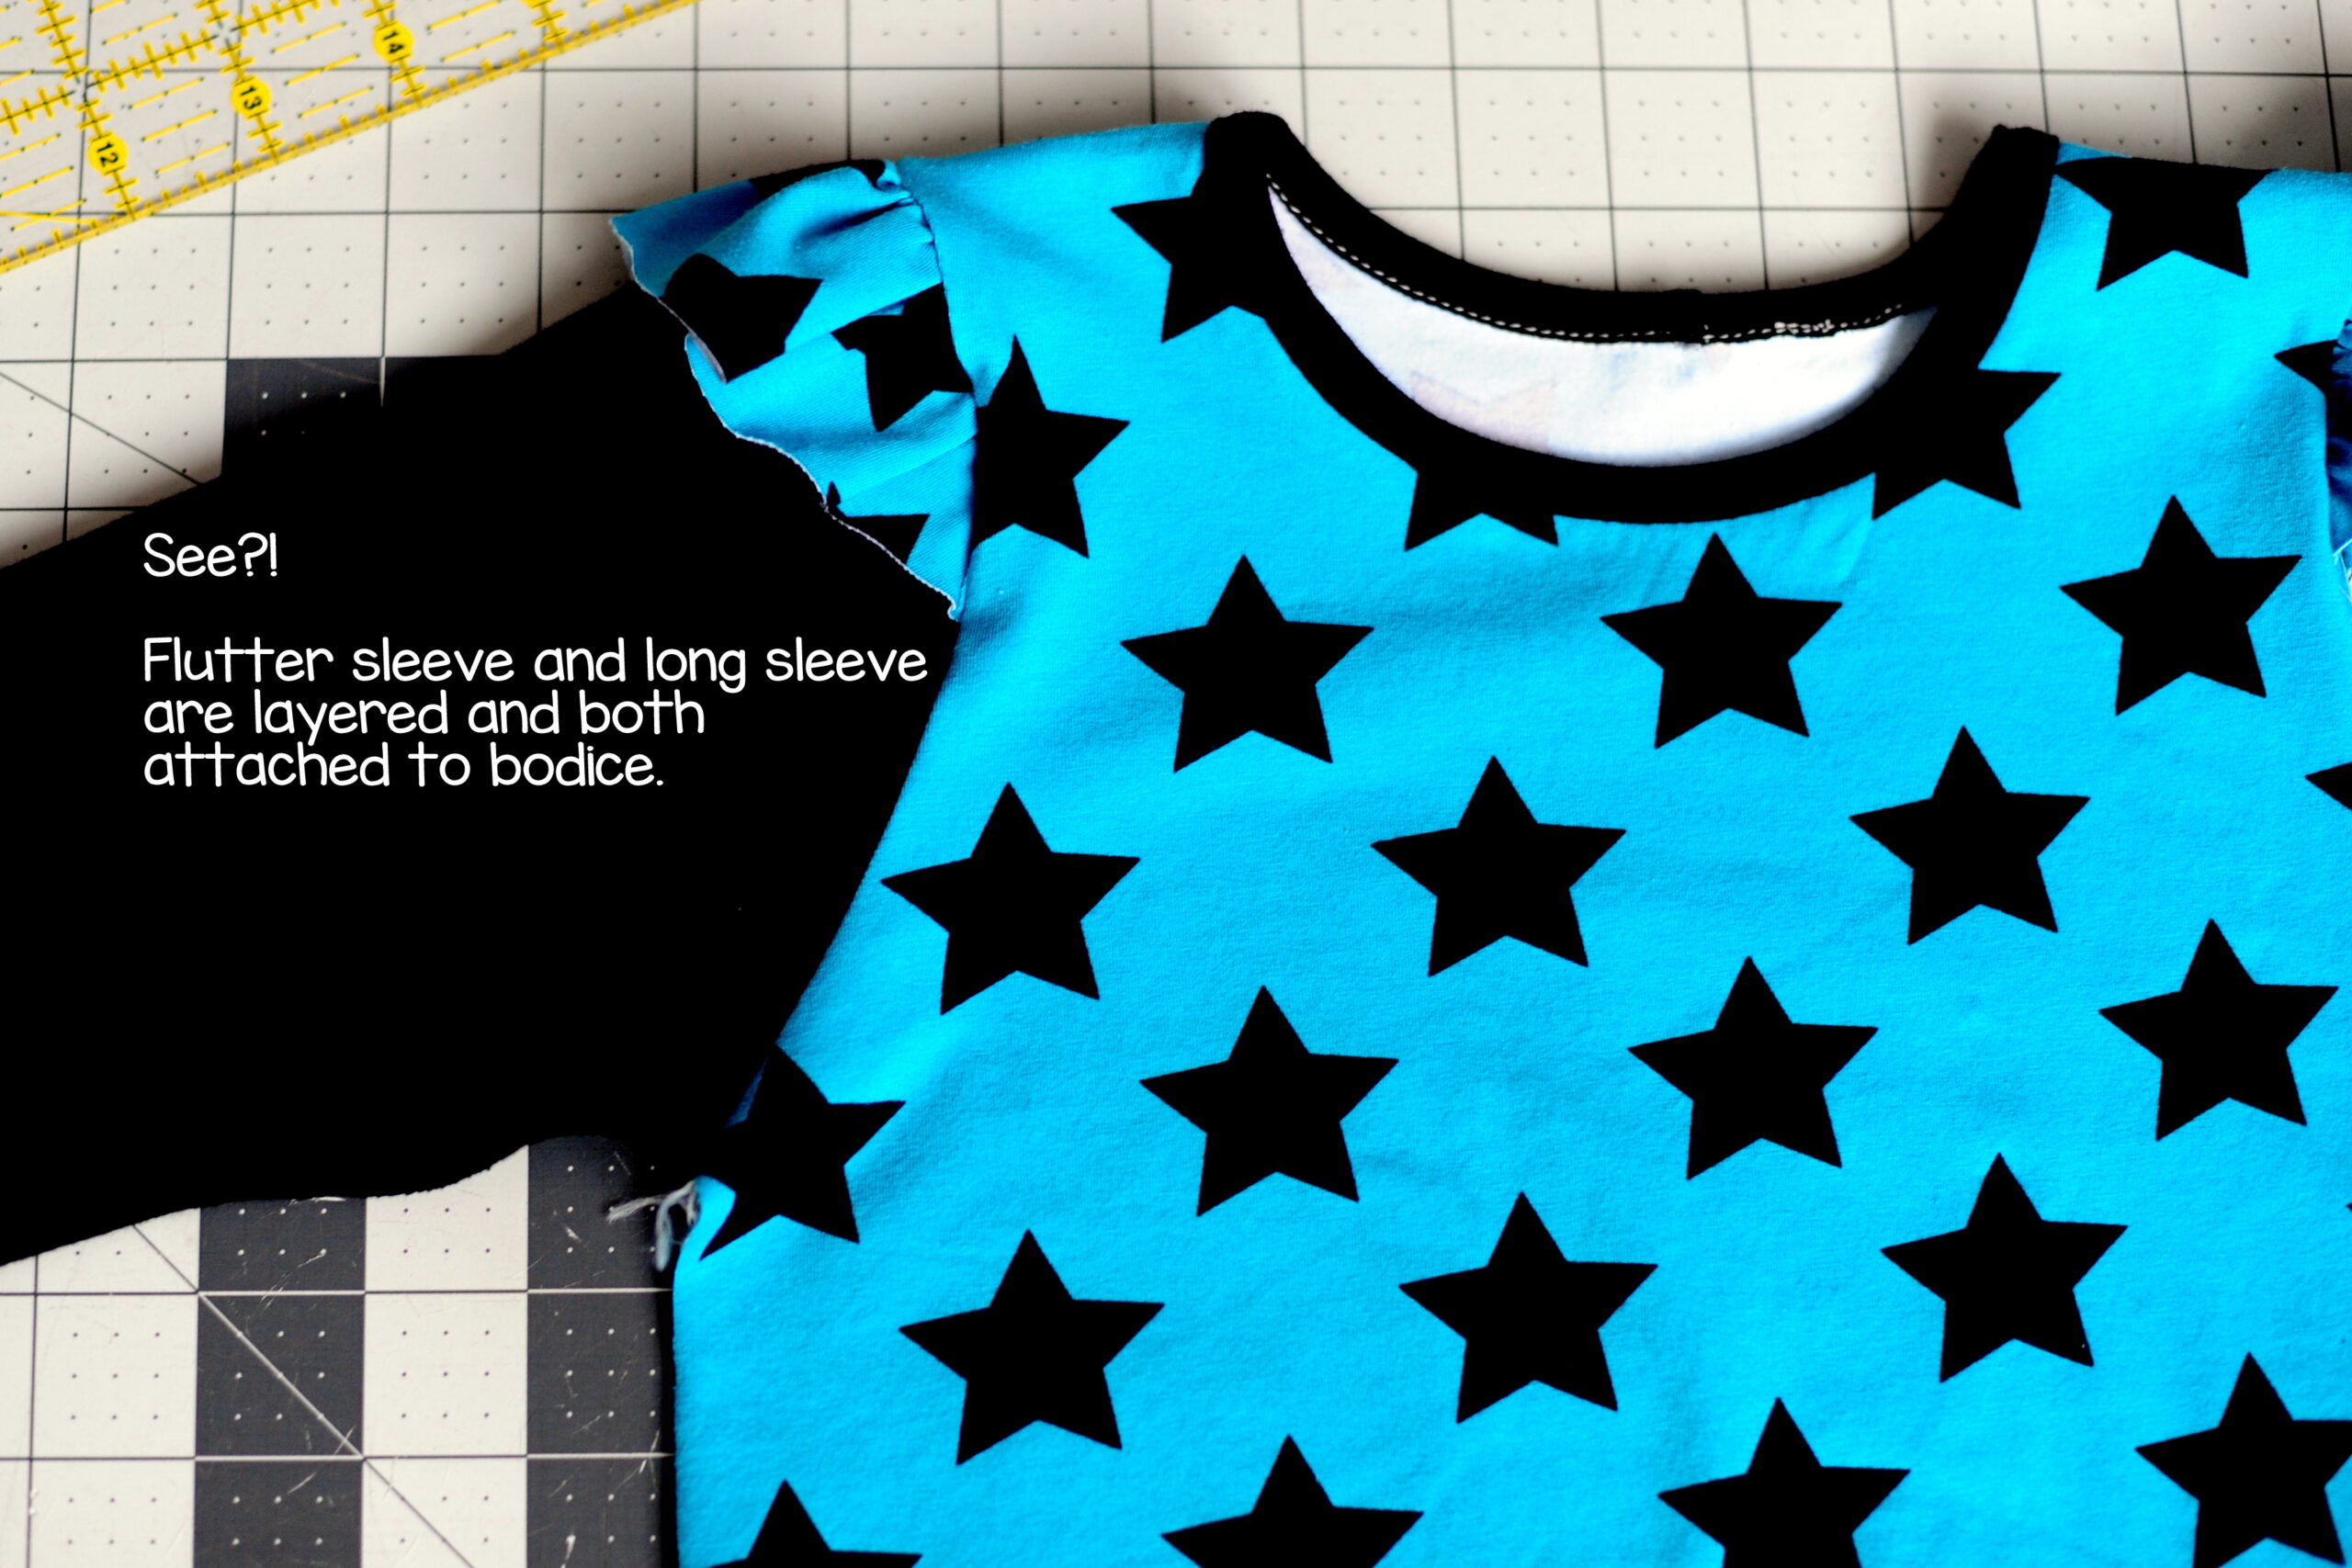
To assemble this shirt, I sewed the front and back together at the shoulders, and attached the neckline binding. Then, I gathered my sleeves and basted them RST to the armscye, again centering the flutter perpendicular to the shoulder seam.

I used my serger to attach the sleeve, sandwiching the flutter in between the long sleeve and the bodice. (I’m using the Alex and Anna pjs again here, this time the winter version with the long sleeves.)
This version was a huge hit – despite the fact that temps are in the 90s here and long sleeves are a ways off (I hope!), Miss P was excited to start putting together a “back-to-school” pile of new clothes.
“You know you want to try this, too!”
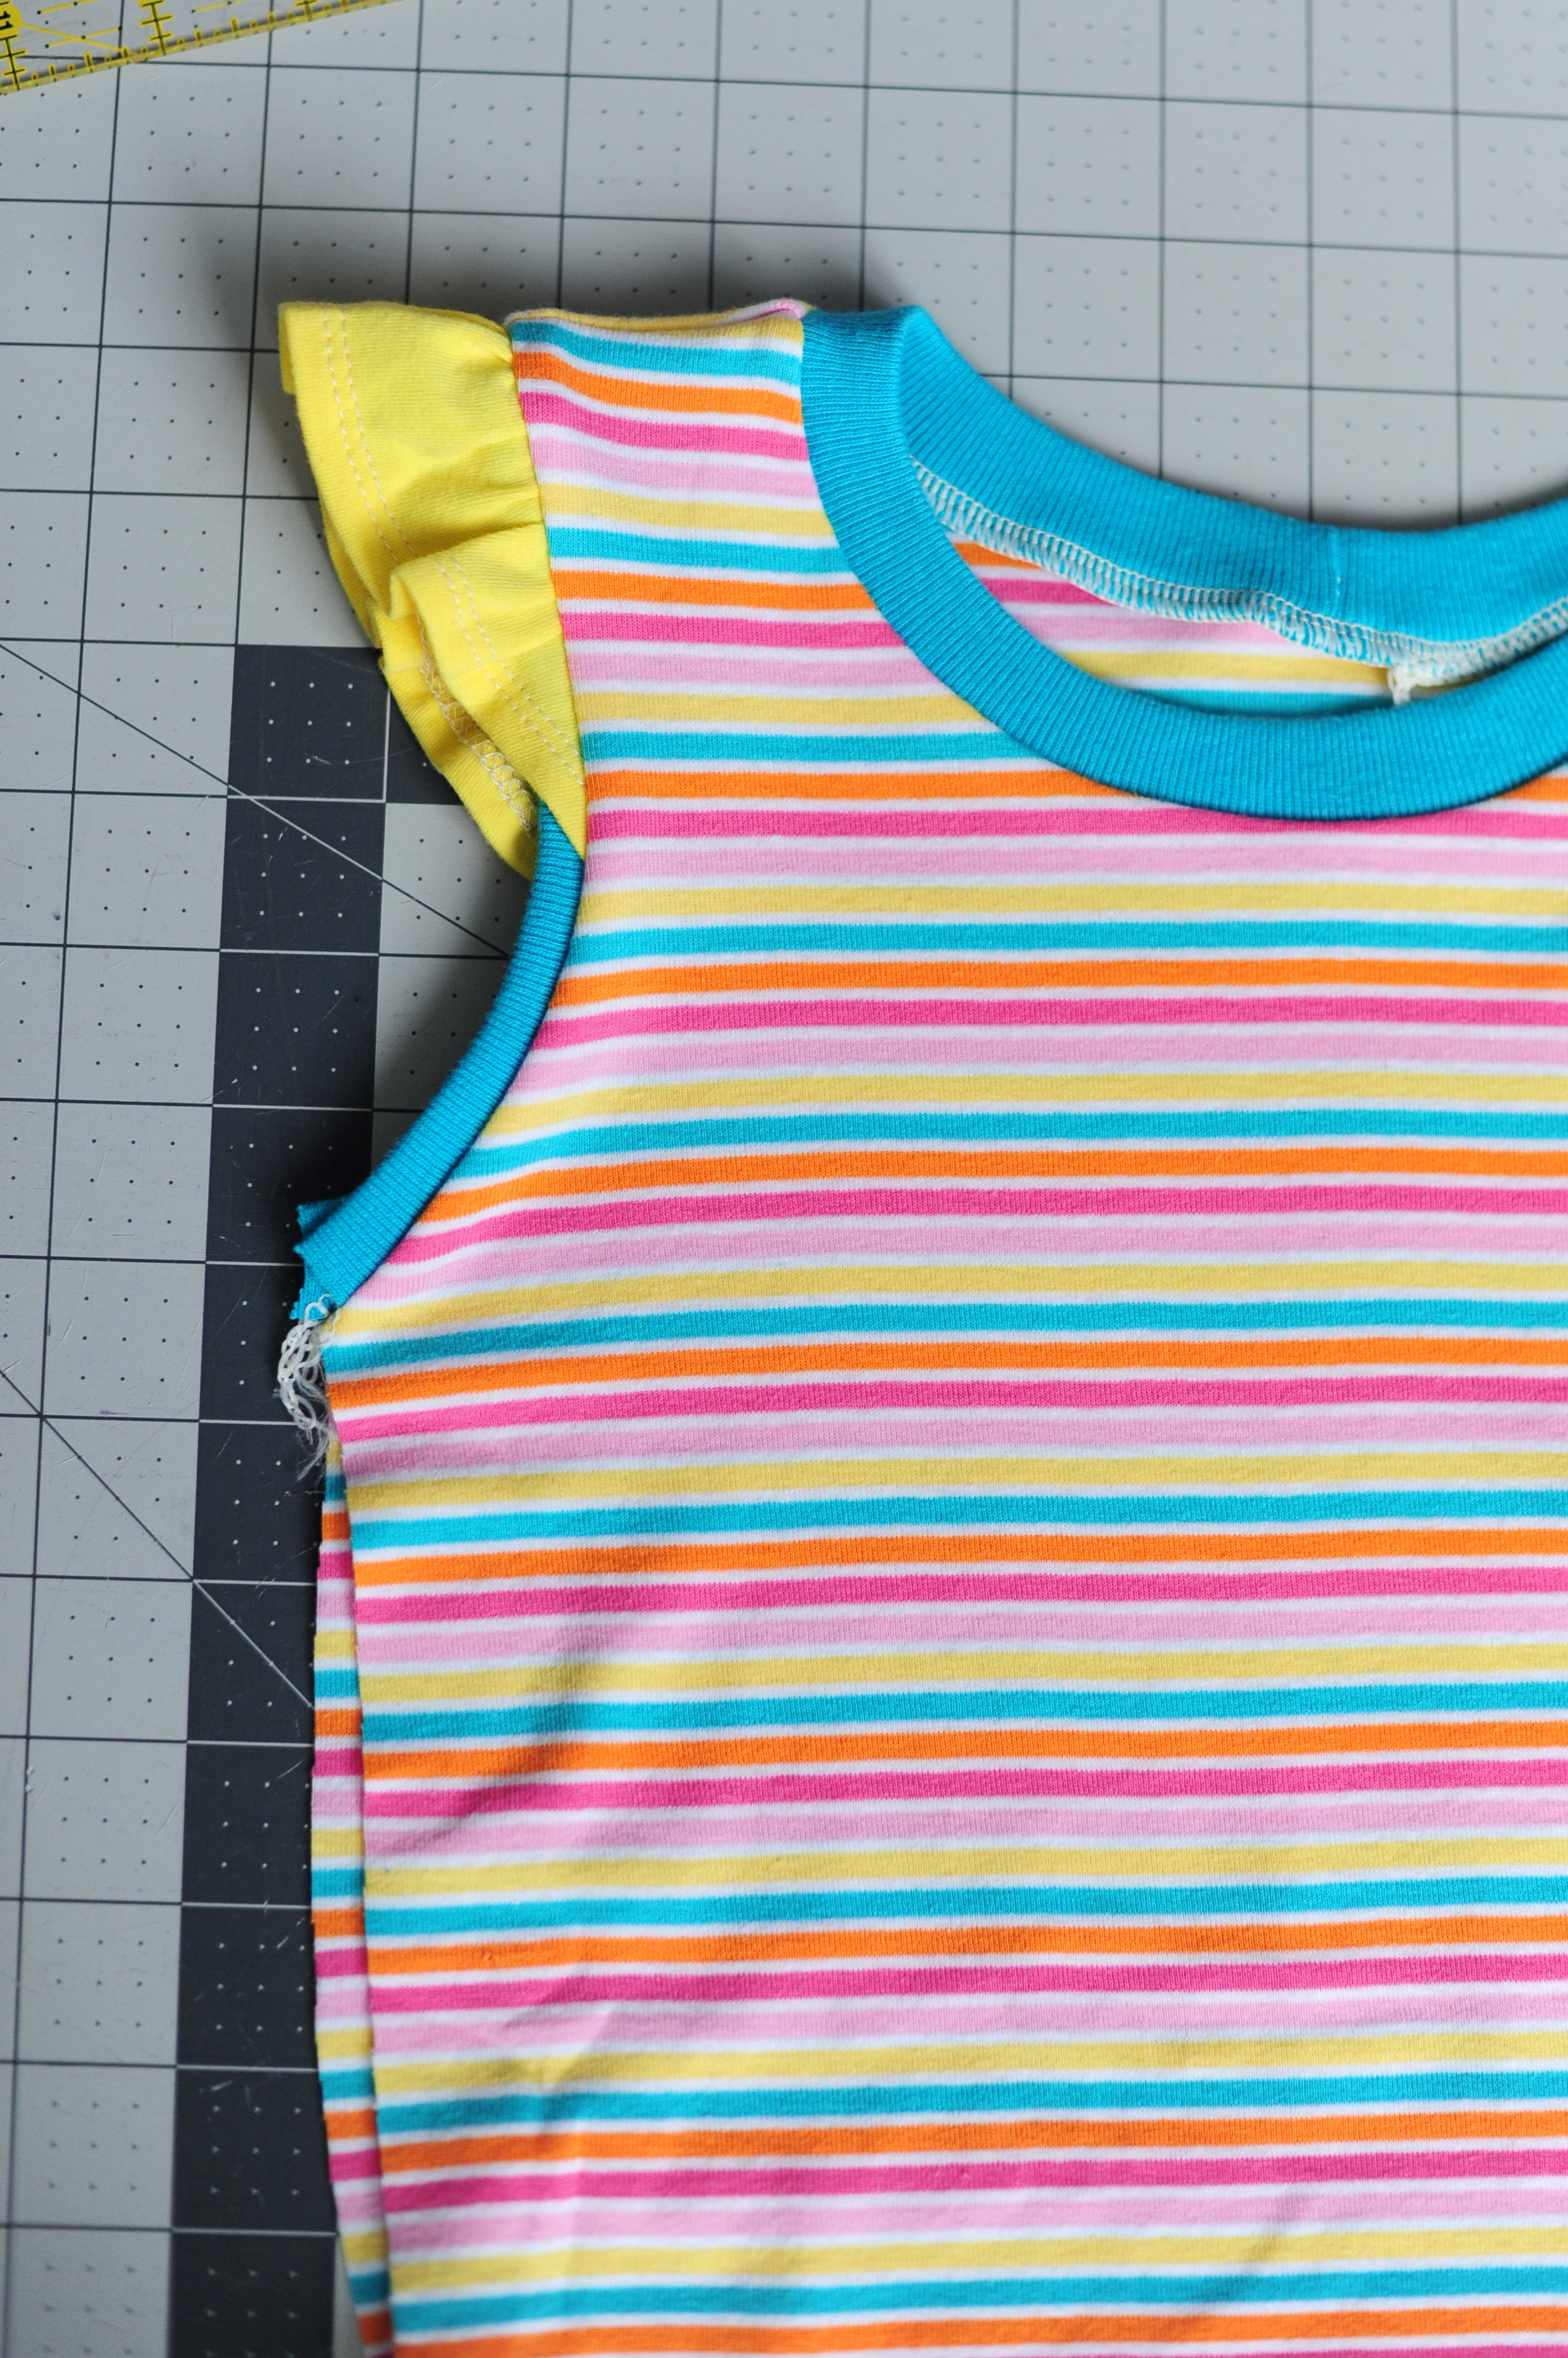
To add the same sleeves to a sleeveless top, I followed the same process for drafting and basting my flutters into place on the bodice. For this shirt, I hemmed the curved edge of my sleeves with a narrow coverstitch. It makes the sleeves stand up a little more, and they’ll hold their shape without curling in the wash. (Rolled hems are also super cute for flutter sleeves, if you enjoy doing those on a sewing machine or serger.)
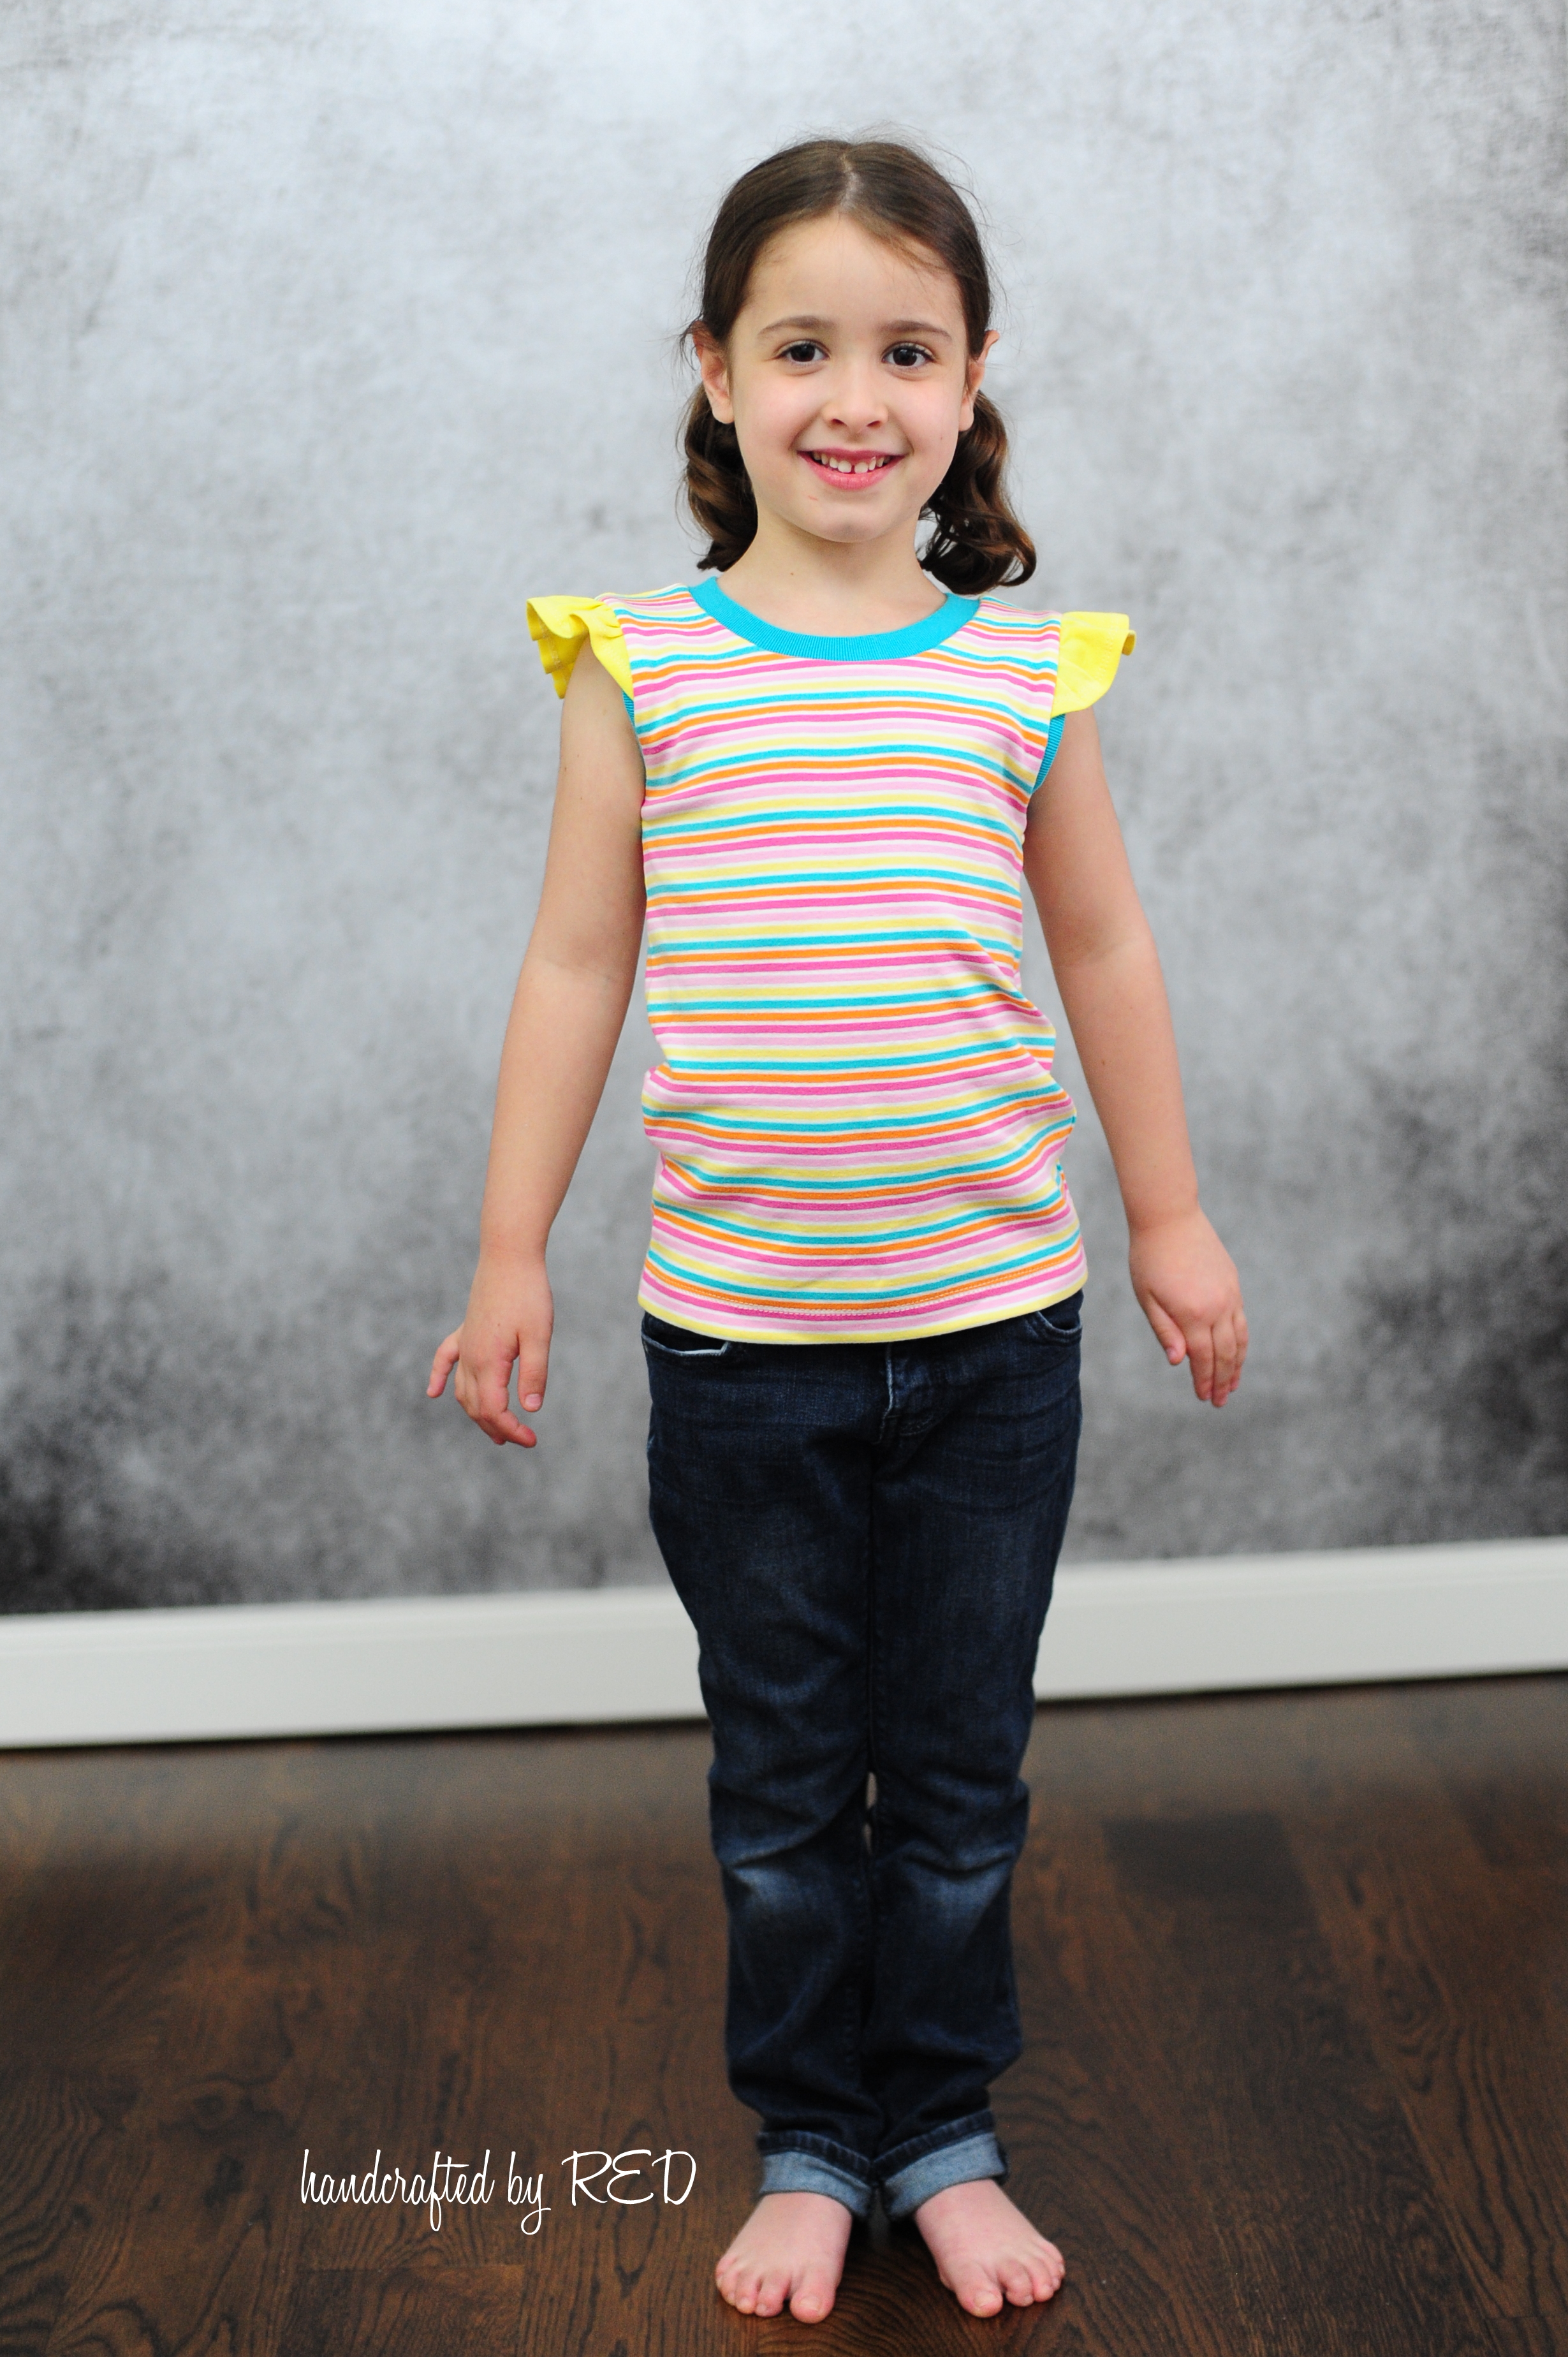
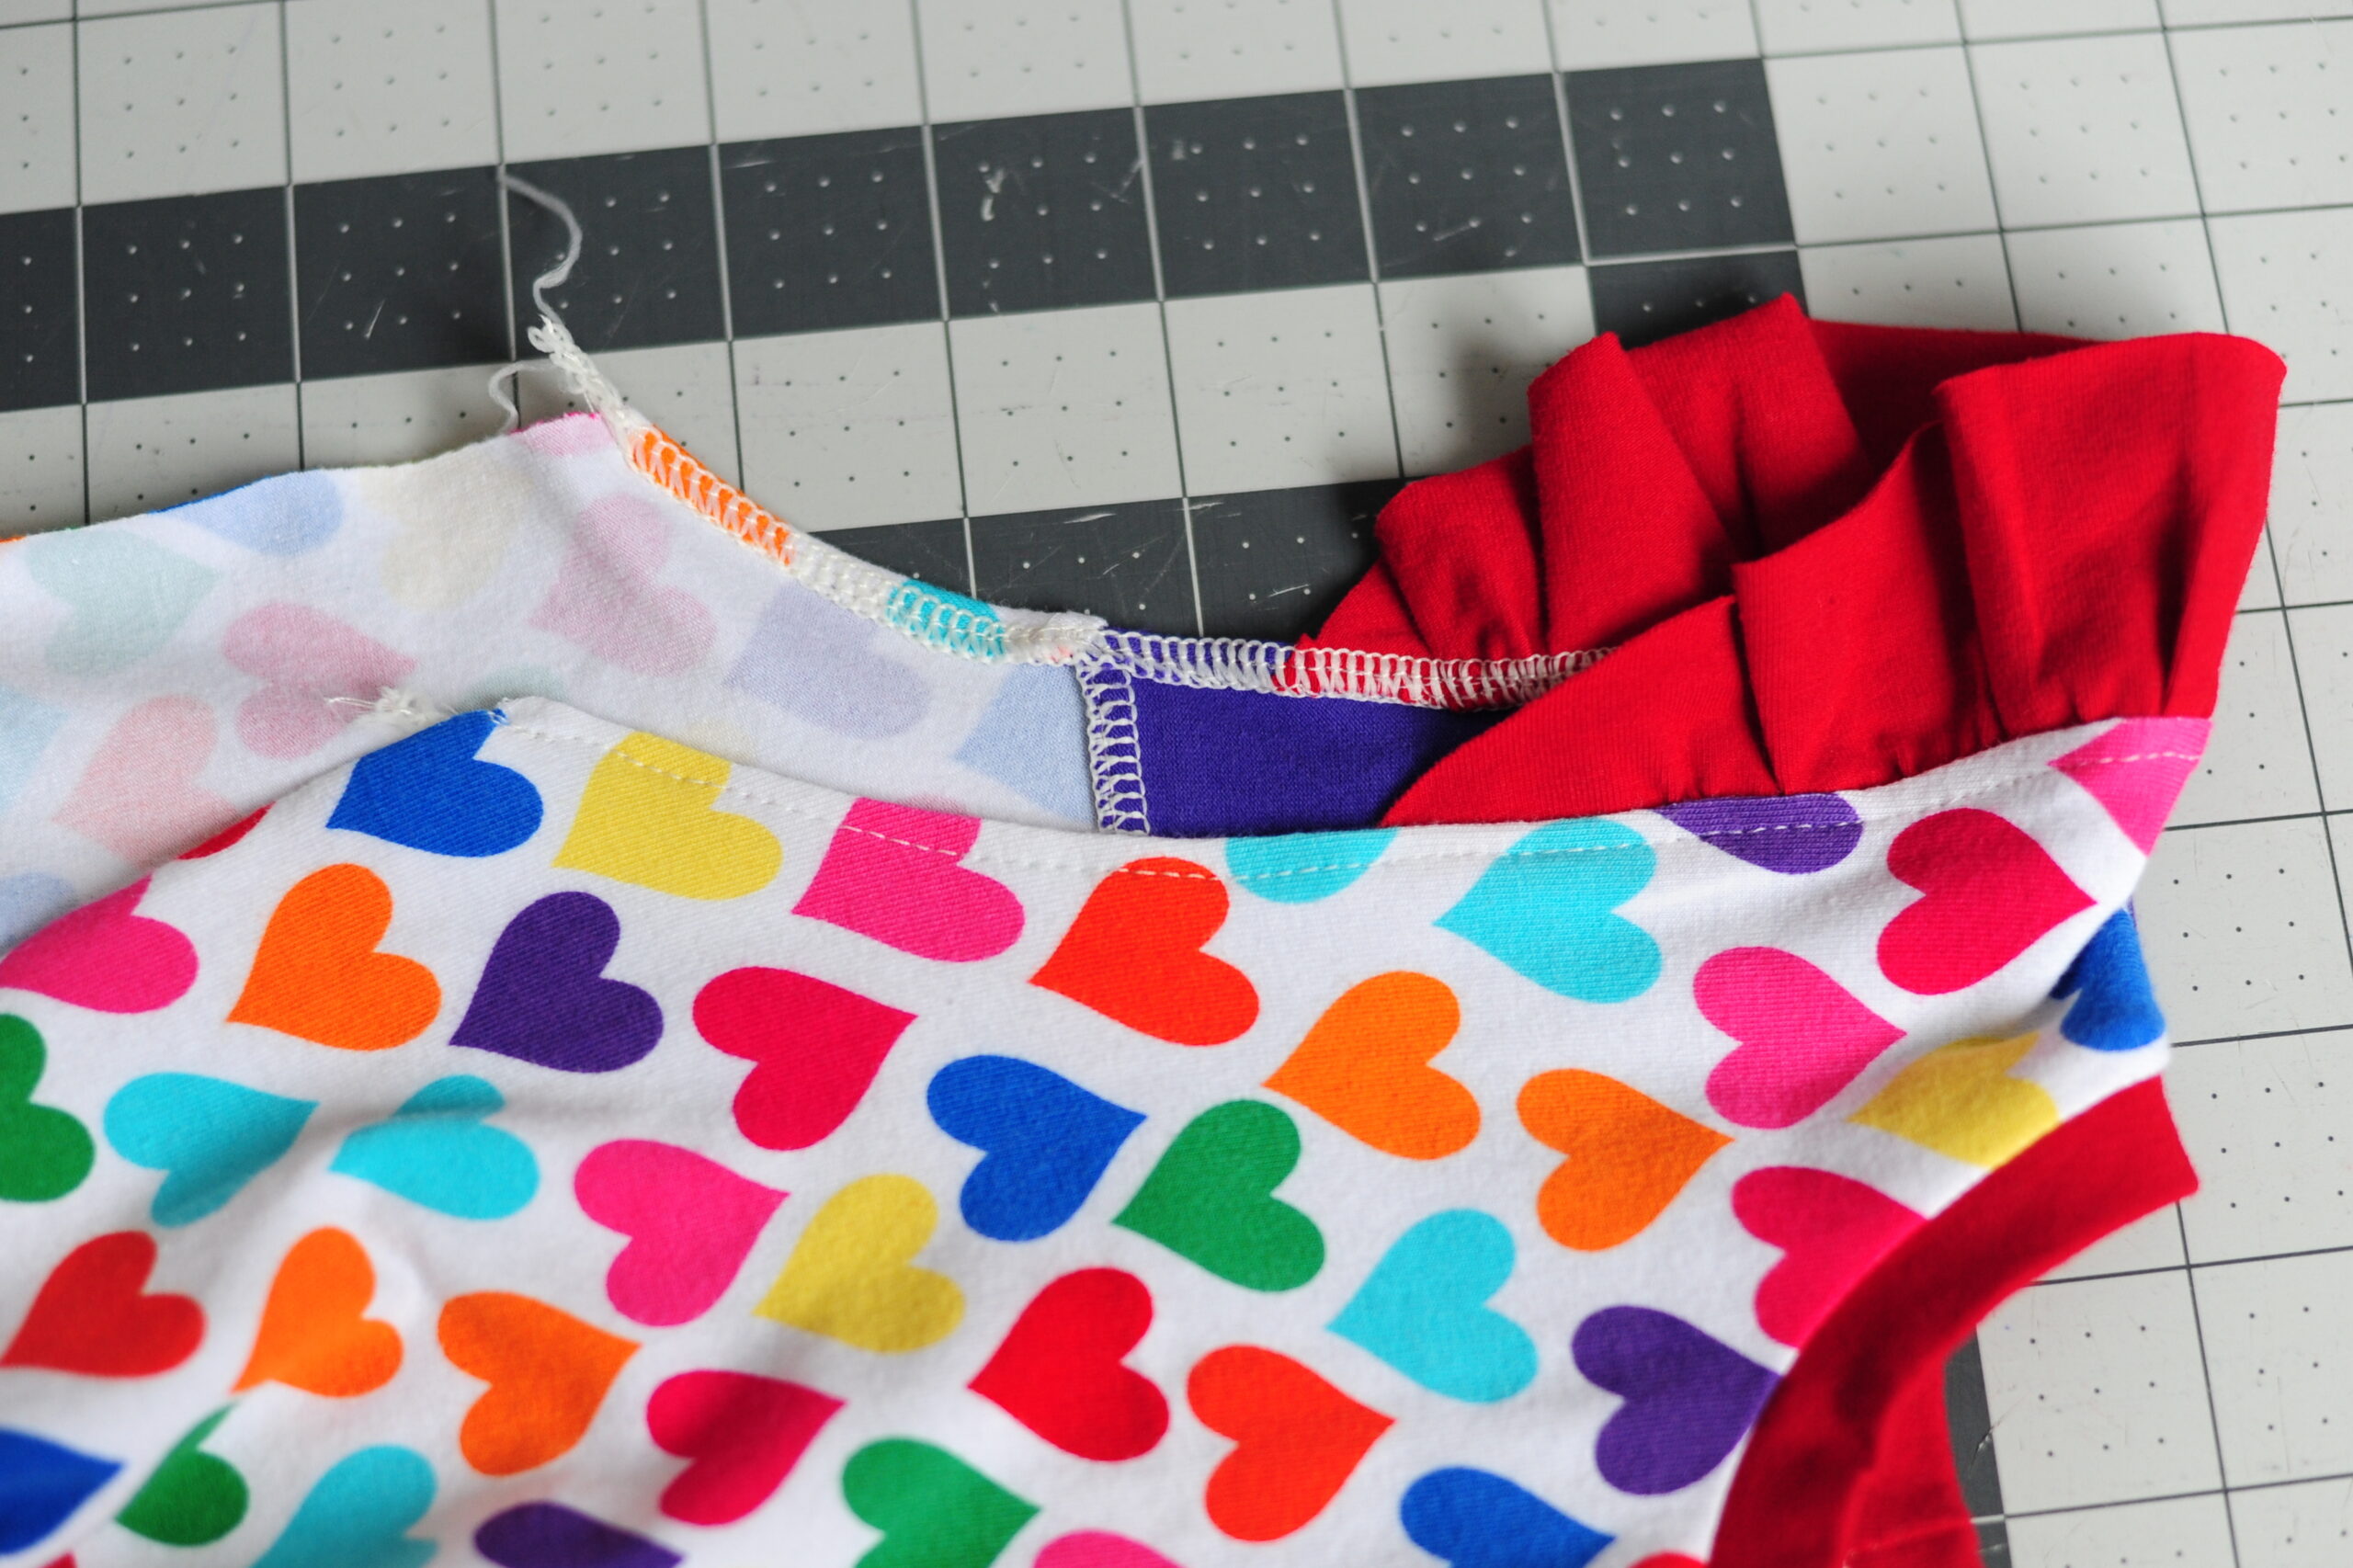
Then, I needed to make sure to finish the rest of the raw edges along the armscye/armhole, since the sleeve only gets sewn part of the way around (in this example, that is – you can make your sleeve any size you want, and it can fill any percentage of the armhole that you would like it to fill). In the striped tank above, I used the bands that are included in the original pattern.
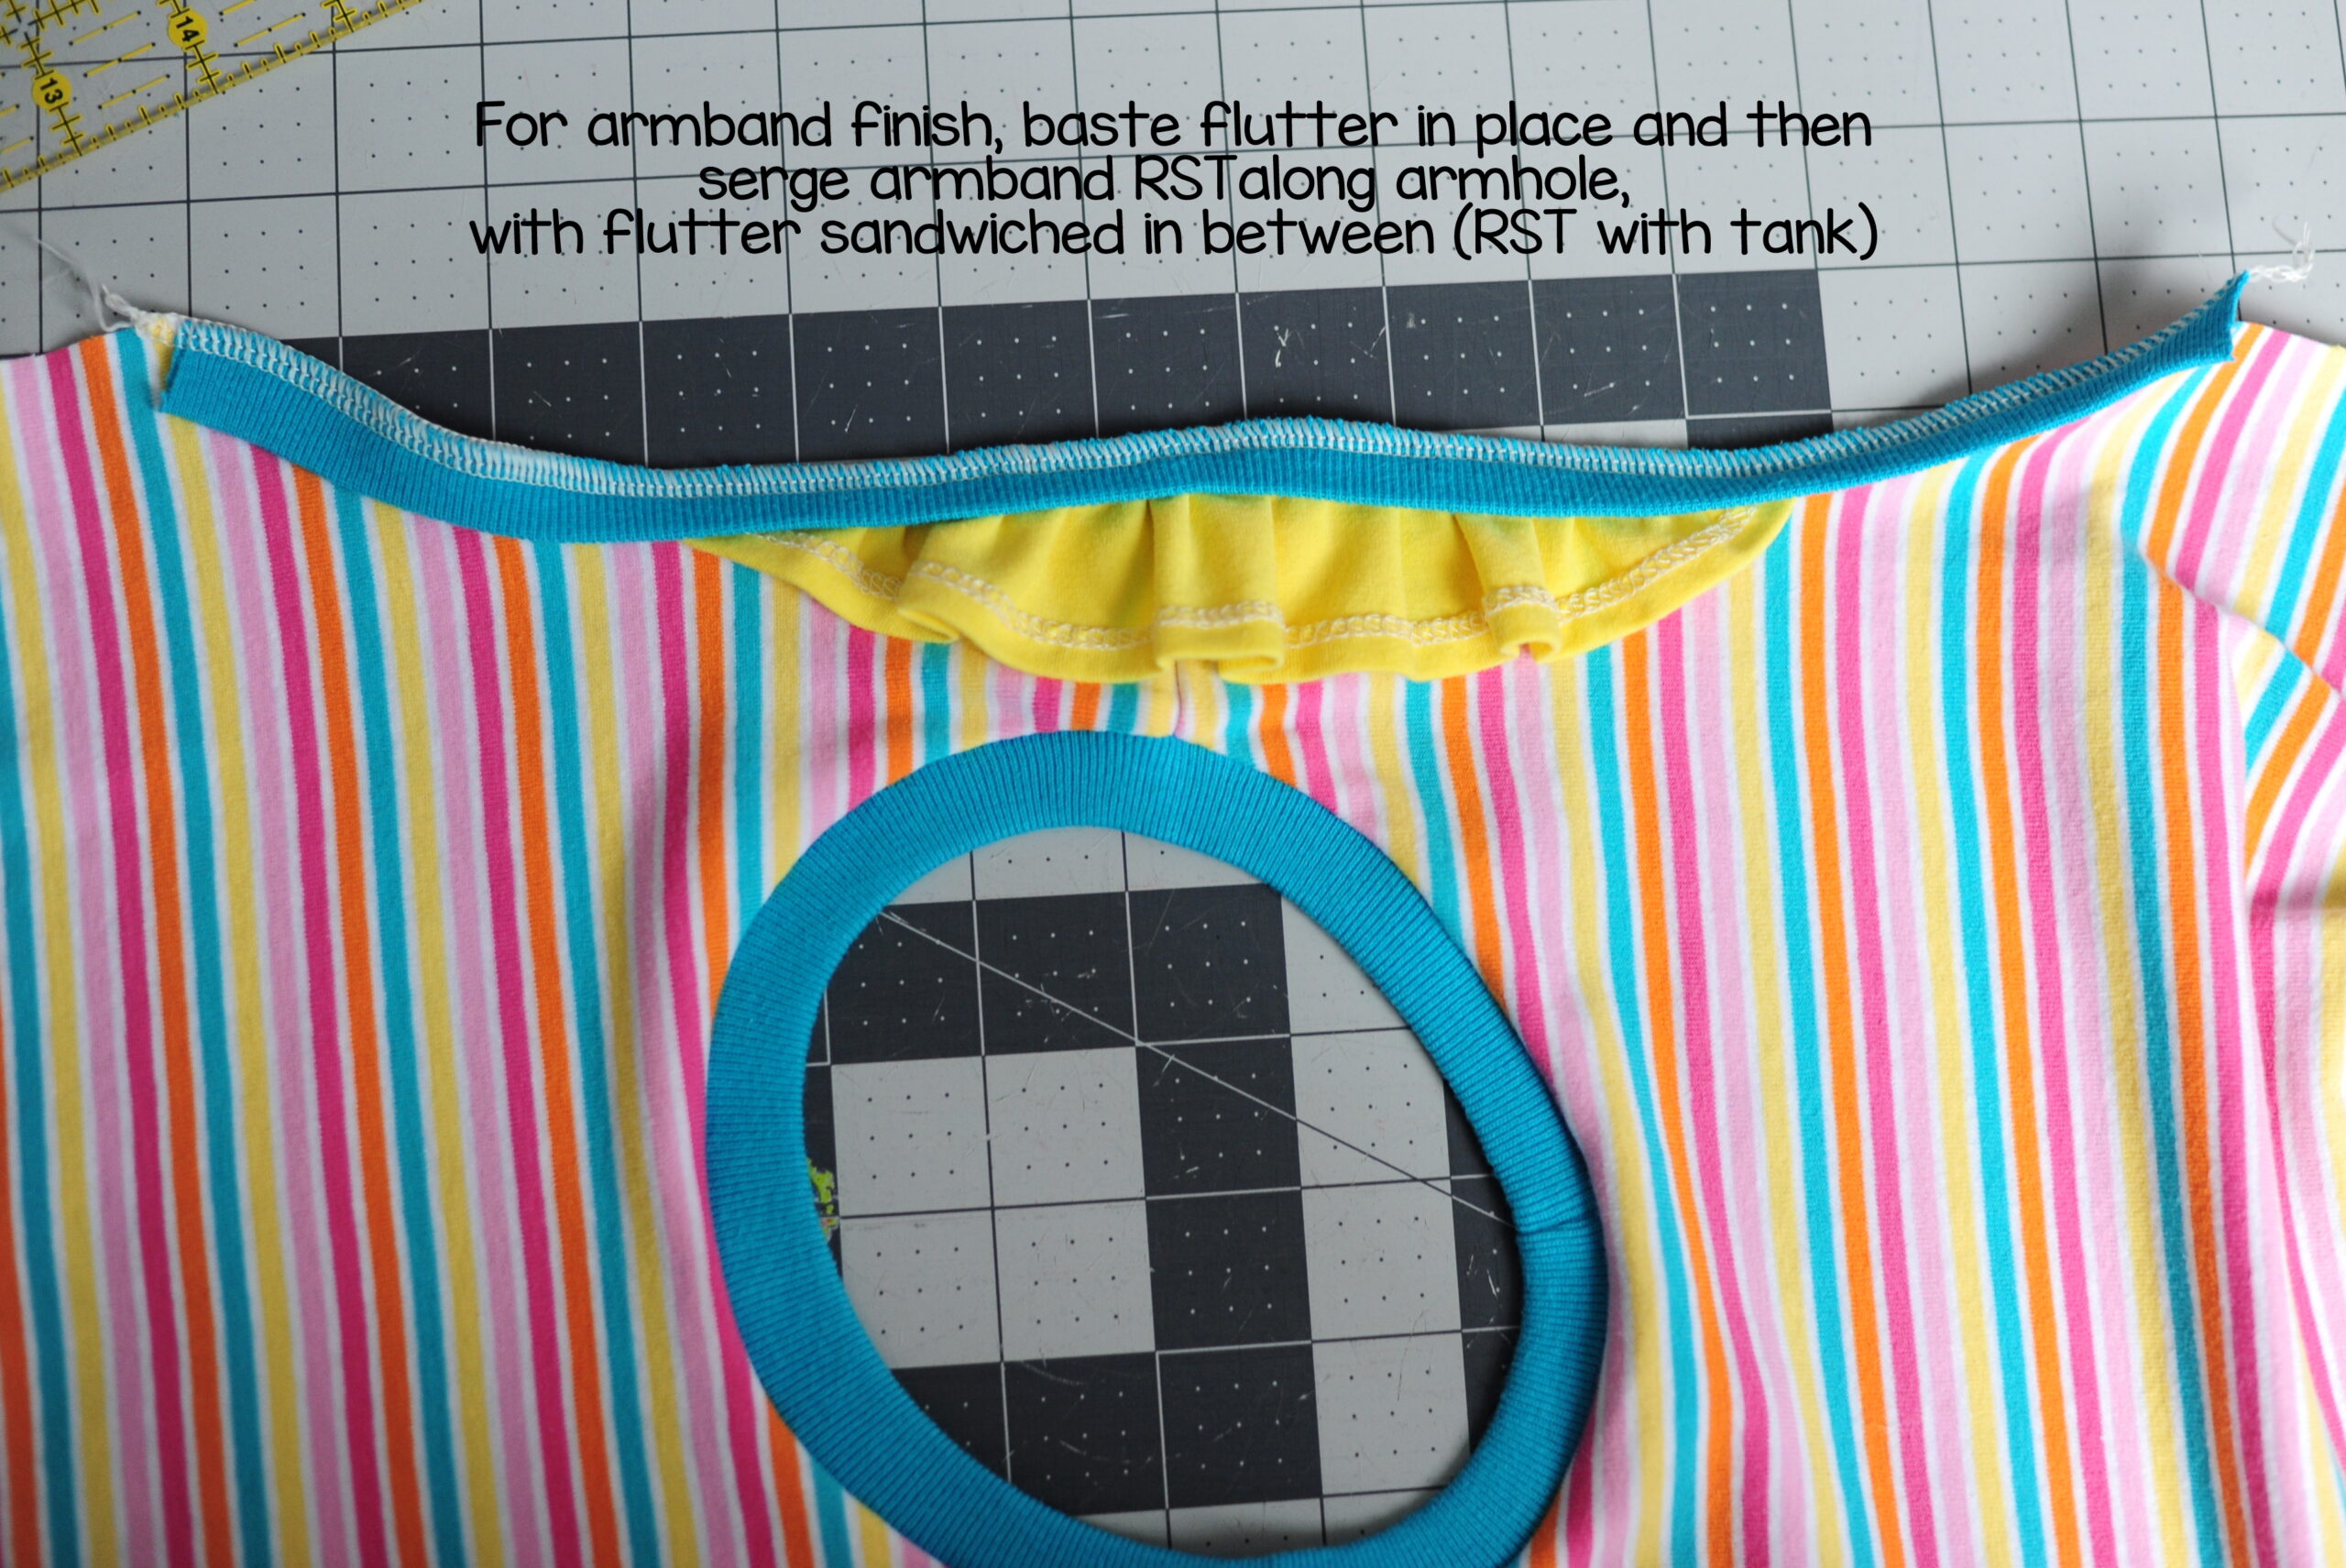
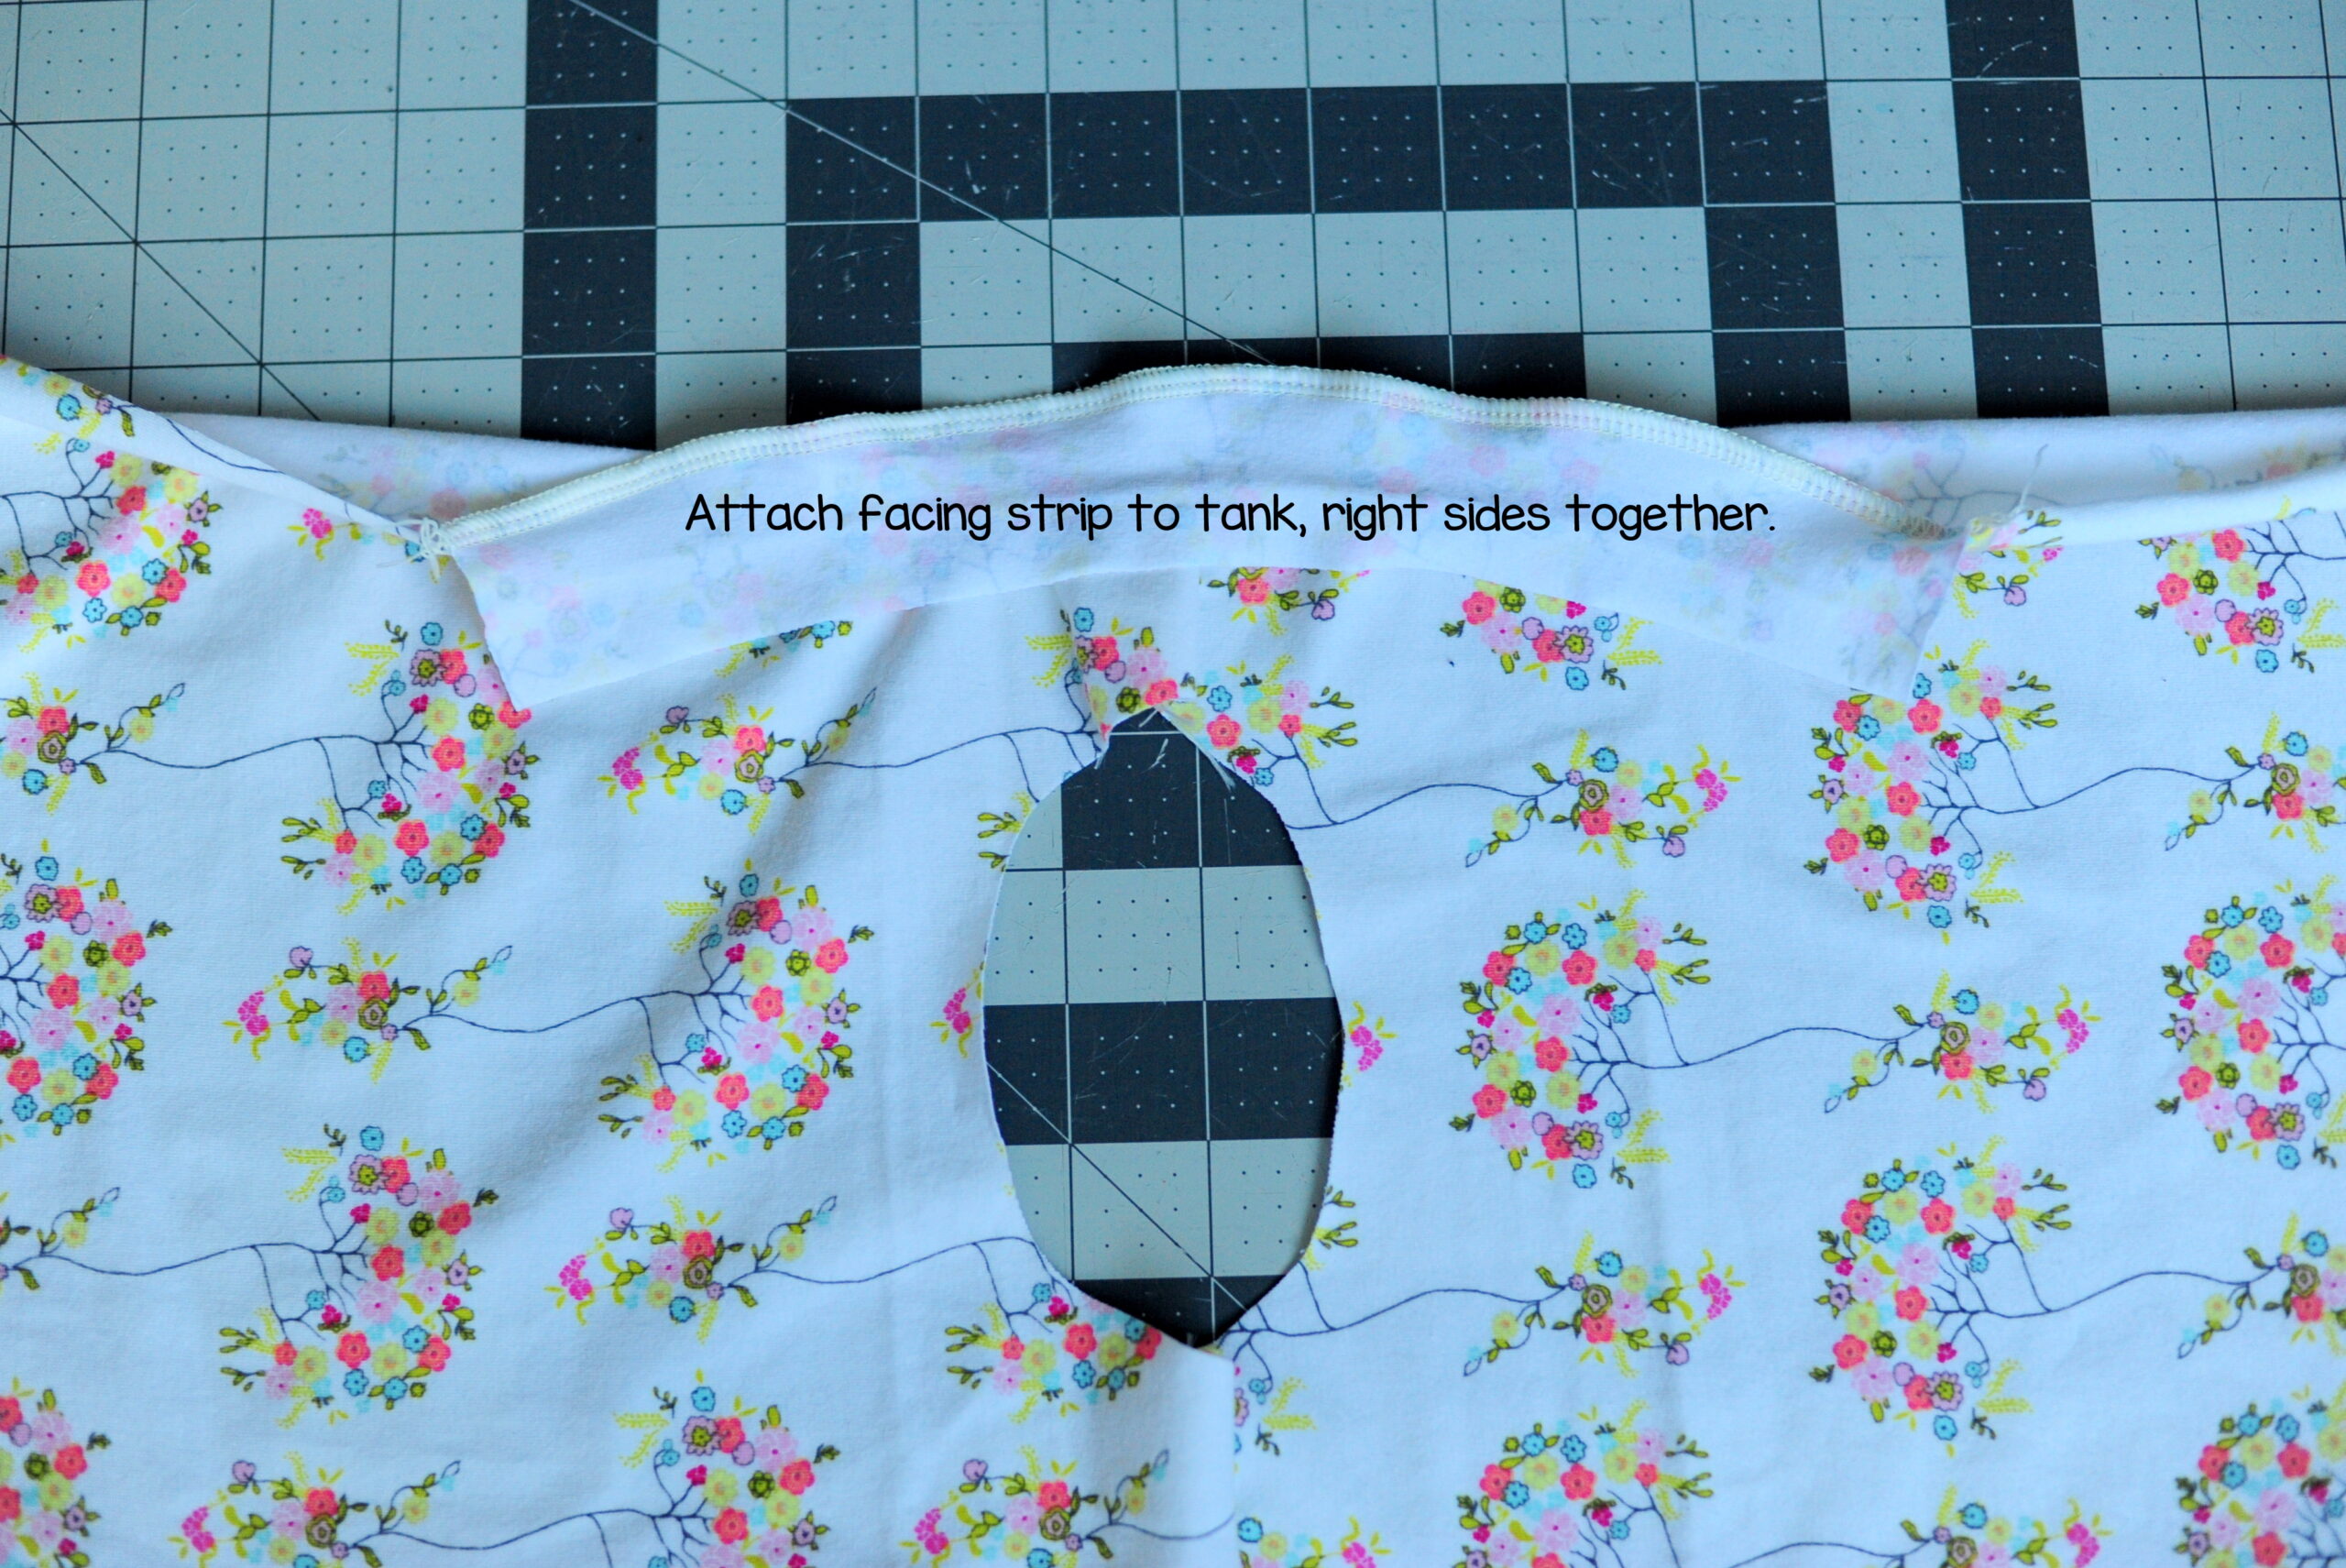
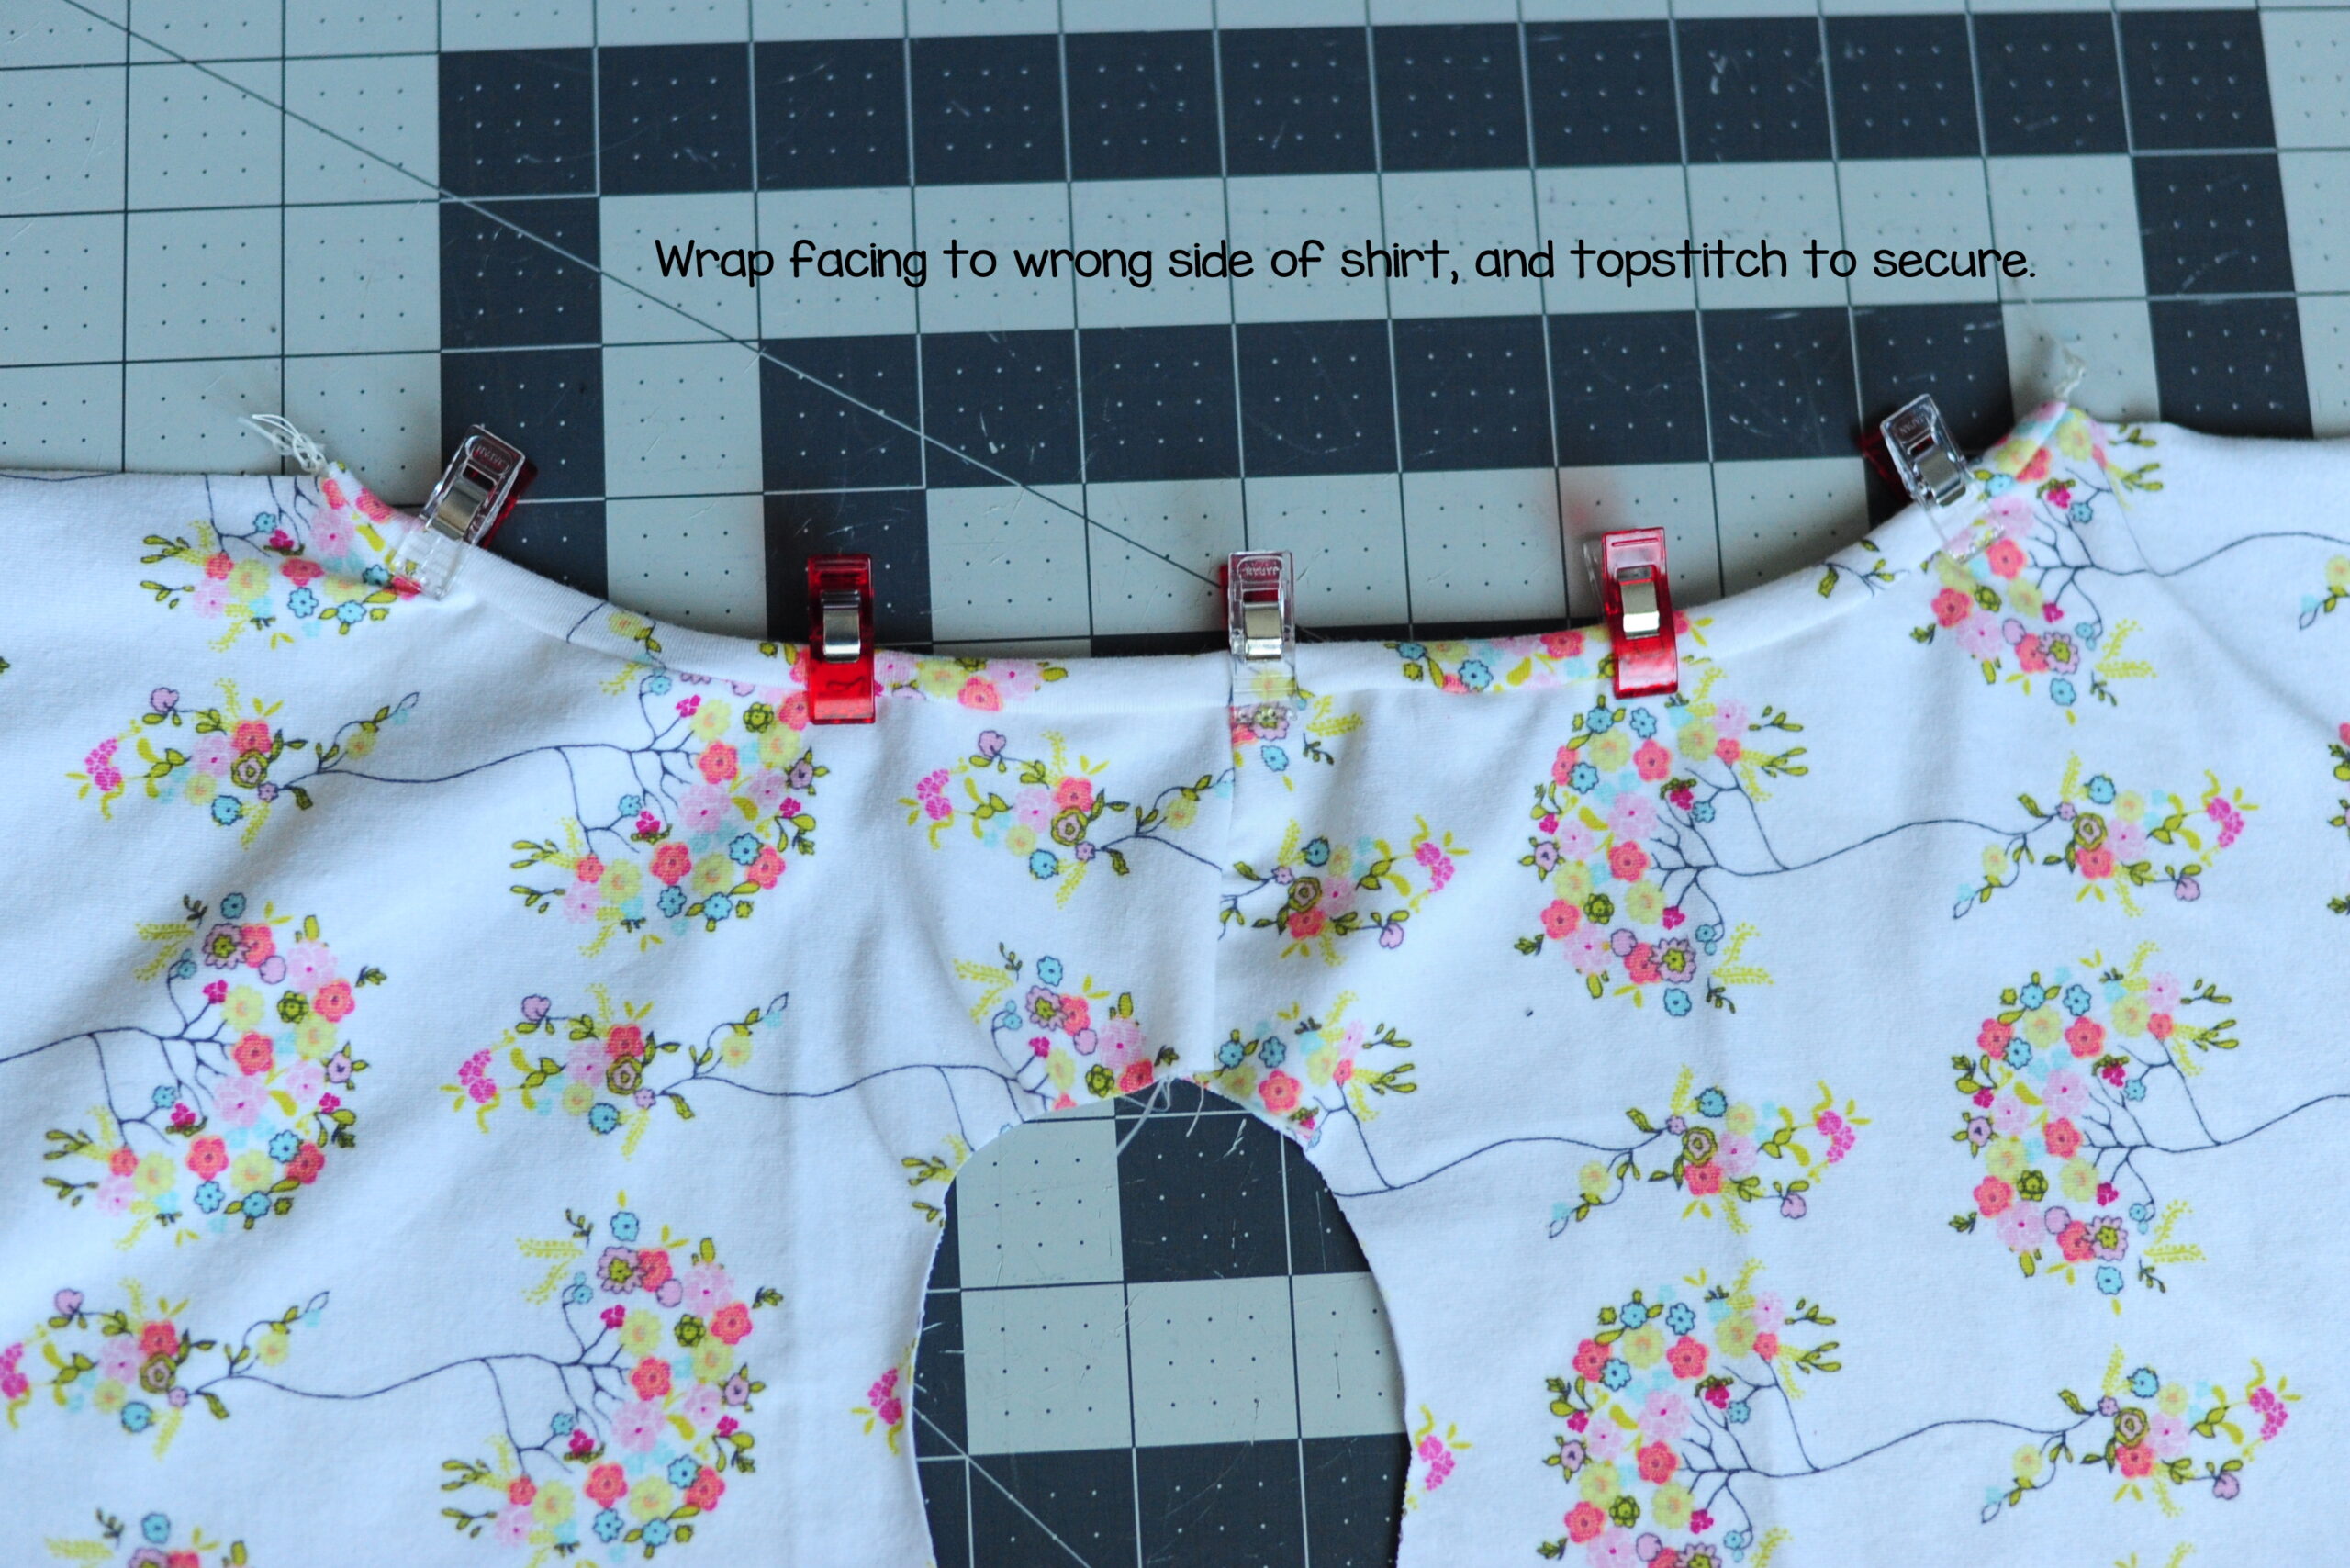
To do a bound finish, like in the first (floral) tank I showed above, you can serge a facing strip to the armhole with the flutter sleeve sandwiched in between. Flip the facing over to the wrong side of the tank, press well to make sure the seam allowance is facing down, toward the tank, and topstitch in place.
You can trim the excess facing since the raw edge won’t fray (that’s how I did it in the images up above), or tuck the raw edges under before you topstitch. For my rainbow hearts tank, I also tried a simple finish that I’ve seen in some RTW tops, and it worked well for this application.
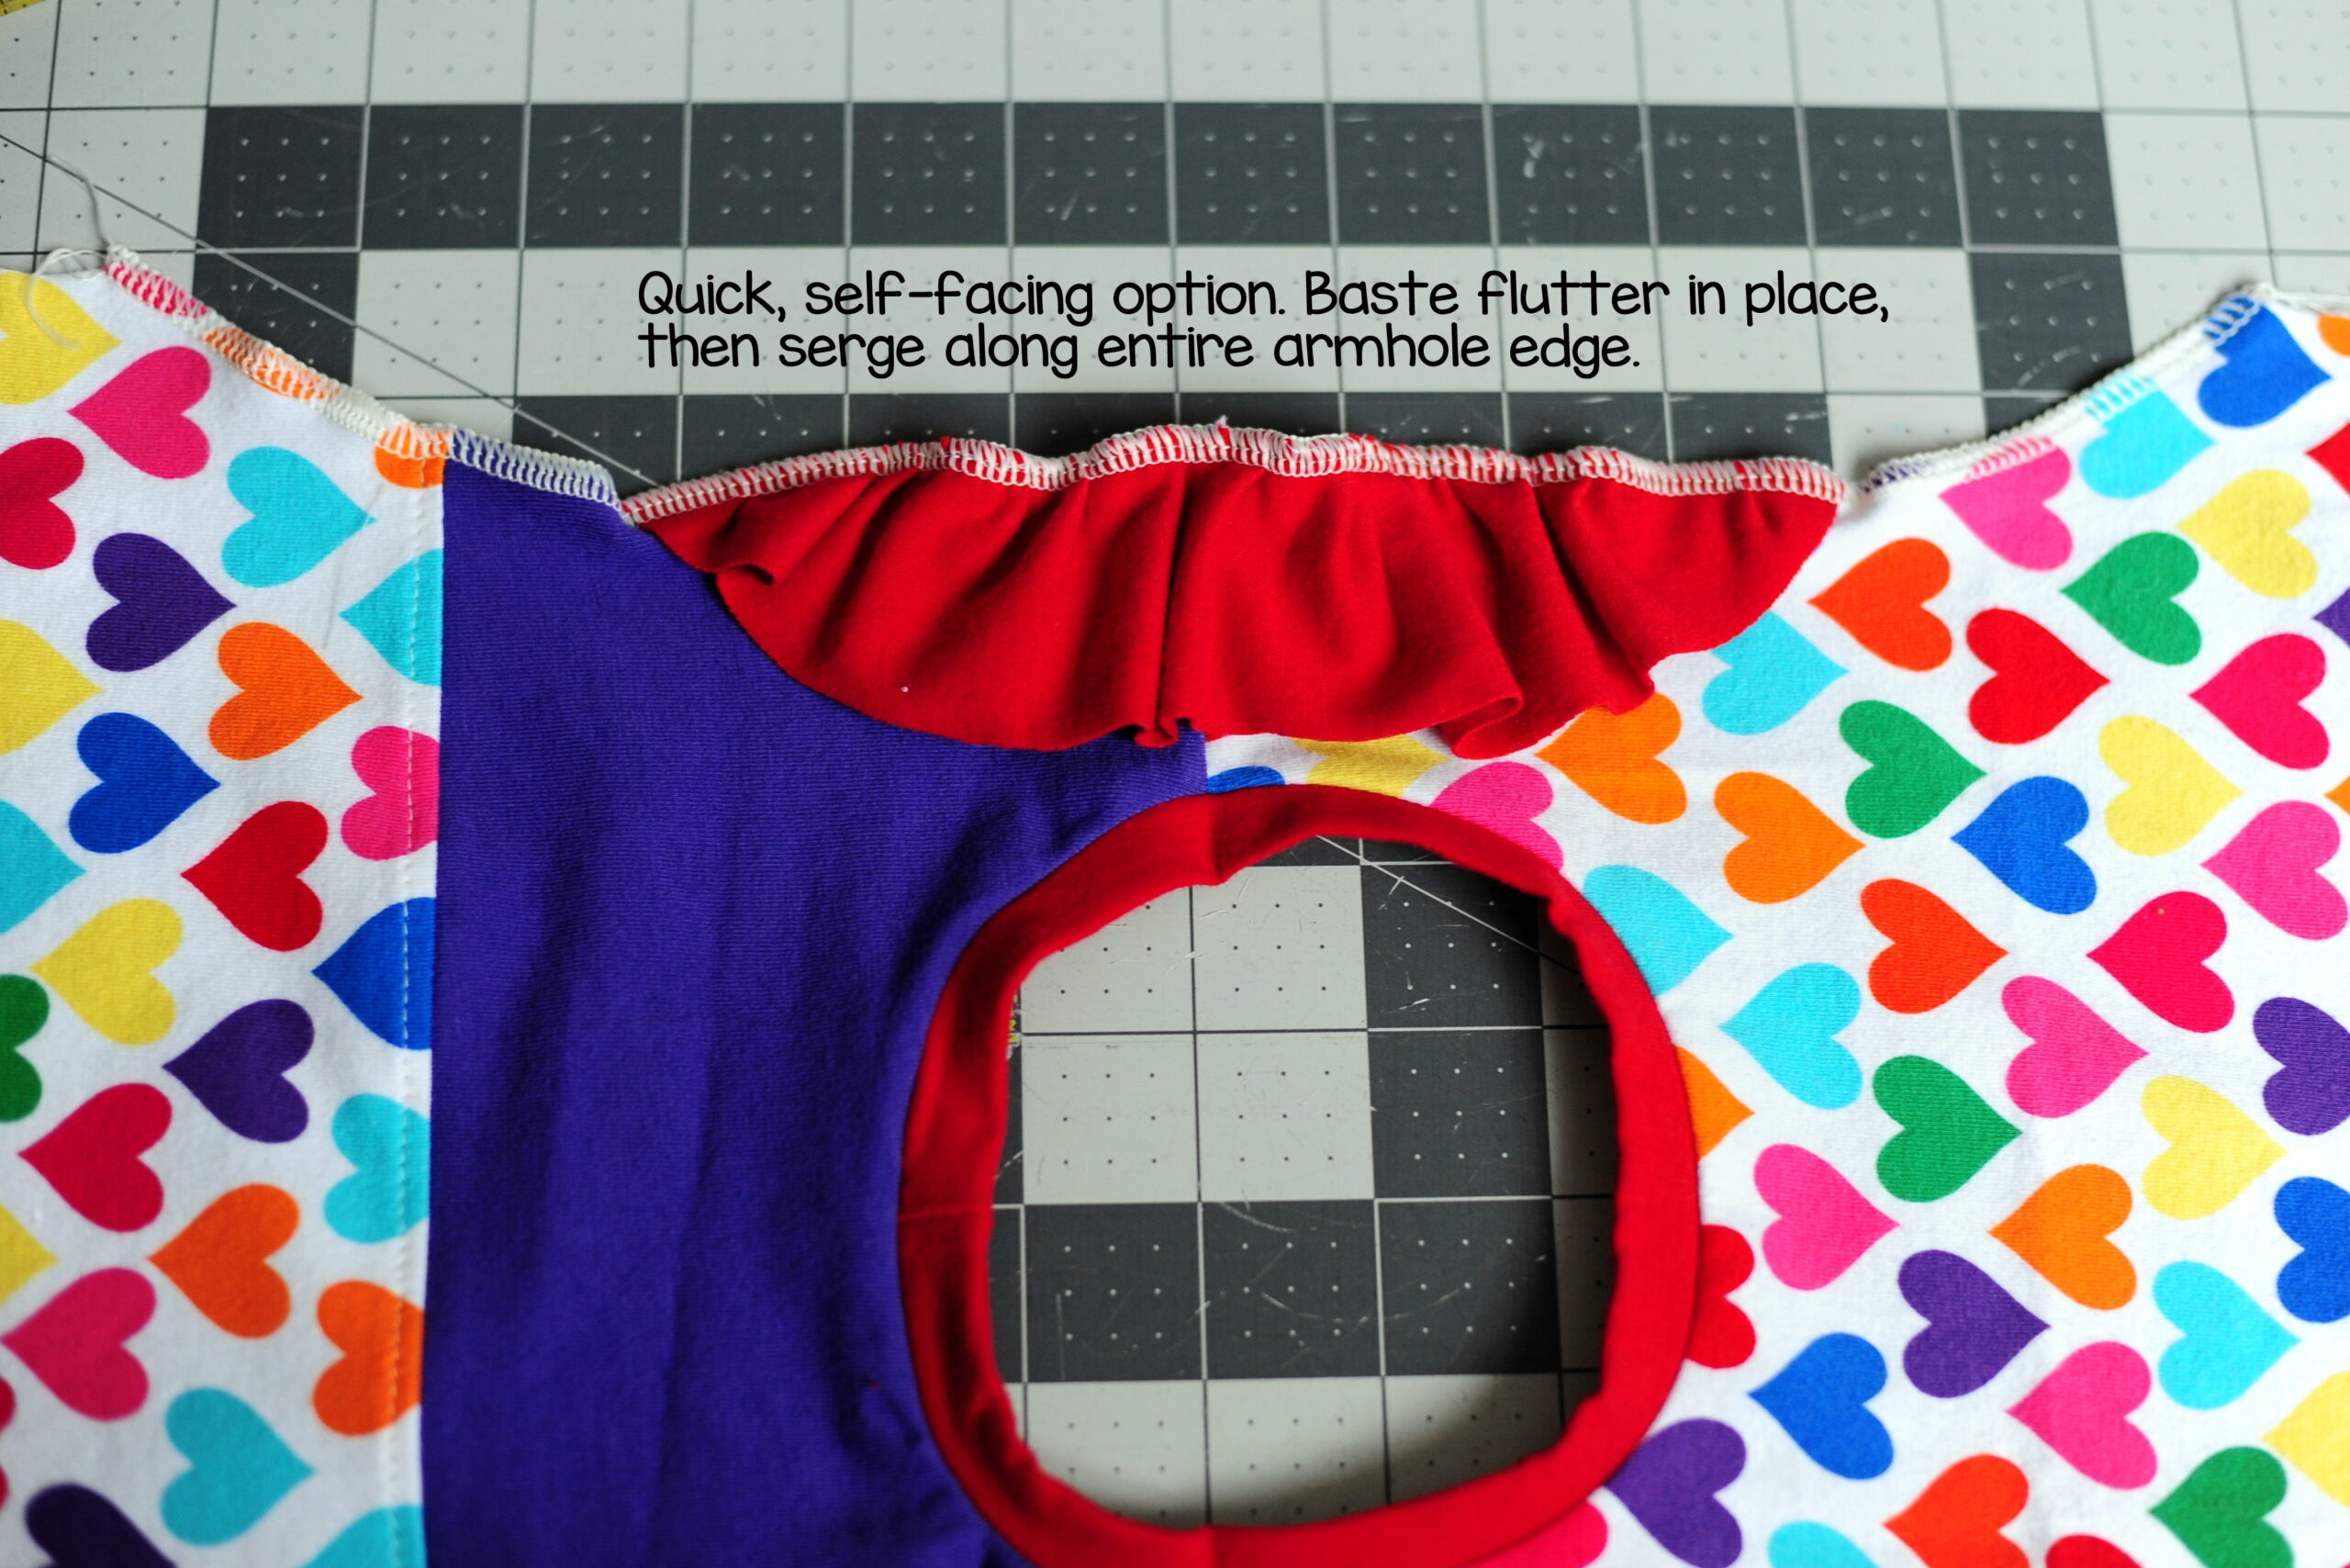
Press serged edge toward the wrong side of the tank, and topstitch in place. You can see my topstitching in the photo below. Please note, this will make the armhole a little wider since you’re not using armbands. When I sewed my side seams, I used a slightly larger seam allowance at the underarm in order to reduce the size of the armhole back to the intended size.
Since I was using up smaller pieces of fabric, I had to piece together the back. If you want a quick refresher on how to color block a pattern, you can read up about it here.
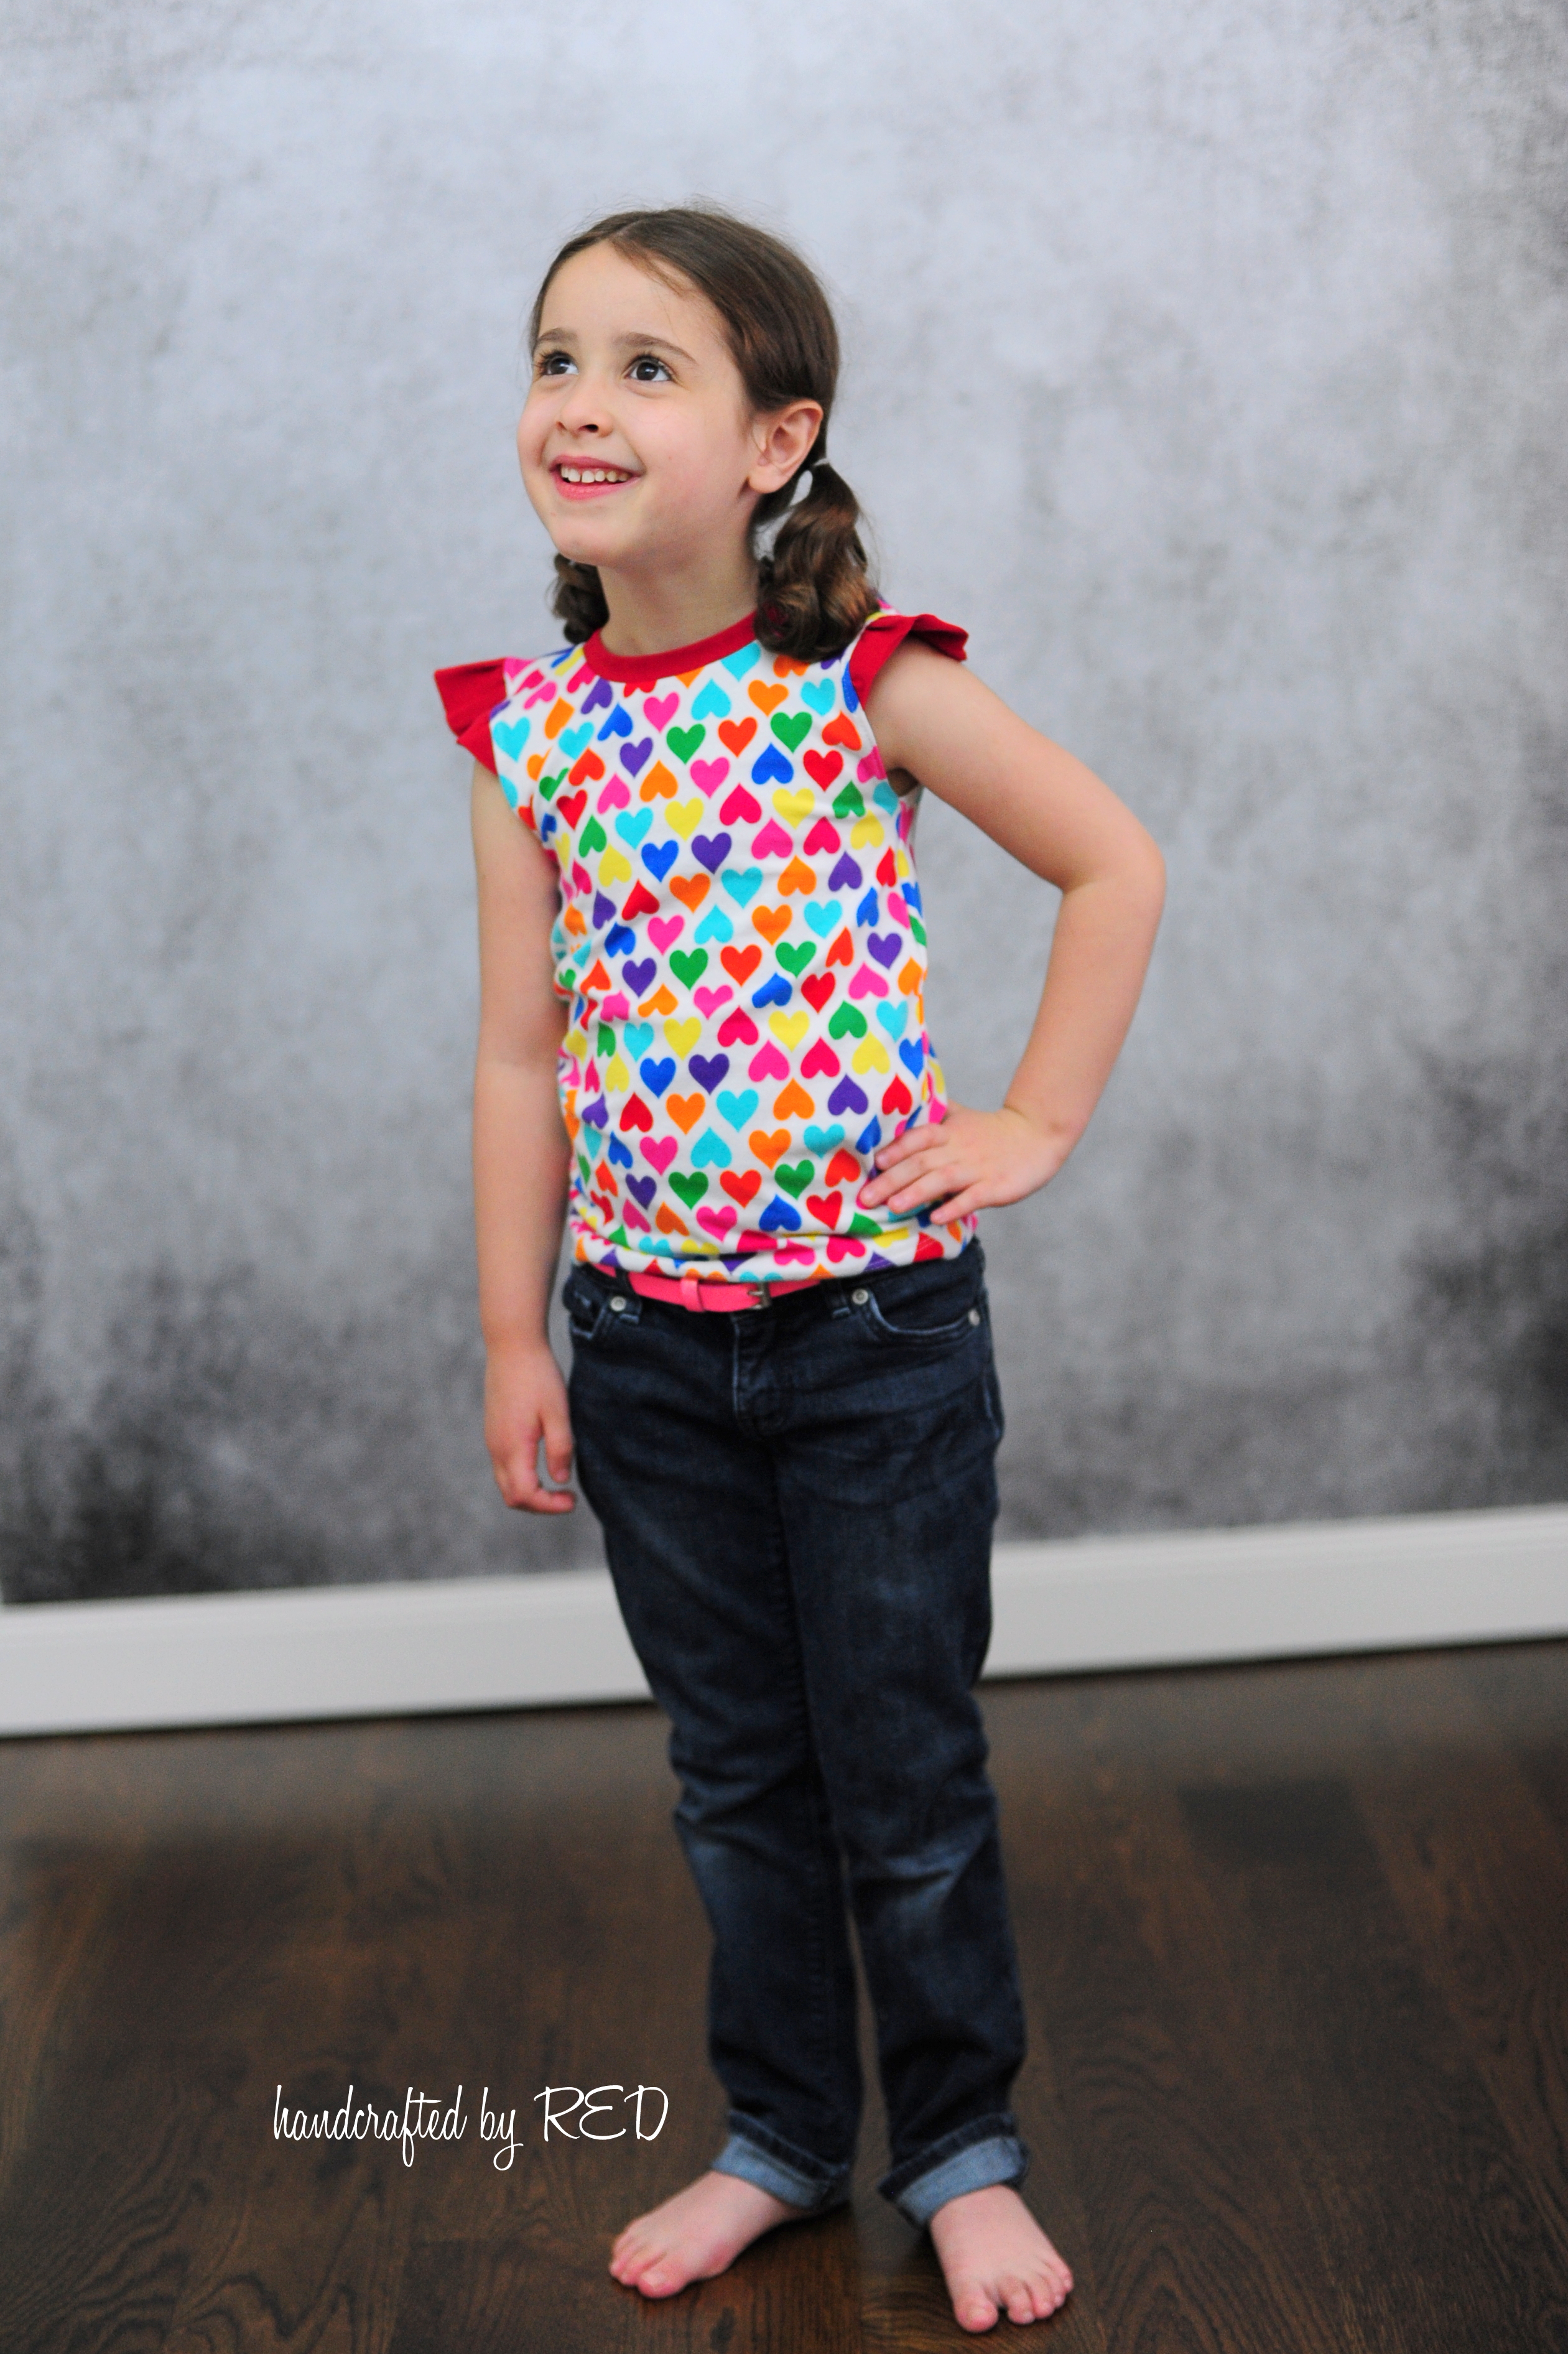

I love the sweet simplicity of these tops, and I especially love that while I used the same pattern for each of them, each shirt has a unique look. Miss P’s next request is for a new dress with flutter sleeves, so I’m planning to add the sleeves to the Gloria dress. SO cute and perfect for back-to-school. What will you add flutter sleeves to??
How Does the Choice of Fabric Affect the Final Outcome?
The fabric choice affects flutter sleeves. Lightweight fabrics like chiffon or satin create delicate and fluttery sleeves, while stiffer materials create more structured sleeves. Subtle stretch in the fabric can enhance the flutter effect. The color and pattern of the fabric also impact the design of the flutter sleeves.
Conclusion
To create flutter sleeves, start by understanding the concept and various uses of flutter sleeves. Gather all the necessary materials, including essential supplies and the right fabric. Create a pattern for your flutter sleeves by following the provided steps and tips. When stitching the flutter sleeves, consider how the choice of fabric will affect the final outcome. With these steps, you'll be able to make beautiful flutter sleeves easily and add a charming touch to your garments. So, get started and enjoy the process of creating unique and stylish flutter sleeves for your wardrobe.
Thank you for joining us today to learn how to make flutter sleeves! Before you leave, make sure to join us on Facebook in the Peekaboo Patterns group and share your creations over there! You can also follow us on Instagram or Pinterest. Happy Sewing!