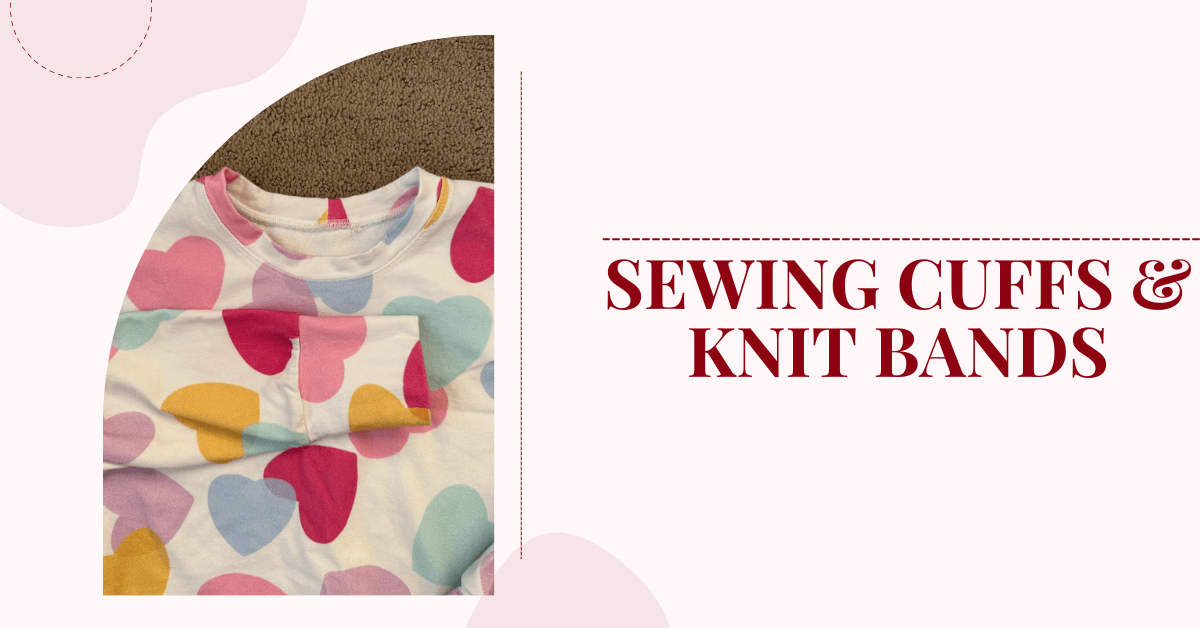
Sewing Cuffs on Sleeves and Knit Bands
Today we’ll go over sewing cuffs on sleeves and how to sew knit bands like waistbands, neckbands, etc. One reason I love sewing with knit fabrics is that you can use neckbands, waistbands, and sleeve and pant cuffs to avoid hemming completely! That is a huge time saver in my book. I love when I can completely construct a garment on my serger. It makes things go so fast!
Sewing Cuffs on Sleeves & Knit Bands
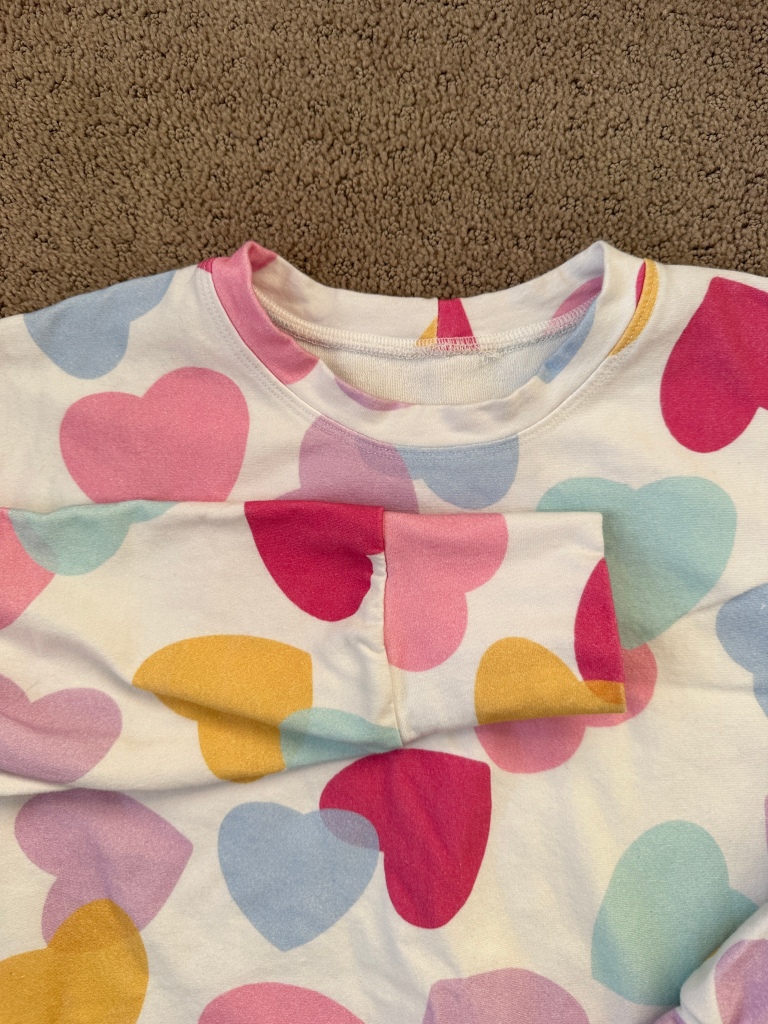 I’m here today to share some tips and tricks on how to do cuffs and bands on all of your knit projects. I used the Women’s Saturday Sweatshirt Pattern. And some French Terry to make this fun Valentine’s Sweatshirt.
The Women’s Saturday Sweatshirt Pattern is a quick sew with easy-to-follow instructions. It has a fabulous fit! I’m so pleased with the outcome. The Saturday Sweatshirt sewing pattern features a drop shoulder, room to layer, and lots of options! The Saturday Sweatshirt is designed for medium-weight knits such as sweatshirt fleece, french terry, and waffle. The pattern includes the following options:
- Hood & Neckband
- Optional Pocket
- Crop Length Pullover
- Full-Length Pullover
- Dress
- Nursing Access (available for the dress and full-length pullover)
 Women’s Saturday Sweatshirt
Here’s how I made my sweatshirt…
Depending on how I’m feeling that day, sometimes I construct all my bands and cuffs before I start constructing the rest of the shirt.
There are a couple of ways I like to construct cuffs or bands…

Method #1 for Sewing Cuffs on Sleeves: The Clip
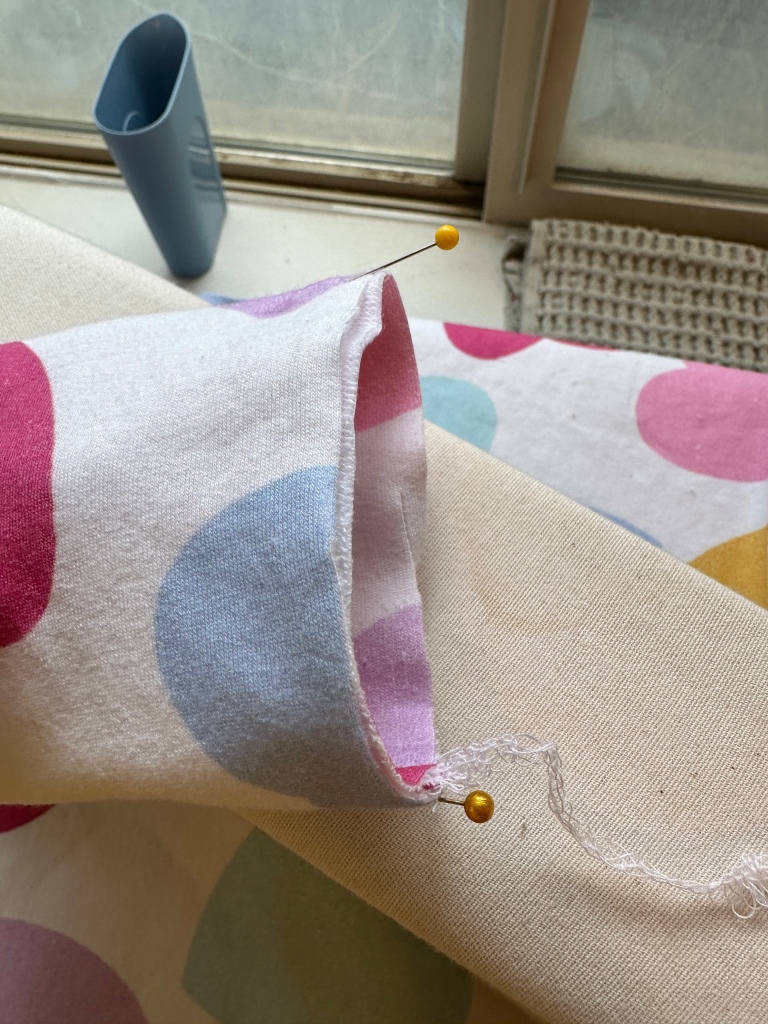
Fold your cuff in half side to side.


Serge down the long side of the cuffs. The seam allowance is 1/2 inch for this pattern. The instructions for the pattern then say to “Bring the long edges of each cuff together so the seam is enclosed, the raw edges are lined up and it’s now double thickness” which is a perfectly great way to do it.
I, however, like to eliminate some seam bulk at the cuff-to-sleeve seam to make it easier to sew and flatter to wear. So before I follow the written instructions on this part, I fold the cuff in half and find the center between the top and bottom.


Then I make a little slit right at the center. Very carefully snip through your SEAM ALLOWANCE ONLY! Take care not to cut into your cuff.
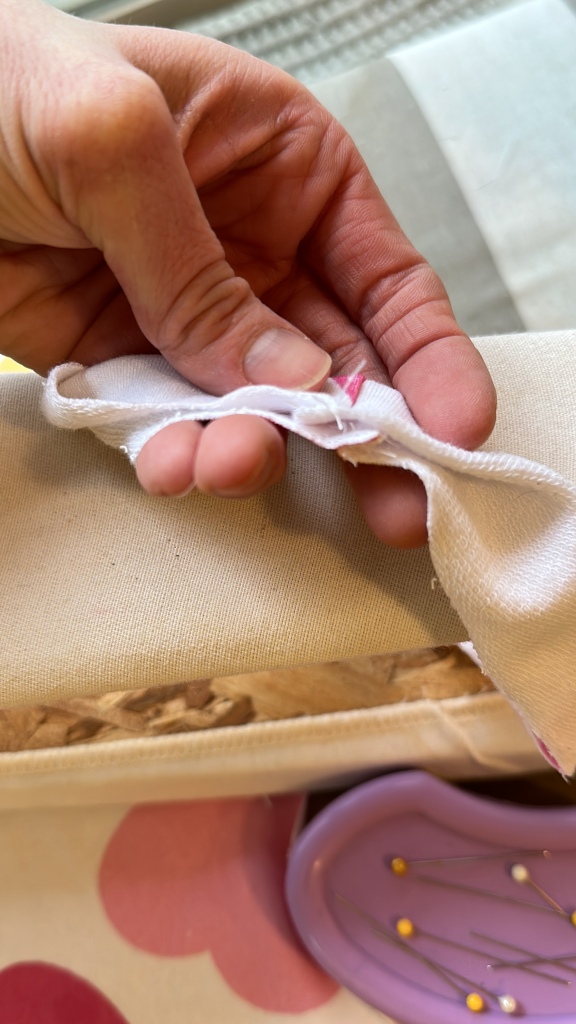
Then take your cuff to the ironing board. I like to use my sleeve board for this part because it’s the perfect size for the cuff. I press one side of the seam to the right and one side of the seam to the left. In opposite directions of each other.

Next I bring the bottom up to the top. Wrong sides together, enclosing that seam you just pressed in opposite directions. Take care to make sure your seams stay in the direction they were pressed too.

This is how it will look when folded up. One seam goes to the right and one seam goes to the left. You can repress after its folded if you want to make sure the seams stay nice and flat.

I like to put a pin or clip at the seam we just matched up and then find the center mark directly across from where the seam was. These pin marks will be helpful when we sew the cuffs to the sleeves later on.
Some worry that the clip we put in the seam allowance will compromise the strength of that seam. I have been doing this for YEARS and I have never once had a problem with the seam integrity doing this method. The only reason I see could be a potential problem is if you cut all the way through the seam allowance on accident. That will put a hole in the actual cuff. So, be super super careful as you are snipping that seam allowance.
If your fabric is super thin or lightweight the method I just talked about may not be your best option. The next method I’m going to show you works really well for thinner more delicate fabrics.
(The fabric I used for this top was a mid weight French Terry with good stretch and recovery. I prefer the first method I just described when working with this particular fabric, however for the purpose of this tutorial I’m going to show you both ways.)
Method 2 for Sewing Cuffs on Sleeves: All in One Step
For this next method, we are going to fold our cuff in half right sides together just like method 1. However, before sewing your side seam like method 1 we are going to fold from top to bottom first.

Make sure things are lined up nice and straight because next we are going to serge through 4 layers of fabric at once.

(The video I initially made didn’t work, and it was my second cuff, so I made another video, with a different fabric, showing how the cuff looks sewn and how it turns inside out.)
https://video.wordpress.com/embed/sFRDQrYk?cover=1&preloadContent=metadata&useAverageColor=1&hd=0
The first time I tried this method I was a little mind blown. I’m always looking for tricks to save me time while sewing and this one definitely saves some time doing two steps in one. I also love it because the cuff side seam isn’t slipping. All of the layers are nice and tight in the same seam.
One caution with this method is if you are sewing with a thicker fabric this can get really bulky. But for the most part I have found it to be pretty versatile.
Sewing Neckbands & Waistbands:
Next up Neckbands. I like to use the clip method for neckbands. It’s much easier to topstitch neckbands because there isn’t too much bulk. Because of the width of the neckband, I’ve found the All-in-One method to be too bulky to top stitch after you have sewing the neckband to the garment.
Follow method 1 to sew the short ends of the neckband together. Then make your clip just like the cuffs.
Fold up just like you did with the cuff and have one seam pressed to the right and one side to the left.
Next we need to quarter our neckband. Your first quarter mark will be the seam you adjust sewed. Then you will want to fold your neckband in half and mark 1/2 way (directly across from the seam you just sewed.) This will be the front of the neckband.

Bring the two marks together, across from each other. (I choose to mark with pins. you can choose to use clips or a fabric pen, or little scissor snips. Just be careful to make them shallow, and inside the seam allowance.) Mark the quarter marks halfway between the two pins. These will be the side marks on your neckband.


At this point I like to press the neckband in half. Taking care to make sure its lined up well in preparation for attaching to the top.
Sew your shoulder seams.


Press your shoulder seams toward the back of your top. Use a sleeve board to make pressing easier.
Attach your sleeves. Line up the center of the sleeve. (I made a tiny clip to mark it.) with your shoulder seam, making sure to keep the shoulder seam allowance toward the back. Fabric should be right sides together.


Pin the edges of the sleeve at the edge of the armseye. Ease the fabric between these two clips and sew. Removing the clips as you sew.

Press the Armseye seam toward the sleeve.
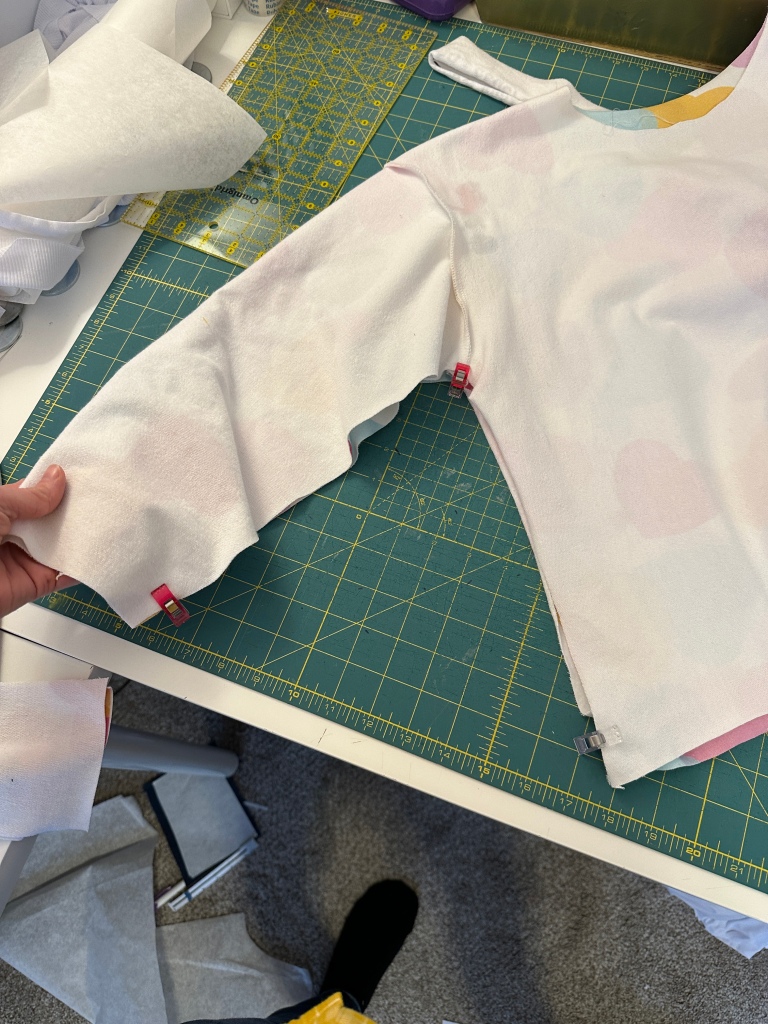
Pin or clip at the underarm, side seam and sleeve bottom. Add more pins if you need. Sew your side/sleeve seam. I start at the bottom of the shirt and sew up to the under arm and then to the bottom of the sleeve. This helps to keep that armseye seam pressed toward the sleeve.
Attaching the Neckband, Waistband & Cuffs

Quarter your neck opening on your top. I start by matching the shoulder seams and temporarily clip them together to I can find and mark the center front and the center back.

Then match your center front and back together to find the side quarter marks. These will not match up with your shoulder seams. They will be closer to the front .
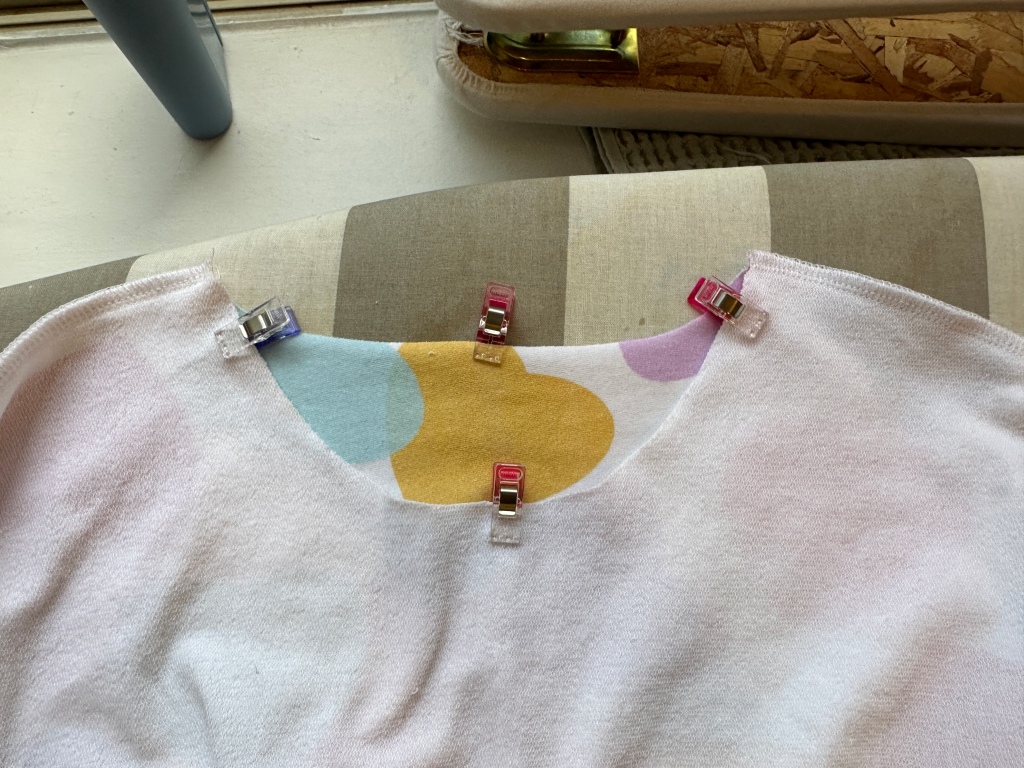

Line up the center back seam on the neckband with the center back bodice. Right sides together. and match the other 3 clips.
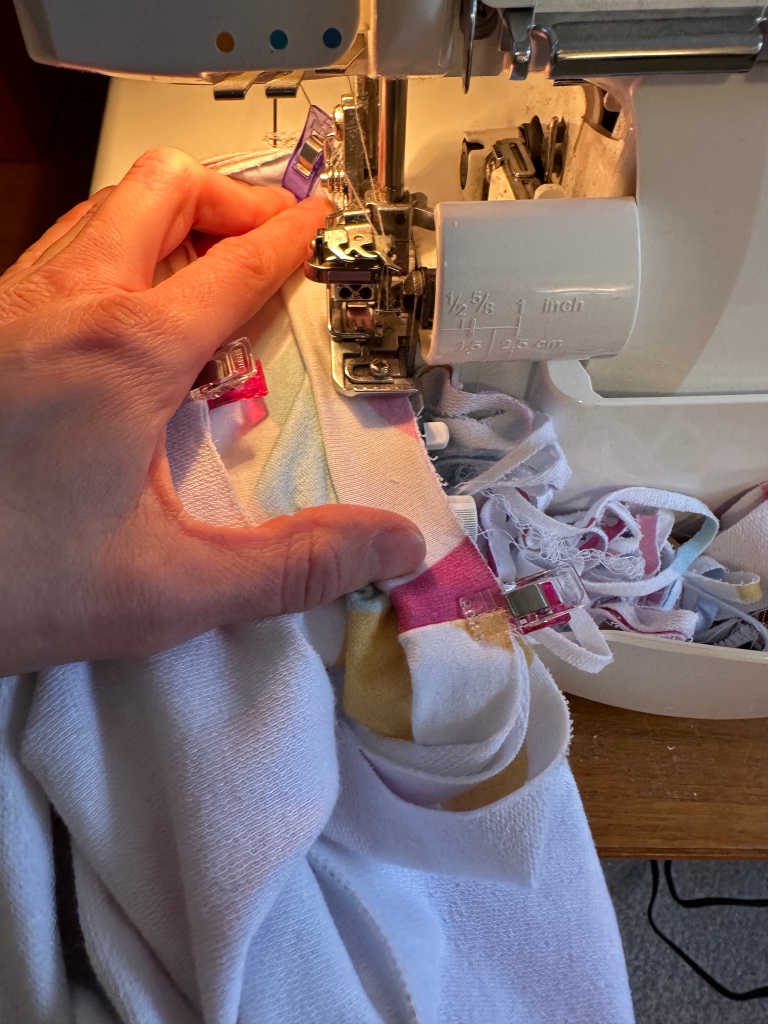
Sew your neckband on. I sew with the garment on the bottom and the neckband closest to the presser foot.

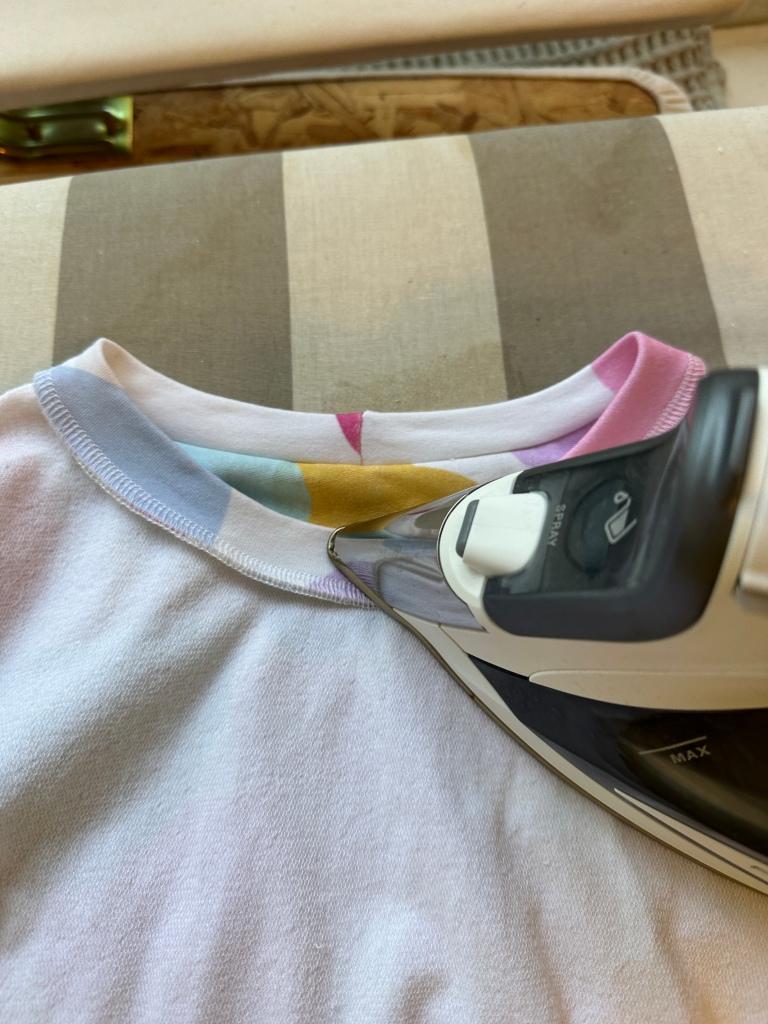
Press seam allowance toward the garment.
To sew on cuffs I just mark directly across from the sleeve seam.

I like to topstitch my neck seam with my coverstitch machine. You could also use a double needle, a zigzag, or a stretch stitch on your sewing machine.

Match the sleeve mark with the cuff mark and line up the cuff seam and the arm seam. I make sure my seam allowances are going in opposite direction to reduce bulk.

To attach the waistband I match up side seams and center fronts and center backs.

And there you have it! A Perfect Saturday Sweatshirt! This pattern has a great fit and is super comfortable. I need a million more in my closet!


Big thanks to Whitney for going over sewing cuffs on sleeves. Sewing cuffs on sleeves can be a challenging task, but with the right technique and a little practice, you can achieve professional-looking results. Whether you're sewing cuffs on a shirt, blouse, or jacket, it's important to take your time and pay attention to detail. Start by measuring and cutting the cuffs to the correct size, then sew them onto the sleeve using a straight stitch or a decorative stitch if desired. Press the cuffs flat to give them a polished look, and voila! You've successfully sewn cuffs on sleeves. With patience and practice, you'll soon become an expert at this essential sewing skill.
Thanks again for joining us. Before you leave, make sure join our Facebook Group and follow us on Instagram. Happy sewing!