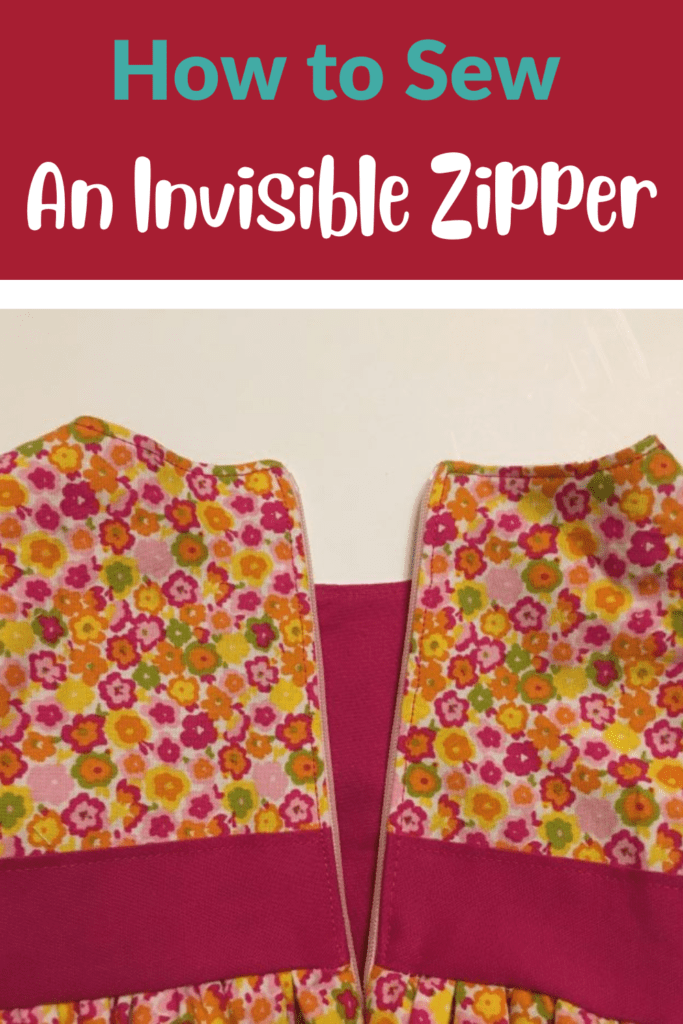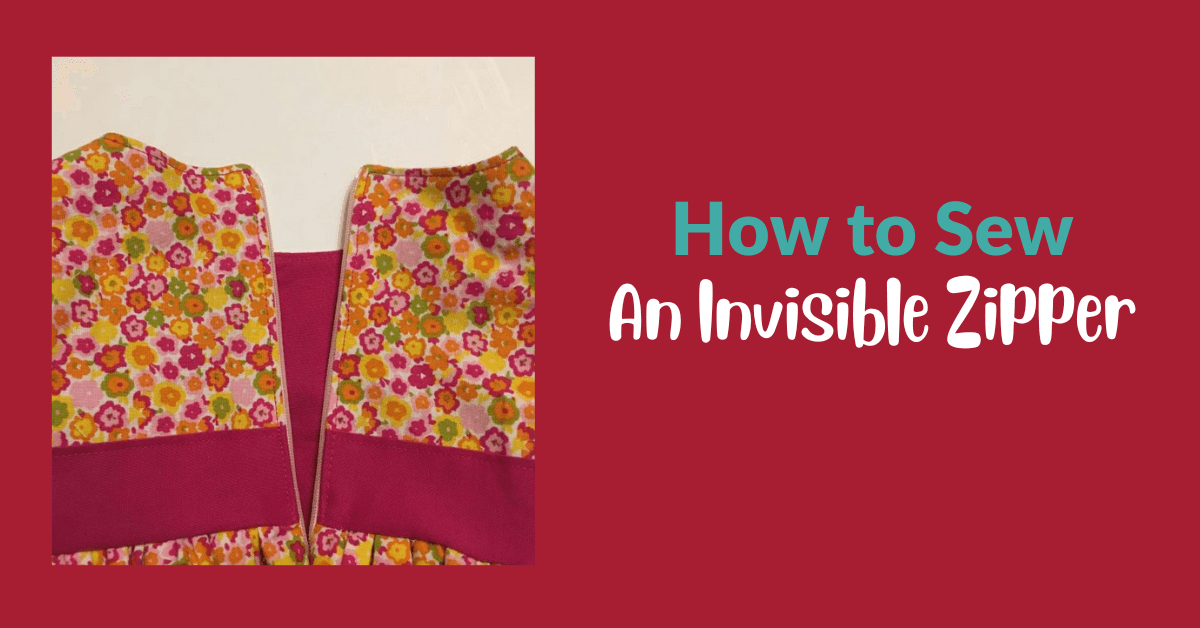
How to Sew an Invisible Zipper Easily
Hello! Stephanie from Stephie B’s Designs here again today to share a great how to sew an invisible zipper! Sewing zippers is intimidating enough as is, but an invisible zipper?! I know what you’re thinking. but together we’ll tackle this. 🙂
This tutorial also comes just in time for the release of Peek-a-Boo Pattern Shop’s brand new dress, the Ruby Party Dress. It is sooooo beautiful! It’s available from size 3m-12 years, can be made using several options to achieve a ton of looks, and like all PAB patterns, has easy step-by-step instructions to walk you through till the end. Although it was released during the Holiday season (and you can make amazing formal party dresses with it!), it can be used to make lovely year round. In fact, today I’m sewing a sweet little Spring dress for one of the twins I’ll be having in a few months, just in time for her arrival.

Before we start, I highly recommend you check out this Peek-a-Boo Pattern Shop blog post called Zippers 101 for more information on types and when to use them. Its a great breakdown of the who, what, when, where, and why. More specifically, the Zippers 101 tutorial will give you an idea of different types of zippers and how to sew zippers with a zipper foot on your sewing machine.
Ok! Time to dive in on what an invisible zipper is and the process to sewing one!
How to Sew an Invisible Zipper
What is an Invisible Zipper?
An invisible zipper is a zipper that is hidden or blended into the seam of the clothing. The main difference between an invisible zipper and other zippers is visibility. The teeth on an invisible zipper and small and narrow and hidden within the zipper. A regular zipper has teeth showing while an invisible zipper only has the small and narrow zipper pull showing at the top. Here’s a picture of some Invisible Zippers from Amazon:

These zippers are used on the backs of dresses, skirts, decor (like pillows) and pants.
Sewing an invisible zipper can be challenging, especially for beginners. But once you master the art of it, you'll find that it's one of the easiest zippers to install and gives your garment a professional look. In this blog, we will deeply dive into everything you need to know about sewing an invisible zipper. From understanding what it is and why it's different from regular zippers to gathering the necessary supplies, preparing your fabric and zipper for installation, and detailed steps on how to sew an invisible zipper easily. We will also discuss how you can troubleshoot common issues that arise while sewing an invisible zipper and how to ensure that your zipper stays truly invisible. So, let's get started on making your garments look flawless.
Step-by-Step Guide on How to Sew an Invisible Zipper
Step 1: Prepare the Zipper and Garment
Alright, now we have the basics down of what an invisible zipper is and what supplies you’ll need to start sewing one. Now lets get into the steps you need to take when sewing an invisible zipper into clothing.
After removing it from the package, prepare the zipper for installation by pressing it from the wrong side so it lays flat. I always use high heat (the cotton setting) and have never had an issue with the zipper teeth melting, but stick with what will make you comfortable.
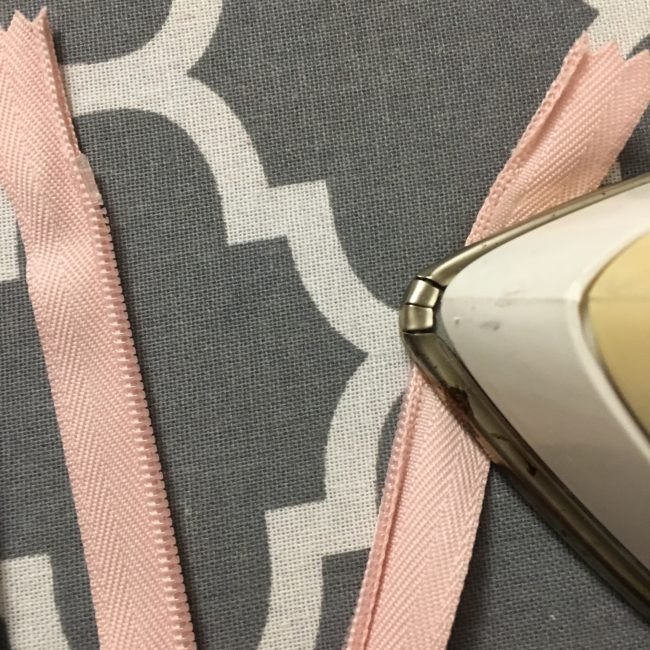
The zipper teeth naturally curl over to the wrong side of the zipper, but you want to make sure they are on the right side when you install them. Pressing the zipper flat will also help you sew as close to the teeth as possible, especially since we’re not using an invisible zipper foot in this tutorial. For more information on sewing invisible zippers using an invisible zipper foot take a look at the section at the bottom of this article.
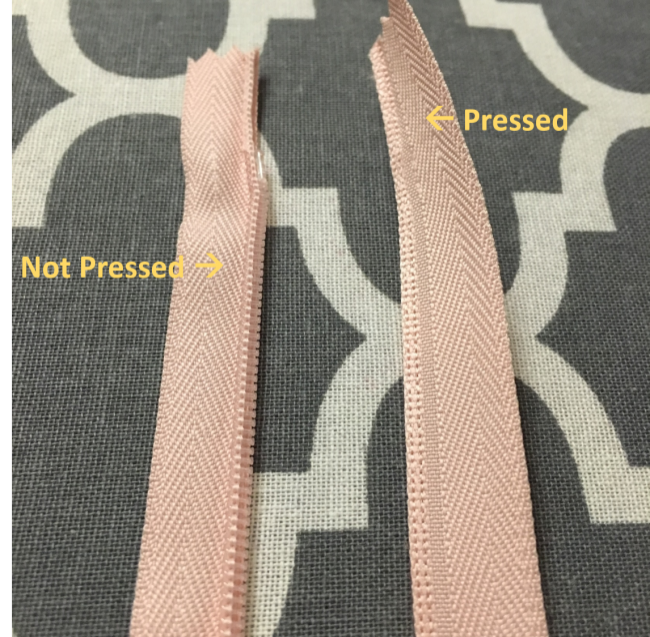
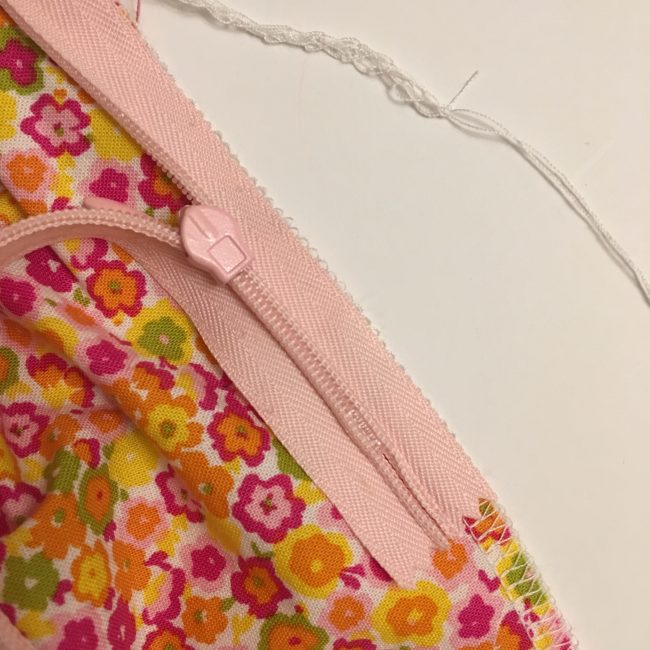
In the image below, you can see the difference between the pressed and not pressed sides of the zipper tape. This is looking at the invisible zipper face down (wrong side up).
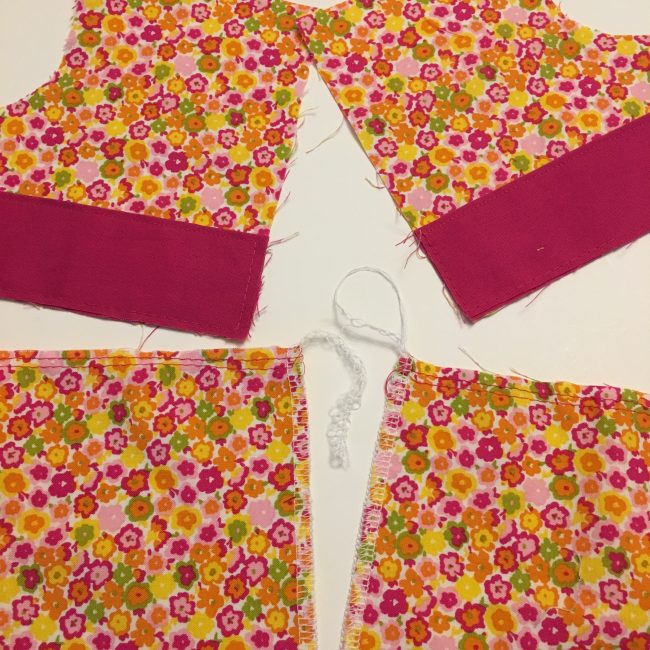
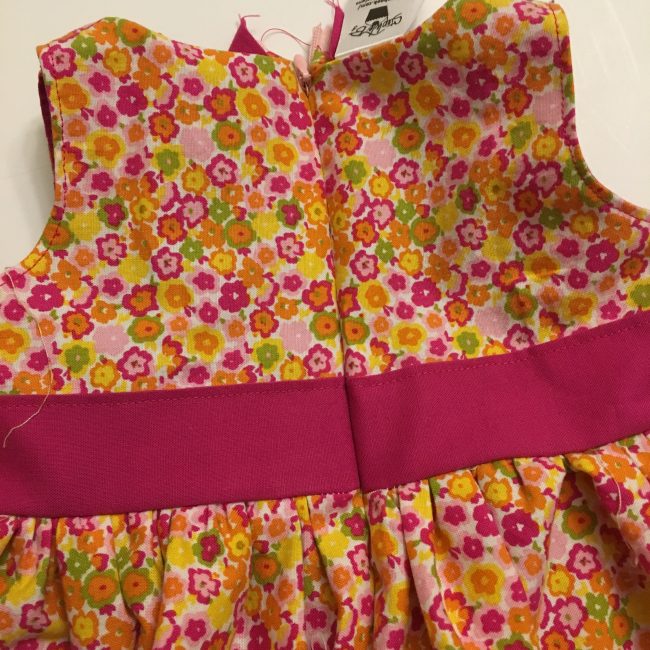
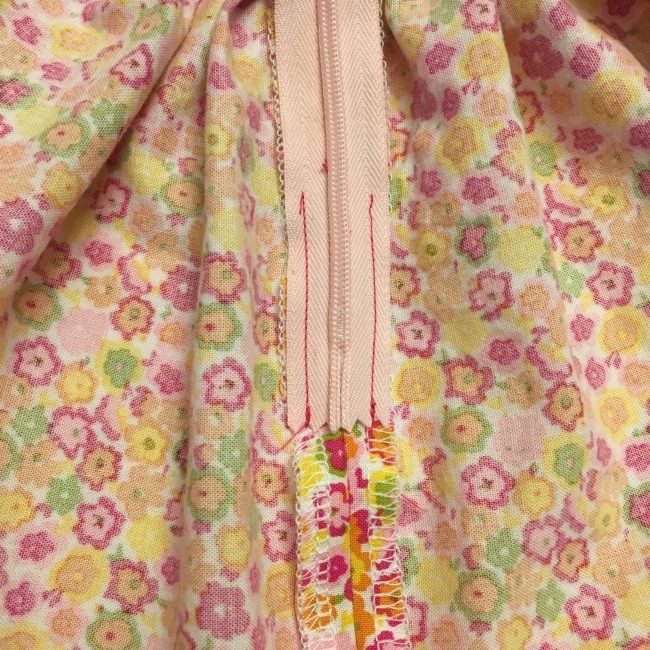
If your garment is not fully lined, I recommend sewing the edges of the exposed raw edges with a serger, zig-zag stitch, or pinking shears before you install the invisible zipper.
For the Ruby, because the bodice is lined, I chose not to finish the raw edge of the fabric, however I did finish the skirt with a serger as seen in the picture below.
Step 2: Lay out the Zipper
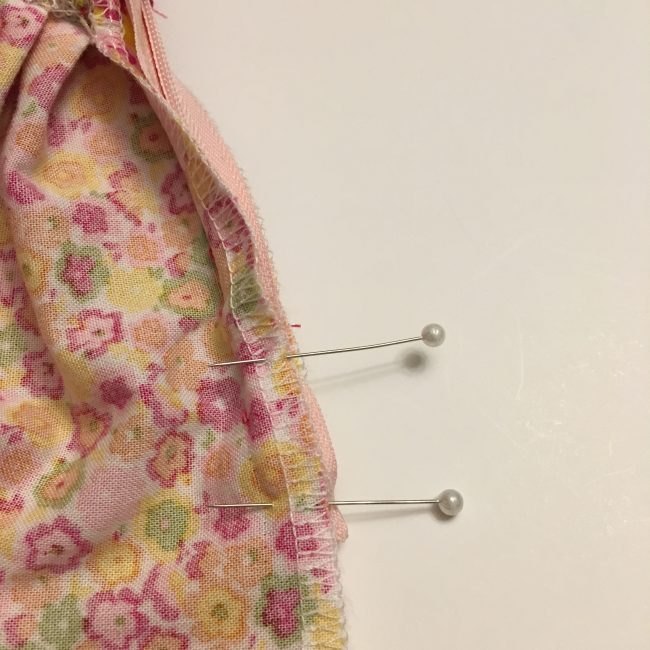
Unzip and lay one side of the invisible zipper tape face down on the right (as in right/wrong) side of your garment. If the pattern calls for a specific seam allowance, use a ruler or seam gauge to make sure it’s in the correct position. Use pins, washable glue, or washable tape to hold the invisible zipper in place as you are sewing. I used washable glue.
Once you reach the end of the zipper at the zipper pull, zip it up slightly to ensure the bottom of the zipper is also in line with the raw/finished edge or flush within the seam allowance as you make sure it is pinned/taped/glued in place.
Step 3: Sew the Zipper
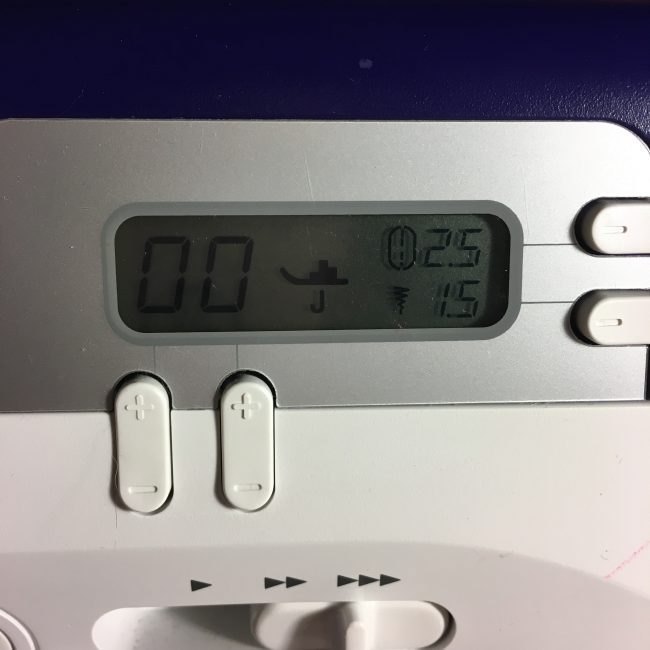
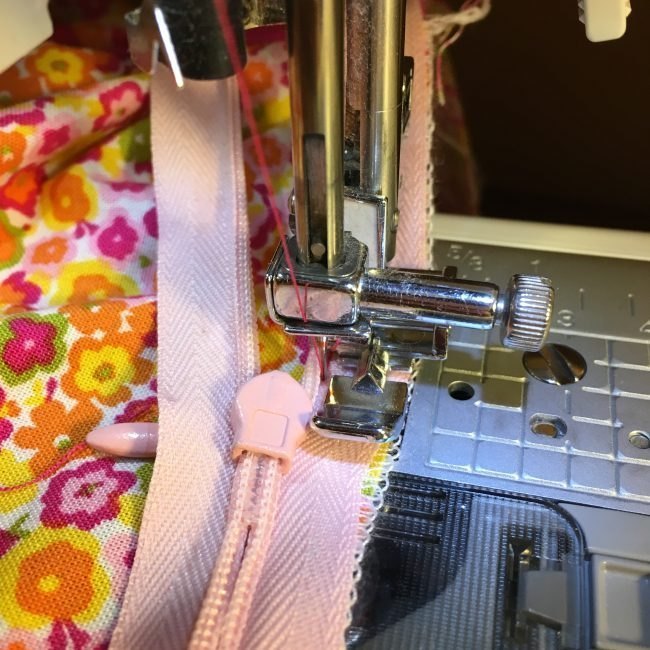
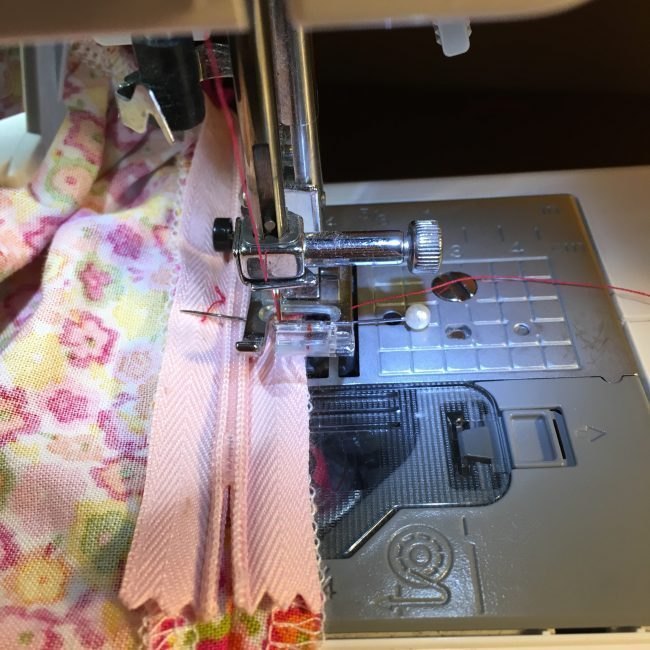
Attach your regular zipper foot to your sewing machine and change your stitch width to a setting that will land the needle as close to the zipper teeth as possible. In order to swing my needle as far to the left as possible, my setting was 1.5mm for the stitch width (as shown in the picture below).
As you can see below, I started with the left side of the dress, and was able to align the right side of the zipper foot along the right side of the zipper tape, aiding me in keeping a straight line as I was sewing.
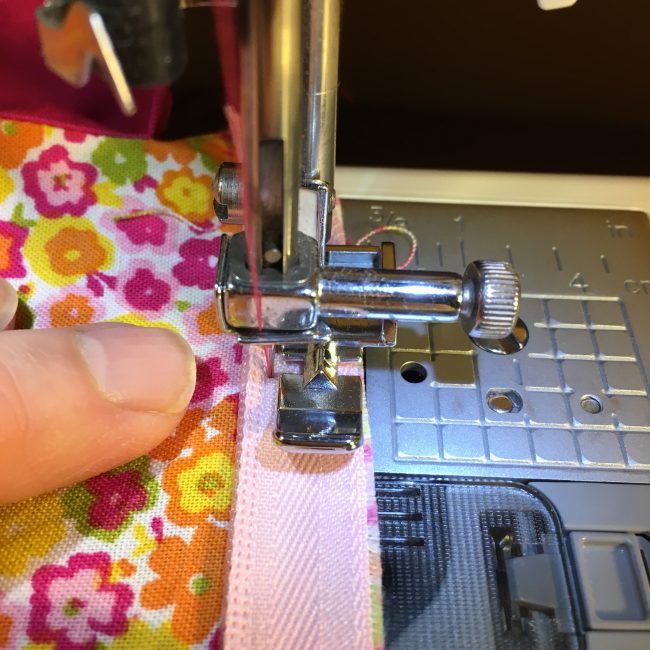
Starting at the top of the invisible zipper, sew in place with the foot as close to the teeth as possible, stopping when you near the zipper pull. Start sewing slowly to maintain control of the zipper, and use your fingers to keep the invisible zipper in place and lying flat.
As you’re sewing slowly, make sure you are holding the fabric and zipper tape in place as the foot nears the invisible zipper stop.
After the first side is sewn, zip up your invisible zipper and align the two sides of the garment so they match up perfectly prior to adhering the second zipper side onto it. Make sure your zipper tape is still face down against the right side of the garment and that it hasn’t twisted.
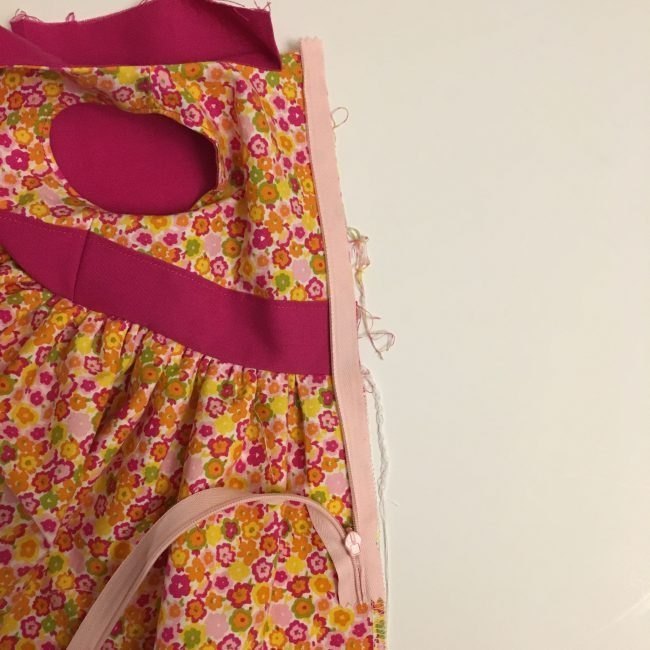
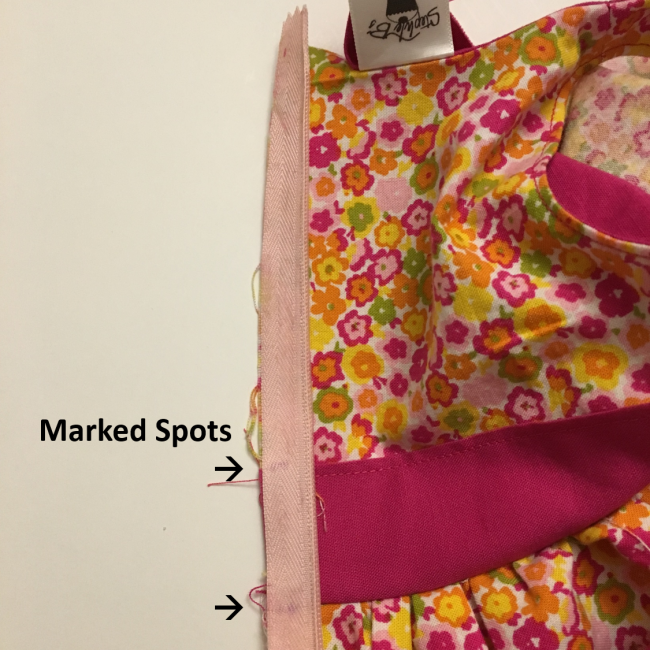
Hint: If your garment has a waist seam or other defining seam or feature, mark its placement on the unsewn side of the zipper tape and adhere the zipper tape to the garment up and down from that point. You may have to pull and tug to align everything, but alignment is critical. As you can see below, I marked the waist and top of the band on my Ruby.
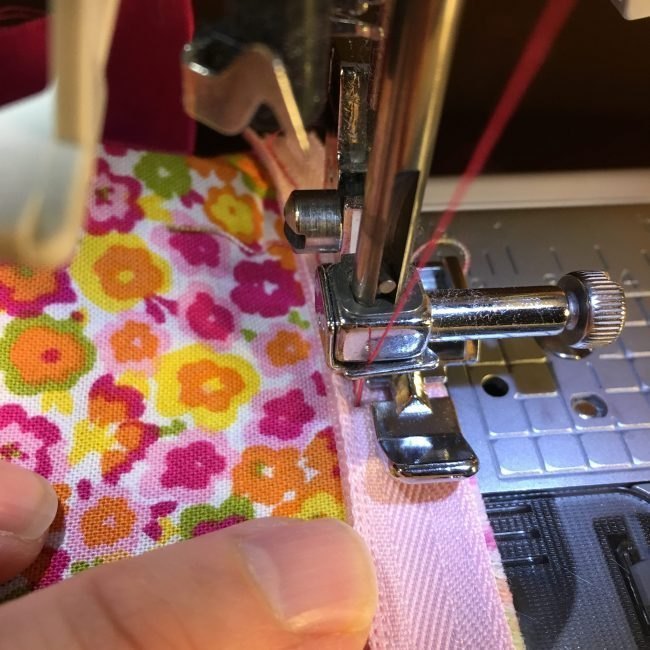
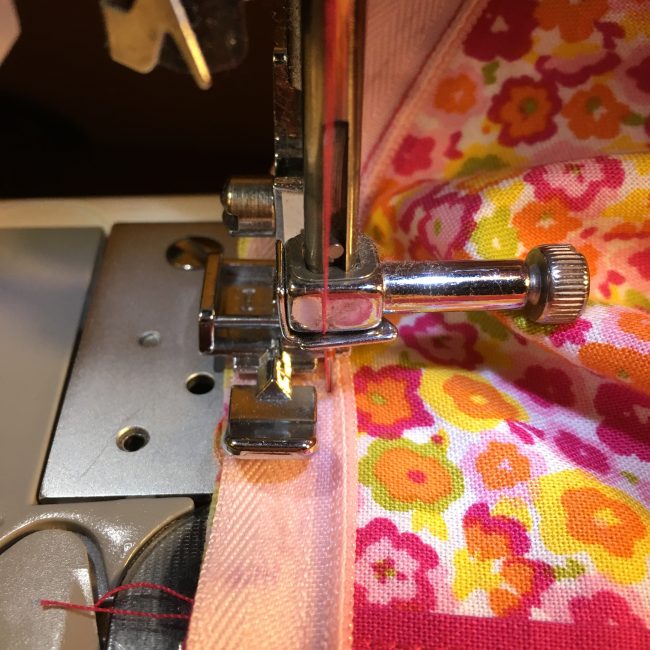
Once you have proper alignment on the second side of your garment, adjust your zipper foot and width to line up with the other side of the zipper tape. For this side, I used a 6.0mm stitch width to move it as far to the right as possible.
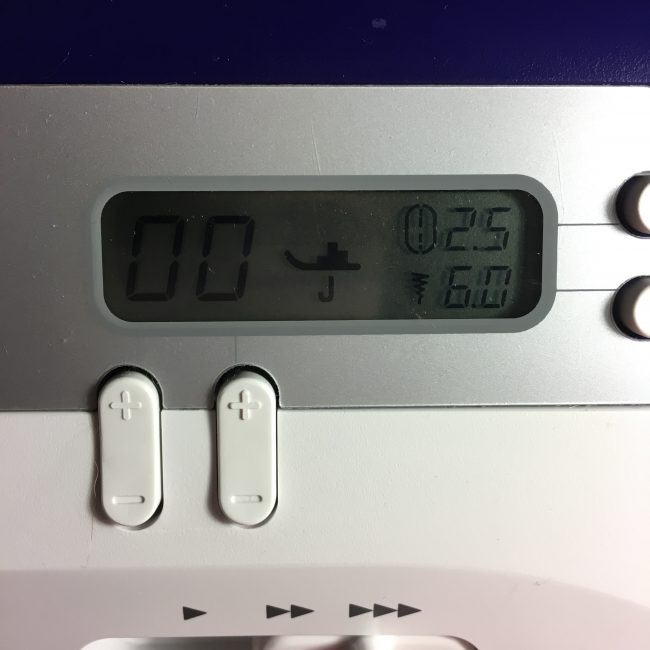
Note: Some sewing machines cannot offset the needle to both sides – meaning you can’t set it very far to the left or very far to the right, which is necessary for this zipper installation – so you may not be able to move your needle into place along the second side. If that’s the case, start sewing at the bottom of the invisible zipper and sew up.
My sewing machine does allow me to set the needle with very wide margins on either side, so I was able to get close to the zipper teeth while sewing from the top down.
After sewing, zip up the zipper to ensure both sides are aligned and working properly. If not – use a seam ripper and try sewing that invisible zipper again!
Once both sides of the invisible zipper are right where you want them, do a happy dance, then sandwich the remaining (bottom) portion of the zipper tape within the seam allowance and pin in place before sewing.
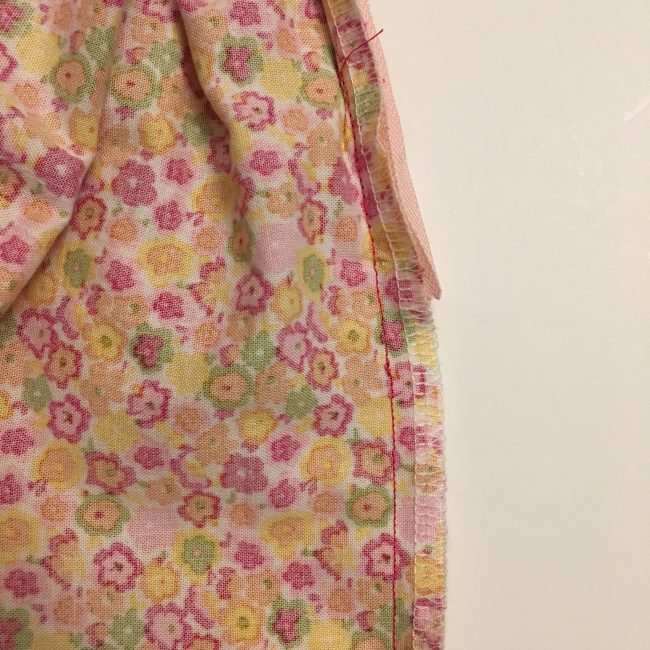
Start sewing 1/4 - 1/2 inch above the zipper stop and overlapping your previous stitches, stitch down the remainder of the seam. Try not to catch the bottom portion of the zipper tape or it will not lay flat after pressing.
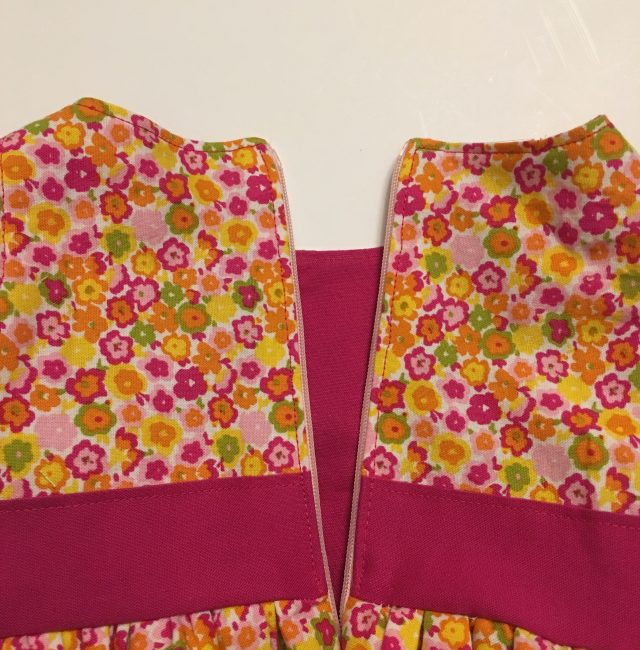
Press the seam open…
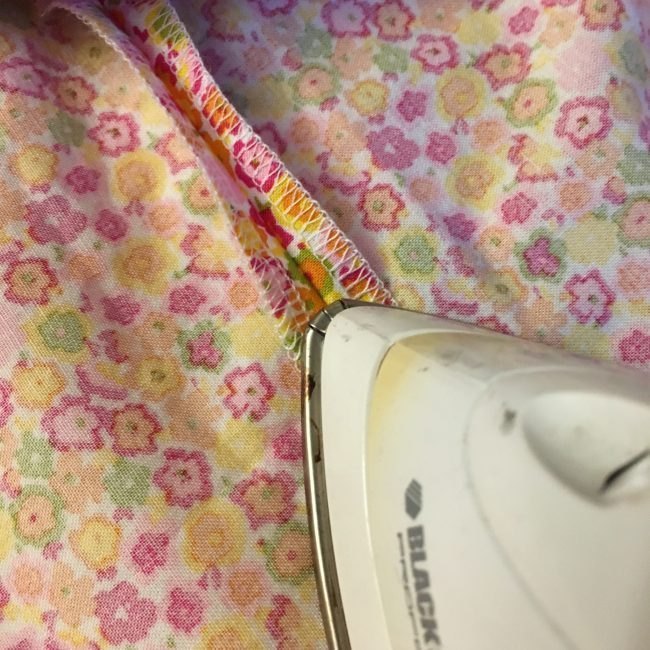
And sew the remaining portion of bottom to each side of the seam allowance.
Does the zipper opening need to look pretty? Not at all! 🙂
Last but not least, finish sewing your garment according to the pattern instructions and admire your work.
All done!!!!! Now you know all the basics on sewing an invisible zipper. Sewing invisible zippers help you make professional-looking clothing without a zipper sticking outside the back side. Thank you for joining us for this sewing project today!
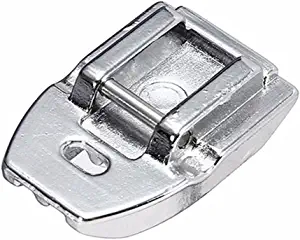
Make Sewing an Invisible Zipper Easier with an Invisible Zipper Foot
Sewing an invisible zipper can be made easier with the use of an invisible zipper foot. This specialized presser foot has a groove that allows the zipper teeth to pass through smoothly, ensuring a seamless installation. The sides of the foot also help guide the fabric, enabling precise stitching along the seam line. Using the foot's edge as a reference point, you can maintain a consistent stitch line throughout the zipper. Additionally, the groove of the foot ensures that the zipper tape lies flat against the fabric, giving your garment a clean and professional finish. With an invisible zipper foot, you can reduce the risk of stitching too close to the zipper coil, eliminating the possibility of the zipper getting caught or jammed. Sewing an invisible zipper becomes a breeze with this handy tool, making it a must-have for any sewing enthusiast.
Can I Sew an Invisible Zipper by Hand?
Sewing an invisible zipper is best done with a sewing machine, as it allows for precise stitching and ensures a secure and professional-looking finish. While it is possible to sew an invisible zipper by hand, using a machine will yield better results and make the process easier and more efficient.
Troubleshooting Common Issues while Sewing an Invisible Zipper
Having trouble learning how to sew in an invisible zipper? Here are some troubleshooting tips: - Stitch on the correct side, facing downward towards the fabric's wrong side. - Gently press the top edge of the zipper to realign any misalignment. - Use a standard zipper foot and position your fabric properly for even topstitching. - Take your time and use a straight stitch when sewing the first side of the zipper, keeping it aligned with the seam line. - Trim excess fabric near the neckline or hem if handling becomes challenging. Troubleshooting these issues will ensure flawless results with your invisible zipper installation.
Thank you for joining us to learn how to sew an invisible zipper. It may seem daunting at first, but with the right tools and techniques, it can be easily mastered. Understanding the basics of an invisible zipper and gathering the necessary supplies are crucial first steps. Preparing your fabric and zipper properly ensures a smooth installation. Following the detailed steps, such as preparing the zipper and garment, laying out the zipper, and sewing it carefully, will result in a seamless finish. Using an invisible zipper foot can make the process even easier. Lastly, troubleshooting common issues and ensuring the zipper stays truly invisible will help you achieve professional-looking results. So, don't be afraid to give it a try and elevate your sewing projects to the next level.