How to Sew an Exposed Zipper | Step-by-Step Guide
Are you tired of using invisible zippers in your sewing projects? Do you want to add a touch of style to your garments? Look no further, as we bring you a step-by-step guide on how to sew an exposed zipper. An exposed zipper is a decorative element that can be used to add visual interest and texture to any outfit. In this blog post, we will cover the definition of an exposed zipper, when to use it, and the essential tools required for sewing it. We will also provide you with a detailed step-by-step process of installing an exposed zipper and common mistakes that should be avoided while doing so. So, grab your sewing kit and let's get started on adding some flair to your next project!
What is an Exposed Zipper | Exposed v. Invisible Zipper
An exposed zipper is the most common type of zipper sewing project that you’ll come across. “Exposed” just means that the zipper itself and some zipper tape is showing and exposed on the surface of a project. The exposed zipper can be used to add a stylish embellishment, rather than being concealed within the fabric. Another type of zipper project that we won’t cover here is an invisible zipper. To get more information on sewing an invisible zipper take a look at our tutorial HERE.
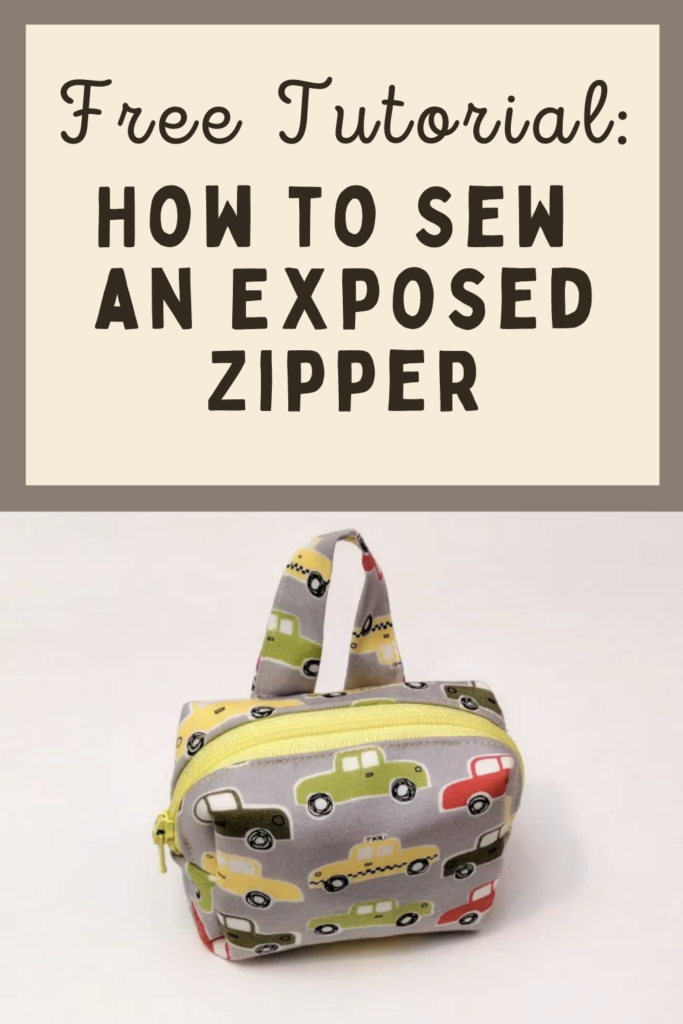
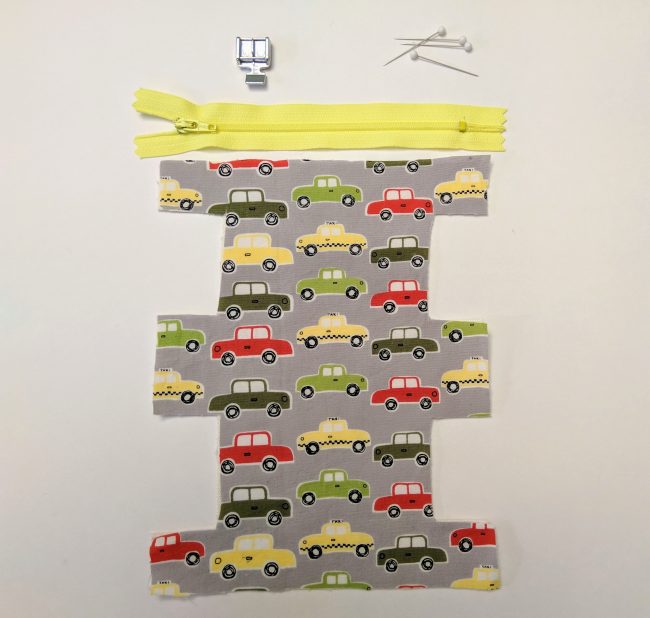
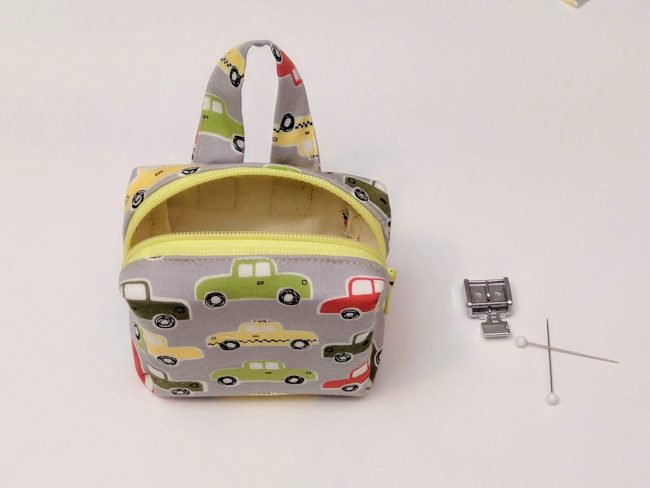
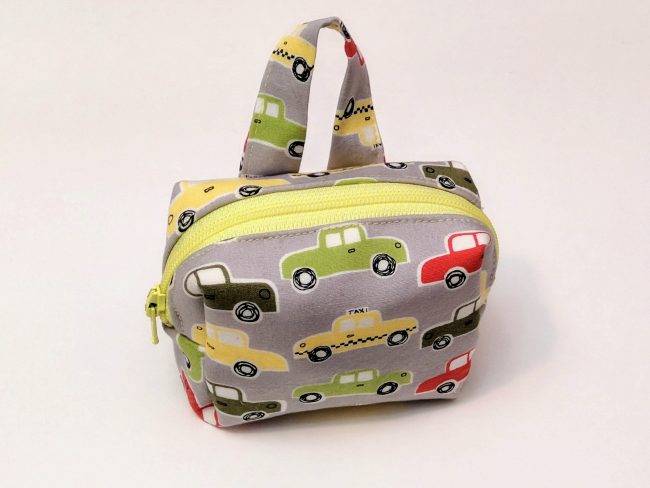
You can sew an exposed zipper as the back closure of a top, the same techniques found here apply to garment sewing. For this tutorial, I decided to design a tiny zippered suitcase for my 8-year-old daughter’s beloved doll. She has a standard 18-inch doll that she just loves to take on trips. Her doll has many accessories which needed a home for our upcoming vacation to NYC, so I chose this adorable taxi cab print from the Urban Patch collection by Monaluna…since I knew we’d likely be taking a cab on outings!
Essential Tools for Sewing an Exposed Zipper
Essential tools for sewing an exposed zipper include the appropriate sewing needles for stitching and a zipper foot designed to accommodate the zipper teeth, ensuring easy installation. Additionally, using a seam allowance guide, chalk, and basting stitches aids in marking and securing the zipper placement. Fusible interfacing, a glue stick, and a presser foot contribute to achieving clean seam edges. It's also crucial to ensure that the zipper stop, zipper head, and zipper tape length match the garment's design and pattern instructions, adding to the precision of the installation.
When sewing an exposed zipper, using a zipper foot is crucial. This sewing machine presser foot allows precise stitching close to the zipper teeth, preventing fabric distortion and facilitating accurate sewing along the zipper tape edge. With a zipper foot, seamstresses can achieve a professional finish for the exposed zipper, with easy zipper placement and obstruction-free seam allowance sewing. Adding a zipper foot to your sewing equipment expands your capabilities, allowing for advanced techniques and the ability to work with different zipper lengths and fabric pieces.
Tips for Sewing Exposed Zippers
How to Sew an Exposed Zipper Tip 1: Zipper length
First, when a pattern calls for a specific length of zipper, the pattern maker is referring to the measurement from the very beginning of the metal zipper pull to the metal stopper. For example, I am using a 6-inch zipper for my doll suitcase.
Next, always aim to add about a 1/4 inch on either side of the beginning and end point of the metal zipper measurement when cutting fabric. Below, I used 6 1/2 inches as my width at the very top of my suitcase fabric. This ensures that the sewn zipper will look neatly tucked in when the project is finished. Zippers come in a variety of lengths and you can shorten a zipper if necessary. Check out this YouTube tutorial for an easy method to shorten a zipper.
How to Sew an Exposed Zipper Tip 2: Zipper Foot
When sewing exposed zippers, always use a zipper foot as pictured above. Make sure to position the foot to glide past the zipper, and not directly on the zipper teeth. Depending on which side of the zipper you are sewing fabric too, the zipper foot can be clipped in two different spots. I have a Janome for this tutorial, so individual sewing machines may vary.
Sewing over the zipper teeth could break a needle, so definitely sew about 1/4 inch to either side of the teeth when sewing an exposed zipper. For a first project or even generally, I recommend plastic zipper teeth over metal ones.
How to Sew an Exposed Zipper Tip 3: Stabilize the fabric
Sewing an exposed zipper to a garment may require the use of interfacing to stabilize the fabric, especially if the outer layer is on the thin side. I used a layer of canvas as my interfacing for this project, so here my canvas/interfacing later is directly under the taxi print fabric.
Okay, let’s tackle our exposed zipper!
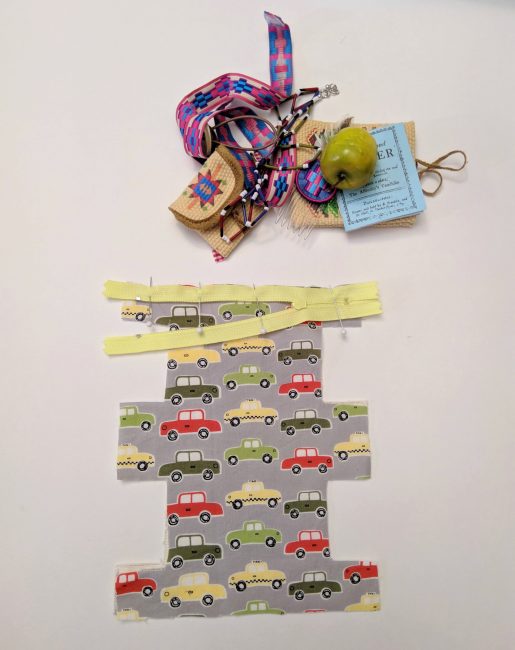
(Here are the things that my daughter wanted to fit inside her doll’s suitcase, so again, I ended up using a 6-inch zipper.)
Step-by-Step Process of Sewing an Exposed Zipper
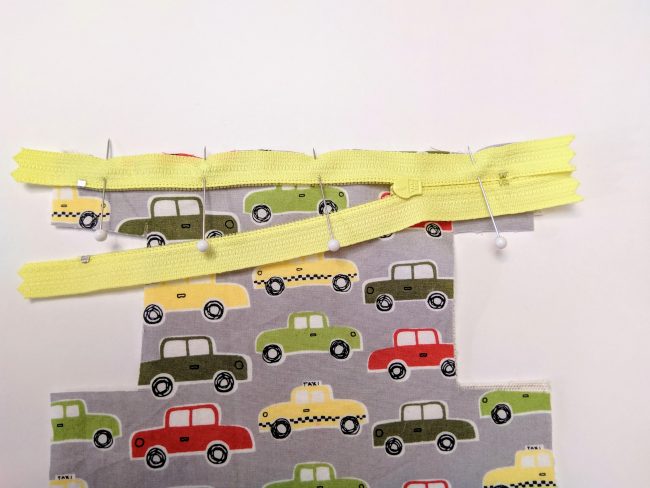
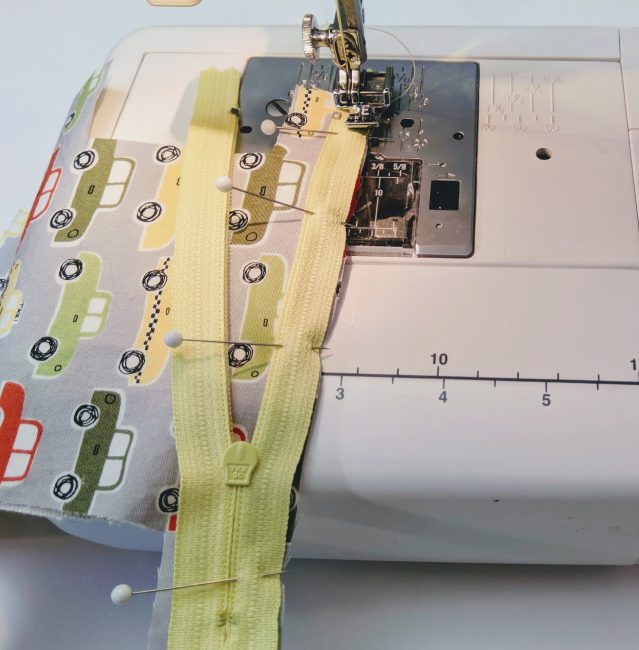
How to Sew an Exposed Zipper Step 1
Place the zipper face down so that the right side of the zipper and the right side of the fabric are together. Unzip the zipper about halfway and pin along the edge, centering the metal end points along the fabric edge.
How to Sew an Exposed Zipper Step 2
Using a regular straight stitch and the zipper foot, the next step is to sew 1/4 inch from the edge down the length of the zipper.
Stop before you get to the zipper pull, put the needle down and raise the presser foot. Swing the fabric out and close the zipper, continue sewing. Backstitch at both the beginning and end of sewing.
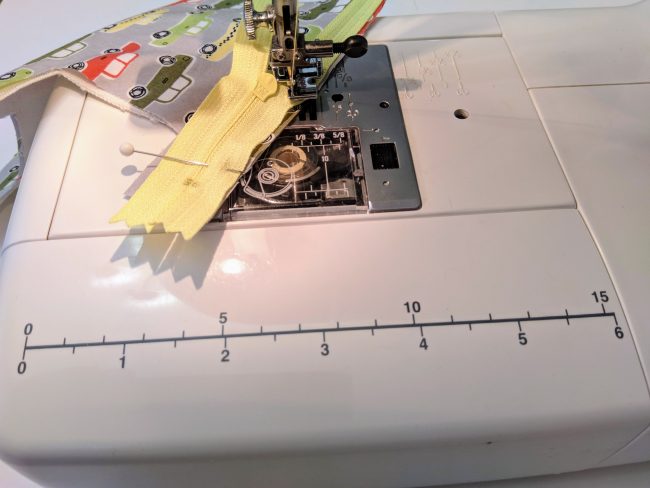
Repeat with the other fabric piece and the other side of the exposed zipper. Be sure to leave the zipper partially unzipped if you are sewing a tube as I was, so that the tube can be turned right side out.
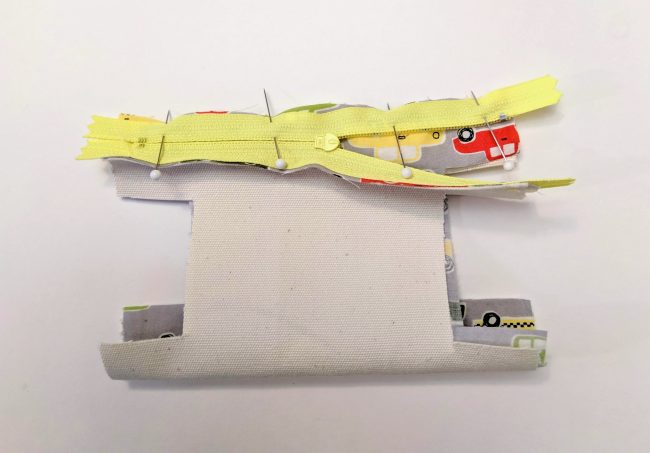
How to Sew an Exposed Zipper Step 3
Using a regular straight stitch and zigzag or straight stitch foot, topstitch if desired. Use the same technique as above, partially unzipping the zipper and using the needle down function along with swinging the project around to manipulate around the zipper when needed.

Here is my project reading for topstitching, I tried the topstitching with a zipper foot but quickly realized that I needed my regular foot.
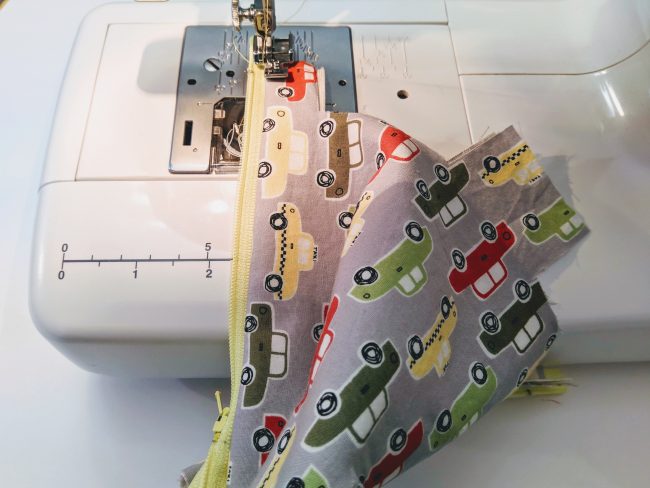
When you make a pouch or project like this one I’m using, you can safely sew the sides right up to the metal stopper as long as you don’t sew over it.
There you have it, sewing an exposed zipper while keeping it simple. I love how this turned out! I added a tiny handle so that the doll can carry her own suitcase. You can use these same principles to sew an exposed zipper in different clothing patterns – like the one’s listed below.

Finalizing the Installation
To ensure a clean finish, sew close to the edge of the zipper tape using a zipper foot. Next, close the bottom of the zipper by sewing across it. Carefully open the basting stitches on the garment with a seam ripper. Then, press the fabric around the zipper to create a polished look. Finally, admire your beautifully finished project with the exposed zipper!
What are the Common Mistakes to Avoid While Sewing an Exposed Zipper?
To sew an exposed zipper without mistakes, follow these steps carefully: Align the zipper properly, use the correct needle size and thread tension, baste the zipper before sewing, and avoid skipping any steps. A zipper foot is also handy.
Conclusion
We sure appreciate Karrie’s tutorial on how to sew an exposed zipper today. Being able to sew an exposed zipper is essential for a lot of different projects and even a beginner can do it by following along with this tutorial. At Peek-a-Boo Pattern Shop we have a number of patterns that require sewing an exposed zipper. Here’s a few of our favorite patterns with a zipper:
- Classic Zipper PJ’s
- Cascade Fleece Jacket for Women
- Wanderlust Duffle Bag
- Lullaby Line Zip Inseam Pajamas
Other Sewing Tutorials for Zippers
If you’d like more information on sewing zippers then we have that for you too. The following tutorials will help you, combined with this one, to get a more comprehensive feel for sewing different types of zippers:
Also, be sure to join the Peek-a-Boo Pattern Shop Facebook Group to share your projects, receive pattern help, and be informed of new releases and sales.