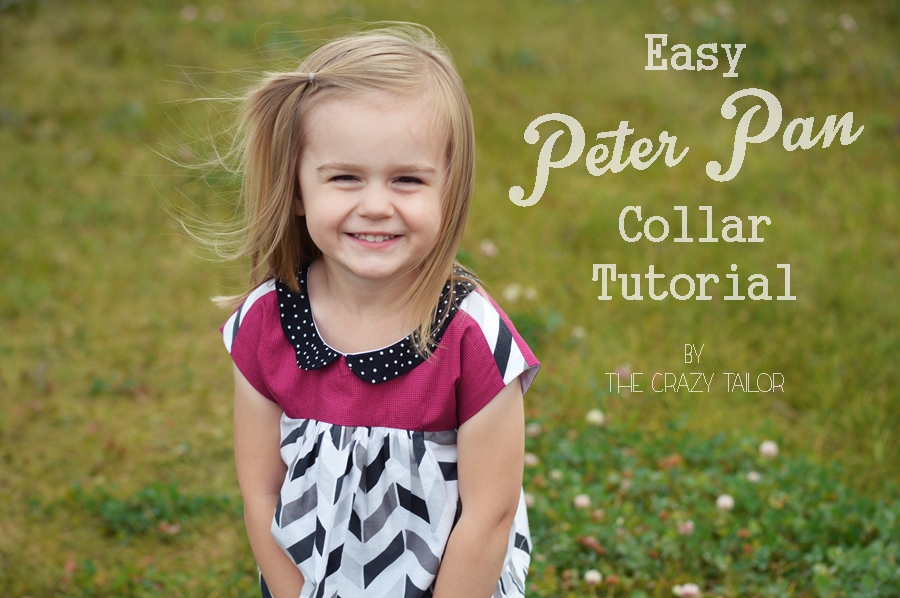
How to Sew a Peter Pan Collar
Today we have Sarah of The Crazy Tailor from our contributor team here with a fabulous tutorial on how to sew a peter pan collar! I absolutely adore peter pan collars and with this easy tutorial you’ll want to stick them on everything 🙂 If your child attends a school with a dress code this collar pattern is a great way to make your favorite pattern dress code friendly!
What is a Peter Pan Collar?
A Peter Pan collar is a style of collar that is rounded and flat, resembling the shirt collar worn by the character Peter Pan in J.M. Barrie's famous novel. It is often seen on children's clothing, but has also become popular in women's fashion. The collar is typically attached to a garment, such as a dress or blouse, and adds a touch of whimsy and vintage charm to any outfit. The name "Peter Pan collar" has stuck due to its association with the character's youthful and playful image. Whether paired with a pinafore dress or worn under a sweater, the Peter Pan collar is a timeless and versatile accessory that adds a touch of sweetness to any look.
How to Sew a Peter Pan Collar Tutorial
I’ve got a great little tutorial for you on drafting your own how to sew a Peter Pan collar! I firmly believe the Peter Pan classic collar is here to stay. It’s timeless, and takes any dress or top up a notch. Plus, it’s a fun way to add some unexpected color or pattern to a garment.
Find a Pattern With a Peter Pan Collar Option
In this how-to sew a peter pan collar tutorial, I will be showing you how to draft and add a collar to a simple lined top. This method could be used on any rounded, lined neckline sewing pattern (or bias/facing finished). Just to get you started, here are some patterns that you could use: Molly Schoolgirl Blouse, Hopscotch Top/Dress, and the Jubilee Party Dress. If you plan to use a pattern that has some piecing happening with the bodice (like the Hopscotch) or some pleating (like the Savannah) then you would want to be sure to tape the appropriate pieces together with seam allowances included (just like you’ll read below) to allow you to trace the actual neckline.
Instructions on How to Sew a Peter Pan Collar
Step 1: So to begin, grab your bodice pattern pieces. We’ll be focusing on the shoulder seams. Make sure that you know what your seam allowance is for the pattern.
Mark your seam allowance on the shoulder seams of both pieces. Mine was 1/2″ so I used a ruler to draw a line at that point.
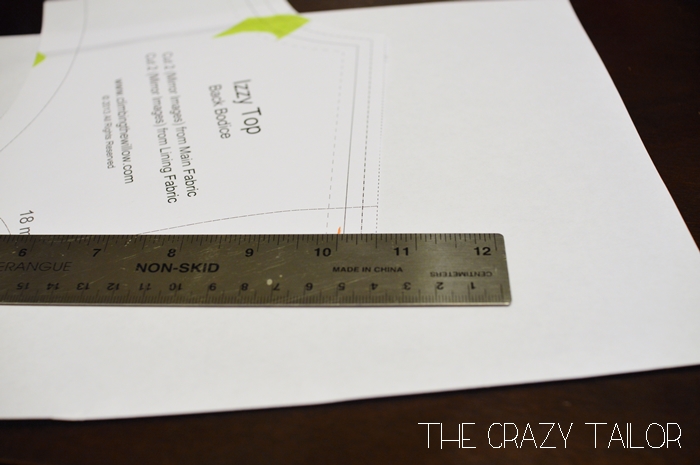
Yes, that is painter’s tape. You do what you’ve gotta do when you need a pattern put together, amiright?

Step 2: Fold your patterns along the seam allowance mark you just made. Take the front bodice and lay that onto a piece of paper and trace around, from the front fold line, around the neck curve and then down the shoulder, as indicated. For kids patterns, an 8.5″x 11″ piece should be fine…for adult clothing, you may want to tape some paper together.
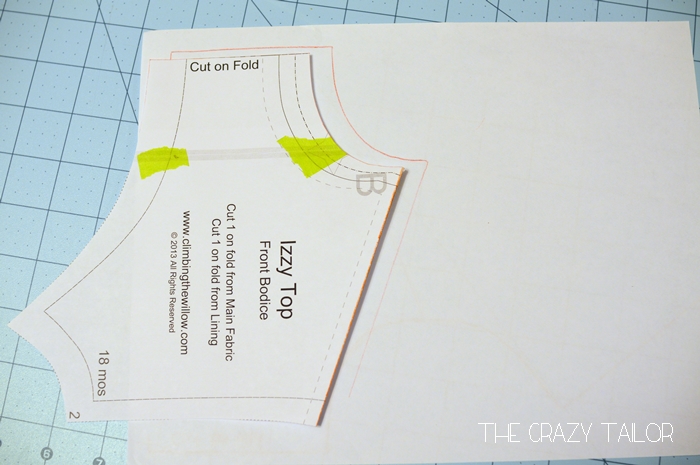
Step 3: Take your back bodice and place it so the shoulder seam lines up right with the one you just drew, keeping the neckline curve nice and smooth. Trace around the neck curve to the back seam and go down:
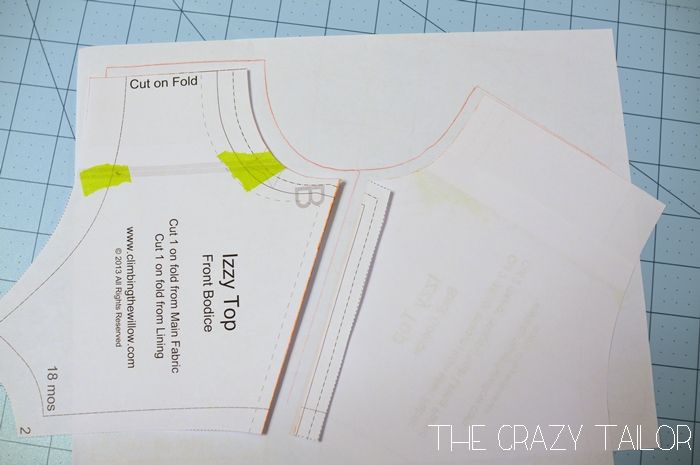
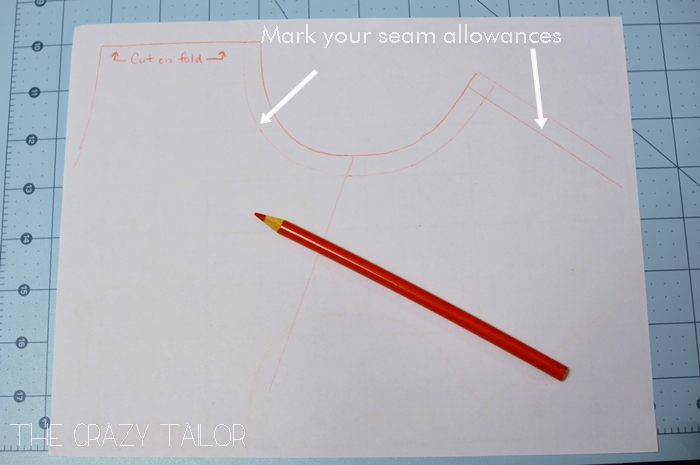
Step 4: Next, you’ll want to mark your seam allowance along the neckline and the back seam, that way you will get a better idea of what size your finished collar will be and where it should end at the back. If your back bodice closes with more than just a regular seam allowance (for instance, a button placket with overlap) make note of how much you will need for that, and mark it off on the pattern.
Then you won’t have a collar ending over top of where buttons need to go. (note: this can also be done on any dress that buttons up the front – you would just be doing it the opposite way). My top pattern had a little snap tab that didn’t require any overlap of the back bodice pieces.
Step 5: Decide how wide or narrow you want your collar to be. I chose to do a smaller one for this top, and I love the dainty feel it gives! I used a measurement of 1 1/4″ from the neck seam allowance marking. Mark in intervals all around your neckline.
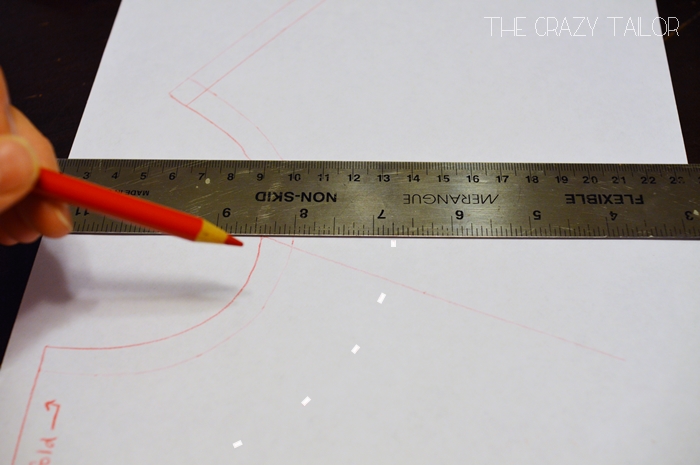
Step 6: Connect the dots using a french curve or just with a smooth hand. Curve up the ends of the collar to end right at center front, and then to end at your determined back position (again, depending upon your back closure).
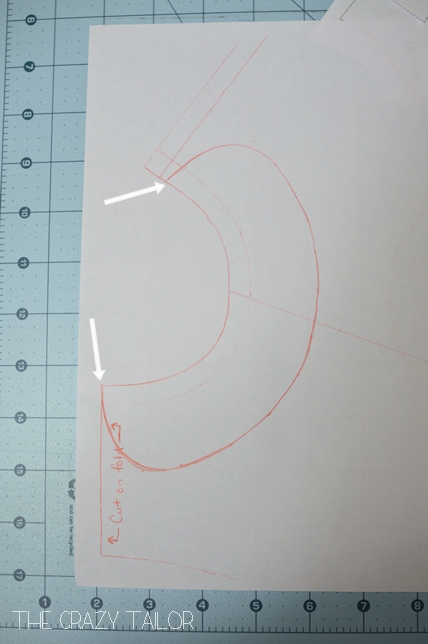
Step 7: Make sure that it is a shape that you like, and then add your seam allowance to the collar. I used 1/4″ since I’ll be trimming it a bit after anyway.
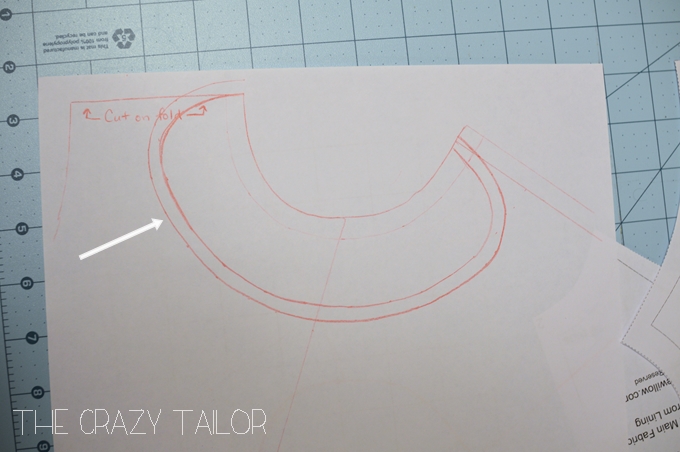
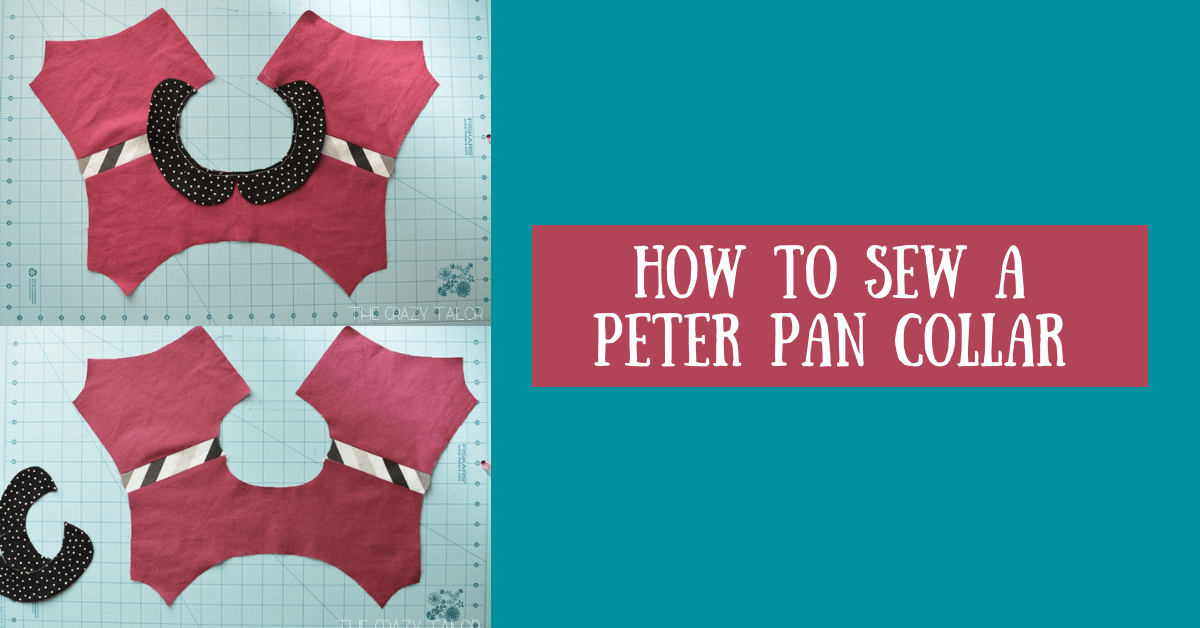
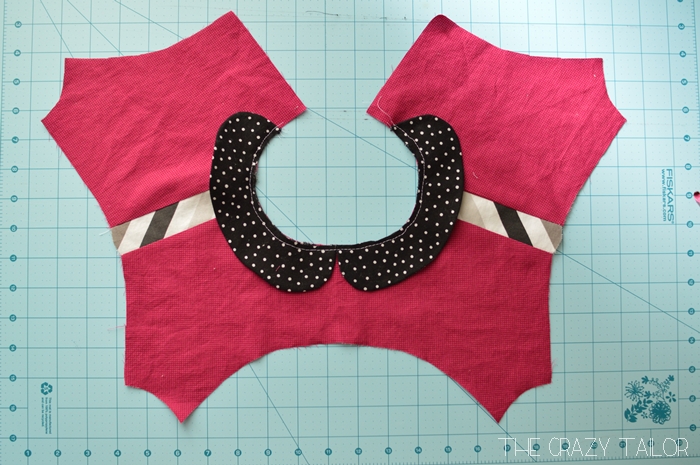
Step 8: There you go! Your pattern is done! Cut along the outer lines of the collar and neckline. You’ll need to cut 4 of these in your fabric in total, with two in reverse (or two mirror image). If you are using a flimsy material, you may want to cut out and add a light fusible interfacing as well.
Pin two collar pieces right sides together (RST) and sew at 1/4″ seam allowance along the longer curved collar edge. Leave the neckline open.
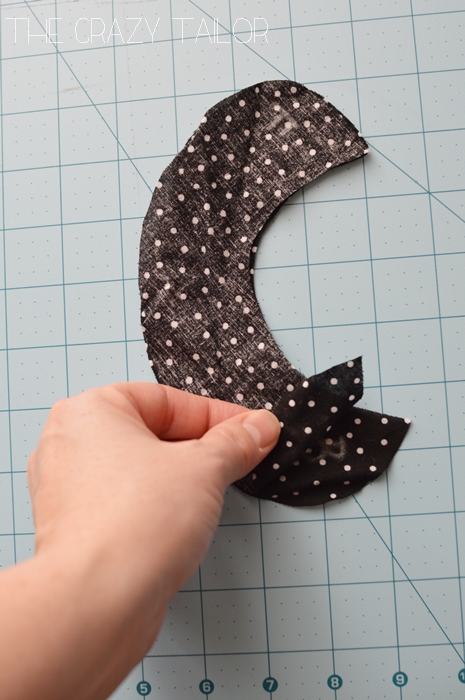
Step 9: I like to trim down my seam allowances to about 1/8″. Or you could just clip the curves. Also, I marked which was the front and back on the collar…they look very similar, but won’t fit on your neckline just any old way.
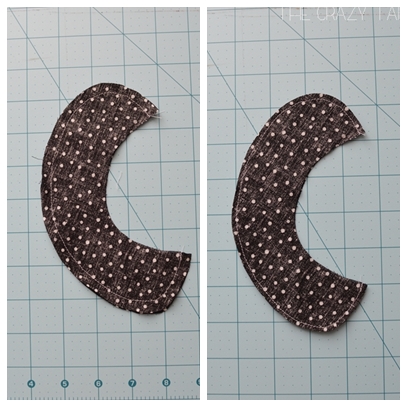
Step 10: Turn them right side out and press well. Note the silence of your children. Haha.
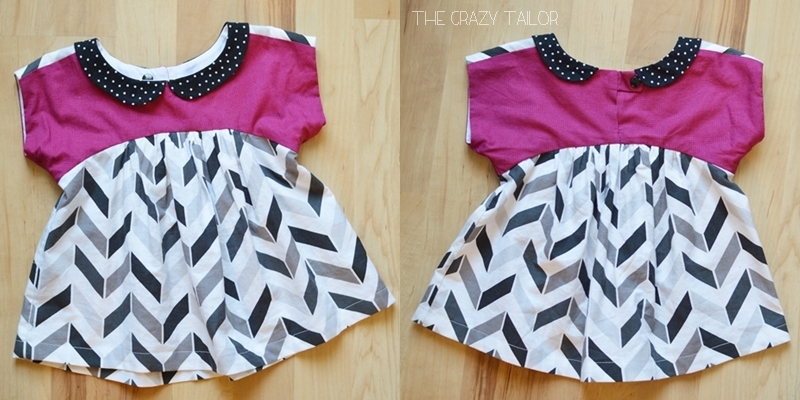
Step 11: Ok, so now you’ll want to sew the shoulder seams of the main fabric of your dress/top together and press. If you have any piecing or pleating to do, that needs to be done now as well. Find the center of your front bodice and mark it. Pin your peter pan collar pieces in place and baste 1/4 inch from the raw neckline edge.
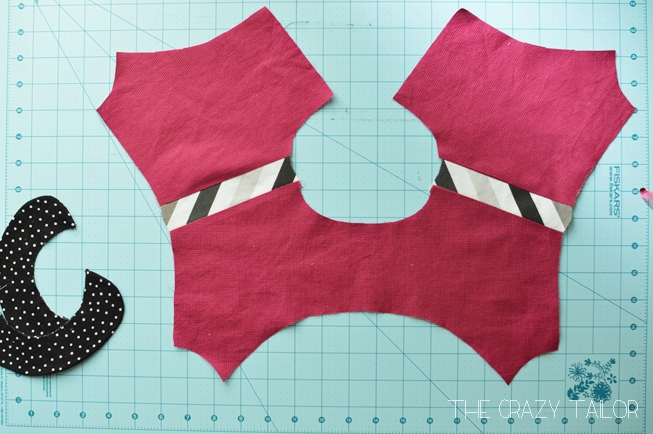
You can treat your bodice and collar as one piece now and finish your garment as directed.
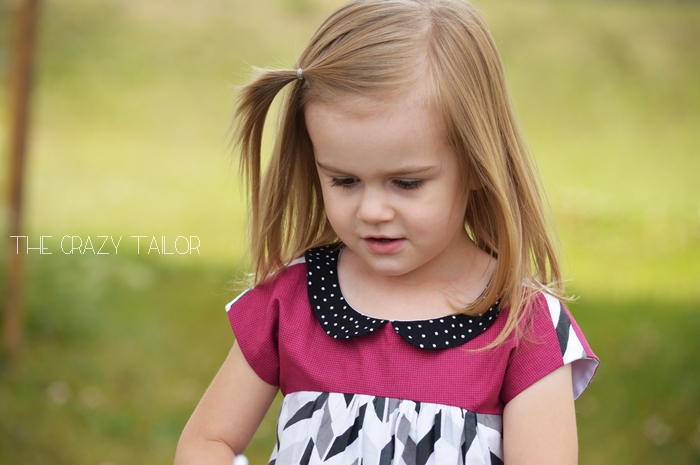
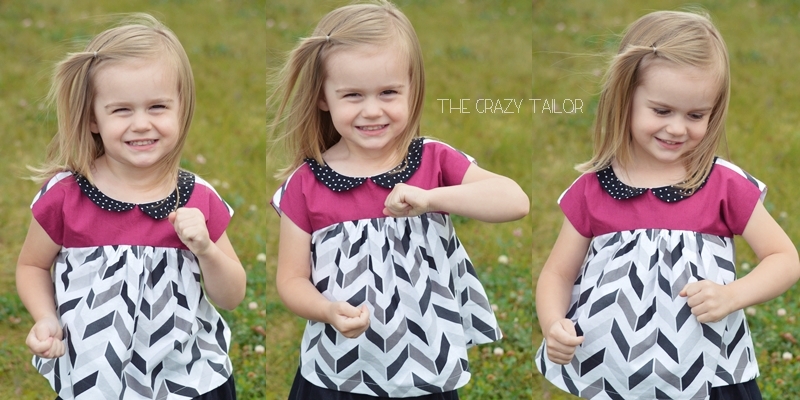
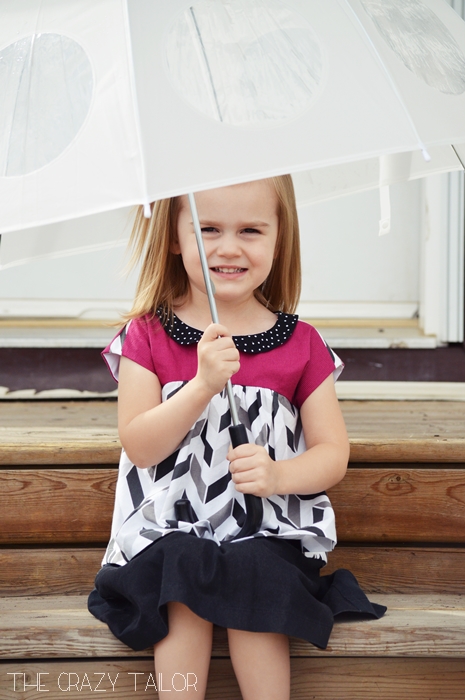
Such a fun little modification that really makes anything cuter 🙂
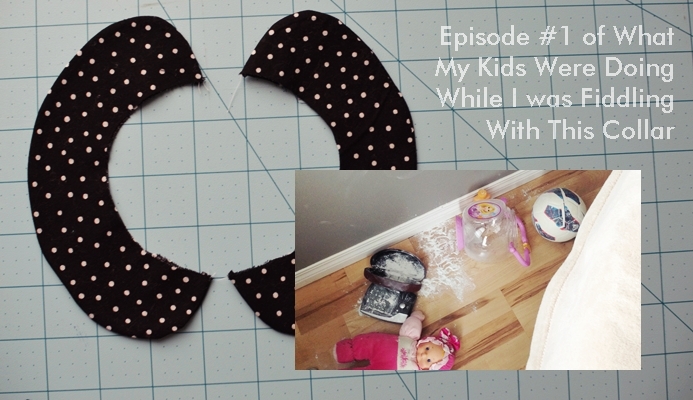
I’m not exactly sure what she was up to here, but at least I got some smiles! We’ve had so much rain lately…she was just happy to be outside!
Thank you for joining us today to learn how to sew a peter pan collar. Adding a new collar to your outfit is a fun addition with little extra cost. Before you leave, be sure to come join our sewing community in our Peek-a-Boo Pattern Shop Facebook Group or follow us on Instagram! Happy Sewing!