How to Sew a Button-Up Shirt Dress
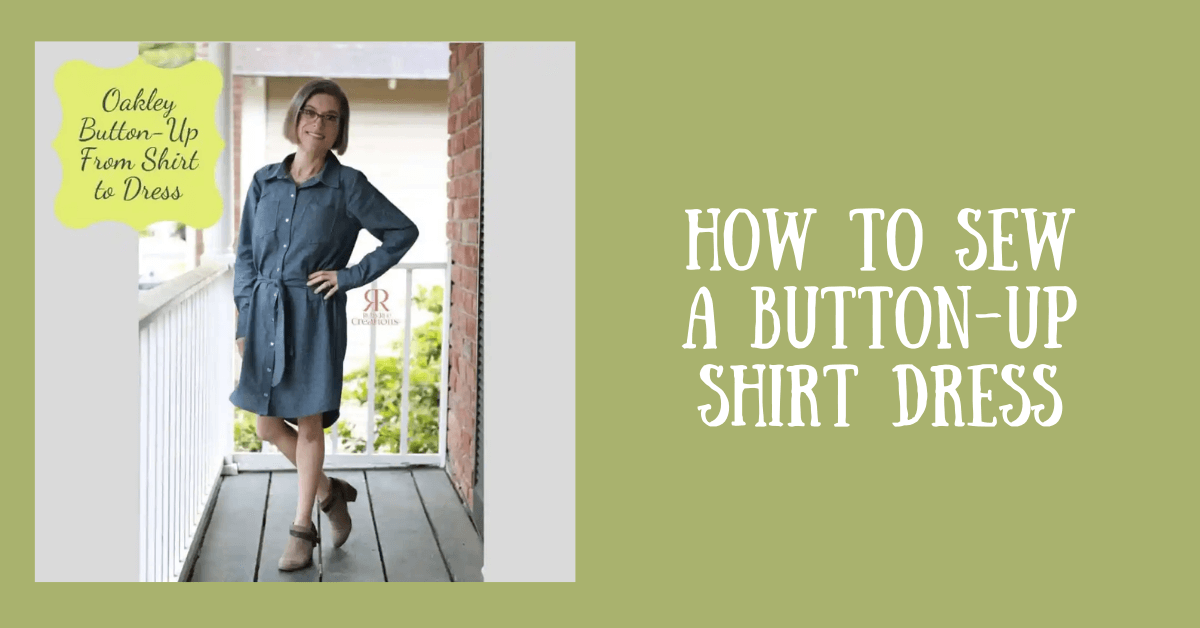
Today I’ll show you how to sew a button-up shirt dress. The change of seasons always has me in a pickle as to what to wear – it may be chilly one day but warmer the next. Shirt dresses are my go-to for work or for casual weekend get-togethers with family and friends. You can dress them up or dress them down to suit the occasion. Today I’m going to share the quick and easy way that I used the Oakley Button-Up pattern to make a great capsule wardrobe shirt dress!
How to Sew a Button-Up Shirt Dress
Gather Your Supplies
Here are the supplies you’ll need for this project:

- Oakley Button-Up Pattern
- Fabric according to the pattern requirements (I used chambray, but you can also use quilting cotton, poplin, lawn or flannel)
- Freezer Paper (or Swedish tracing paper)
- Tape, Pencil, and basic sewing supplies
Modifying the Pattern Pieces
Start by printing the size(s) you need of the Oakley Button-Up pattern. The beauty of sewing for yourself is being able to blend/merge sizes to get the perfect fit for your body shape. Next, we will lengthen the front and back pattern pieces. To do this, draw a horizontal line across the front and back pieces. I chose to do this around the natural waist since I have small hips.
If you carry more weight in your hips, be sure to account for this and it may be better for you to add length closer towards the bottom of the pattern pieces. Wherever you lengthen on the front, lengthen at the same location on the back piece (I laid the pattern pieces on top of each other to make sure my adjustments were at the same place).

Next, measure from your shoulder to where you’d like the dress to hit at the hem. Cut the pattern piece along the drawn horizontal line and add the desired length between the pattern pieces as shown. I’m very petite so I only added 9″ between the cut pieces.
After taping the pattern pieces onto the freezer paper, hold the new pattern up while looking in a full length mirror to determine if you’ve added enough length for the look you want. Be sure that you add the same length to the front and the back pieces.
To sew this modification, simply follow all instructions in the pattern. You’re simply adding length and the sewing instructions will not vary.
Helpful Tips
First, I suggest making a muslin. Grab some cheap fabric, or actual muslin, that is the same weight/drape as your final fabric to create a practice garment. It’s much less painful if you mess up cheap fabric! Since you are going from a shirt to a dress, you want to be sure that you will have room in the hip area so you can move and sit comfortably once the garment is sewn. Adjustments made to the muslin can then be transferred to the final garment.
Make notes as to the adjustments you make. I’m horrible about writing things down and then it takes me twice as long when I want to make another item! Any little mods you make, either write them on your pattern pieces or on a separate sheet of paper that you can store with your pattern. This will save you time and a headache!
I suggest using pins or safety pins to check for placement while you’re wearing the dress. Check for gaping in awkward places BEFORE you add the buttonholes or snaps!
Buttons vs. Snaps
When purchasing your fabric and notions, keep in mind that you will need more buttons or snaps than the pattern suggests. The number you need will be based on how much length you add. I suggest buying more than you need because once you make one of these shirt dresses, you’ll definitely make more soon after!
I am a huge fan of using snaps for the Oakley Button-Up. Although I know how to add buttonholes and buttons, I find that snaps are faster and easier to install. For a professional finish, I love using the size 18 pearl snaps from Snap Source. They are easy to install and easy to move in case you accidentally line things up incorrectly (ask how I know!!).
Waist Sash
For me, the waist sash was the perfect finishing touch. Since I have very small hips, I needed something to add a little definition around my waist. To make this quick and easy sash, I cut a 5″-6″ tall strip the width of the fabric (WOF). You will need to cut two of these and sew the short ends right sides together to form one long strip so that your sash will be long enough to tie.
Once you have the very long strip, with RST sew around the raw edges leaving a hole about 3″-4″ at the middle (near the seam you sewed in the previous step). This hole will be to turn the sash right side out. I angled the short side edges as a personal preference. Turn the sash right side out and topstitch around all 4 edges, closing the gap from the previous step.

That’s it! A super simple modification to “dress up” a classic button-up pattern! 😉