How to Make a Hooded Towel | Monkey Hooded Towel Tutorial
How to Make a Hooded Towel: Step-by-Step Guide
Are you ready to learn how to make a hooded towel? In this step-by-step guide, Amber will walk you through the process of creating a customized hooded towel that is perfect for your child. This project is sure to give you the satisfaction of creating something unique and special for your child. So let's get started!
Learn How to Make a Hooded Towel
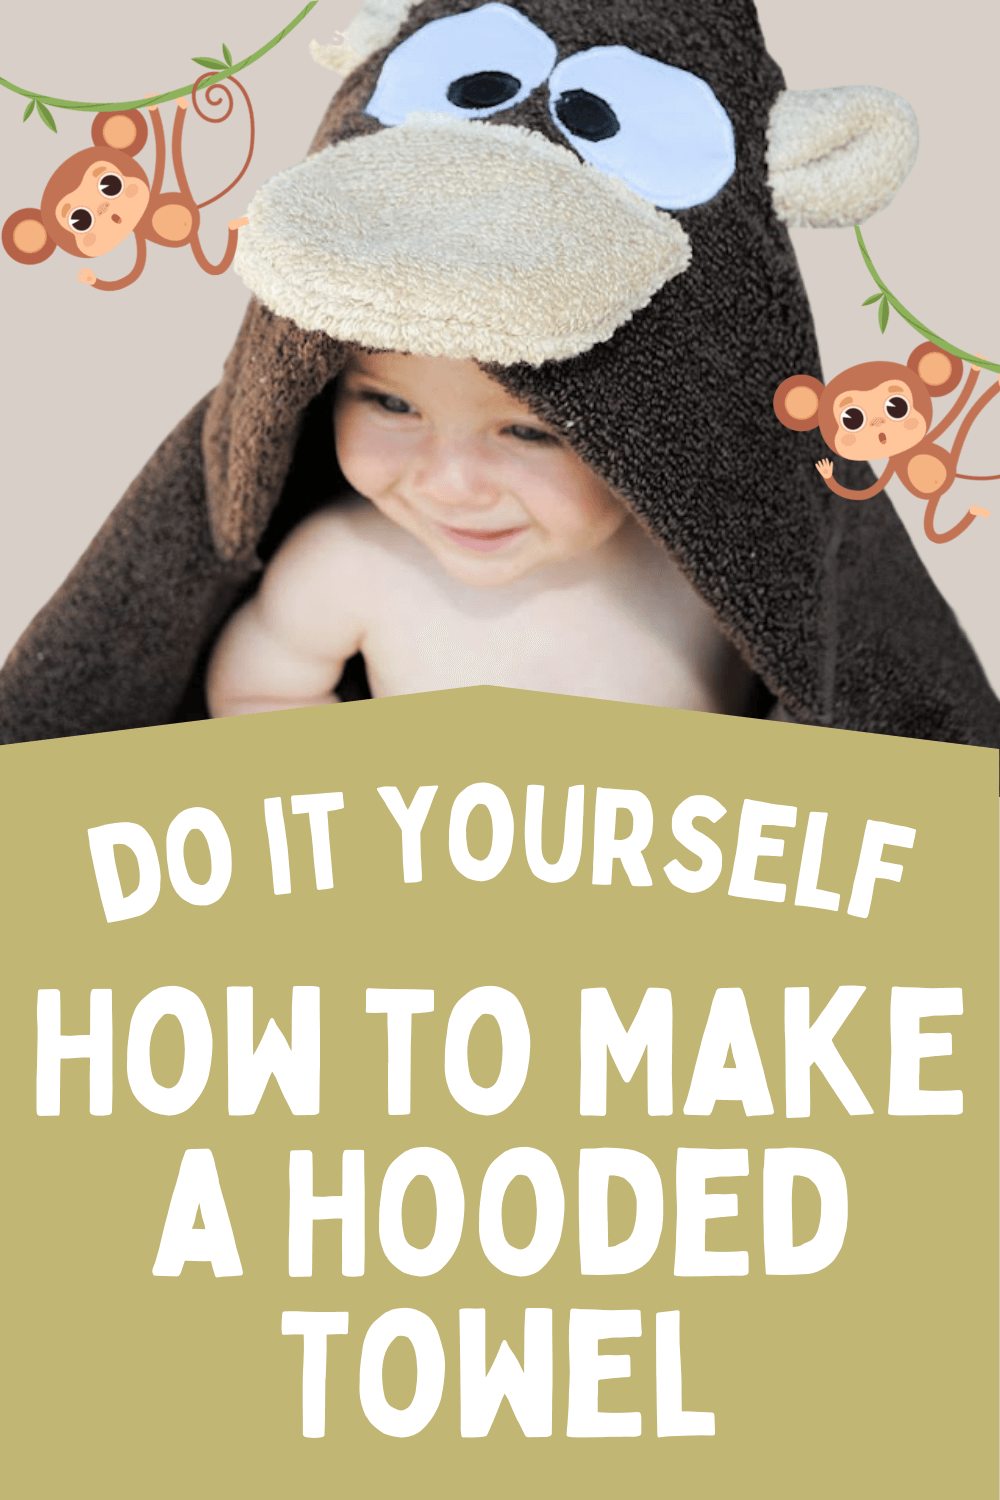
I am Amber from Crazy Little Projects about to show off my latest creation…a Monkey Hooded Towel for baby! Want to see more? Come visit my blog.
It’s time for another adorable hooded baby bath towel! Each month I make, and teach you to make, a hooded towel. Last month was a Ladybug and before that it was a Frog. This month? A monkey! Let’s learn how to make a hooded towel that look’s like a monkey!
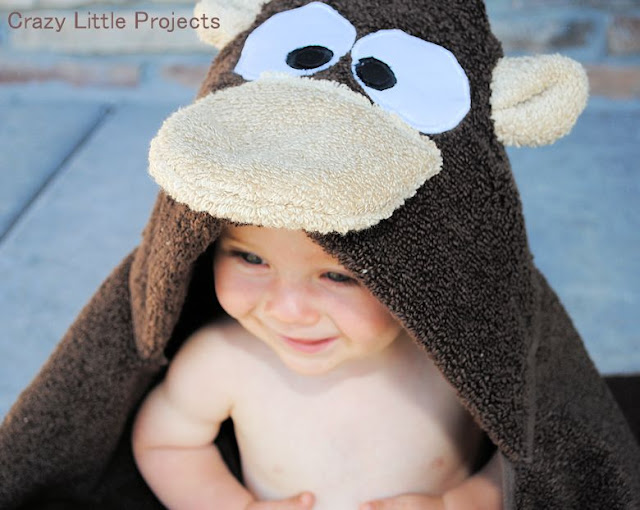
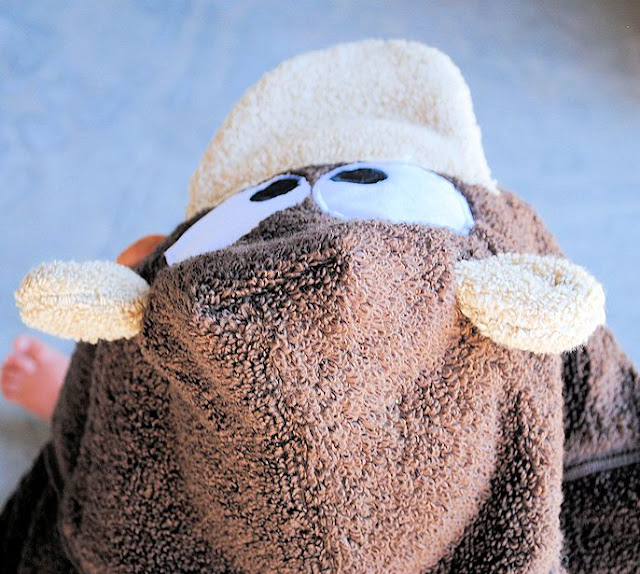
This is the first time I have done a monkey towel and I have to say, I LOVE how it turned out. At first, I was worried that it might end up looking like a bear, but all the little kids at my house, while I was making it, could tell what it was. So I’m calling that a success!
These towels are not hard to make. They cost around $10, maybe a little less, and take under an hour. Well under an hour if you are experienced at sewing.
What is a Good Fabric for a Hooded Towel?
We're using premade towels for our project today. If you want to start from scratch then it's essential to select fabrics that are absorbent, soft, and durable. One popular choice is terry cloth due to its excellent absorbency.
What Materials Will You Need?
You'll need to get some new towels for this hooded towel tutorial - a large towel and a small hand towel should do. Here's what I used for the monkey:
- 1 brown bath towel
- 1 brown matching hand towel (you’ll only use half)
- 1 light brown hand towel (you’ll only use half)
- Small amounts of white and black fabric
- Optional: iron on transfer for the eyes
- Coordinating Thread
- Tools: Sewing Machine, Rotary Cutter, etc.
Step 1: To start out, cut your brown hand towel in half hamburger way. Then fold the finished edge in about 4 inches in toward the center of the bath towel and pin the top of the finished edge like this:

Step 2: Stitch a straight line across the folded edge where you pinned it (where my yellow pin is above, but go all the way across the towel.)
Step 3: Now, flip it over and work on the back of your half-hand towel.
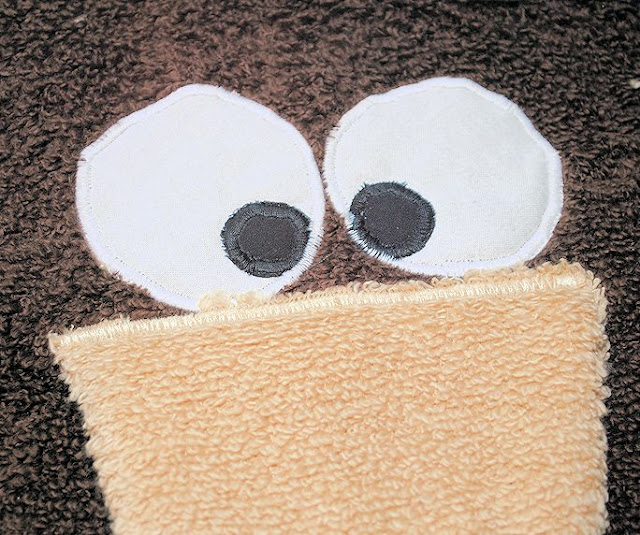
Step 4: Cut out eyes. I like to use fabric that has already been attached to iron on transfer.
You need 2 white pieces and 2 black pieces. My black ones are about the size of nickels. Really you can just eyeball this. Make them as big or small as you want them.
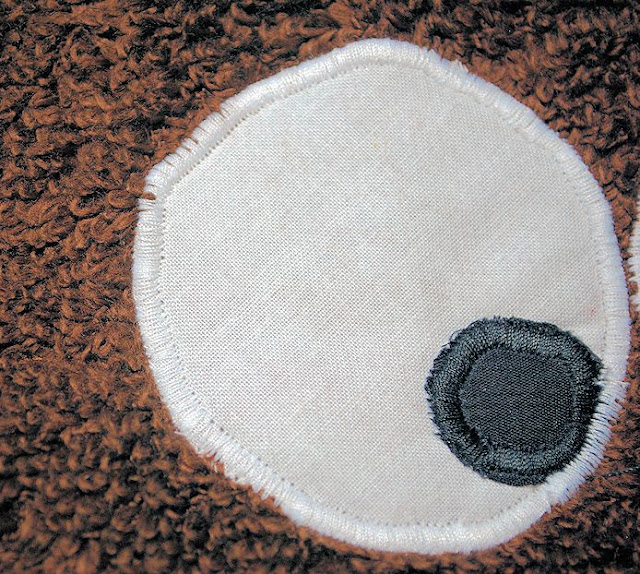
Step 5: Iron your eyes in place (or you can skip this step and just sew them in place).
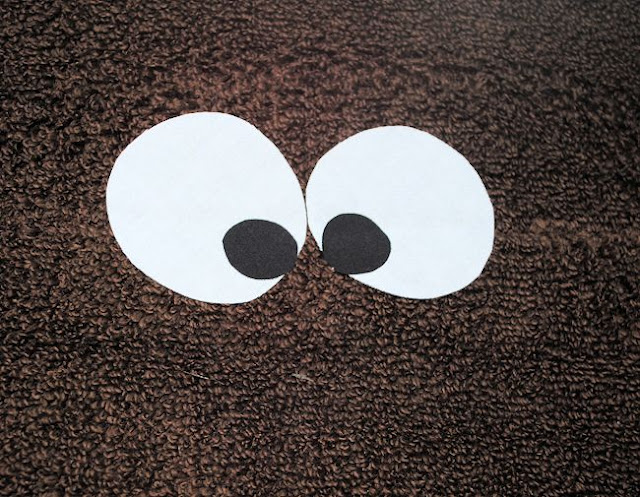
Step 6: Using a tight applique zigzag stitch, sew around your eyes and eyeballs:
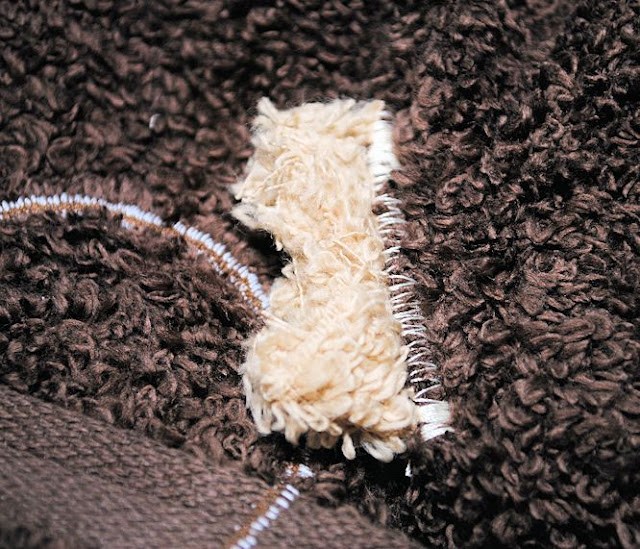
Step 7: Now, with your light brown towel you need to cut out the nose and the ears. You need 2 nose pieces and 4 ear pieces. Make them basically half circles but with a little extra length on them:
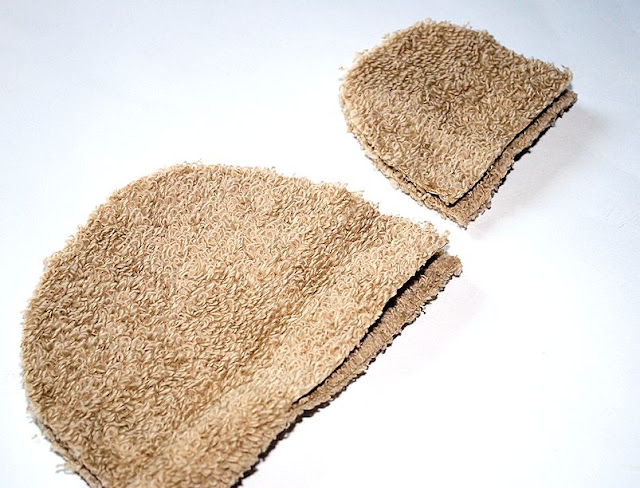
Step 8: Sew around them leaving the straight edge open to turn them. Turn them right side out. Sew your nose in place with another tight zig-zag stitch:
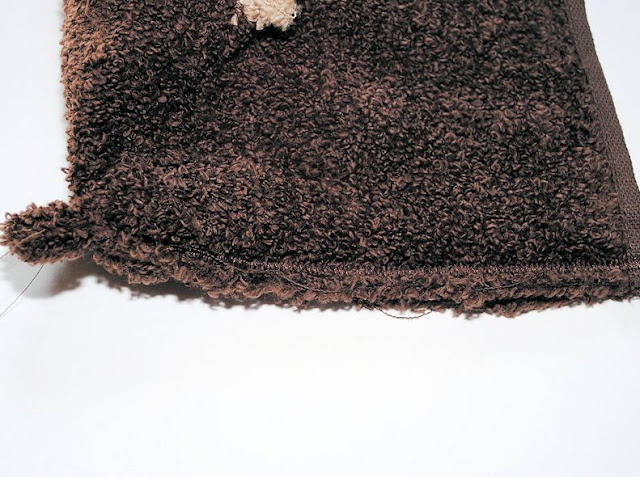
Step 9: Now, for the ears, figure out where you want them on the top of the bath towel and then cut a small slit through the towel. The only thing to remember is to make it smaller than the width of the ears. Slide the ears down into place. Because the slit is smaller than them they will scrunch up a little. This is good.
On the wrong side of the towel, zig zag your ears in place:
Guess what? Your face is done!
Step 10: Now, fold the hooded towel in half with the face on the inside. Zig zag up the raw edge of the towel to form your hood:
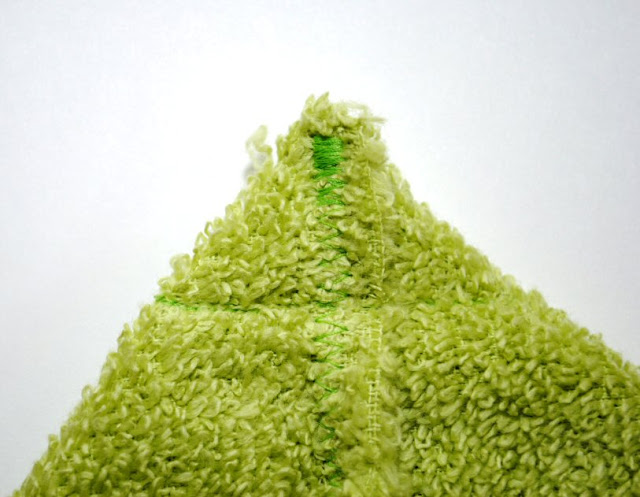
I’m going to show you this next part with my frog towel just because the pictures explain it well. Do this with your monkey. Turn the top of the towel so that it looks like this:
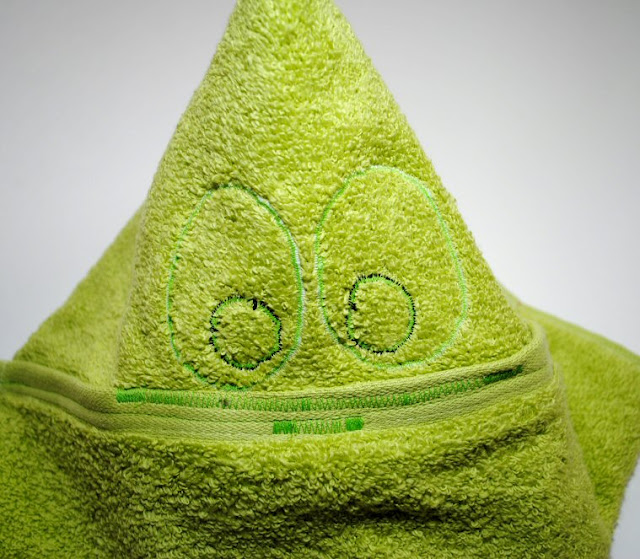
Step 11: Then sew a straight line to form a triangle at the tip. Then snip off the very tip of the towel. This just gives your monkey less of a pointy head.
Step 12: For the next step, just attach your head. I like to make a nice little pleat in my towel:

Step 13: Sew that pleat in place and then zig zag your head onto your towel like this:

That’s all it take – you have yourself a monkey hooded towel. As for my model, I think he likes it!

Is it just me or is he adorable?
Now, be sure to check out the Ladybug and the Frog as well!
How does this DIY Hooded Towel benefit your child?
The DIY hooded towel offers a cozy and comforting experience during bath time. It keeps your child warm, preventing chills after a bath. Plus, you can customize it with their favorite patterns or characters, making bath time more enjoyable and exciting for them. This handmade towel also makes a great gift for special occasions.
What Are Some Other Ideas for Hooded Towels?
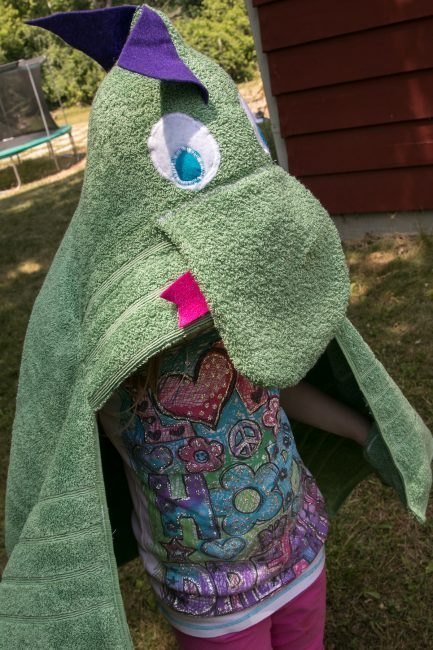
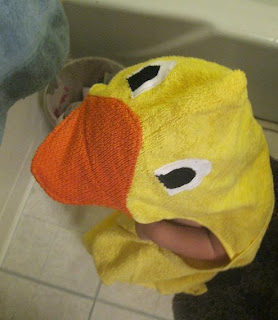
Amber just showed how to make a Monkey and has tutorials for a ladybug and frog over on her blog as well. Genie from the Sew and Tell Project also created a Dragon for us a number years ago that I'll show below and I also made Anne the duck one below. The possibilities are endless!
Conclusion
In conclusion, creating a personalized hooded towel for your child not only adds a touch of uniqueness but also provides practical benefits. By following the step-by-step instructions and using suitable fabric you can ensure durability and comfort for your little one. My older kidseven still use these hooded towels. They also make great handmade gifts! So, gather the necessary supplies and get started on this fun and rewarding project that your child will love.
Thanks again for joining us today to learn how to make a hooded towel! Before you leave, make sure to join our Facebook Group and follow us on Instagram! Happy Sewing!