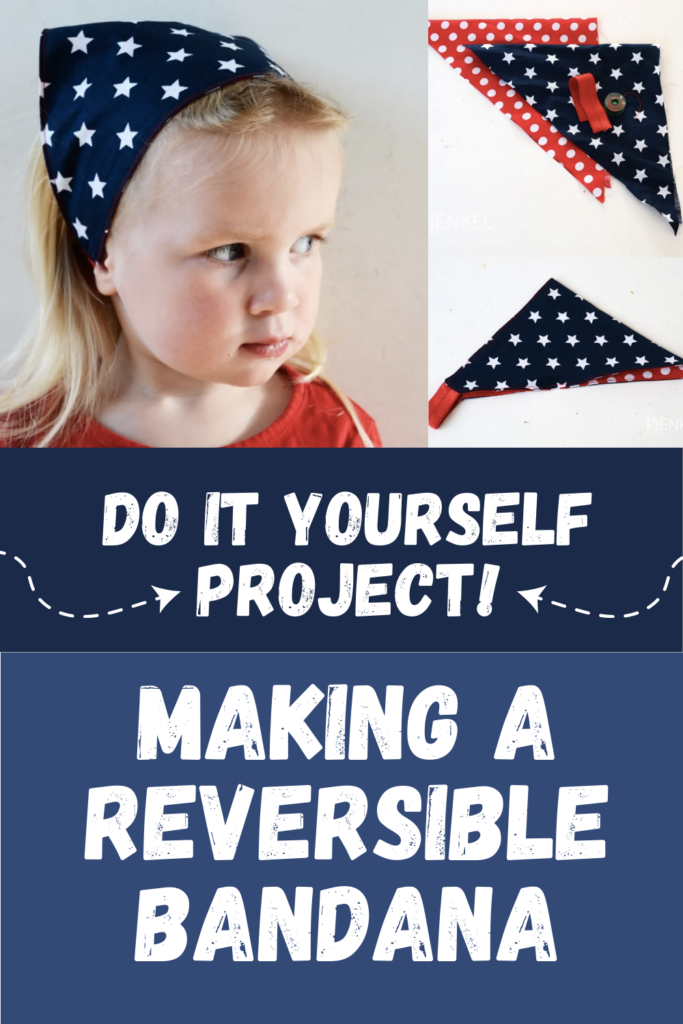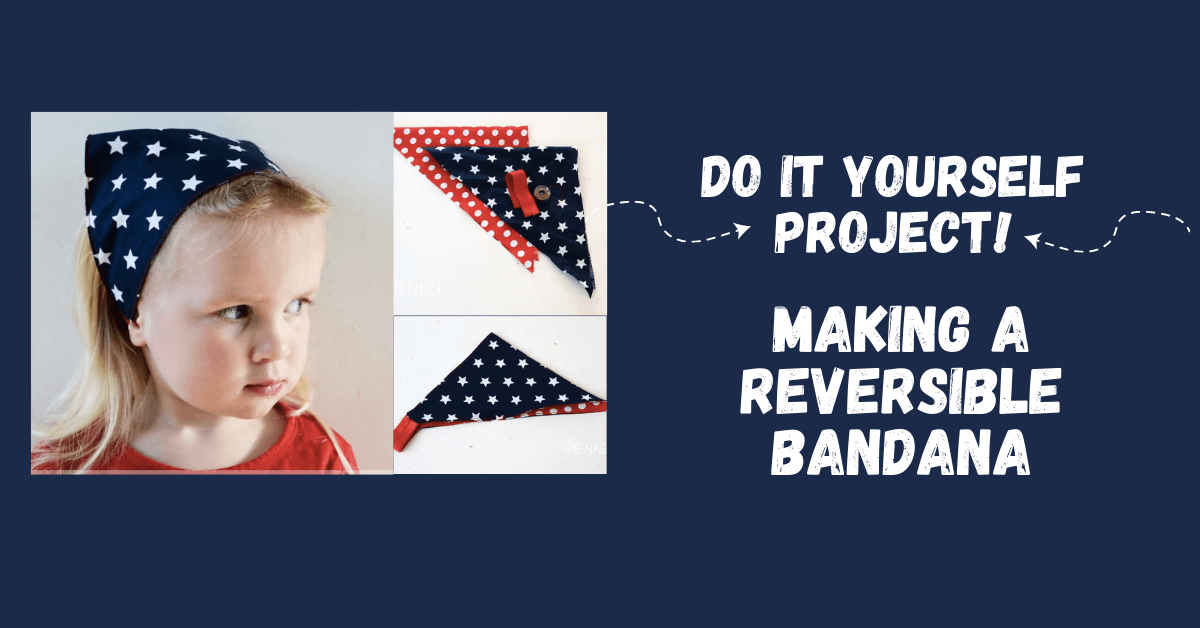
How to Make a Bandana | Step-by-Step Tutorial
In this tutorial, Nienke will guide you through the process of of how to make a bandana - in fact, a reversible bandana. Although summer may not be here yet, a few sunny days might have already lifted your spirits. This is an excellent accessory to have in any season, and making it reversible adds versatility to the design. With Nienke's step-by-step instructions, you'll be able to whip up a cute and functional bandana in no time!
Also - we know dog bandanas are popular so if you're looking to make one of those be sure to check out our Dog Bandana Tutorial. We also have a Free Bandana Druel Bib Pattern.
What Fabric Can I Make a Bandana Out of?
Cotton woven fabric is popular for bandanas because it's versatile, comfortable, breathable, soft, and absorbs moisture well. Our Quilting Cottons offer a wide variety of options. You can also choose from many other fabrics for your bandana.
How to Make a Bandana Without Sewing?
Well....there's a couple ways. The simplest way is to just fold the fabric and tie. You could also make one without sewing with a square piece of fabric and some fabric glue or adhesive tape. Start by folding the fabric in half diagonally to create a triangle shape. Then, fold the two corners of the triangle inward towards the center, overlapping them slightly. Use the fabric glue or adhesive tape to secure the corners in place. Allow the glue to dry completely before wearing your homemade bandana. The best part about this no-sew method is that you can customize your bandana with different patterns and colors to match your style. So go ahead and get creative with your designs!
How to Sew a Bandana | DIY Bandana Step-By-Step Instructions
Alright - it's time to show you how to sew a bandana. This is a great project for a beginner. While the traditional way of wearing one is by tying a triangle-shaped fabric around the neck or as a headband, it can be quite inconvenient as it tends to slip off. A better alternative is to use an elastic-backed bandana that stays securely in place without requiring any knots. This makes it easy for kids to put on themselves and ensures that the bandana stays where it should be. The stretchy elastic at the back also makes it comfortable to wear for extended periods.
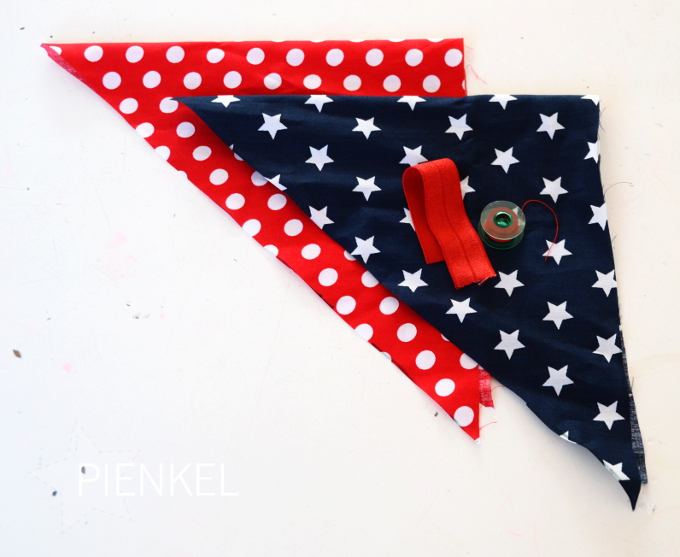
Fabric & Materials:
- Fabric: I used two different prints. However, this project is perfect for stash busting, colour blocking or patchwork of any kind. I prefer to use quilting cotton but other fabrics might work as well. This tutorial is not meant for knit or stretch fabrics.
- Fold over elastic: Just a small piece.
- Sewing Machine
- Matching thread and other regular sewing notions.
Tutorial
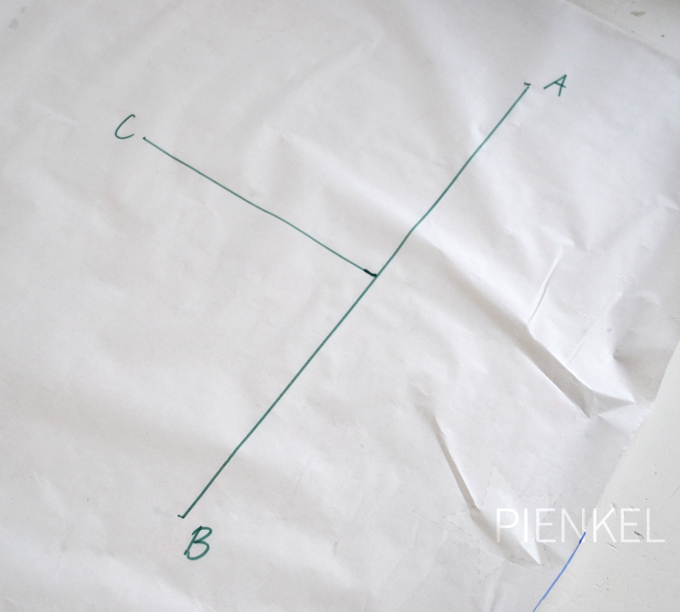
Step 1: Your first step in how to make a bandana is deciding on the size of your triangles. Don't assume there's a standard size - take measurements! To get this measurement, measure the head of the designated wearer along the line where the bandana should be. My girl has a head circumference of 19″.
The long size of the triangle will be 3/4 of this amount, so 12 2/3″. This is the line A-B on the photo above. Mark the middle of the line and use your ruler to draw a line square out of that mark, up to point C. The length of this line is half of the line A-B, so in this case it’s 6 1/3″. Connect A, B and C to form a triangle.
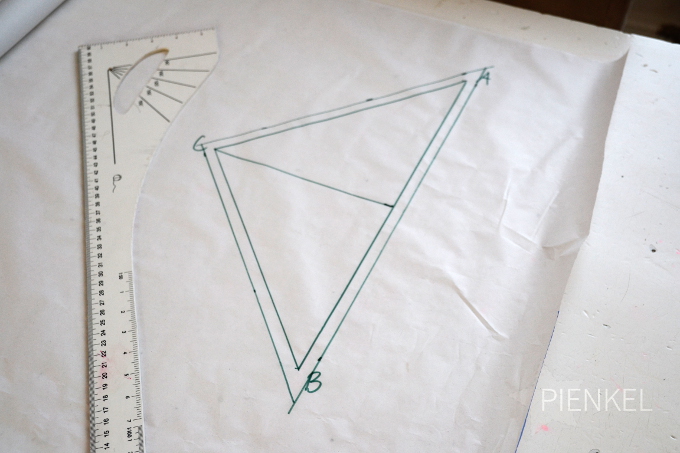
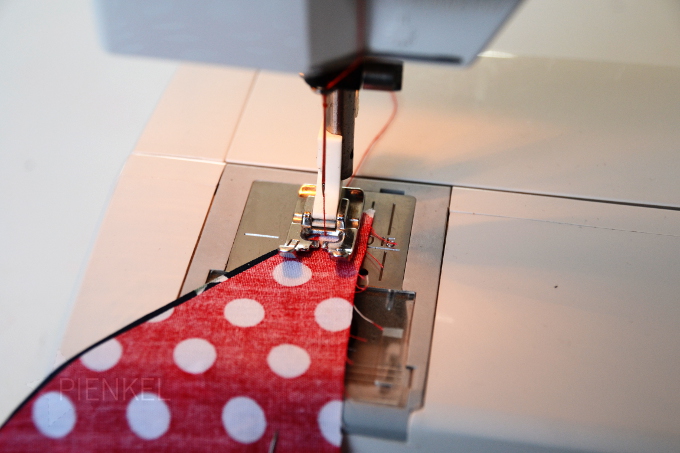
Step 2: Add 3/8″ all around the triangle for seam allowances. Use your rotary cutter or scissors to cut one of these triangles from each of your fabrics. Place them right sides together and sew along the long line with a straight stitch and the added 3/8″ seam allowance, as pictured below.
Step 3: Press the seam open and place your piece of elastic along the seam, on the right side of the fabric. I used 1/4 of the total head circumference as the length of the elastic, since I used 3/4 of it for the fabric triangle.
I figured the length of the elastic that would disappear in sewing would make it nicely stretched in wearing. However, it is a bit too tight now, so I recommend a length of elastic of 1/4 of the measured head circumference, plus 1/4″ for seam allowances.

Step 4: Place the elastic along the seam, at a distance from the corner of the triangle, so that the side of the elastic touches the side of the triangle, as pictured above. Close the triangle again, right sides together, with the elastic sandwiched in between at one corner. Sew along one side, with a 3/8″ seam allowance.
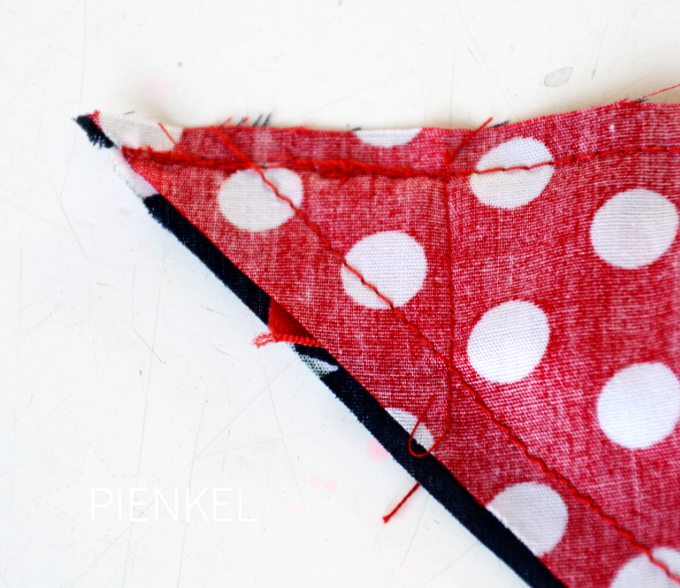
Step 5: Now sew straight across, from the place where the elastic crosses the seam you just sewed to the first seam of the triangle, as pictured above. Cut off the small point of the triangle, as pictured below.
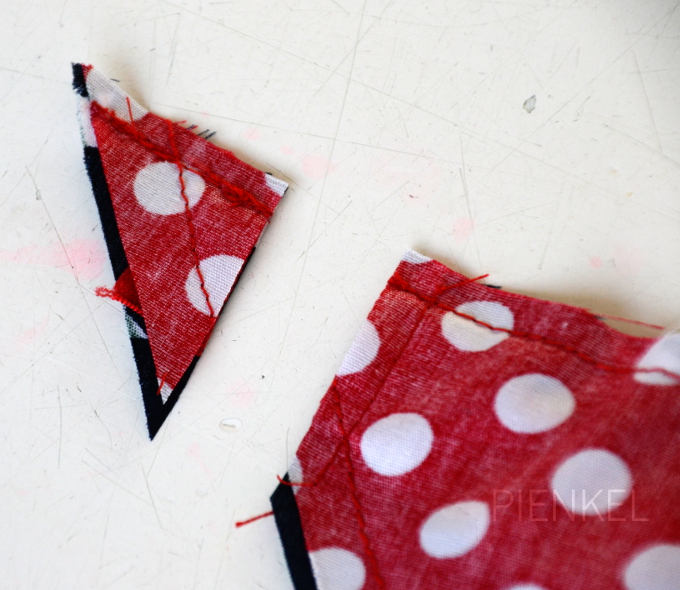
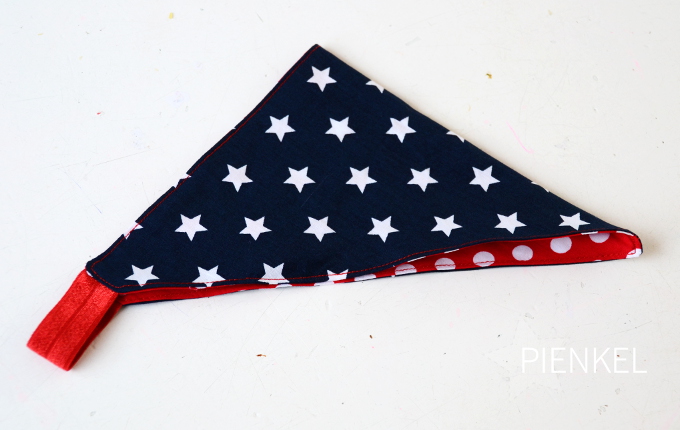
Step 6: Repeat the process for the last side of the triangle. However, do not sew this last seam completely, but leave an opening to turn the bandana. After sewing the seam, turn it right side out. Make sure you press out all corners properly.
A chopstick might be useful with this part of the job! I often use my – closed – kitchen scissors if I can’t find anything better and though it usually works out fine, I have pierced through corners more than once… So I recommend something slightly less pointy, like a chopstick. After turning it right side out, please give it a press and topstitch along all edges. This is also decorative, keeps the layers in place, and closes the opening in the last seam as well.
There you have it. You can now create your own bandana with ease. Once completed, it's perfect for keeping kids cool and stylish on sunny days. We hope you found this tutorial helpful and that you enjoy the process of creating something unique and personalized. It's always satisfying to create something yourself, and the joy of seeing someone wear something you made is priceless.
How to Customize a Bandana
Customizing a bandana is a fun and creative way to add your personal touch to this versatile accessory. Whether you want to showcase your favorite design, promote a cause, or simply create a unique fashion statement, the possibilities are endless. To customize a bandana, consider adding embellishments such as iron-on patches, embroidery, or fabric paint to bring your vision to life. You can also experiment with different folding techniques to create interesting patterns and designs. With a little imagination and some basic crafting supplies, you can transform an ordinary bandana into a one-of-a-kind accessory that reflects your individuality and creativity. So go ahead and let your imagination run wild – the world is your canvas!
Thank you for joining us today to learn how to make a bandana. To sum it up, making your own bandana can be a fun and creative project that allows you to customize the design and style to suit your personal taste. Whether you're looking for a unique accessory or a thoughtful gift, creating a DIY bandana is a great way to express your individuality. With just a few simple steps and materials, you can have a stylish bandana that is both fashionable and functional. So why not give it a try? Get started on your DIY bandana project today and show off your creativity.
If you need help with any of your sewing projects then make sure to join our Peek-a-Boo Pattern Shop Facebook Group. Also, be sure to sign up for our Newsletter to keep up to date on sewing tutorials and new sewing patterns.