DIY Cinderella Dress Pattern | Free Costume
Today I have a FREE Cinderella Dress Pattern to share with you! Every girl needs their own Cinderella dress up costume whether it’s for Halloween or just for having as a princess dress costume to keep around the house. This blog post has the tutorial and you can get the FREE Pattern Here after you sign up for our Newsletter.
For us, the Cinderella dress obsession started when I took my daughter to see the new Cinderella movie earlier this year. She immediately fell in love with her amazing dress and wanted her own Cinderella Halloween costume! And since I enjoy playing fairy godmother I sewed one up for my little Cinderella for Halloween. Childhood should be magical 🙂
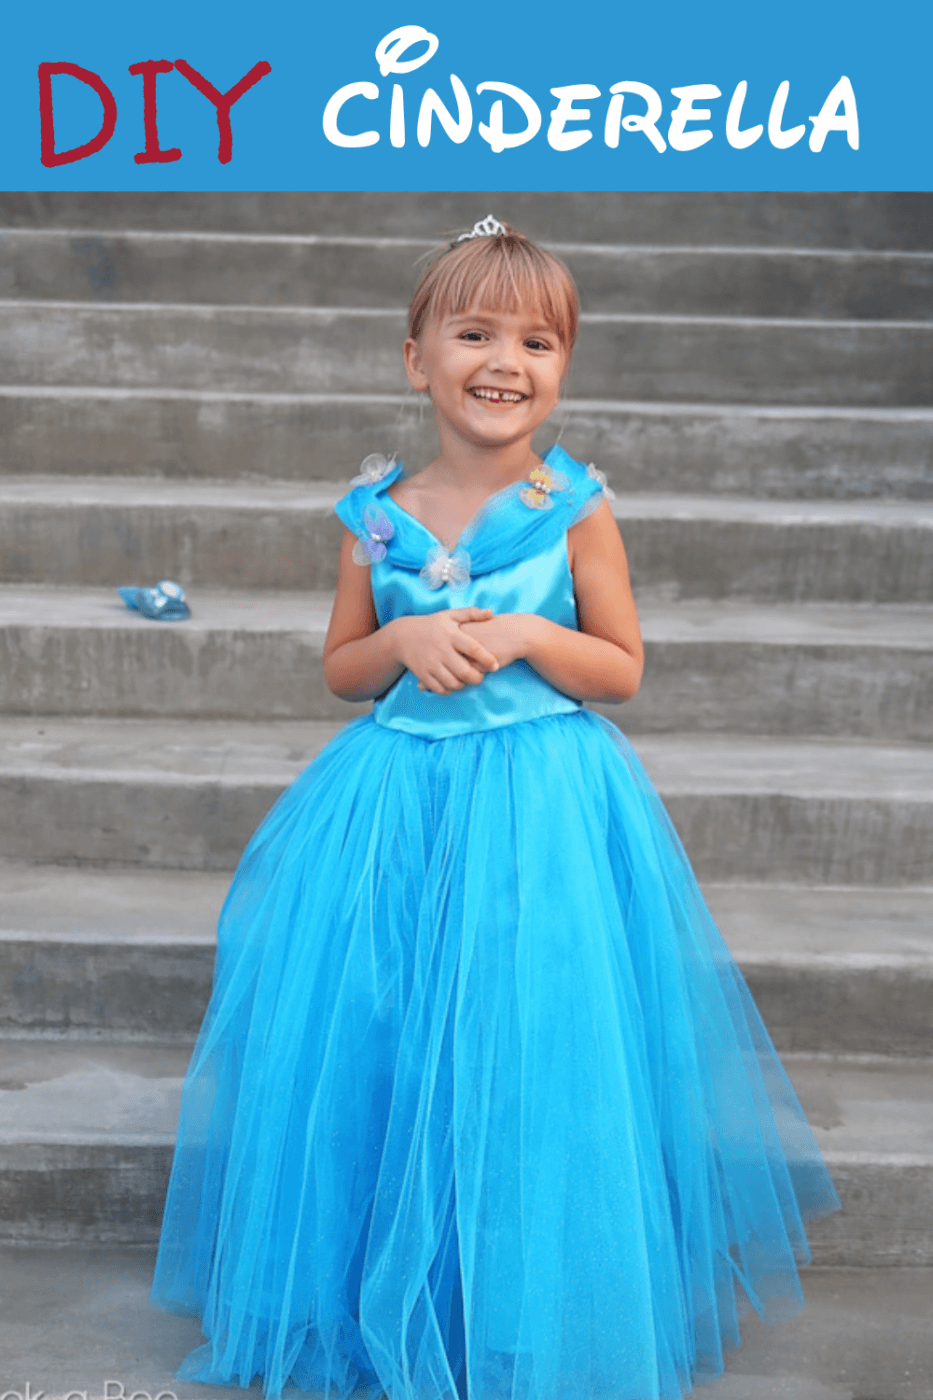
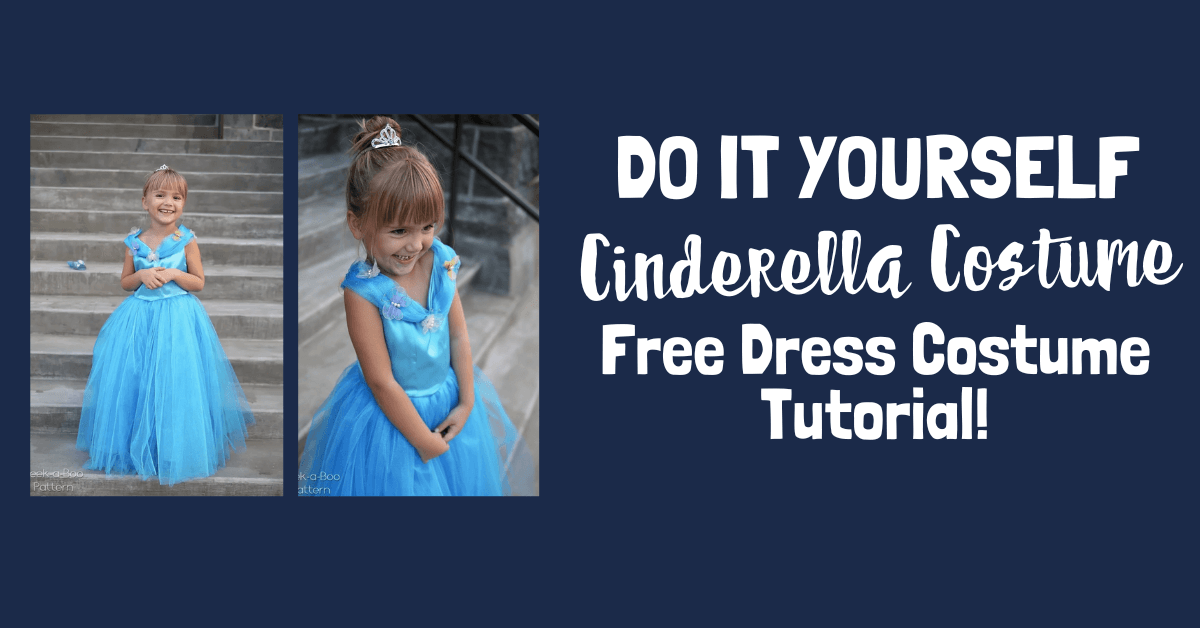
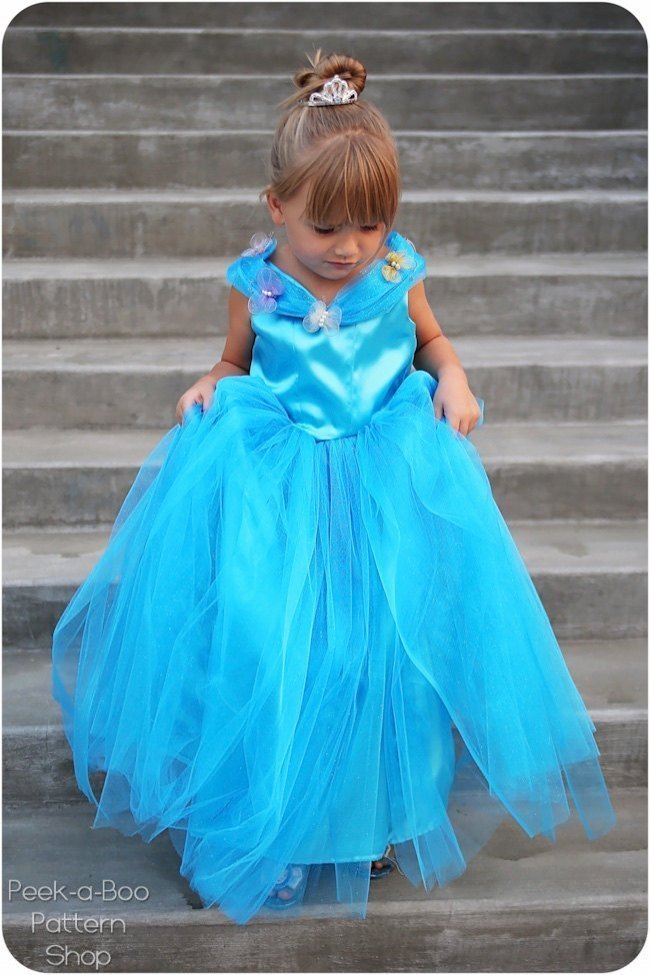
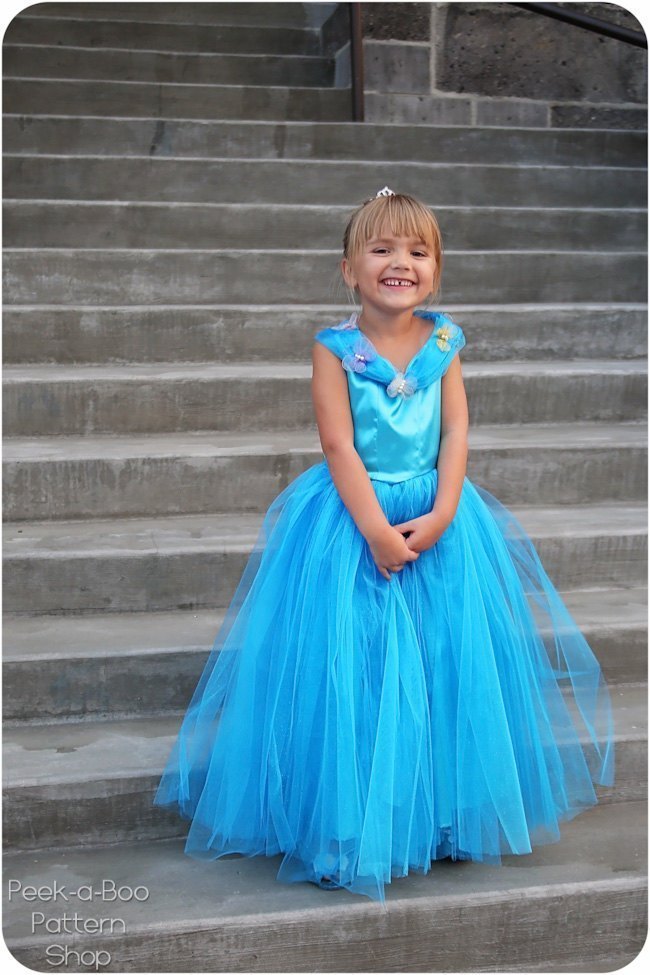
Just so you know what you’re getting into with this DIY project costume, here’s the completed dress for Cinderella.
DIY Cinderella Dress Pattern
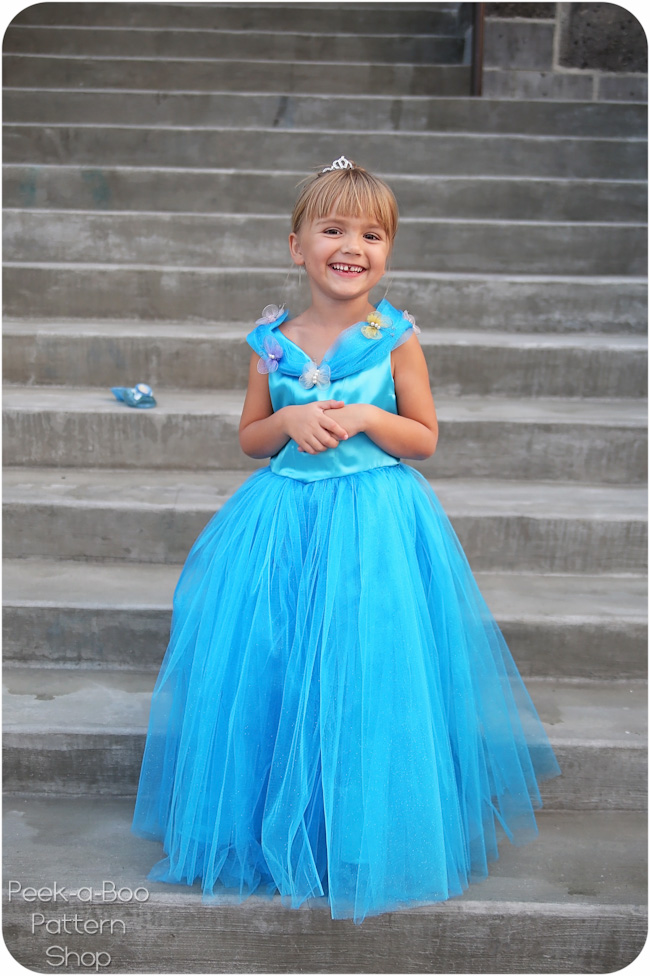
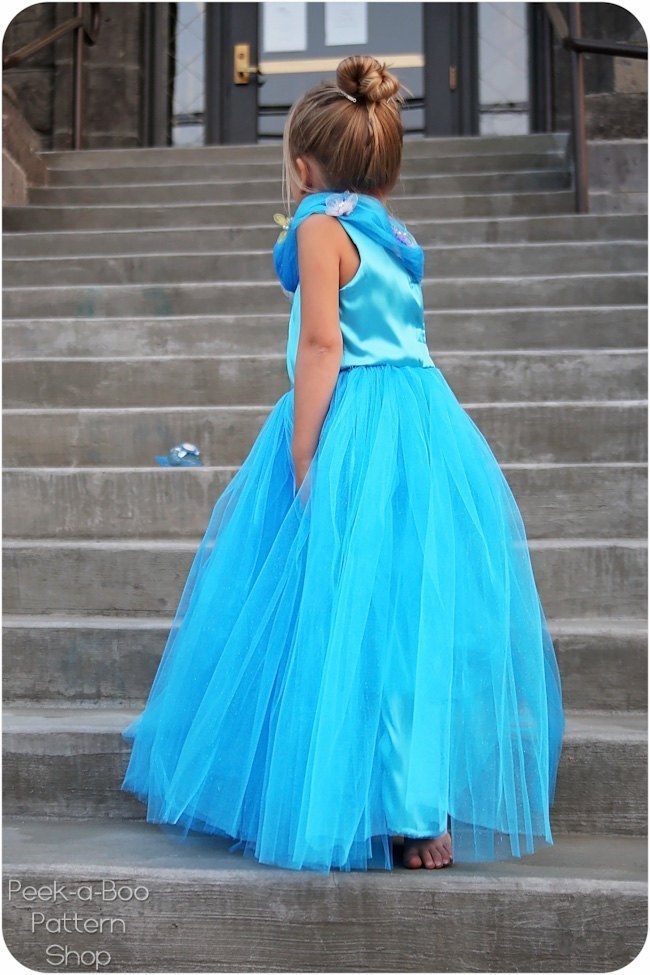
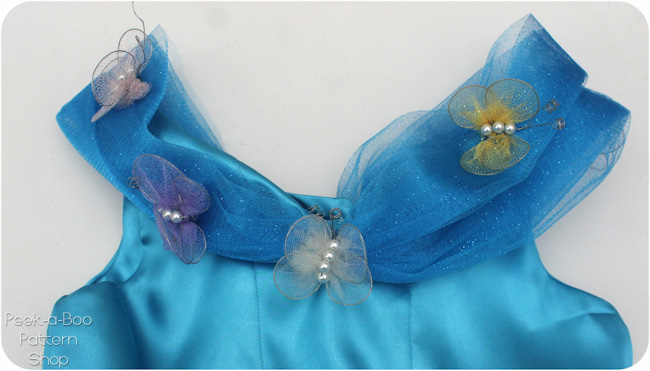
Of course the Cinderella dress wouldn’t be complete without the butterflies!
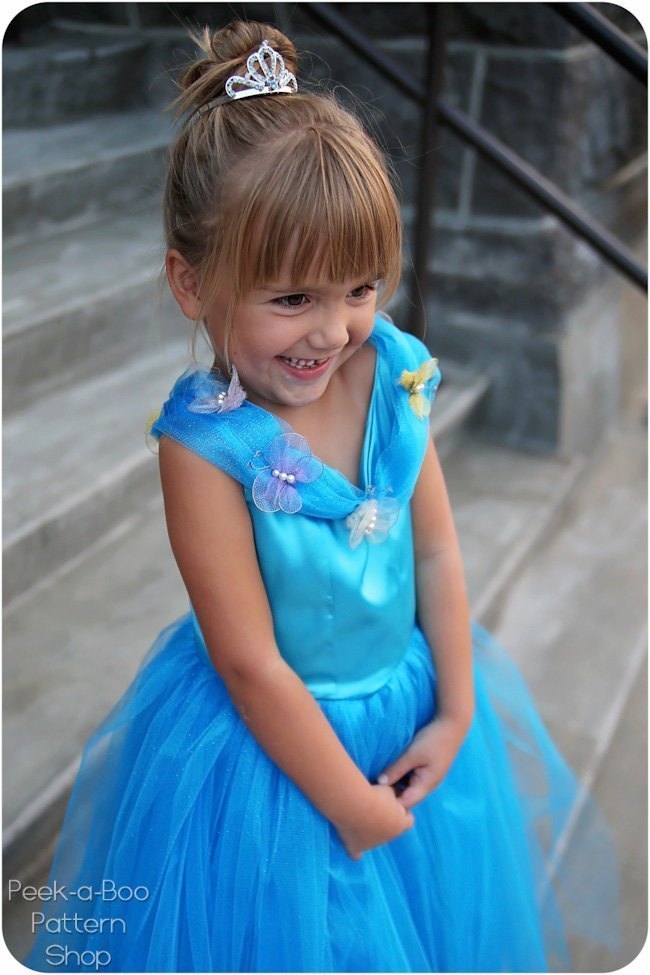
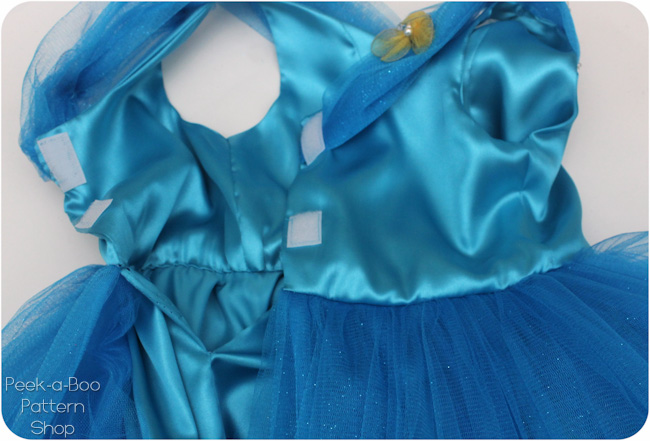
The back of Cinderella’s costume has a simple velcro closure for easy on/off.
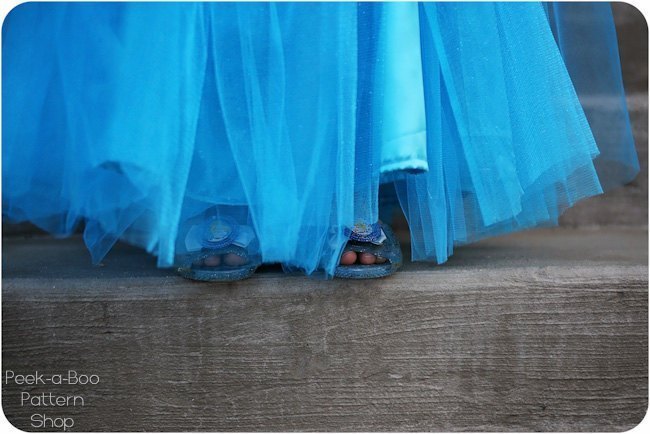
So much tulle fabric but so worth it! The entire Cinderella dress is fully lined so no need to worry about itching in this Cinderella costume.
Hurry Cinderella – it’s almost midnight!
Don’t forget your glass slipper Cinderella!
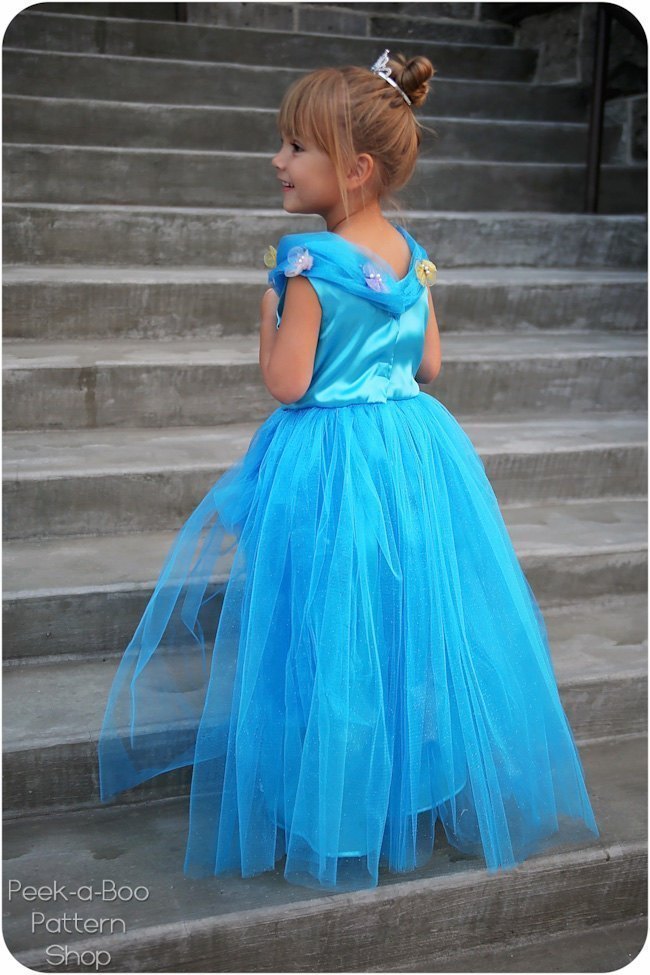
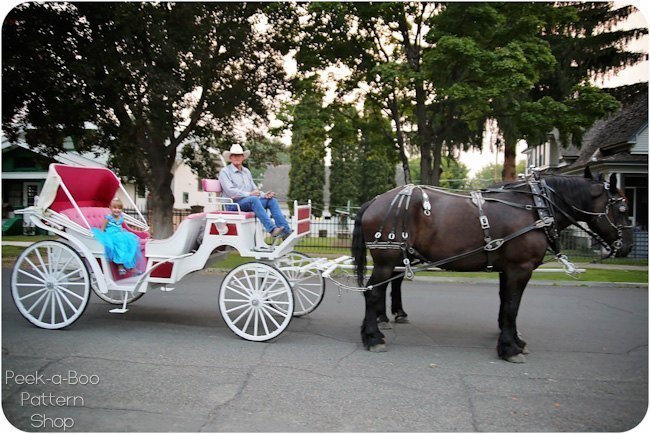
Off she goes!
Ready to sew your own DIY Cinderella Costume?
This pattern is for a size 5 (24″ chest circumference). My daughter has a 22″ chest so it’s a little roomy on her but I wanted room to layer over warm clothing on Halloween. You can easily overlap the back a little more/less to customize the fit. My daughter is 44″ tall and the dress sweeps the floor. If you plan to adjust the skirt length on this costume you may need additional fabric
Cinderella Halloween Costume Materials List
- Sewing Pattern! – The pattern is free when you Subscribe to our Newsletter or join our Facebook Group (Coupon Code is Found in New Subscriber E-mail and/or First Post in Facebook Group): Download it here
- 8.5 yards tulle fabric (54″ bolt width)
- 1.5 yards satin (56/58″ bolt width. Costume Satin comes on a narrower bolt and you will need additional fabric if you choose to use that)
- Velcro for Back Closure
- Sewing Machine / Sewing and Craft Supplies
Materials List for Butterflies
- 1/8 yard tulle in 3-4 colors
- 3-4 beads/butterfly
- Fine gauge wire
Cinderella DIY Costume Instructions
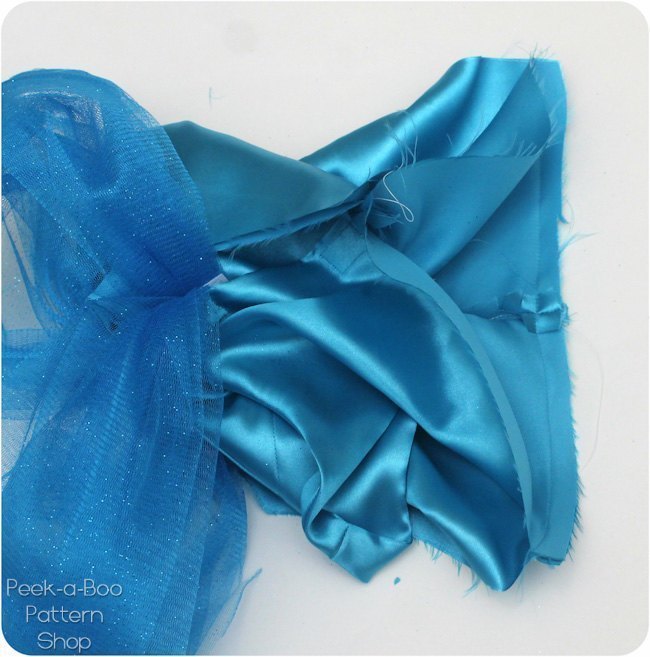
First, print your DIY Cinderella Costume pattern out at 100% and check the 1″ box to make sure the costume pattern pieces printed correctly. Tape the bodice pieces together along the dashed lines. Use a 1/2″ seam allowance.
1. With right sides together (RST) sew the center bodice piece to one side bodice piece with the edges matched at the seam allowance.
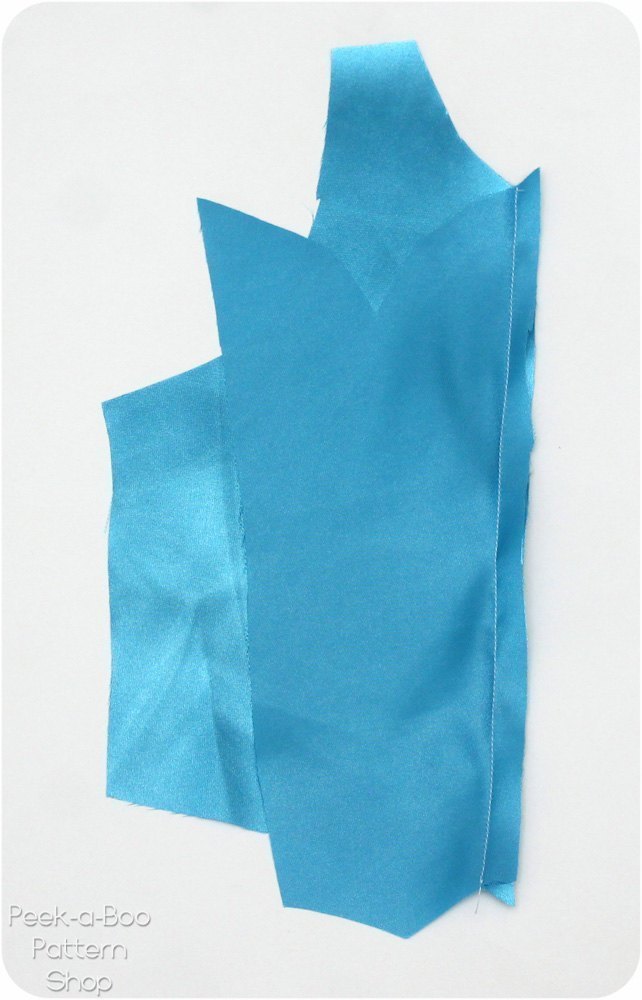
2. Repeat on the other side
3. With RST sew the back bodice pieces to the front bodice at the shoulder seams. Repeat stesp 1-3 with your 2nd set of pieces
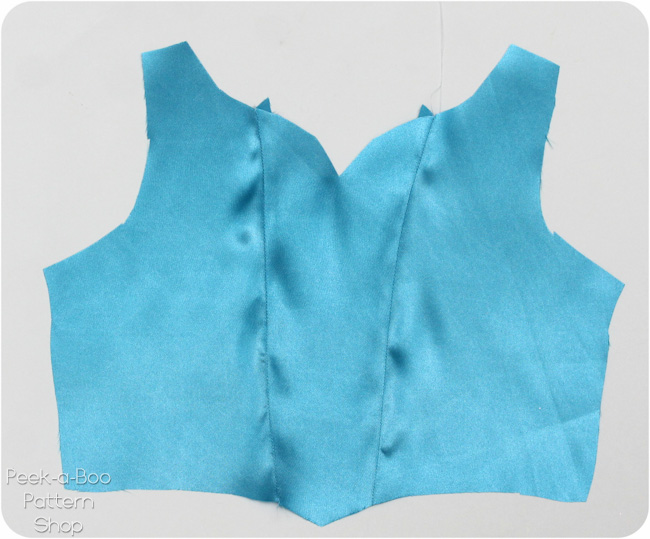
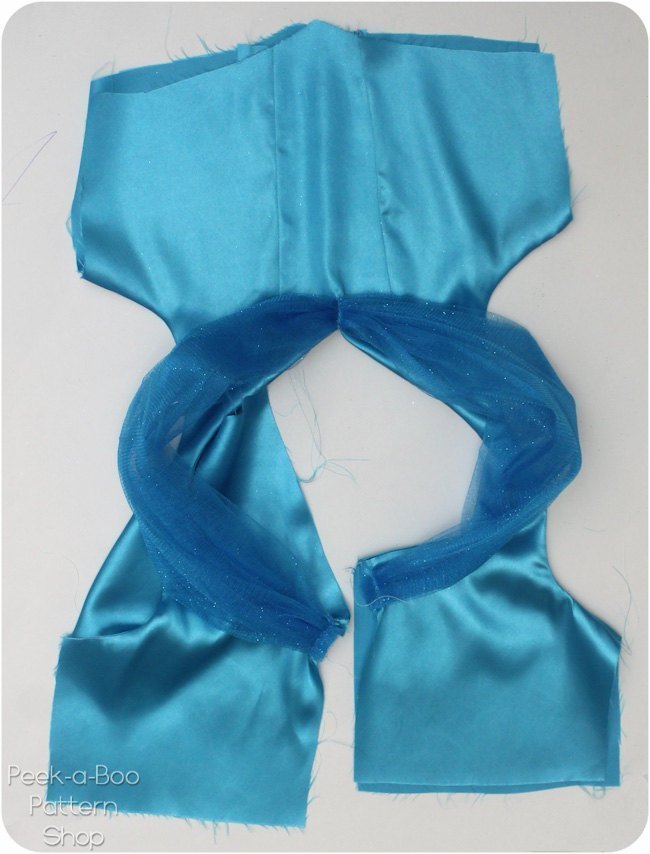
4. With RST sew the outer bodice to the bodice lining along the arm openings and neckline. Do not sew the side seams or center back. Clip your seam allowance along the curves.

5. Turn the bodice right side out by pulling the back pieces through the shoulders. It will be a bit tight but it does fit. Press flat.
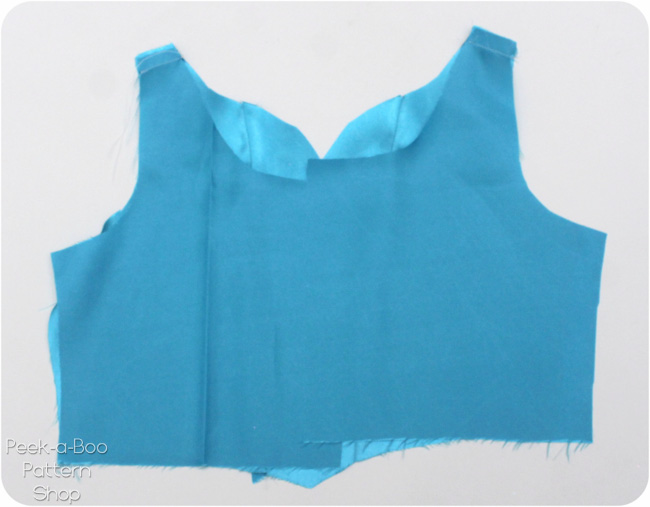
6. Gather the center of the shoulder sash together with your fingers and sew over it a few times to secure.
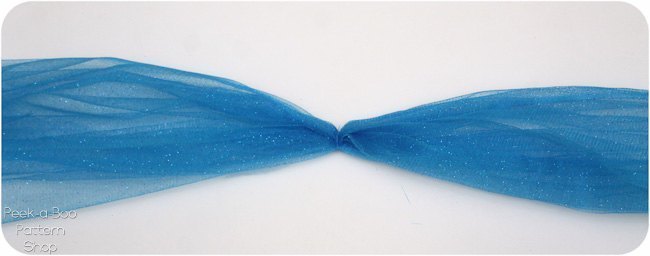
7. Topstitch the gathered point of the shoulder sash to the enter front of the dress. Gather the tail ends with your fingers and sew to the center back opening on the outer layer of the dress only.
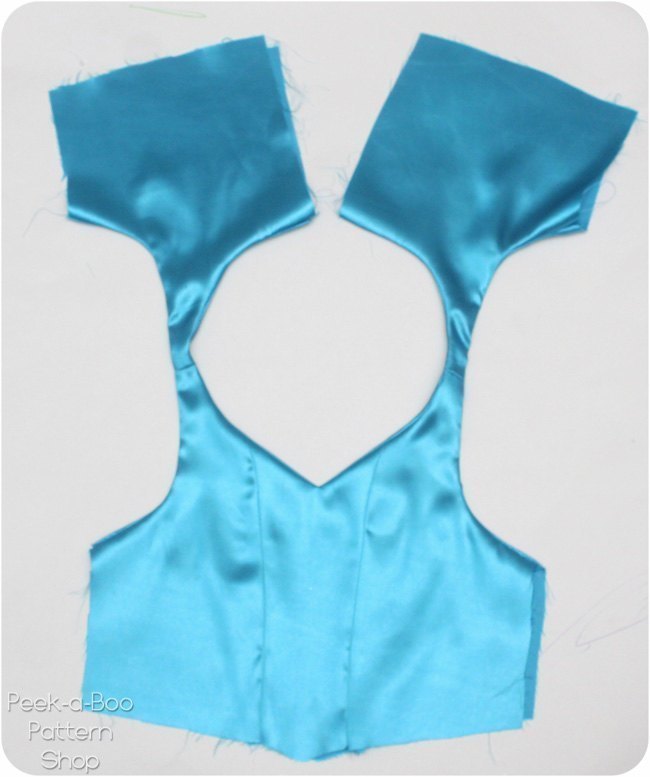
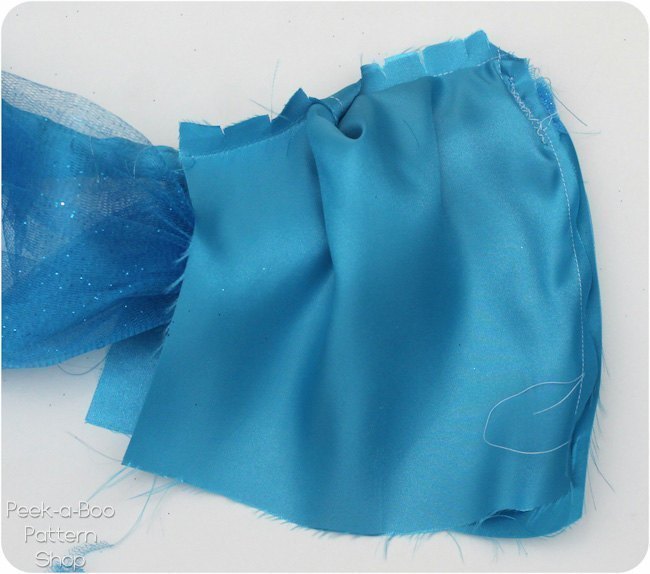
8. Flip the center back of the bodice around so right sides are together and sew together, stopping 1/2″ before the bottom edge. The tail end of the sash will be in-between the 2 layers. Clip the seam allowance at the corner.
9. Add velcro to the back opening to make the costume easy to get on and off.
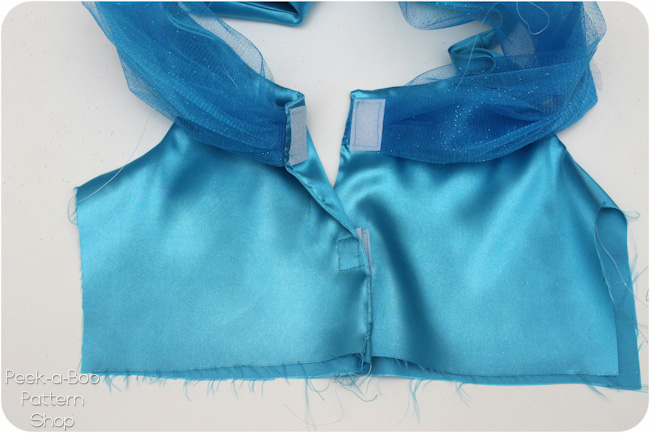
10. With RST sew the bodice to the bodice lining along the side seams
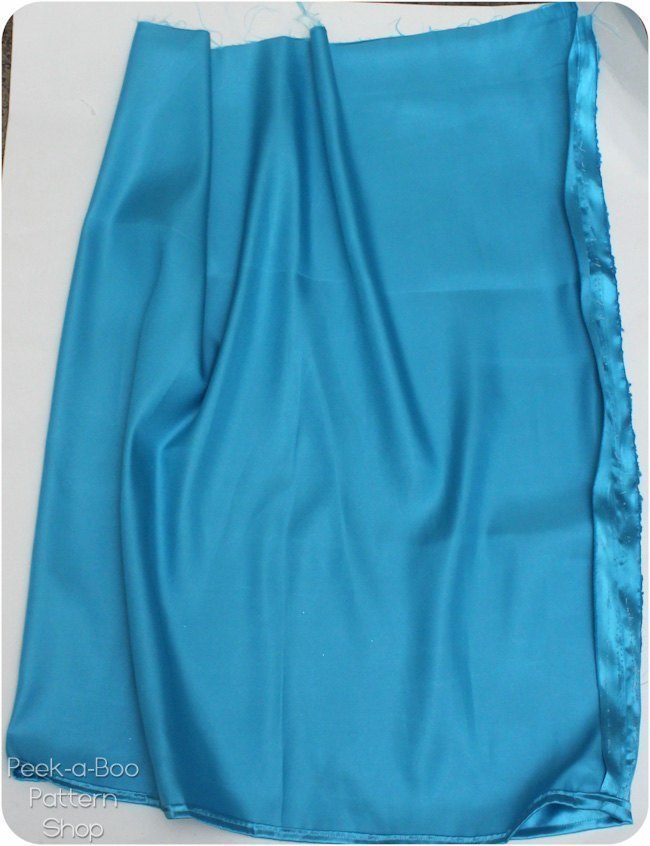
11. With RST sew the side seams of the costume skirt lining together stopping 2″ from the top edge. Fold the hem over 1/4″ twice and topstitch. Since the front bodice is angled downward, I trimmed the top edge of my skirt as well. Mark 1.5″ from the top edge at the center front point and trim at an angle. It will be gathered so don’t worry about getting this exact.
12. Gather the top edge of the skirt to match the bodice width
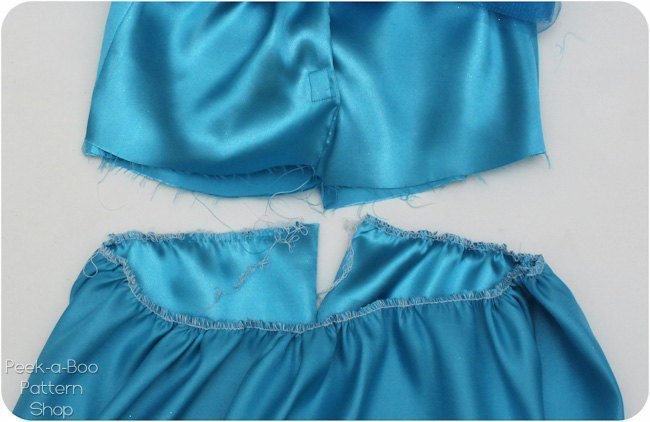
13. Gather your tulle to match the bodice width. I made 2 skirt layers of tulle (5 tulle pieces in each layer). Instead of sewing each tulle layer to the next along the sides, just overlap the pieces 1/2″ as you go.
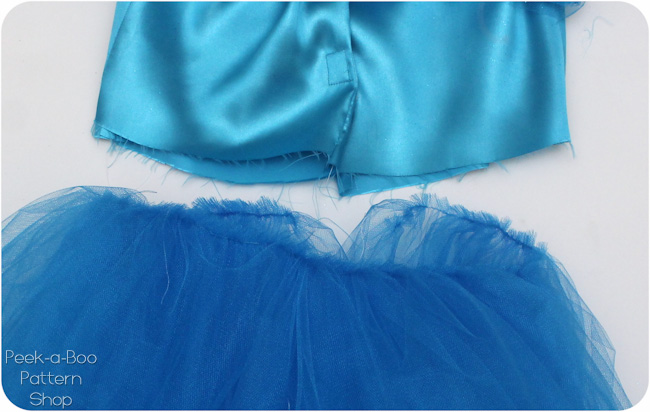
14. Slide the tulle layers over the skirt lining on the right side of the fabric. Baste together along the top edge. The tulle layers will be open in the back but the skirt is so full it’s not noticeable. 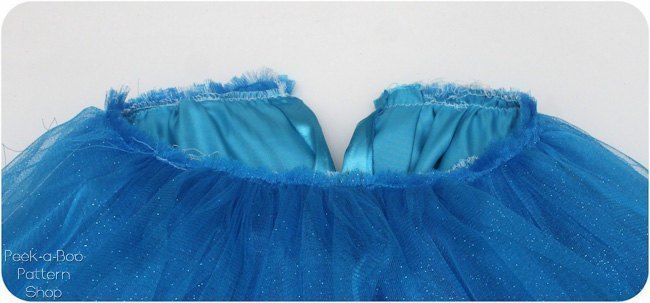
15. With RST sew the skirt to the outer layer of the bodice. Tuck the seam allowance inside the bodice and hand sew the bottom edge of the lining in place.
16. Add the butterflies to the costume! I used this tutorial from Birds Party and made 9 butterflies. We have had the antennae get stuck in the sash occasionally so you may want to leave that portion off.
There you have it – the perfect cinderella dress pattern. I hope your princess enjoys this dress as much as mine does!
Other Costumes for Cinderella or Other Princesses | Maid Dress Cinderella Dress Pattern
Before you leave, I’m going to show you one other method you can use to make up Cinderella costumes for Halloween or costumes for anytime of the year – that is our Practical Princess Costume from Peek-a-Boo Pattern Shop. The Practical Princess sewing pattern can be used to create numerous different dresses, tops, and costumes inspired by your favorite princesses.
If you like sewing with knit fabric, or want to make costumes more comfortable for your daughter to wear year round, then this is the sewing pattern for you. It makes a great costume as well as a great everyday outfit.
The practical princess pattern includes the following options:
- Bodice: Basic or Corset / Embellished
- Skirt: Peplum or Dress Length
- Sleeves: Puff Sleeves, Gathered Sleeves in short, 3/4 or long length, or Sleeveless
- Optional Apron
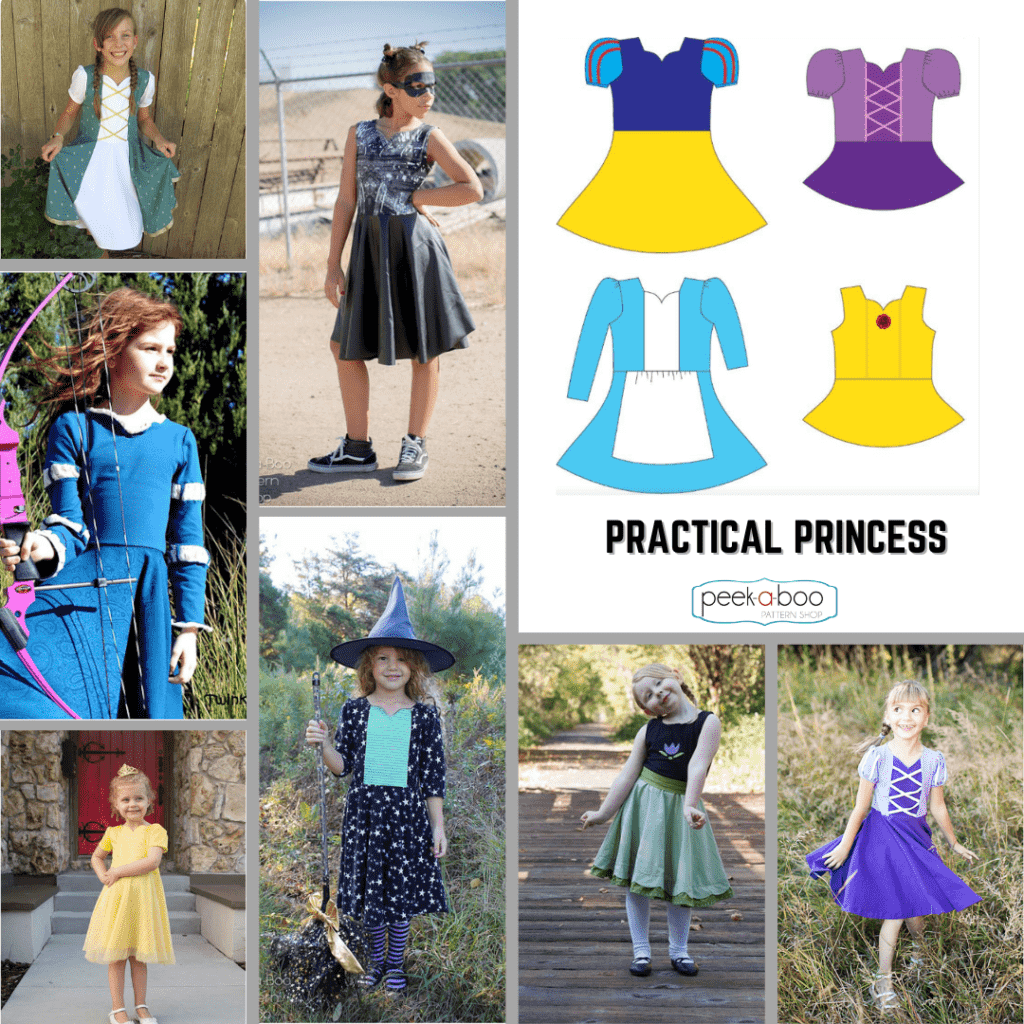
Our customers have used the practical princess to create a wide variety of costumes, including numerous versions of Cinderella. We especially like how this Cinderella Maid Costume turned out:
Everyone loves the Practical Princess:
“Awesome Pattern. Just finished making two reversible princess in black dresses using this pattern. I’m not a very good sewer, but my daughter and her friend requested and I tried to oblige. The pattern was very easy to use and follow. I really loved the simplicity of it (especially because I complicated it by making reversible dresses). Highly recommend.
“One of my Pre-K students saw a picture of this dress. She asked me to make one for her. It was fun to create a special dress. The pattern was easy to use, instructions easy to follow. I loved ordering my fabrics from this site as well as getting the pattern. I know I will be making more of these sweet dresses.”
Thank you for joining us to see how to make a DIY Cinderella costume! If you’re interested in other costumes for Halloween take a look below.
What are your tips for dressing up as a princess?
When dressing up as a princess, choosing the right dress pattern is key. Look for patterns that have a fitted bodice and full skirt to create that classic princess silhouette. Don't forget to accessorize with sparkly jewelry, a tiara, and glass slippers for the perfect royal look!
Other Halloween Costumes
If you’re having second thoughts on Cinderella, then we have plenty of other costumes for you too.
Our customers have made hundreds of different Halloween costumes using our patterns at Peek-a-Boo Pattern Shop and our tutorials in the Costumes section here at Peek-a-Boo Pages. You’ll find inspiration or ideas to make hundreds of costumes. One of our most popular Halloween Costume patterns is the Ultimate Costume Creator which will help you get ready for Halloween with options to make hundreds of different costumes.
Another resource is our Peek-a-Boo Pattern Shop Facebook Group – no matter what you’re looking to make, you can search the group and there’s a good chance that someone else has made it. It’s an excellent source for Halloween costume ideas. In the very least, this Facebook Group is an excellent resource for getting help with your diy sewing projects and sharing what you’re sewing.