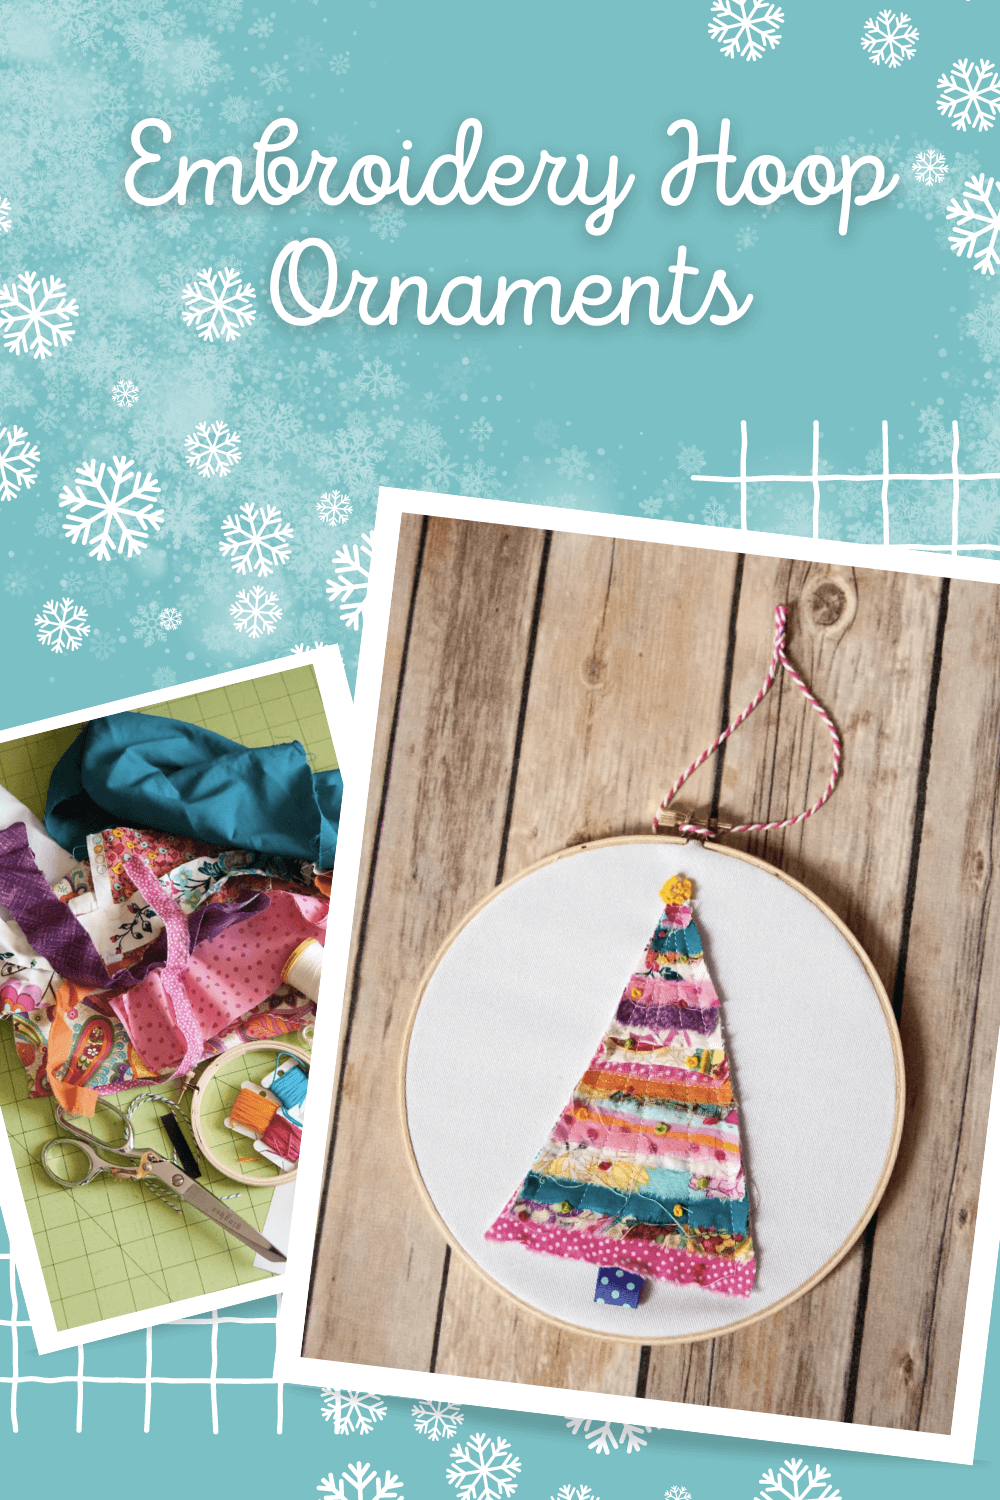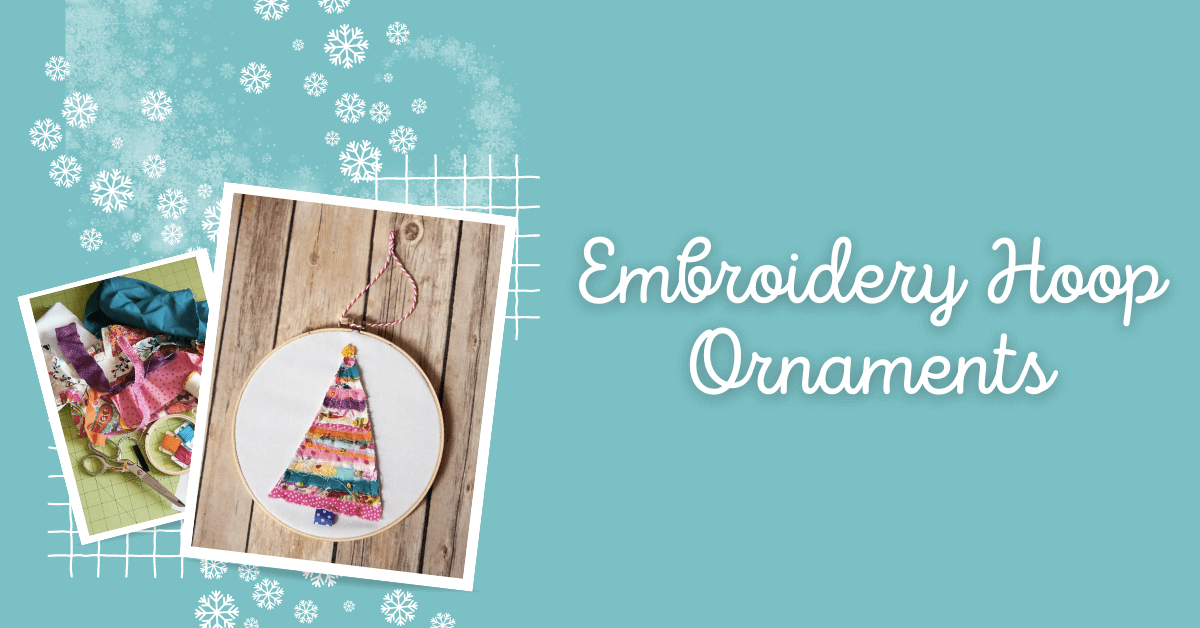
DIY Embroidery Hoop Ornaments | How to Make Them
Let’s learn how to make embroidery hoop ornaments. Every year I struggle to come up with a little something to say thank you to the people that make such a difference in my life. Pinterest is chock full of ideas for simple handmade items…that everyone else makes – something like these felt ornaments.
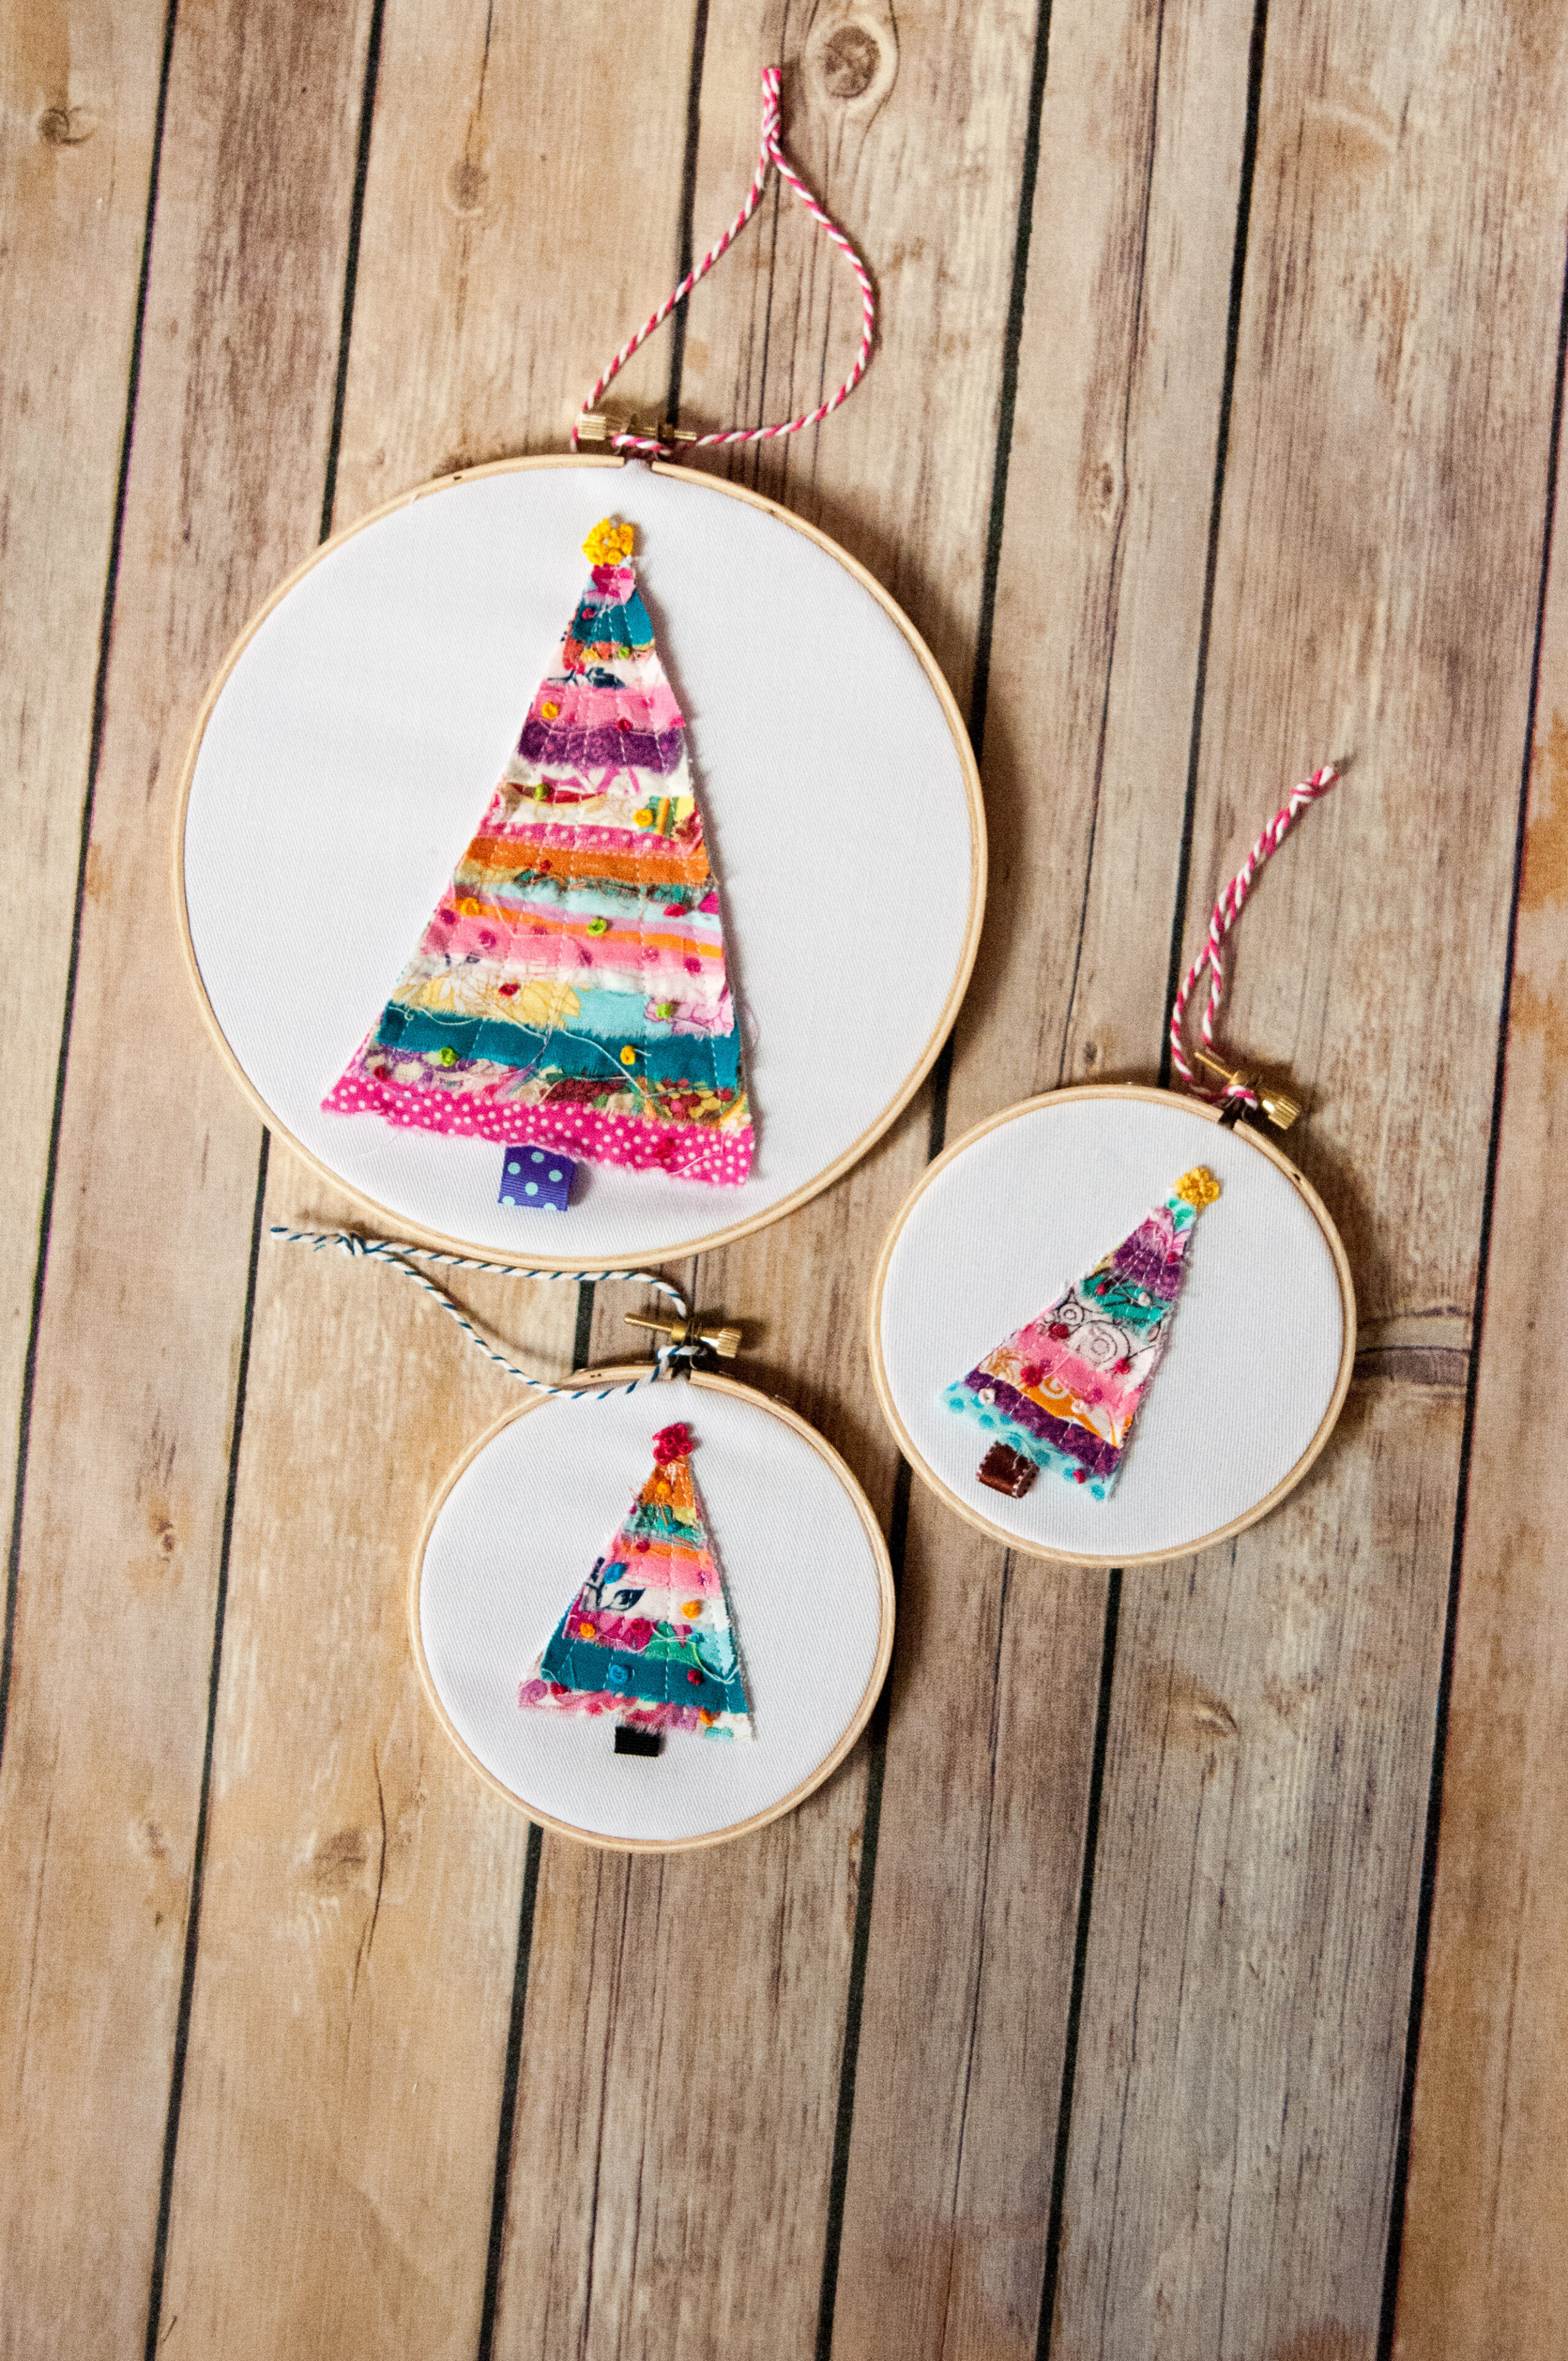
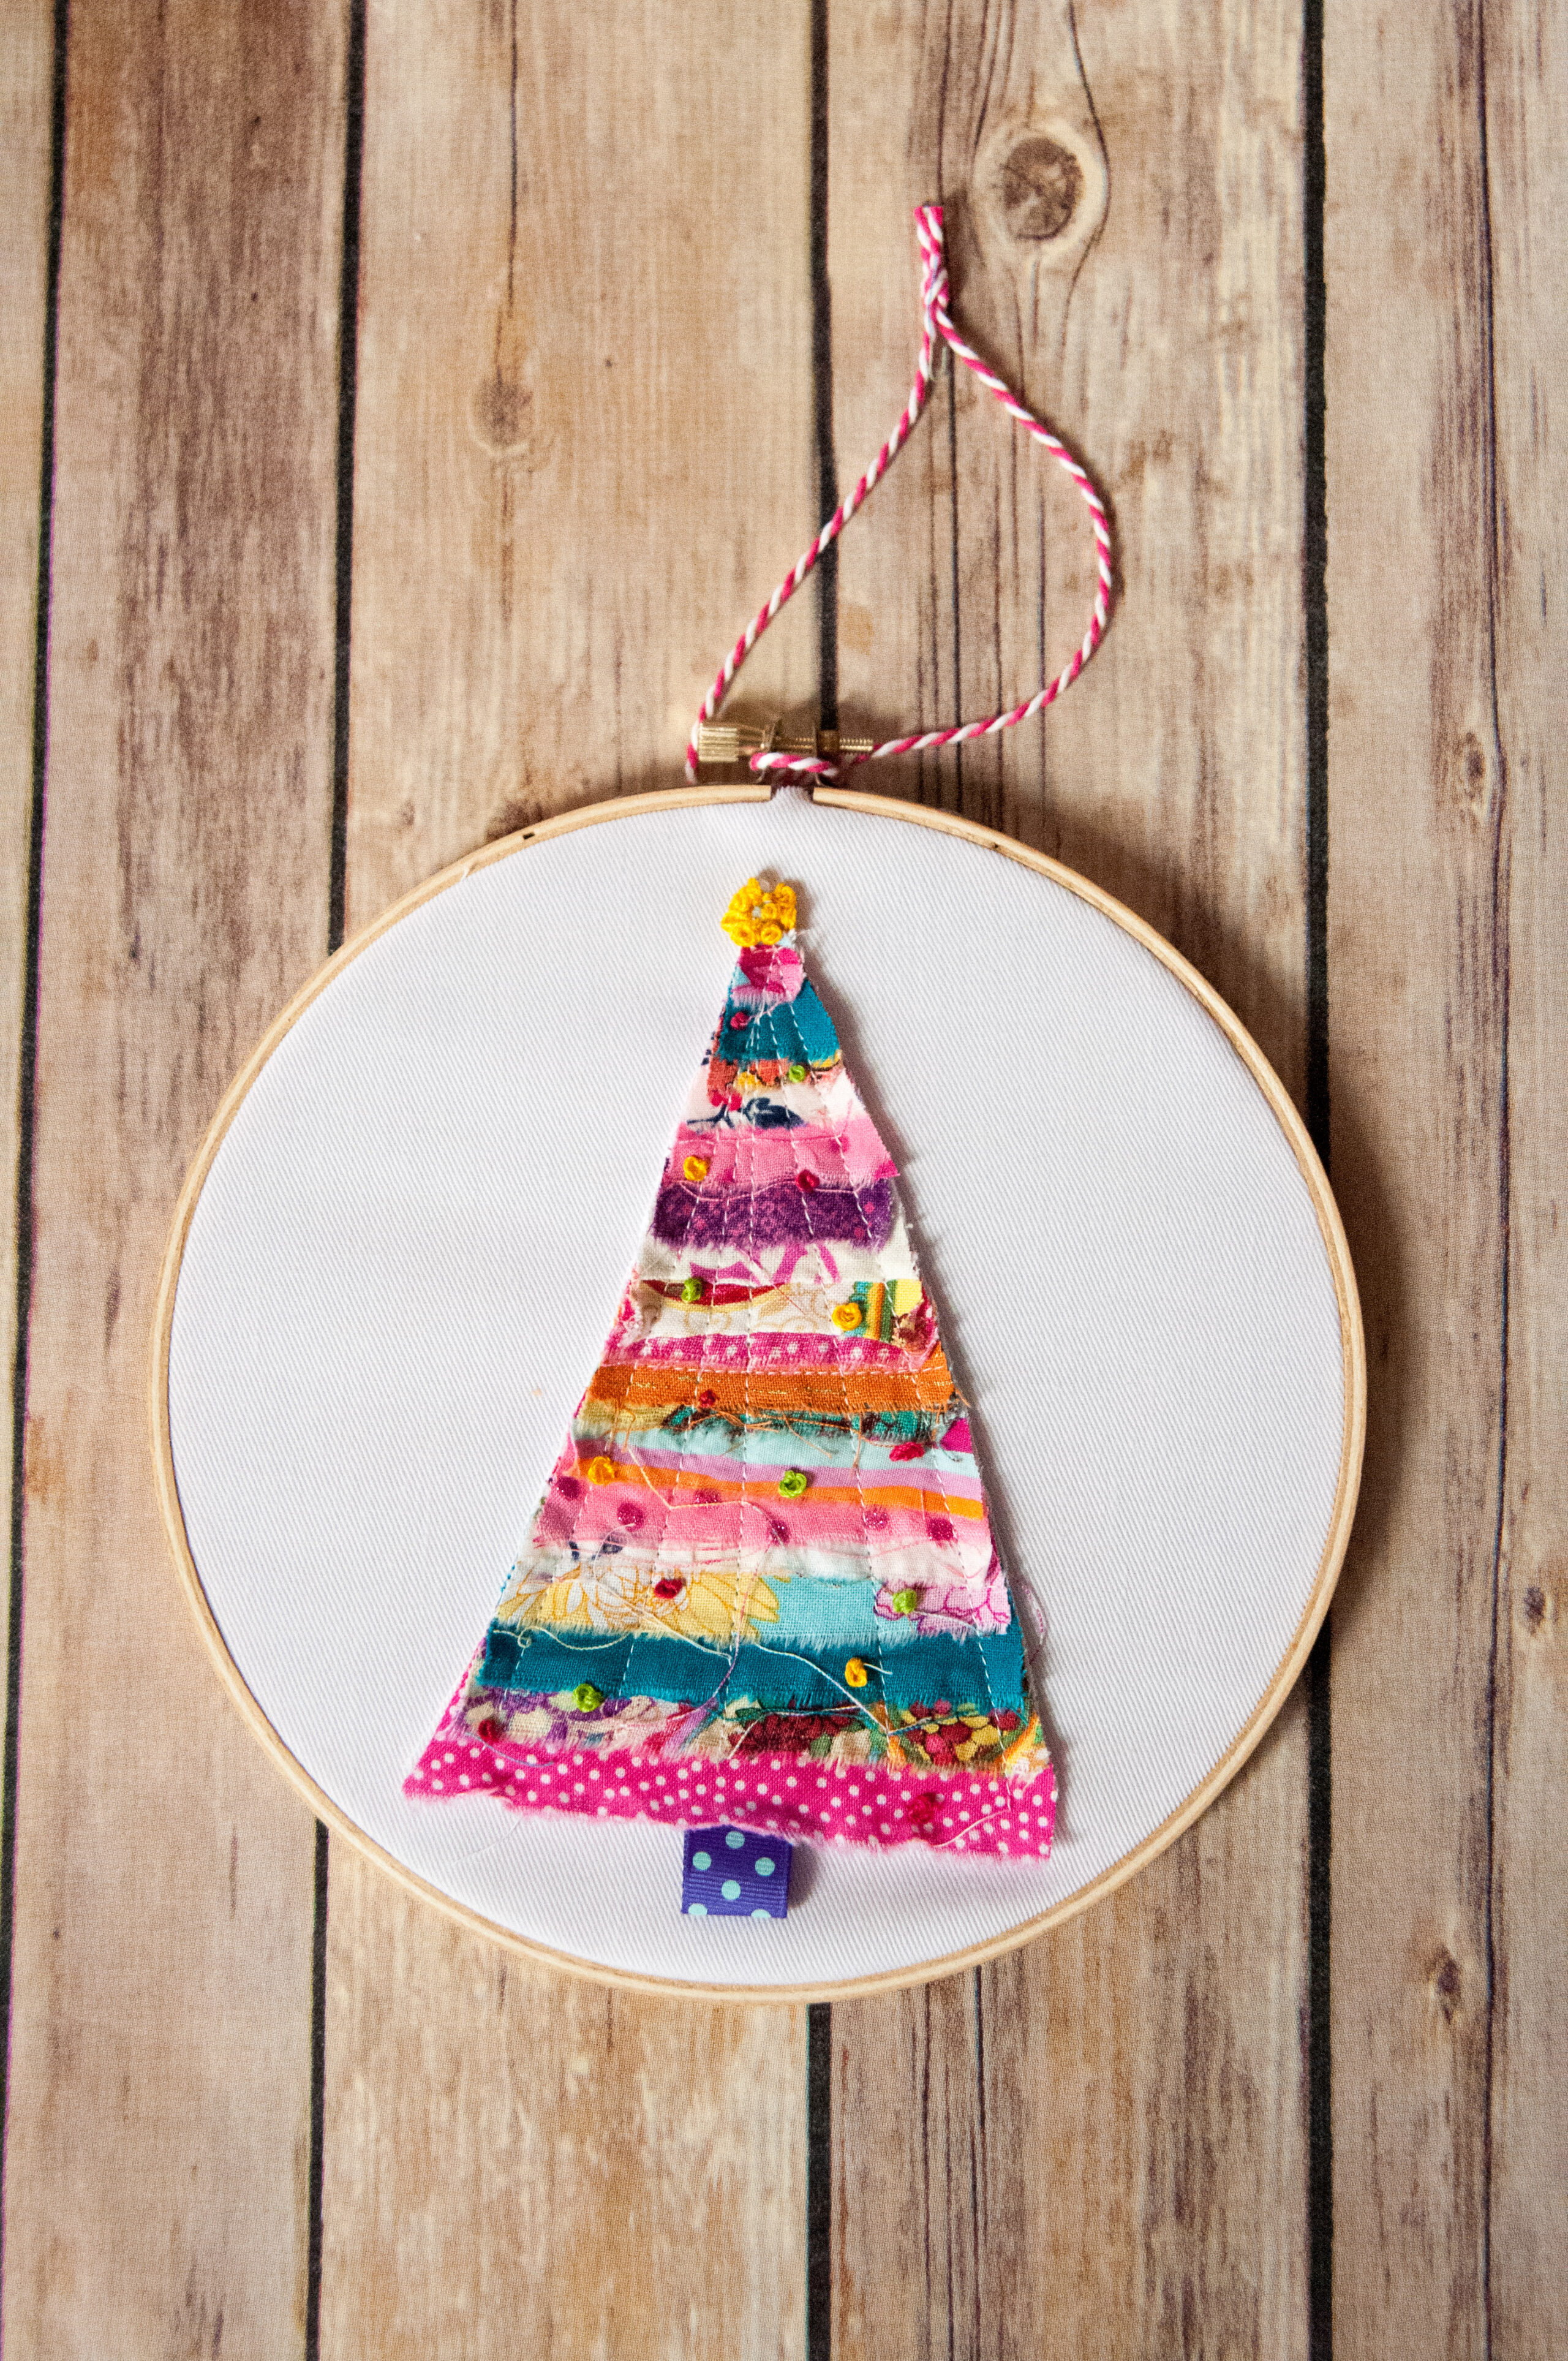
This year, I decided it was time to get clever and be able to mass produce something that still had homemade charm, didn’t break the bank, was the perfect size, and also was respectful of my time (because none of us have any – amiright?!?). Thus – the Mini Embroidery Hoop Ornaments! These are made with a few layers of fabric from your scrap selection, small embroidery hoops, and some sewing and craft supplies. They don't take much time so lets get started with this fun DIY tutorial for Christmas decor!
Embroidery Hoop Ornaments
The beautiful embroidery hoop ornmaents take under 15 minutes and if you do like I did, you can spend about an hour and crank out four or five ornaments at least. Not too shabby if I do say so myself. Plus, a mini embroidery hoop is 99 cents when it’s not on sale. So – stock up and let’s get going.
Embroidery Hoop Ornaments Supplies:
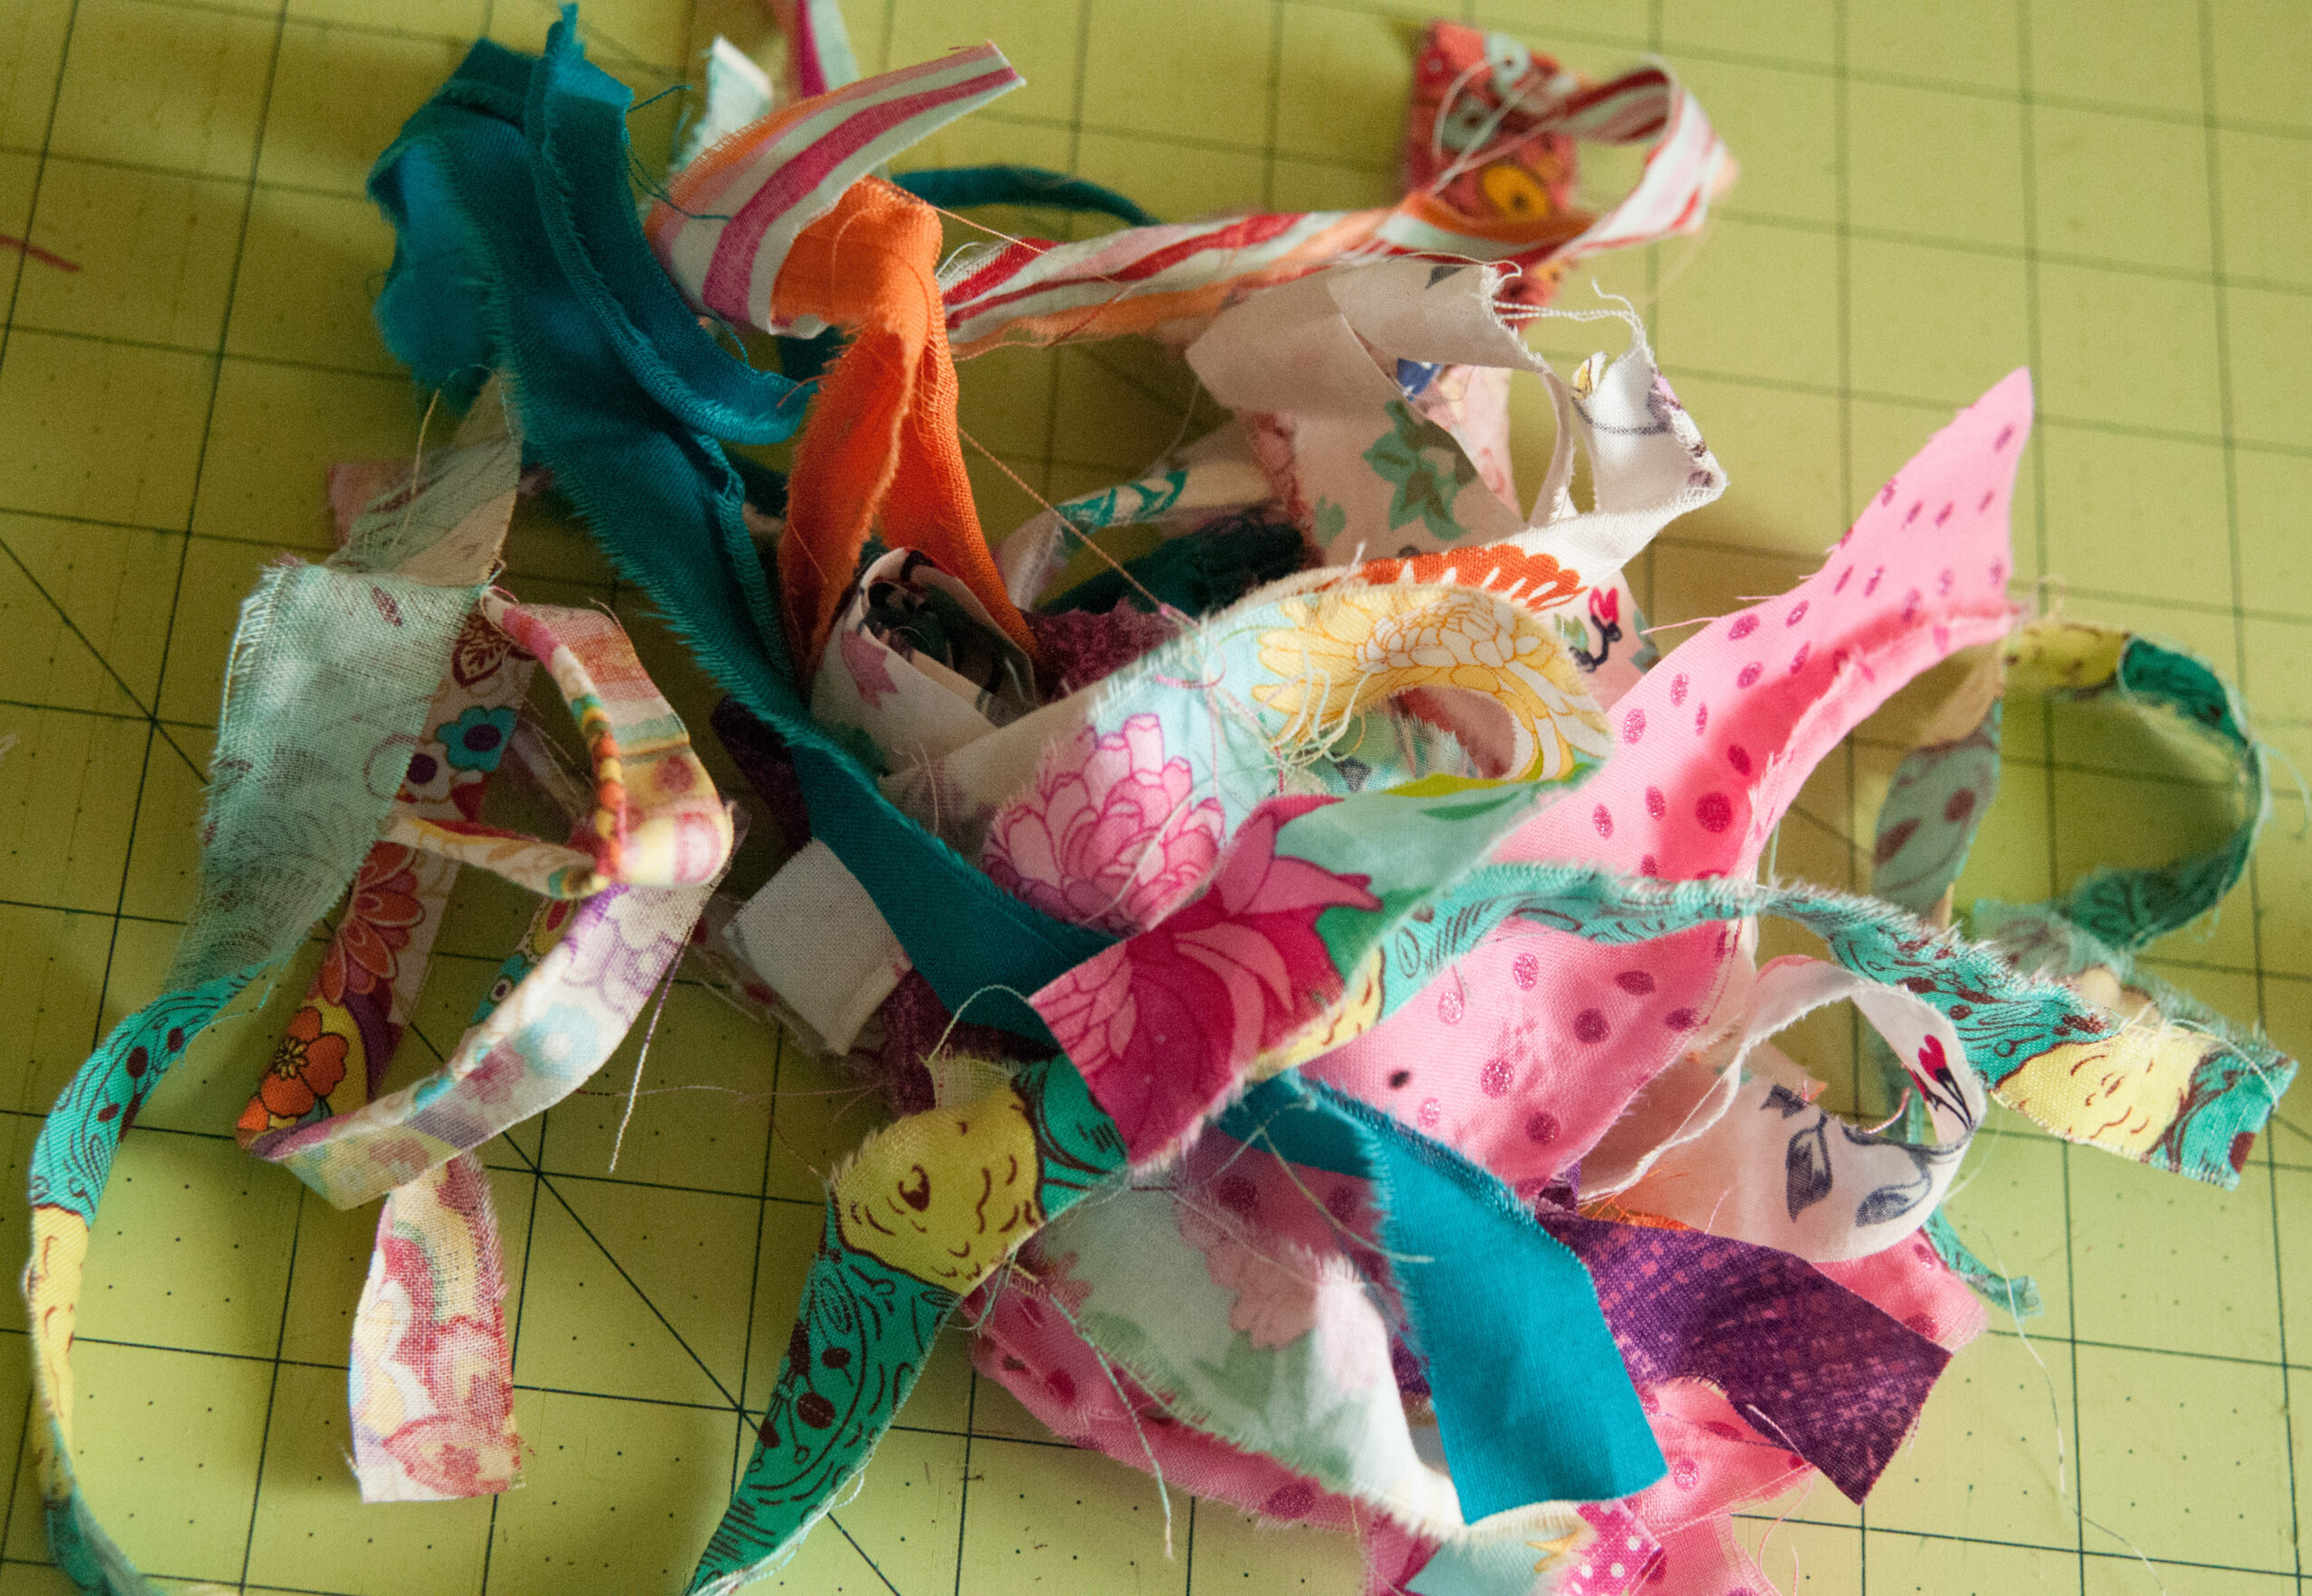
- Scrap Fabric (torn into strips about .5 -1 inch wide
- Pieces of Fabric for backing – I went with white
- Sharp Scissors
- Embroidery hoop (mine are 4″ and 7″)
- Thread
- Scissors
- Paper/Pencil/Sharpie/Erasable Fabric Pen
- Embroidery Floss and Needle
- Scraps of ribbon or fabric for tree stump
- Baker’s Twine or Ribbon for hanging
Embroidery Hoop Ornament Instructions
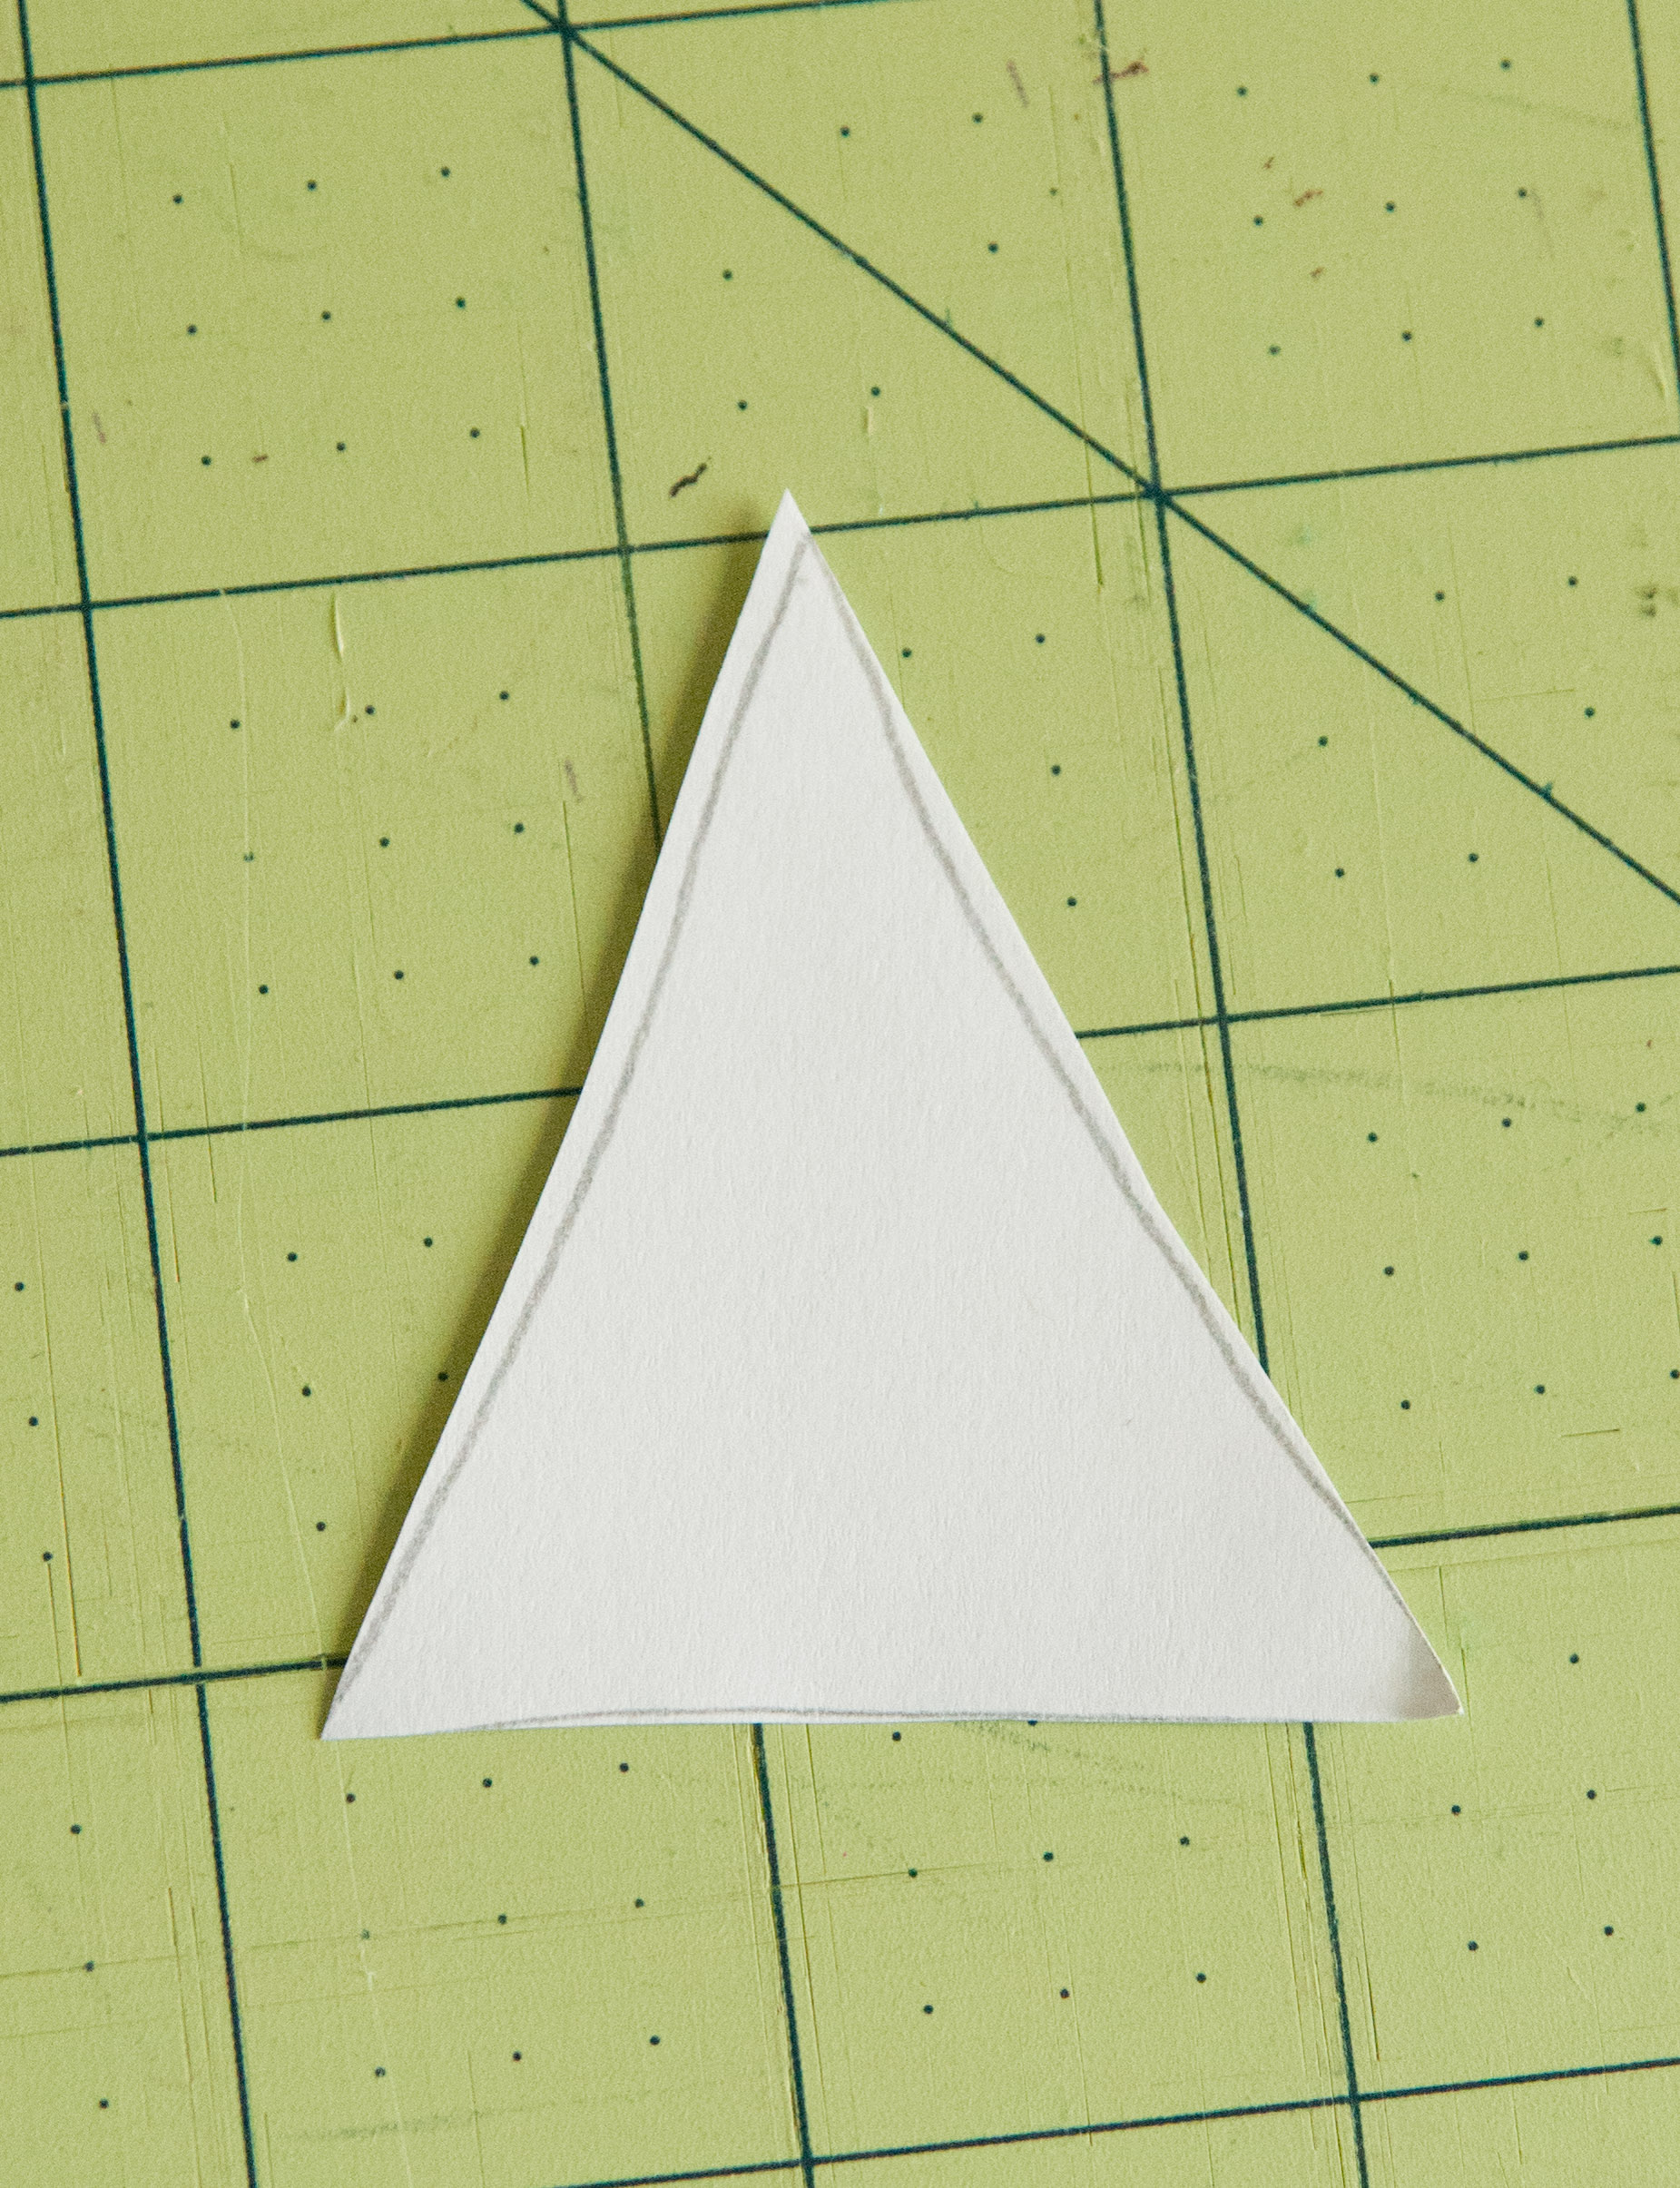
Step 1: First things first, draw your tree. I put my hoop right on the paper so I had a guide as to how big to make my tree. Tall and skinny? Short and squat? So many varieties – doodle until you get it just right!
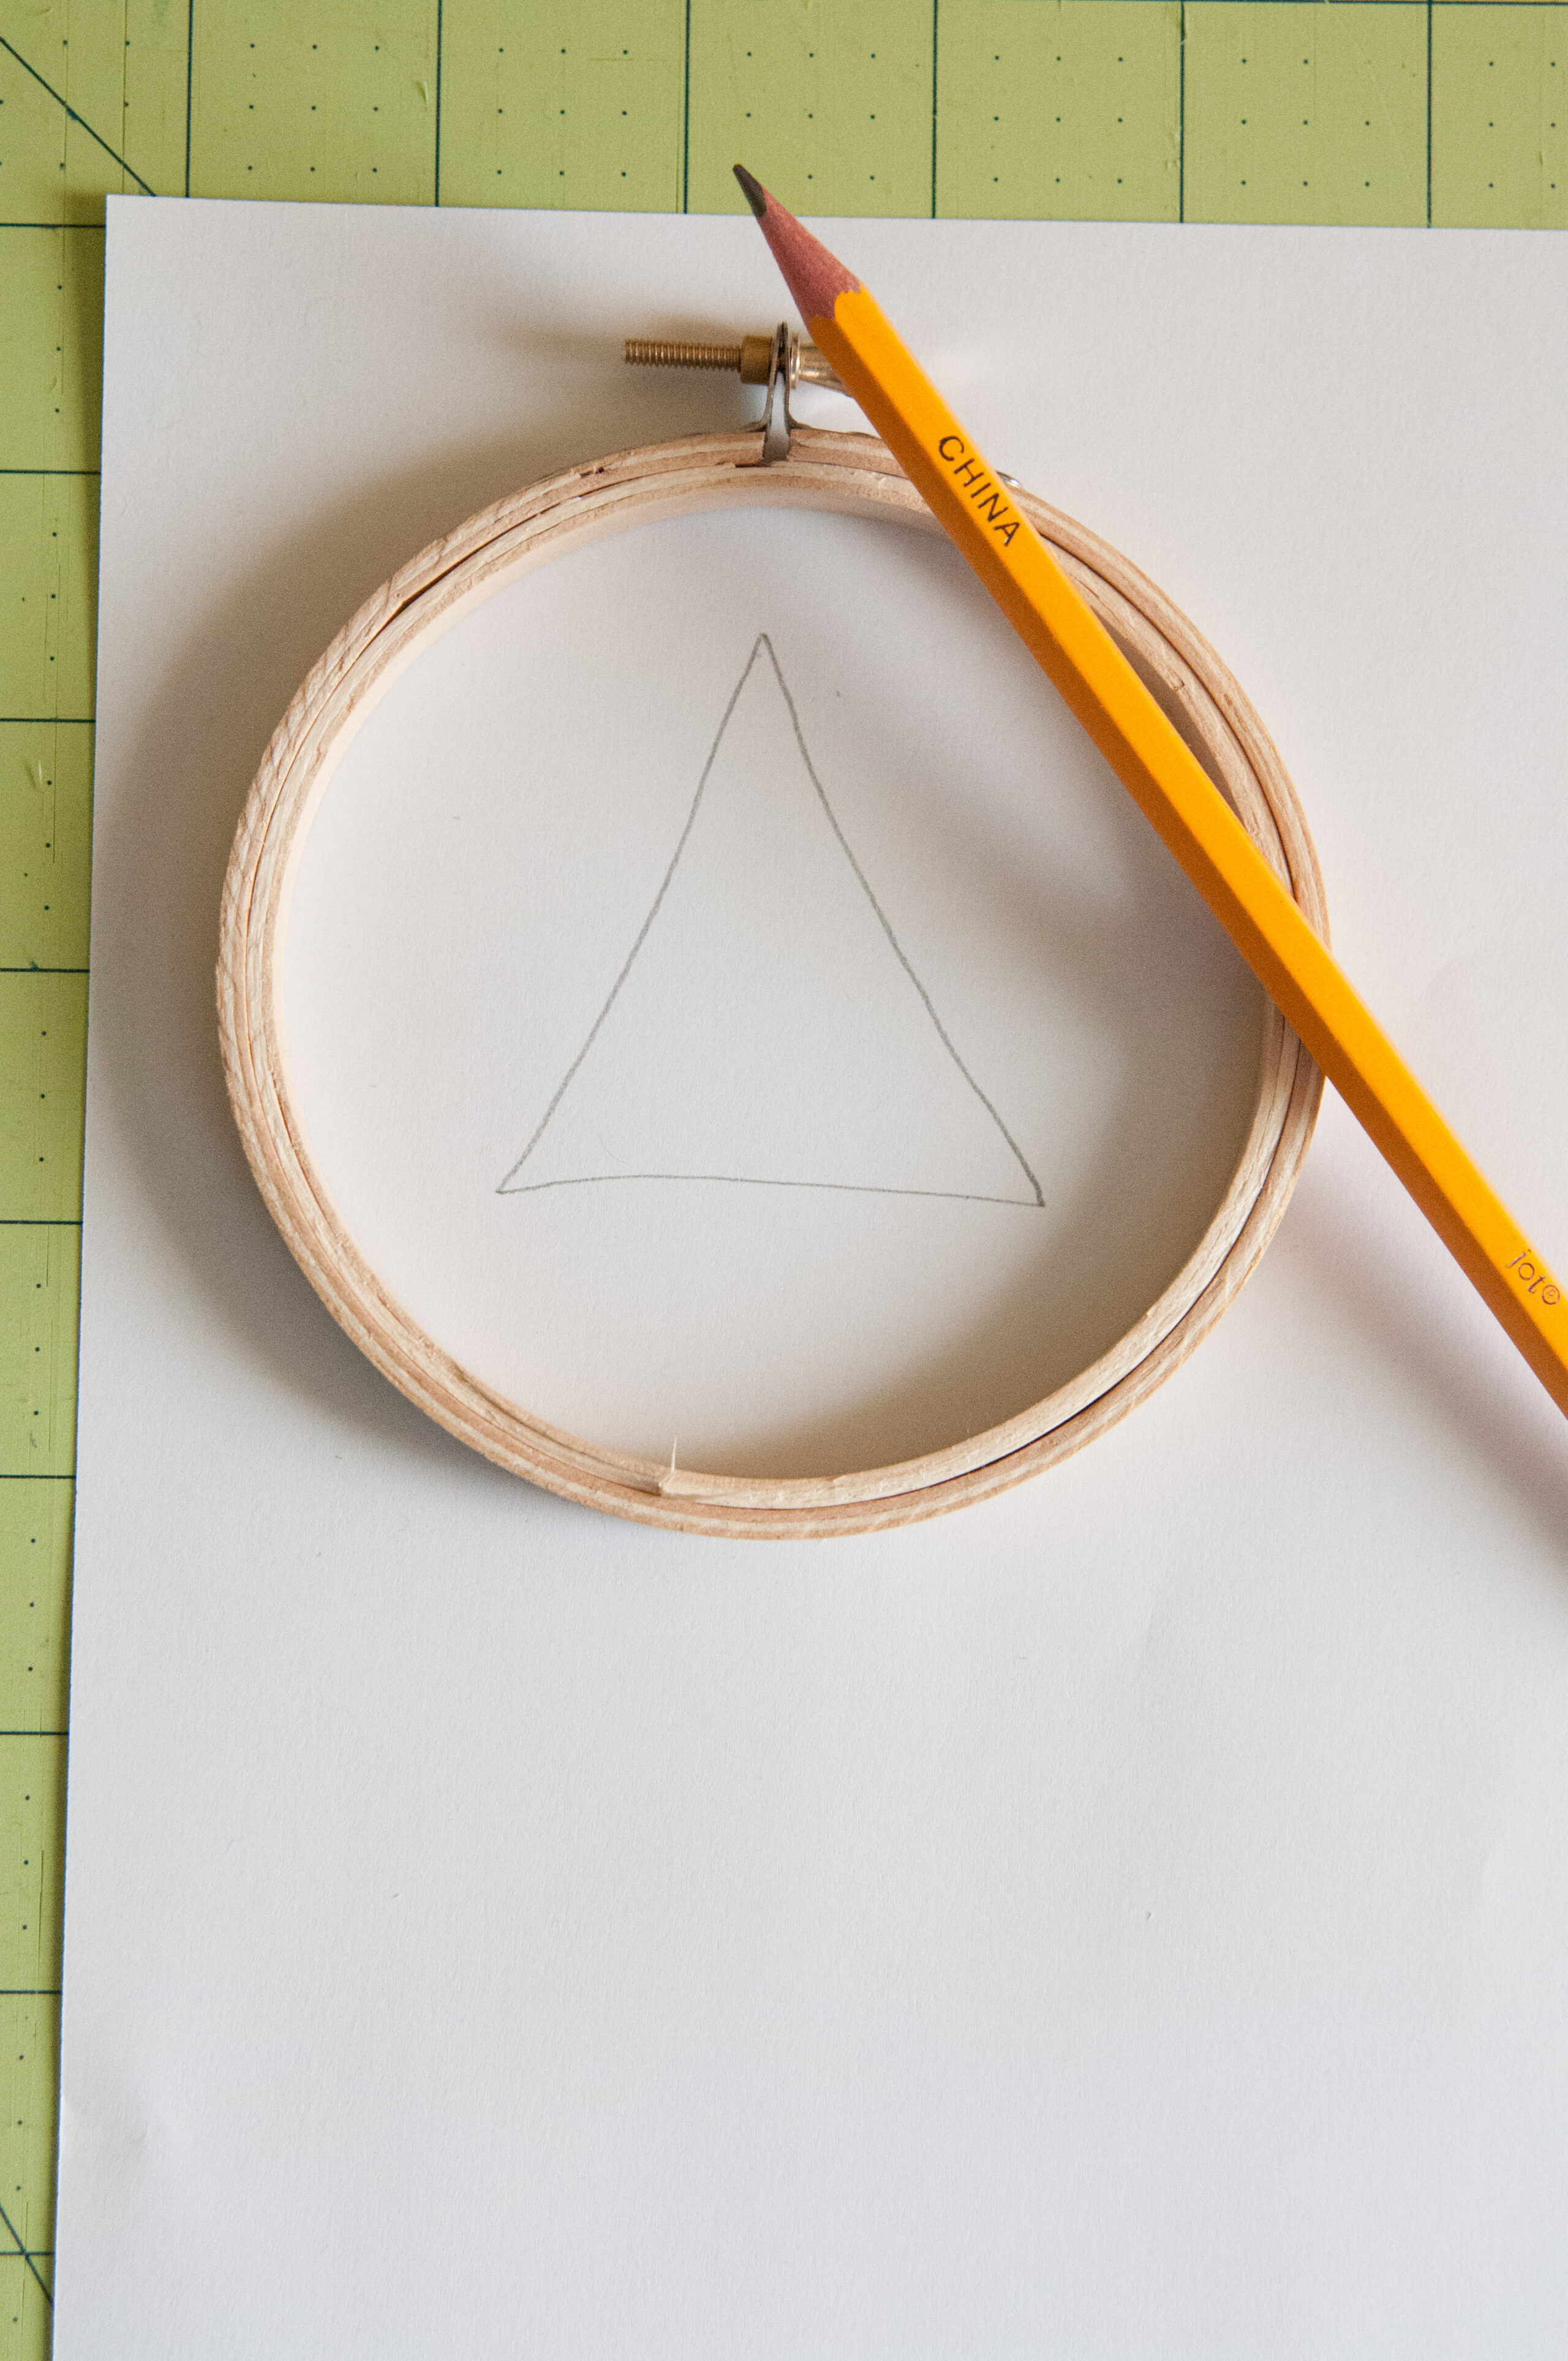
Step 2: Cut out your tree template.
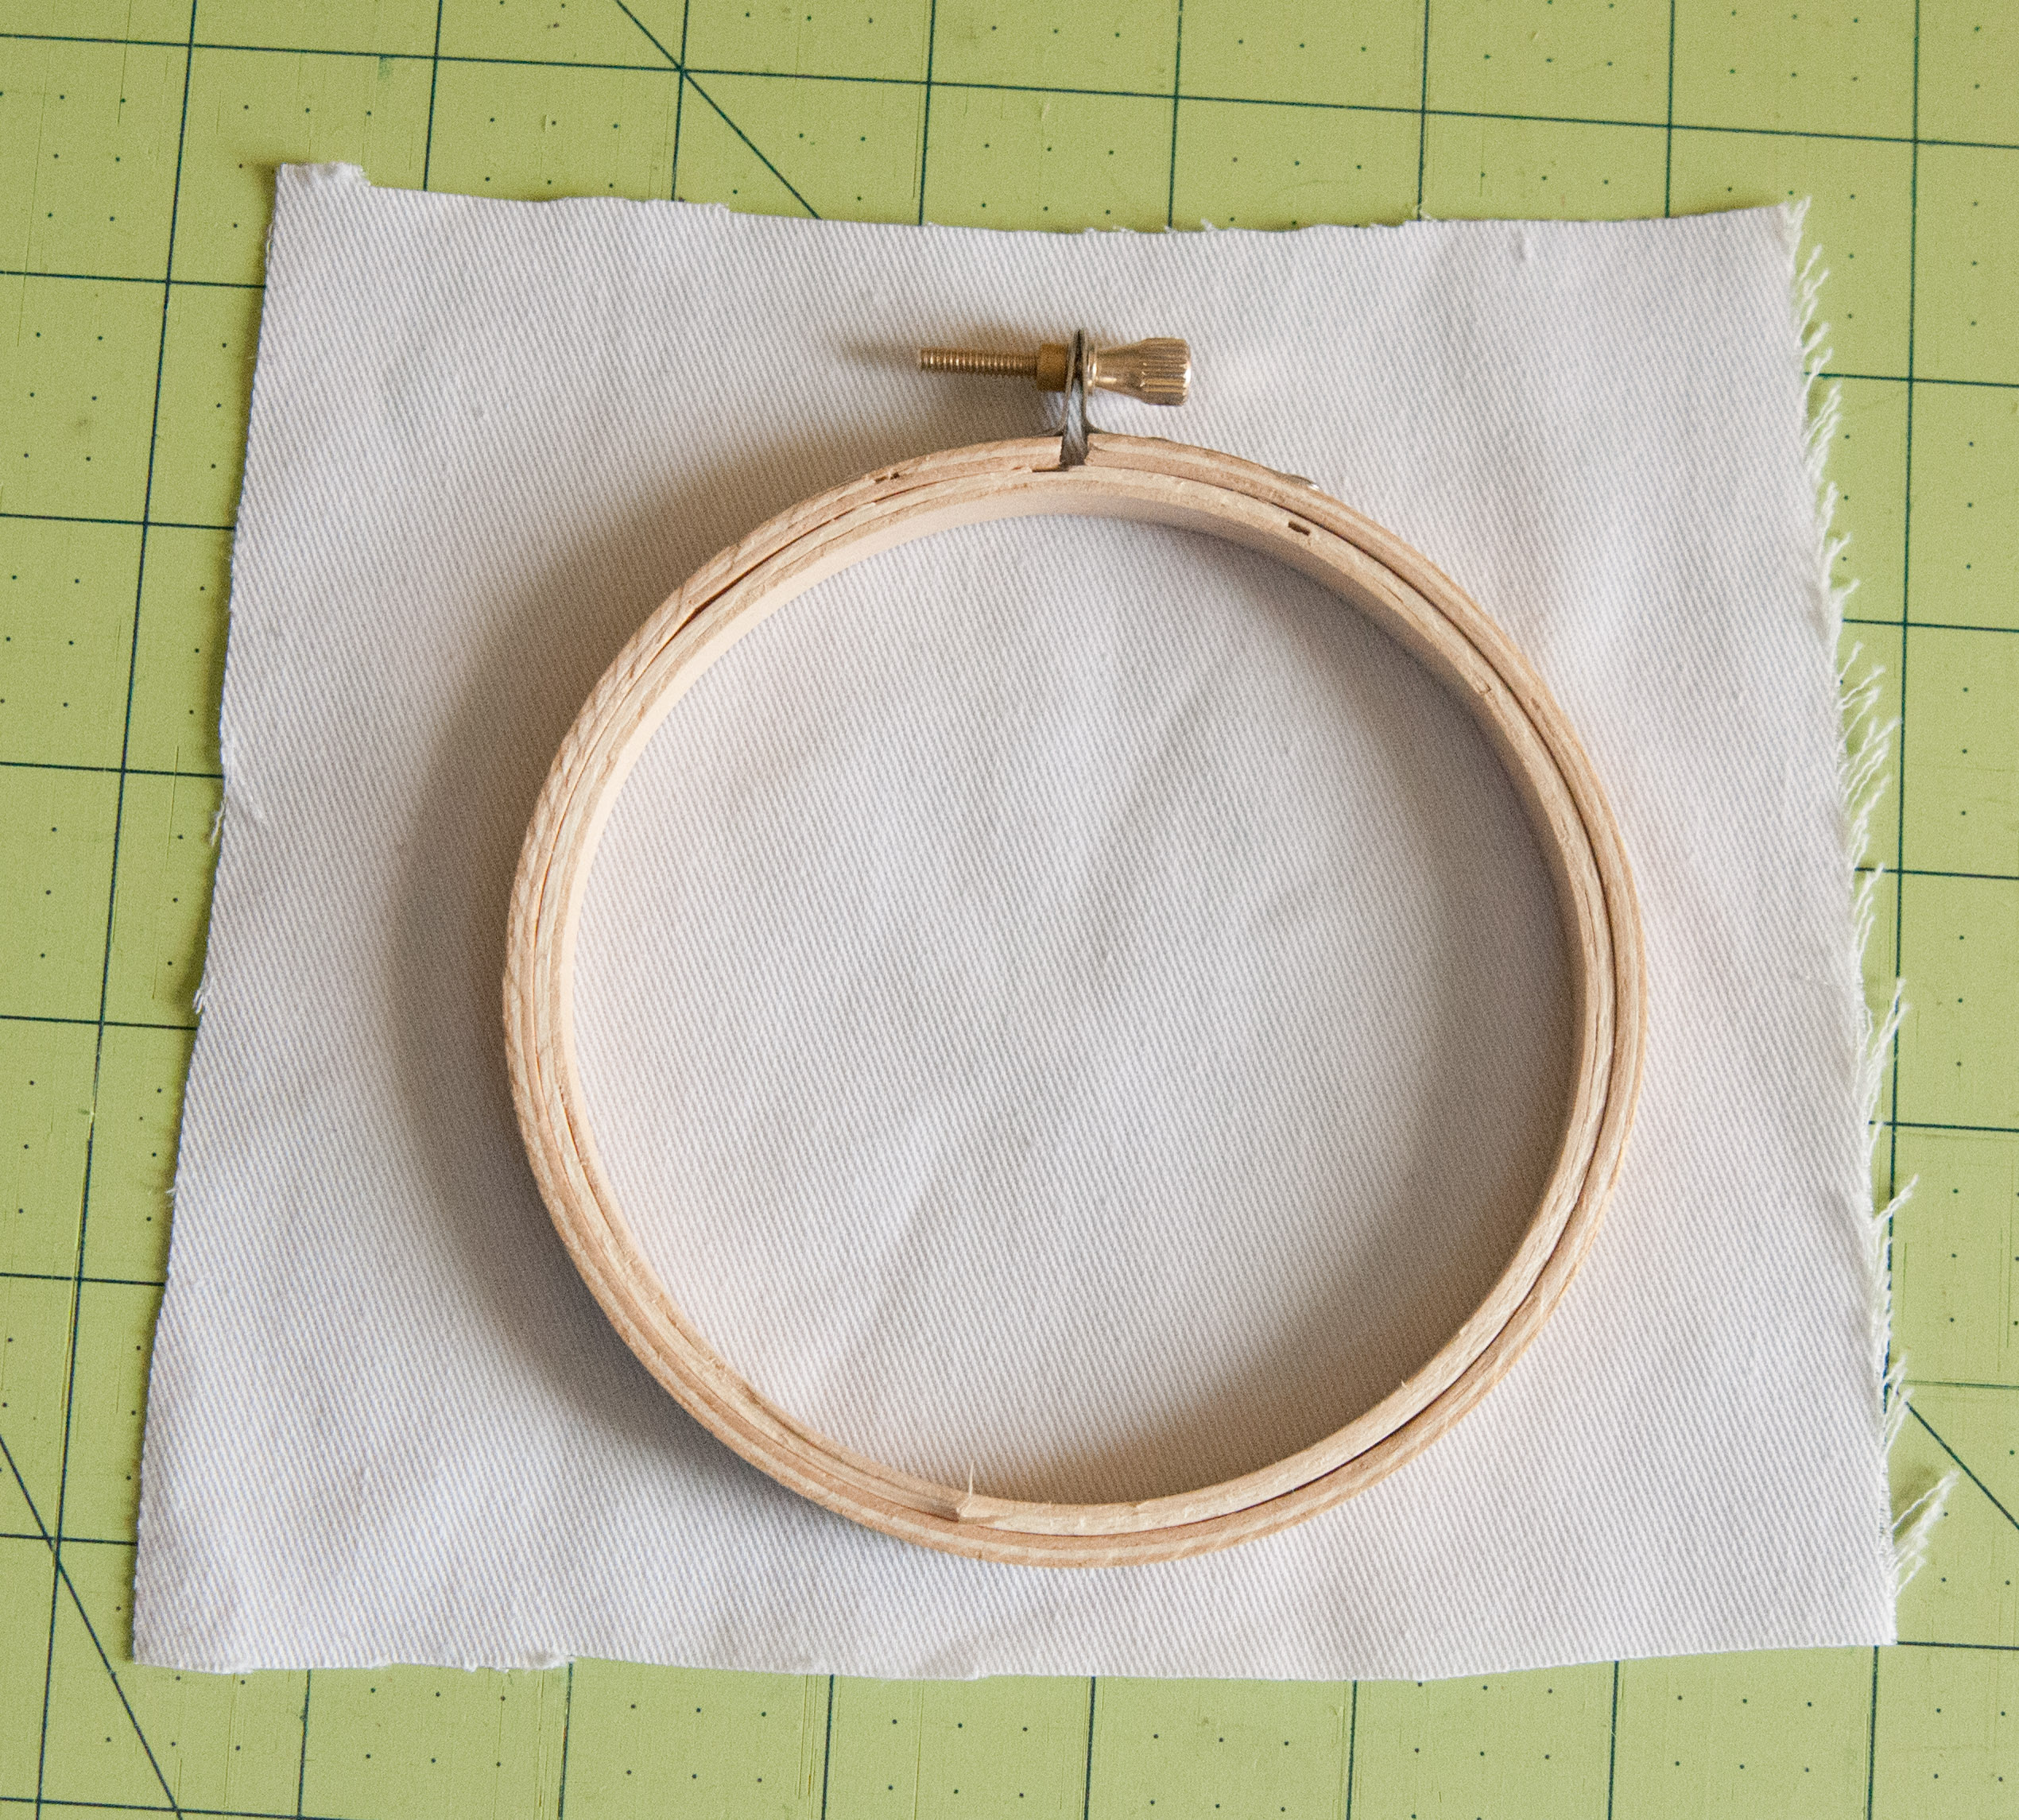
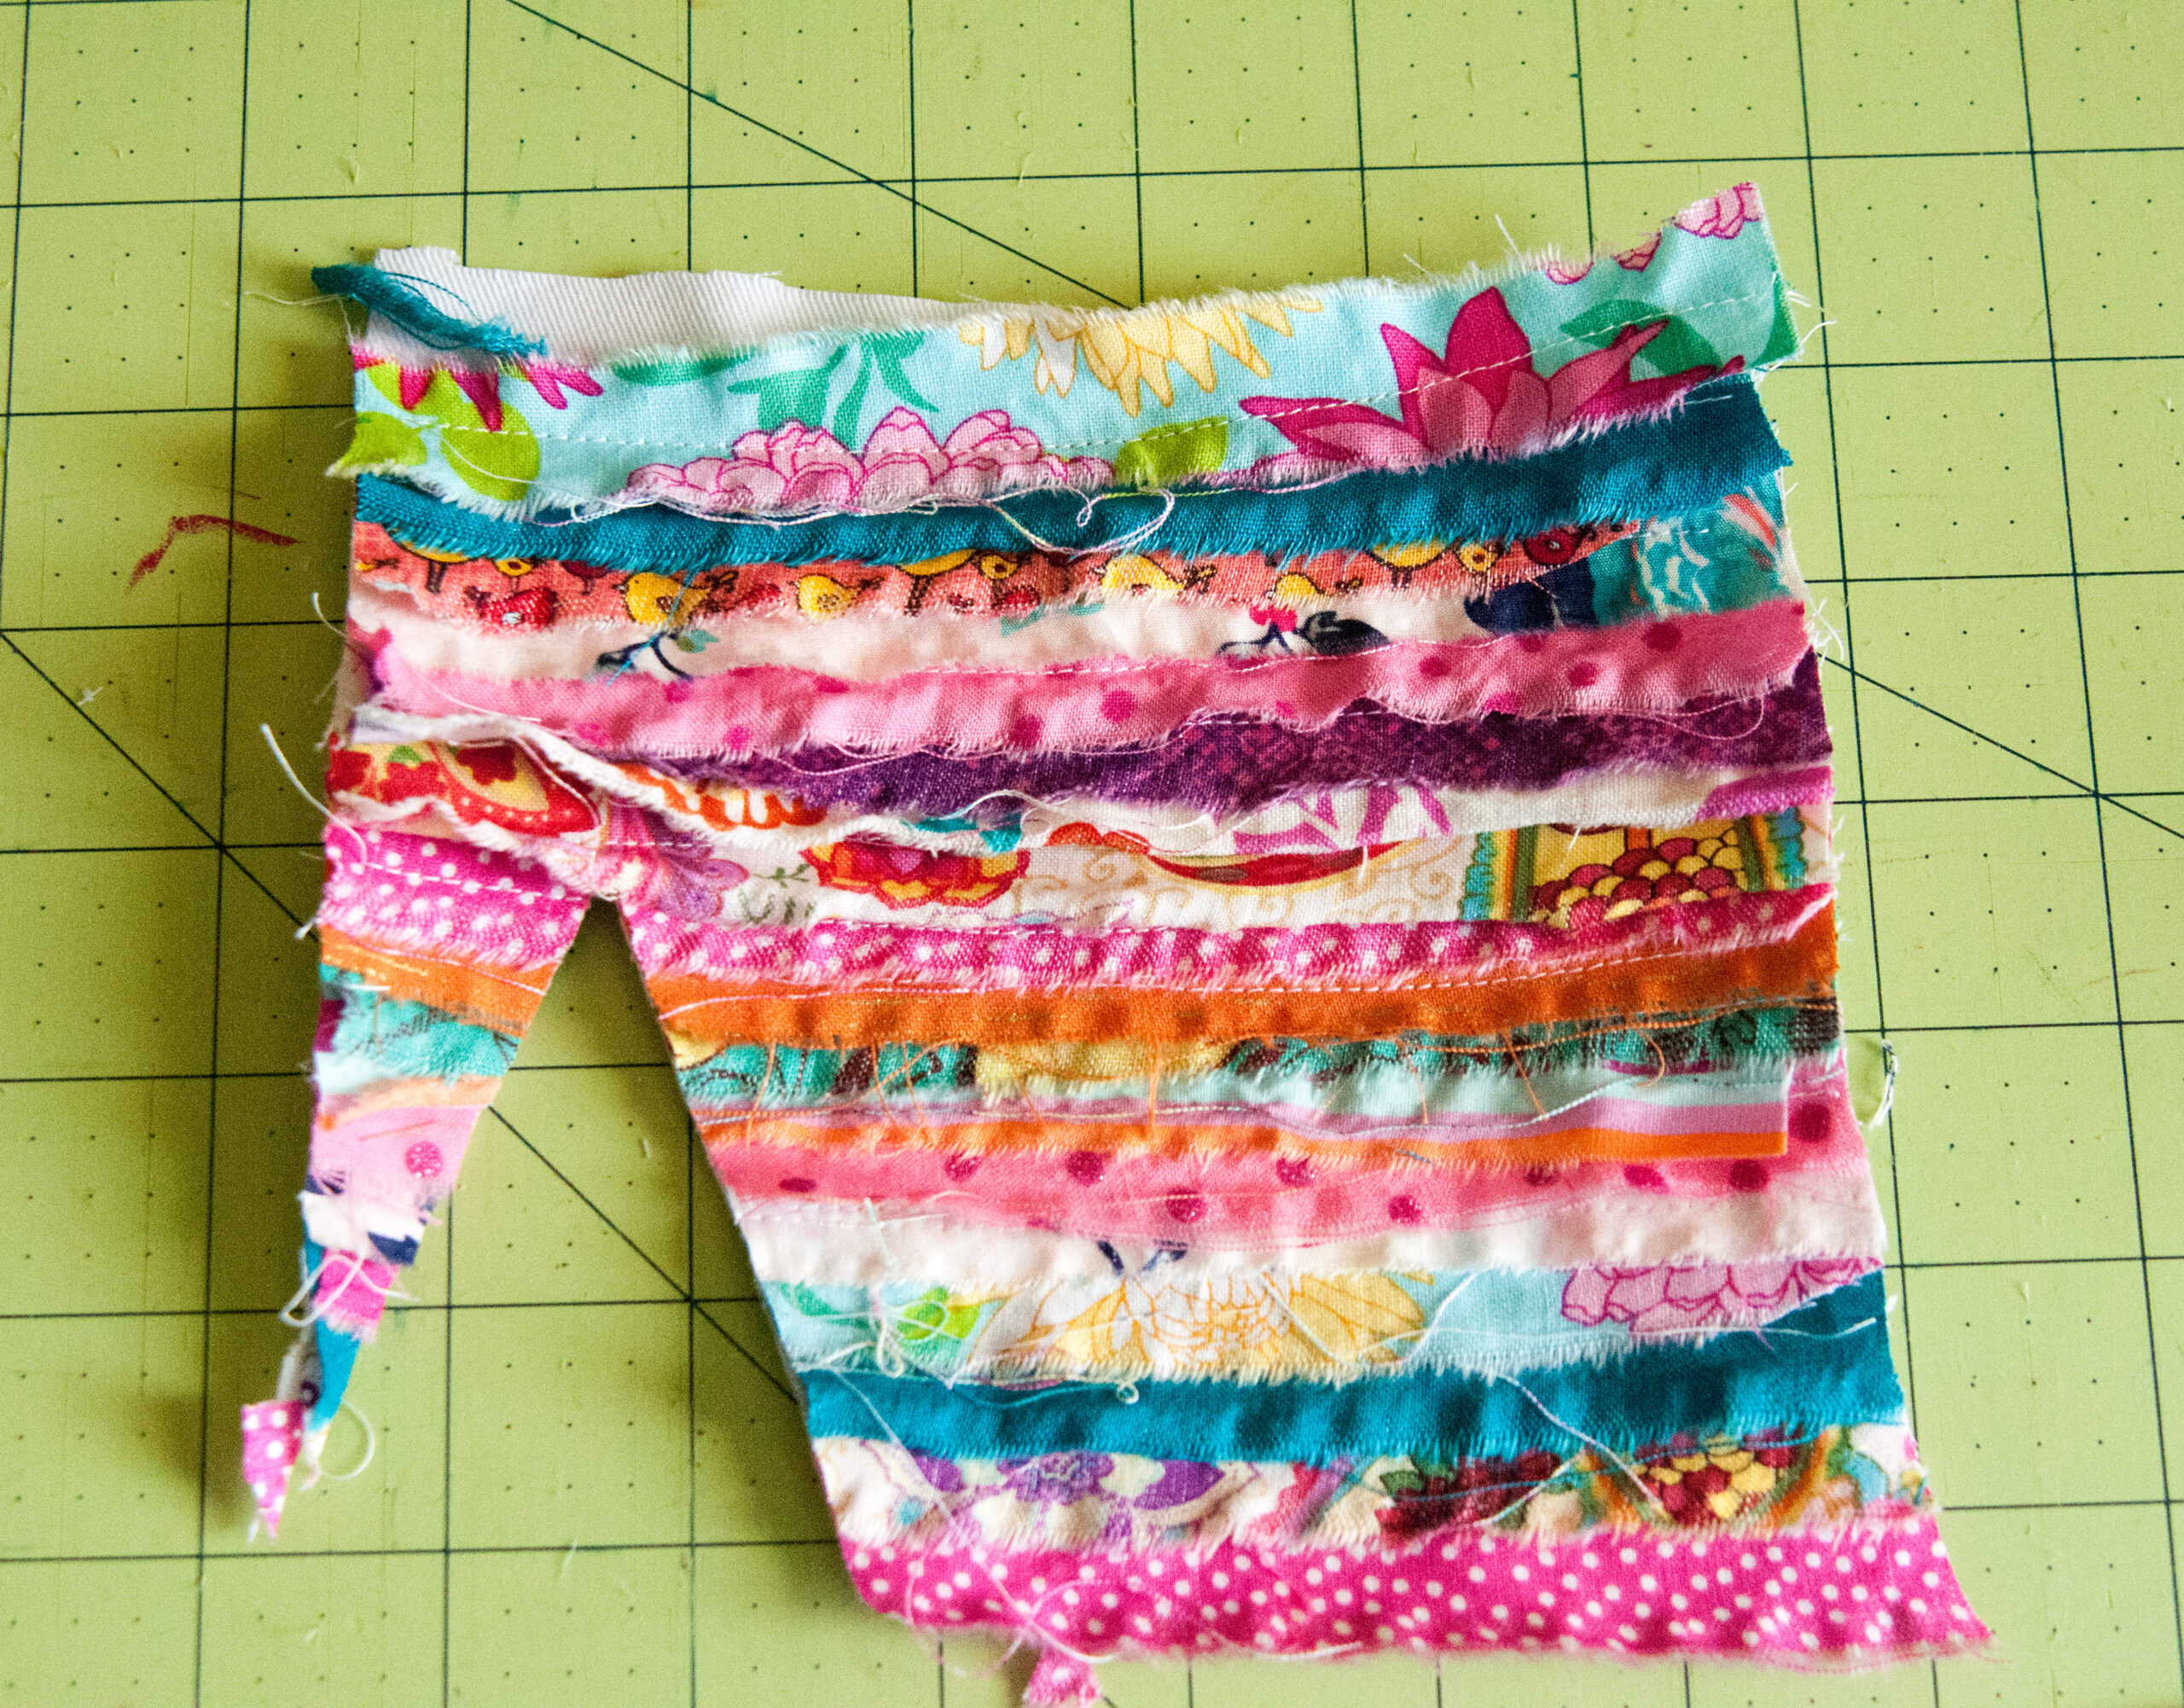
Step 3: Cut a scrap of fabric to sew your strips to. We’ll call this the base. Make sure it is bigger than your hoop. {Hint: The bigger the scrap the more trees you get out of it at one time.}
Step 4: If you haven’t already, tear up your scrap fabrics into strips. Mine varied a bit from half an inch to an inch wide.
Step 5: You will start to construct your tree from the ground up – just like nature does! Put your first strip near the bottom of the base and sew the top of your strip down. Just like I did – see?
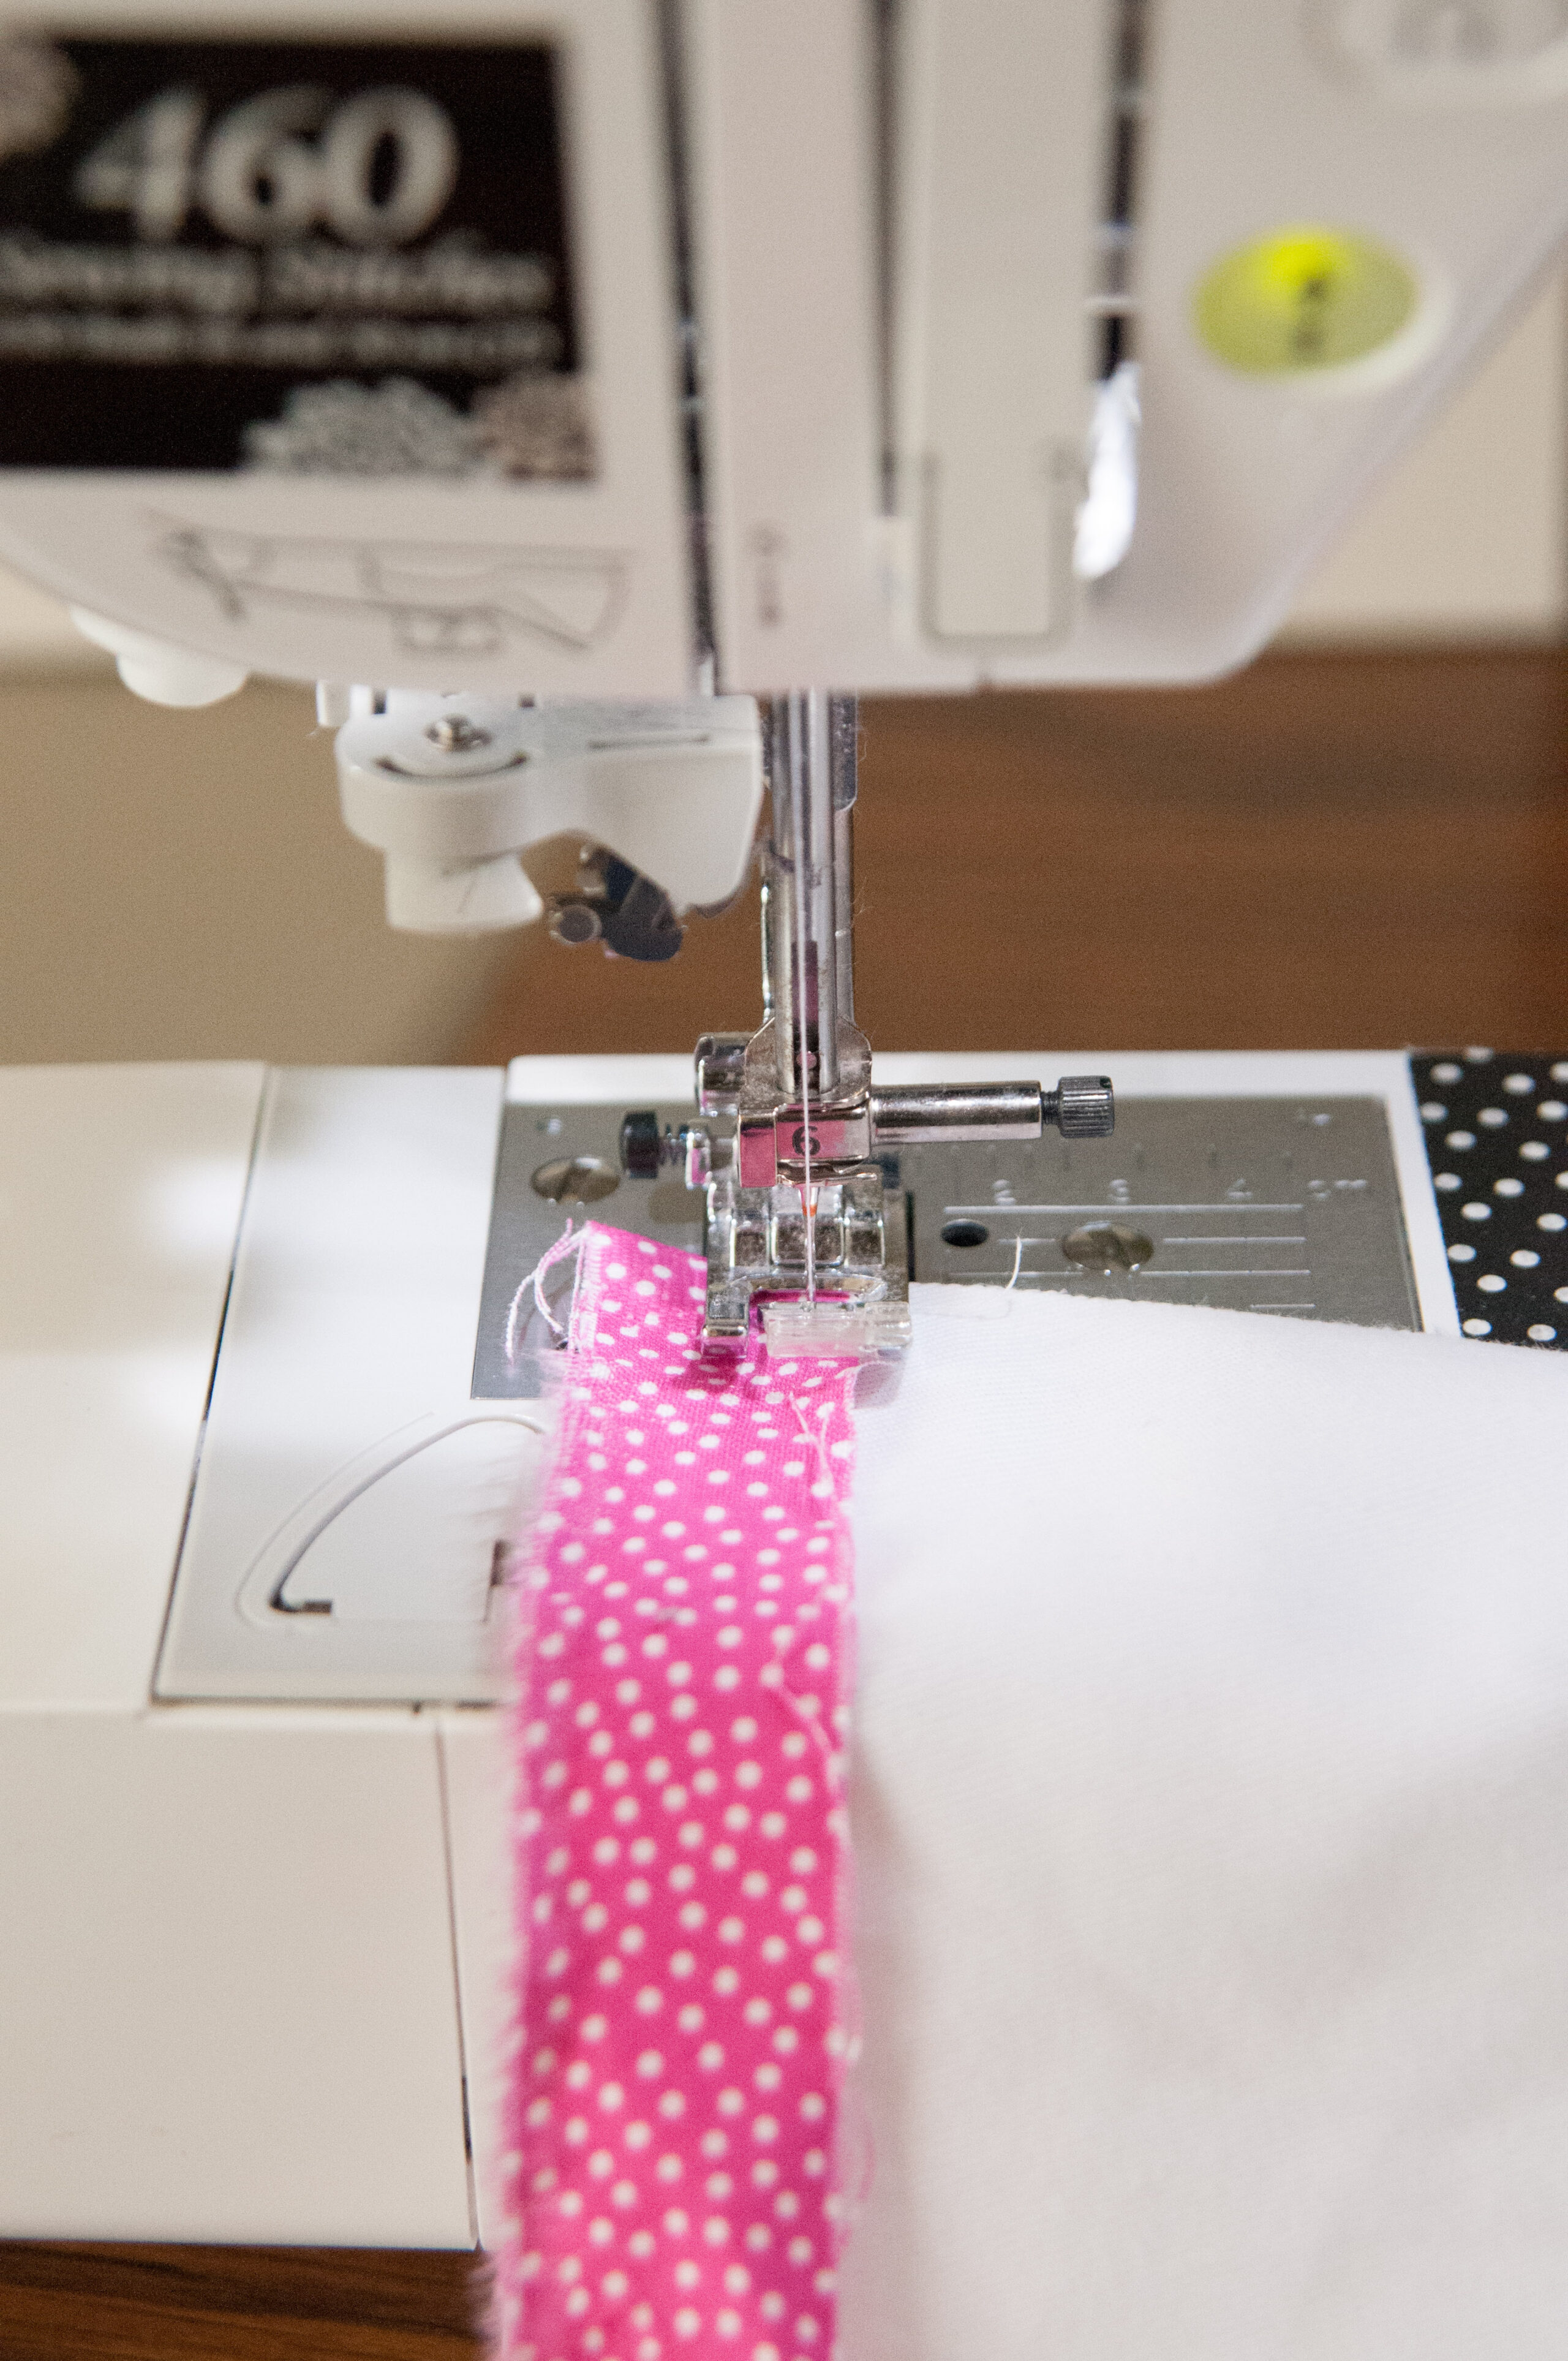
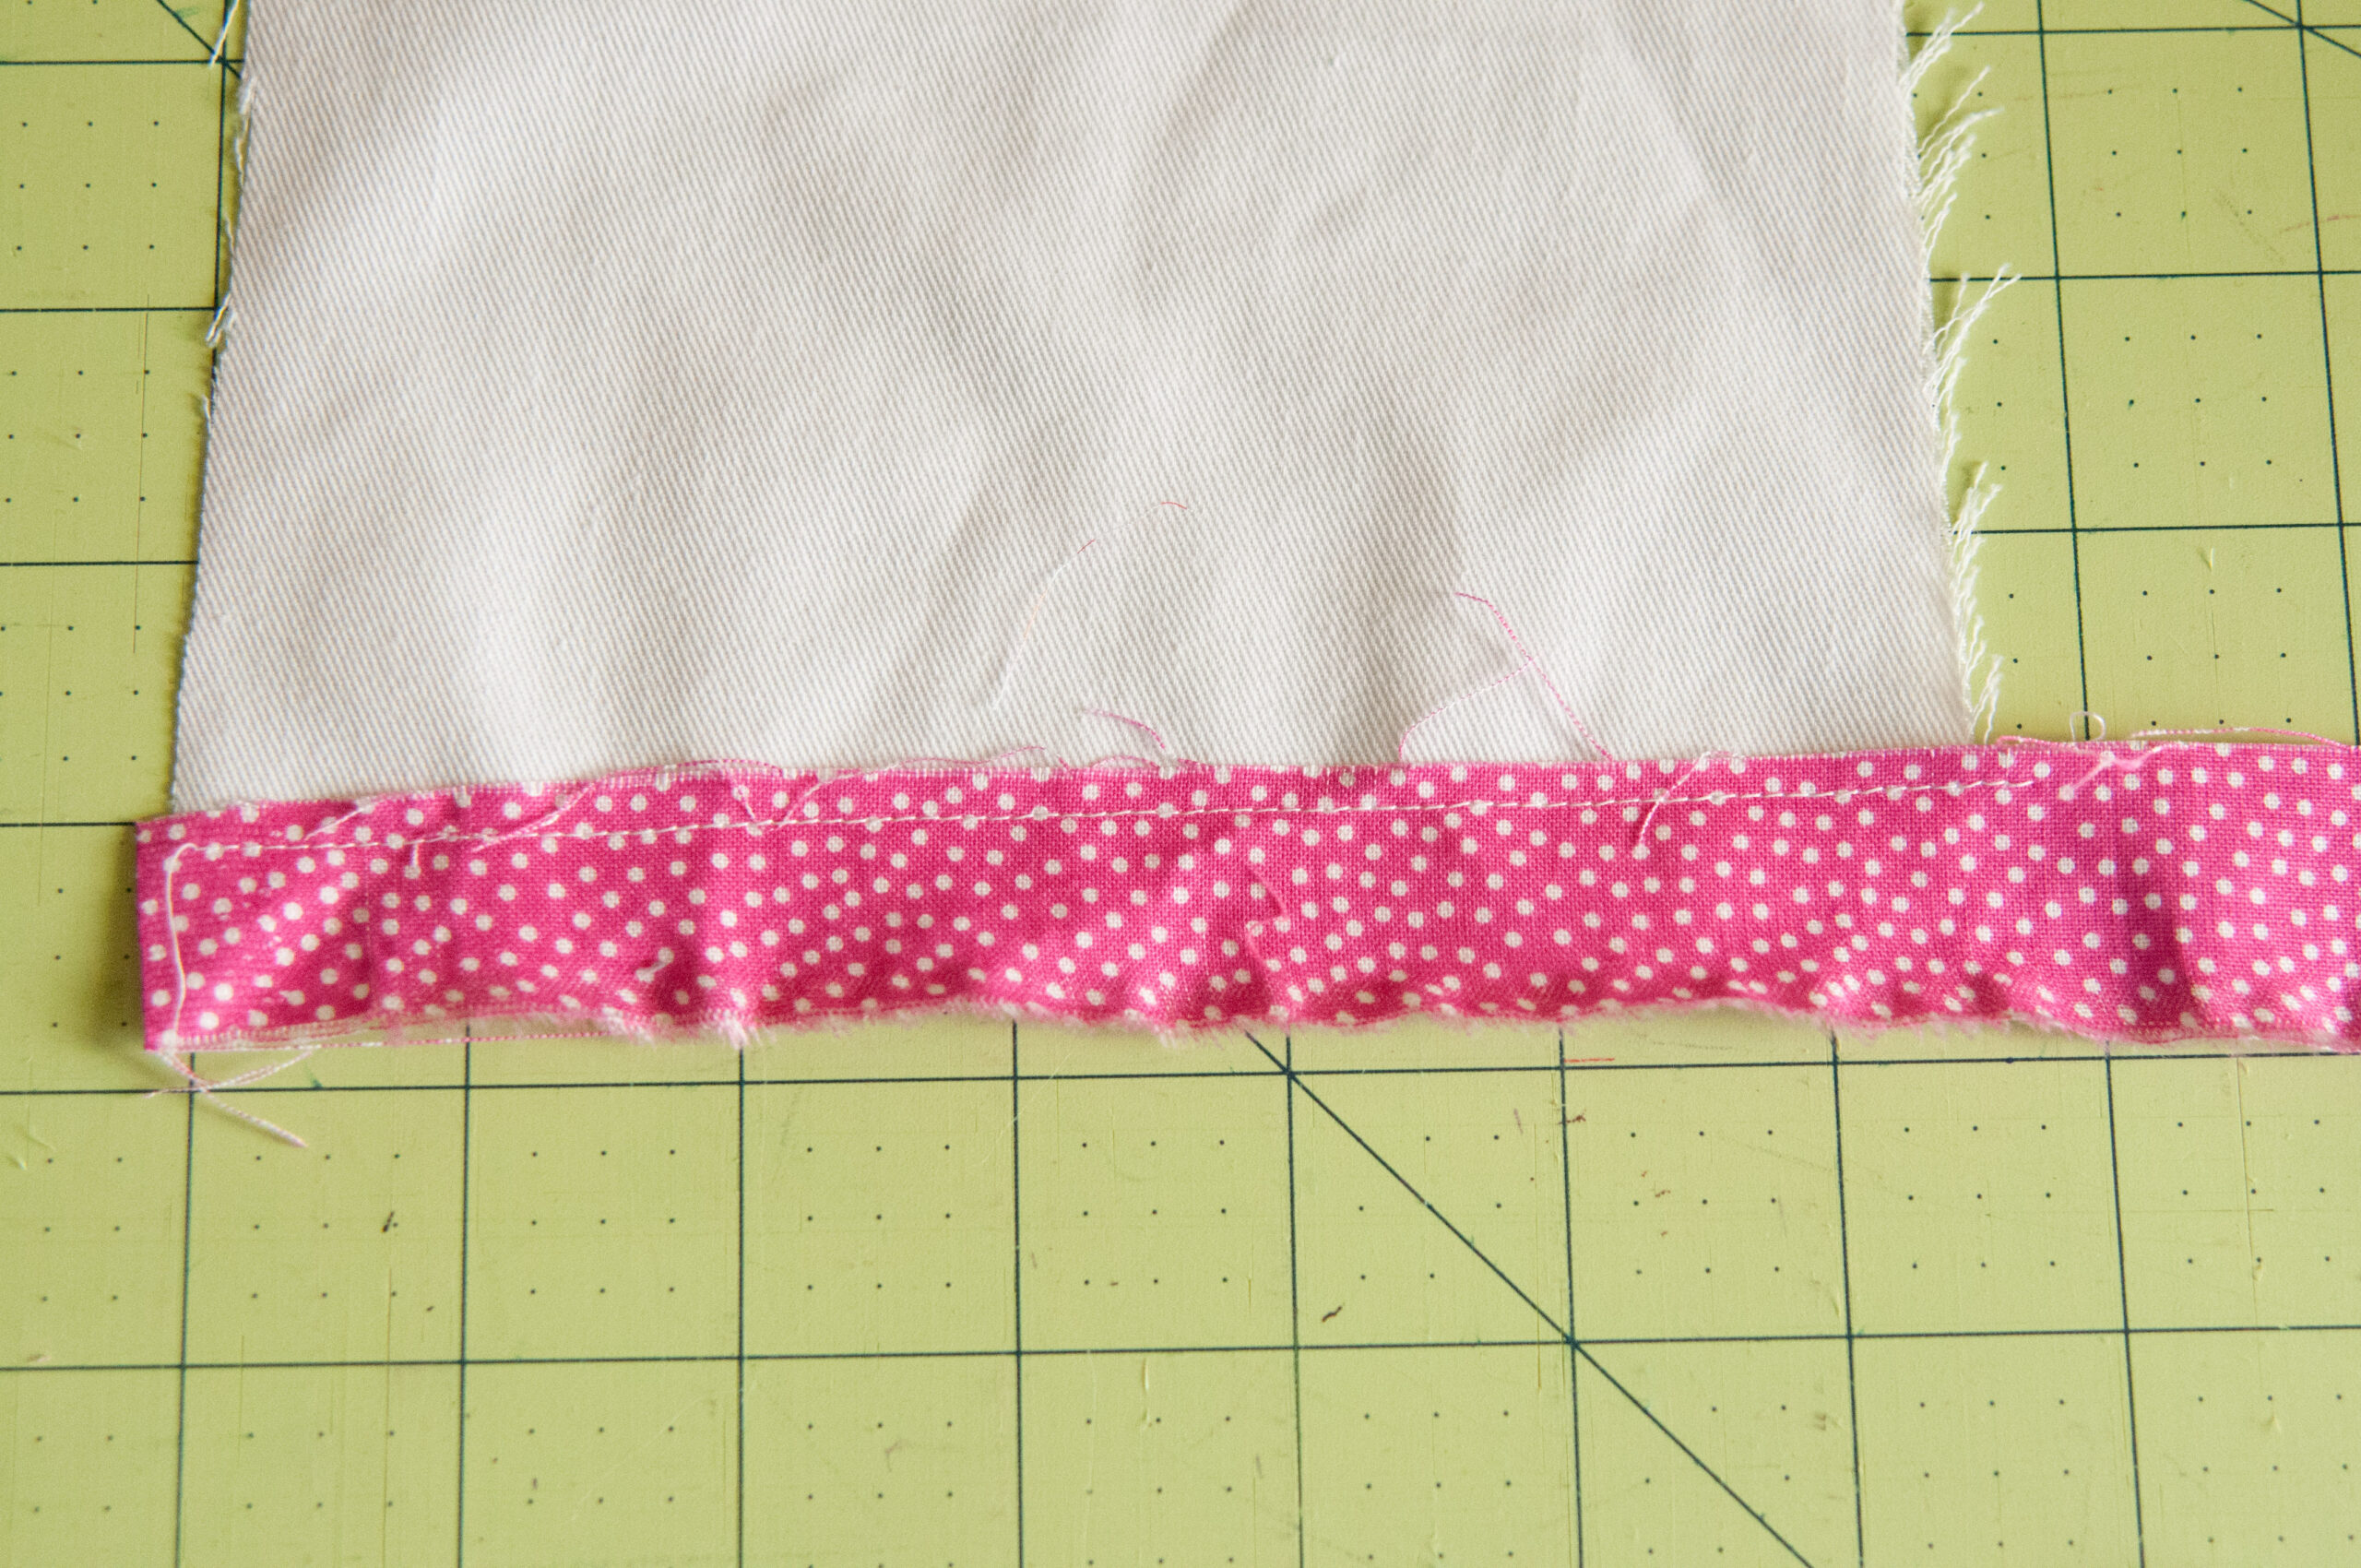
Step 6: Overlap your next strip making sure the frayed edges are all pointing down. Stitch it down.
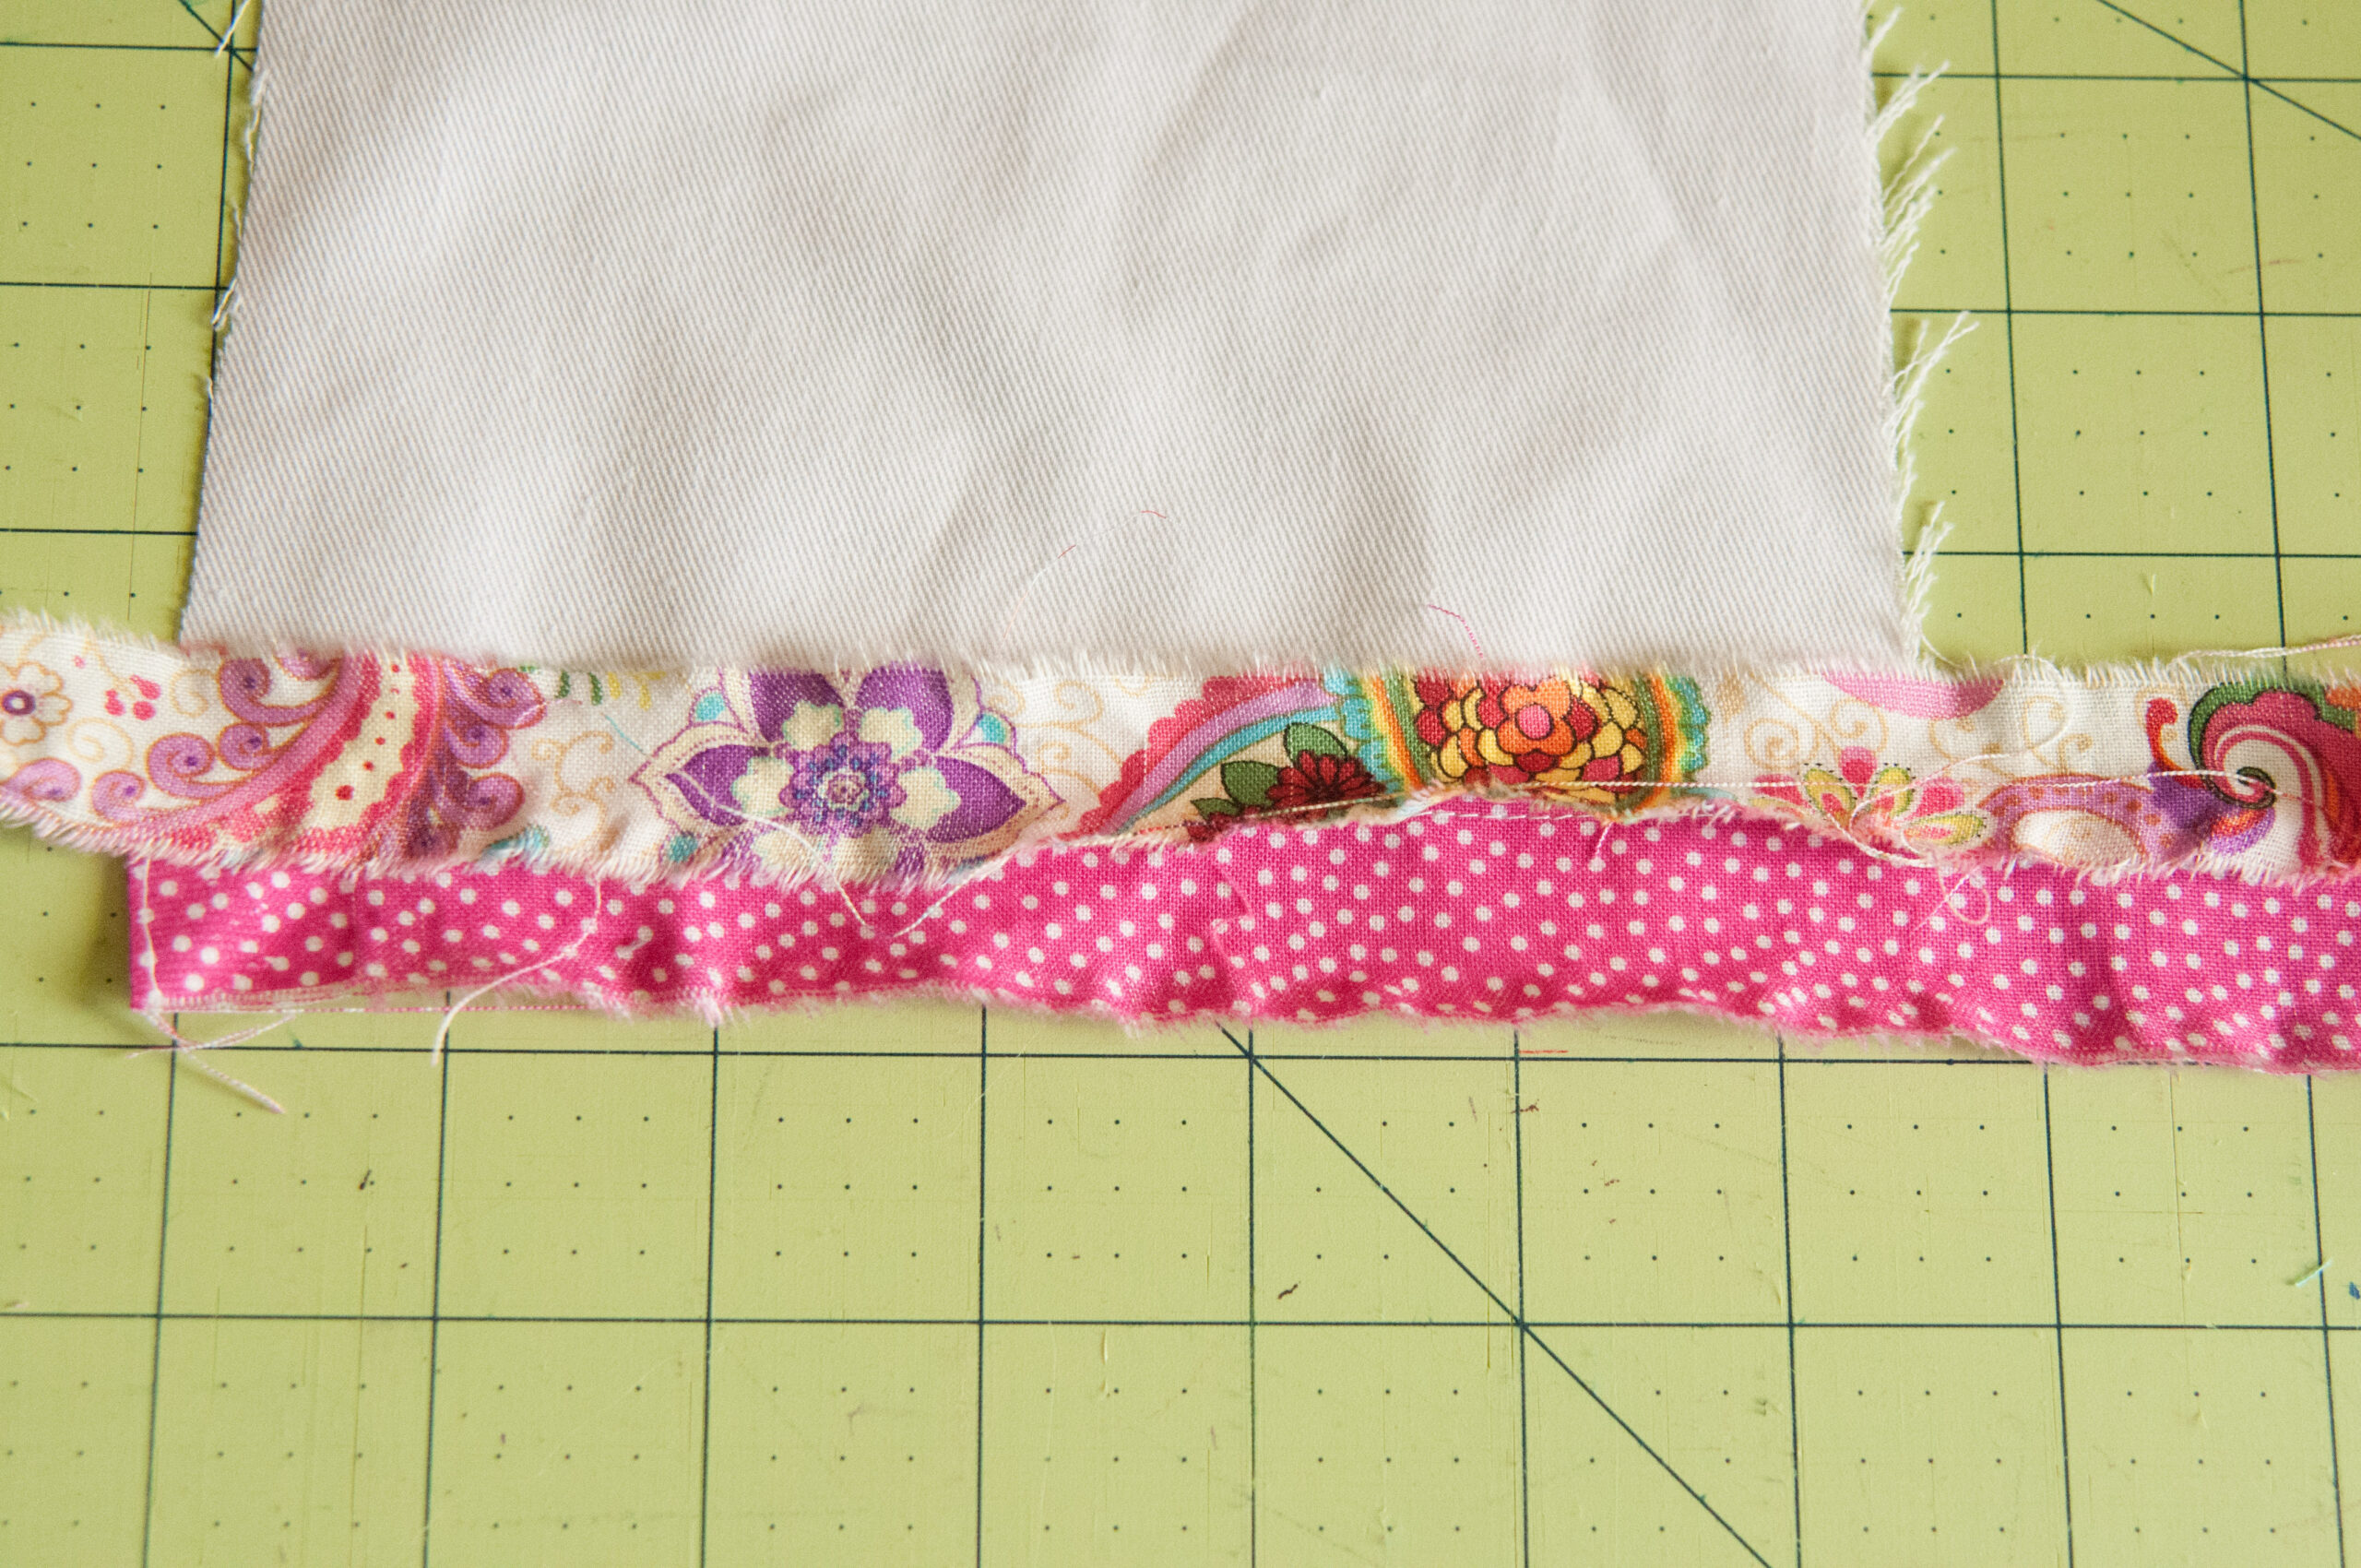
Step 7: Continue stitching down strips until you reach the top of the base. If you have tails on either side like I do, just trim them off to match the base.

Step 8: Decide where you want your first little tree to go and pin the template to your fabric.
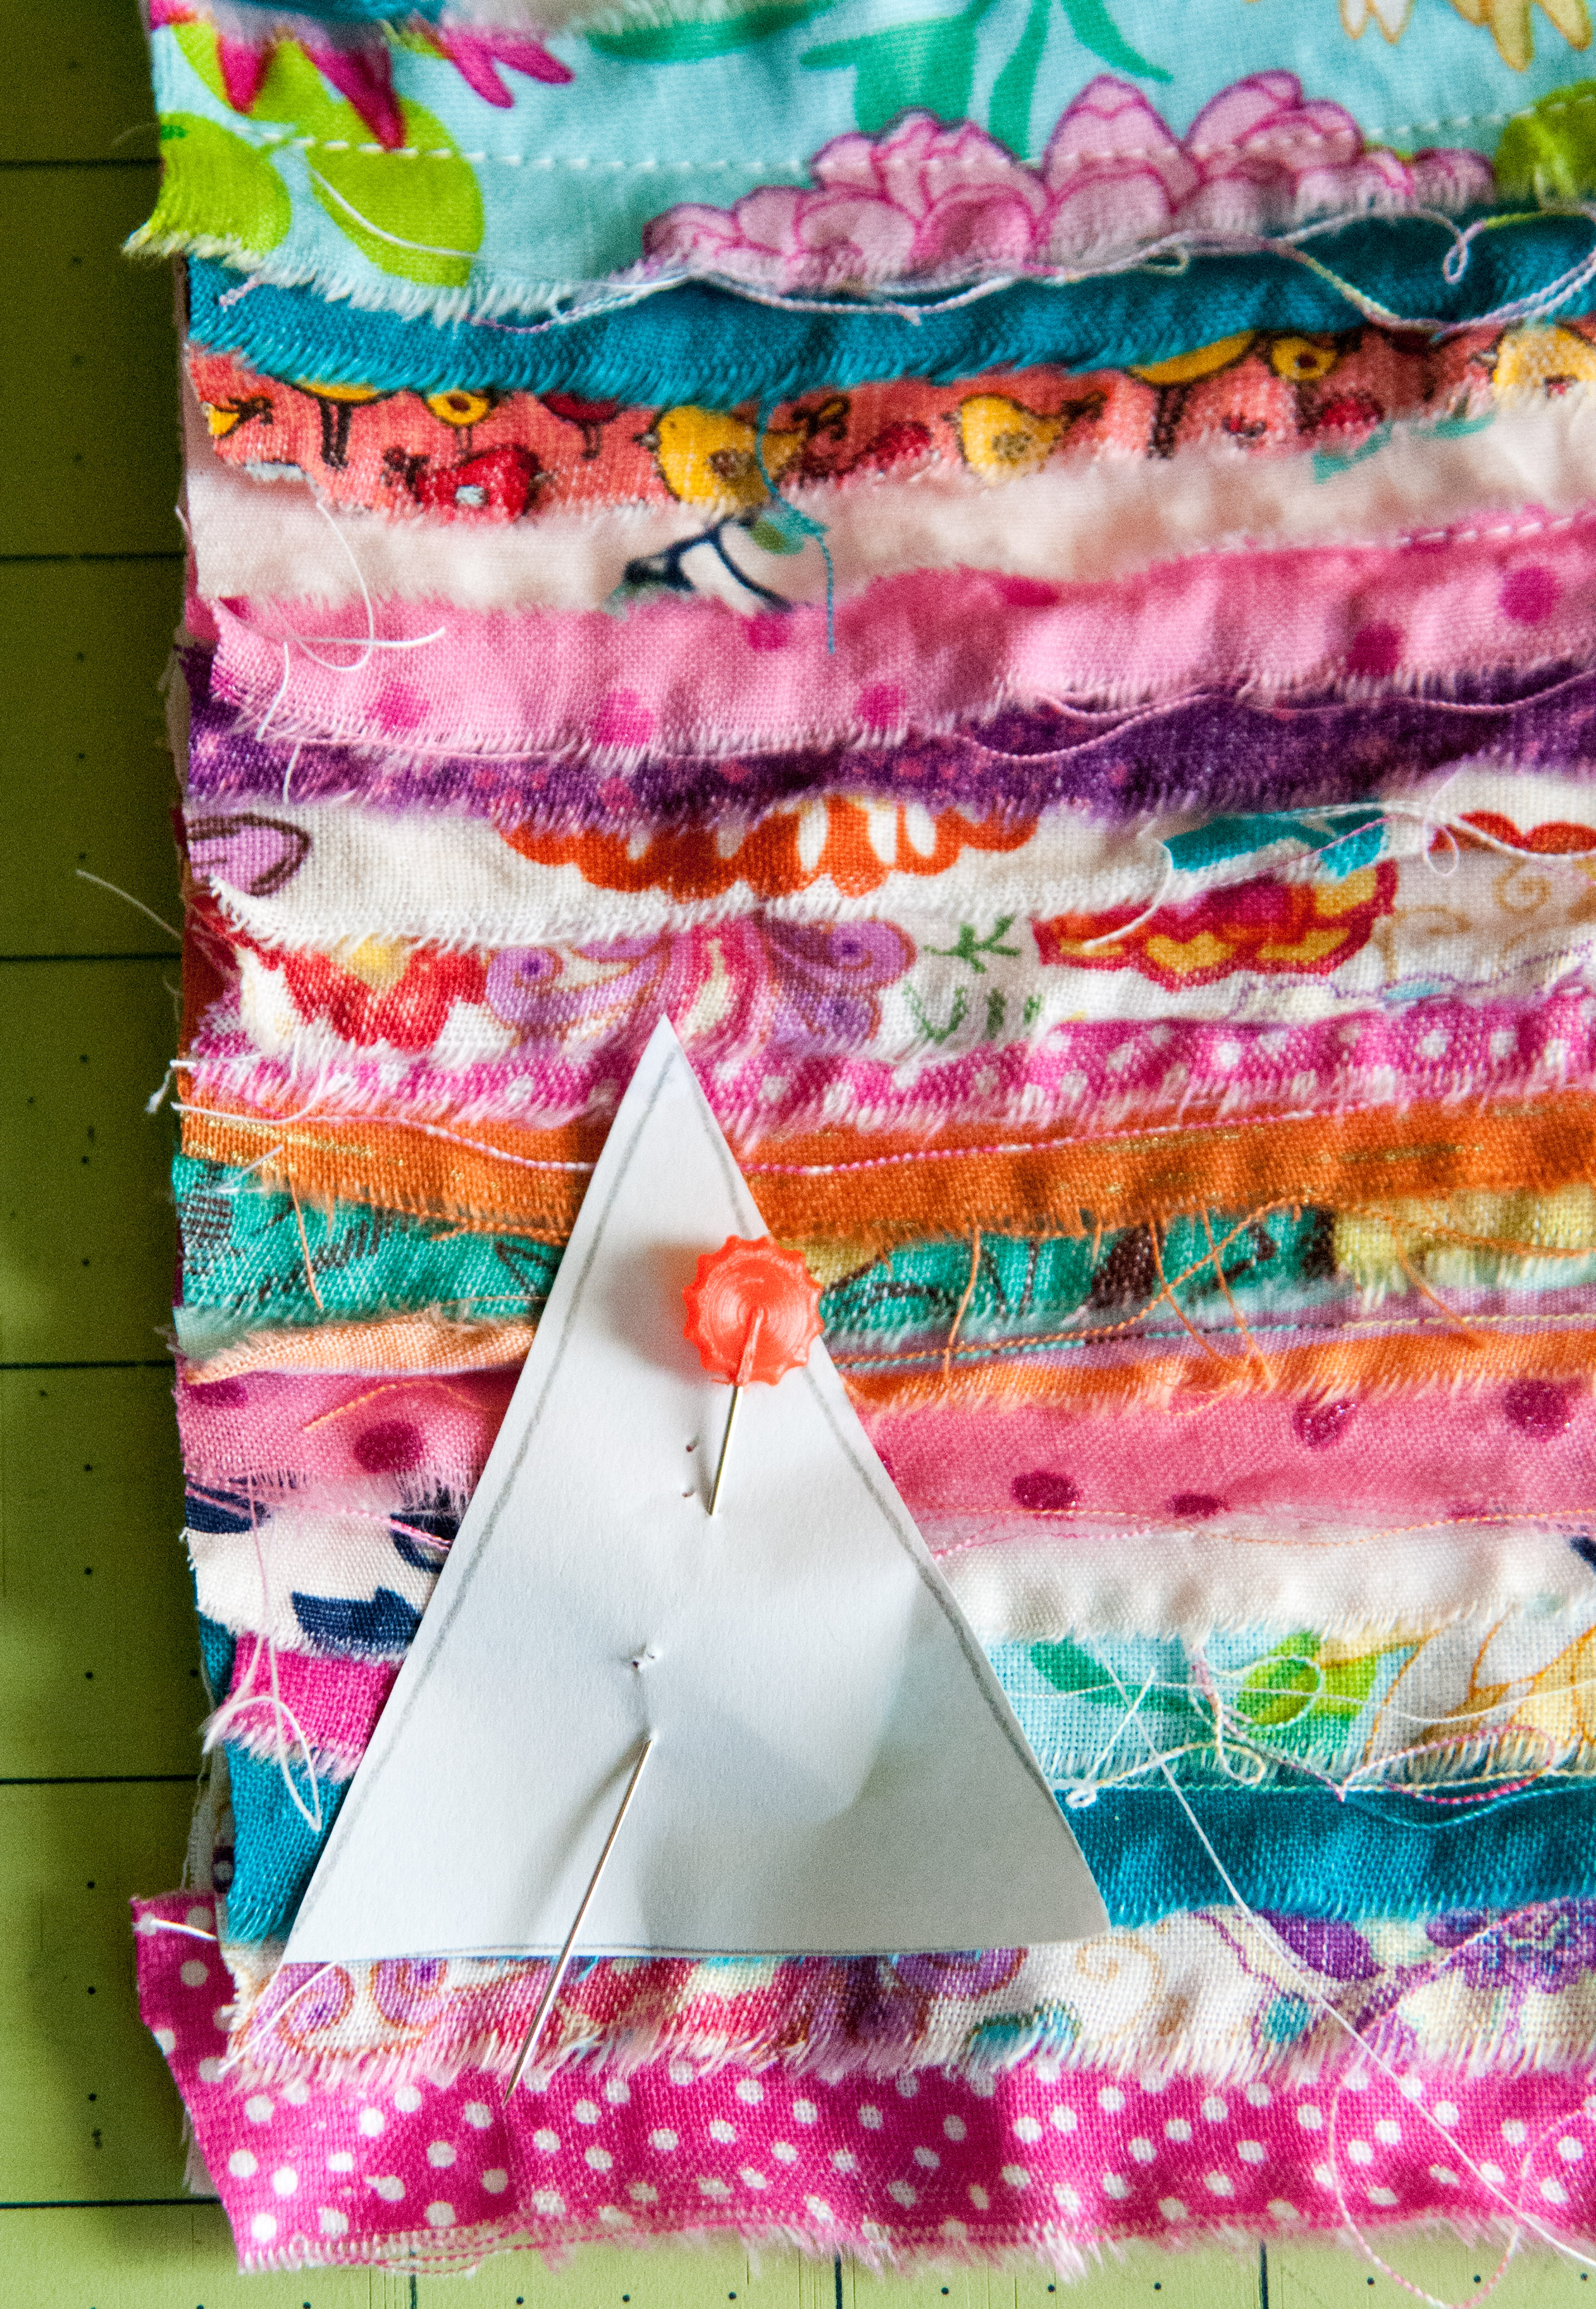
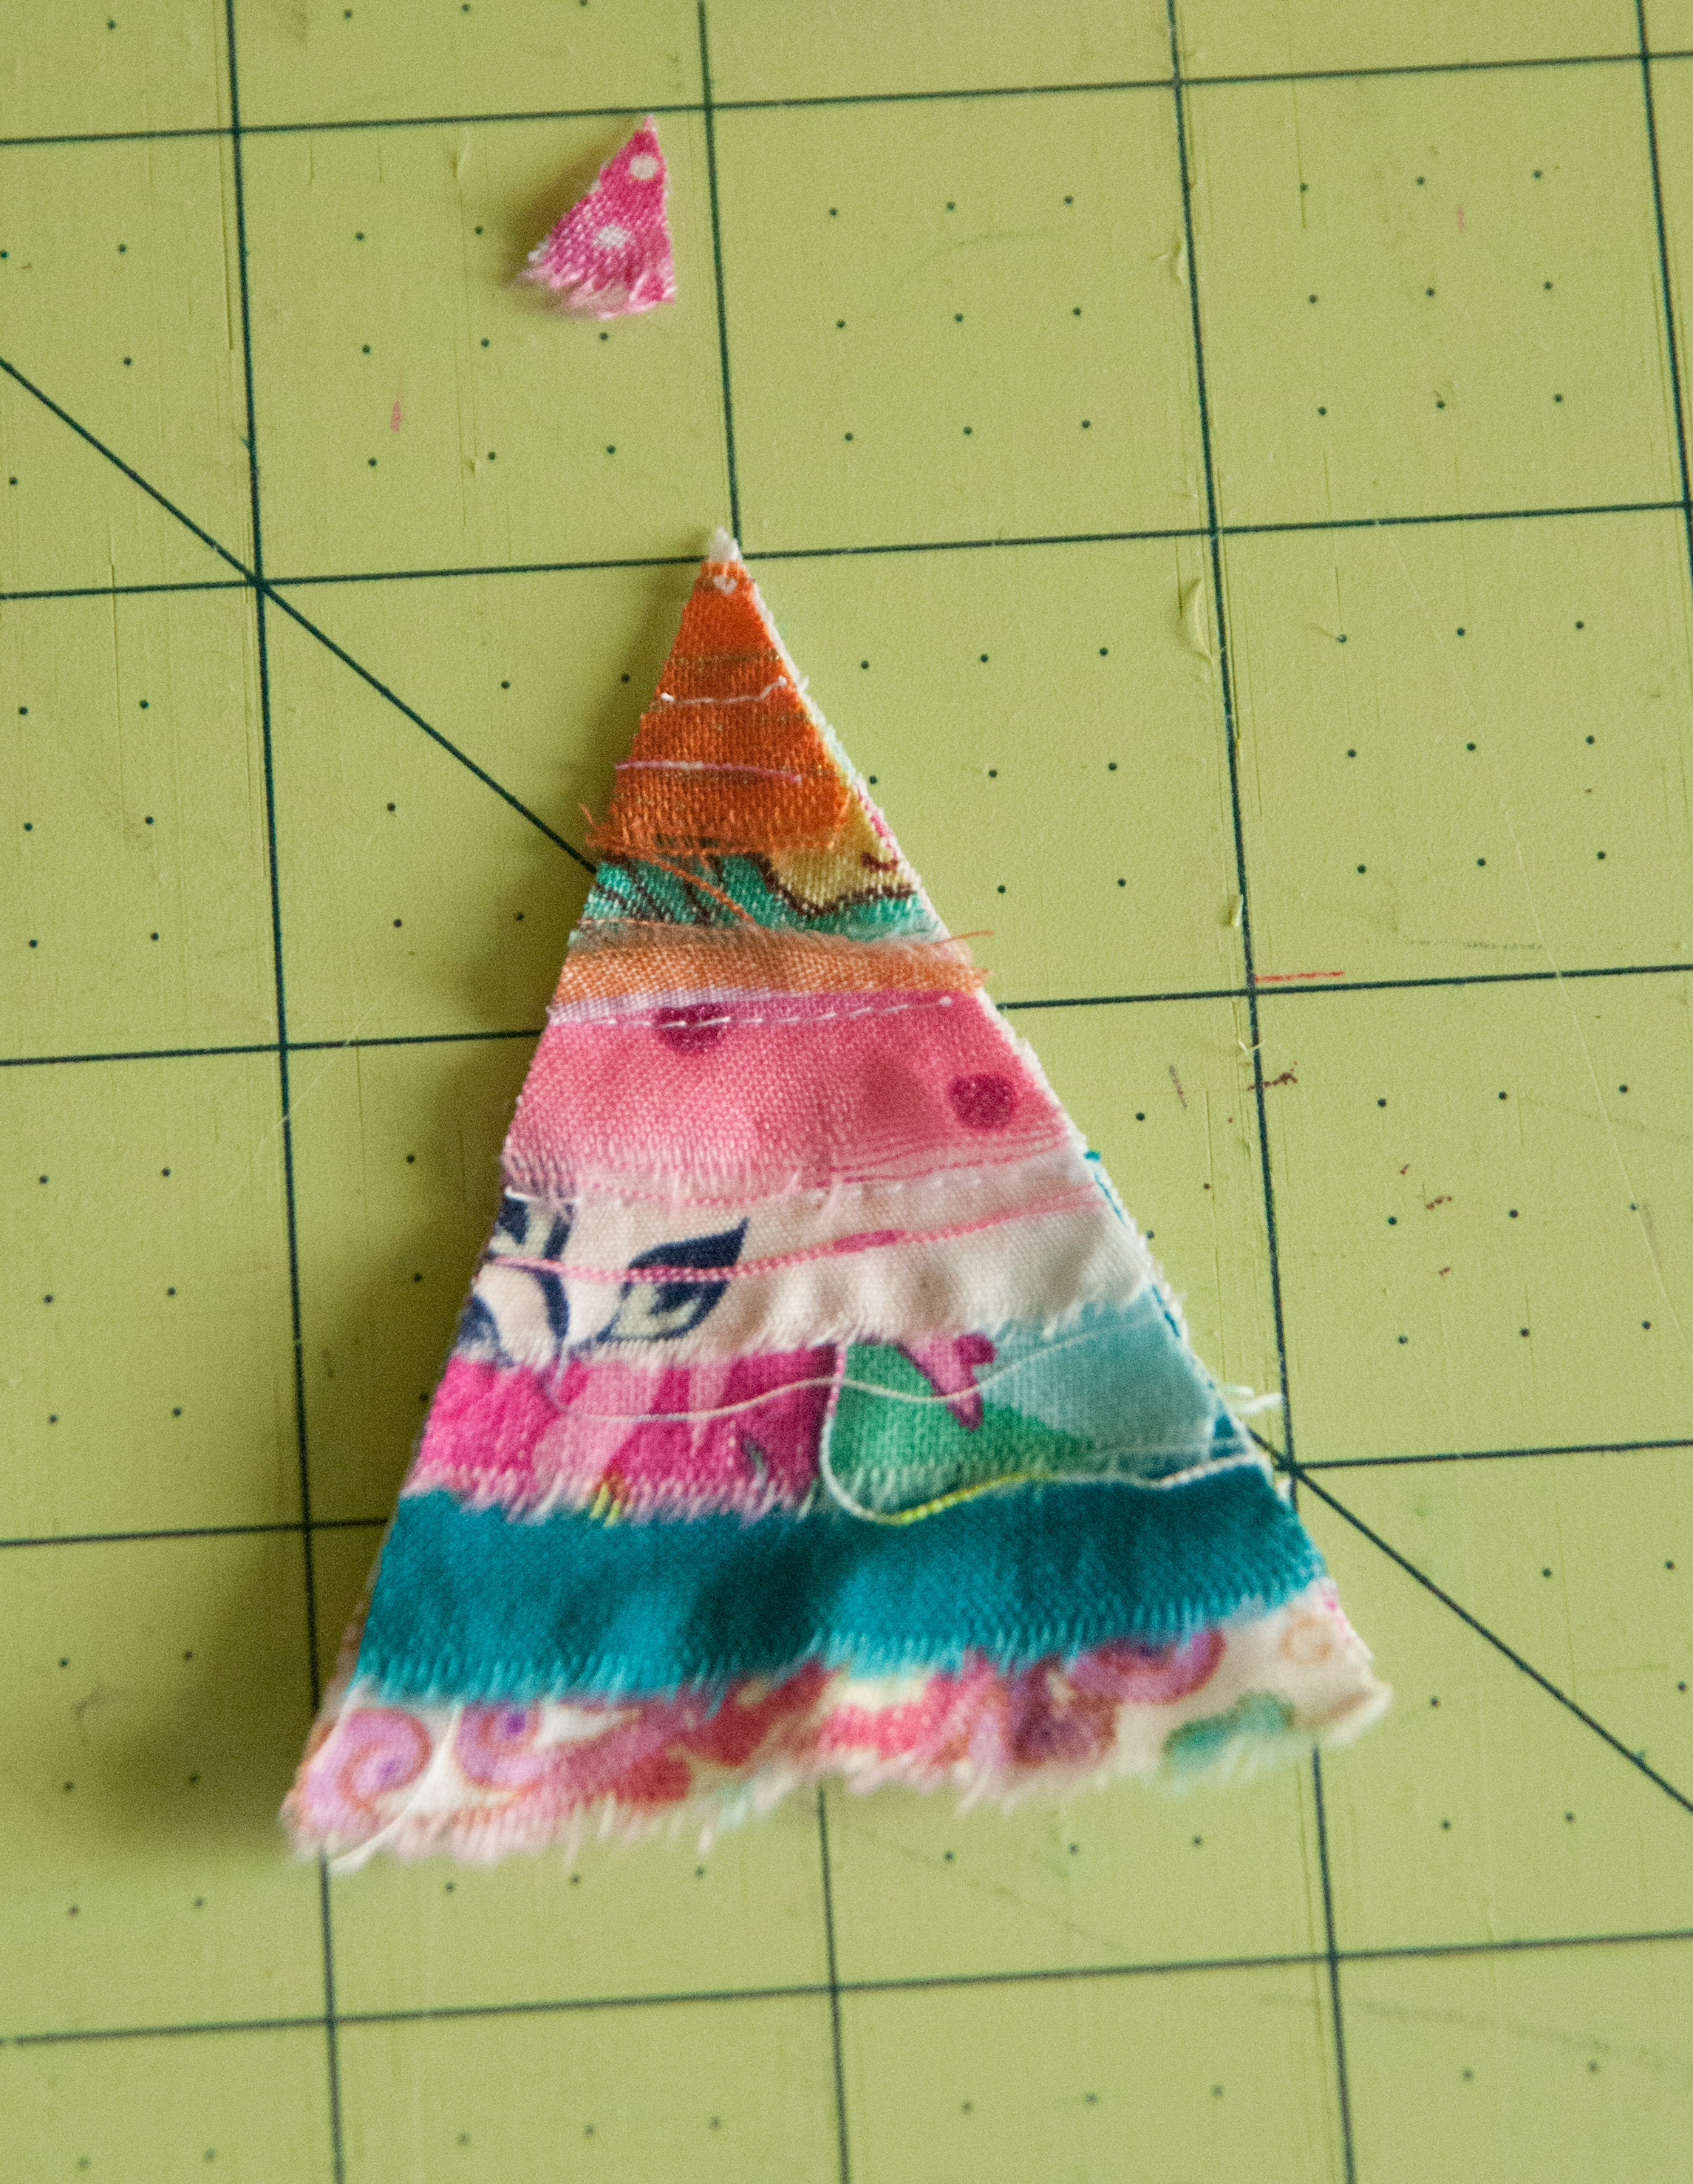
Step 9: Cut it out. It’s okay if the top of your tree falls off. Mine did and we have a neat little trick to hide the exposed stitches.
Step 10: See all those trees begging to be cut out??? I told you this was a fast and easy project!
Step 11: Okay, now grab the fabric you will use for the backing in your hoop. I chose a left over white woven I had on hand. Remember you want your tree to be the focus, so don’t go too crazy with patterns here. Grab your erasable fabric pen and trace the *inside* of your hoop onto the fabric. This will be our guide for placing your tree.

Step 12: Layout your tree and ribbon for the stump. I just used a scrap of ribbon folded in half with the cut edges under the tree. Remove the tree and stitch down the stump.
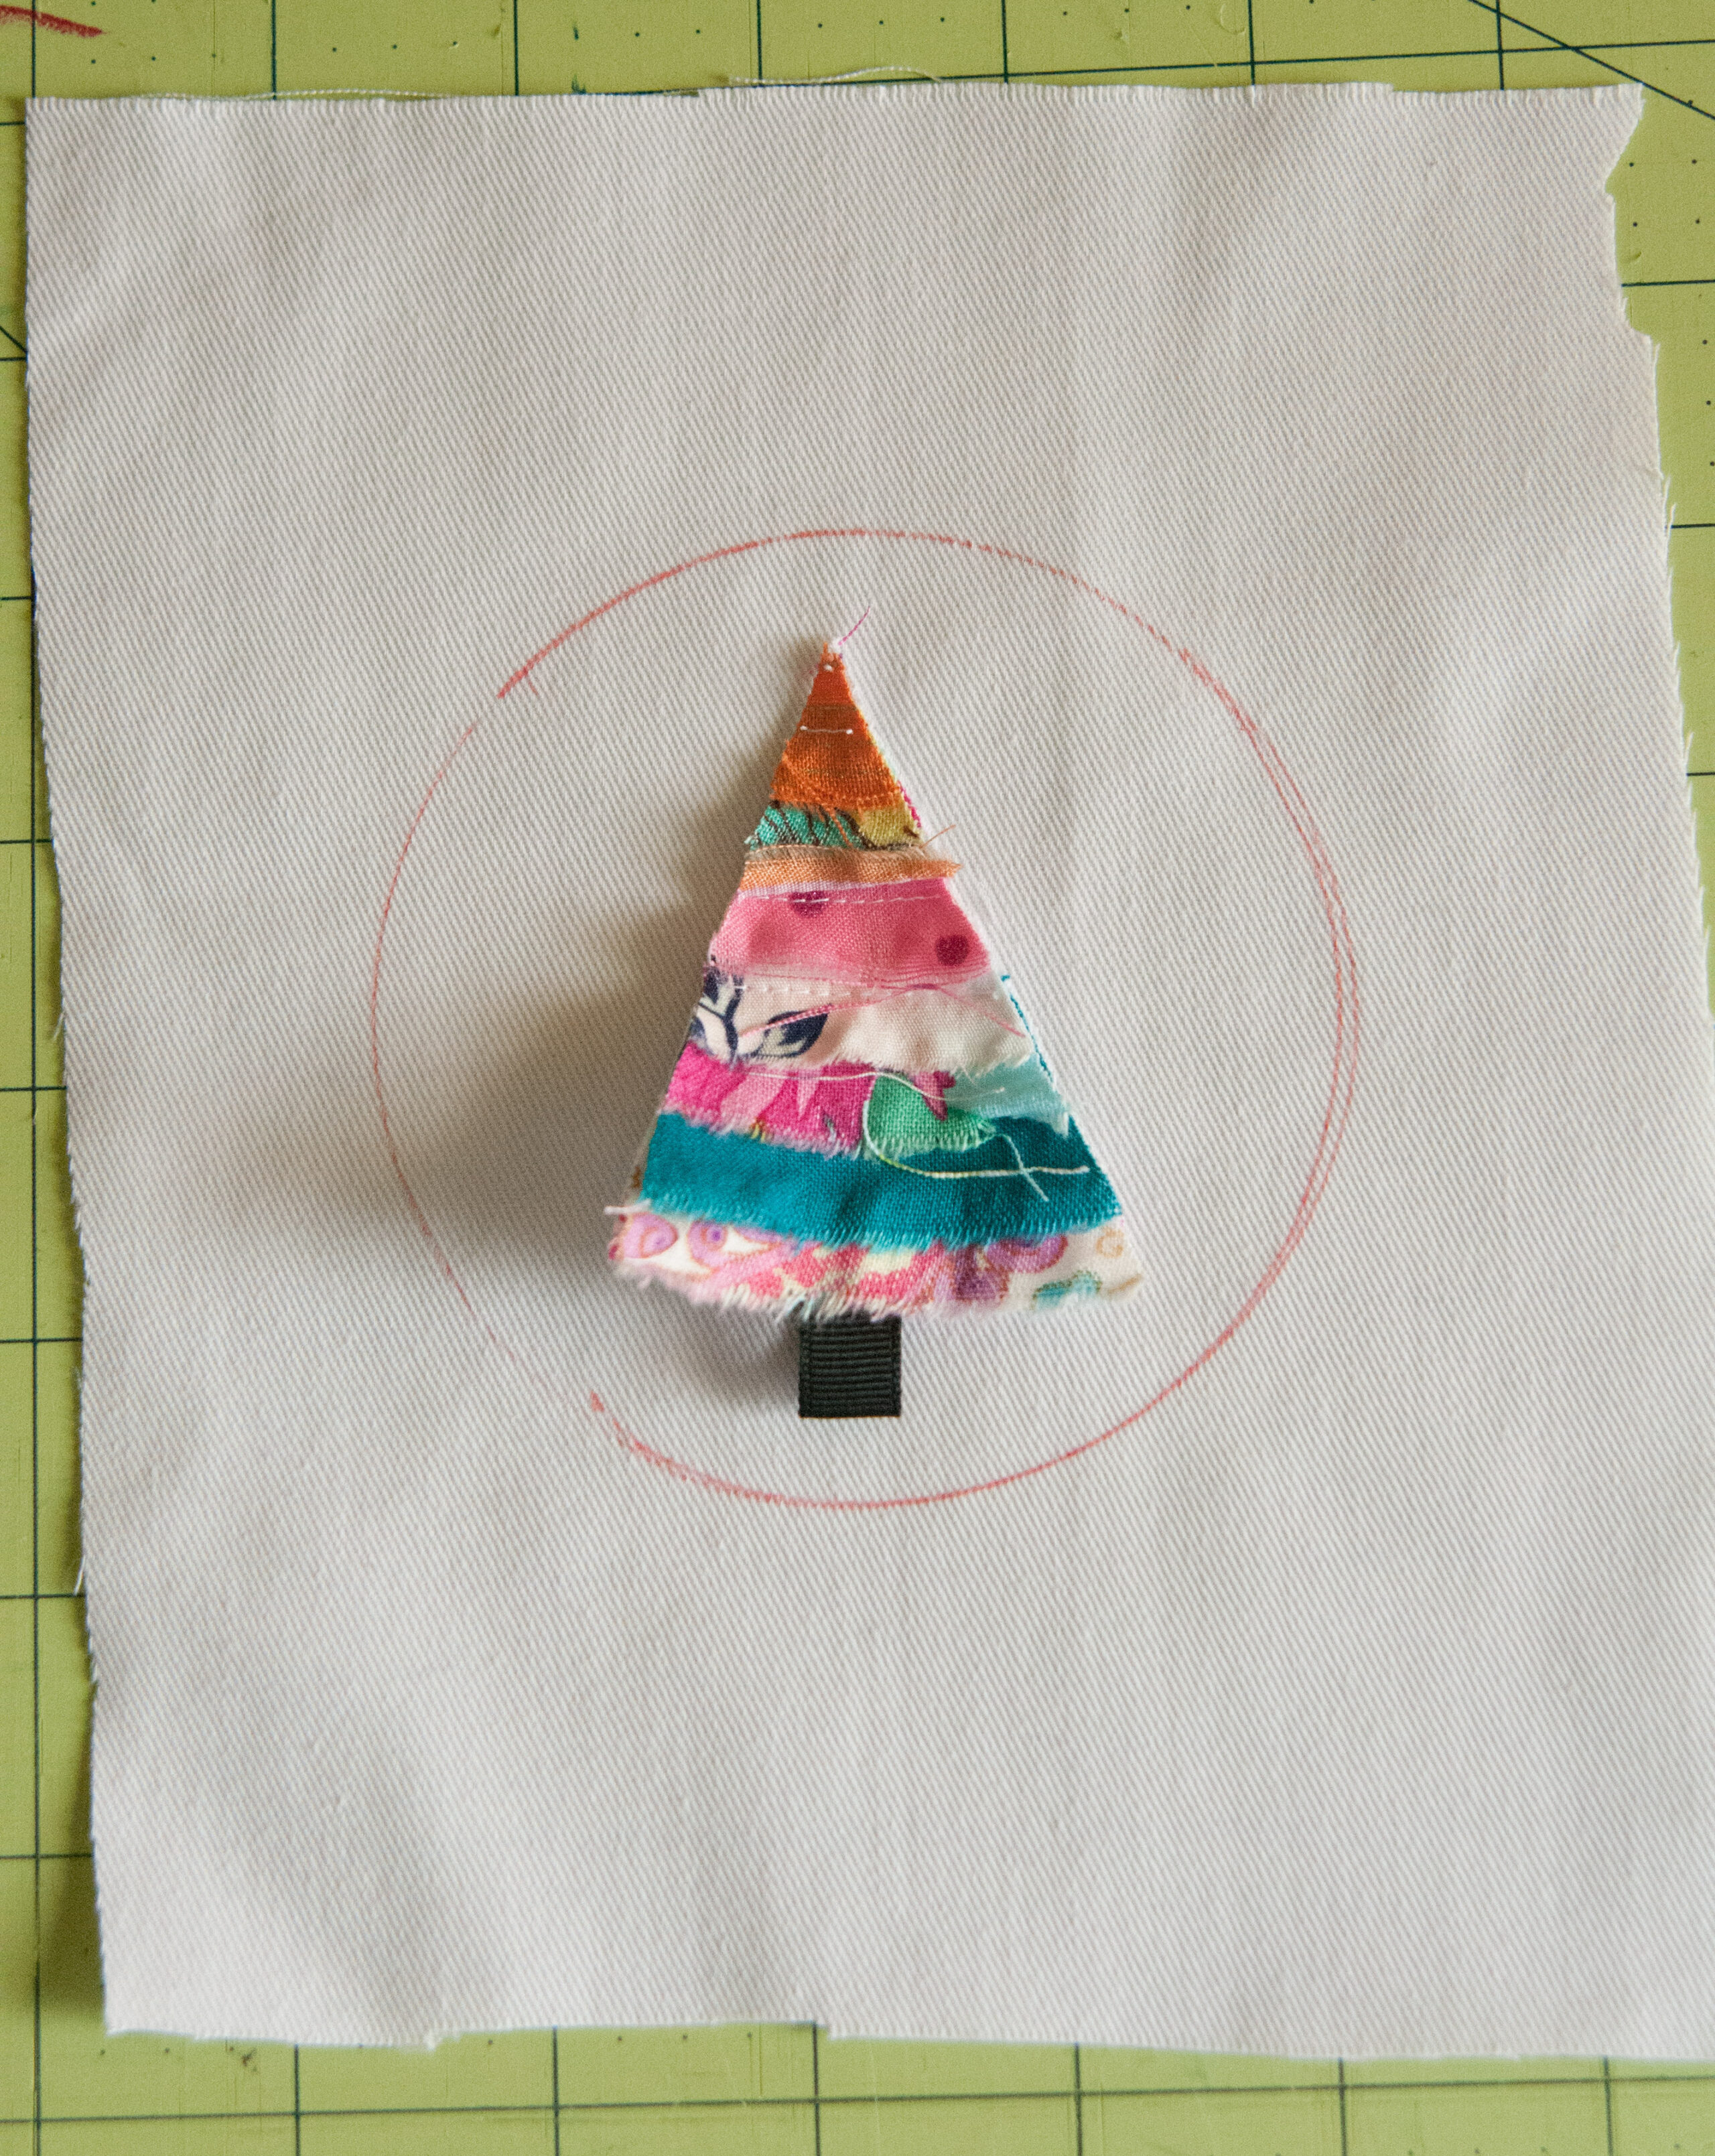

Step 13: Put your tree back in place and stitch it down however your heart desires. I started at the top and did the sides first and then the middle.
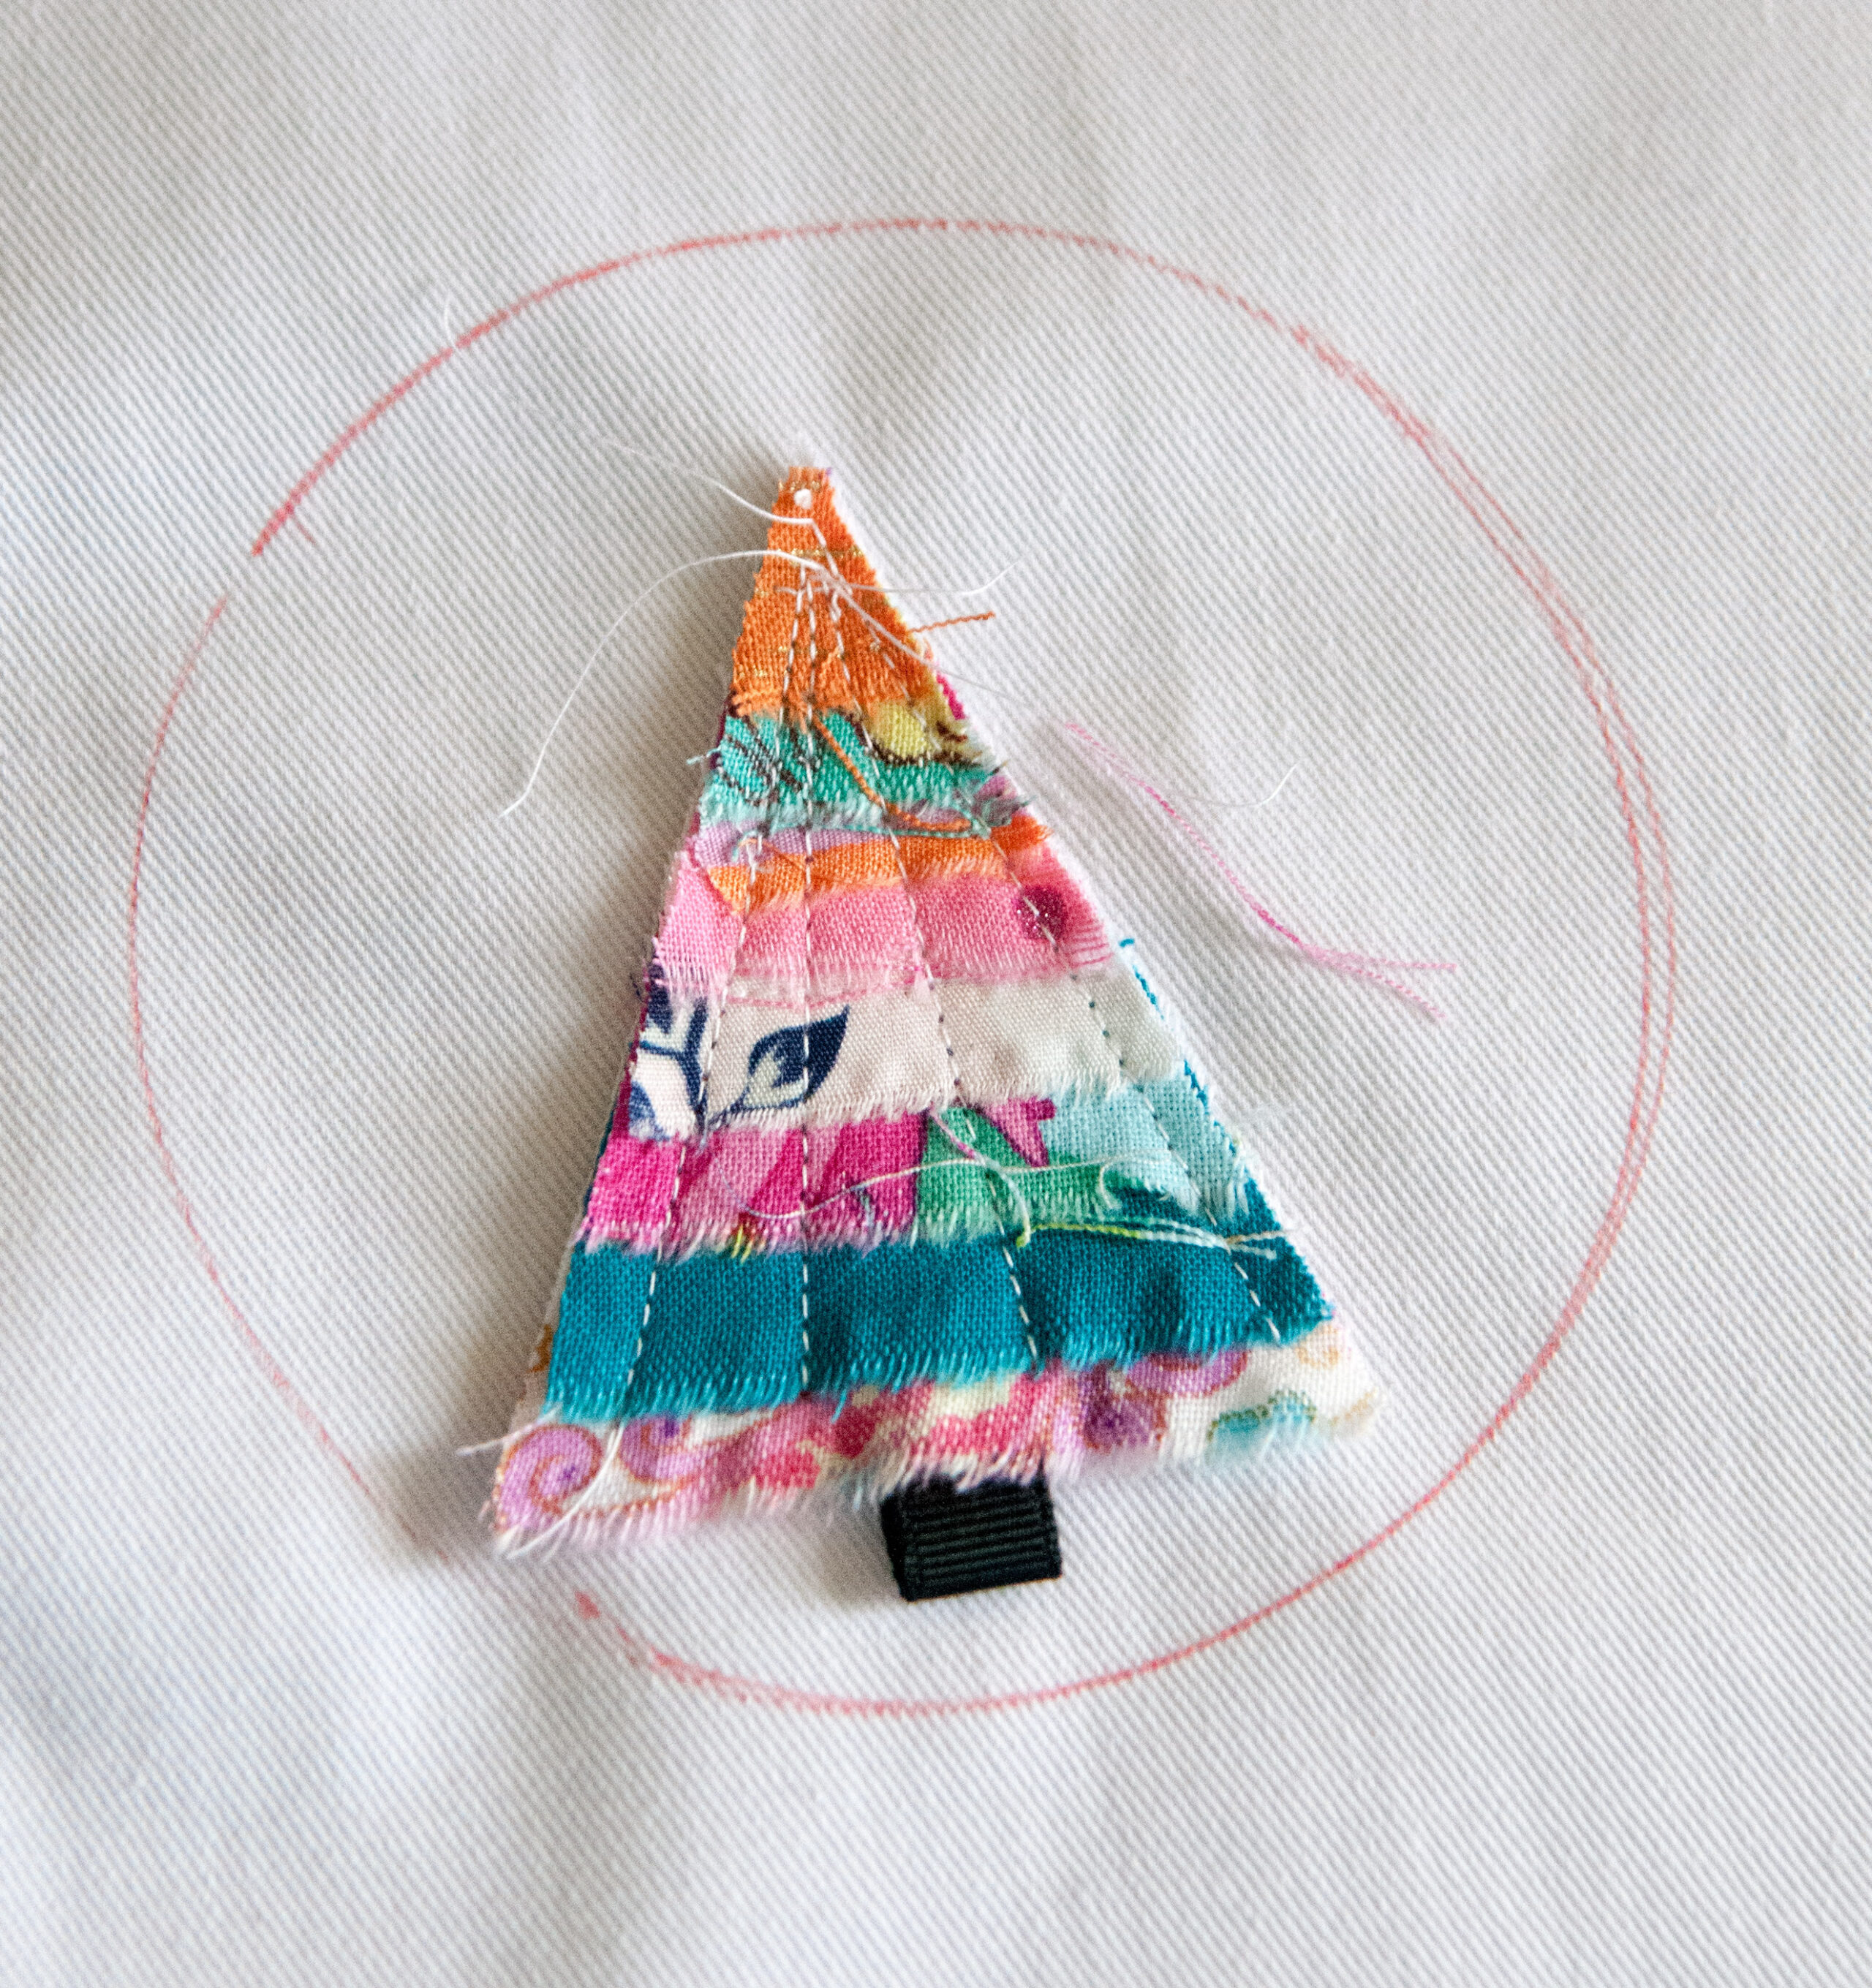
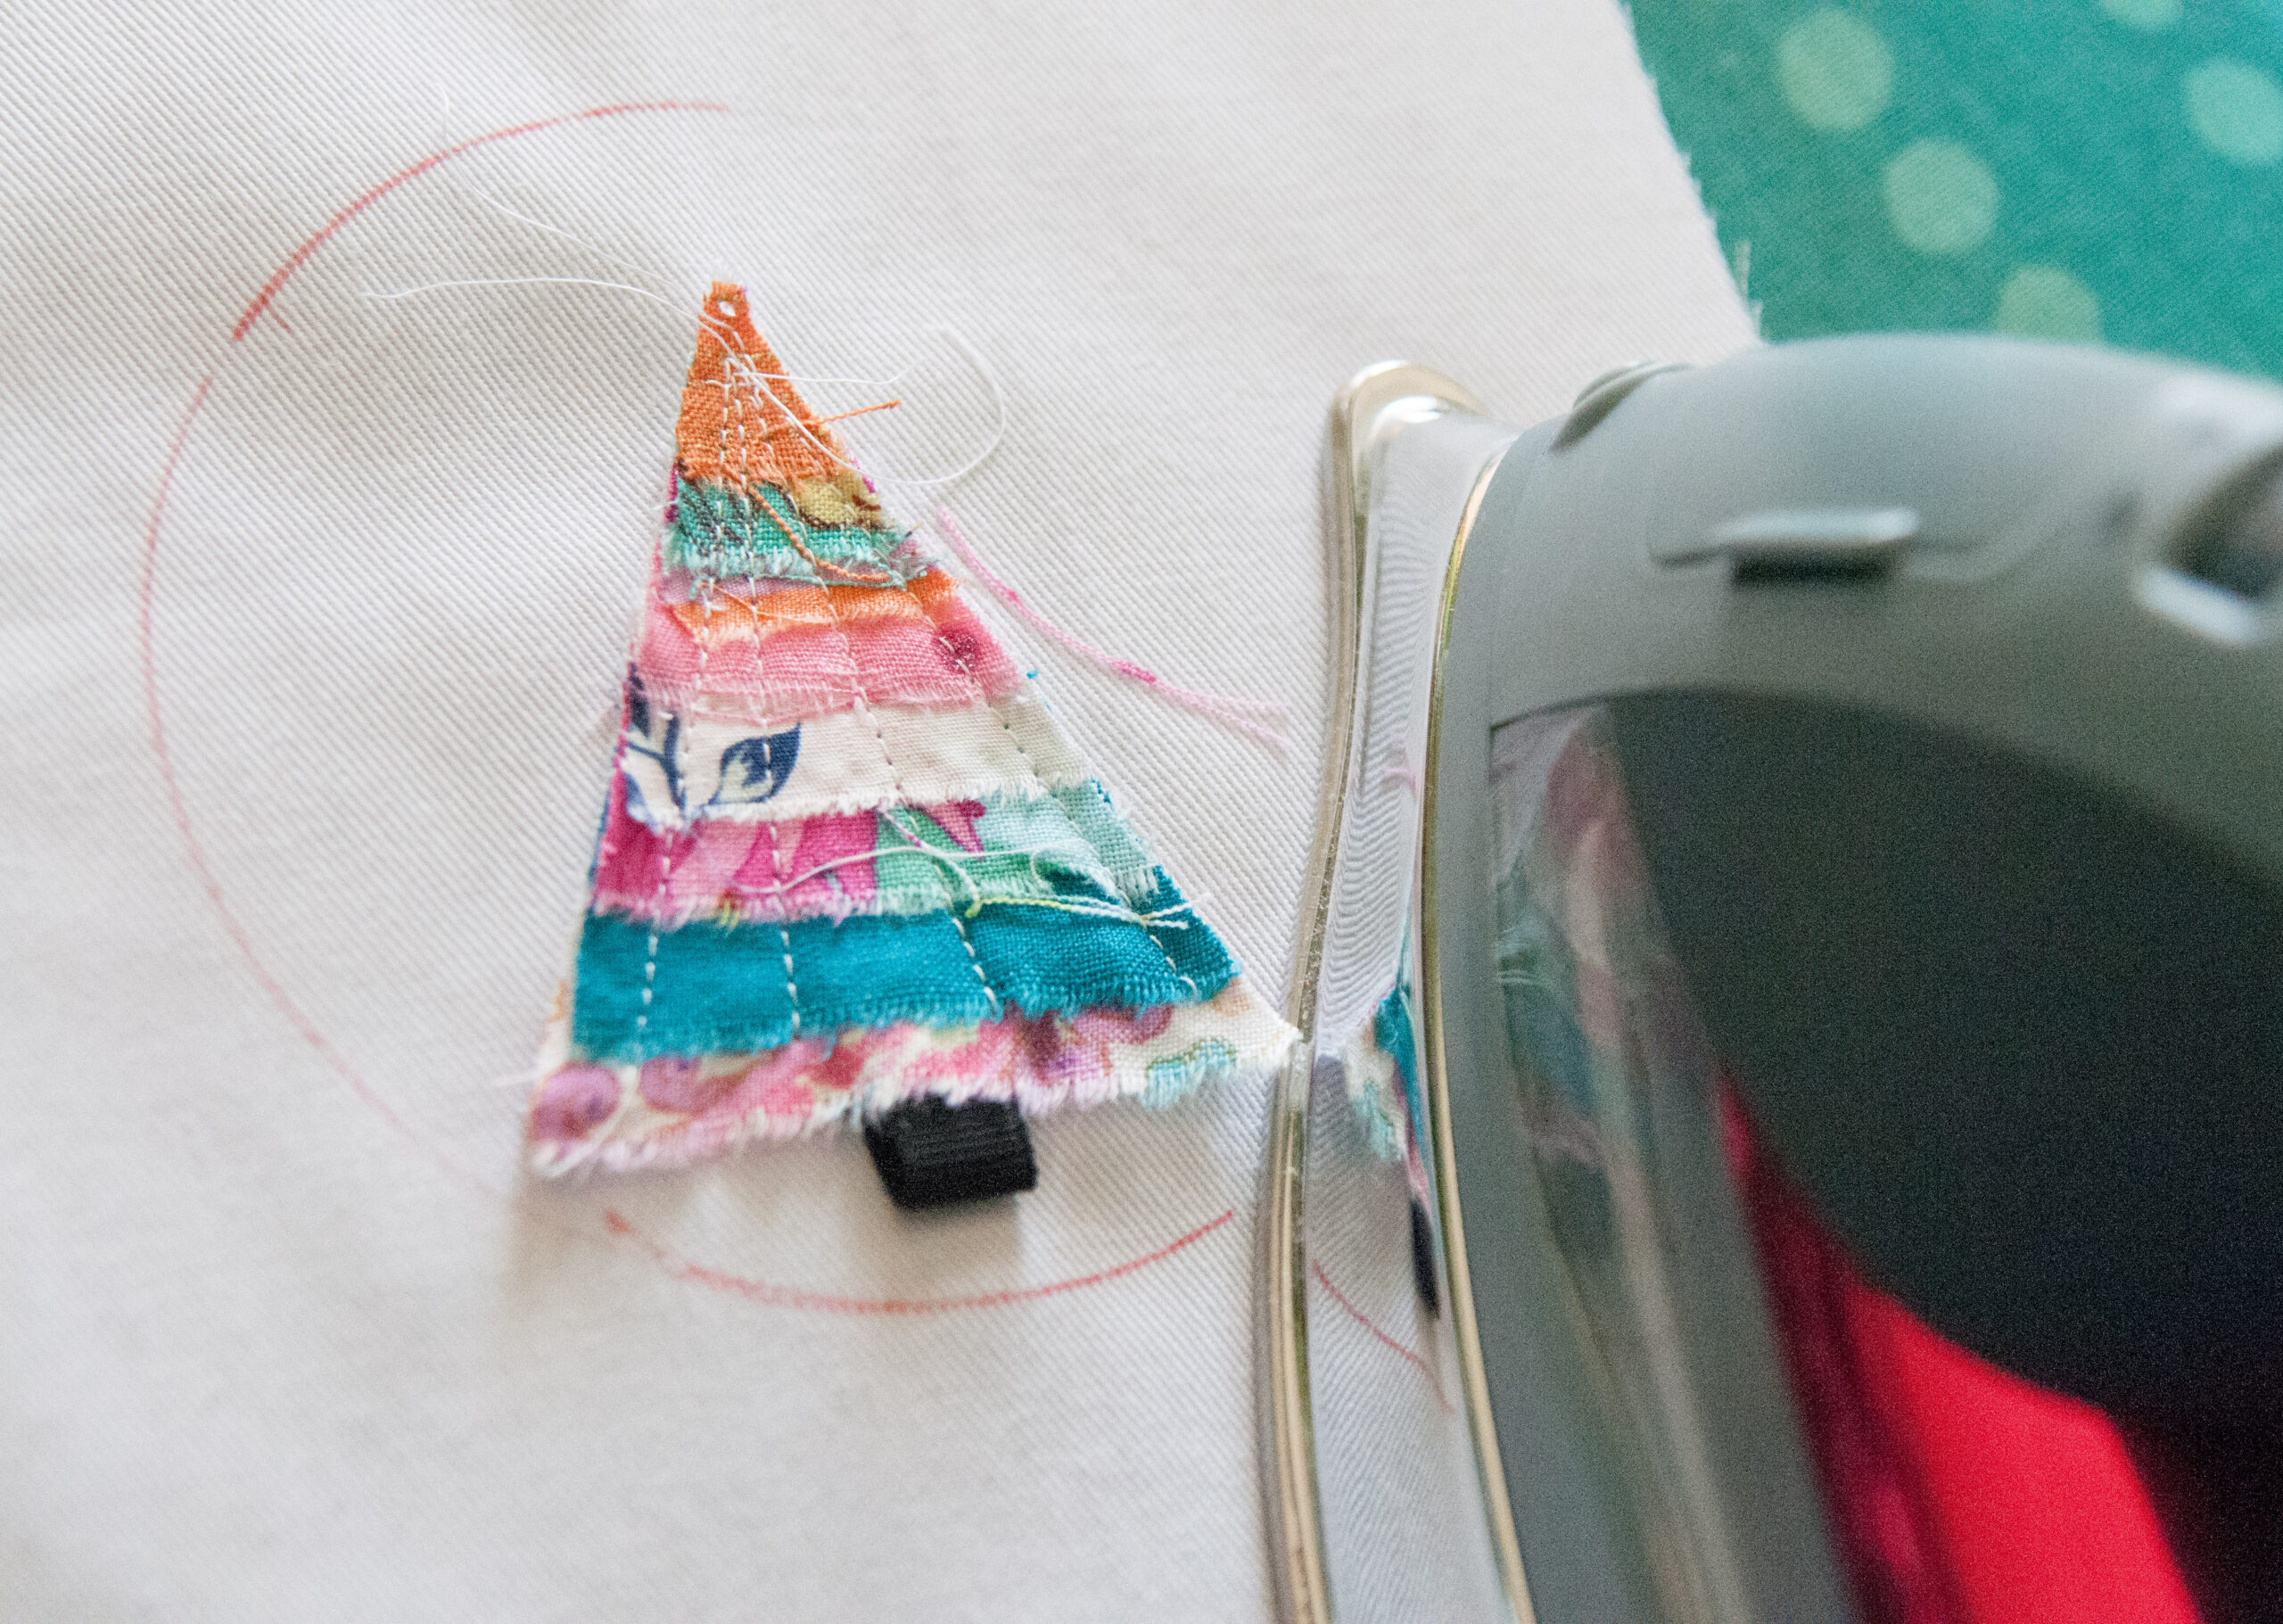
Step 14: Iron off your erasable fabric pen.
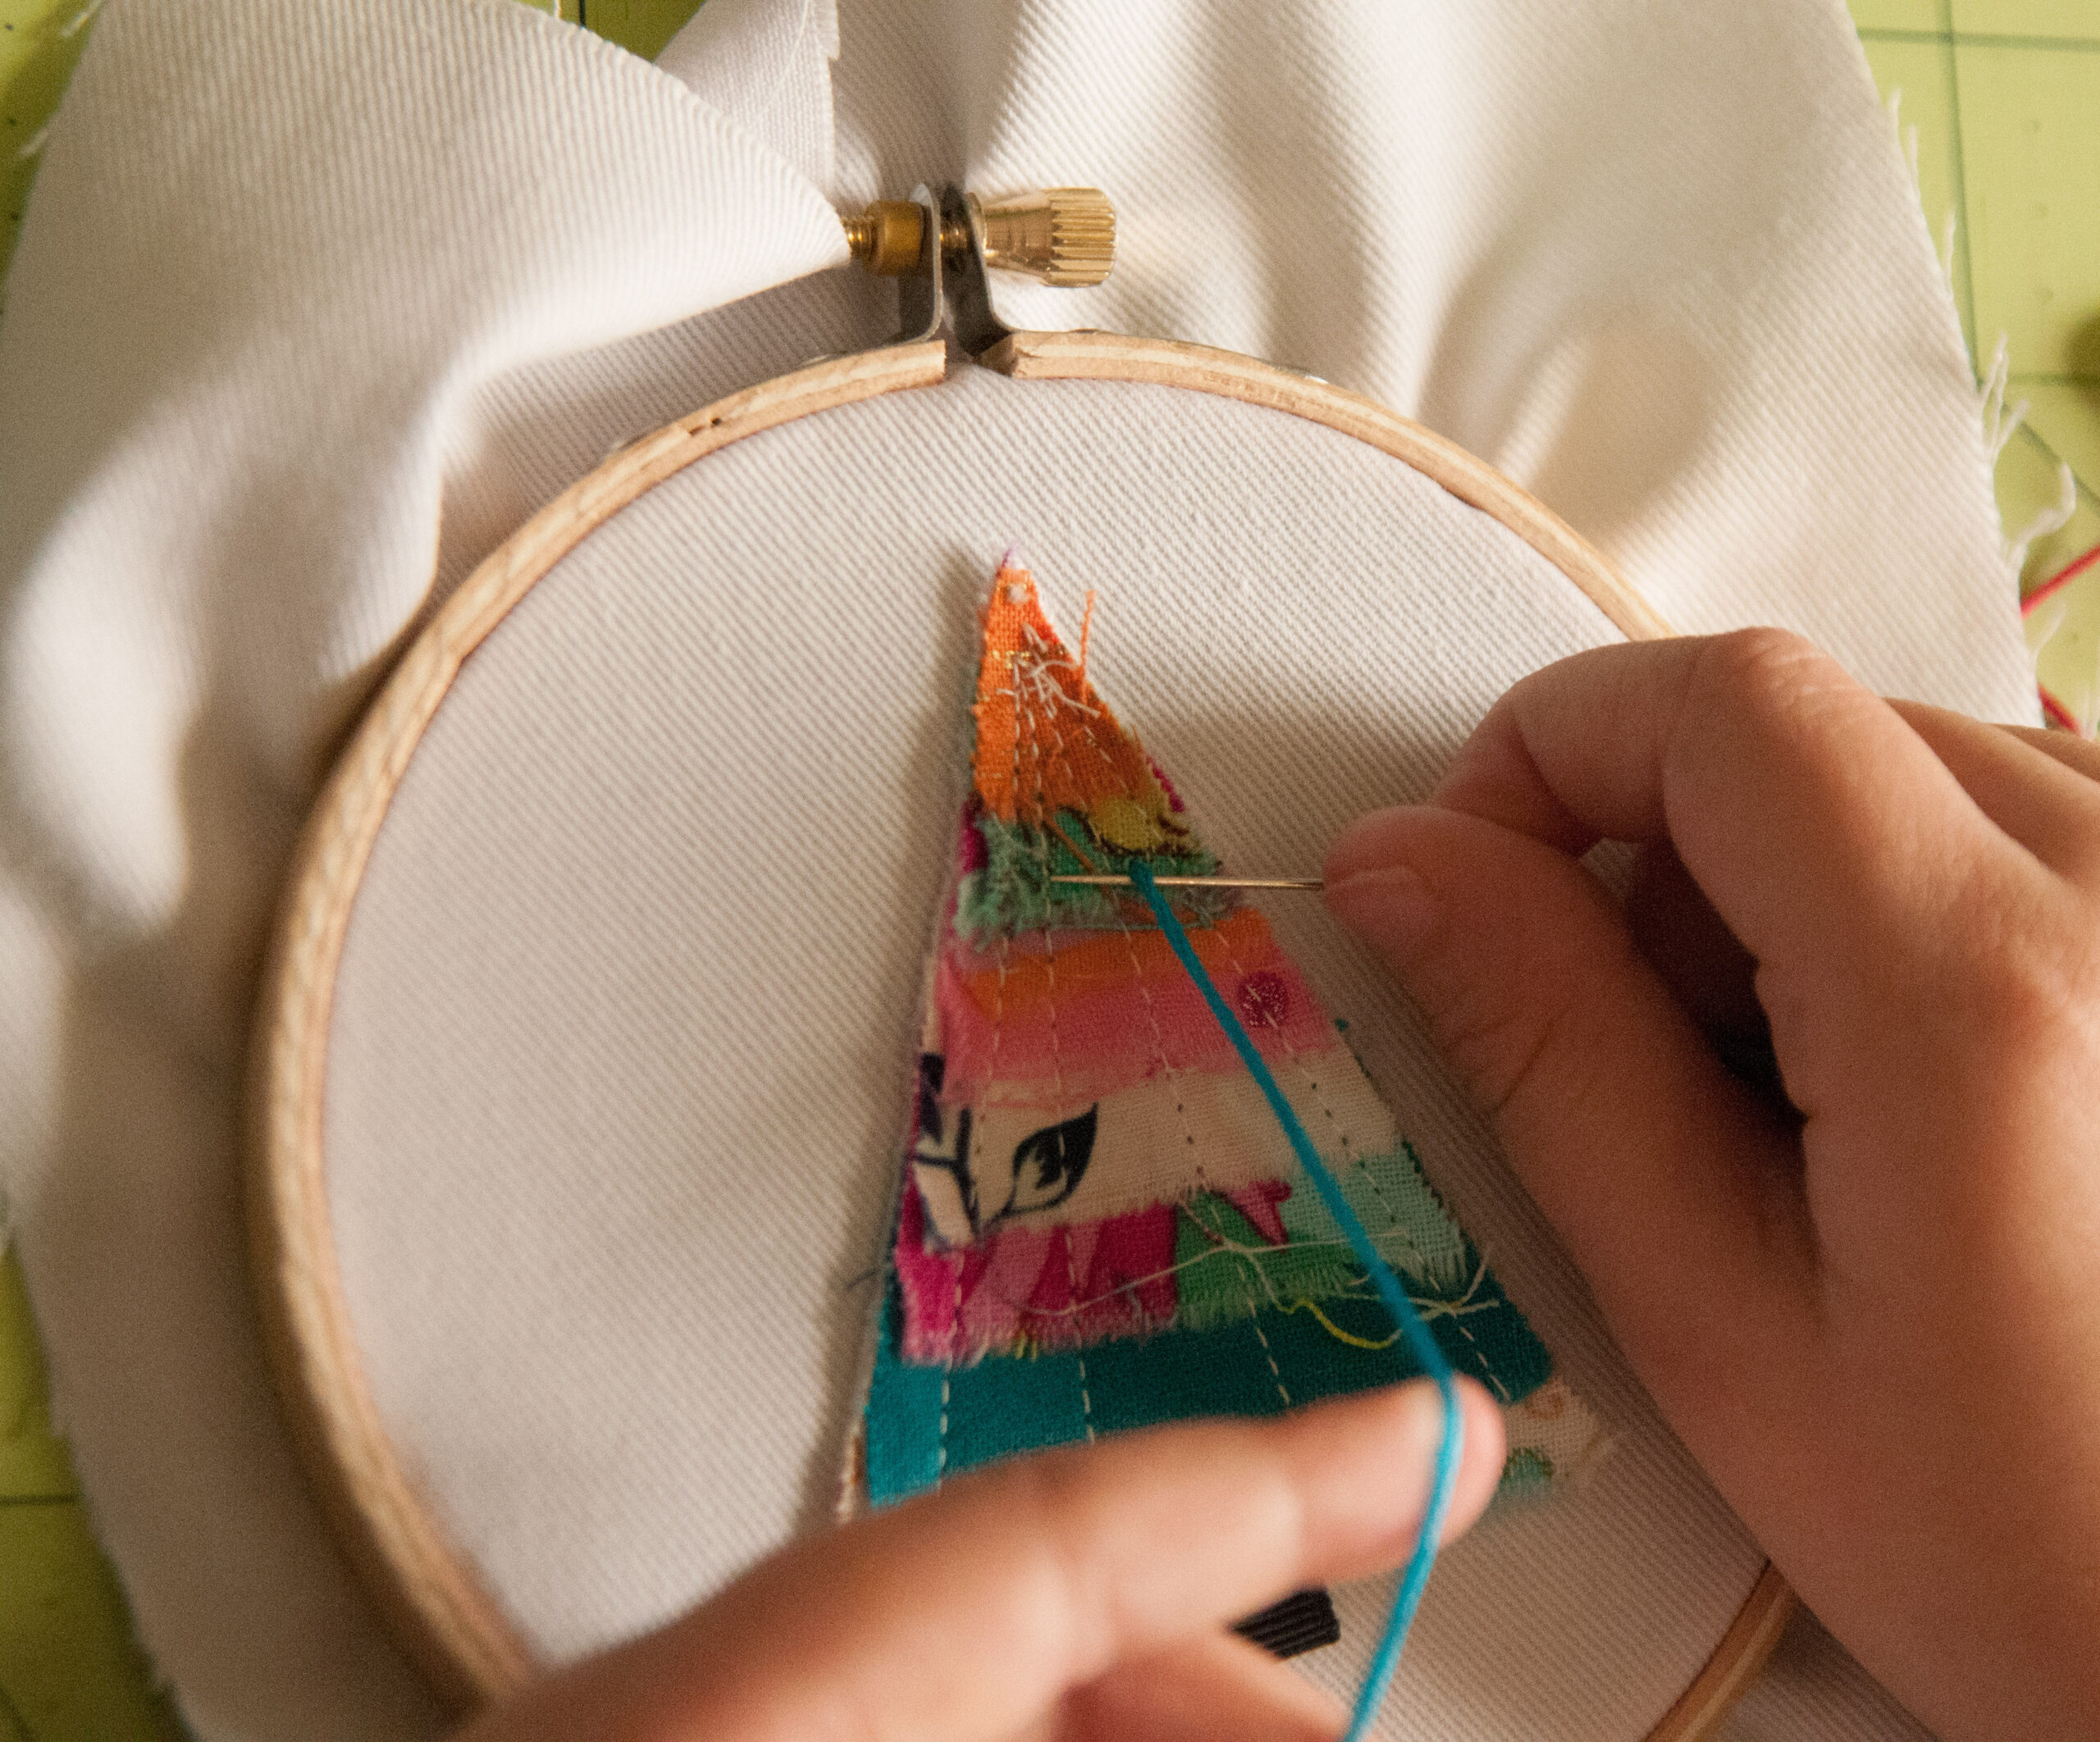
Step 15: Put your tree in the hoop and get your needled threaded with embroidery floss. I used all six strands of the floss for this project. Tie a knot in the end of your floss.
Step 16: We will begin with the ornaments, which are made using the French Knot at the back of the ornament. Begin by starting on the underside of your hoop.
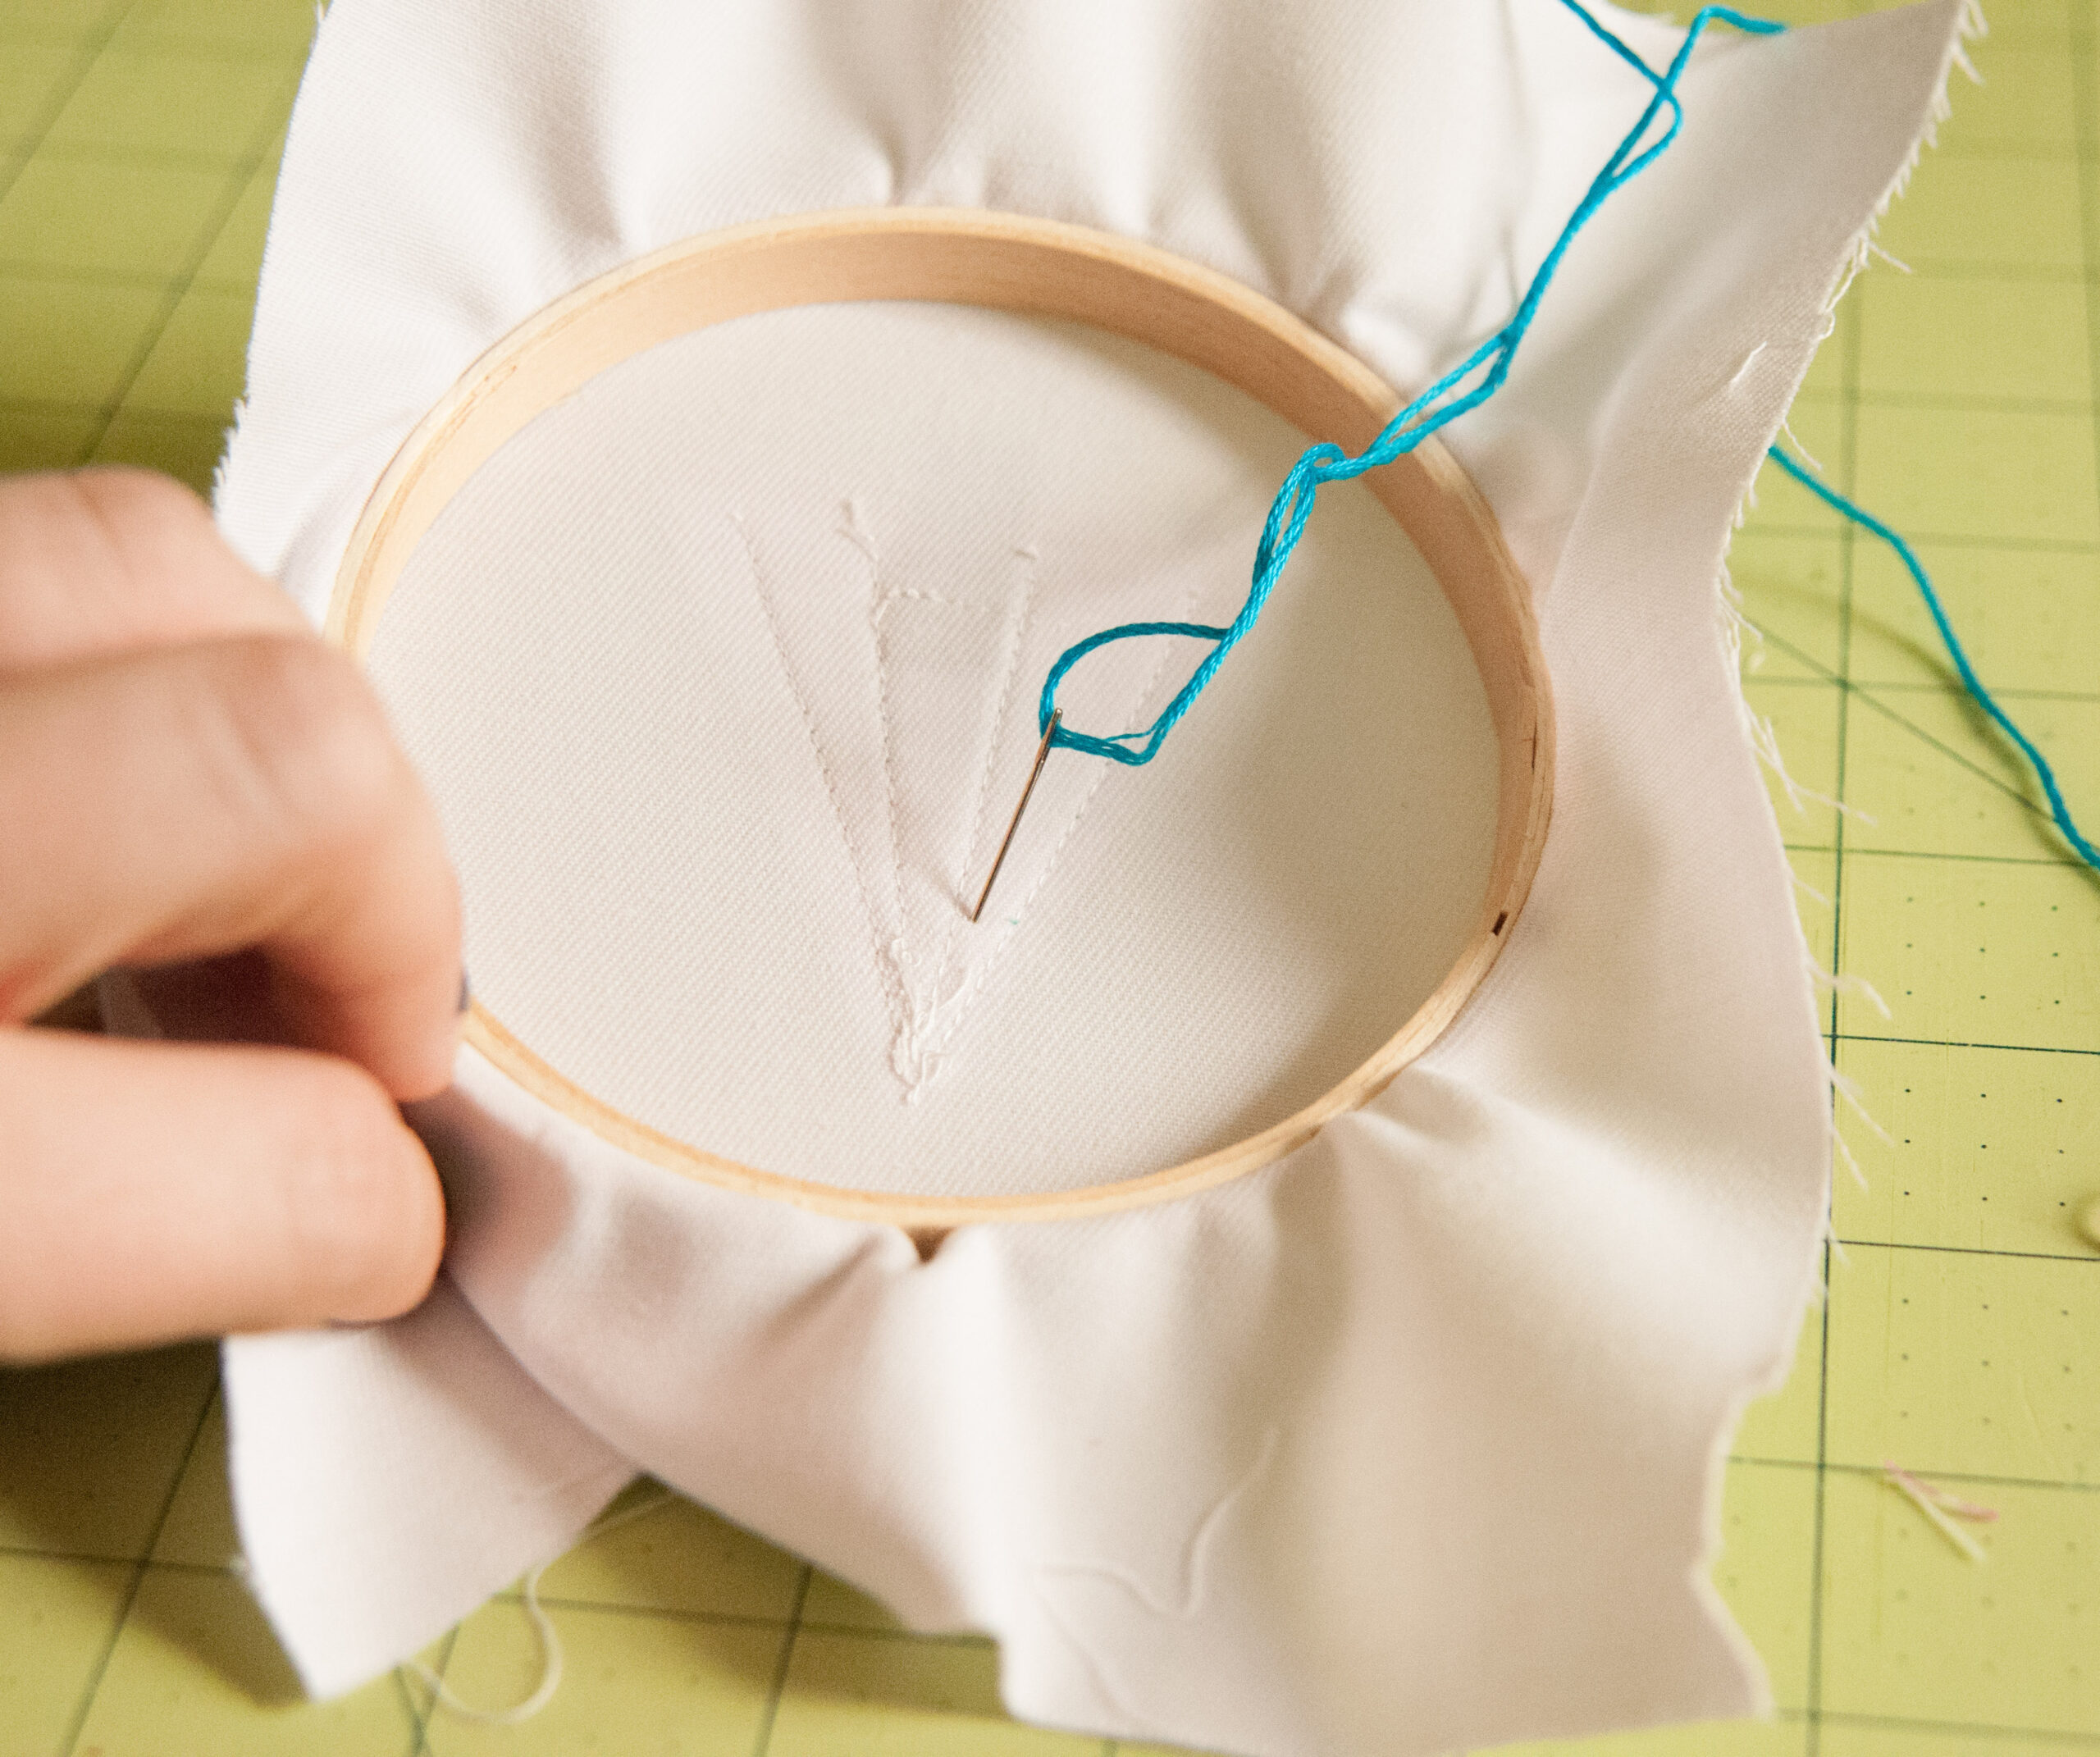
Step 17: Pull floss through until your knot is tight.
Step 18: This is where it got hard to photograph and work at the same time – so Stella stepped in to help and consequently can now sew a French Knot! (great kid project!) Pull your floss tight and place the needle under the floss at the base.
Step 19: Wrap the floss around the needle.

Step 20: Wrap it again so it looks like this.

Step 21: Hold on tight and put the needle back through the fabric right next to where it poked out. Be sure to hold that floss tight or your knot will end up like a pouf.
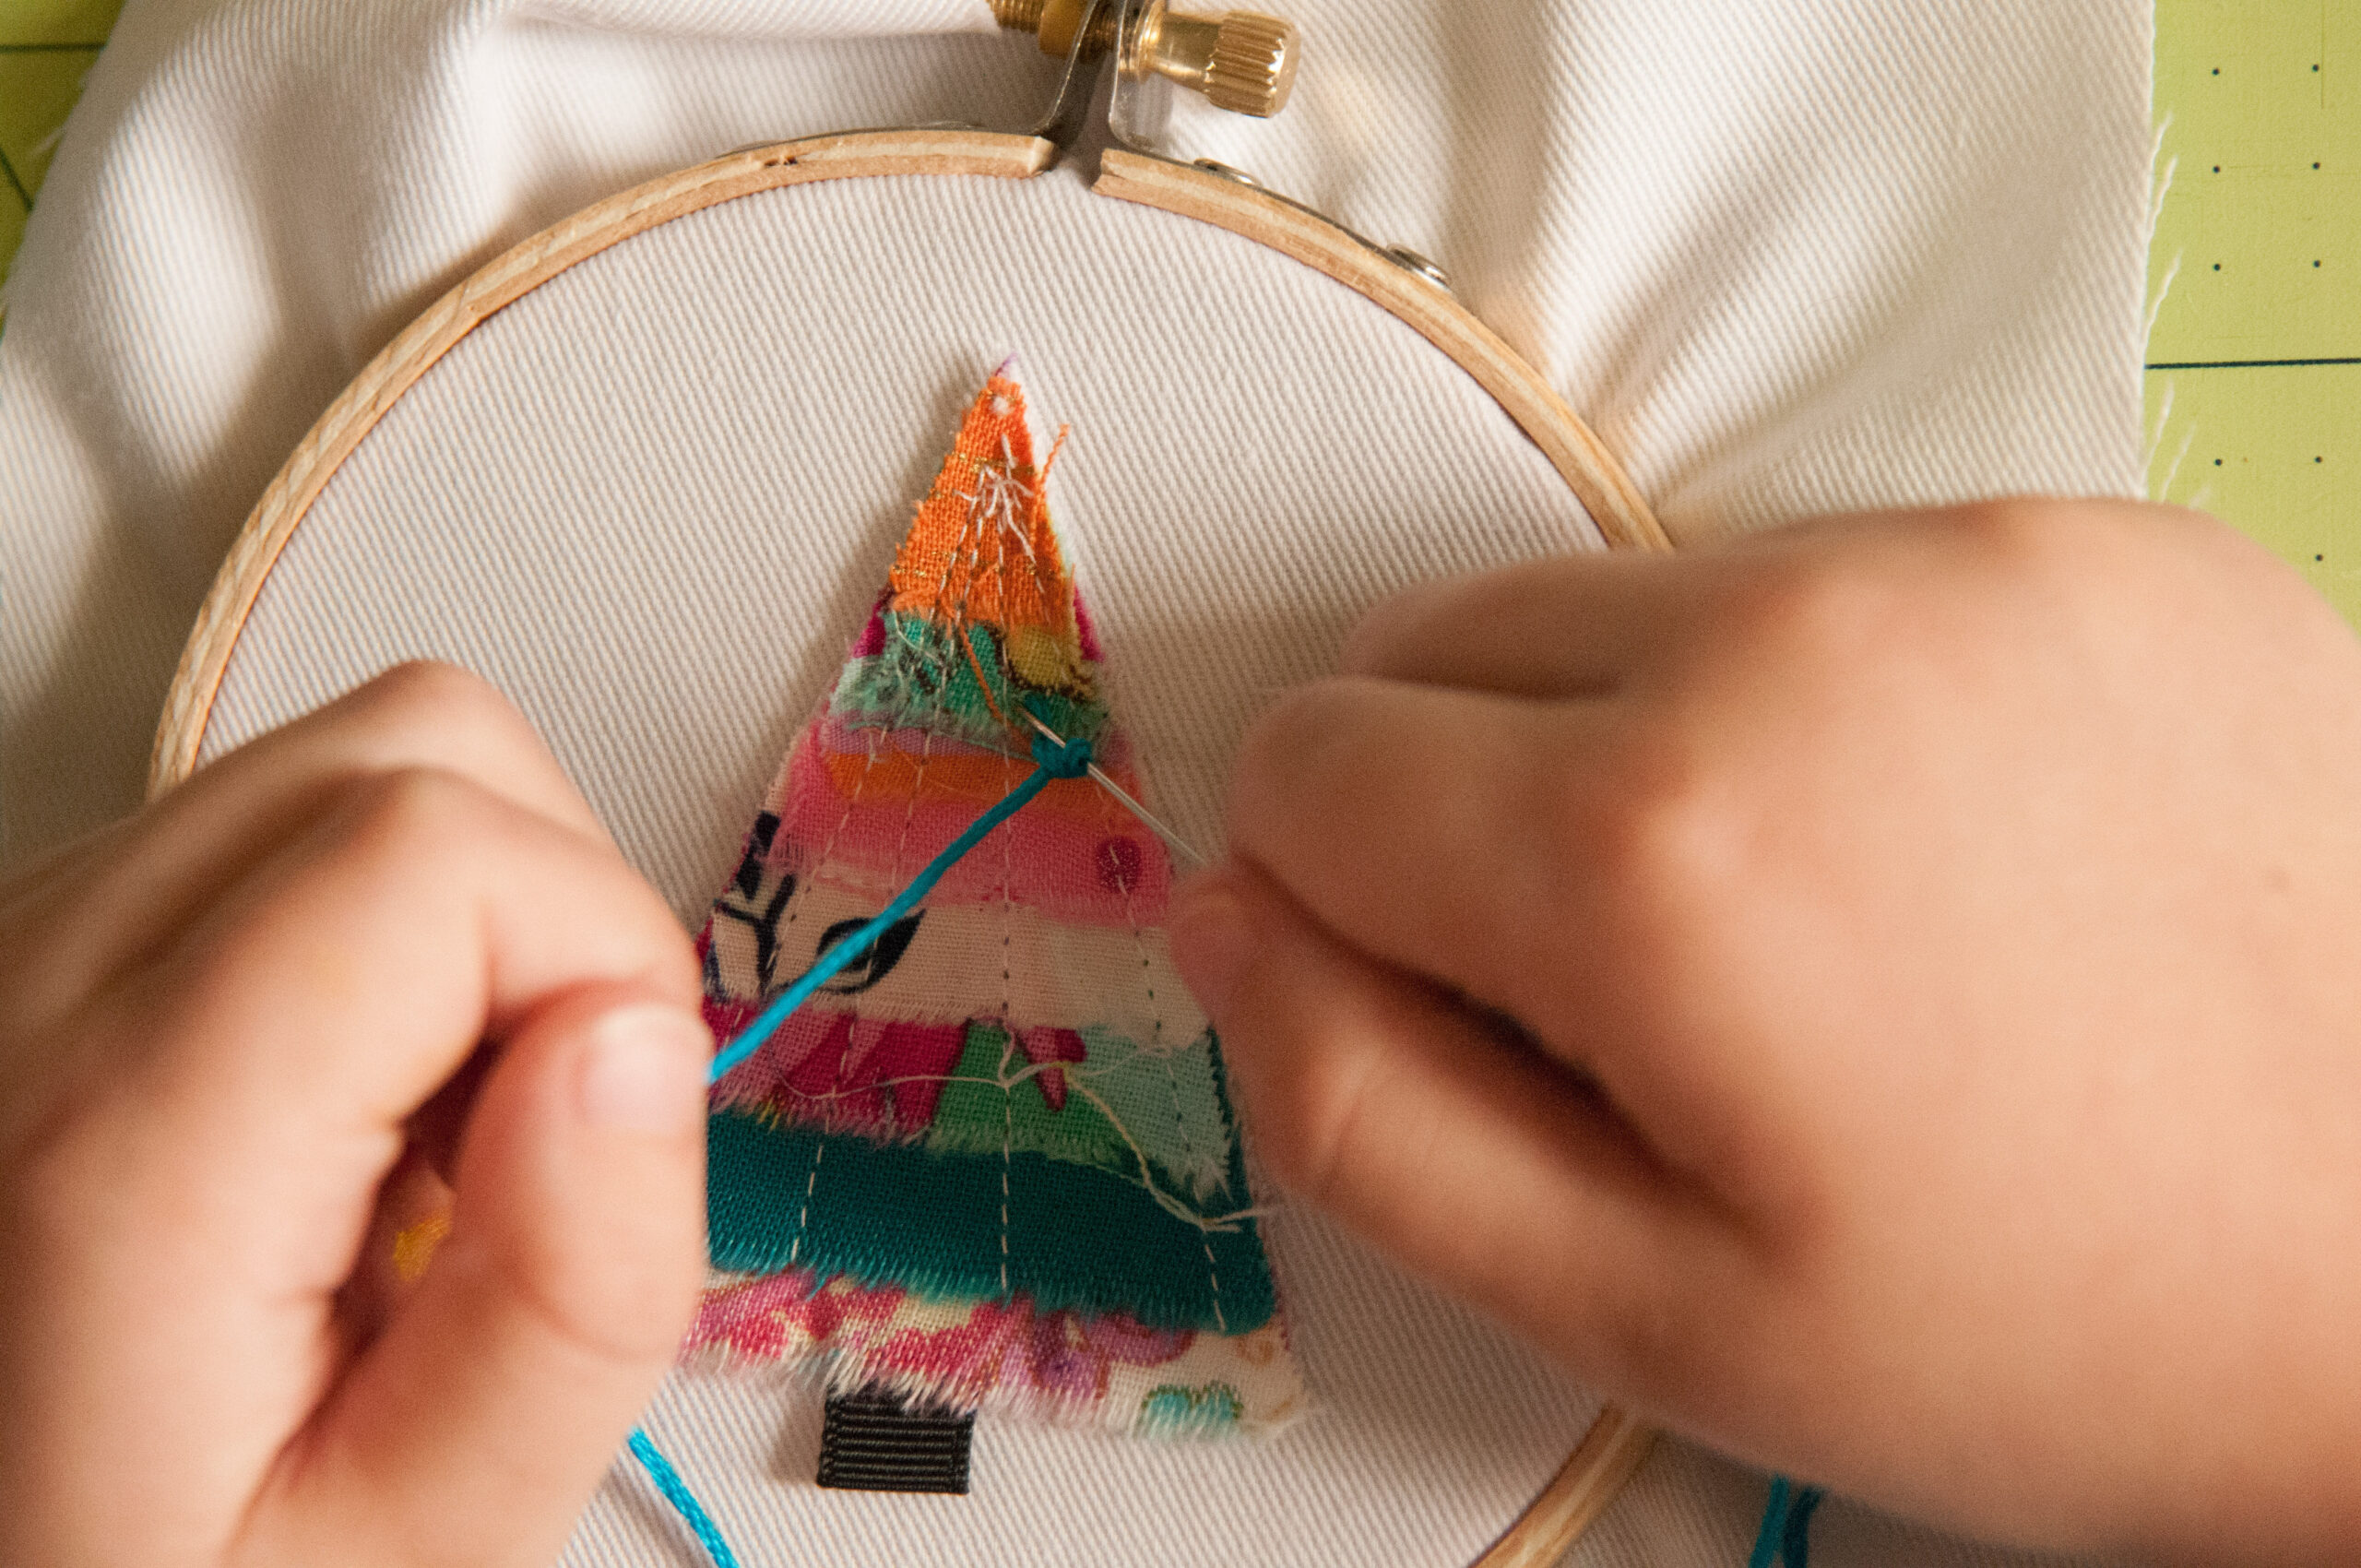
Step 22: Push the need through the fabric all the way. This can be a little tricky sometimes if your needle is small and the floss is thick. Pull gently so you don’t tear your fabric and continue to hold down the floss as you pull from underneath.
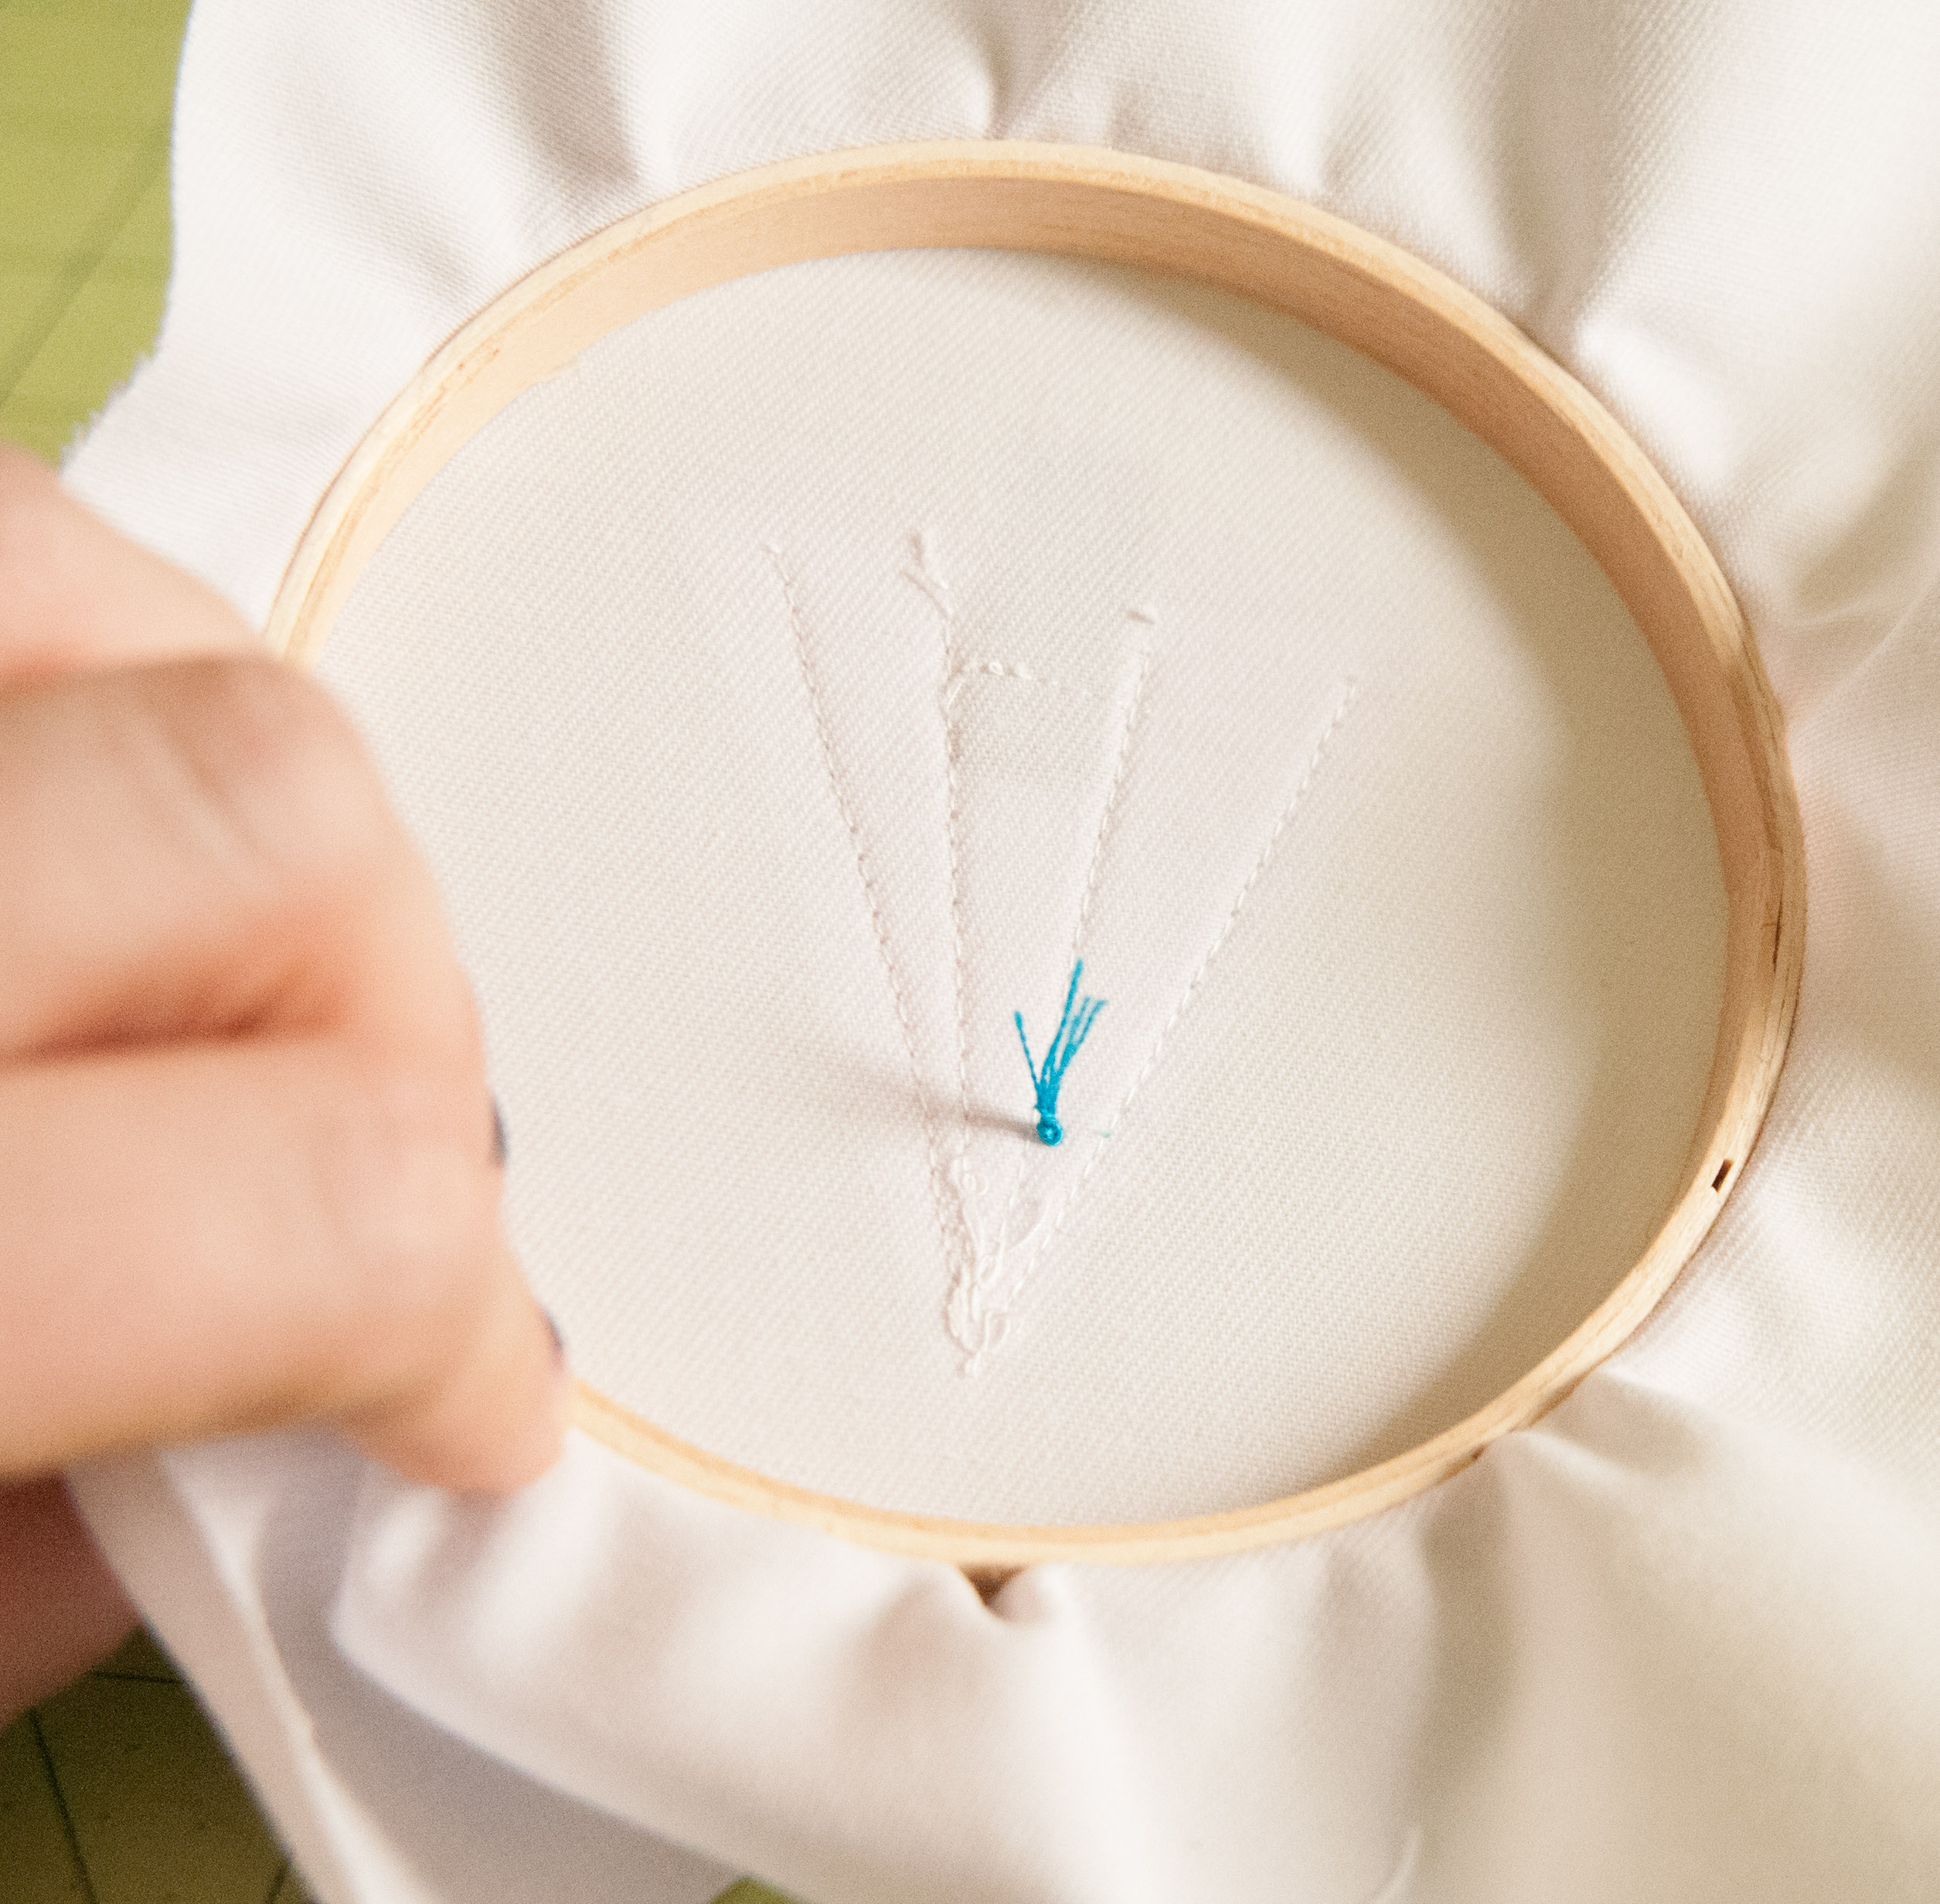
Step 23: After all your thread is through give it a good tug to tighten up your knot.
Step 24: Congratulations! You made a French Knot! Now – you can make them bigger by using a larger needle or by wrapping the floss more times. I wrapped the ornaments two to three times each and the tree topper four times around the needle.
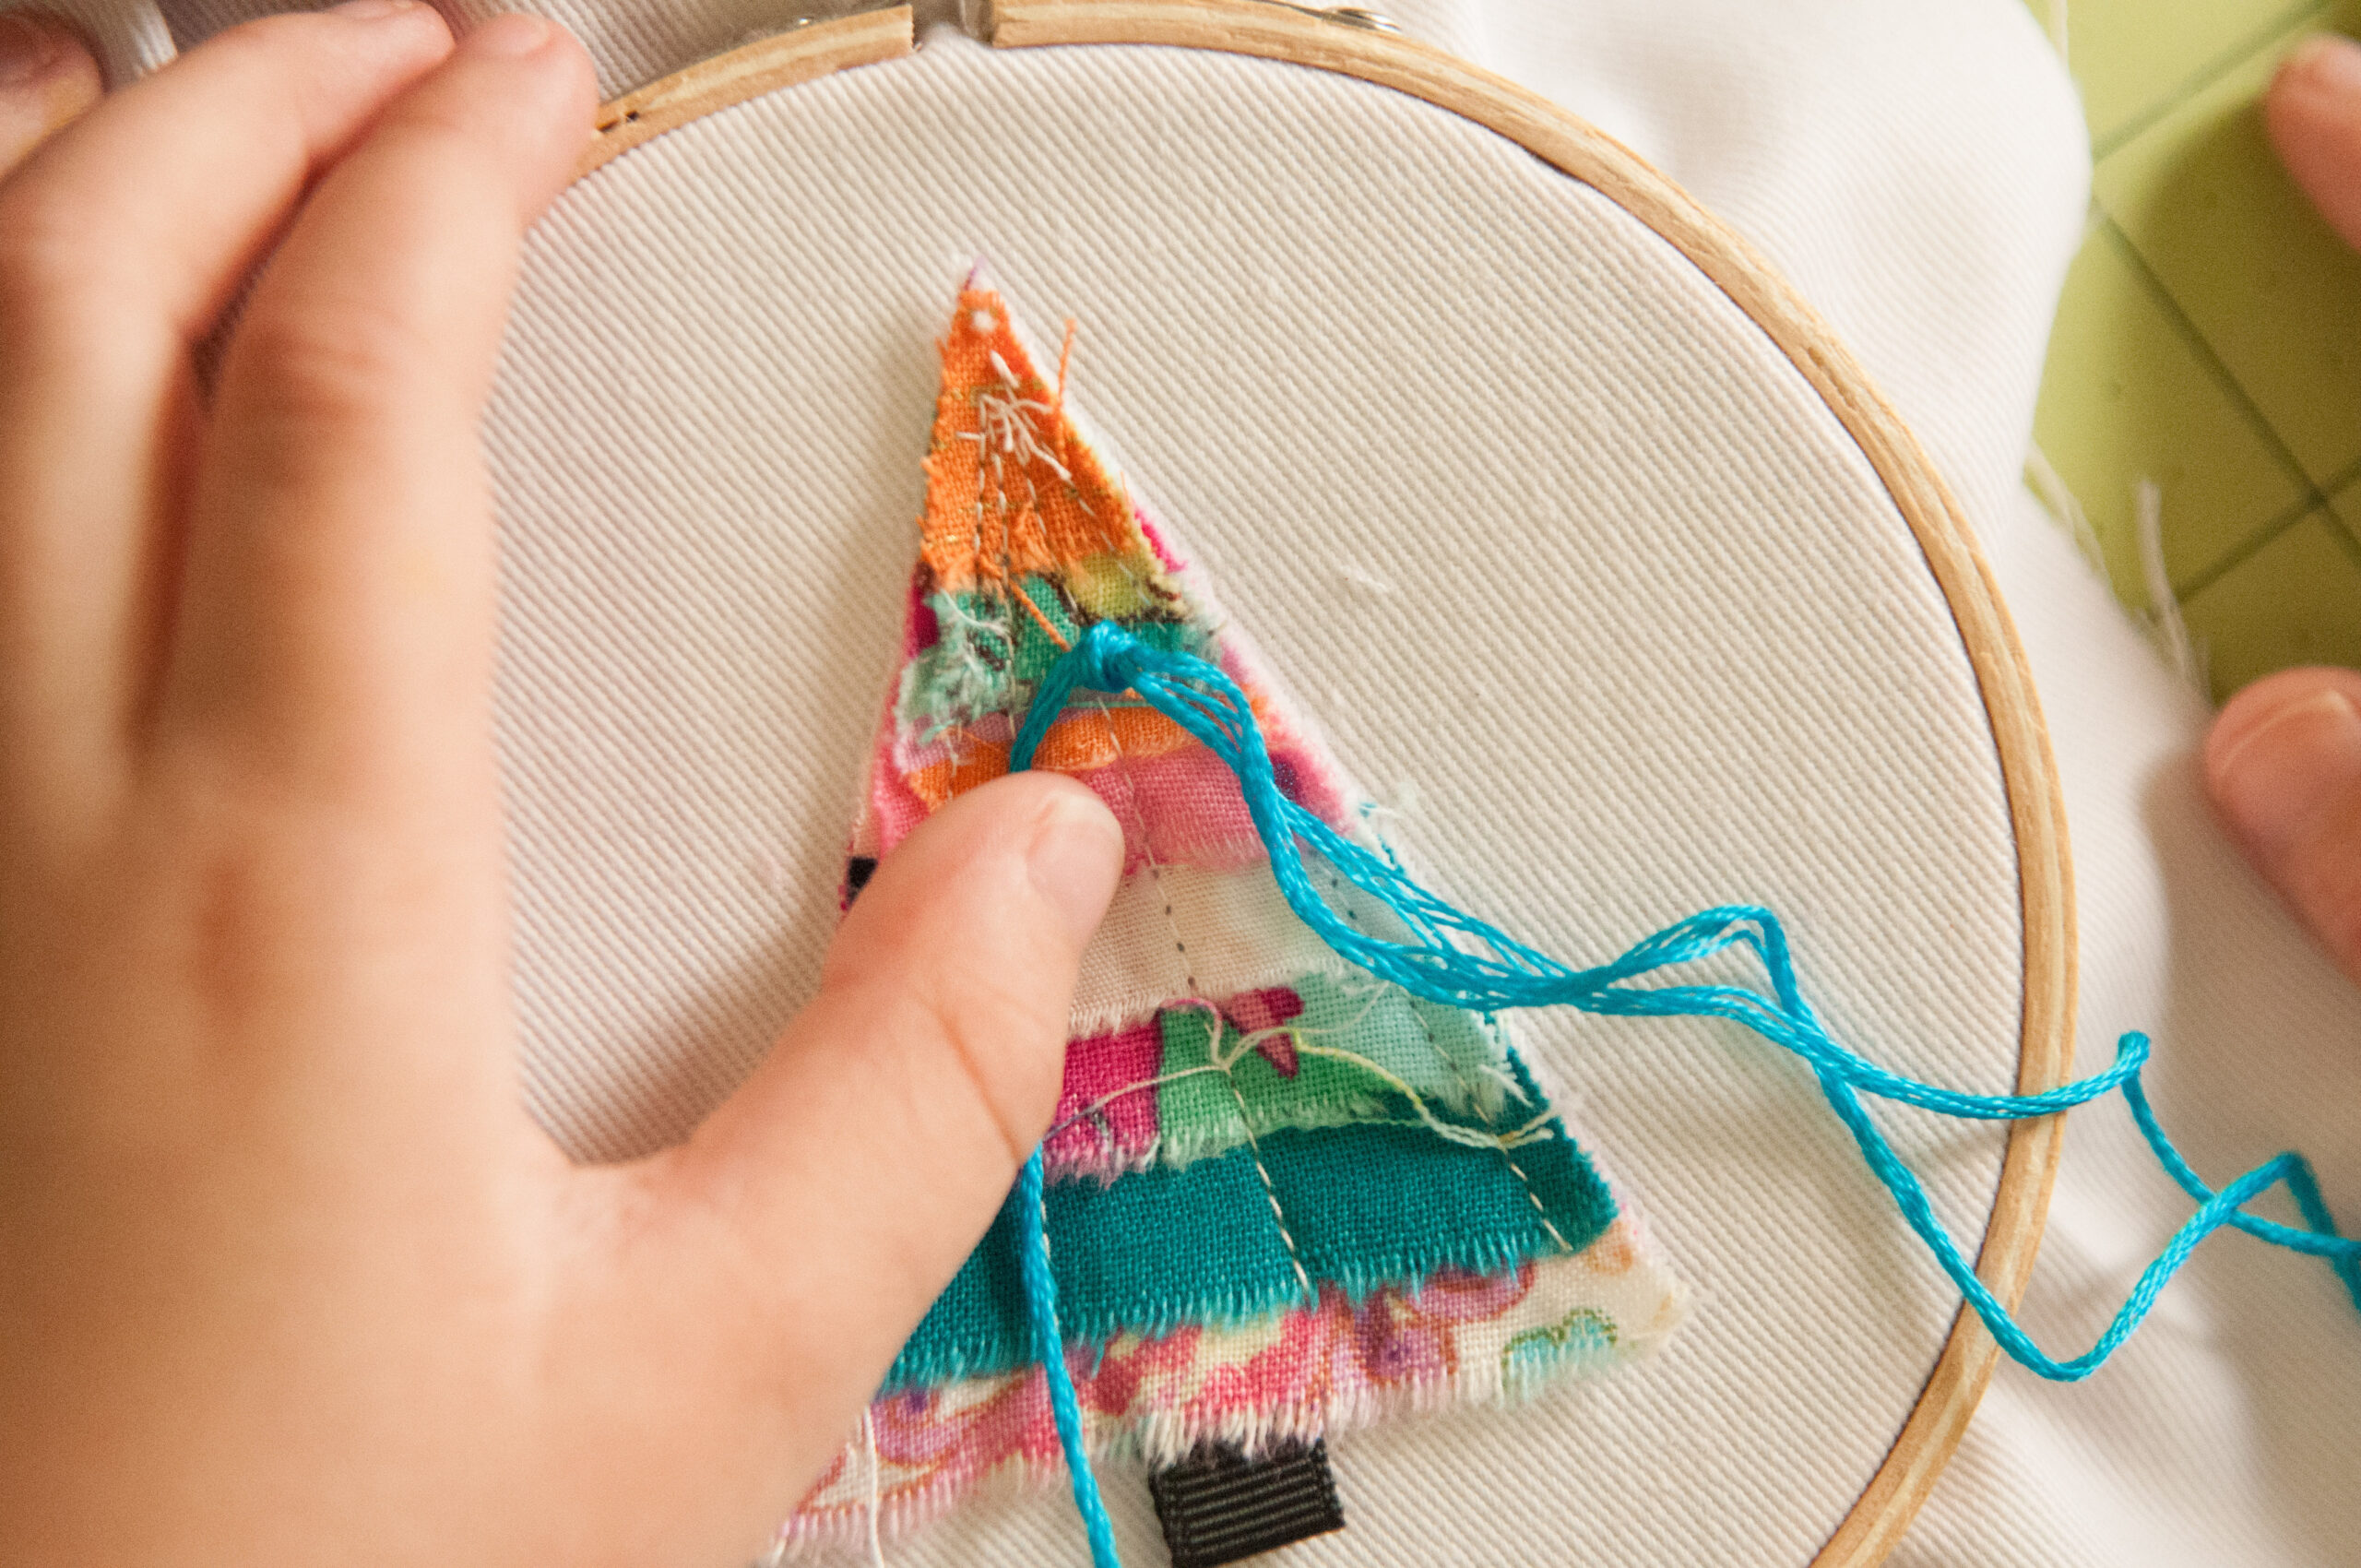
Step 25: You can either tie off your knot on the backside, or cheat like I did and choose your next ornament spot and poke through from the backside again and only tie the last knot.

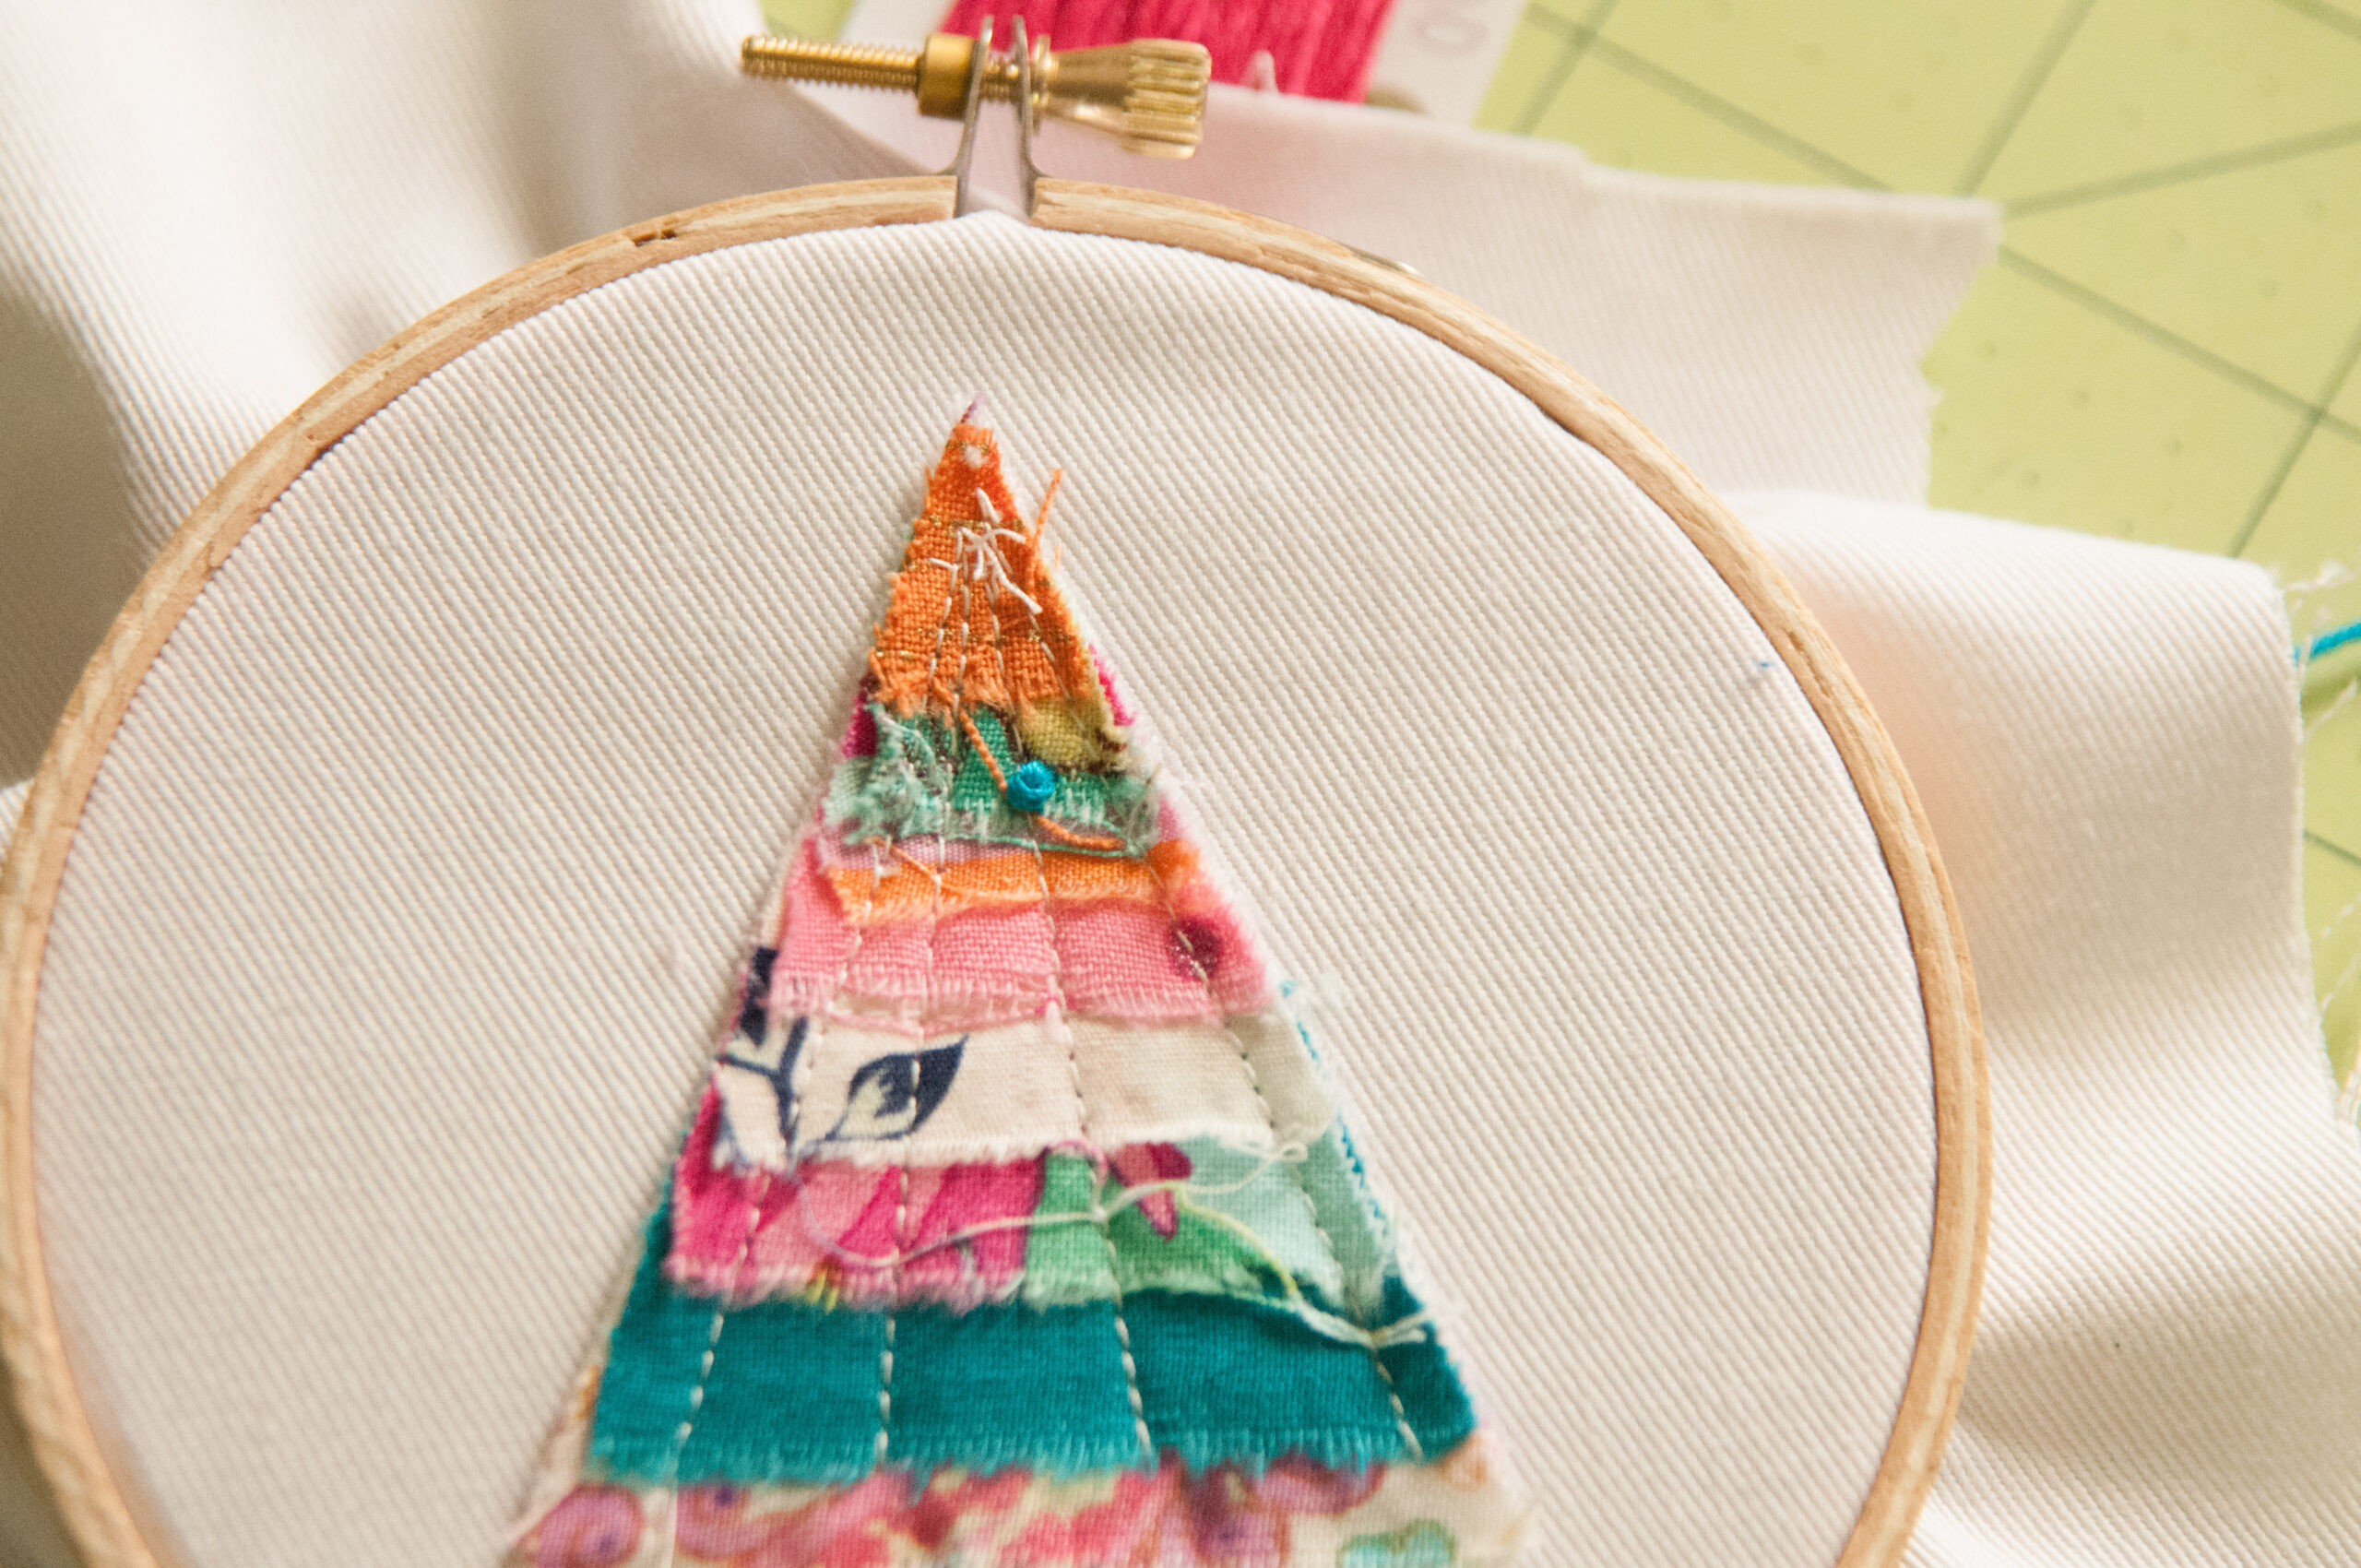
Step 26: To make the tree topper just pile your knots right next to each other. Think of a flower shape or a star and start at the point of your tree. See how much bigger these knots are? Remember, I wrapped them four times.

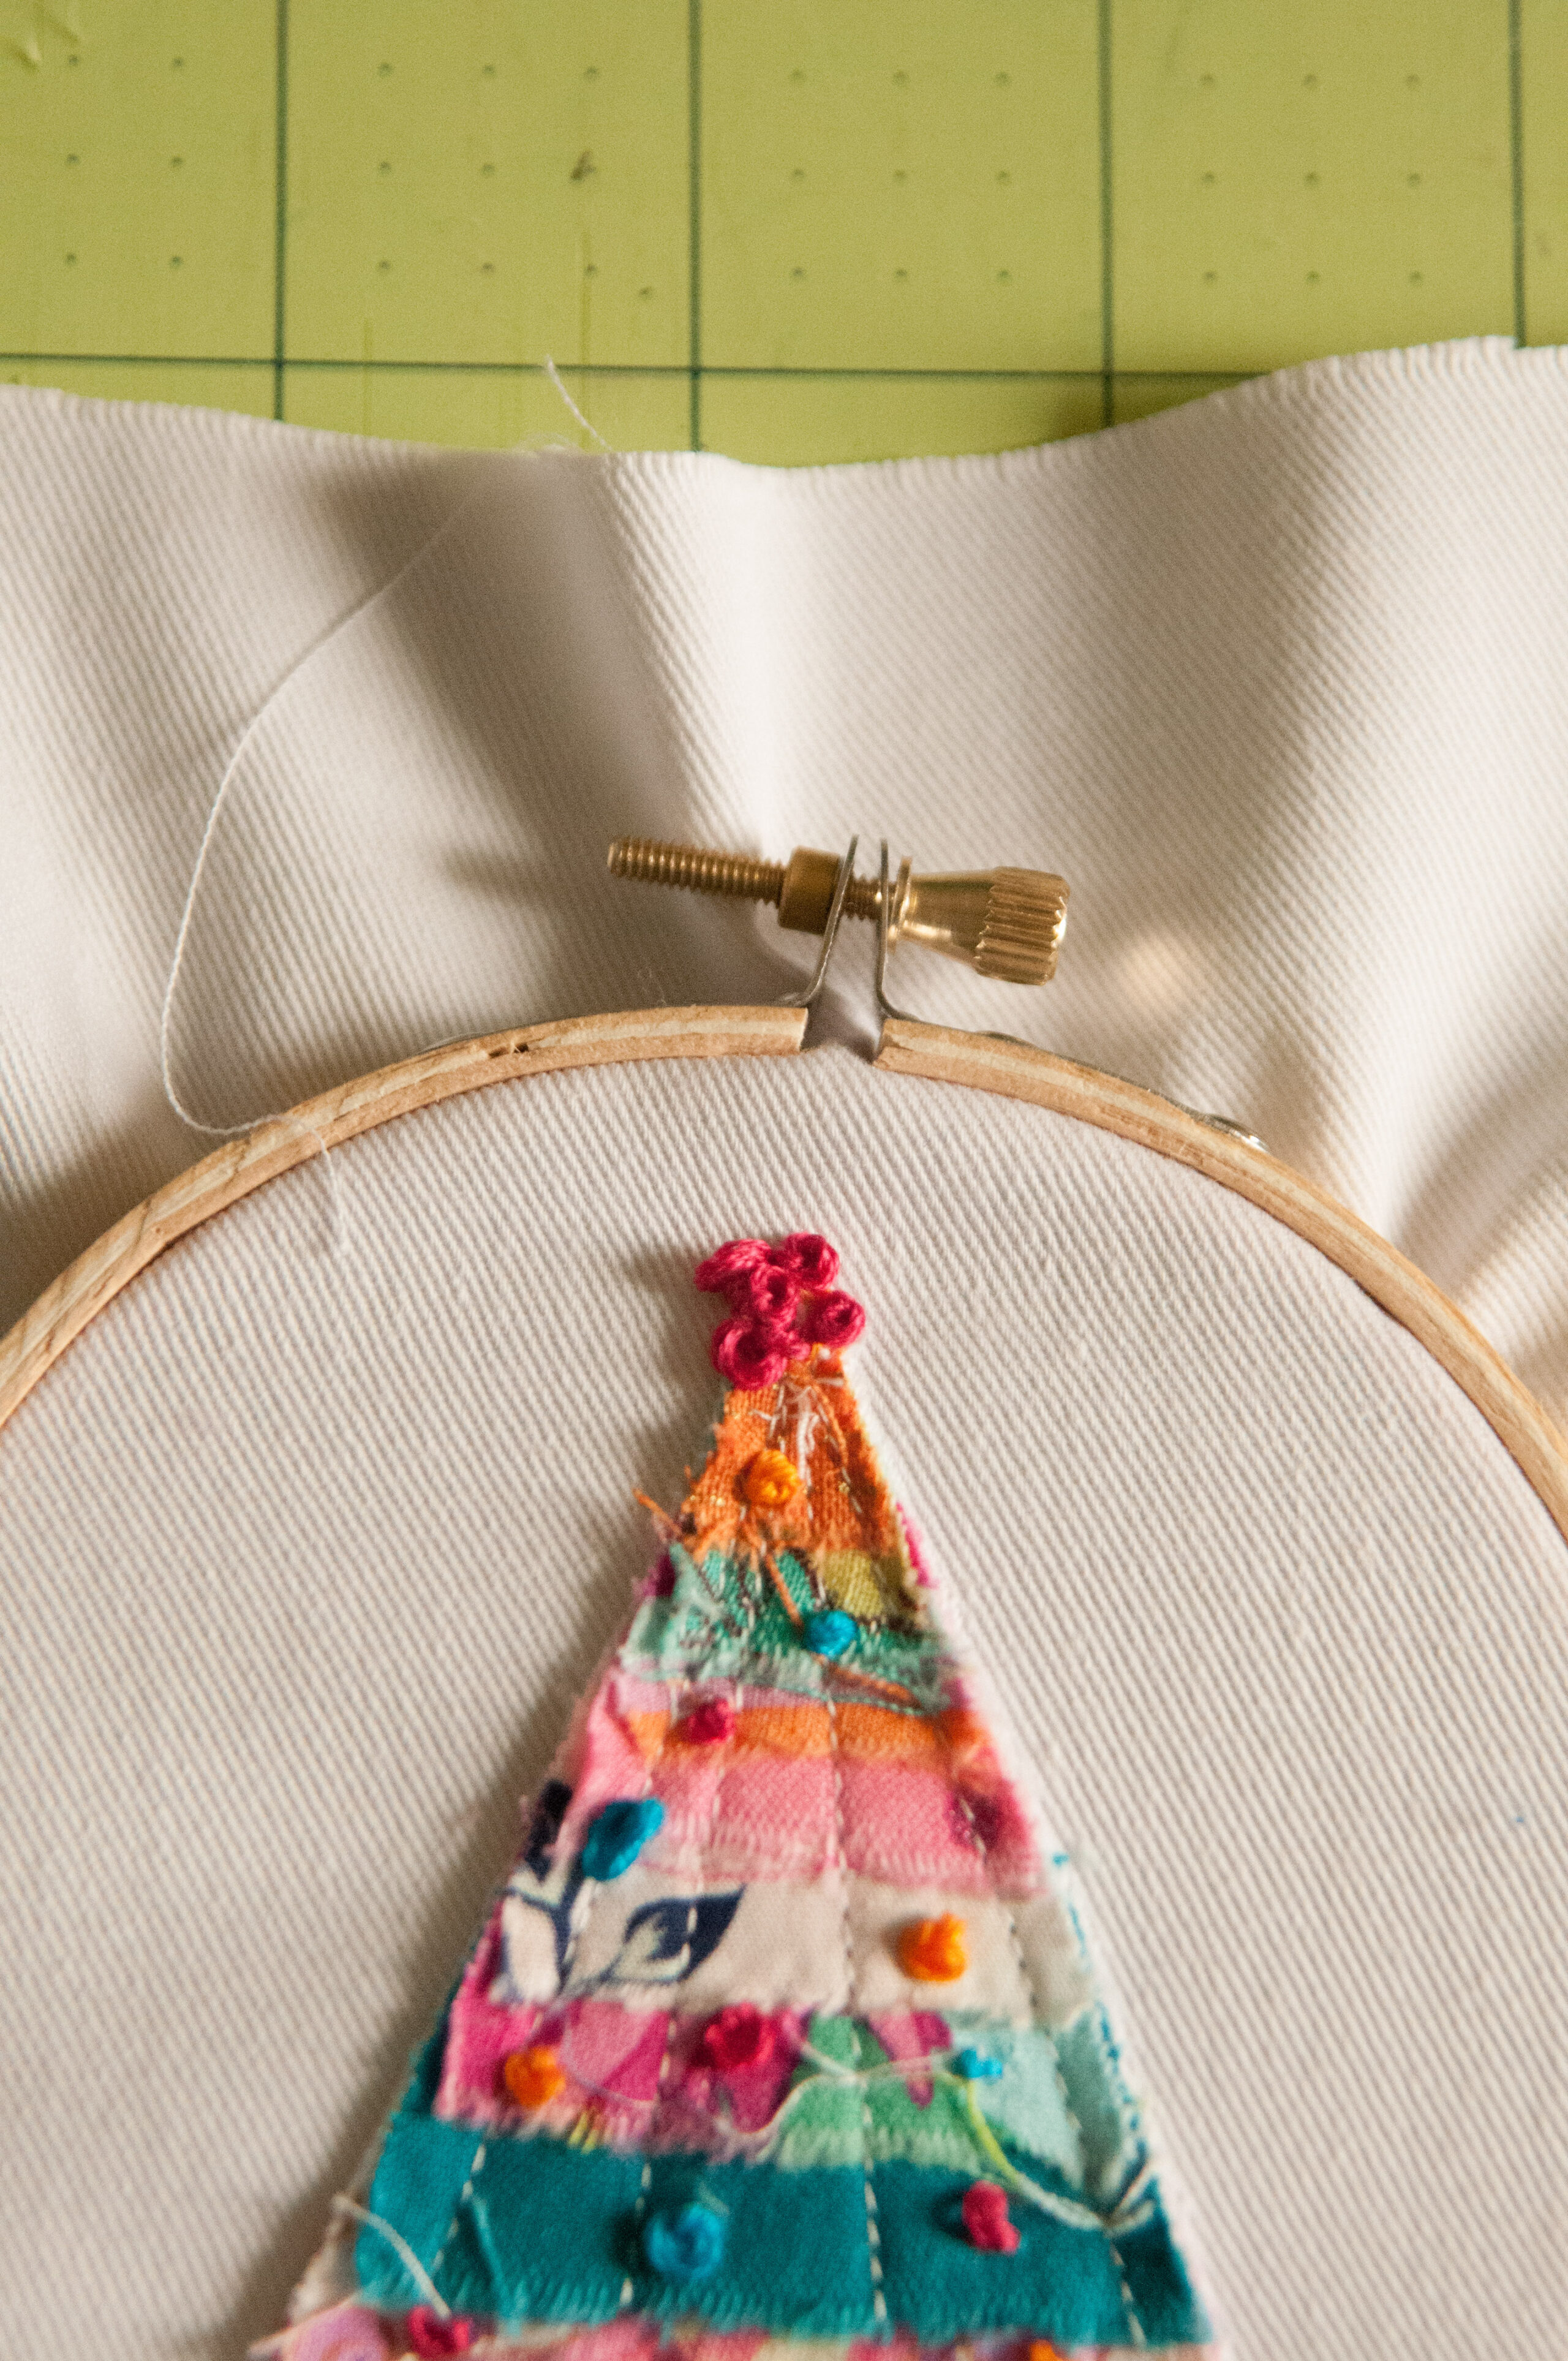
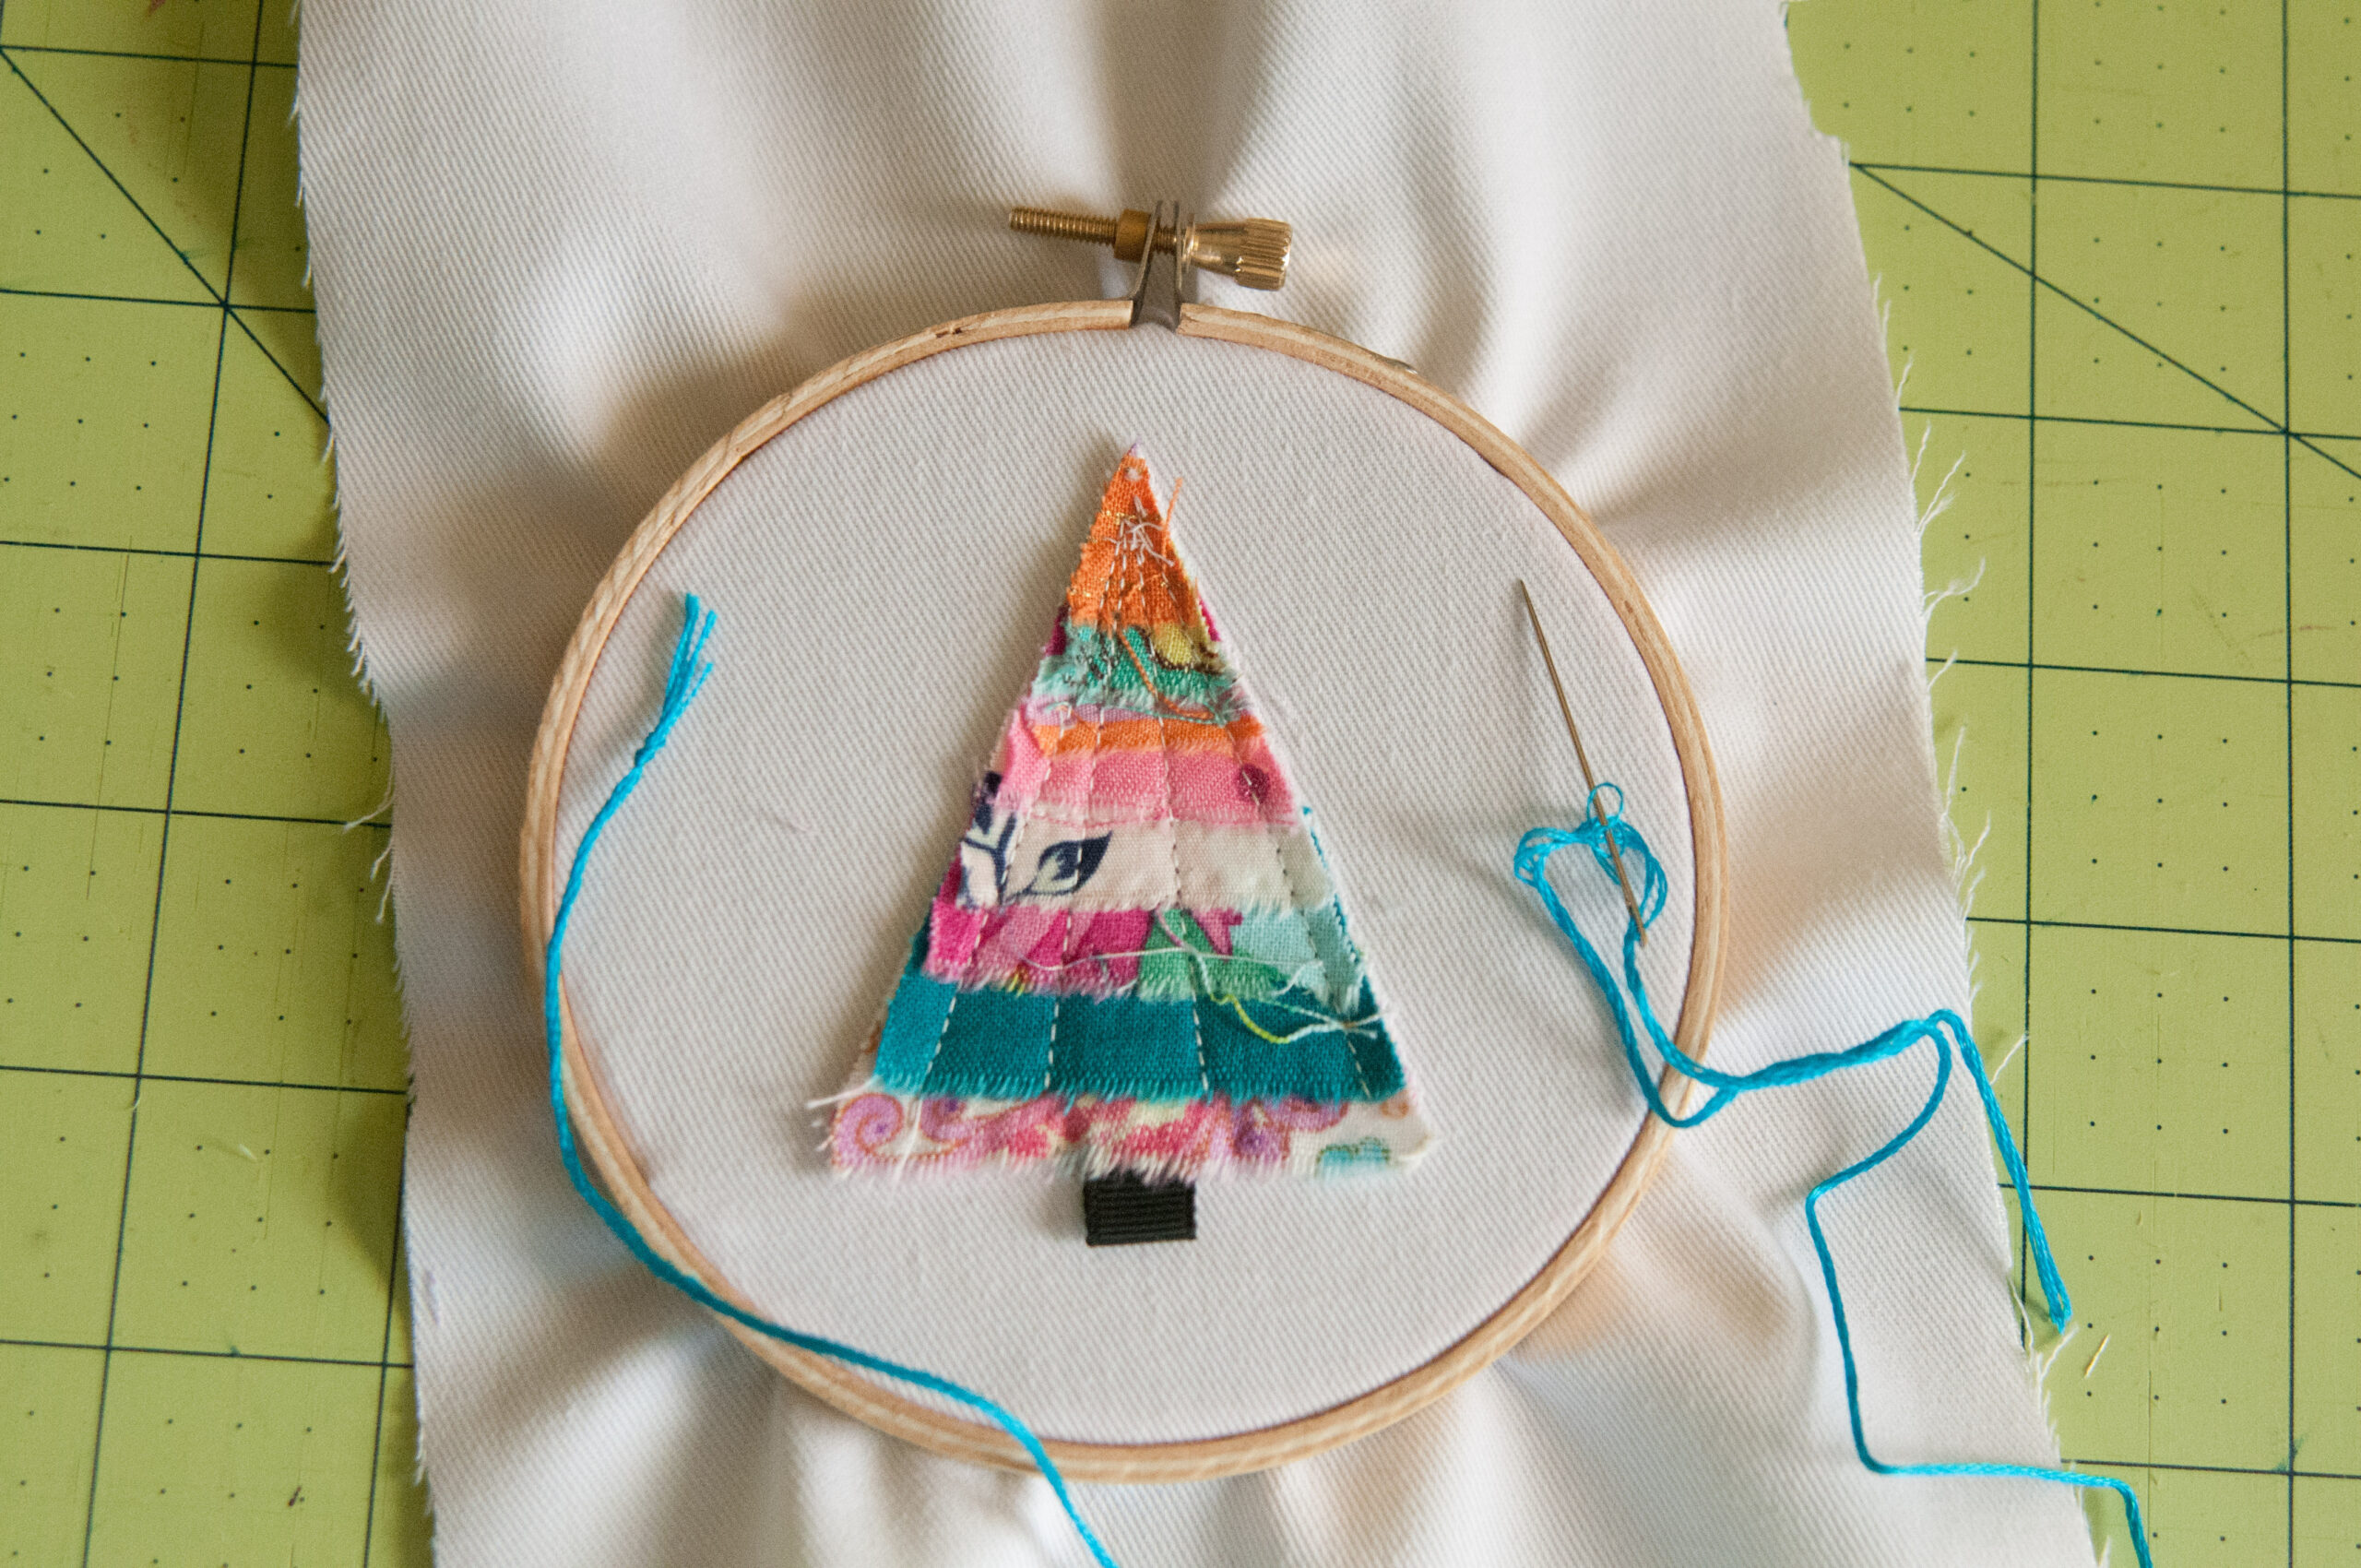
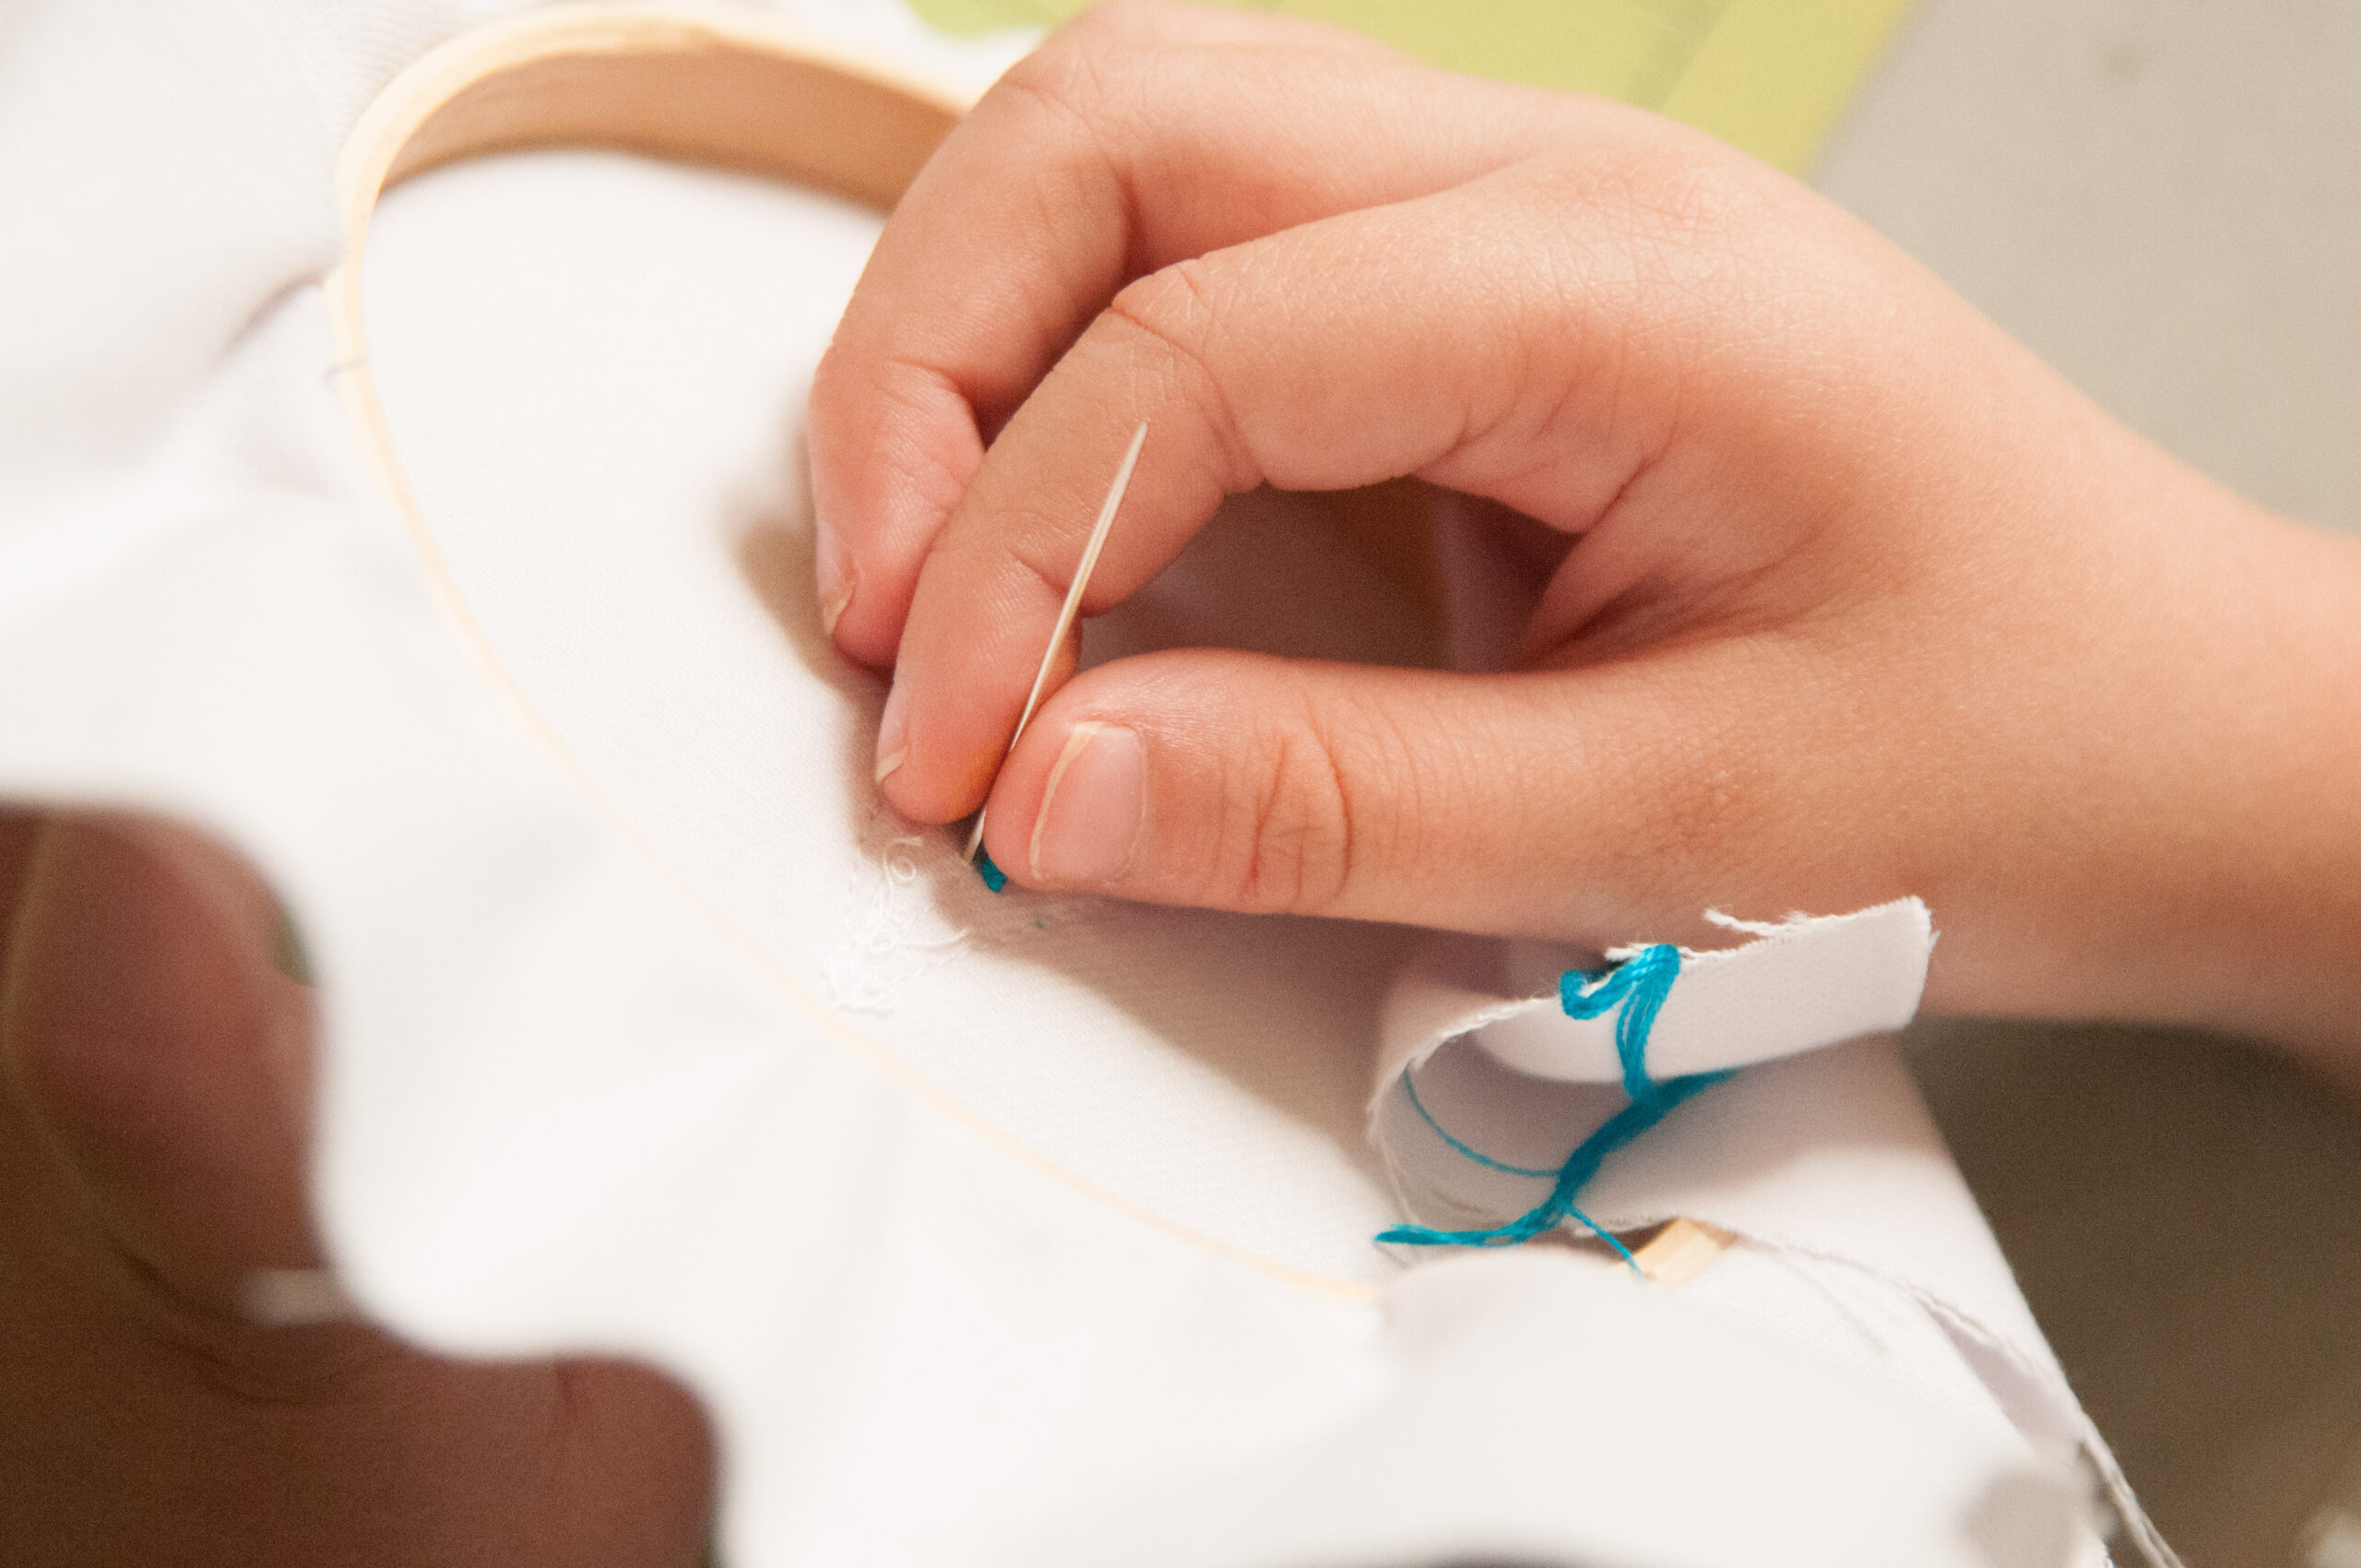
Step 27: Pop your embroidery out of the hoop. See that dent in your fabric? You now have a cutting template for finishing.
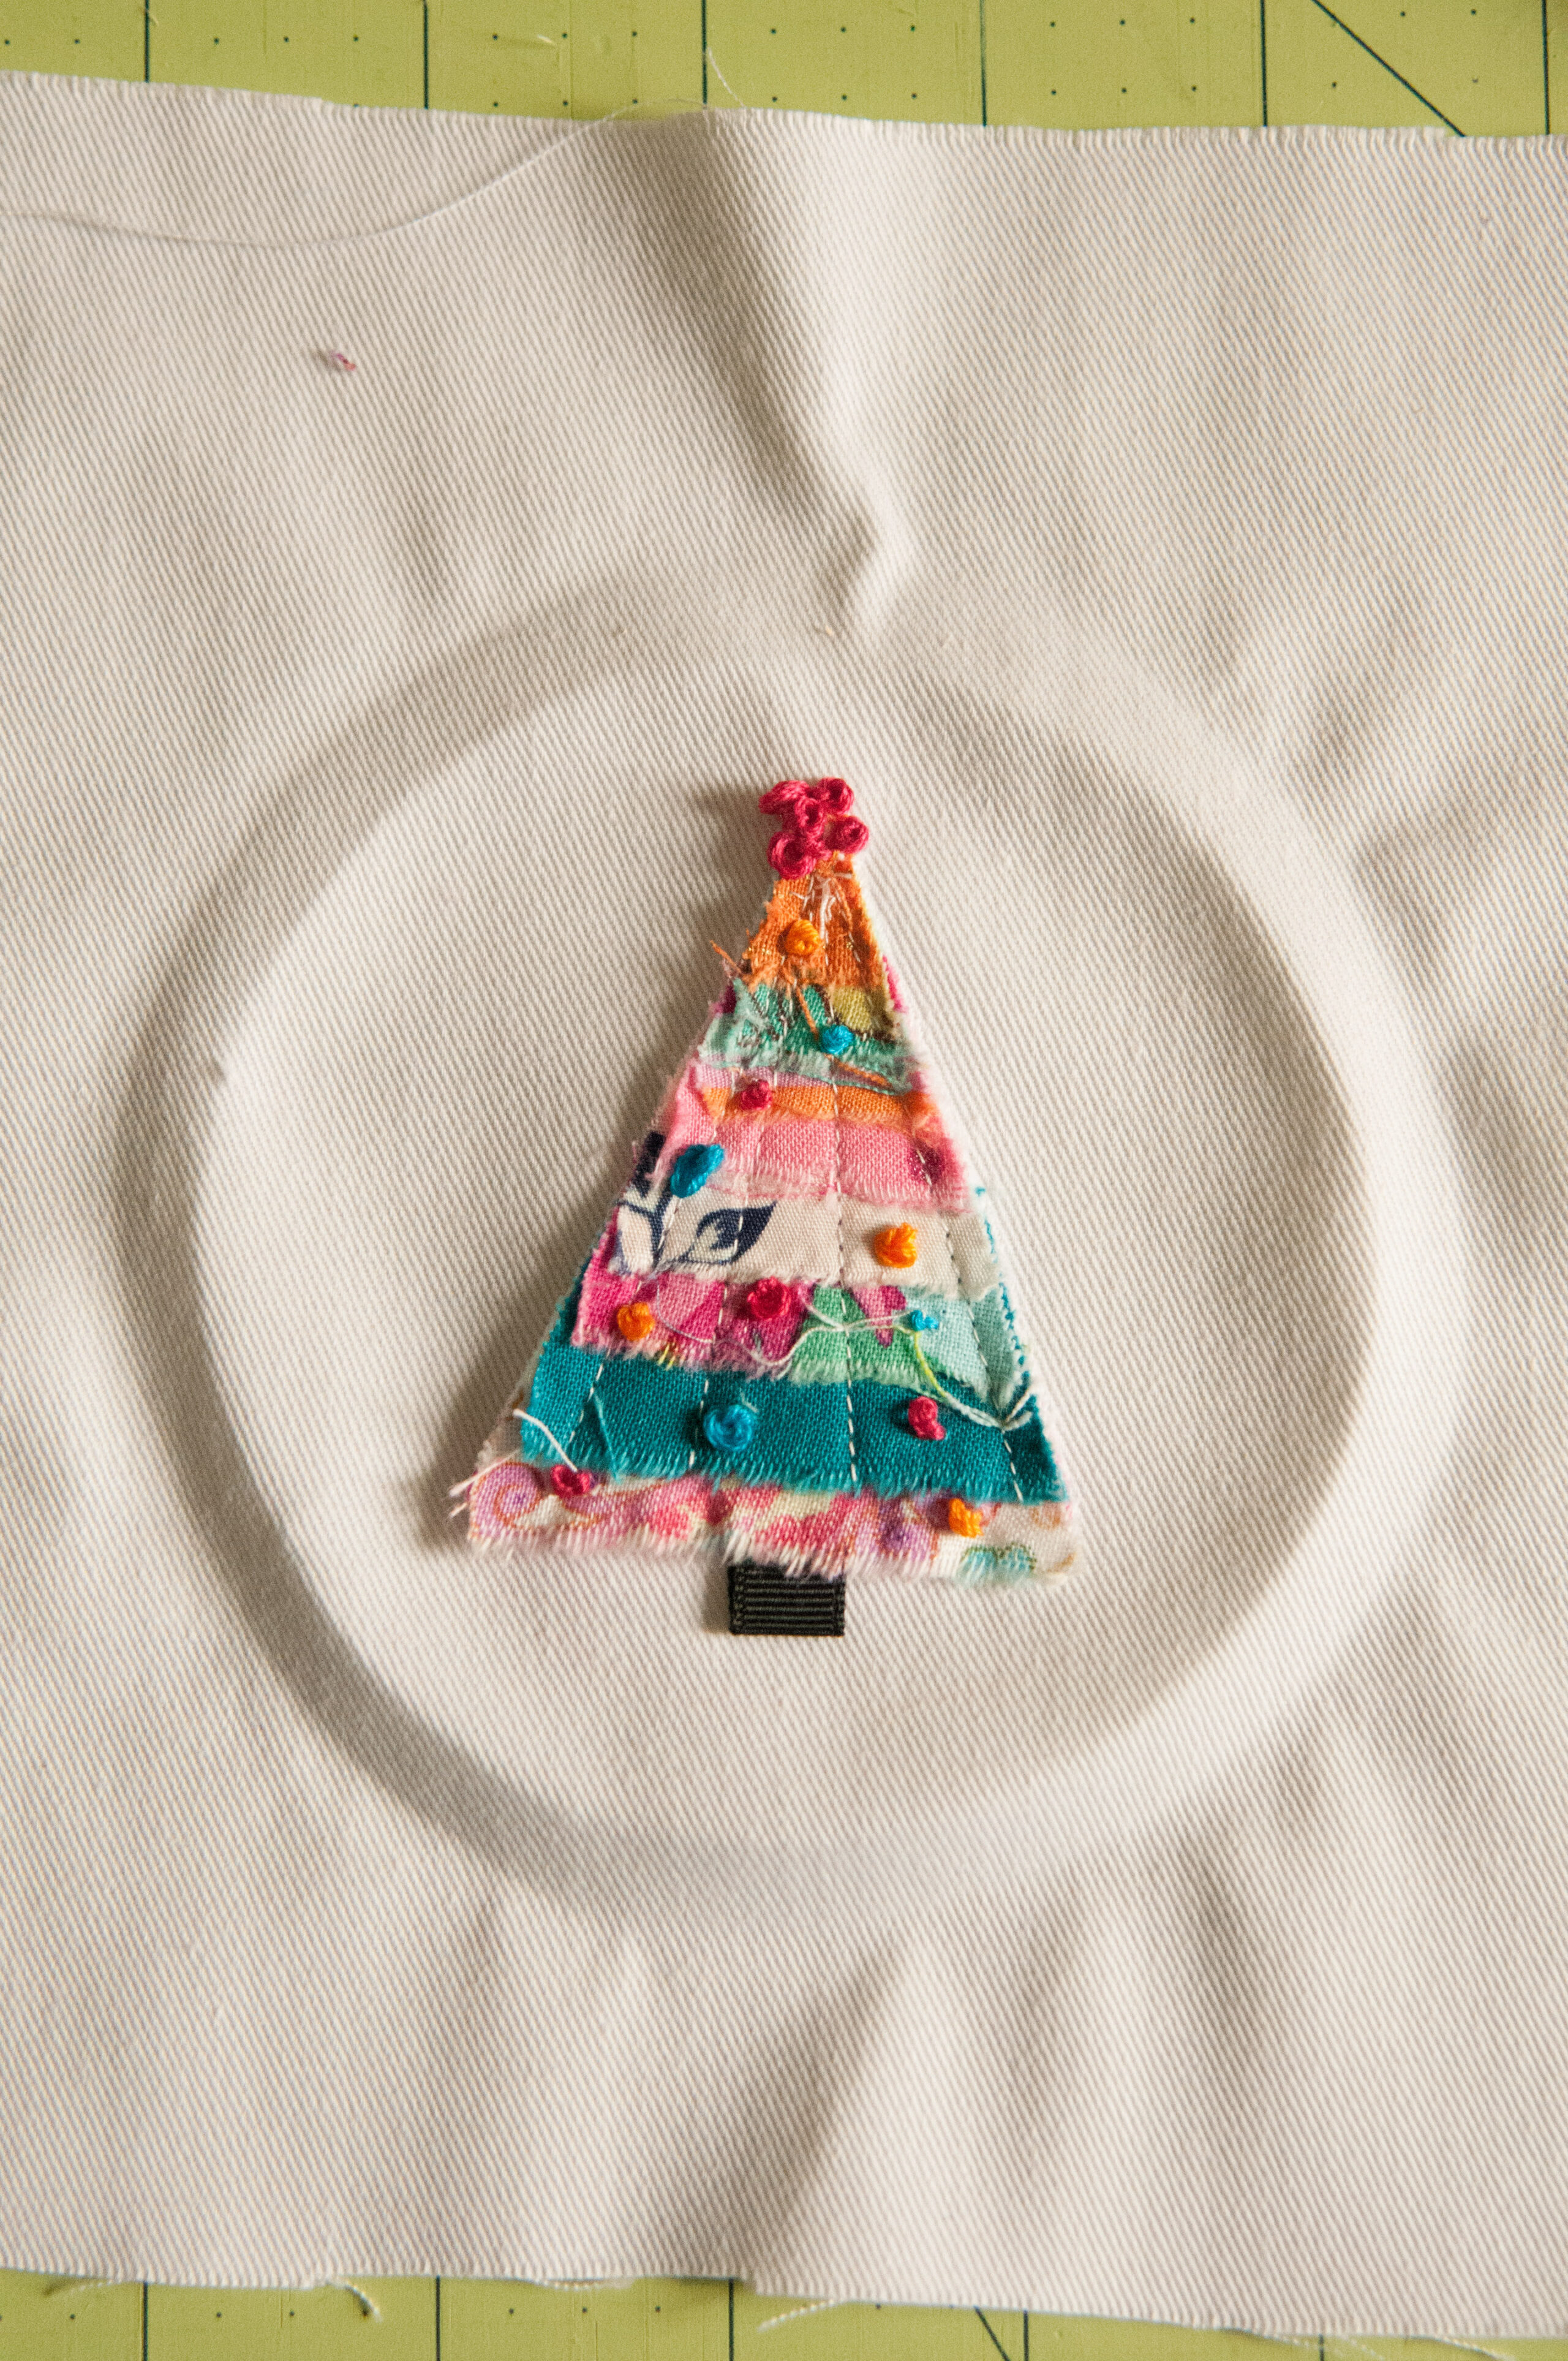
Step 28: Cut just inside the largest ring. Be careful! If this part goes wrong, you’ve just ensured your embroidery wont’ stay in the hoop!

Step 29: Pop it back in the hoop.
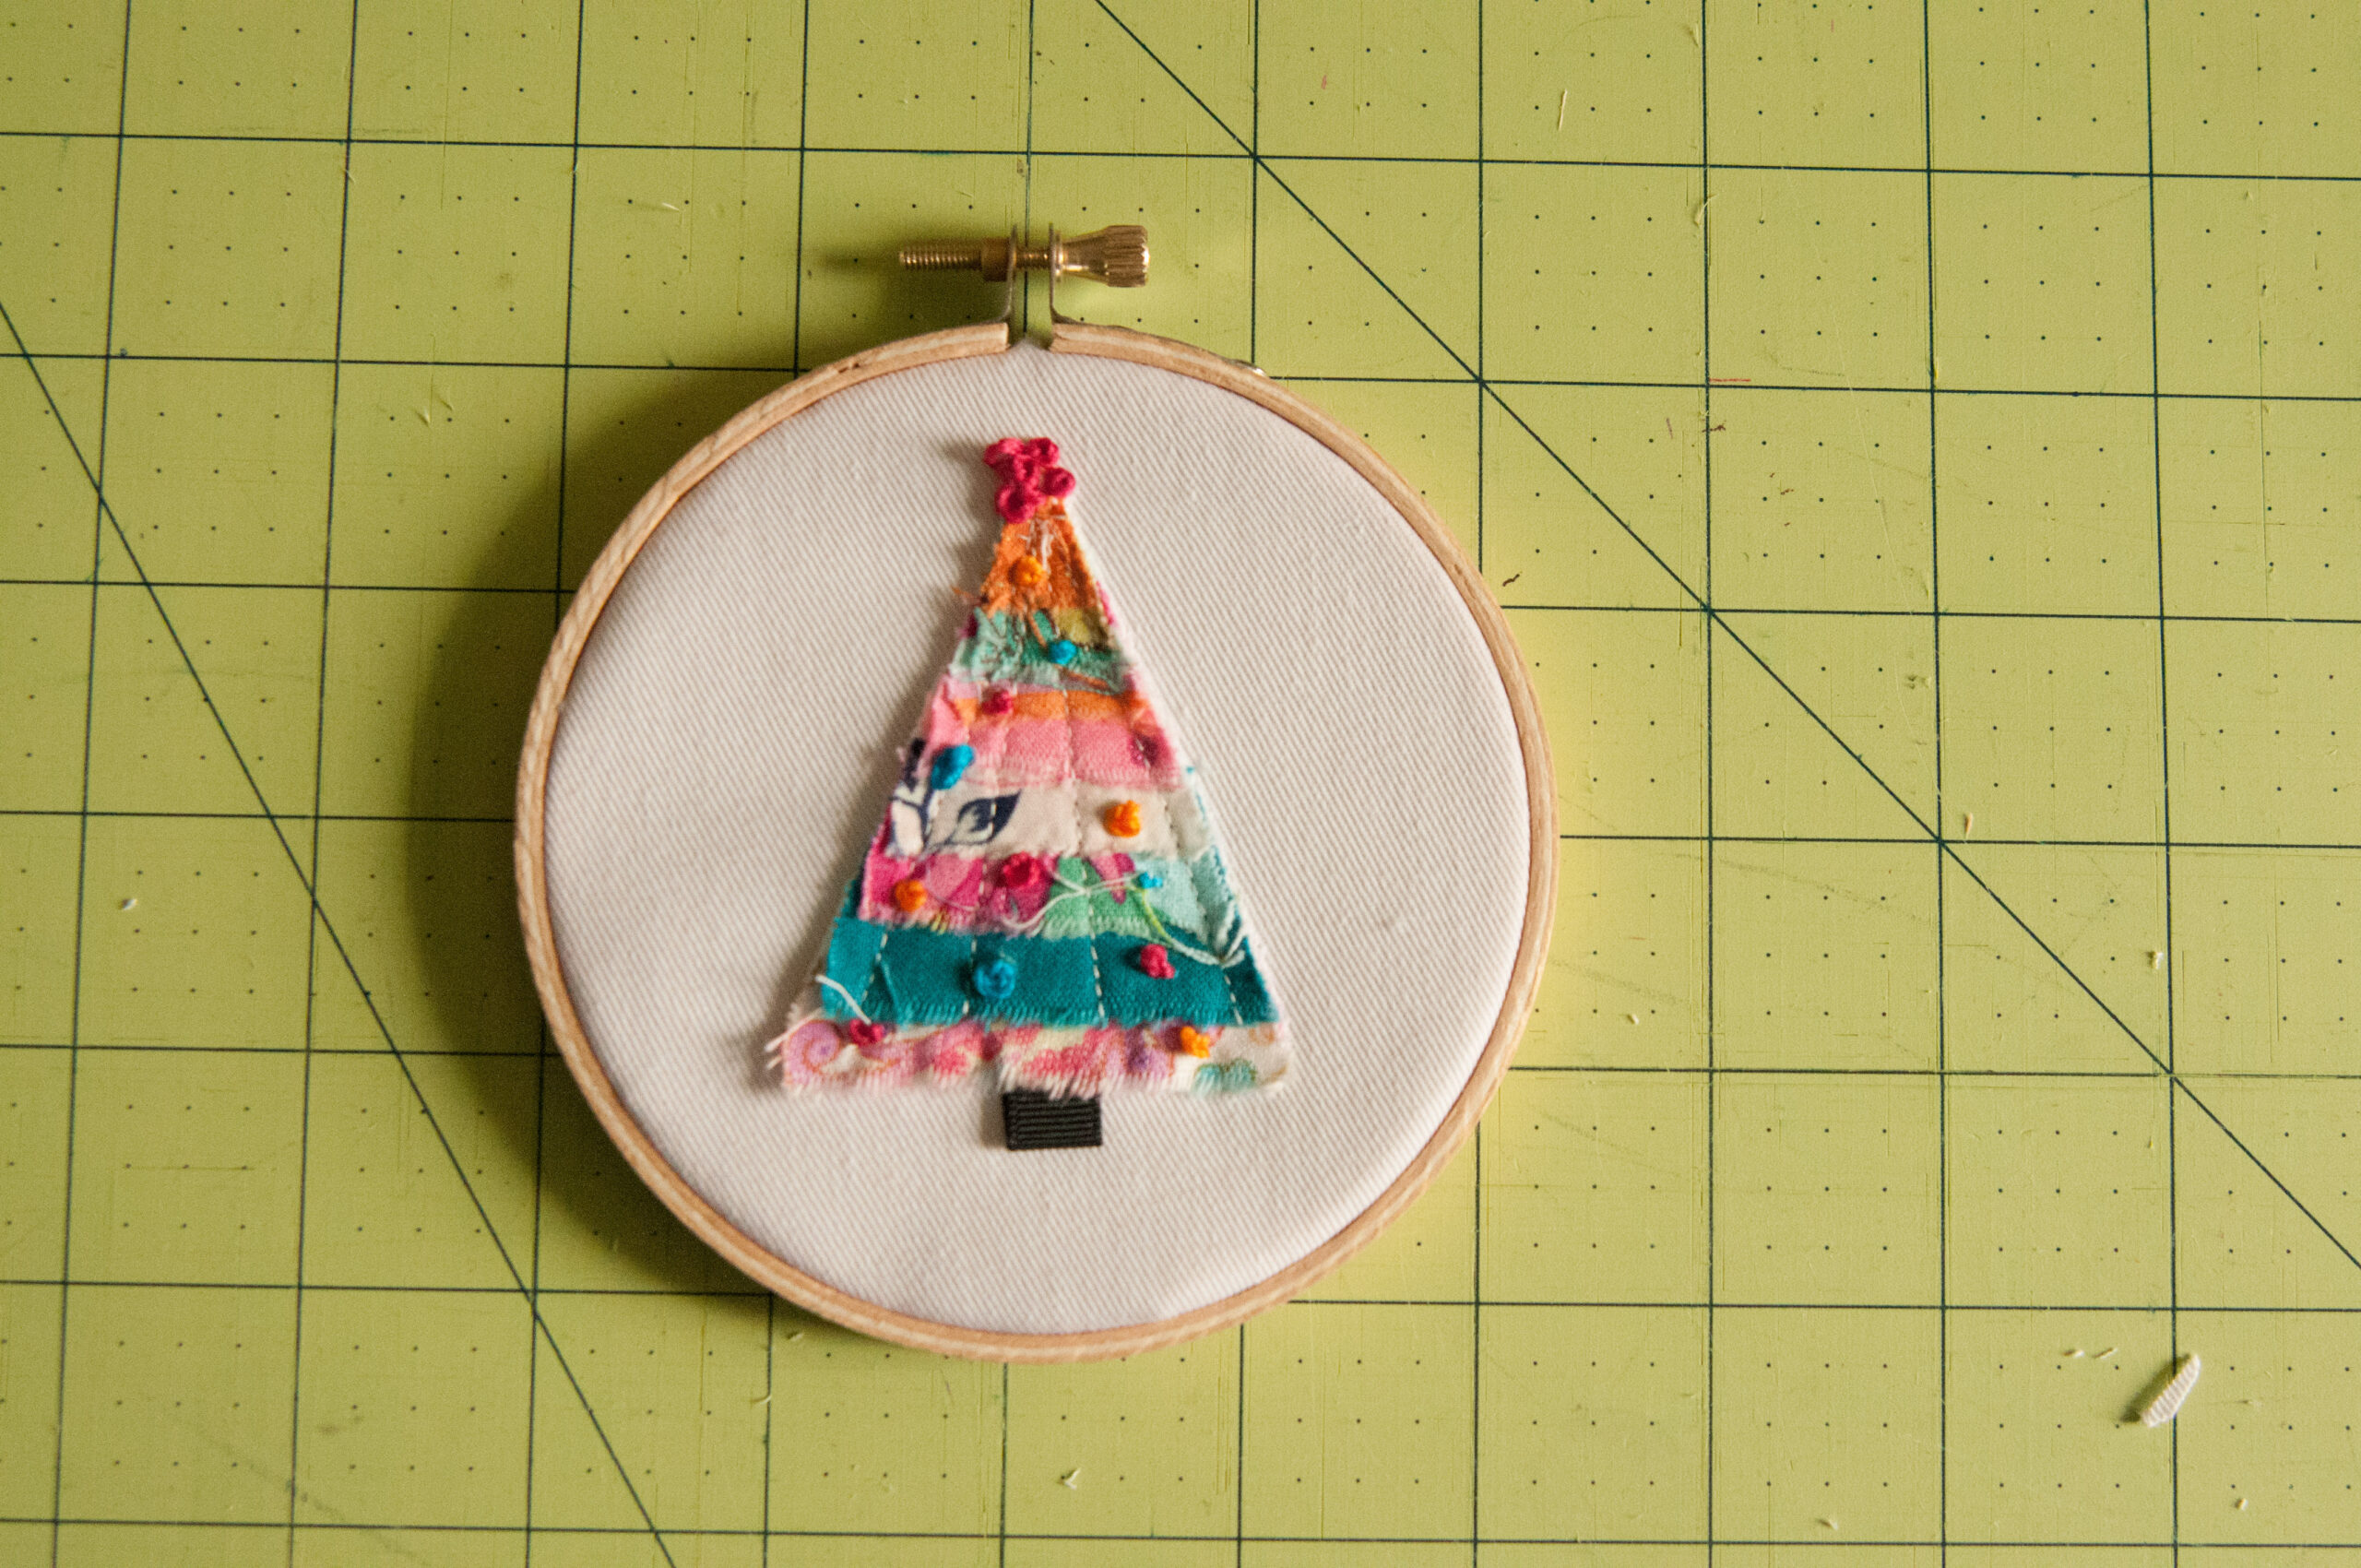
Step 30: Tie a piece of baker’s twine or ribbon for hanging. You can leave the back exposed like I did (because mine are hanging on the wall) or you can use a little glue and felt to cover the stitches on the back. Just trace your hoop on the felt, cut it out, and glue it down.
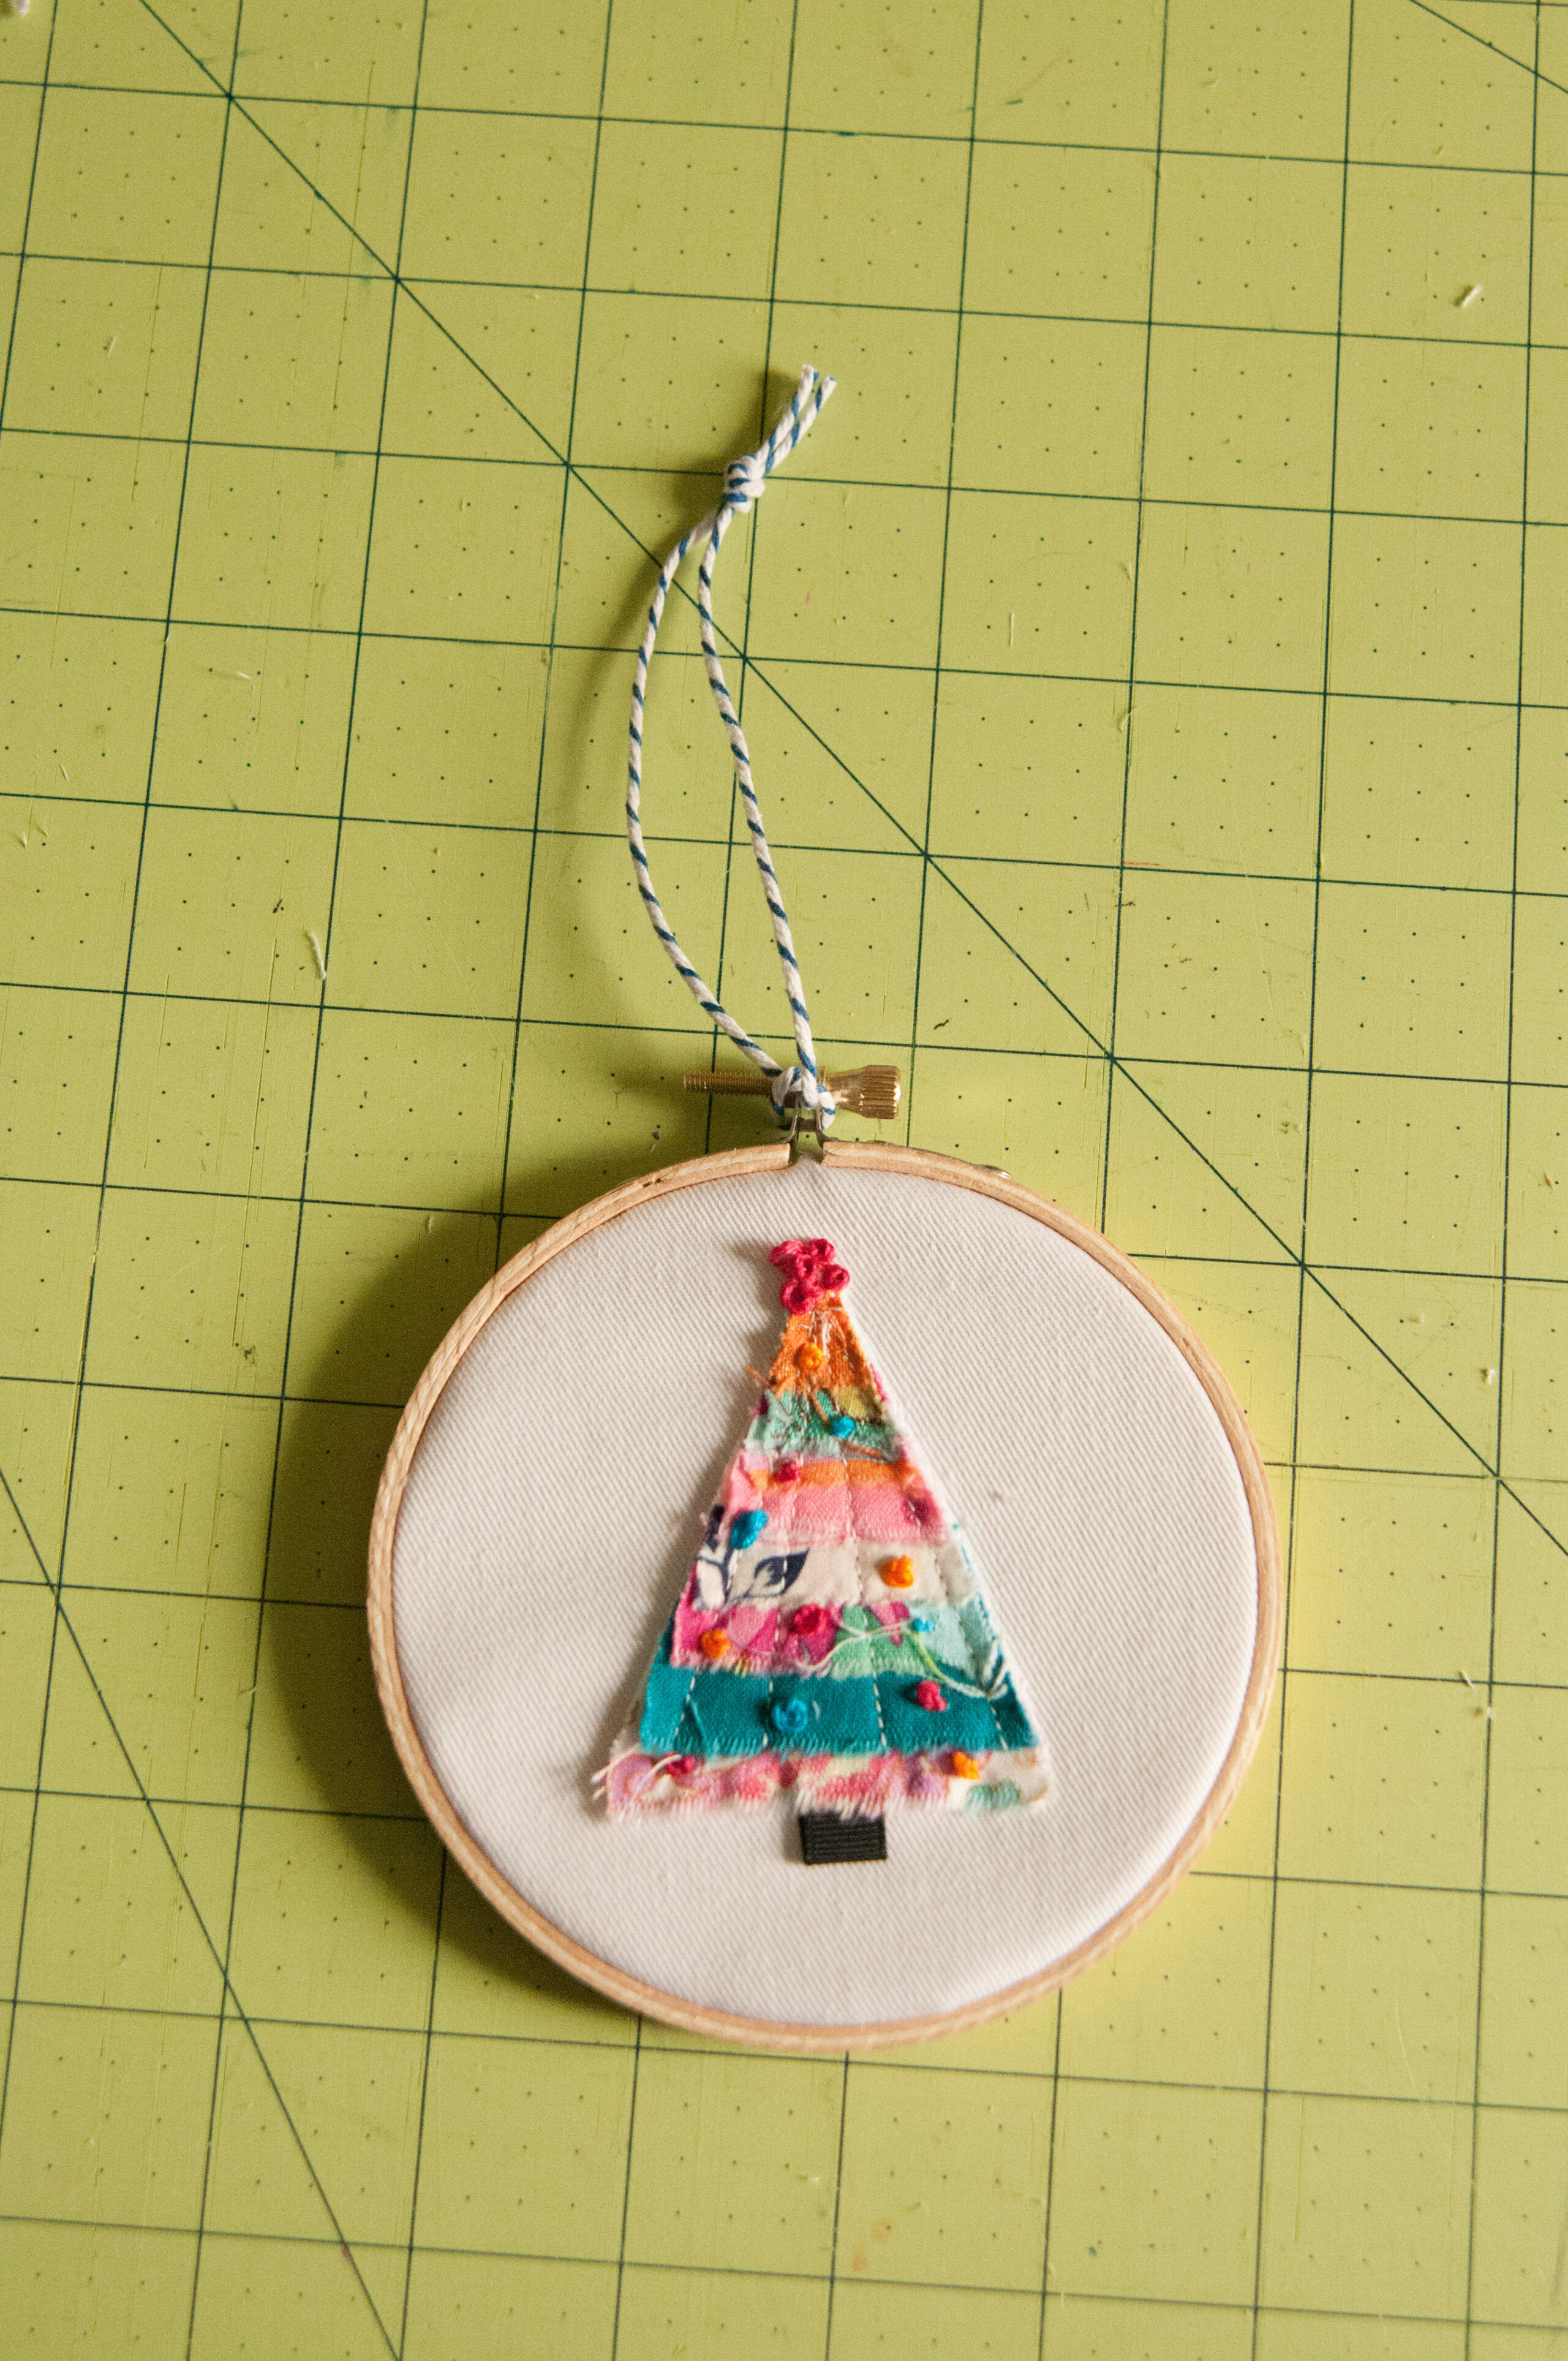
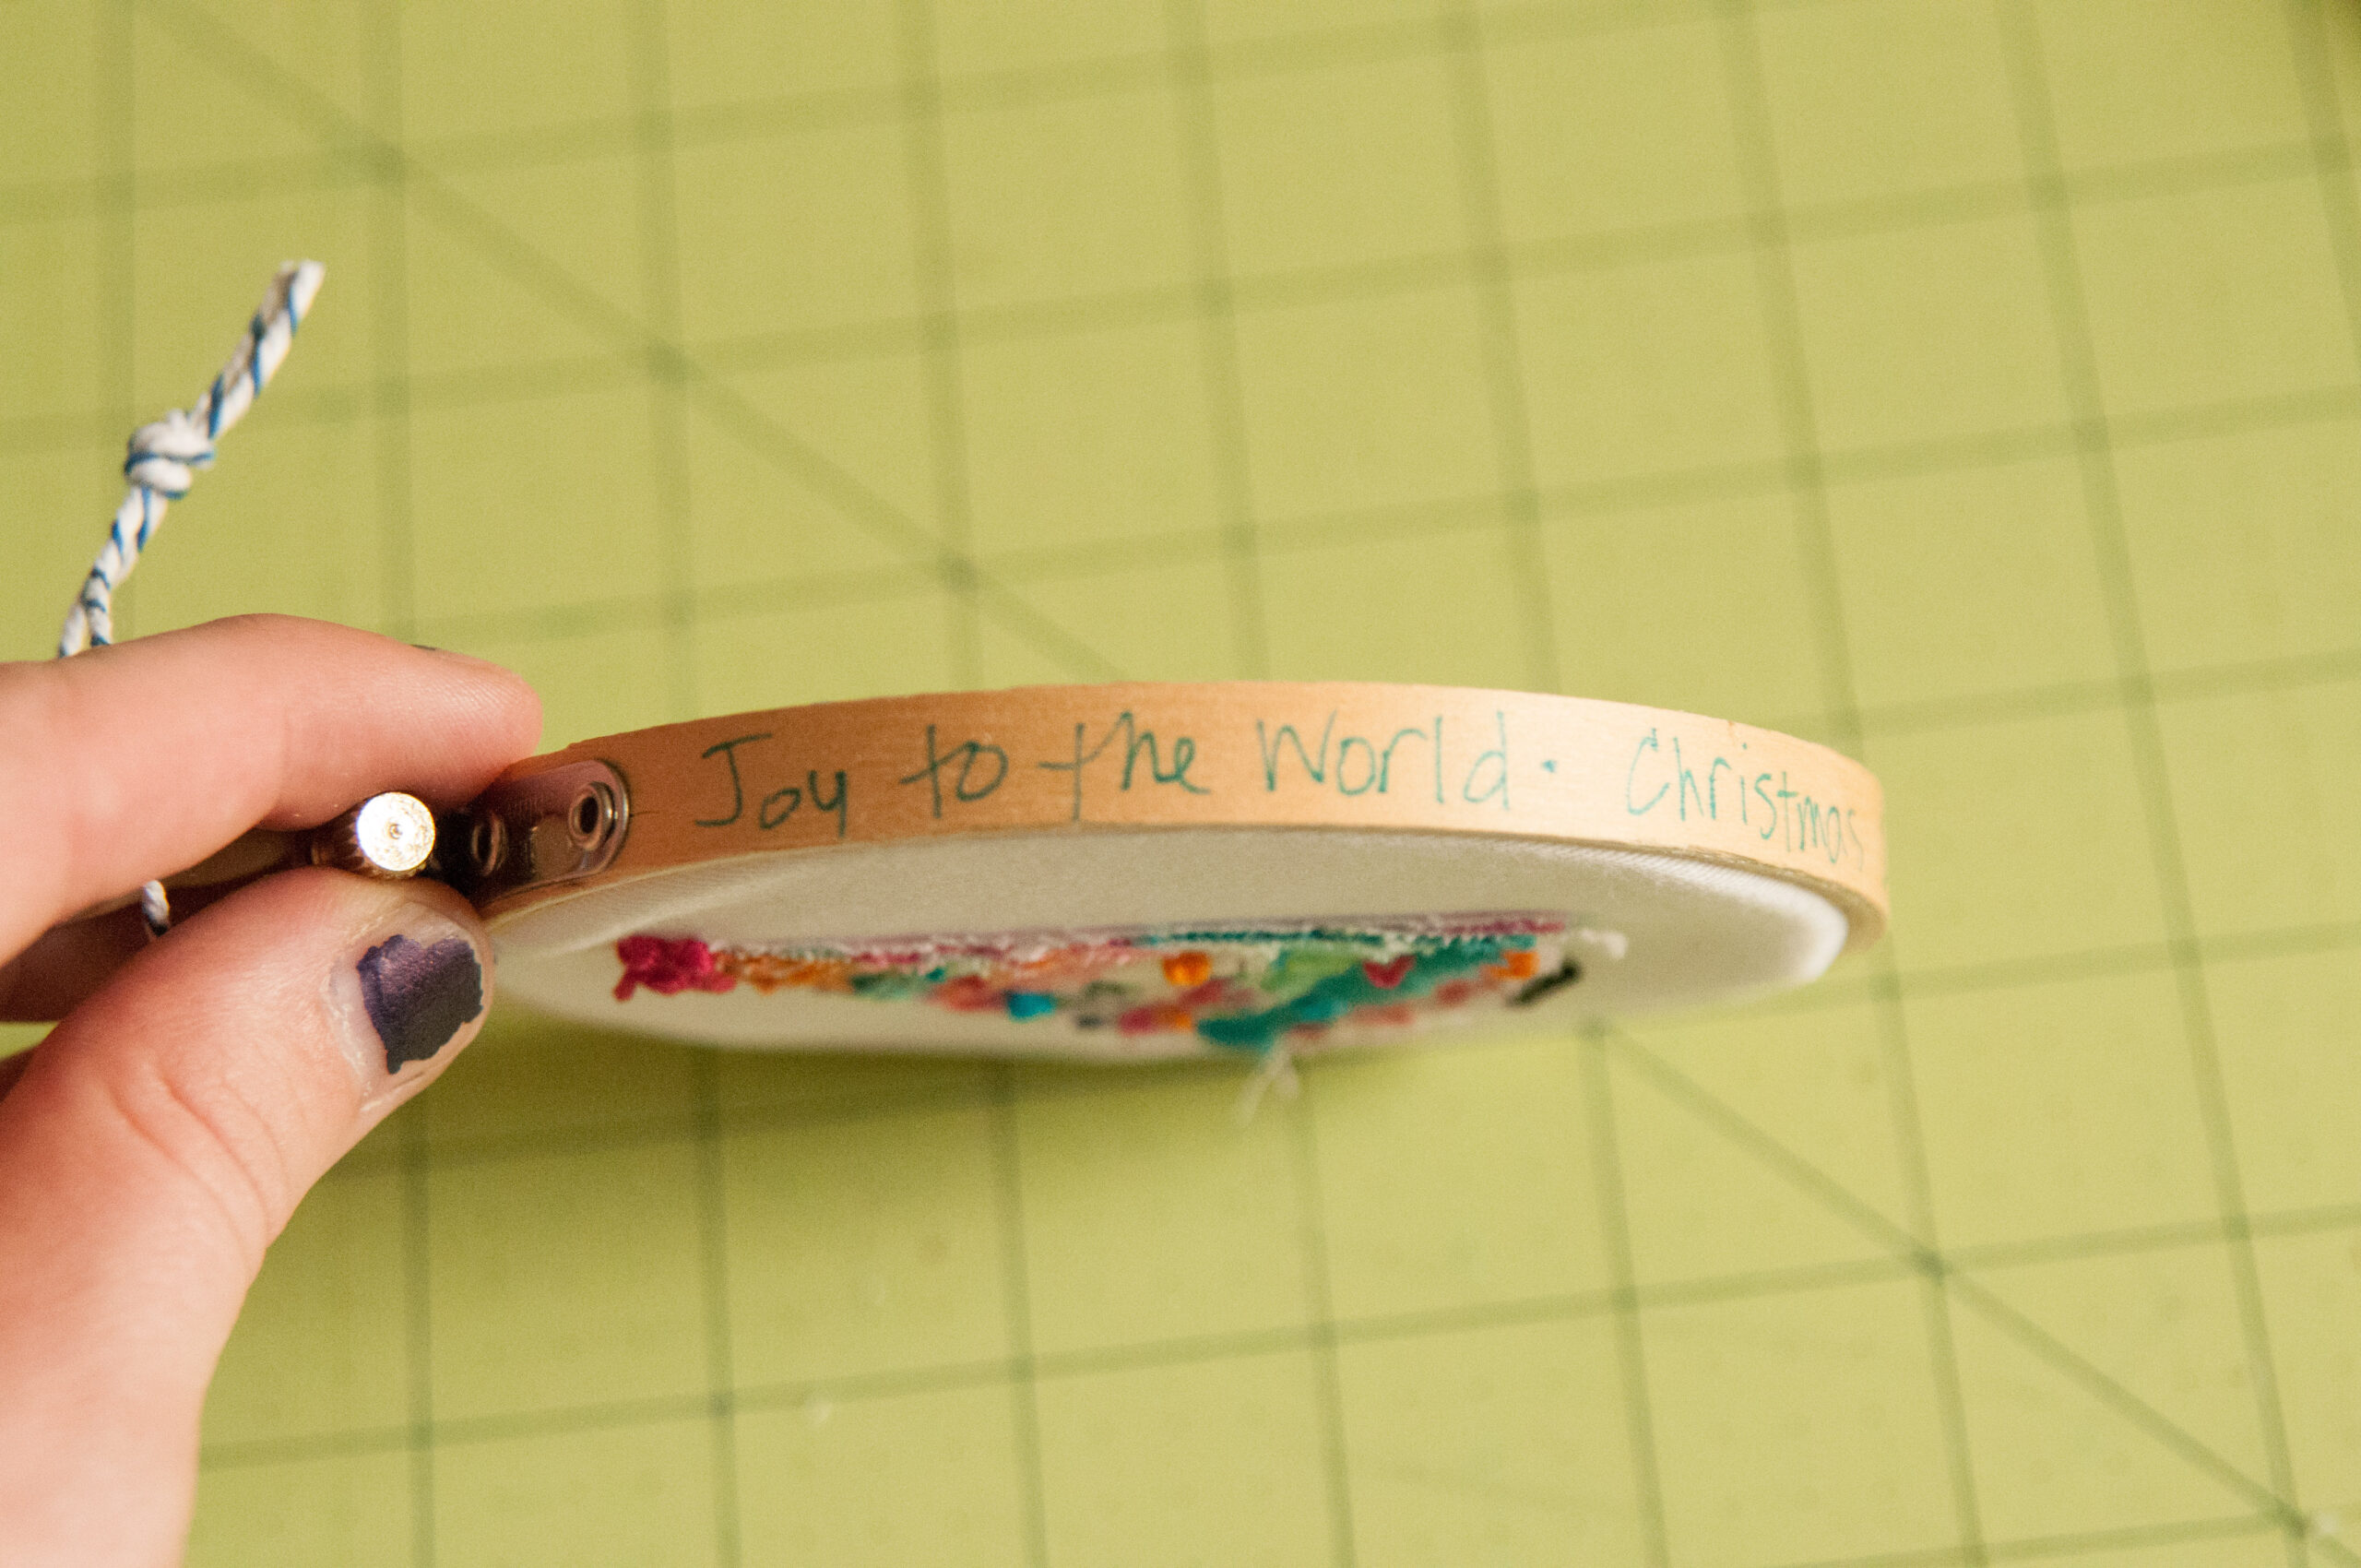
Step 31: Grab a Sharpie and write a message, song lyrics, the date, etc. I like to include my handwriting somewhere in my projects. I remember it meaning a lot to me to see my grandmother’s handwriting on cards and such when I was a kid.
Step 32: Now, assembly line these babies and you’ve got a quick, easy, inexpensive Christmas gift for teachers, pastors, friends, co-workers, neighbors, etc. Or – just keep them for yourself! 🙂

Are there any other common designs or themes for embroidery hoop ornaments?
There are endless design possibilities for embroidery hoop ornaments, but some common themes include holiday motifs (such as snowflakes or reindeer), floral patterns, animals, and personalized monograms. The choice of design ultimately depends on personal preference and the intended purpose of the ornament.
Merry Christmas from our home to yours! I hope you enjoyed these embroidery hoop ornaments! These ornaments are a favorite Christmas tree decoration. There's so many ways you can customize these for the holiday season. Get out your hot glue gun and add some jingle bells, berries, mistletoe, and more. I've also seen embroidery hoop ornaments with applique or done for another time of year. Lots of different ways to and DIY possibilities to make this simple Christmas craft!
It's amazing what types of Christmas ornament designs you can come up with with just a few fabric scraps. I'm excited to see everyone else's creative Christmas ideas! Thank you for coming to our blog to learn a little more about DIY embroidery hoop ornaments. Before you leave, make sure to stay in touch on social media by joining our Facebook Sewing Group or following us on Instagram. You can also signup for our email newsletter below! Happy Sewing!
xoxox
b.