How to Sew a Lined Zipper Pouch | 6-Step Tutorial
How to Sew a Lined Zipper Pouch | 6-Step Tutorial
If you're new to sewing or looking for a fun and practical project, learning how to sew a lined zipper pouch is a great place to start. Whether you want to create a cute coin purse, a stylish makeup bag, or a handy organizer for your small items, this tutorial will guide you through the process step by step. From choosing the right fabric and zipper to sewing in a lining for a professional finish, we'll cover all the tips and tricks you need to know. So grab your sewing machine and let's get started with this great tutorial!
DIY Zipper Pouch Tutorials
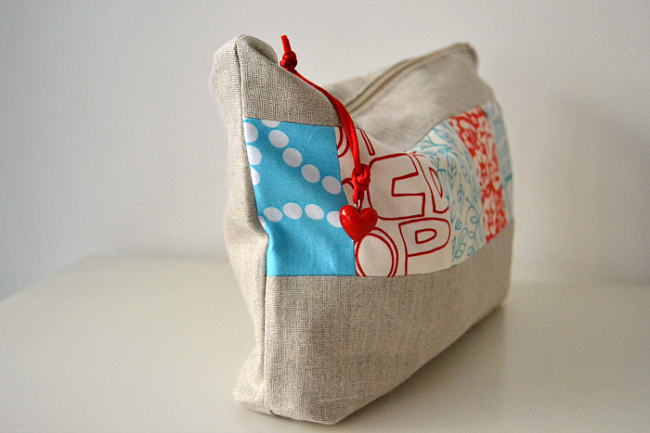
Sara from Made by Sara here with a DIY Zipper Pouch you can make as a gift for a friend or Mother’s Day. It is a simple lined zipper pouch with a twist – some patchwork as an added lovely detail!
Every woman can find a use for another zipper pouch, right? I know I can! I have them in all colors and shapes and I find them very useful. As moms we appreciate useful gifts (although all those sweet postcards and crafts from our kids are so priceless!) so I thought this would be a good project to share as a tutorial.
Lined Zipper Pouch Supplies
- 2 fat quarters for outer fabric (quilting cotton or linen) and a few fabric scraps of quilting cotton for the lining fabric
- fusible interfacing
- 11” zipper
- matching thread
- about 10” of ribbon and a charm (or a tassel)
How to make a simple lined diy zippered pouch
- Seam allowance is 1/4”.
Step 1: Cut all the fabric pieces as follows:
- For the front piece: 2” x 12” rectangle and 4” x 12” of main fabric, plus six 1/2” x 3 1/2” rectangles of different quilting cotton prints
- For the back piece: 9”x12” rectangle of main fabric
- For the zipper tabs: cut two 2” squares
- For the lining: two 12” x 9” rectangles of fabric of choice
- Interfacing: two 12” x 9” rectangles of fusible interfacing
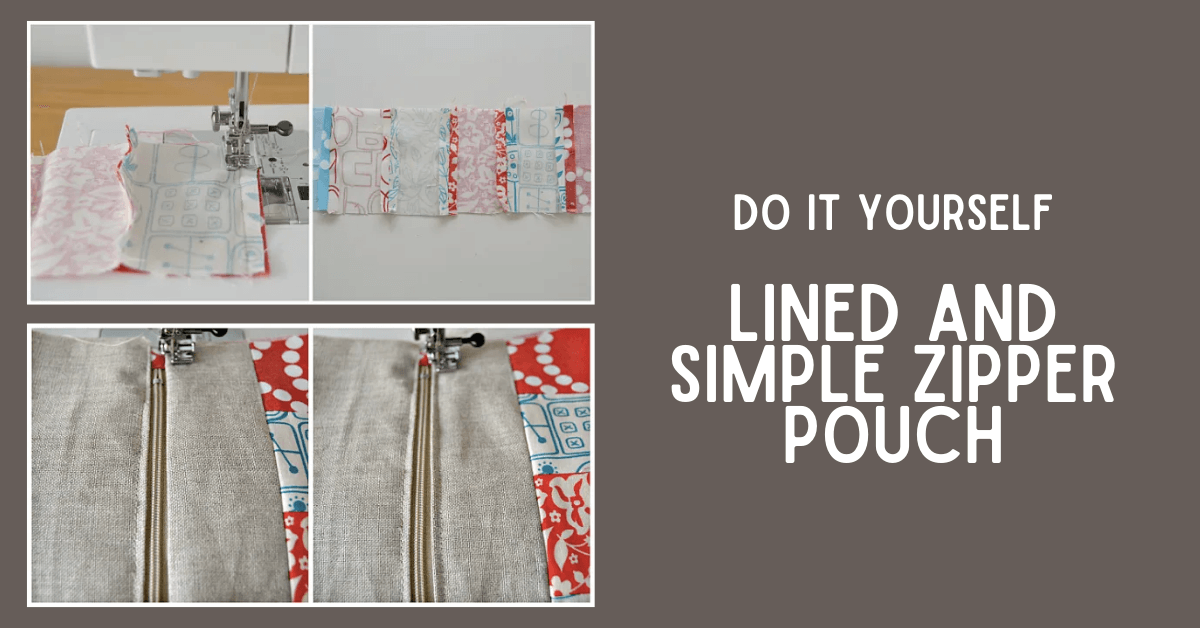
Step 2: Let’s start with the front side piece of outer fabric.
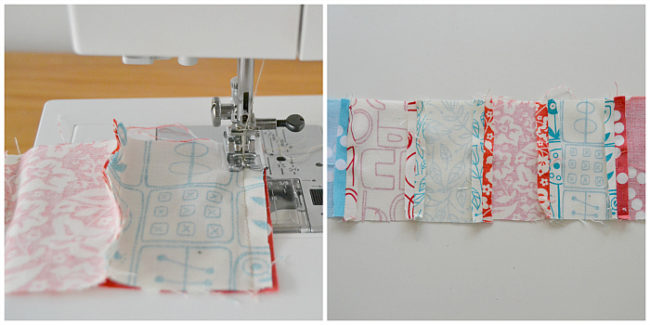
Grab all six 2 1/2” x 3 1/2” rectangles. Sew them together, side by side, right sides together (1/4” S.A.). Press open seams.
Place the 4” x 12” rectangle right sides together (RST) with the patchwork piece you have just sewn, aligning long edges. Stitch. Press the seam open.
Place the 2” x 12” rectangle RST with the patchwork piece, aligning long edges. Stitch. Press the seam open.
Step 3: Iron the two interfacing pieces to the front side piece and to the back side piece of the main fabric.
Step 4: Sewing the zipper and attaching the lining.
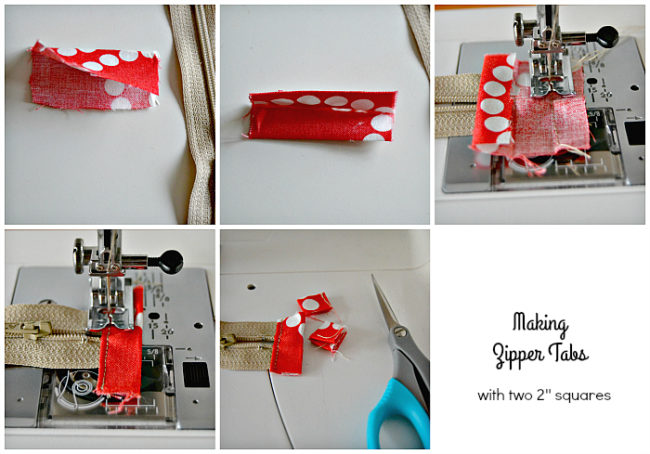
Grab the 2” squares. Fold them in half and then fold the edges towards the center (just like bias tape), with an iron. Place one open square right side with the bottom side of the zipper on one of its edges. Stitch at 1/4”. Fold up and over the edge of the zipper, towards the upper/right side. Edge stitch close to the zipper. Repeat for the other zipper edge. Trim tab excess on the sides (along the zipper sides).
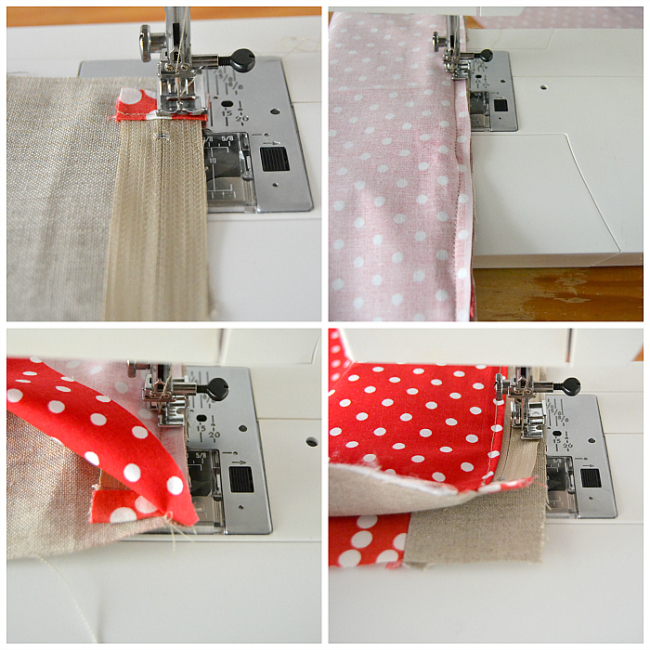
Place zipper face down along the right side of the upper edge of front side piece, aligning edges. Stitch at 1/4”.
Place one of the lining pieces RST with the front side piece, aligning upper raw edges. Note: the zipper is sandwiched in between the two fabric layers. Stitch at 1/4”.
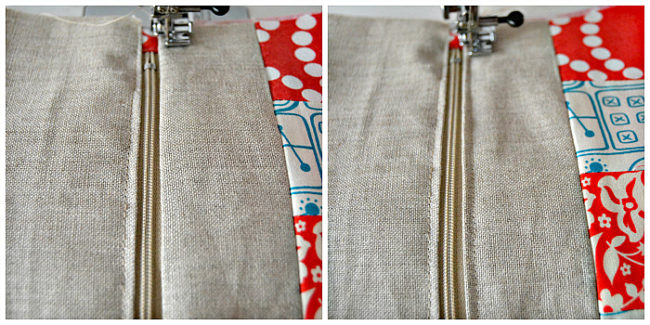
Turn lining over and press. Edgestitch along the seam, next to the zipper.
Repeat these steps to sew the zipper to the back side (and back lining).
Step 5: Sewing sides and bottom to close the pouch.
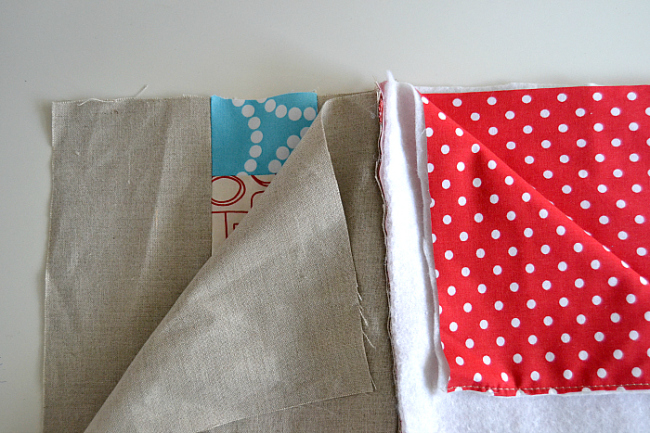
Fold the pieces so you have both linings on one side of the zipper and both main sides on the other. Make sure you leave the zipper a few inches open.
Sew along the sides and bottom edges of main pieces. Note: Leave about 3 inches open on the lining bottom seam (to turn right sides out later on) . Be careful not to catch the zipper tabs. Stitch as close to them as you can.
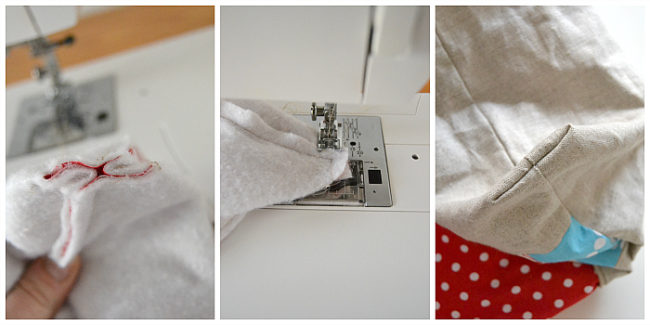
Grab and hold one of the corners so that the side seam matches the bottom seam and raw edges form a straight line. Cut the triangle tip (about 1”). Stitch.
Lined Zipper Pouch Tutorial Step 6: Finishing touches to the diy zipper pouch.
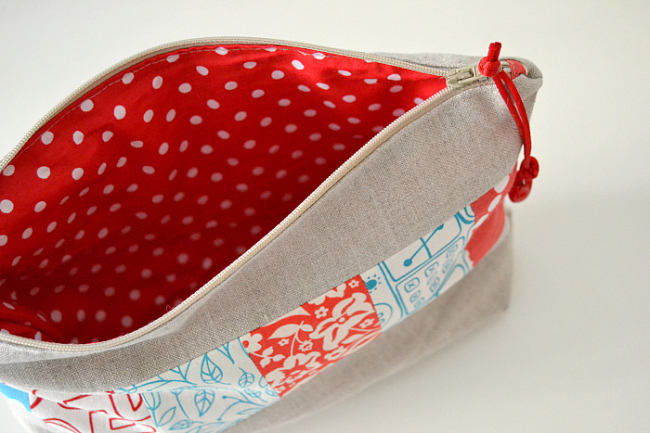
Turn the pouch right side out through the opening you left at the bottom edge of lining. Hand stitch the opening with a slip stitch for a clean finish. Note: If you don’t know how to hand stitch, just press the seam allowance of the opening and stitch it on the outside. The stitching will be visible inside the diy zipper pouch.

Give it a good press, tie the ribbon and charm to the zipper pull and you’re done!
What is the best fabric to use for a lined zipper pouch?
Woven cotton fabric is popular for lined zipper pouches. It's durable, versatile, comes in various colors and patterns, and is easy to work with. Cotton fabric provides structure to the pouch while remaining flexible for sewing.
Thank you for joining us to learn how to sew a lined zipper pouch. Sewing a zipper pouch is a fun and rewarding project that allows you to showcase your sewing skills while creating a practical and stylish accessory. By following the steps outlined in this blog, you can confidently sew a lined zipper pouch that is not only functional but also reflects your personal style. Whether you use it as a makeup bag, pencil case, or organizer, your handmade pouch will be a testament to your creativity and craftsmanship. So gather your materials, fire up your sewing machine, and prepare to embark on a sewing adventure.
Before you leave, make sure to come join our Facebook Group, follow us on Instagram, or sign-up for our Newsletter below. Happy Sewing!