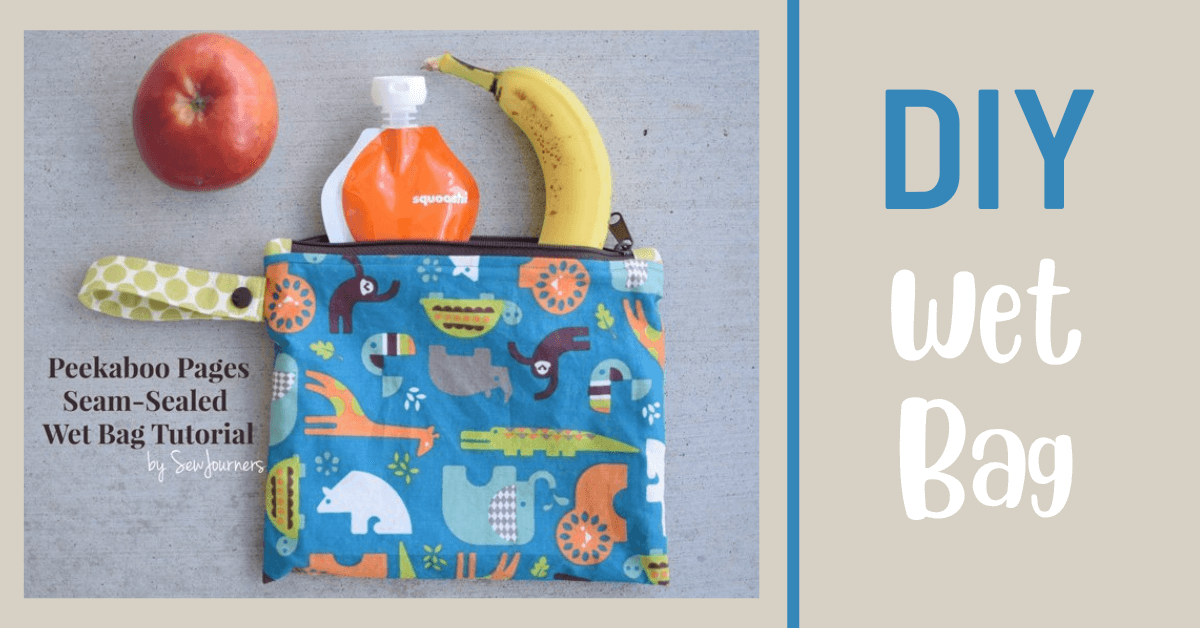
DIY Wet Bag | Free Tutorial
DIY Wet Bag Tutorial

Make a wet bag right now, or pin for later.

DIY Wet Bag Tutorial Materials:
- Main Fabric and PUL: (I recommend just using white PUL because if you seam seal it you will not benefit from a colored or printed PUL) These sizes are a suggestion. You can make your bag any size: Small wide: 10″ x 16″ or Small long: 20″ x 8″
- Medium: 15″ x 30″
- Accent Fabric: 10″ x 4″ plus two scraps about 2″x”2
- Zipper: The length of the zipper should be at least the width of your fabric or longer. I like the zippers with long pulls for handbags. These are especially handy when cloth diapering when you may need to open the bag one-handed.
- Snaps

Make Wet Bags
Take your strap and press one edge in 1/4″ to the wrong side. Then fold the wrong sides of the fabric together along the long edge and press. Open it up, the wrong side up, and fold the two long edges to meet at that center fold and press. Then fold along the initial fold so raw edges are encased and pressed again. Now three edges of the fabric are folded and one short edge is raw. topstitch around the entire strap. Set aside.

Press one side of 2″ scrap to the wrong side about 1/4″ (Fig.1) Place scraps on a zipper end with the folded edges facing each other. The distance between them should be 2″ less than the width of the fabric.(Fig. 3 I know my numbers are out of order!) Topstitch along the folded edge. (Fig. 2) Make sure to hand turn the wheel as you go over the zipper teeth so you don’t force it into the teeth. Adjust the needle if you meet resistance.

*To have a waterproof wet bag we will need to seal the seams. PUL has a shiny side and in this tutorial that will be referred to as the right side.
Lay PUL right side (shiny side) up and lay the zipper right side up across the top of one of the short ends. (Fig. 1) Lay the main fabric on top right side down so the zipper is sandwiched between the right sides of the pull and the lining. Pin in place. (Fig. 2)

Using your zipper foot sew the layers together for the wet bag, making sure to stop and pull the zipper pull out of the way when needed. You may want to baste it on first, check your work, and then sew it in place. (Fig. 3) Turn the right side up and topstitch just the main fabric to the zipper. We don’t want unnecessary holes in the PUL. (Fig. 4)
We will attach the other end of the pull and main to the zipper in the same fashion. Bring the opposite PUL edge up to meet the other raw zipper edge with the right sides of the PUL together, and the opposite main fabric edge up RST with the zipper sandwiched in between. (Fig. 1) The main and PUL are each folded RST independent from each other. See the image below for more clarification. Sew together. (Fig. 2)

Flip the main fabric right side out and top stitch just the zipper and the main. (Fig. 1) Topstitching is a little trickier on the shorter bags like I have here because you have to isolate the zipper and the main fabric. I pulled all the other layers underneath my presser foot and out of the way. (Fig 2) It seems bulky at first but it isn’t nearly as hard as it might look.

The strap will go on the side of the bag that the zipper pull is on when the zipper is shut. Place strap over main fabric RST a 1/2″ down from the zipper, raw edges aligned and baste in place only to the main fabric layer.

Position the wet bag inside out with PUL on one side of the zipper and the main on the other side. (Fig.1 & 2) I like to clip the zipper in place so I sew evenly there. (Fig. 3) Un-zip the zipper for turning. Sew down the length of the bag on one side. If you have a Teflon foot you may want to use it here. Also, remember to hand turn the wheel again while going over the zipper. Repeat for the other side only leave a 3″ opening on the main fabric raw edge for turning. (Fig. 4)

Trim excess zipper. (Fig. 1) Sew reinforcement zig-zag stitches in the seam allowance over the strap. (Fig. 2) Clip corners. (Fig. 3)

DIY Wetbag Seam Sealing Using a press cloth, press the two seams on the PUL side. (I used a press cloth but not for the picture so you could see where I am ironing. Also, it didn’t hurt anything not having a press cloth). Press the seam allowance and just over the stitches to melt the fabric together, closing up the holes from stitching and creating a waterproof seal. I hold my iron over each section for about 15 seconds.

Turn the bag right side out. Topstitch or hand-stitch the turning opening closed. Affix snaps 1/2″ in from each end of the strap.

And you’re done with the wet bag! Now you can make some more because these have so many uses!

Thank you for joining us today. Before you leave, make sure to join our Facebook Group and follow us on Instagram. Happy Sewing!