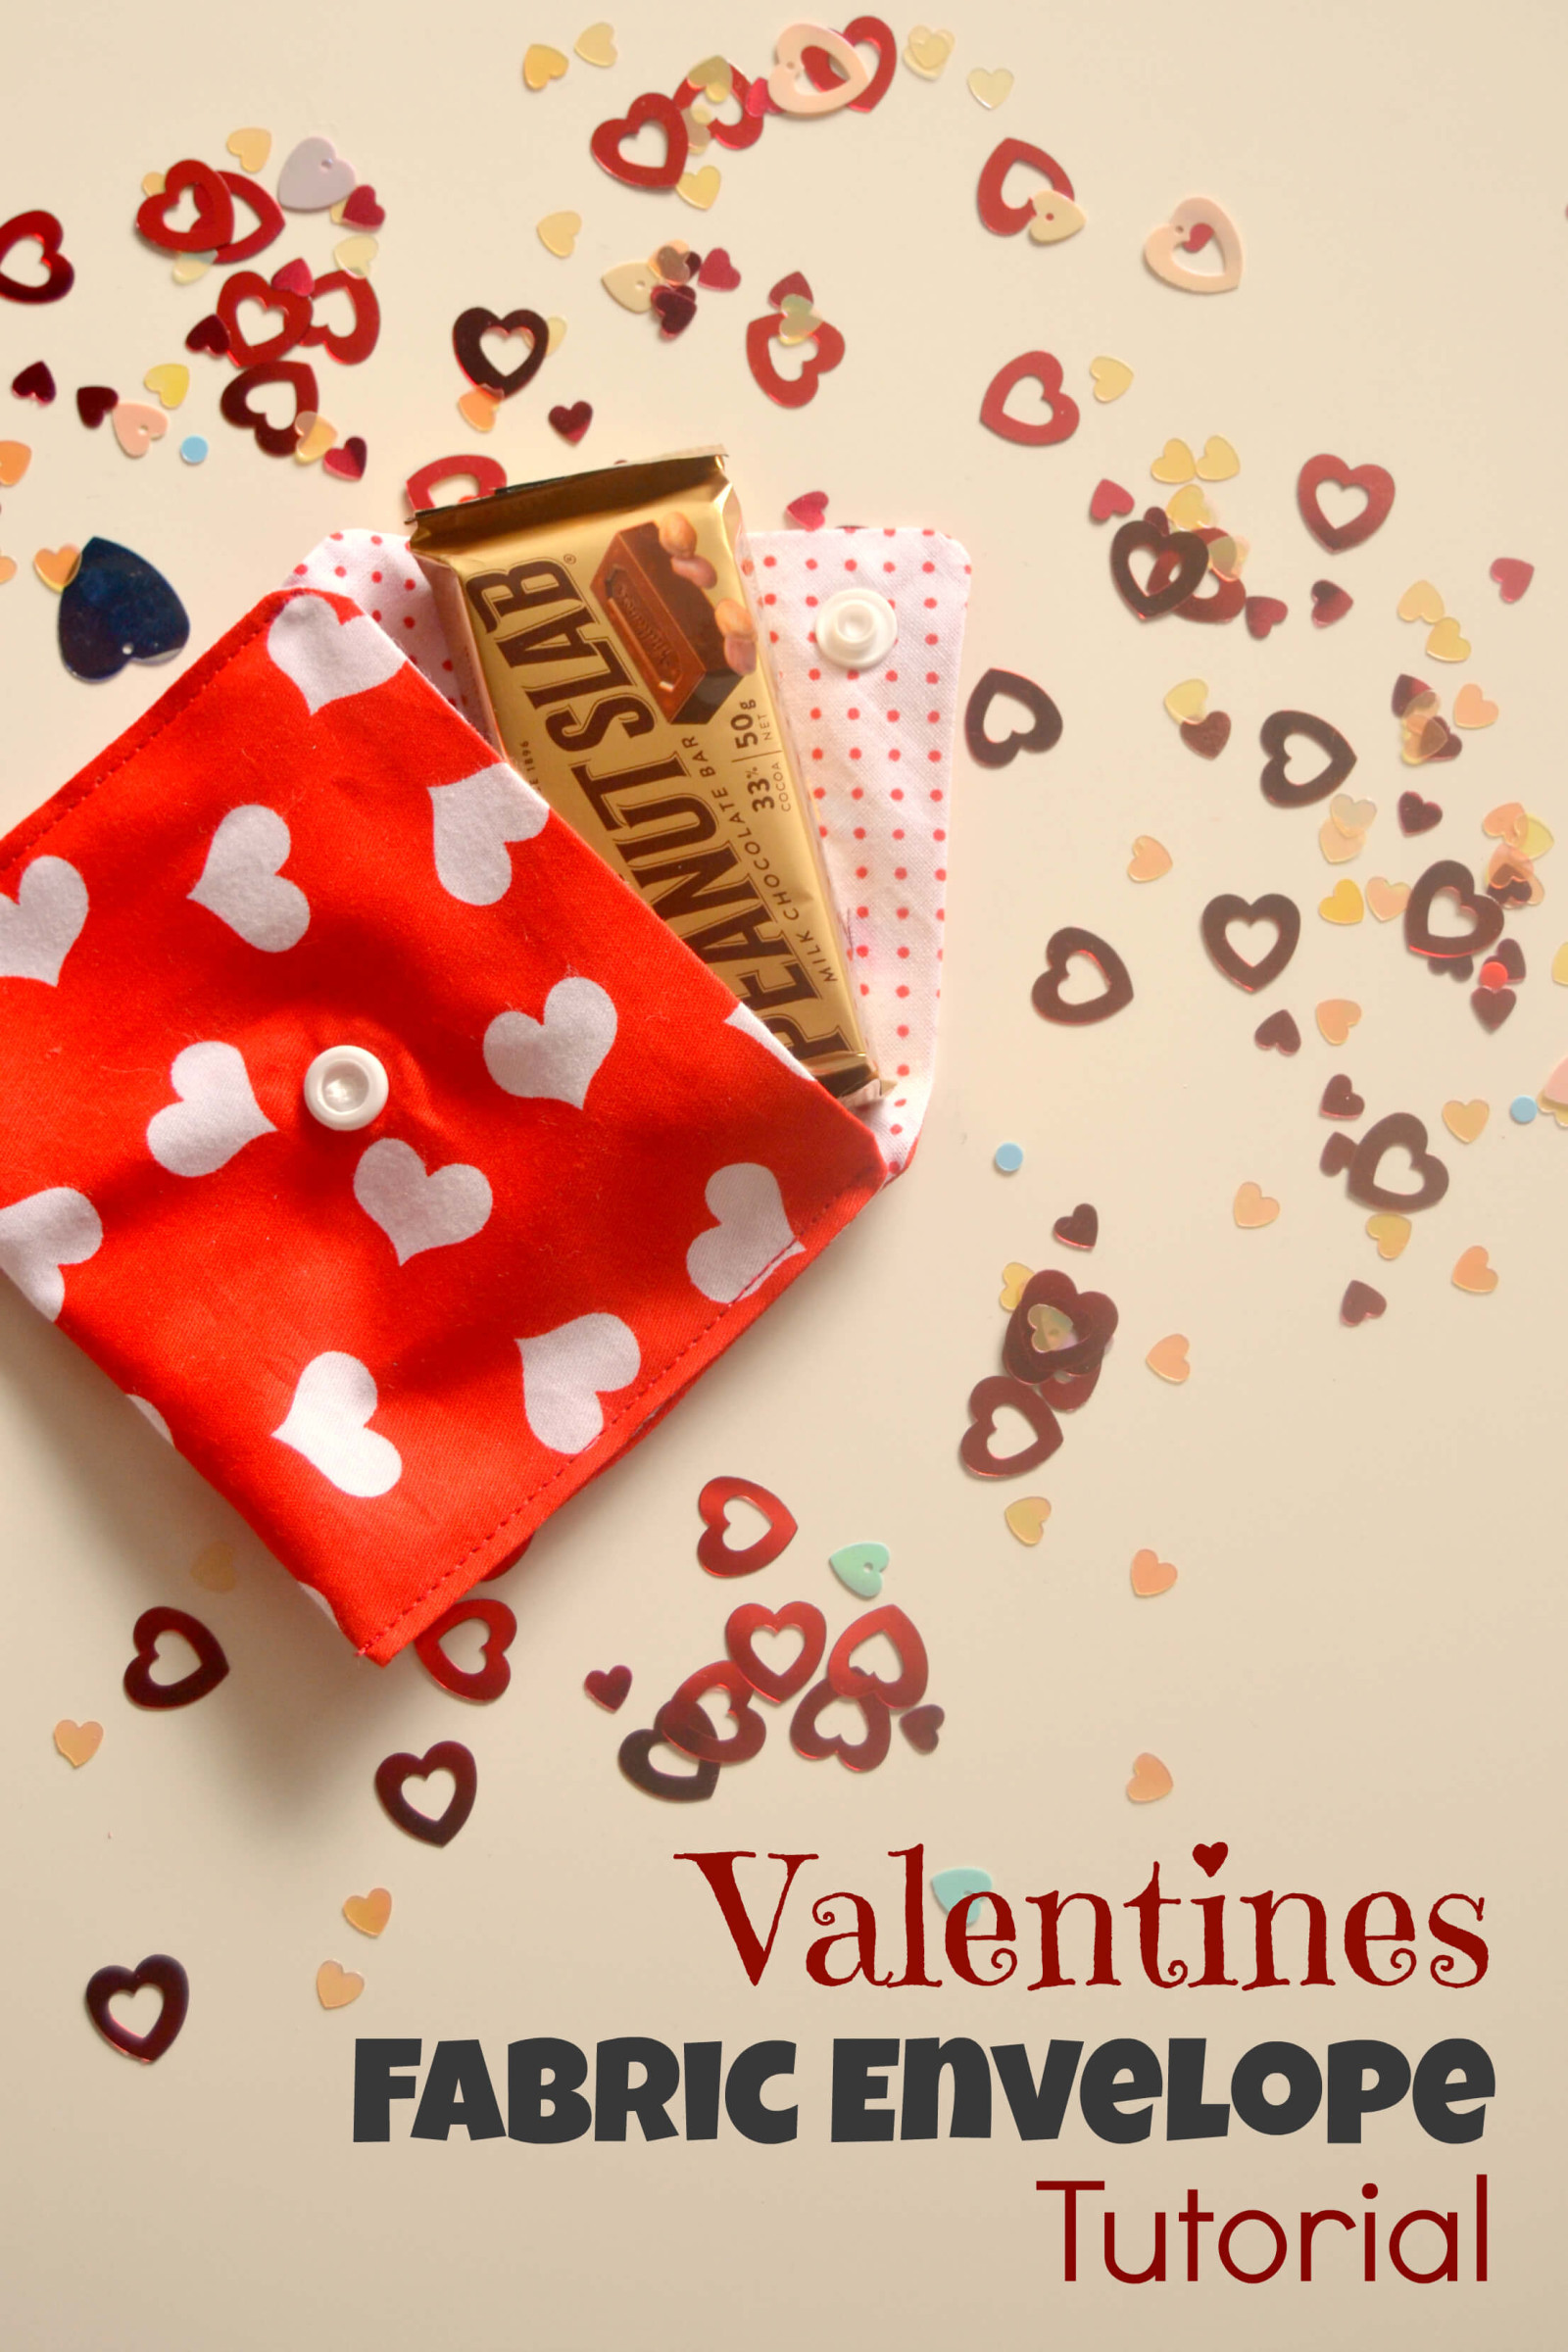
DIY Valentine Envelope Tutorial
Let's make a DIY Valentine Envelope together. I love real letters! And my kids love writing letters too. Well, actually my older son is the only one who knows how to write, my two girls can only draw a few doodles. :) They love to play that they are "writing" letters one to the others. They used to ask for paper envelopes but they were spending so many at some point that I had to find some reusable ones.
So I made them a few out of... fabric! They were so excited! Now that Valentines is fast approaching I thought I would share with you this quick valentine fabric envelopes tutorial. You and your kids can use them to make a special one-of-a-kind Valentine!
DIY Valentine Envelope

DIY Valentine Envelope Supplies:
- A few scraps of fabric (minimum of 5'' x 11'')
- Matching thread
- Buttons, snaps or hook & loop tape
- Embellishments, pom-pom trim, ric-rac, etc.
How to make it:

Step 1: Cut 1 rectangle out of two different fabrics. Find the middle of the upper edge and cut the upper corners as to make it a triangle (as you see on image).
Optional: If you want the envelopes to be a bit sturdy then cut 1 rectangle of fusible interfacing and press it to one of the fabric pieces.

Step 2: Sew both pieces right sides together with a 1/4'' seam allowance. Make sure to leave a 2 inches gap. Clip corners. Turn inside out through the gap. Press. (Note: Don't worry about the gap, it will be closed later on.)
Optional: If you want to add some trim or ric-rac you have to stitch it to one of the pieces (on the right side) before you sew both envelope pieces together.

Step 3: Fold to form the envelope shape. Edge stitch on both sides to close the envelope.
Note: Finished size for these envelopes is 4.5'' x 3.5''. If you want them to be bigger then cut the fabric to your desired finished size plus 0.5'' for seam allowances.


Step 4: Sew two buttons and attach a string, or use some snaps to keep the envelope closed. You can also sew hook & loop tape.
Step 5: Fill the envelope with a love letter, a cute kids drawing, or some candy.
You're done. Happy Valentines!

This project can be used for other seasons and purposes. You can actually send a real letter on one of these fabric envelopes - can you imagine the recipients surprise? They are also perfect as wedding favors or for a fancy dinner party invitation! You can also make these a bit bigger and used them as a gift wrap.
If you give them a go please share with us in Peek-a-Boo Pattern Shop''s Facebook Group. We would love to see them!
Happy sewing!