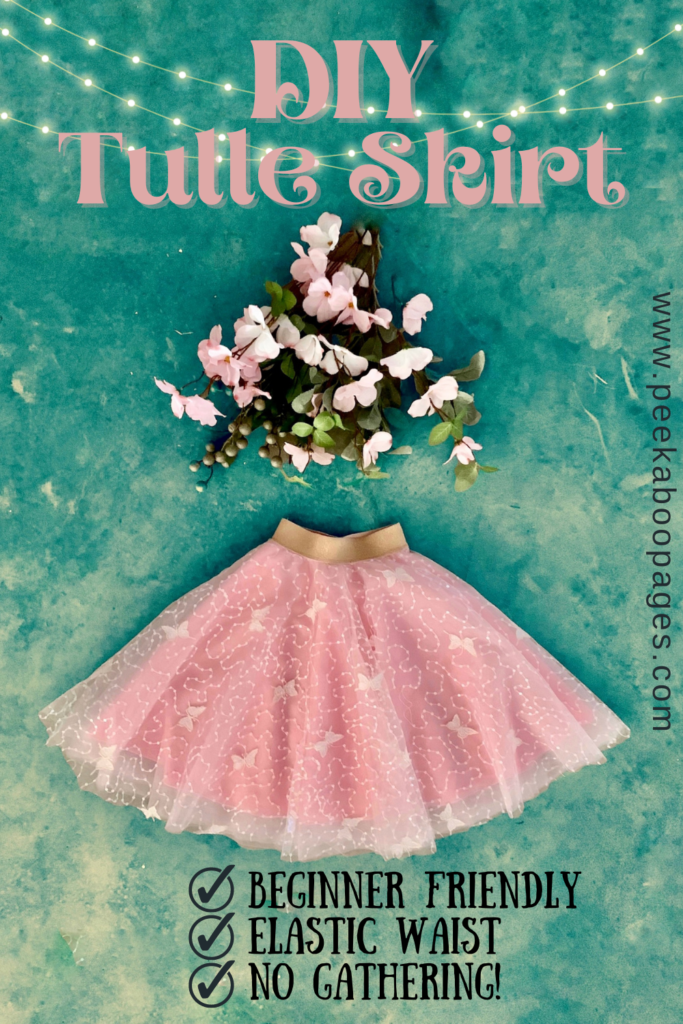
DIY Tulle Skirt | How to Make a Tulle Skirt
Let’s learn how to make a tulle skirt! We have 2 methods we'll go through - a basic tutu and a layered tulle skirt with a solid layer beneath it. The truth is, every little girl (hmm, every grown up girl too! 🙂 ) loves these! And the skirt is so fun to make and so versatile! You can make one for dance classes, for a fancy outfit, just for playing around the house, or… for a costume!
You can get tulle in several colors, so depending on the theme or character you choose, you can make a fun skirt or dress! Think blue for a Frozen inspired dress, a black one for a Halloween witch costume, an orange skirt for a cute pumpkin costume, a yellow skirt for a Snow White costume… The possibilities are endless! This is a simple project - and as mentioned, we have a couple different tutorials, so lets get started.
Method 1 | Basic Tulle DIY Tutu Skirt
Supplies:
- 1 to 3 yards of tulle pieces (It depends on the girl’s waist size and how much gathering you would like it to have so you may have some excess. For this tutorial, I have used 1 yard for a 21-inch waist.)
- 2-inch elastic band with waist measurement width
Tulle Tutu Skirt Instructions:

- Fold the tulle. Depending on how long you want the skirt to be, you can fold it in two, three or four layers. I was able to fold it parallel to the skirt length, so I have it folded twice – four layers – for a length of about 13.5 inches (tulle usually is 54” wide, so 4x 13.5”). If you need to cut it, then cut it folded with a rotary cutter along a ruler. Cut desired length + 1 inch.
- Pin one of the long edges and run a gathering stitch (maximum length) about 1/2 inch from the edge.
- Pin sides and stitch with a 3/8” seam allowance. (Make sure not to catch the gathering thread.)
- Gather skirt by pulling the bobbin threads.
Note: Personally I find it easier doing this way with tulle, but you can stitch the sides together first and then stitch and gather the upper edge.

- Grab the elastic and overlap raw edges by 1/2 inch. Zig zag stitch on both edges.
- Pin it to the inside of the elastic. Adjust gathering. Stitch with a zig zag stitch or with a stretch stitch.
You’re done with this simple tutu!
Note: If you find that the raw edge on the inside is a bit itchy (when in direct contact with the skin), you can enclose it with bias tape by sewing folded bias tape around the raw edge.
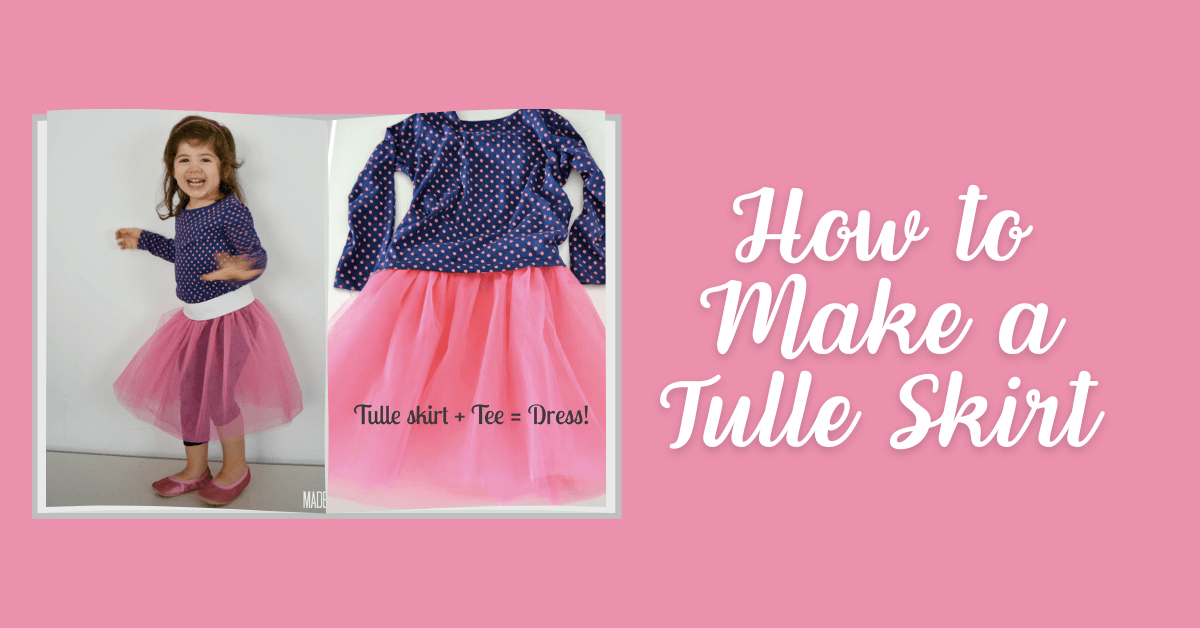
Note: If you want a no see-through skirt you need to either add several more layers or you can make a simple fabric skirt to add as a bottom layer as shown below. You can either make a simple gathered skirt pattern or a circle skirt pattern for a fuller skirt.
Method 2 | Multi-Layered Skirt
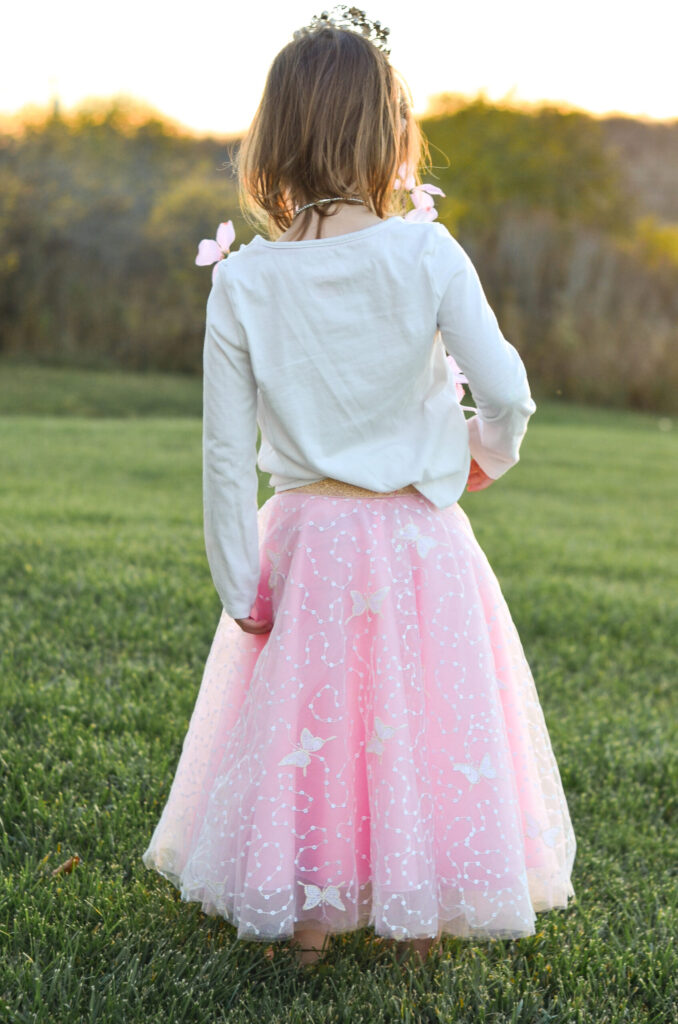
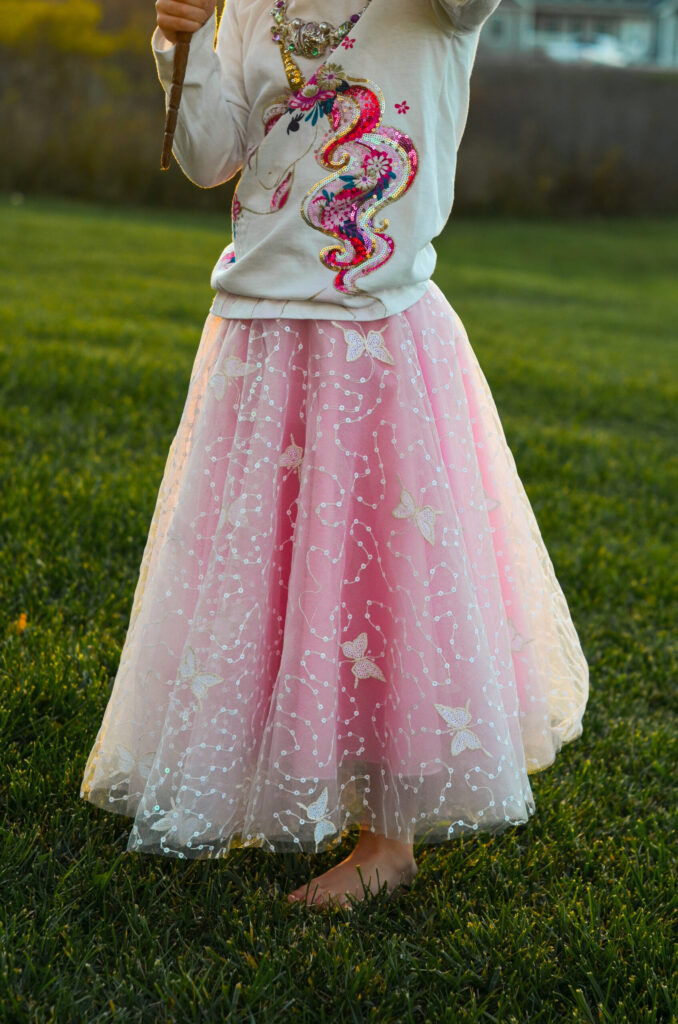
This year, Halloween has stimulated my daughter’s interest in playing dress-up! She considers any and all pretty skirts to be princess skirts, so I thought that it would be fun to add some tulle skirts to her wardrobe. She hasn’t taken it off since I made it, and she even tried to wear it to picture day! This is easy to adjust to suit your needs, making it ideal for dress-up, the holiday season, or everyday wear!
First, you will need to take the following measurements of the person that you are sewing for:
- Waist Measurement: Measure around the natural waist, usually about 1-2 inches above the belly button.
- Hip Measurement: measure around the widest part of the hips. Since we aren’t gathering the skirt and are using non-stretchy material, the opening needs to fit over the widest part of the bottom of the subject, which is usually the hips.
- Length Measurement: Measure from the natural waist (or where you want the waistband to sit) to where you want the skirt to hit. You can always trim if the skirt ends up a little long! I wanted an 18-inch skirt length, which will hit right around her ankle bone.
Collect Materials:
- Tulle: Not all tulle is the same. There is some incredibly stiff and itchy stuff out there. Adding a liner layer helps if you happen to end up with the not-so-soft stuff. Look for 60” wide soft nylon tulle. If you are making this for an older child and need more length, they make a super wide 108”, but it may be more difficult to find. I find that the most difficult part about sewing with tulle is cutting since it is a little shifty. Pattern weights, pins and a large open floor or cutting space with help. Basting multiple layers together before adding the waist band is also extremely helpful. for this skirt, you can add as many layers as you want. I used about 5-6 yards of the pink tulle to make 3 layers of pink underneath and 2 yards of the butterfly tulle for one top layer.
- Elastic: I used 1 ¾” for the elastic waistband. Depending on the size of the child and how many layers you are doing, you may want to do a slightly thicker or thinner elastic. You will need the waist measurement plus one inch.
- Lining fabric: I just used regular quilting cotton (or really any woven fabric will be fine), but it is easier if you have at least 60” wide fabric to make a larger skirt. Up to about 4T/5T, ankle-length skirt, 44-inch wide fabric will likely be fine!
The pattern for this skirt will be created using a little bit of easy math. The construction does not involve any gathering and it is simple enough for the beginner sewist!
Step 1: Calculate your measurements.
Don’t worry about the theory behind it, just use this little guide and punch it into your calculator.
First, the waist radius:
Hip measurement divided by 6.28
Example: 19” / 6.28 = 3” (Round up to the nearest 1/4 inch)

For the length, take the length of skirt measurement and add it to the waist radius.
Example: 3”+ 18”=21”.
Step 2: Cutting
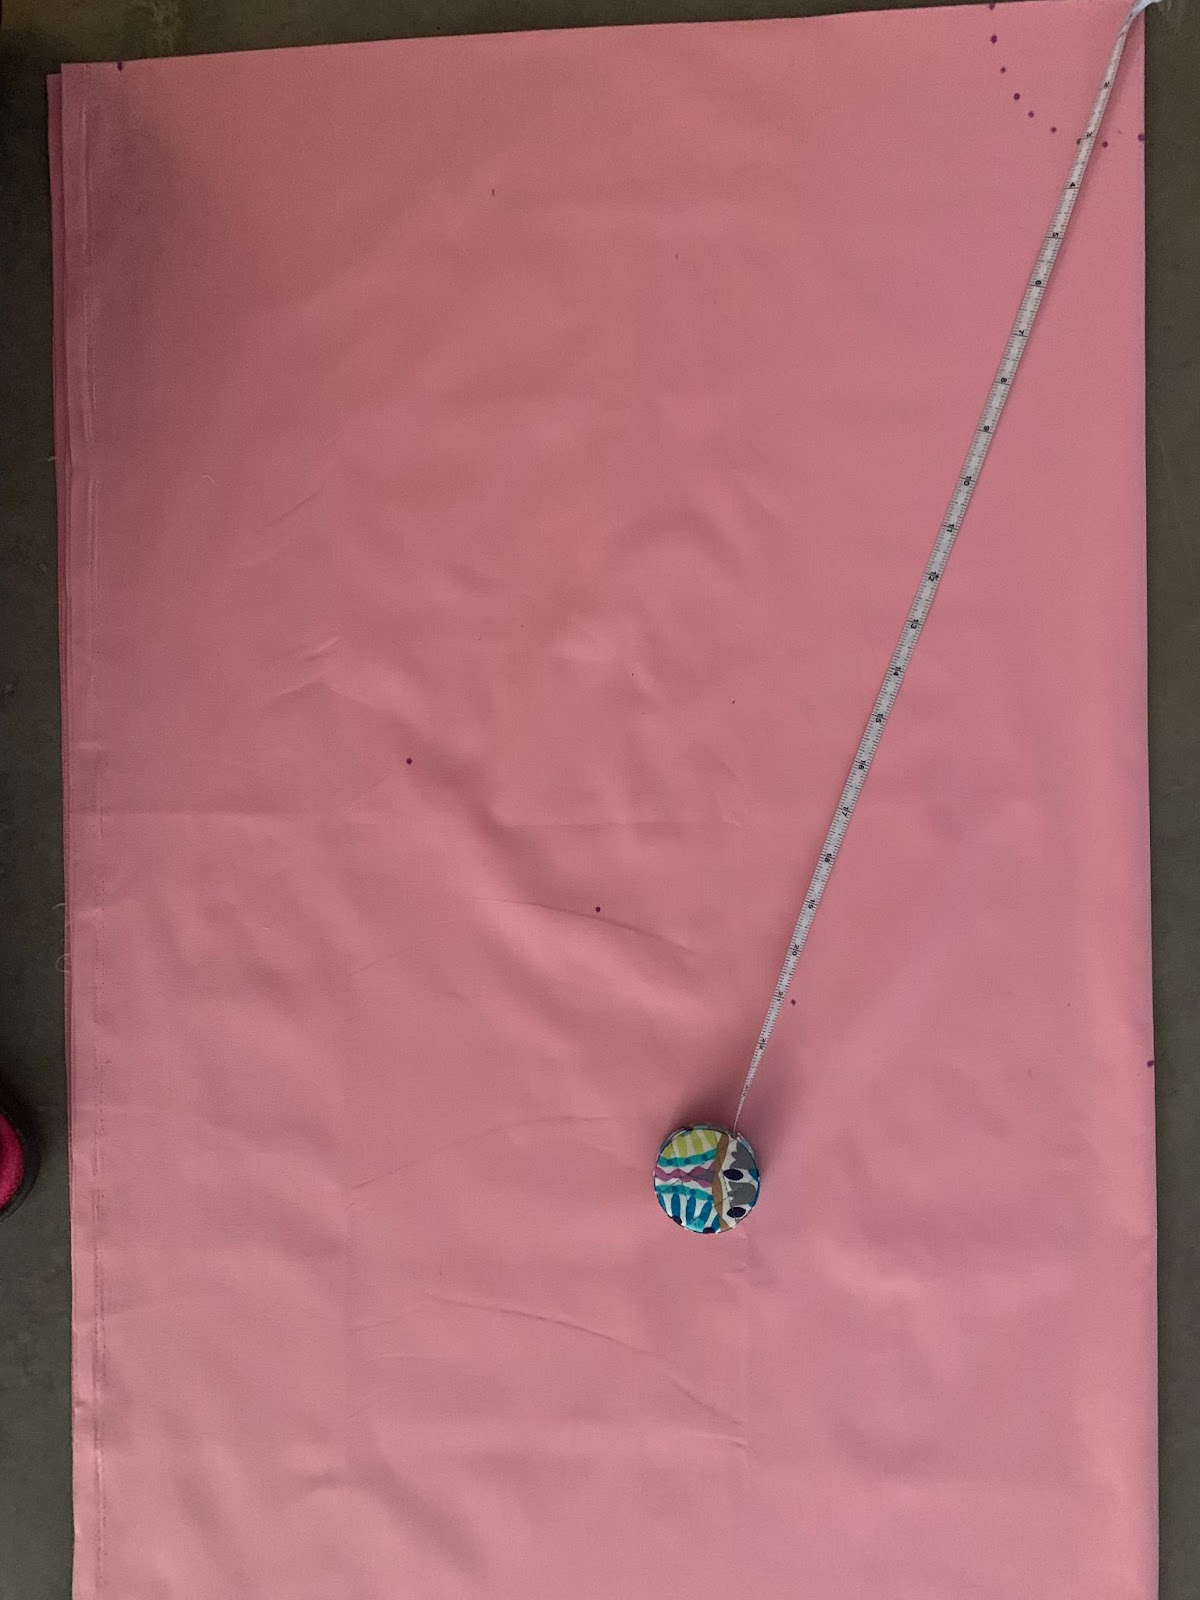
 Cut your lining fabric first–it’s much less shifty than tulle! Fold the fabric from selvage to selvedge and then from bottom to top so there are two folded sides. Where the folded corners meet, measure the waist radius from the center point along each folded side. As you can see, I tape the measure at the corner and then maneuver it as needed.
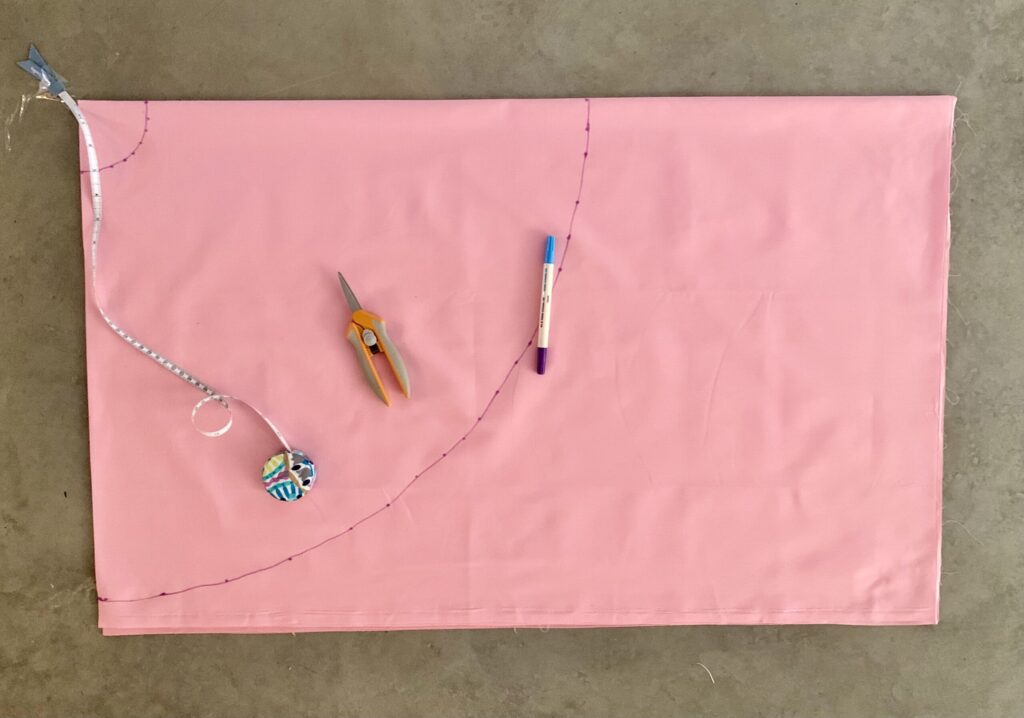
Using a disappearing pen, mark dots from one folded side to the other at 3”. This will create the waist curve. From the center point, measure the skirt length (Example: 21”) along the two folded sides. Using the same method, connect, move your ruler or measuring device and draw dots to make the curve. Draw the curve to connect the dots. Keeping the fabric folded, cut the two curves. You should end up with a donut shape! I then use this as a template to cut the it after hemming.
Step 3: Hemming
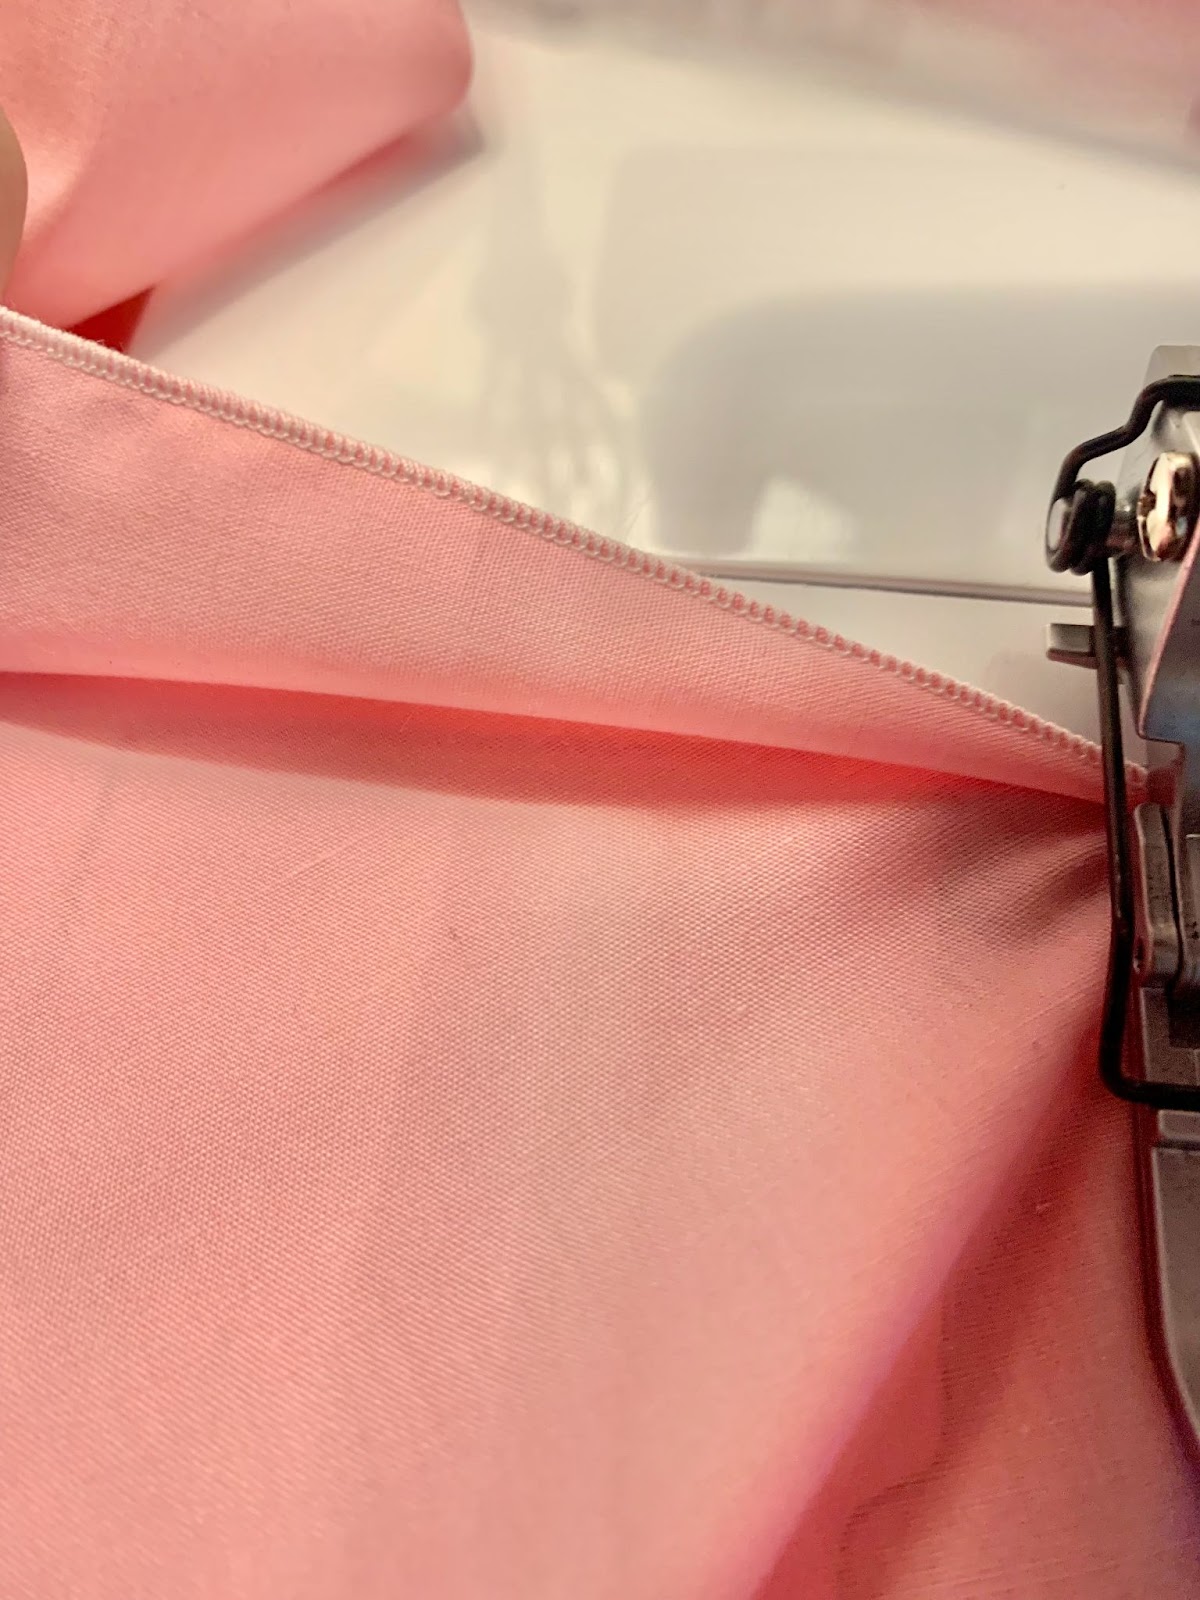
Hem your lining. I just used my serger to do a rolled hem, which is my favorite way to hem a circle skirt. You could also serge the raw edge, fold it over a ¼ inch using the serged edge as a guide, and then straight stitch on the sewing machine, or just fold the raw edge over twice and top stitch.
Step 4: Adding Layers of Tulle


Stack the layers. Place the lining fabric donut on top. Use a few pins to keep the layers from shifting (or heavy pattern weights would be great here). (If using an embellished layer, cut that one separately since it will be your top layer. Sometimes the sequins or embroidery can be tough to cut through or around). Cut the tulle. I usually cut it about 2 inches wider than the lining so it will hang a smidge longer while wearing.
Step 5: Sewing
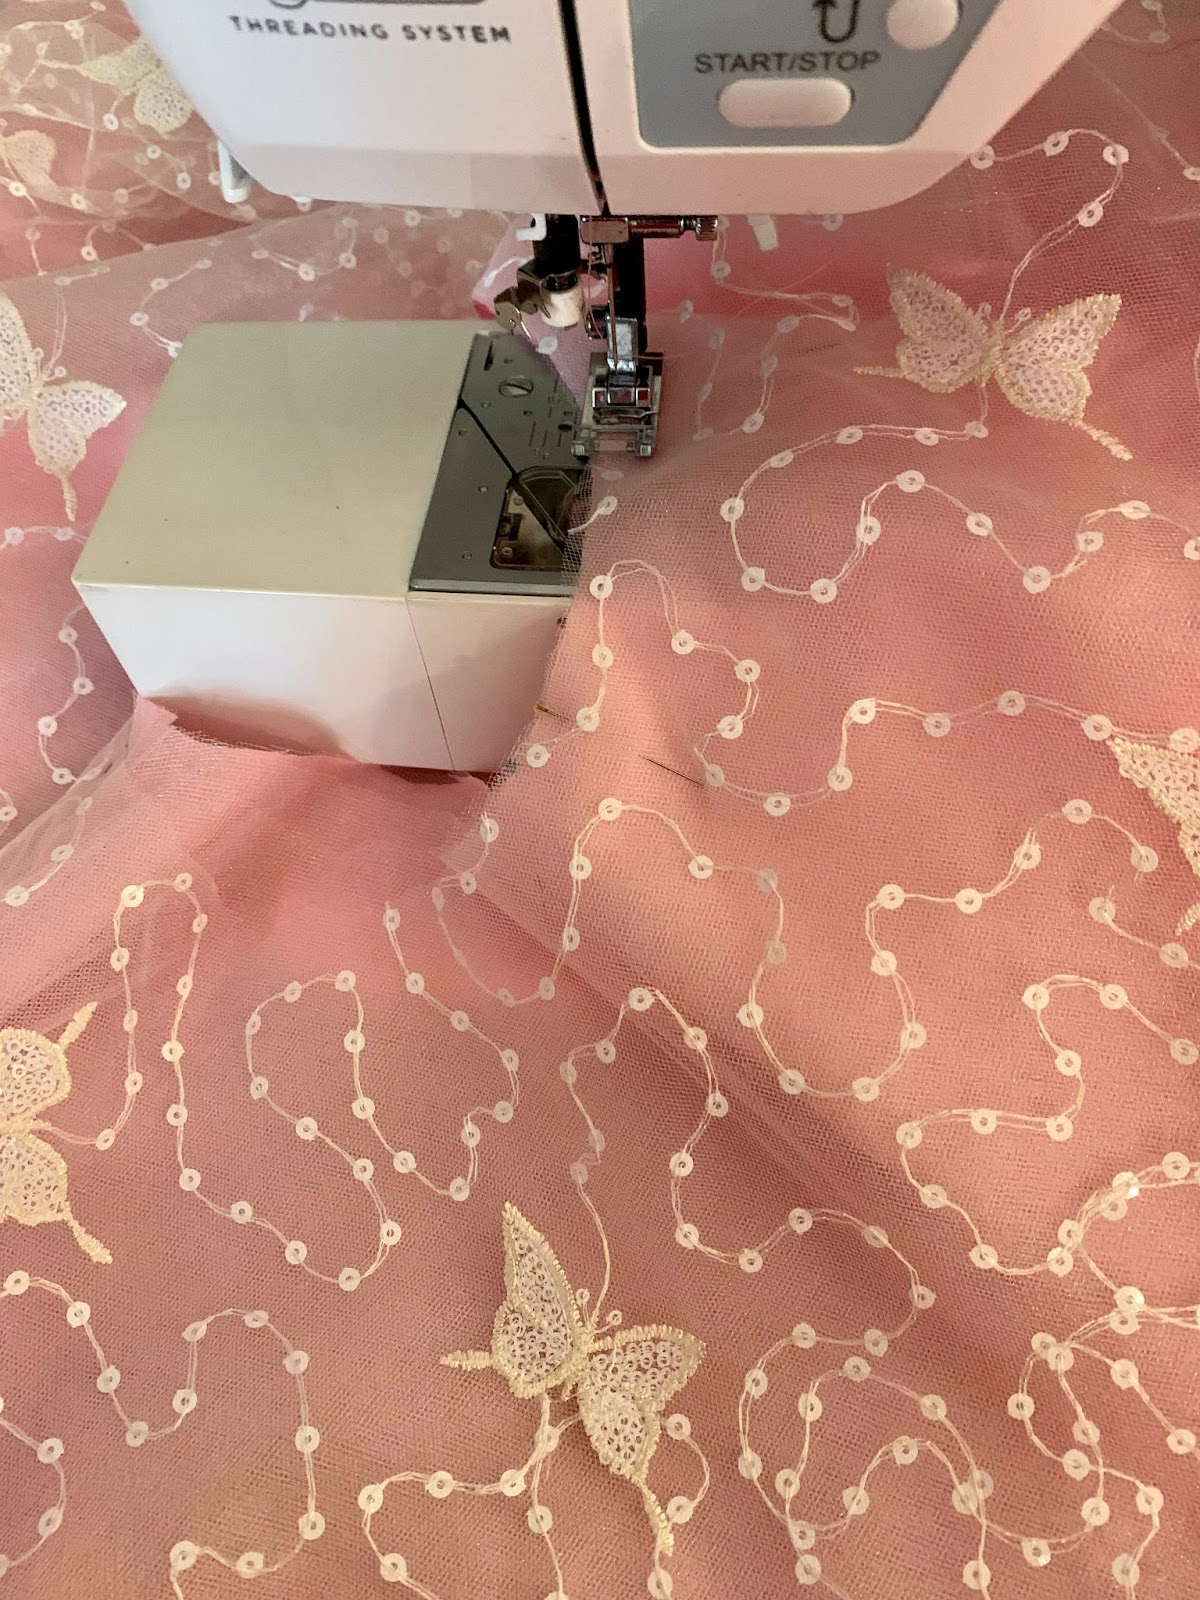
Clip or pin the layers of fabric together: Lining (wrong side down), then the tulle on top, and the embellished tulle on the very top (wrong side down). Baste the layers together using a serger or sewing machine. DON’T SKIP THIS STEP!
Step 6 of How to Make a Tulle Skirt: Adding an Elastic Waistband


Place the short sides of the waistband elastic right sides together. Sew using a ½ inch seam allowance and a zigzag stitch. Stitch down the edges if desired.
Step 7: Adding the Waistband

Using a disappearing marker or clips, mark 4 equal sections of your tulle skirt and your waistband. The opening will be wider than the elastic. Match these quarter points and pin. The wrong side of the elastic will be touching the right side.
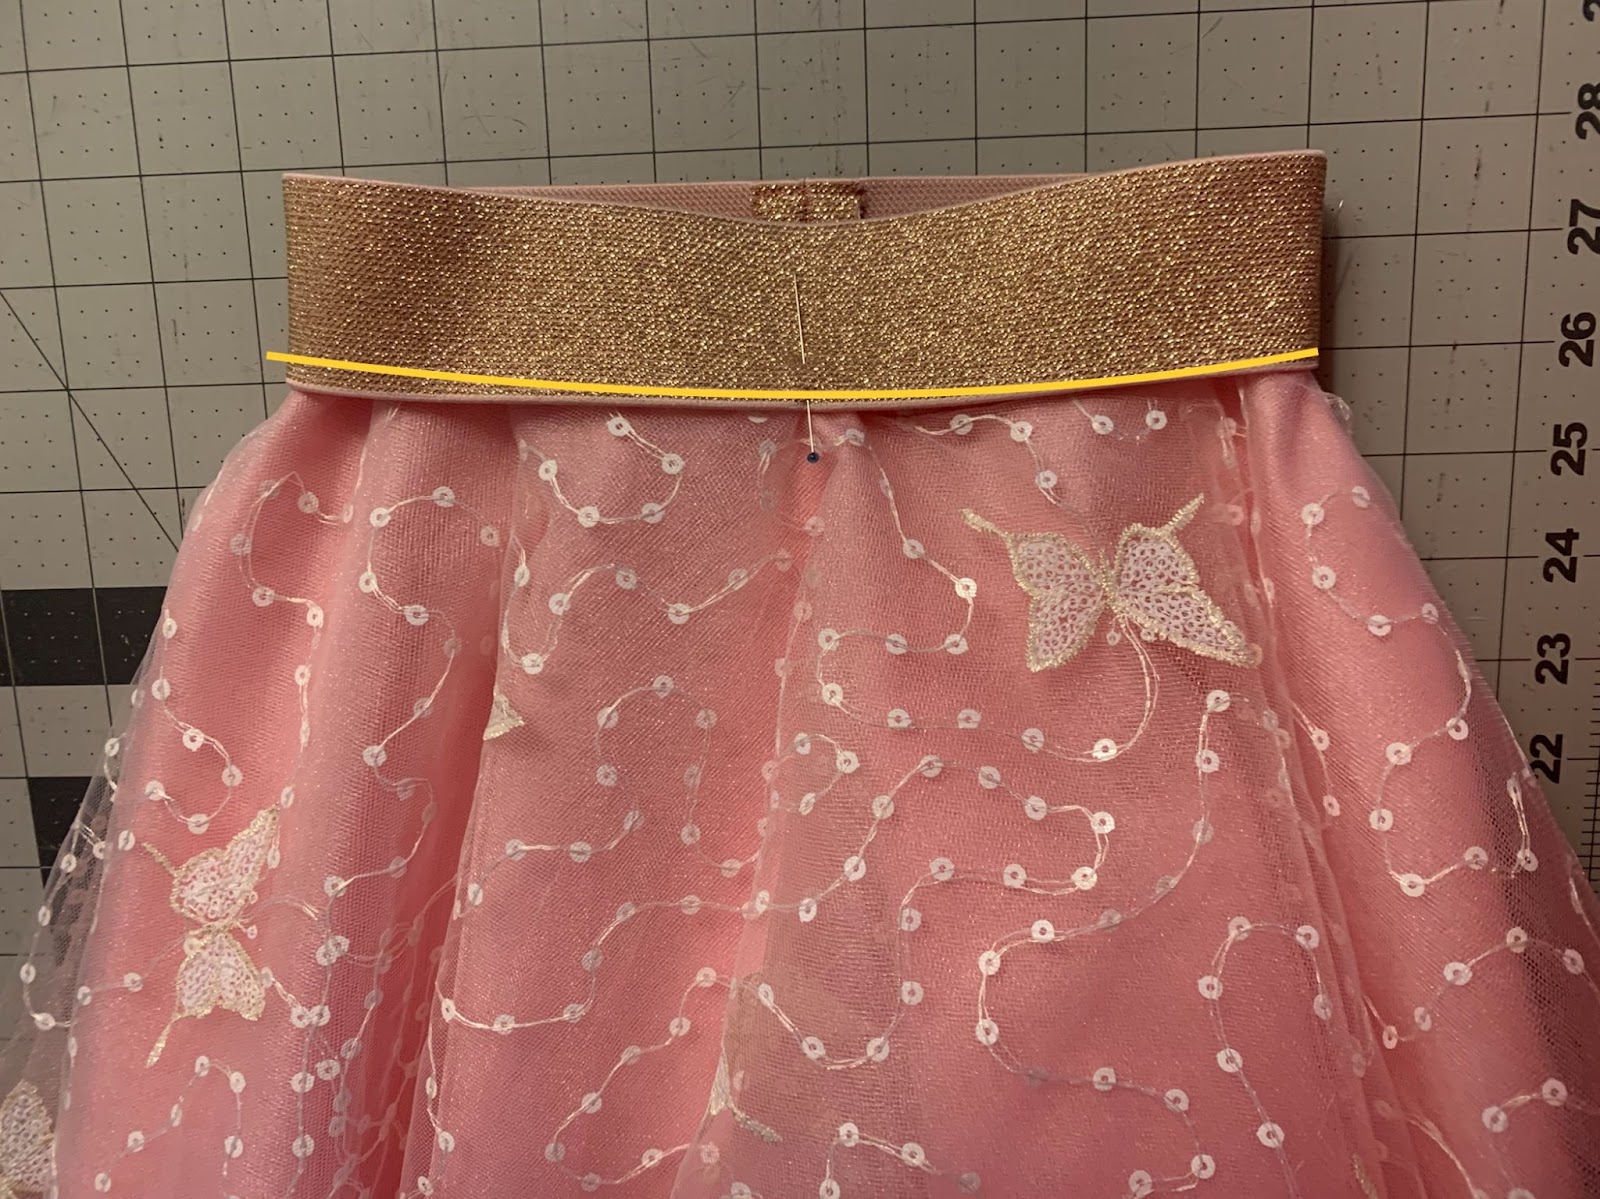
Stretching the elastic between the quarter points as your sew, attach the waistband to the skirt using a stretch stitch. I used a zig-zag stitch on this one. Try to use coordinating thread with your waistband since it will be visible when wearing.
And you’re finished!
Can You Make a No-Sew Tulle Skirt?
Yes, you can make a no-sew tulle skirt! This DIY project is perfect for those who want to create a beautiful and whimsical skirt without the need for a sewing machine. To make one, you will need tulle fabric in your desired color, a measuring tape, ribbon or elastic for the waistband, and scissors. Simply measure and cut strips of tulle to your desired length, then tie them onto the waistband in a knot. Add more strips until the waistband is fully covered and the skirt has reached your desired fullness. Adjust the length as needed, and you'll have a stunning costume that is easy to make and requires no sewing skills!
What Patterns Do You Have that use Tulle?
We have a couple of Halloween costumes that use Tulle. You can make up a Cinderella Dress or Elsa Dress Costume with our free patterns. Get the patterns for free by signing up for our Newsletter.
Can You Wash Tulle in the Washing Machine?
Yes. Most agree that you can wash tulle in a washing machine. However, it is a delicate fabric and should be washed with care – cool water, mild soap, and air drying.
Can You Iron Toole?
It is not recommended to iron tulle. Why? Because it is generally made from synthetic nylon and if you get it hot enough it can melt. To get wrinkles out of the tulle you should use some form of steam.
Why is it Called Tulle Fabric?
Tulle fabric is named after a town called Tulle in France. It’s supposedly where Tulle was first made. Tulle became more popular, especially with weddings, after the wedding of Queen Victoria in 1840.
With all that said, let's wrap up our tutorial on how to make a tulle skirt. Before you leave, make sure to join our Facebook Group and follow us on Instagram. Happy sewing!