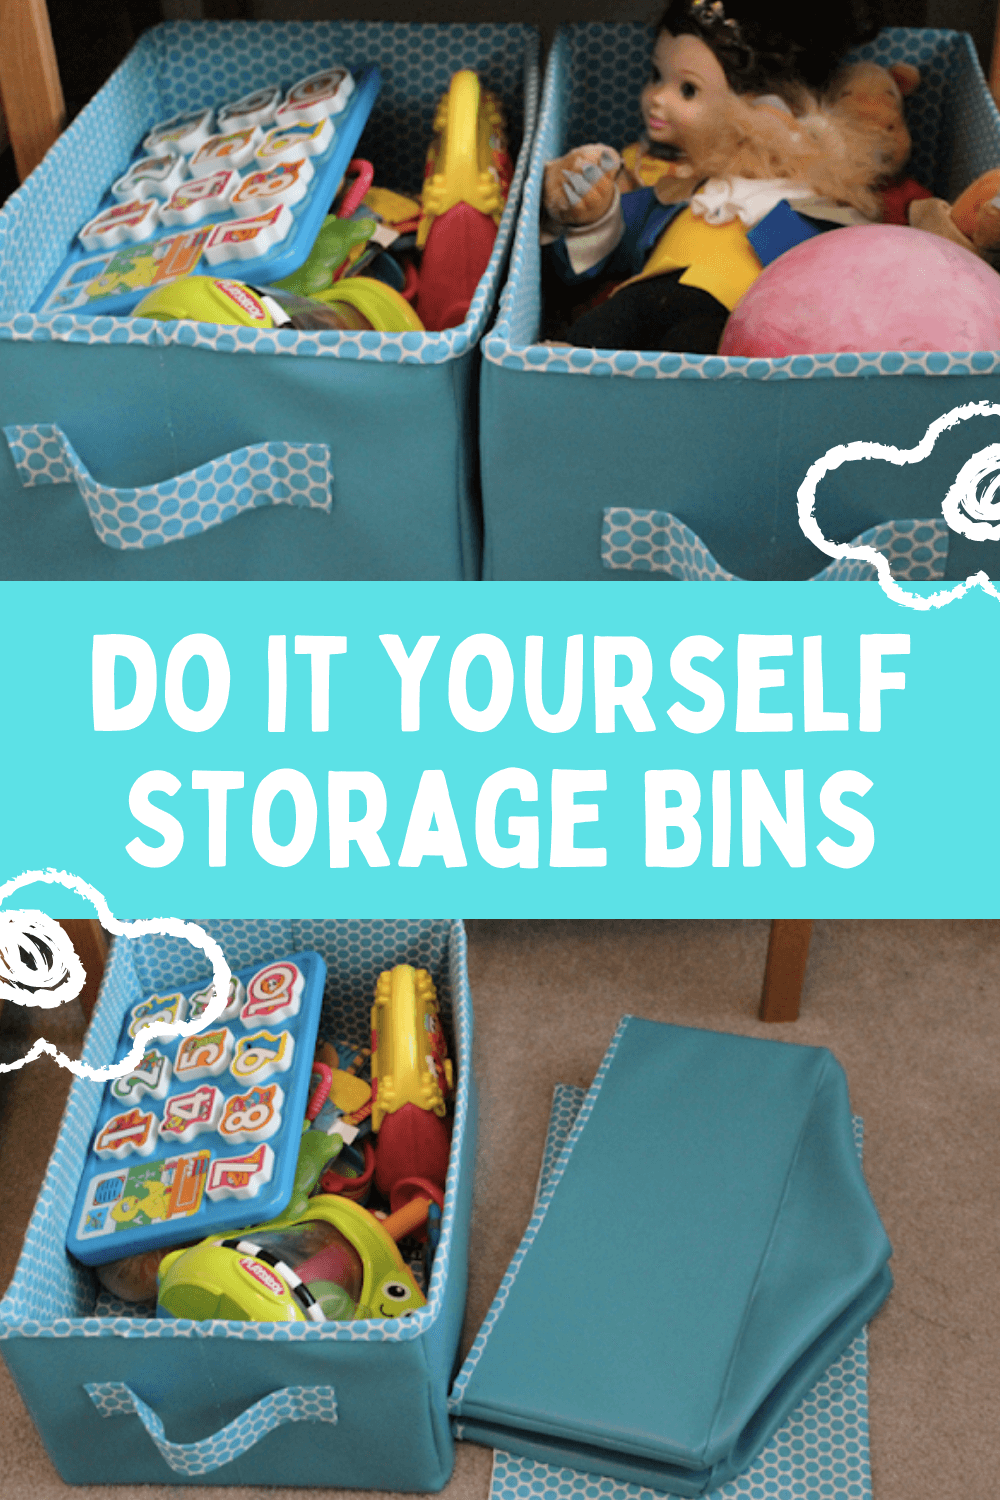
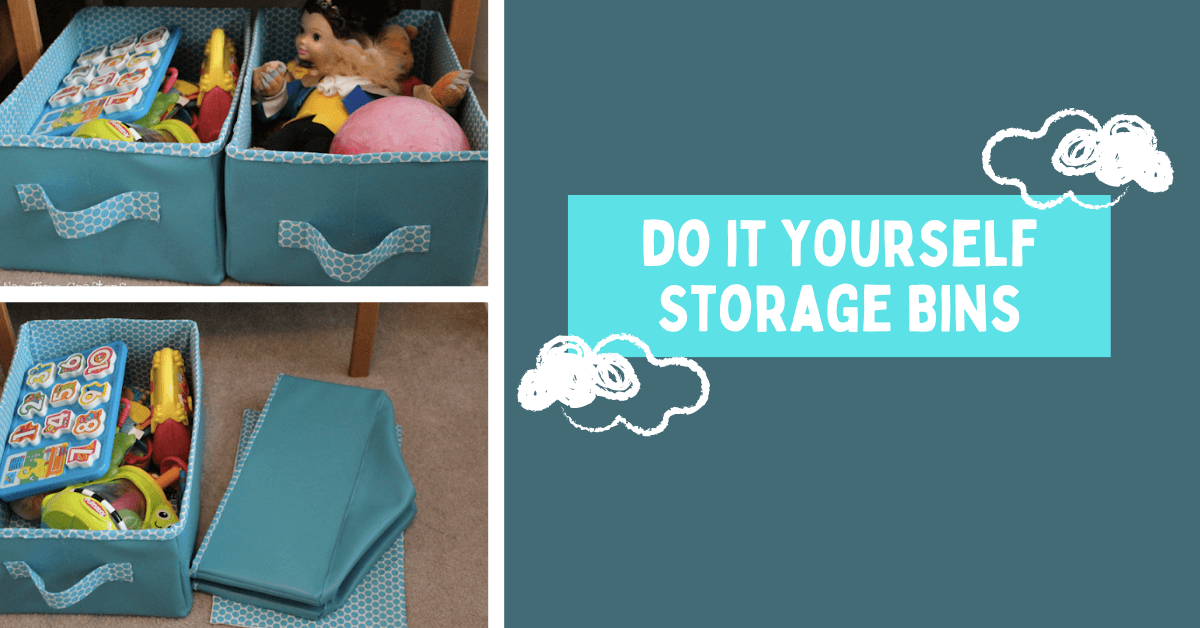
When we arrived in Oregon for the summer I quickly realized that the few toys we brought were already everywhere and we had no where to put them away- hate that! So I made up these DIY storage bins or boxes to help keep me organized! I love them and they’re excellent for storage! Check out the tutorial below for a free tutorial to make your own DIY storage bin.
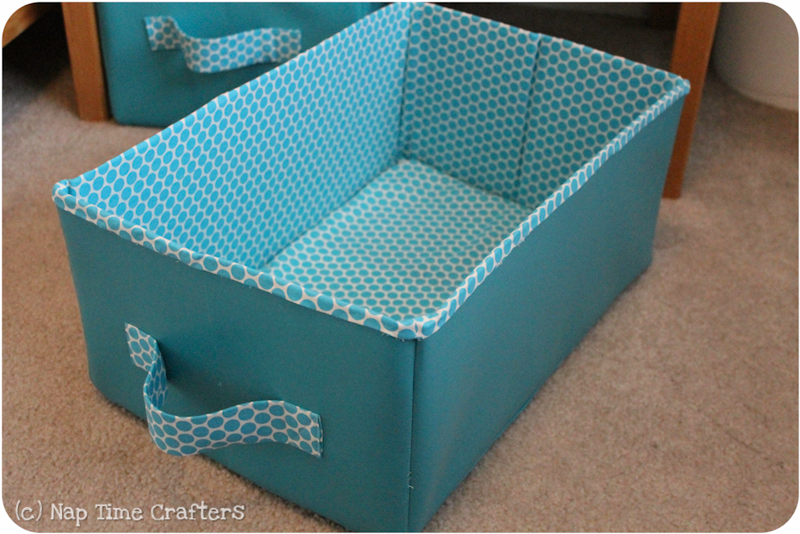
Make Your Own DIY Storage Bins | DIY Storage Boxes
The diy storage bins slides right under the changing table and keep everything nice and tidy.
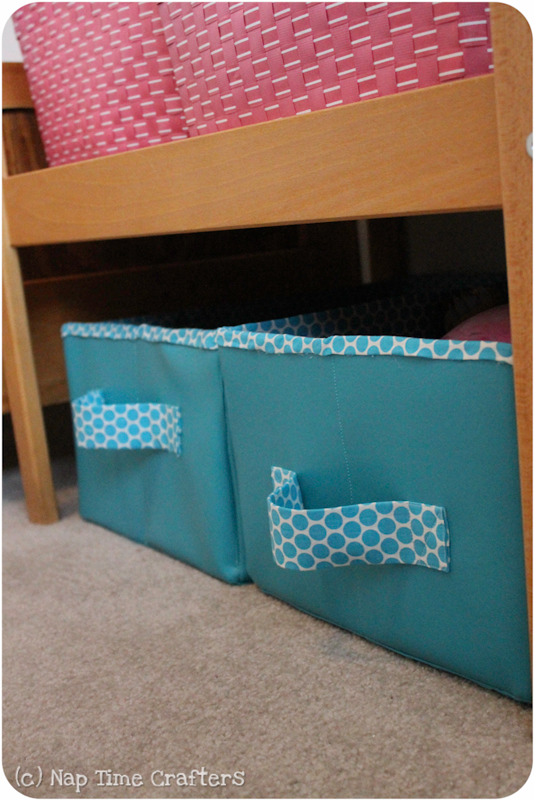
and this girly has a lot of things that need a home
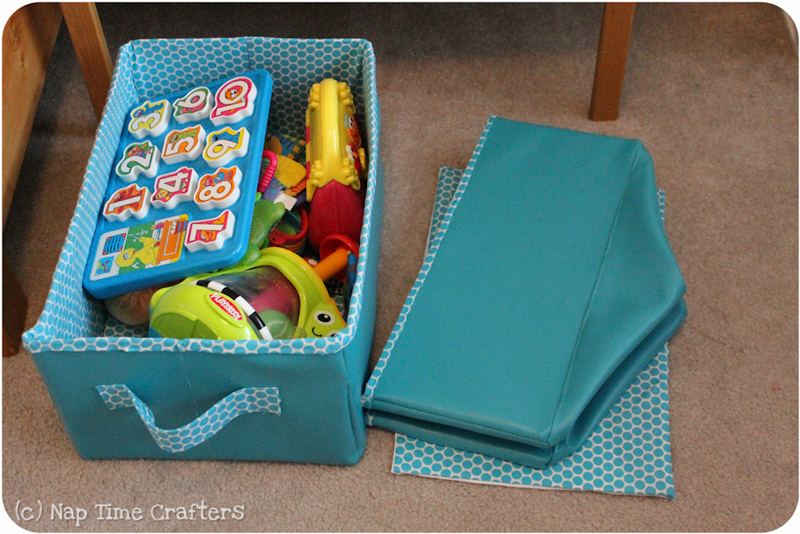
And the diy storage bins collapse down so they’ll be easy to move (and we move often) or store when not in use.
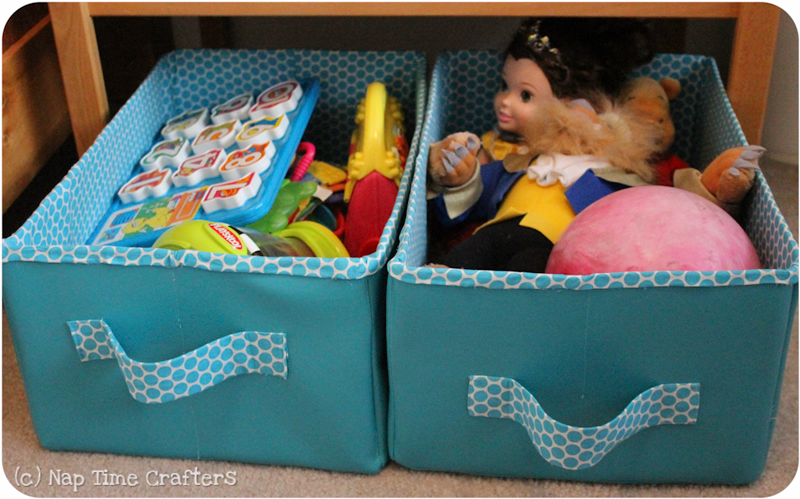
We use the collapsible diy storage bins for toys but you could use them for just about anything! Fabric, accessories, seasonal items (hats, scarves, beach towels, etc.)…
Let’s get organized!
DIY Storage Bin Materials
My storage boxes are 18x12x8 and fit perfectly under the Ikea changing table. To make 2 of the boxes you’ll need:
- 1 1/8 yard outer fabric- I used marine vinyl but you don’t need something quite that stiff for a box
- 2 1/4 yards lining fabric for the inside of the boxes
- Cardboard or sheets of plastic canvas to stiffen the boxes sides
- Hot Glue
Box Instructions
Box Step 1: First you need to cut out all of your pieces for the boxes. For each bin I used:
In outer fabric:
- 2 long sides: 19×9″
- 2 short sides: 13×9″
- 1 bottom: 19×13″
In lining fabric:
- 2 box long sides: 19×10″ (notice it’s 1″ taller- if you want longer to fold over the top adjust as needed)
- 2 box short sides: 13×10″ (again 1″ taller)
- 3 box bottom pieces: 19×13″
- 2 box handles: 10×4″
In cardboard:
- 2 box long sides: 18×8″
- 4 box short sides: 6×8″
- 1 box bottom: 18×12″
Box Step 2: Let’s start with the box handles. Fold in half and sew the long edges together. Turn right side out. Then I slid a piece of vinyl inside to stiffen them up but you could skip that. Turn the raw edges back inside the handle on each short edge
Box Step 3: Sew the handles in place on the short edges of each bin. It’s a bit hard to see but I sewed down each end with a rectangular stitching pattern for extra reinforcement.
Box Step 4: Sew the sides of your bin pieces together forming one big loop- you should now have a bin in the liner and the outer fabric that’s just missing the bottom piece
Box Step 5: With wrong sides together line up the bottom edge of the liner with the bottom edge of the outer bin. Sew together at each seam and down the middle of the short piece- you’ll have to stitch half way, go around the handle, and then stitch the other half. This makes the compartments for your cardboard reinforcement pieces.
Box Step 6: With right sides together sew the bottom of the bin (in the outer fabric) to your upper bin.
Box Step 7: Take one of your bottom lining pieces and press all of the edges in 1/2″ so it’s the same size as the bottom of your bin. Sew in place around all edges to cover the seam allowances in the bottom of your bin. It’s a bit tricky moving it through the sewing machine but go slowly and you’ll get it to work out just fine
Box Step 8: Slide in all of your cardboard pieces- you may need to do a little trimming (sorry I forgot to take a picture)
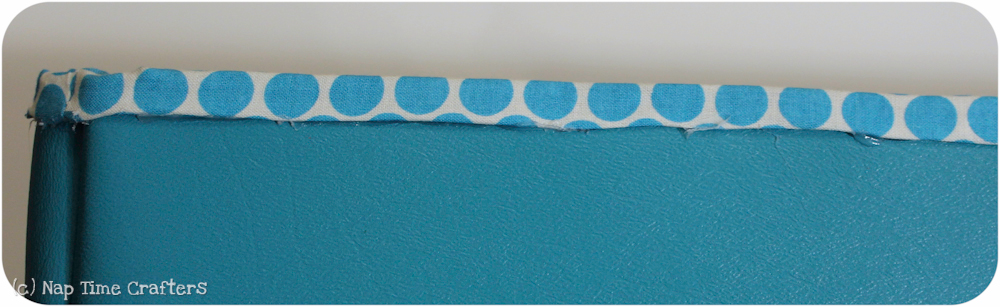
Box Step 9: Fold the top edge of the liner over twice towards the right side of the box so the raw edge is hidden. Secure in place with hot glue
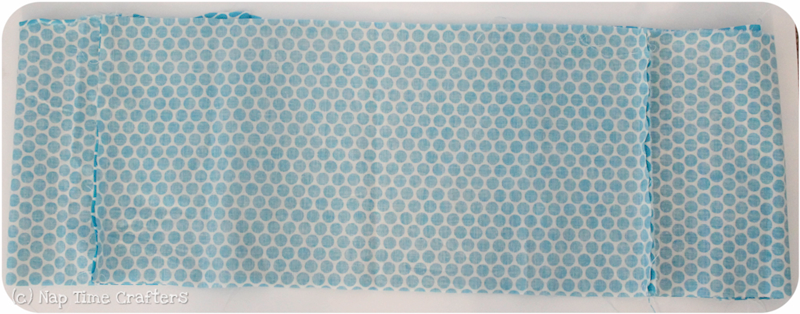
Box Step 10: With right sides together sew your remaining 2 bottom lining pieces together around 3 sides. Turn right side out.
Box Step 11: Slide your cardboard bottom piece inside and then turn the raw edges of the fabric to the inside and hot glue in place. Pop it into the bottom of the box and you’re finished!
To fold the box down just take out the bottom piece and fold the short edges in towards the middle
Uses for the Bins | Fabric storage Boxes
I used the boxes for toys and items under the changing table. Of course, they can used for anything. One popular use is as fabric storage boxes. The storage bin can also come in handy as crates in your closet or for DIY storage boxes in the kitchen or any other room of the house.
If you like this tutorial, we have another tutorial for a fabric storage bin that you might like.
If you enjoyed this then sign up below for over 25 FREE Sewing Patterns from Peekaboo Pattern Shop. Also, check out some of our other tutorials:
43 Responses
Wow! These are great, I thought these were store bought! !
This DIY storage container is awesome; but I couldn’t get u properly with the procedure written and shown here; cud it be possible for u to show us the whole procedure on how u sewed this container – by doing a VIDEO? Please…
Amazing storage bins! I love that they are also collapsible. Thanks for making this wonderful tutorial!
I linked to this post from my blog, see it here: http://www.sewingshop.net/blog/collapsible-storage-bins/
I just came across this tutorial. I have an older motor home with deep ‘cubbie’s to store the clothes in. Originally, they were meant as short closets for shirts/trousers, but a previous owner put shelves in them and I like them except they are too deep to properly reach things in the back. I’m going to use this tutorial to make custom baskets to fit those cubbies to make them more efficient. As these weigh very little, I think they’ll be great in our motor home. Thank you so much, I could never find baskets that properly fit the spaces. It’s a project I can do over the winter for next summer’s camping season. Blessings!
Genial,justo lo que buscaba,me has facilitado el trabajo,espero me queden tan lindos como los tuyos 🙂
Hi Amy,
Thank you so much for the amazing tutorial. I wanted to let you know that we have featured this tutorial as our first inspirational free pattern recommendation on QuickNeed.
Looking forward to reading more of your wonderful tutorials.
Sorry, the correct link to the post is: http://quickneed.com/sewing-patterns/free-pattern-collapsible-storage-boxes/
Love these, Great Job, great tutorial. Thanks for sharing!
Thankyou.
As a mother and a teacher, I am always looking for clever ‘mobile’ storage. This is great. Thankfully I can sew, so I am going to give it a go. Thankyou ;o)
This is fantastic. Thanks so much for taking the time for writing it up. I have repined on my Pinterest page and I also copied it to my hard drive so I will always have it. (unless my computer crashes)
I am thinking I may alter the measurements make these as covers for my sewing machine and serger. It would be nice to have the covers fold neatly away when the machines are in use.
These are amazing!!!! I’ve been looking for these as shop bought ones aren’t always the right size. Will be making these very soon. Thank you so much for this tutorial.
These storage bins are fantastic & being collapsible is an added benefit. Do you think I could substitute plastic canvas for the cardboard? I just found your site today & I’m sure I will be a frequent visitor!
Thank you,
Sharon
Plastic canvas would work great!
Love these! I found these at Dollar Tree and thought that they would be easy to make to match my decor. You did the hard part for me, thank you for this tute-greatly appreciated!
Very nice tutorial and good idea for home organizing. I have to do make similar boxes for my daughter.
Thanks for the idea Granddaughter will be going off to college and I think they would be great
your projects are good and easy. please teach me how to stitch quilt in old sarees, baby’s shoes,and caps made of co ton materi al new born infants easy dresses
Thank you so much! These are wonderful!! 🙂
Ah, Denim! That is a fabulous idea. I was wondering what to do with my kids old jeans. Made a quilt for my son with some denim the year before last and it turned out wonderful. These bins would look really cool made with old jeans.
My wife made some collapsible storage bins for our sons’ toys, and when it was about time for them to give these away, all she did was to fold these up. The collapsible storage bins were perfect to create some space when we cleared and gave away some of the toys.
Ah, Denim! That is a fabulous idea. I was wondering what to do with my kids old jeans. Made a quilt for my son with some denim the year before last and it turned out wonderful. These bins would look really cool made with old jeans.
Thanks for the tutorial! I just made some for my bookcase.
These are wonderful thanks so much.
these are so awesome and so useful! great tutorial! 🙂 lisa
Thank you for the time and work you put into posting this tutorial. The explanations are simple, the directions are clear and the outcome was rewarding. I have looked at bins but find them a bit pricy (unless they are at the $ Store then they are just cheap. I promised myself to be more green this year, and it’s turning out to be a lot of fun! I have saved jeans from all my kids, and my GFs kids. Kept saying “Im going to make a quilt.” Arghh…20 years of jeans from 9 kids…it piles up! No quilt. Then I made my New Year resolution. I have made a pair of ‘No-Socks Slipper Mocs’ from another blog, I have begun a braided rug, and today I made my first of 6 storage bins, following your directions. All from denim! I LOVE it! Thank you so much.
WOW! This is exactly what I was looking for! Thanks so much for posting this FAB tutorial! Going to get started on it now!
Thanks so much for sharing this tutorial!
These are awesome! And your tutorial is right on time for me, I’ve been searching for an odd size of storage boxes & can’t find them. This will be perfect to customize.
You are wayyyy talented!!! I aspire to be like you!!! Well see if I can ever tackle this cuz those are adorable
ah-maz-ing Amy!!!! Wow, I really need to make these, thanks for the tutorial!
Wow, that is amazing work. I would never be able to do that!
Emily, never say never. If you even have the slightest idea of how to sew, just take one step at a time. If
something seems wrong, go back to the previous step. Don’t use teeny tiny stitches in case you have to rip.
I have been sewing for 55 years and my middle name should be “Ribbit” (rip-it) I must admit there were a few years here and there when I didn’t touch my sewing machine, but you’d think an old bird would remember how to do things. Dementia?
Wow! These are really great!
Awesome tutorial! LOVE it! I am featuring this today at somedaycrafts.blogspot.com.
wow! these are awesome, I thought these were store bought!!