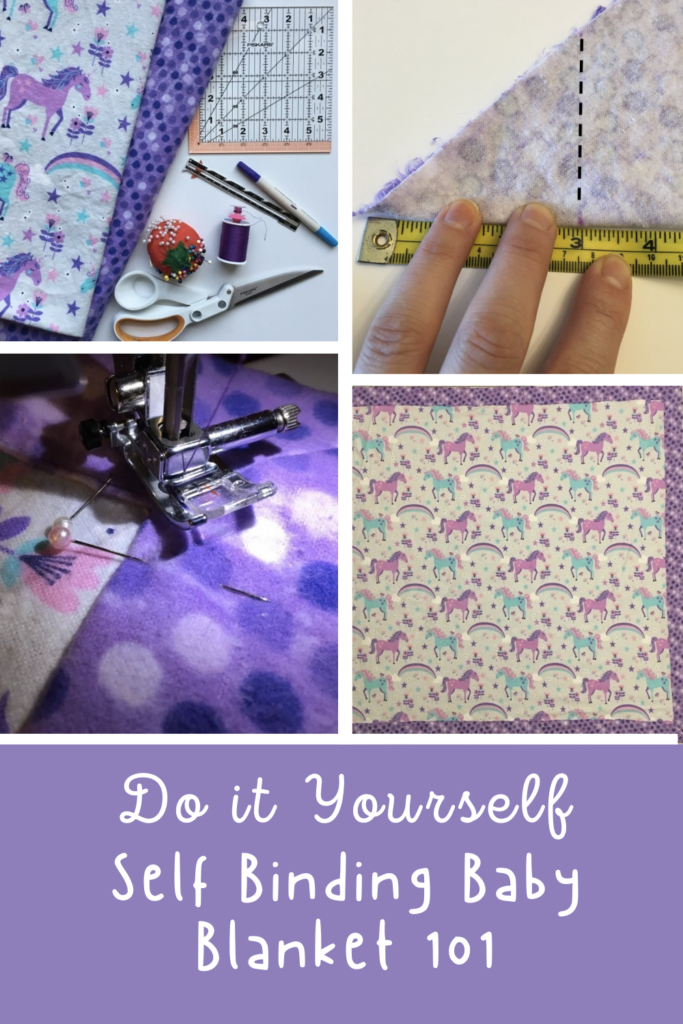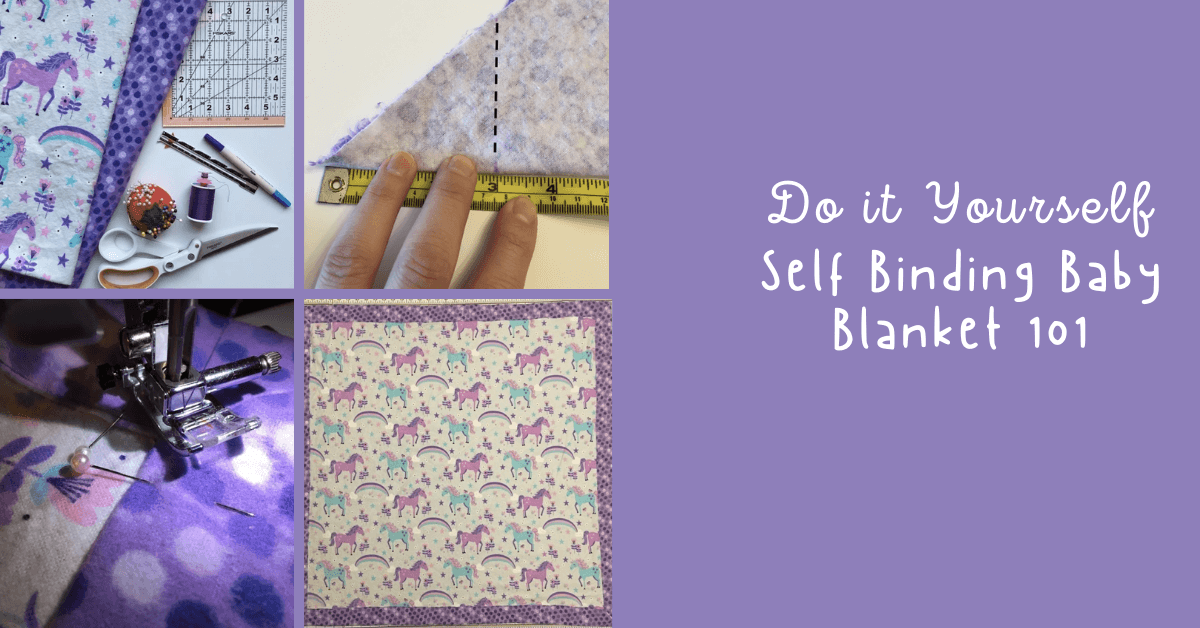
Hello! It’s Stephanie from Stephie B’s Designs here again today to walk you through how to make a diy self binding baby blanket. There are a couple methods for making a diy self-binding baby blanket floating around the web, but the one I’m discussing today has proven it’s successful on five different occasions, so it’s definitely the one I recommend the most. I call it the “sew and tuck” method.
My twin girls are arriving about a week before this tutorial will be posted, so what a great way to teach you a few things while making my new girls something special at the same time. I made two blankets at the same time while writing this blog, so if I can do that 35 weeks pregnant with twins, I think you’ll be just fine. 🙂
As I always say, let’s get started!
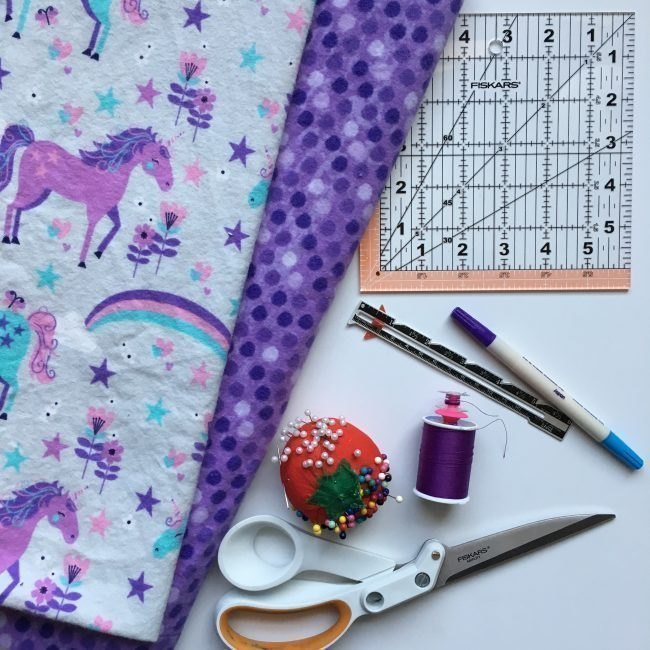
DIY Self Binding Baby Blanket Materials:
- 1 to 1 ½ yard main fabric for the center front (you can use flannel, fleece, minky, gauze, really anything you’d like) – I’ll discuss below how to figure out exactly how much fabric you need. For your fabric needs, come to KnitFabric.com.
- 1 to 1 ½ yard coordinating fabric for the back/borders (again, use what makes you happy)
- Seam Gauge
- Marking Pen/Tailor’s Chalk/Pencil
- Square Ruler (if you have one, otherwise a ruler or cloth tape measure will work)
- Scissors or a Rotary Cutter
- Pins
- Thread
- Optional: I recommend using a walking foot if you opt to use minky, knits, or other slippery fabric
DIY Self Binding Baby Blanket Step 1: Cut out your fabric
For this project, you’ll be cutting out two pieces of fabric. There’s one large square that will serve as the back and binding (aka border), and a second smaller square that will be the center front portion.
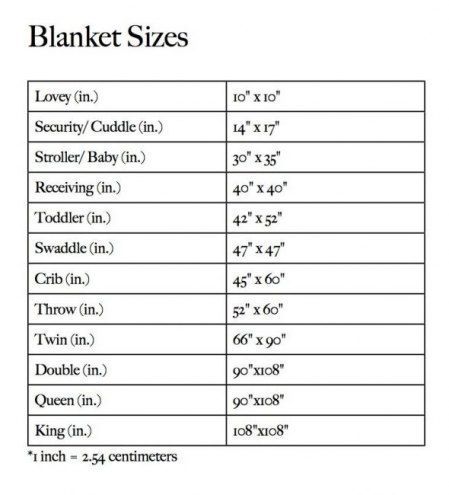
If you read through my last tutorial, How to Make a T-Shirt Blanket, you may remember the blanket sizes chart I included. How much fabric you’ll need depends on how big or small you want your blanket. Here is that chart once again to help you gauge what size you may want your blanket.
With all my self-binding blankets, I didn’t follow the chart. Instead I always chose to go rouge and make square blankets using my own dimensions. For this one, I decided to use the entire width of some lovely flannel that I purchased, so my back/border piece will be 42”x42″. I opted for a 2” border, so my finished blanket will be 37”x37”.
Wow, wait, go back… how in the world did I go from 42″ to 37″?? Great question! Here’s how:
Calculate the border + seam allowance x 2 (since there is a top/bottom and side/side), then subtract that total from the width of your fabric.
2″ border + 1/2″ seam allowance x 2 = 5″ … then 42″ – 5″ = 37″
From that total, I subtracted 1″ from to determine the size of my second, main square… 36″x36″.
You can also use that formula to calculate how large to cut your pieces if you know what you want your finished blanket size to be. You’d add the border/seam allowance to the desired finish size to get the amount you’d need to cut for the large piece.
For example, if you want a 45″ square blanket with a 4″ border using a 1/2″ seam allowance, you would need a 54″x54″ square for the back/border and a 53″x53″ square for the main…
4″ border + 1/2″ seam allowance x 2 = 9″ … then 45″ + 9″ = 54″
Clear as mud?? Take it slow if you need any I promise you’ll get there.
Just remember, no matter how large you want your blanket, you’ll have to pay attention to the width of the fabric you choose to use and are restricted by that amount. Minky, fleece, and most knits are roughly 58” wide so you have a lot of room to play with, while flannel and other woven cottons are generally only 42” wide.
DIY Self Binding Baby Blanket Step 2: Prepare your back/binding piece for sewing
Here is another formula to determine where to place the cutting marks to make your mitered corners (who knew you’d have to do so much math for this project??!)
This one is easier, though, I promise. For a 1/2″ seam allowance, regardless of your desired border width, add 1″ (the math is 1/2″ x 2). Similarly, for 1/4″ seam allowance, add 1/2″. That’s it!
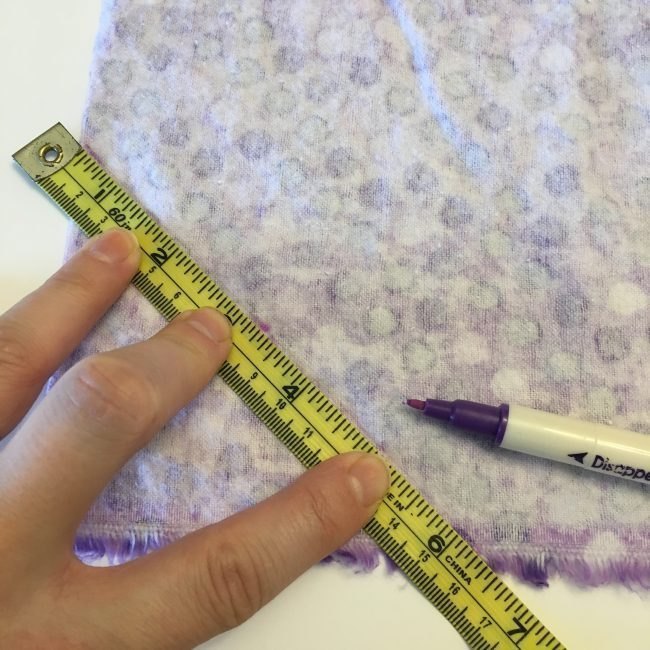
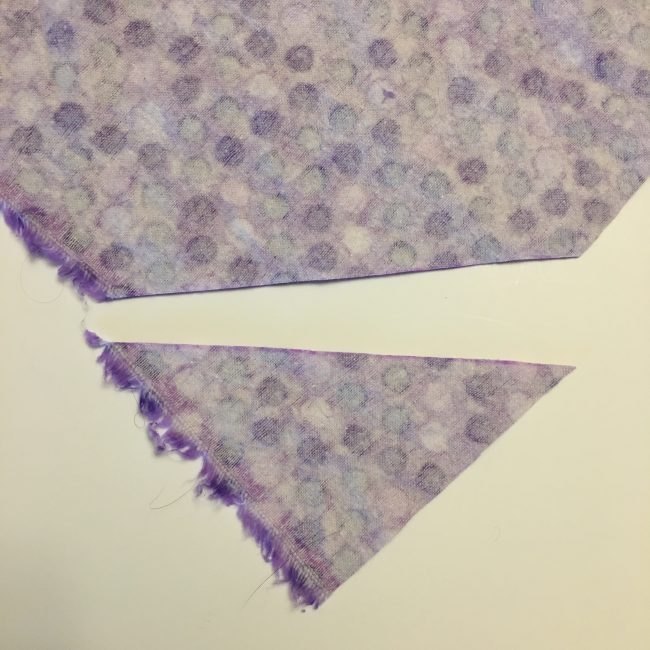
For my blanket, with my 2″ borders, I need to mark 3″ inward from the corner – not along the raw edge – as shown below. If you don’t have a square ruler, you can use what you have on hand.
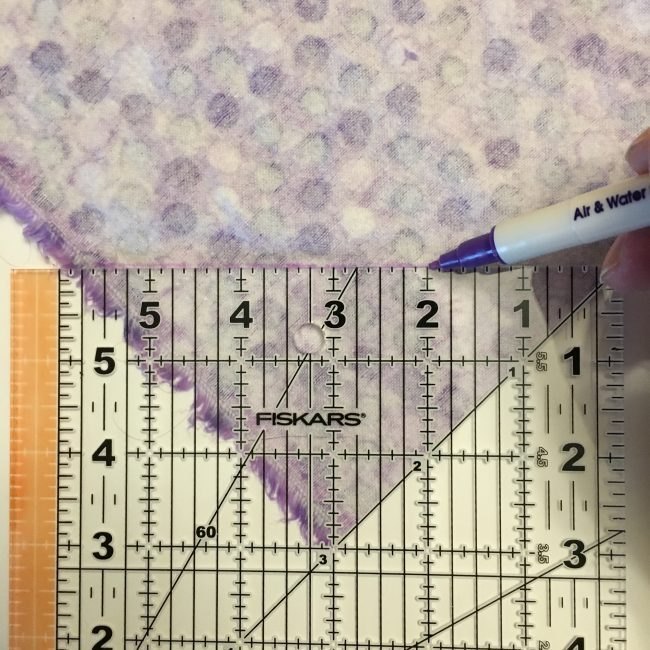
For example, if you only have a measure tape, fold the two raw edges together with right sides together, and mark the 3″ (or whatever your total is) along the fold line. Extend that line 45′ from the fold to the raw edges and mark.Unfold, and with the right side facing down, continue your marking line down the side that was previously folded under.
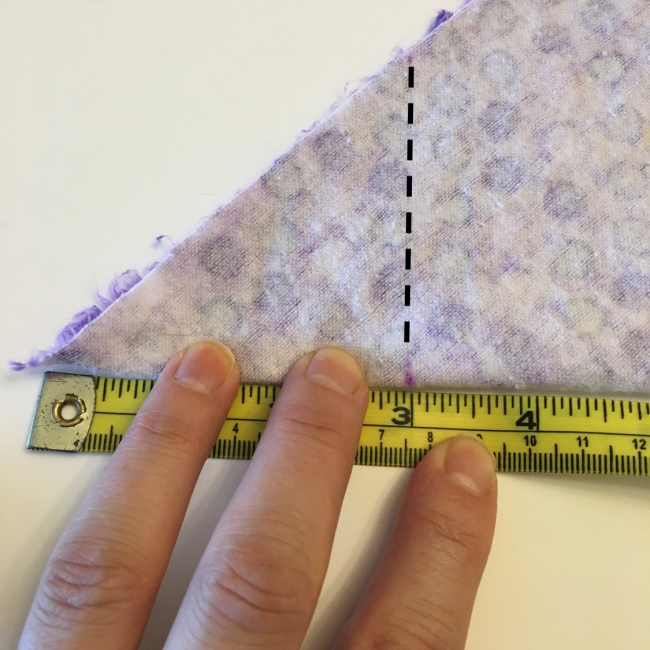
Next, no matter how to got here, trim that piece from your blanket.
DIY Self Binding Baby Blanket Step 3: Pin and sew the corners
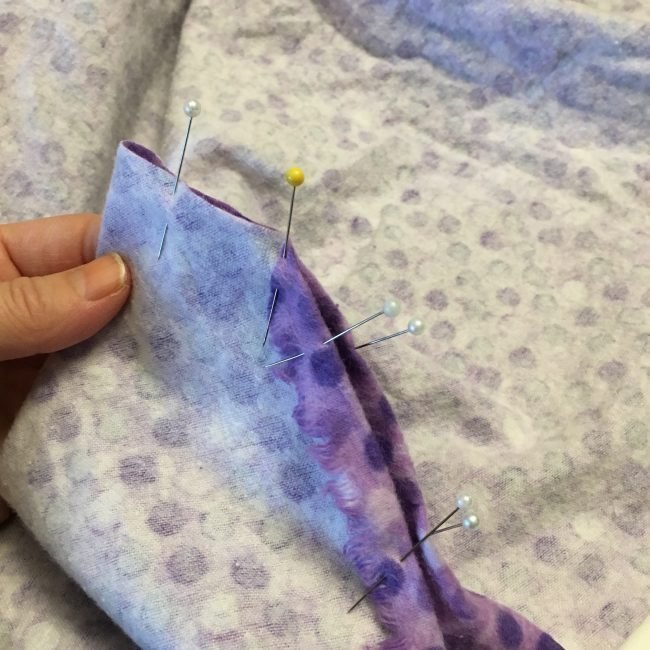
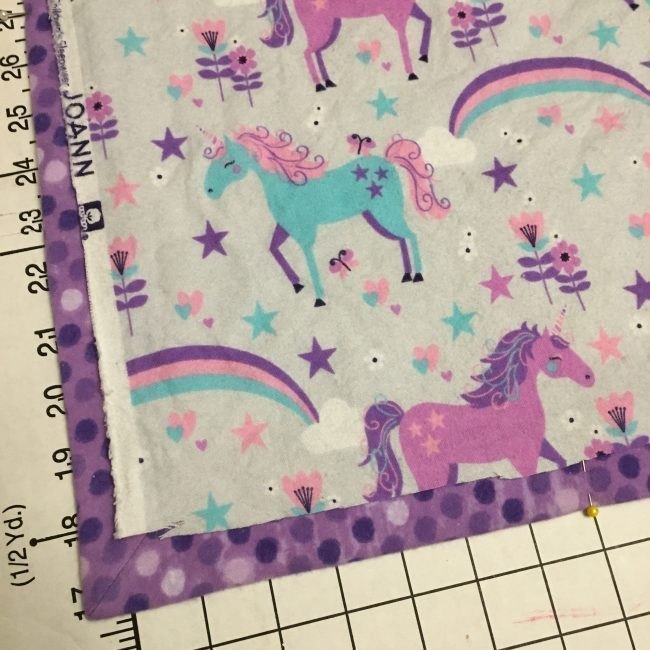
With the right side of the fabric facing down, fold your seam allowance (mine is 1/2″) and pin. You only need to fold a few inches along your raw edges at this time, just enough to sew the two sides together.With right sides together, fold the two pinned sides together and pin again.
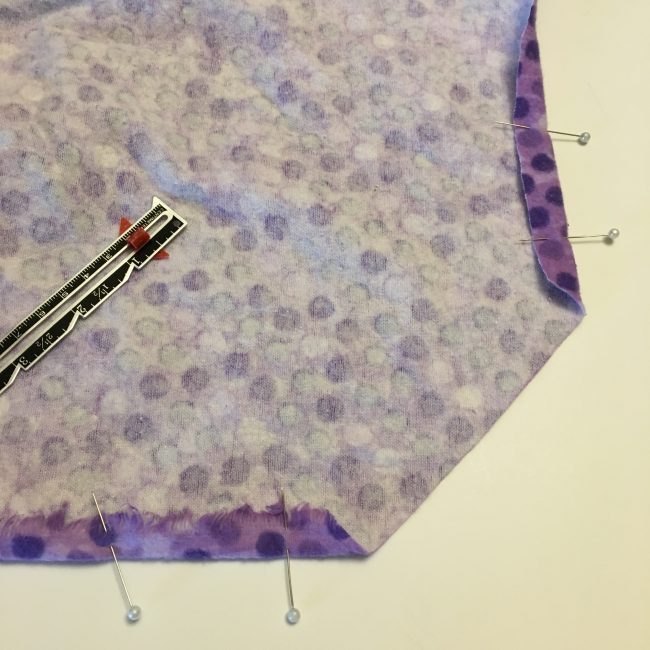
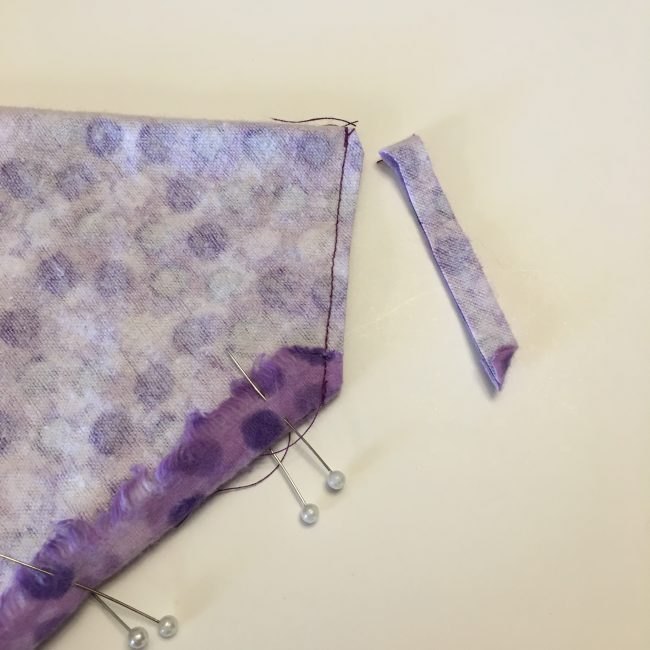
Sew the two sides together using your seam allowance and trim off the end.
Unfold, lay flat, and press the seam allowance open. I also recommend pressing along the pinned portion of your border (if you can depending on your chosen fabric).
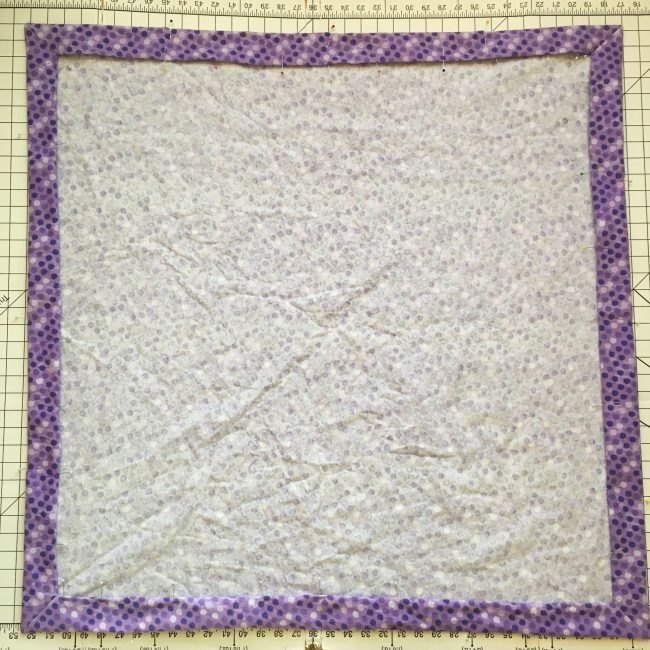
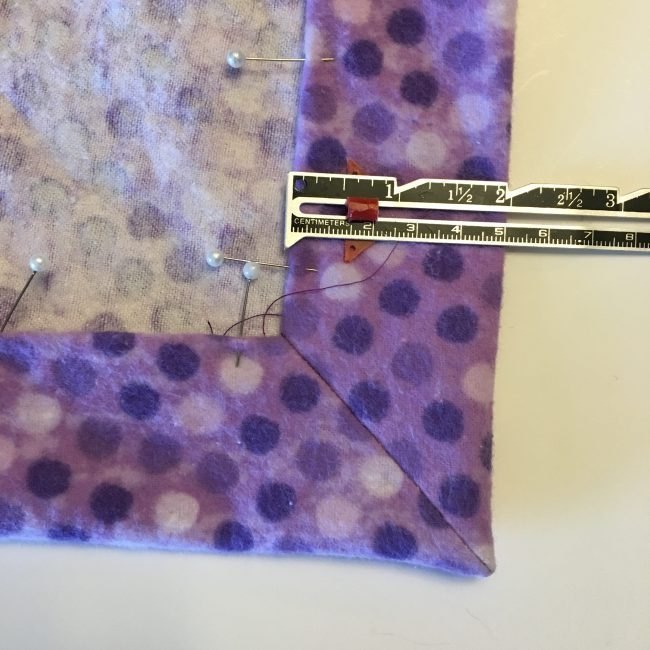
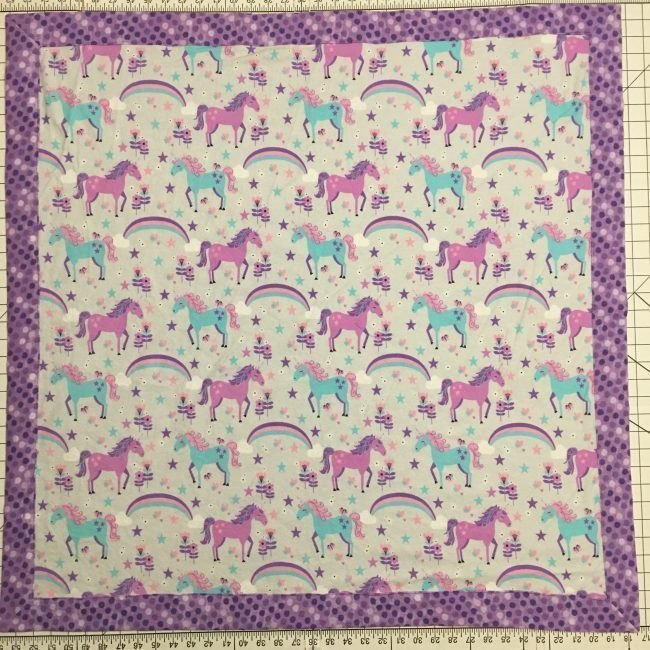
Repeat for all four corners, then flip the blanket right side out and flatten the borders. As you can see below, my border is pretty much right at 2″, exactly where I wanted it to be.
DIY Self Binding Baby Blanket Step 4: Continue pinning around the border
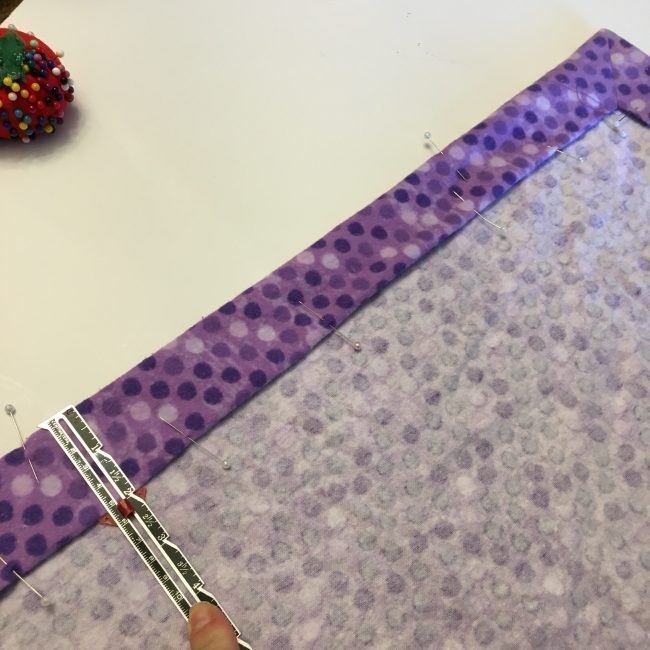
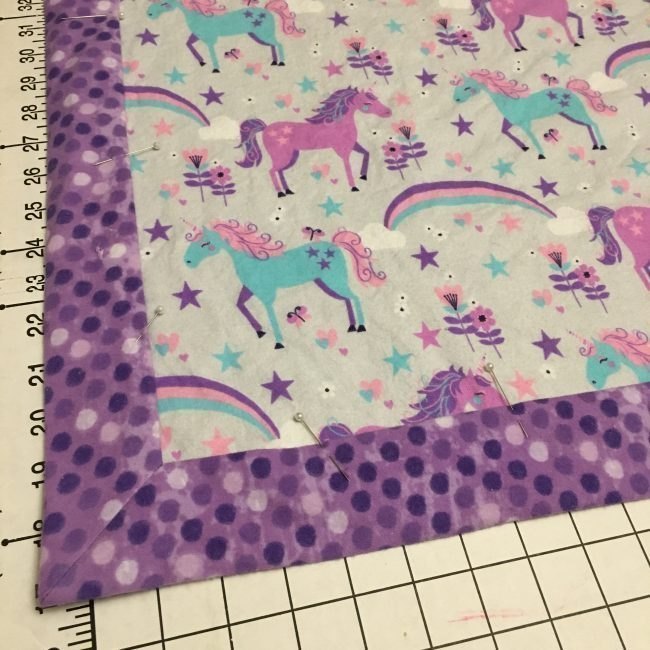
Fold under and pin the seam allowance along all sides of the blanket.I personally didn’t check how much I had folded under before I pinned it – I’m sure my seam allowance went out the window here and there – instead I laid the blanket down as flat as I could, then measured for my 2″ border width and pinned every few inches.
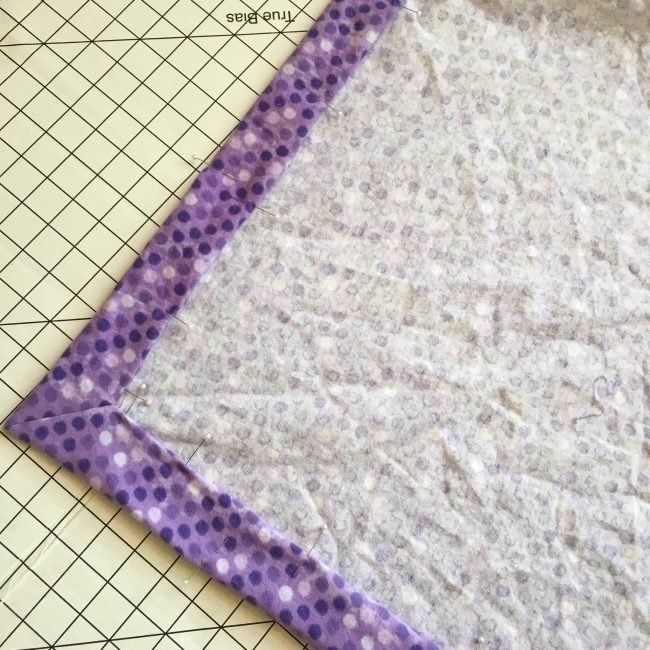
You can never use too many pins…
If possible depending on your chosen fabric, press around the entire border. It will make the next step (sewing) a lot easier.
DIY Self Binding Baby Blanket Step 5: Tuck and sew (the fun part!)
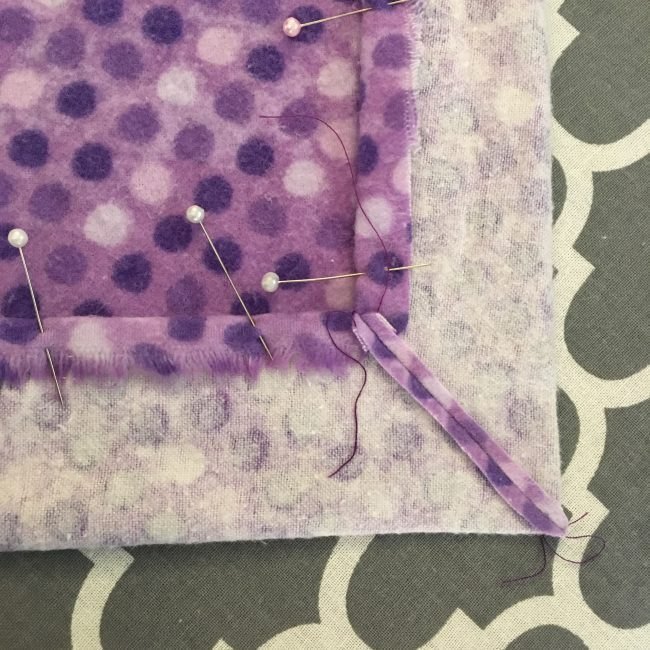
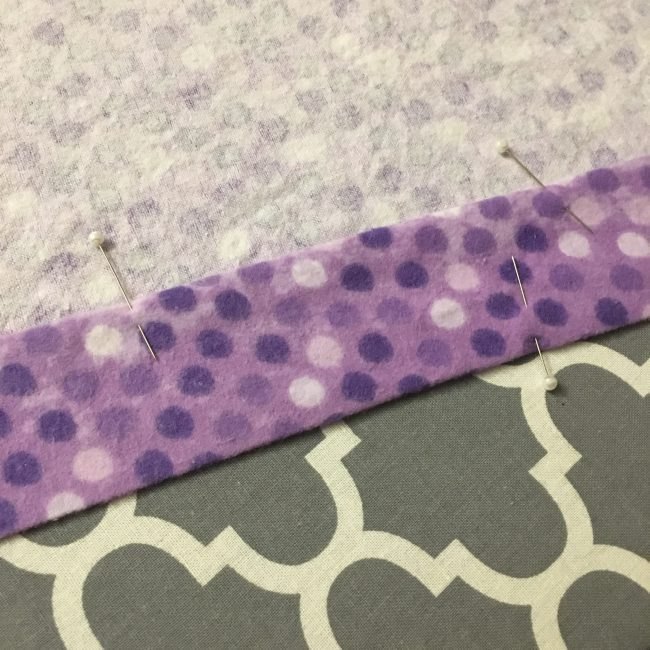
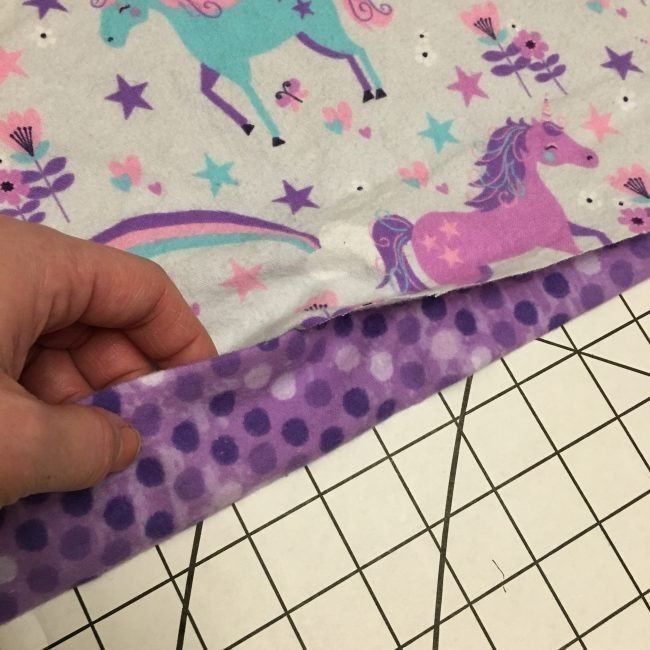
With your prepared back/border still laying out flat with the back side of the blanket facing down, lay the main fabric over the top facing up. As you can see from the image below, the main piece doesn’t have to be cut beautifully and it can include the selvage since it’ll be tucked away.
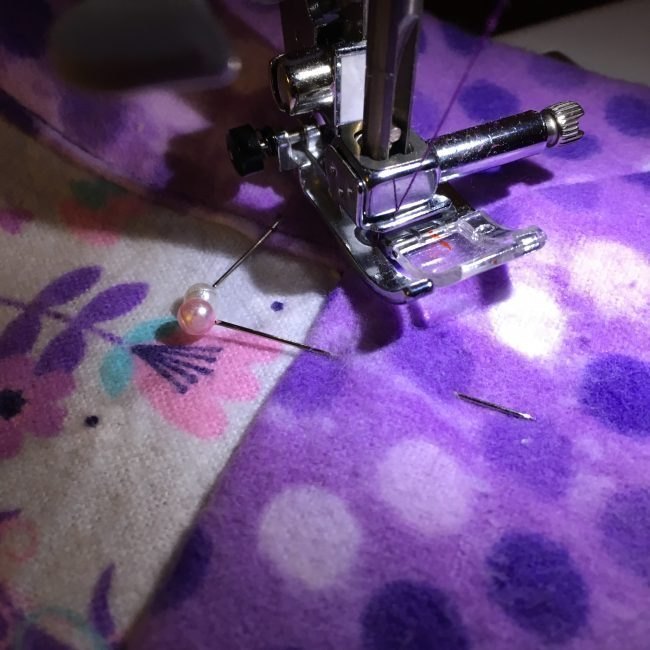
Begin tucking the main fabric underneath the border, pinning in place as you go along.
As always, you can never have too many pins. I ended up going back after the photo below below was taken and added a pin or two between my existing pins… just to make sure the layers would stay just where I wanted them as I sewed.
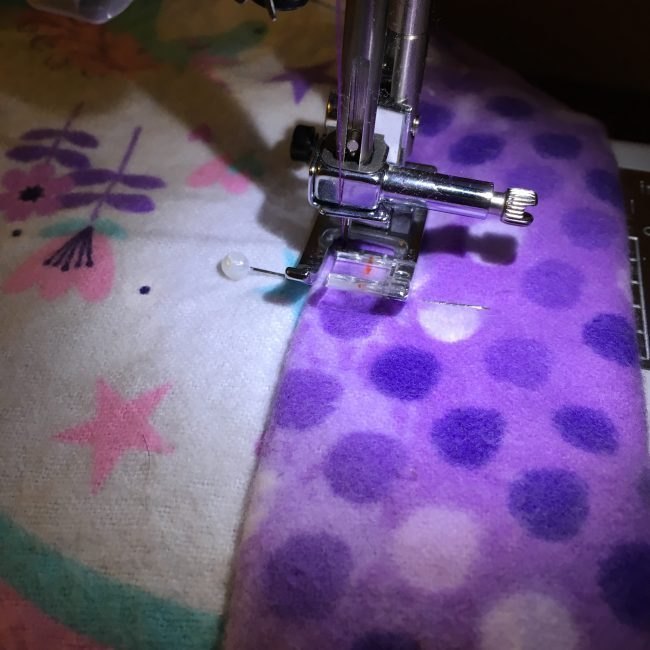
Topstitch all the way around the border to secure all layers of the blanket.
Hint: When your needle lands in the mitered corner (the seam at the corner), pivot to the next side.
And that’s it!!! Stand back and fall in love with the lovely (and easy!) DIY self binding baby blanket you just made. 🙂
I hope you’ve enjoyed this tutorial and will make a self-binding blanket (or ten!) of your own. Please comment below if you have any questions, and I look forward to my next tutorial walking you through another fun How-To.
-Steph
If you need help or would like to share your project, come join the Peekaboo Pattern Shop Facebook Group. Also, check out some of these other posts:
36 Responses
Gosh you made this so simple I now have the confidence to make my 2 week old granddaughter a blanket! Thank you!
Even more special is the fabric of my mom’s from the 70s she used to make my own daughter clothes so I’ll be using that as well. It’s almost like Mama is there with her.
Thank you for sharing with us. This is what I needed to know. Fabulous!
Once completed will the two layers shift, or do you tack them or anything?
Thanks
Hello, I get the math formula for squared self bound blankets but is there a different formula to be using for say a twin size blanket at 66×90 overall length? Im making my daughters twin bedding and have all my fabric but I dont want to start anything if it ends up not turning out right. Any help is appreciated because Google has not been much help lol!
In Step 4, pinning the 2″ border, are your pins piercing two layers of fabric or all three layers? This is the only step that has me perplexed. Two layers allows the tucking-in; three layers stabilizes the border until/while you iron it. Which is preferable?
Bless you for these instructions. I asked my adult son last Christmas what the best Christmas present he remembered as a child. He said it was the faux fur blanket I made him when he was 5 (1976). I wanted to make another and couldn’t remember how to attach the velveteen back/self binding. Great instructions here and exactly what I was trying to remember. Merry Christmas!
Thank you Linda! I am so happy to see that you found my tutorial and that it may help you make another blanket for your son. What a special thing that he is sure to love. Please let me know if you run in to any issues – I am happy to help. 🙂
Just finished a blanket for my granddaughter, coming in about 7 weeks. It turned out well. Thanks for the easy pattern. It was a lot of fun to make. Might have to make a couple for baby dolls!
Hi Pam! Thank you for your comment! I’m glad you found this tutorial and that it helped you make something lovely for your new granddaughter (congratulations!). I’d love to see pictures if you’d like to share them! You can post them on the Peek-a-Boo Pattern Facebook Group and I’ll be sure to find (and love!) them. 🙂
Hello!
I am new to sewing and would love to make a few of these as Christmas gifts!!
I am looking at makes throw blankets. How much fabric would I need to purchase?
Thank you!
Hello Jordan! I’m sorry I haven’t replied yet! Do you still need help with the blanket? I recommend at least a yard, maybe a yard and a half or more, depending on the size you want to make the blanket. I’d love to help you if you have any additional questions… please join the Peek-a-Boo Pattern Shop Facebook Group if you can/haven’t already, and post all the questions you have. If I personally don’t see your questions, any of the other amazing sewists will help you with whatever you need. 🙂
This is cute and easy to make. Thank you for the clear instructions and photos.
Thank you Sherry! I’m so glad you enjoyed the tutorial and I hope you share your blanket with the Peek-a-Boo Pattern Shop Facebook Group. I’d love to see it.
Hi Stephanie. Awesome instructions!!!! Thanks for adding photos!
Do you think Minky on one side (with the border) and a satin material for the other would work out?
I’m glad you found my tutorial! I am a visual learner so think the more photos the merrier! 🙂 I do indeed think those two fabrics will work well together, however they will be very slippery. I suggest some washable tape (Quilter’s Tape/Wonder Tape) to hold them in place as you sew. Good luck and I hope the blanket turns out as beautiful as it sounds.
Just love your blanket, easy to understand! Most blanket do not show how to do a seam allowance. I’m gonna attempt it. Newest grandchild is 2 months now, with 2 more on the way. Phew! I have a lot to do. Wish you had a video of this ?
Susan, thank you for this! I will be attempting to make one (or 5) of these cute blankets. I have a question–# 5 tuck and sew–is that sew around the outside edge of the border with the 1/2 inch seam allowance? The finished product will have two lines of sewing then–one on the outside edge of the border and one on the inside edge? Thank you for the information! 🙂
Stephanie what a great job your tutorial explains it so well thank you so much. I’ve always hated doing the binding on the quilt but this makes it so much easier!
Thank you Sharon! I’m very glad you found my tutorial helpful! I appreciate your comment, and happy sewing. 🙂
Will this work with rectangular pieces?
Great question Ann. It will! Just adjust the measurements of the two pieces, adding whatever width/length you’d like, and continue through the steps. The corner measurements will be the same regardless of the size of the blanket. Good luck! 🙂
It was ALITTLE confusing to me
Can it be explained even more if not I’ll try figuring it out
It’s not you sometimes I have a hard time comprehending
Thank you
Rosalie, I would love to help! Is there a certain part you are having trouble with? The best way to find me is on Facebook. If you’re in the Peek-a-Boo Pattern Shop, you’ll see tons of posts from me (Stephanie Schemenauer). Send me a PM and we can chat. I’m also a mentor for that group, so can help with anything you need. Hope to speak with you soon!
I have made quite a few self border baby blankets, thought I would try your method, WOW!!! Sooooo much easier, lots faster, and the corners are always perfect!!!!! Thank you so much for these instructions!!!!!
Yay! That’s wonderful! And now that you know this awesome trick, you’ll never go back! 🙂
Have you ever added an extra layer of flannel between the two outer pieces? Do you have any problems with the two layers shifting with time/washing?
Thank you for the questions! I’ve never tried an extra later, but I think that would definitely add some warmth and weight, perfect for cold months. I’ve washed my girls’ blankets about a million times since they were born, and I can’t say that I’ve had an issue with the layers shifting since they’re sewn together around the edges, locking the layers into place.
So u do not do any other sewing on the middle fabric to keep it together without any problems ?
Thank you so much for your tutorials
The pictures were just what I need because I’m more of a visual learner
You are a excellent teacher
Thank you
Thank you, Yvonne! I’m a visual learner as well, so I too need pictures in the tutorials I learn from. I’m so very glad you benefited from this one, and I appreciate the compliment. I’m lucky enough to post a tutorial here with Peek-a-Boo Pattern Shop once a month, so please come back again. 🙂
Thank you for the instructions. Is there a way to print them out?
I’m glad you like them, Rob! Because we do not have the series converted into a printable version, I believe you would have to print each day’s tutorial out one by one using your browser’s ‘print’ option.
Thank you. Great instructions.
Thank you Aileen!
If I’m using a double-sided Minky (soft and fluffy on both sides) how would this technique work out?
Susan, I think this method would work for Minky as well (and it’d be super soft!). I recommend using a walking foot on your machine since the fabric is so slippery, though. You will also have a harder time ironing the fabric, but you can certainly make this blanket without ironing it.