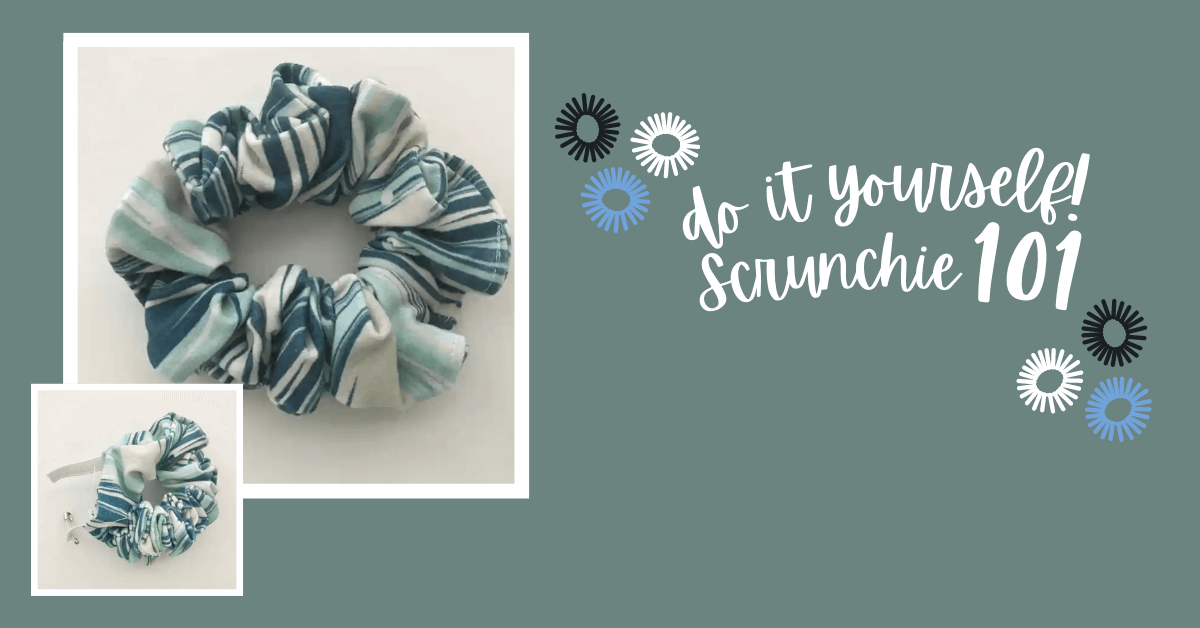
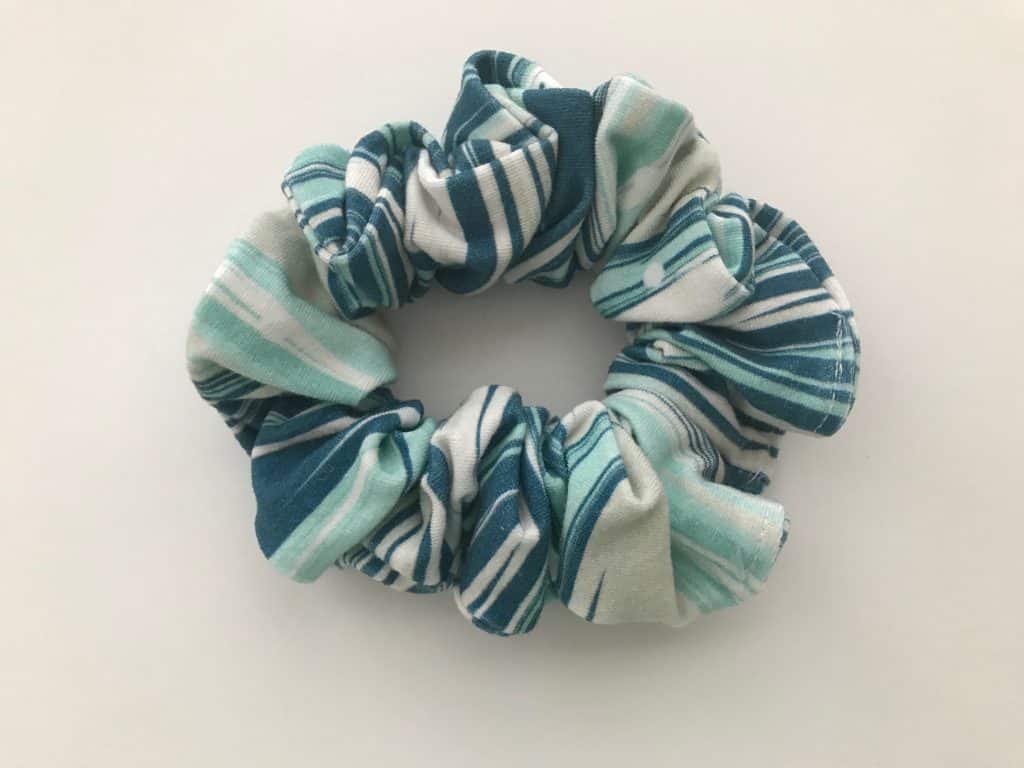
How to Sew a Scrunchie: A Beginner's Tutorial
Today we'll learn how to sew a scrunchie. Scrunchies are an iconic fashion accessory that has come back in recent years. Not only are they stylish, but they are also incredibly easy to make at home. You can make a few of them with just a fat quarter of fabric. If you are a beginner sewer or just looking for a fun DIY project, this tutorial is perfect for you! This blog will go a long way in covering everything you need to know about sewing scrunchies. From understanding the history of scrunchies and why DIYing them is beneficial to the step-by-step guide on sewing your own scrunchie. We will also go over customizing options and care & maintenance tips. So grab your fabric and elastic and prepare to follow our beginner-friendly tutorial!
Scrunchies 101
Scrunchies are a popular hair accessory that adds style to any outfit. DIY scrunchies make for a fun and creative project, especially for beginners learning to sew and needing something to hold their thick hair in a ponytail. It's a great way to get started in the sewing world and explore different types of fabric and patterns. So why not give it a try and create your own personalized hair scrunchies?
In the 1980s and 1990s, scrunchies became popular as a gentle hair accessory that prevented damage. Now, they've made a comeback as a trendy fashion statement. Today, you can find scrunchies in various styles, colors, and patterns. Sewing your own scrunchies lets you get creative with unique designs. Whether you're using fabric scraps or choosing a specific type of fabric, making scrunchies is an easy way to add a personalized touch to your style.
DIY scrunchies are a great beginner sewing project. Firstly, they are more affordable compared to store-bought ones. Secondly, sewing your own scrunchies allows you to have control over the quality of materials used. Additionally, making your own scrunchies gives you the freedom to customize them according to your wardrobe. Moreover, DIY scrunchies can also make for a thoughtful and personalized gift. Lastly, sewing scrunchies can be a relaxing and enjoyable hobby.
Getting Your Fabric & Prepare
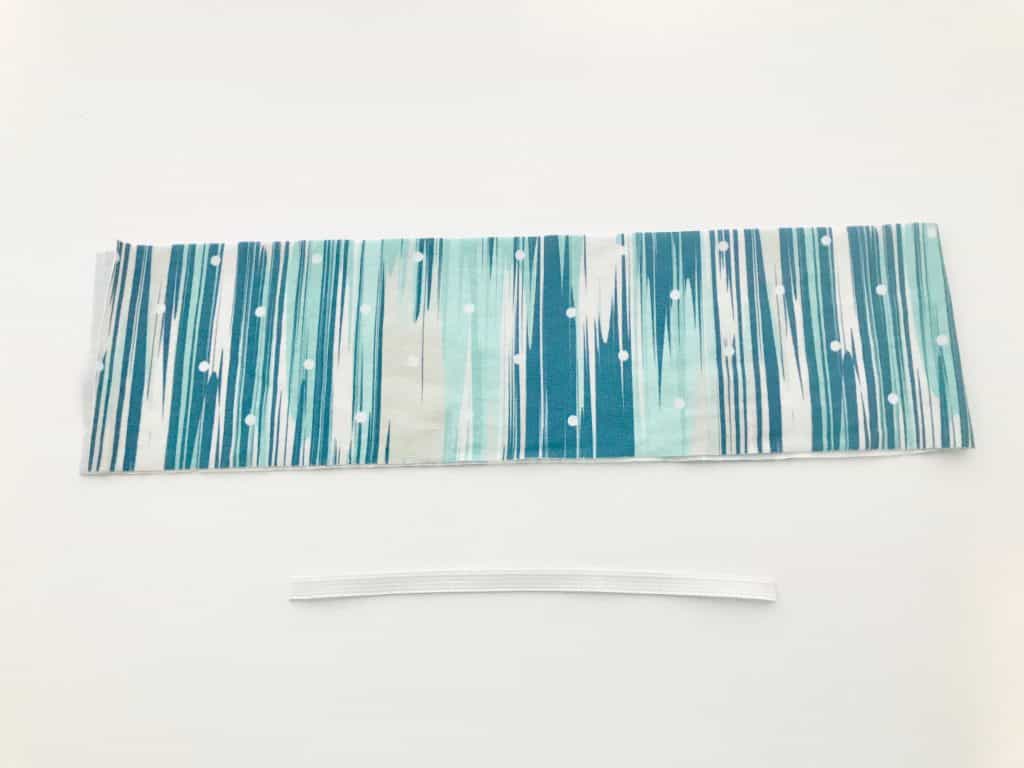
Before embarking on your scrunchie sewing project, being well-prepared is important. Start by gathering all the necessary materials, including a rectangle of fabric, a rotary cutter, and the right size of elastic.
Choose a fabric that suits your style and hair type, ensuring that it's the right texture for your desired scrunchie pattern. I like to use either knit or woven fabric but many scrunchies are made out of velvet, satin, etc. Avoid using fabrics that are too stiff or slippery, as they may not hold well. Set up your sewing machine and gather other tools like scissors and pins. Finally, clear a well-lit workspace free of distractions so you can focus on creating the perfect hair accessory.
For this particular scrunchie, we'll use the following:
- Fabric: A rectangle of fabric 3” by at least 22”
- Elastic: 8 inches of thin elastic-mine is 3/8 inch wide
- Safety Pin: For bringing the elastic through the fabric tube
The Role of Elastic in Scrunchies
Elastic plays a crucial role in the functionality of scrunchies, providing the necessary stretch and hold. When selecting elastic, choose a durable option that won't easily break. Consider the width of the elastic based on your desired scrunchie style. Before sewing it into the scrunchie, it's important to test the elasticity of the elastic. Trim the elastic to the appropriate length to achieve your desired level of tightness. By paying attention to the role of elastic, you can create functional and stylish hair scrunchies.
Step-by-Step Guide to Sewing a DIY Scrunchie
Follow these simple steps to sew your own fashionable scrunchie. Begin by cutting the fabric and elastic to the appropriate size. Fold the fabric in half, ensuring that the right sides are facing each other. Sew along the long edge of the fabric, leaving a small opening. Turn the fabric right side out and insert the elastic. Sew the ends of the elastic together and close the opening using an invisible stitch. Now you have a stylish scrunchie that you can proudly wear.
Step 1: Cutting the Fabric and Elastic and Fold Your Fabric
Start to make the scrunchie by folding your fabric in half like a very long hot dog. Place two pins about 2 inches from each end of the rectangle.
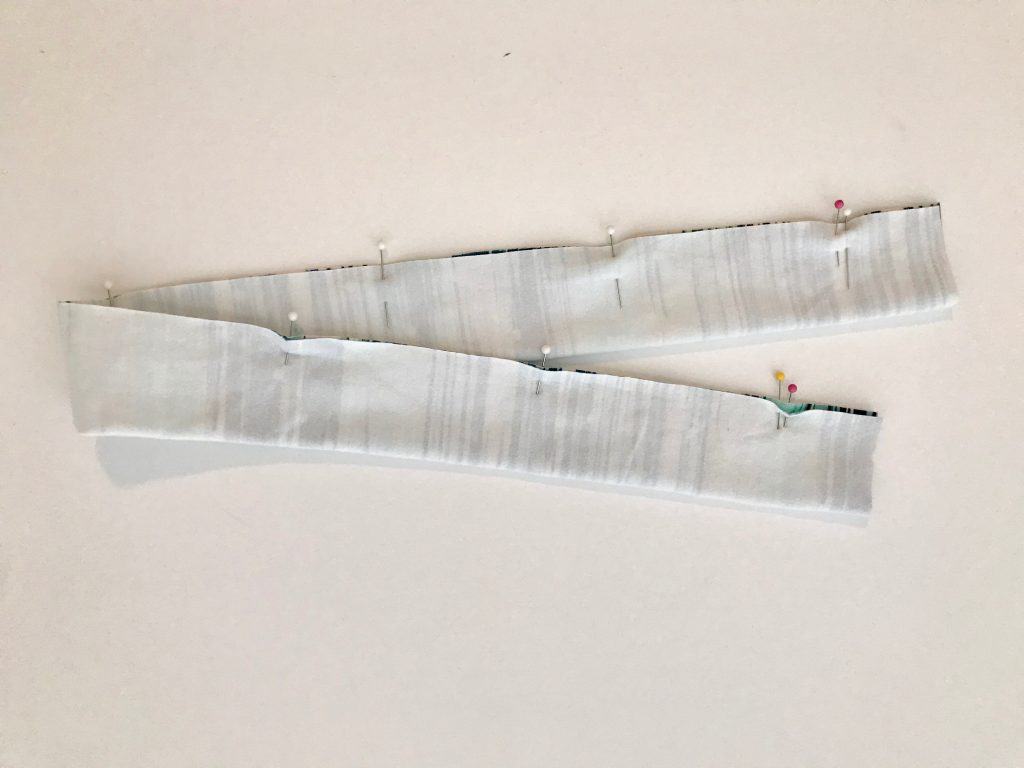
Step 2: Sewing the Edges
Hand sewing a scrunchie is certainly possible but a machine is easier. I recommend using your sewing machine and a straight stitch to sew the edge of the rectangle, starting at one set of double pins and ending at the other set of double pins. I’m using my serger for stitching, but there’s no real need because all the seams will end up inside the scrunchie. For a scrunchie, you can use a normal sewing machine and get fantastic diy scrunchies.
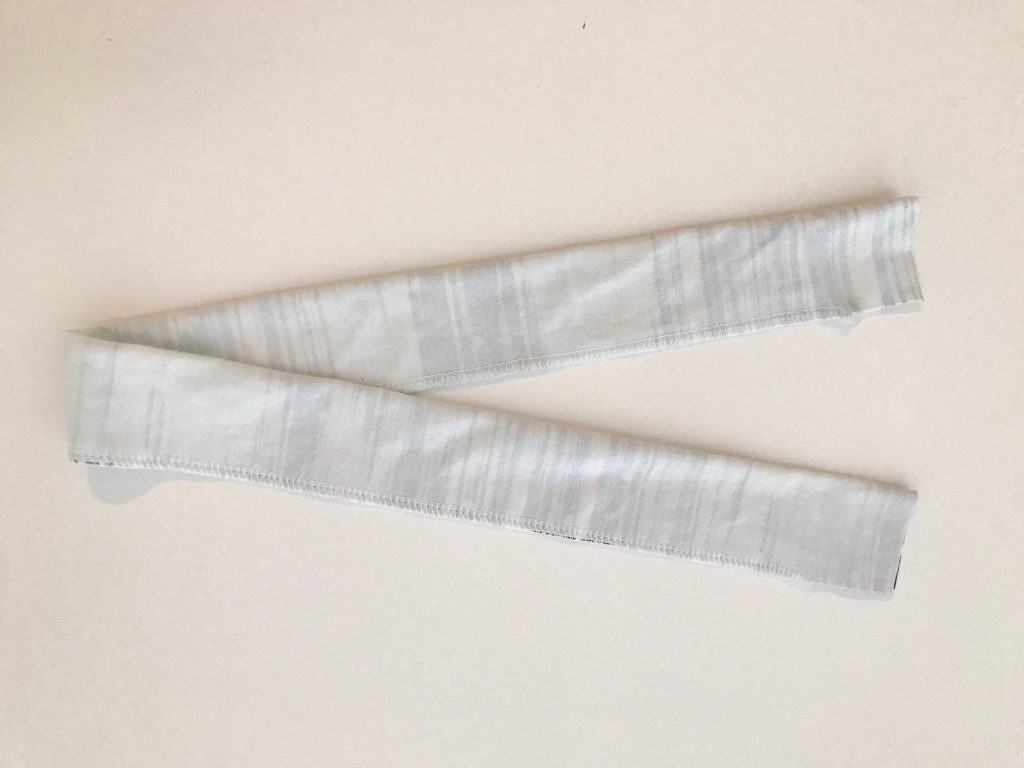
Step 3: Turning the Fabric Inside Out
For the next step, turn the tube inside out.
Step 4: Pin in Place
Pin the on the wrong side of the fabric. Match the short edge of the rectangle, right sides together and pin in place.
Step 5: Sew the Short End of the Rectangle
Use your sewing machine to sew the short ends of the rectangle.
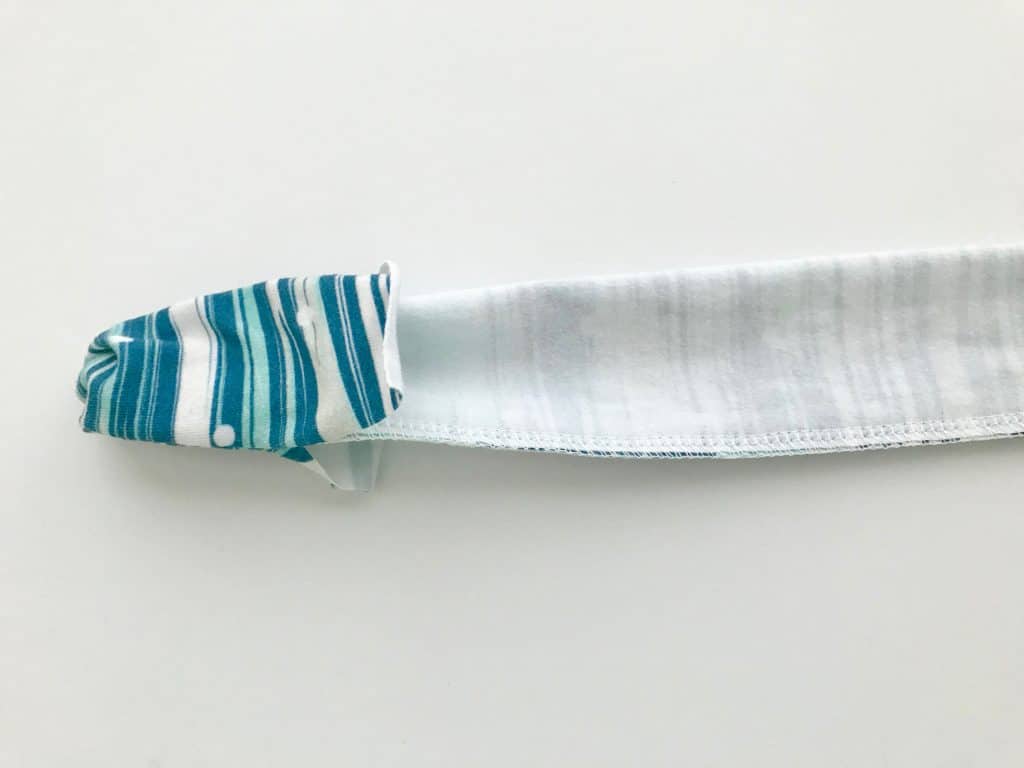
Step 6: Pull on the Tube
Pull on the tube so the seam pulls inside. You should have a circular tube with an opening.
Step 7: Pull the Elastic
Put a safety pin on one end of the 3/8" wide elastic and use it to thread the elastic through the circular tube.
Step 8: Sew the Ends Together
Use your sewing machine to sew the two end of the elastic together.

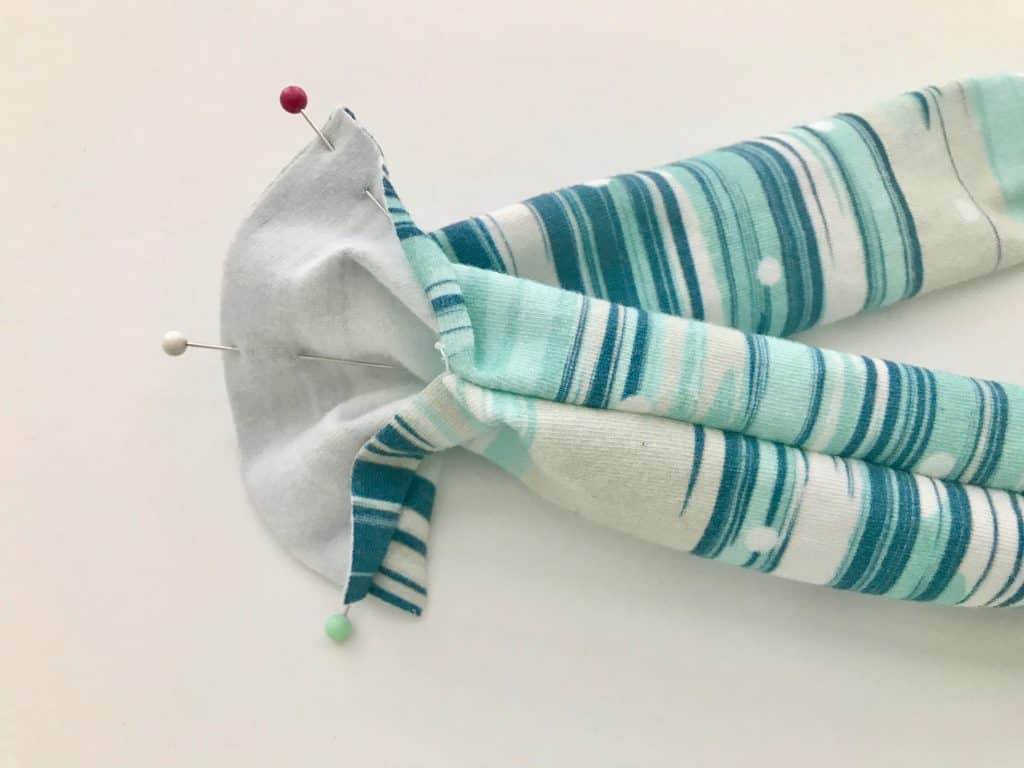
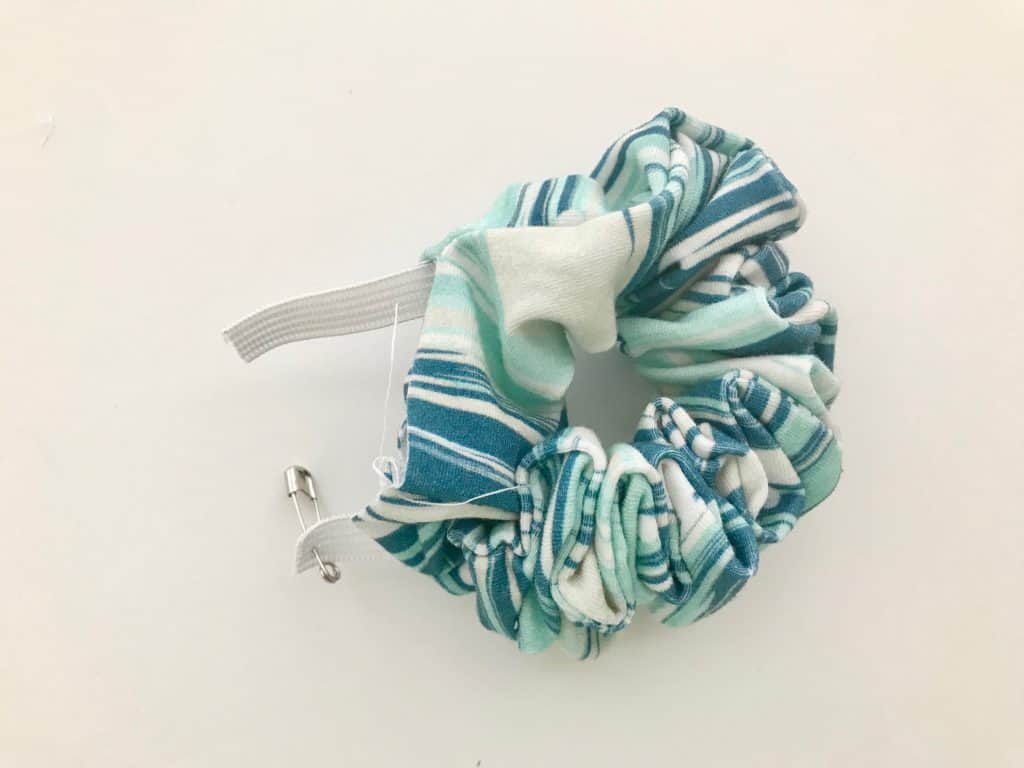
Step 9: Pin the Edges Together
With the elastic sewn together, push the edges of the opening inside the raw edge of the scrunchie, overlap, and pin them together.
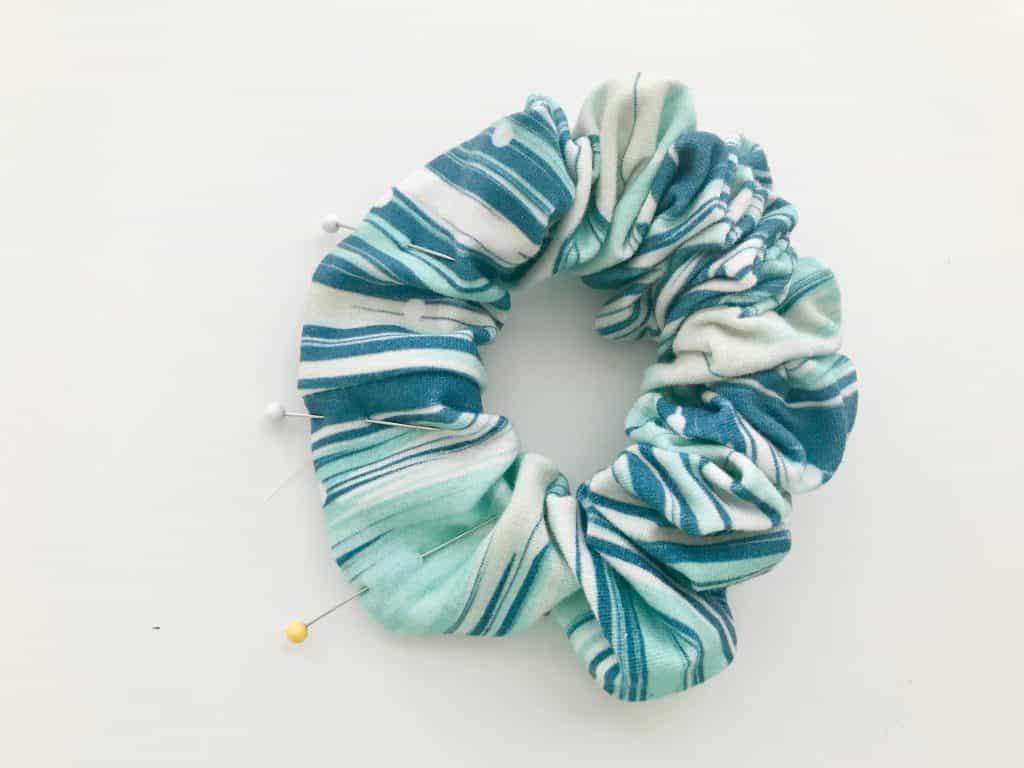
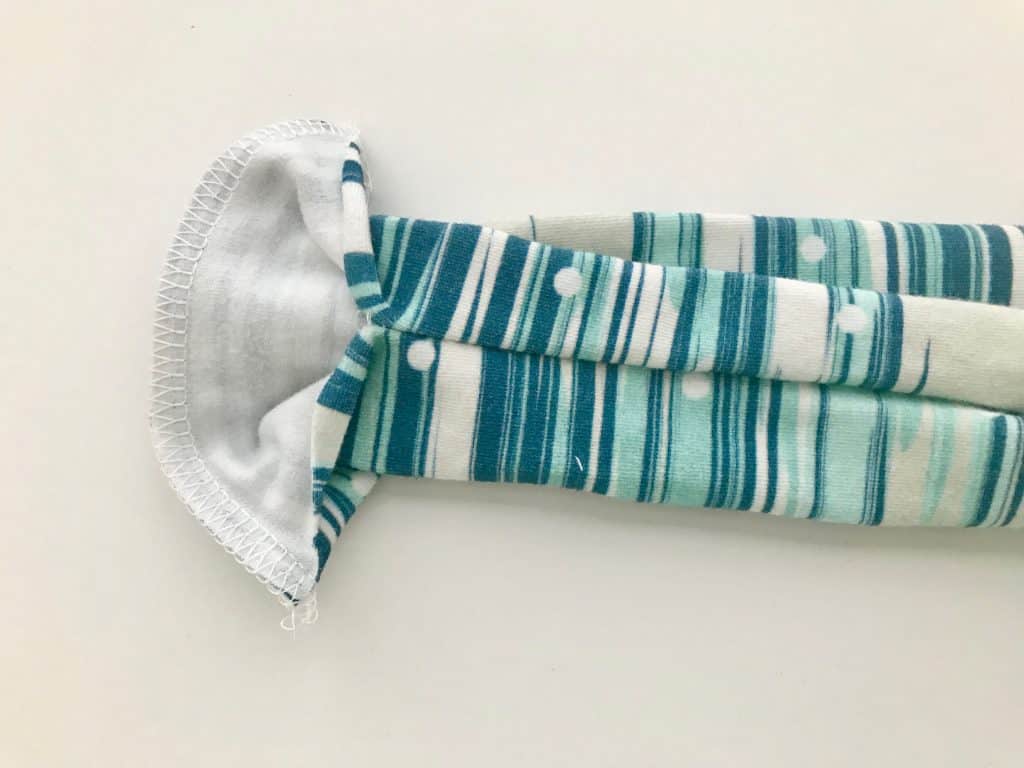
Step 10 of How to Make a Scrunchie: Finish it Up
Using your sewing machine to sew the opening of the scrunchie closed, encasing the elastic into the fabric. You can use a ladder stitch like I use in my table runner tutorial, or you can just use your sewing machine. Because diy scrunchies gather a bit and I can’t really see a bunch of details when my daughter wears them, I went the quick route and used my sewing machine.
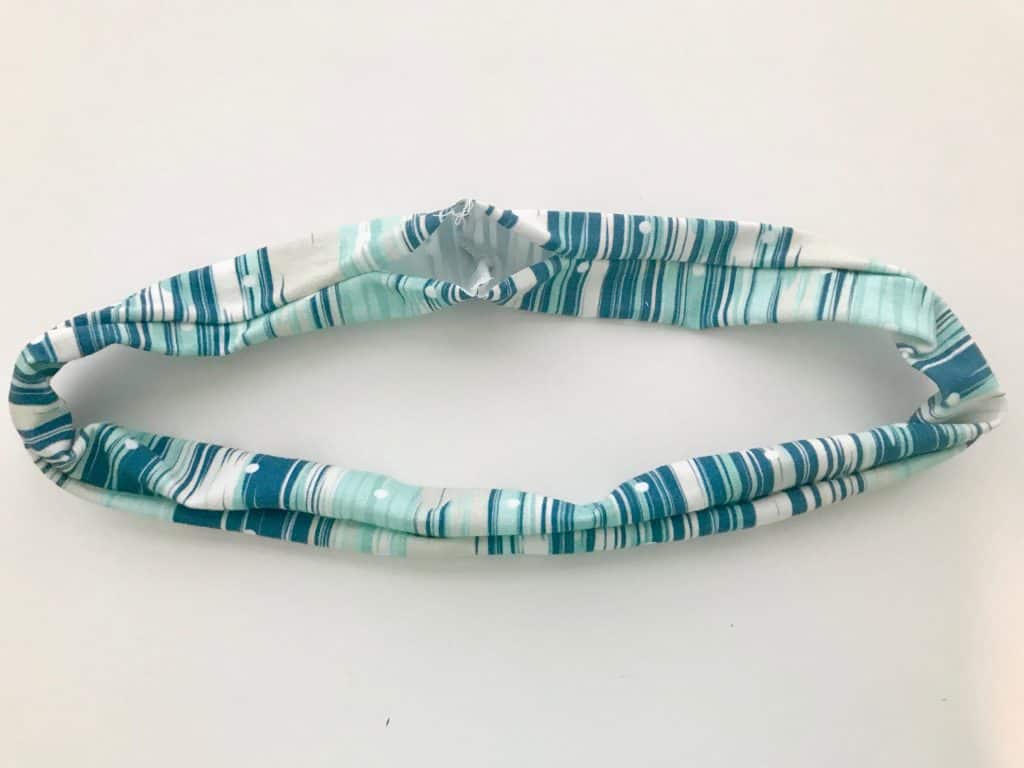
And there you go! You’ve taken a little fabric and elastic, sewn the elastic together, and encased it into the fabric tube. I hope you enjoyed this scrunchie tutorial today. Now make all the diy scrunchies…
Customizing Your Scrunchie
Customizing your scrunchie allows you to add a personal touch and make it uniquely yours. Start by choosing the right fabric for your scrunchie, considering factors such as texture and stretch. Measure and cut the fabric to the appropriate size, ensuring it's long enough to wrap around your hair comfortably. Sew the fabric together, creating the scrunchie shape, using an invisible stitch for a seamless finish. Finally, get creative by adding embellishments or embroidery to make your scrunchie truly one-of-a-kind. Don't forget to experiment with different styles and wear your new scrunchie with pride!
To add bows or tails to your scrunchies, choose a coordinating or contrasting fabric for the bow or tail. Cut a strip of fabric to your desired length and width. Fold the strip in half lengthwise and sew along the edge, remembering to leave an opening to turn it right side out. Once turned right side out, press the fabric flat. Attach the bow or tail to the scrunchie using a needle, thread, or hot glue. Get creative and experiment with different sizes and styles of bows or tails to create unique scrunchies.
Experimenting with Different Sizes
Experimenting with different sizes is a fun way to create unique scrunchies. You can try varying widths and lengths to find the perfect fit for your hair type and desired level of scrunchiness. Don't be afraid to venture into oversized or mini scrunchie sizes for a playful twist. Additionally, you can experiment with different elastic sizes to achieve the ideal tension. By using different fabrics, you can add variety and texture to your scrunchie collection. So go ahead and get creative with sizes to make your scrunchies truly one-of-a-kind.
No-Sew Scrunchie Options
Looking for an easy and quick DIY project? Try creating a no-sew scrunchie using fabric glue. It's a great option for those who don't have sewing skills or equipment. Instead of sewing, you can also use safety pins to secure the ends of the fabric tube. To learn more about no-sew scrunchie techniques, check out tutorials on YouTube and Pinterest. Experiment with different materials like ribbons or lace to make unique no-sew scrunchies.
Scrunchie Care and Maintenance
To keep your scrunchies in good condition, hand wash them in cold water. Avoid using harsh detergents or bleach that may damage the fabric. Air dry your scrunchies to prevent any shrinking or damage from heat. Store your scrunchies in a clean, dry place to avoid dirt or moisture buildup. Gently iron your scrunchies on a low setting to remove any wrinkles or creases.
How Long Does it Take to Sew a Scrunchie?
Sewing a scrunchie can be completed in under 30 minutes, depending on your sewing skills and experience. With practice, you'll become quicker. Take your time to ensure neat stitches and enjoy the creative process of making your own scrunchies.
Common Mistakes to Avoid When Learning How to Sew a Scrunchie?
To avoid common mistakes while sewing a scrunchie, remember to choose a fabric that is not too thick or stiff. Pay attention to the tension on the elastic to ensure a comfortable fit. Double-check your measurements and cut accurately. Always backstitch at the beginning and end of seams. Take your time and sew slowly to avoid careless errors.
Thanks for joining us to learn how to sew a scrunchie. Sewing a DIY scrunchie is not only a fun and creative project but also a great way to customize your accessories. Remember to choose the right fabric and elastic for your scrunchie, and don't be afraid to get creative with different sizes and embellishments. With a little time and effort, you'll have a collection of unique and stylish scrunchies that you can proudly wear or gift to others. So grab your sewing kit and start creating your own personalized scrunchies today. Before you leave, make sure to join our Facebook Group or follow us on Instagram.
Also - once you're comfortable sewing a srunchie, come download one of our many great sewing patterns. Happy sewing!