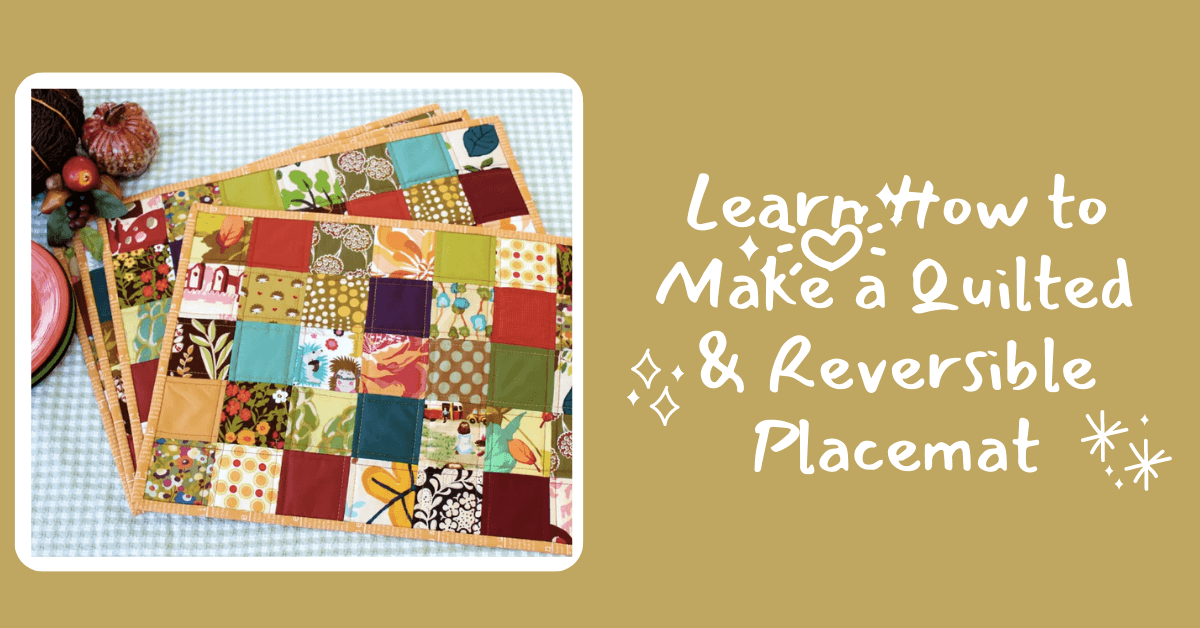
How to Make Quilted Placemats | DIY Placemats
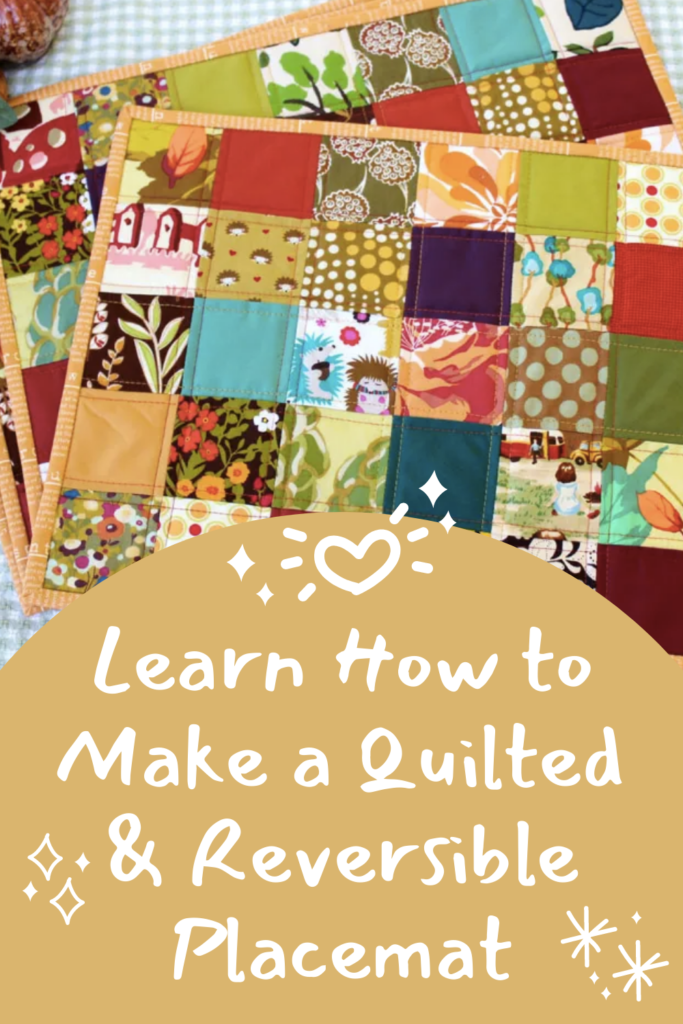
Come join us today to learn how to make quilted placemats. These take a little time but you can use this tutorial to make some DIY Placemats that will have a place at your Thanksgiving or Christmas table for years and years to come. Let's get started.
How to Make Quilted Placemats
DIY Quilted Placemats
Wouldn’t it be great to learn how to make something quilted? I have the perfect beginner placemats tutorial for you! It is a lot of steps (and a lot of photos) but if you take it one step at a time you can make a quilted placemat or four!
Quilted Placemats: Fabric and Materials Needed For 4 Placemats
- Mix of Cotton Scraps (at least 3″ square) or a Fat Eighth Bundle (at least 8 prints measuring 11″ x 18″)
- 1 Yard of Cotton Fabric for Backing
- 1/2 Yard of Cotton Fabric for Binding
- 4 Pieces of Cotton or Polyester Batting (each measuring at least 15″ x 20″)
- Matching Thread
Quilted DIY Placemat Sewing Supplies and Equipment Needed
- Sewing Machine
- Scissors
- Pins
- Iron and Ironing Board
- Rotary Cutter and Self Healing Cutting Mat
- Quilting Ruler
- Masking Tape or Washi Tape
- Marking Device such as a Pencil
- Safety Pins or Quilt Basting Pins
- Sewing Machine Needles – Woven/Regular Size 11 and Size 14
- Optional – 1/4″ Sewing Machine Foot and Walking Foot
- Optional – Elmer’s Washable School Glue
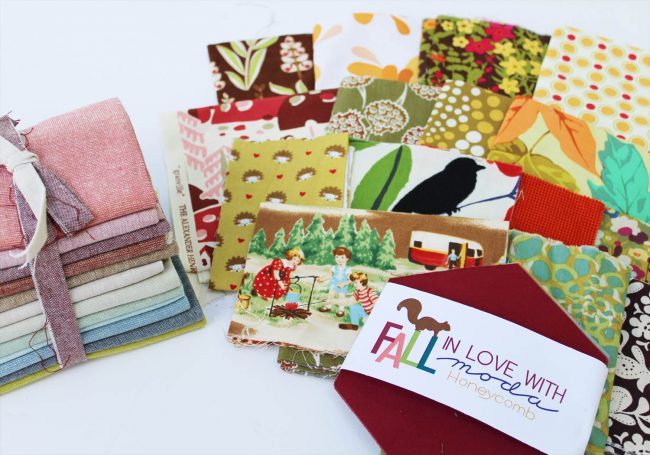
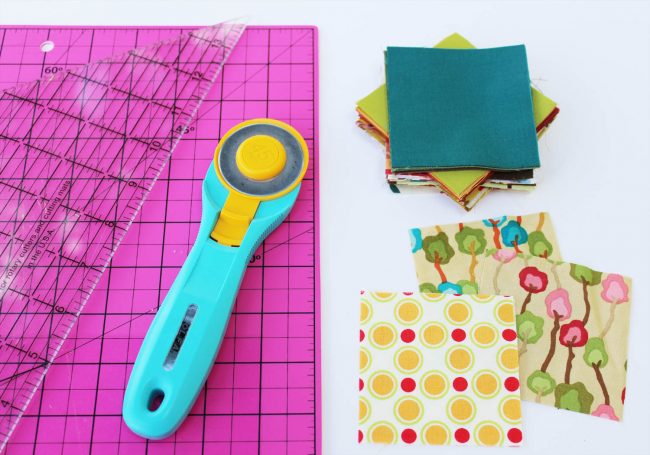
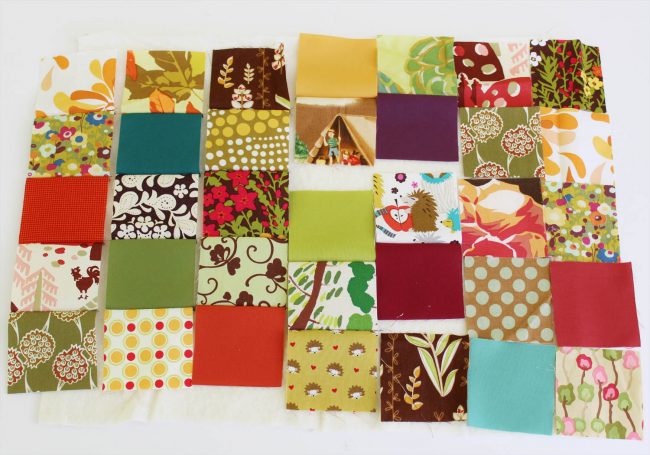
The first step in making quilted fall placemats is to pick out what fabrics you would like to use. Ideally, you would use quilting cotton, but you can use other woven fabrics, voile and shirting are other options. This tutorial uses quilting cotton scraps that are larger than 3″ square (shown above to the right.) If you don’t have a lot of scraps at your disposal you can purchase a fat eighth bundle (at least 8 pieces for 4 placemats.)
A lot of fabric shops now sell these bundles (shown above, left), and are a great way to get a set of matching fabrics for a low cost. If using scraps you will have to decide on your color scheme and which ones you want to include. I pulled a variety of fall colors, a pack of solids, and prints ranging from small to large.
If you need some fabric, look to KnitFabric.com.
Cutting Fabric for Quilted Placemats
Step by Step Guide on How to Make Quilted Placemats
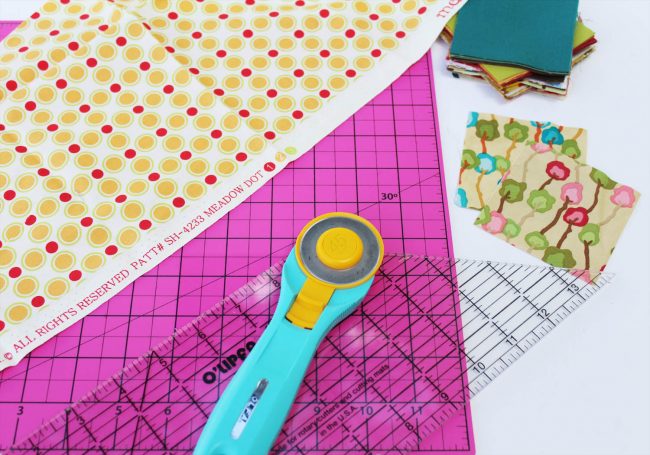
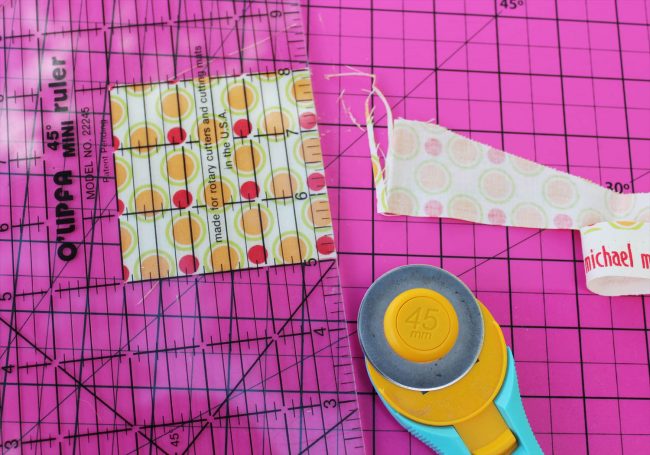
Step 1: First we will cut the fabric scraps into 3″ squares. You will need a self healing cutting mat, rotary cutter and quilting ruler. My quilting ruler is 5″ x 14″ long, which I think is a good average size. The size isn’t that important in this tutorial, you can use what you have on hand. The first cut is to remove the selvedge edge of the fabric. It is shown above on the polka dot print, the edge of the fabric that is white and has printed words.

Place your fabric flat on the cutting mat, line up your ruler on the selvedge edge and using the rotary cutter, trim off the edge. I cut off 7/8″, removing the selvedge and a tad bit of the fabric. If this is your first time using a rotary cutter and ruler, you hold/press down the ruler with your left hand and cut with the rotary cutter along the edge of the ruler with your right. Vice versa if you are left handed.
Take care that the ruler doesn’t move/slide and remember that the rotary cutter is a blade, be careful not to cut yourself. Always close the blade when not in use, as shown above.
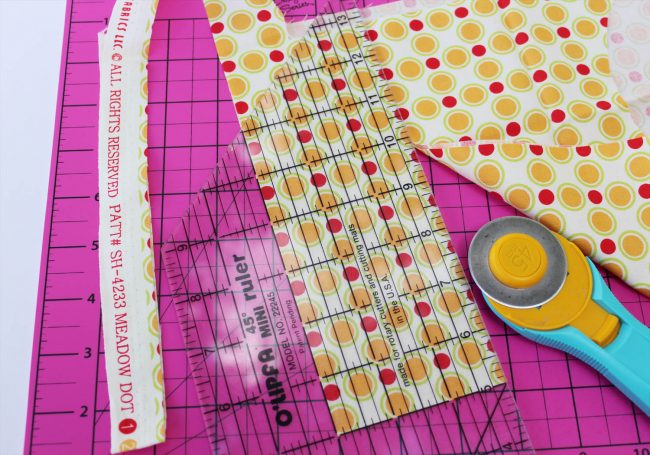
Step 2: Now the selvedge is removed, pick up your ruler and line up the fresh cut fabric edge with the 3″ line marking on the ruler. Cut. On the scrap of fabric above, it was too long to fit on the mat, so I initially folded it in half carefully lining up the selvedge edge before cutting. Therefore this piece of fabric is two layers thick.
Step 3: Move the excess fabric scrap to the side and work only with the 3″ strip. Rotate the 3″ strip or the cutting mat and once again line up the 3″ mark with the edge. This was a scrap so the left edge wasn’t straight. If you look at the photo above, I lined up the bottom of the fabric with one of the straight lines on the ruler and I moved the 3″ mark over just a bit from the left edge and then cut the fabric.
Step 4: Rotate the piece that was just cut and lining up the 3″ mark with the left edge of the fabric, trim that rough edge to the right. Now you have a perfect 3″ square (or 2 squares if your fabric was folded in half.) You can continue to cut off that strip that you initially cut, lining up the cut edge with the 3″ mark, cut and repeat until you are done with that piece of fabric.
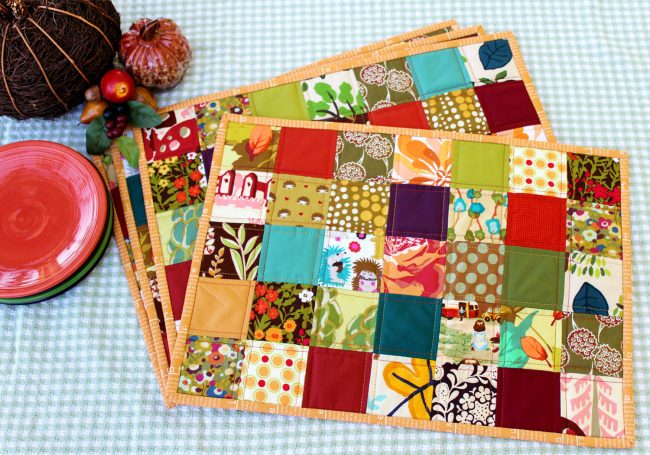
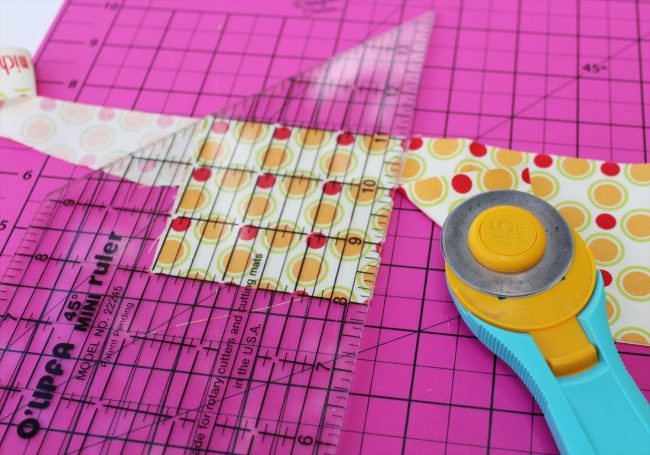
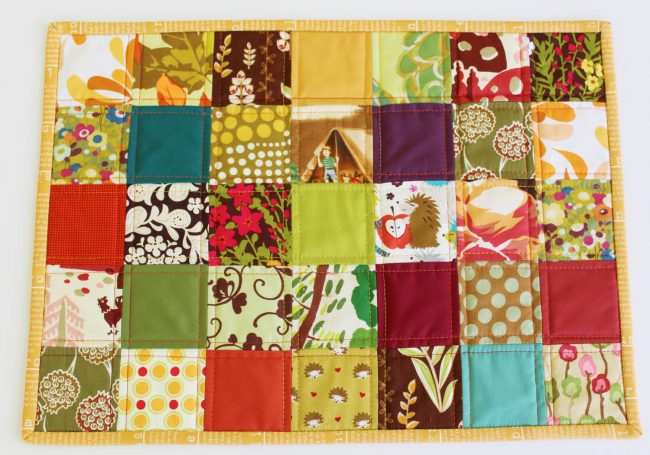
I was going for a very scrappy looking patchwork placemat so I only cut 4-6 squares from each fabric piece. Some of my scraps were small so I was only able to get 2-3 squares from it. This is up to you. The more fabrics you use, the scrappier it will look. If you only use 8 fat eighths it will look less scrappy and more structured. I added solids to my prints so the placemats wouldn’t be overly busy but rather give your eyes a “place to rest.”
Step 5: You will need to cut 35 (3″) squares for each placemat. If you are making 4 placemats, you will need to cut 140 squares. When I am cutting I like to stack my squares in groups of 10, this makes it easier to keep track of how many you have cut. When in doubt, always cut a few extras.
Step 6: While we are on the topic of cutting, let’s go ahead and cut our backing fabric, batting and binding. You will need one yard of backing fabric for the 4 placemats. Cut the yard into 4 pieces, each measuring roughly 18″ x 22″. You can leave the selvedge on the fabric as it will be cut off at a later time.
This project needs 4 pieces of batting measuring roughly 15″ x 20″ each. This is a great opportunity to use up batting scraps if you have them. If you don’t have scraps, you can purchase a Crib-sized batting at the store. This will yield more than enough for this project. There are several types of batting. Cotton and cotton blends are thinner, creating flatter placemats. Polyester batting is thicker or “loftier” and creates puffier placemats. Both are acceptable and a matter of personal choice. I used cotton blend scraps for these placemats.
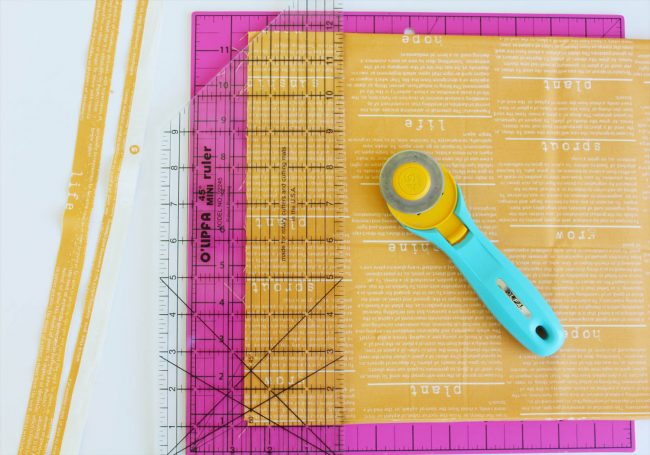
Step 7: The binding is the last step of the quilting process, but cutting it now is more efficient, so let’s cut it out. You need a half-yard cut of fabric that is 42″ – 44″ wide.
Start by cutting the selvedge off of both ends of the fabric (above to the left.) Just like when we cut the 3″ squares, cut strips from the fabric. I used a small cutting mat so I carefully folded my fabric in half and then in half again (4 layers) keeping the top edges lined up straight.
The selvedge edges were trimmed off, that newly cut edge is at the top and the fold is at the bottom. You will be cutting 2.5″ strips and we need 7 strips (if making 4 placemats.) They will fit on this piece of fabric if you cut carefully. My left edge wasn’t straight, so I moved the ruler over roughly 1/4″ and cut the first 2.5″ strip. Just like when we cut the 3″ squares, I rotated this one strip and trimmed off the rough edge to make a perfect 2.5″ strip.

Step 8: Continue cutting 2.5″ strips from the half yard until you have 7 pieces. Above you can see the trimmed-off rough edge to the left. To the right you can see that I just kept cutting 2.5″ strips. If you were to unfold one of these strips right now it will measure 2.5″ wide x 40″ – 42″ long depending on how much you cut off your selvedge. Set these aside for the later.
Patchwork Top Assembly for DIY Placemat
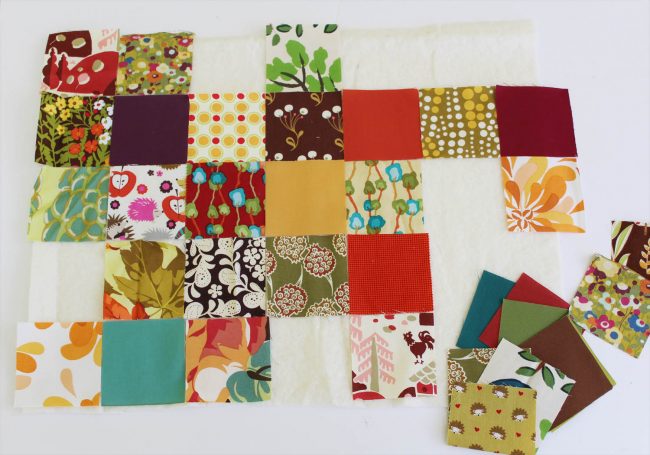
Step 9: It’s time to have some fun and play around with your 3″ fabric squares. Take one of the pieces of batting that you just cut and use it as a makeshift design board. You will see that if you put the fabric squares down on it, they cling to the batting. This is nice because it holds their place and you can move it around.
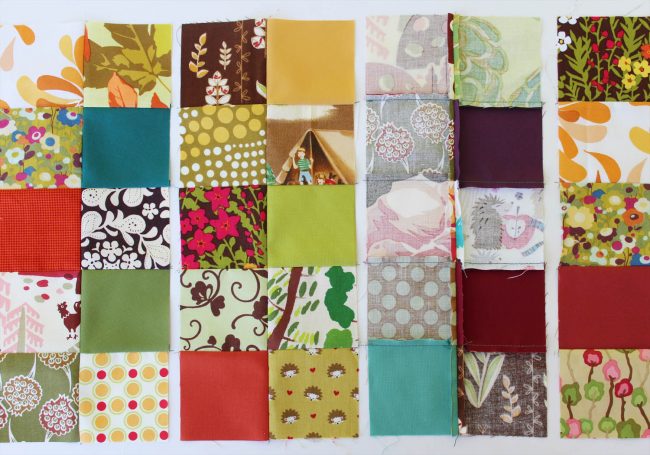
Place the squares how you like them in a 5 x 7 configuration, 5 squares down and 7 squares across. My layout is random, spacing the solids out evenly and trying to keep small prints next to medium and big prints. I also spaced out the polka dots and colors. Personally, I didn’t want too many greens in one spot for instance. This is the time to play and “design” your placemats.
There is no right or wrong, it’ s up to you. Sometimes it helps to take a photo when you are done, it makes it easier to spot things you may want to move around before sewing them together. Also, if you take a photo and your squares fall off or get re-arranged you know how they were and can put them back in order.
Quilted Placemats Step 10: Once you have a layout that is pleasing, it’s time to sew the rows together. Using a size 11 needle, your thread of choice (either a poly-blend or 100% cotton) and a sewing machine foot that is 1/4″ or one that allows you to see/sew a 1/4″ seam. This project doesn’t require a precise seam allowance, they key is to pick a seam allowance and stick with it throughout the entire process.
You can either sew a scant 1/4″, a full 1/4″ or somewhere in between. I chose to sew a full 1/4″ and stuck with that measurement for the entire piecing process. I used my normal sewing machine foot and used the 1/4″ measurement on the needle plate of my machine. Use a stitch length of 2.5 to sew the squares together.
A beginner quilter should start by sewing together the short columns first. Pick up two squares and sew them together bottom to top, right sides together. Then pick up the next two and sew them together. Make sure you put the squares back in the spaces that they belong once you have sewn a few sets together. Do not iron at this point. Continue sewing until you have 7 sets of columns.
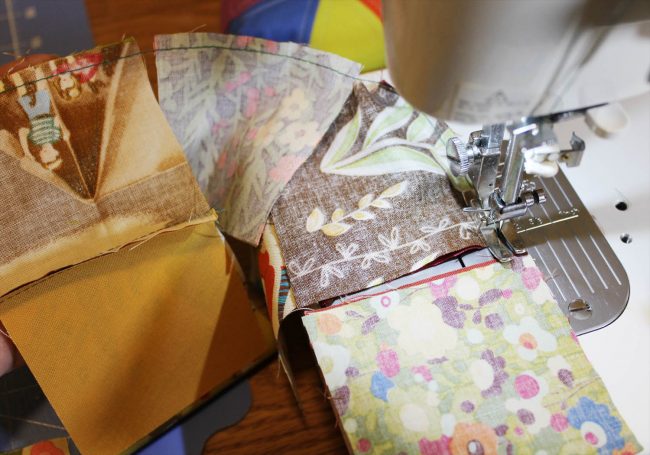
Quilters chain pieces when they are sewing together a quilt top. Chain piecing means that you sew two squares together, when you get to the end don’t lift the presser foot but rather start sewing the next set of squares. This leaves just a little bit of thread in between each set. You can see in the photo above that this creates a “chain” of fabric squares sewn together. You can cut loose this chain that is forming behind the presser foot and then snip all the pieces apart. This process saves time and thread.
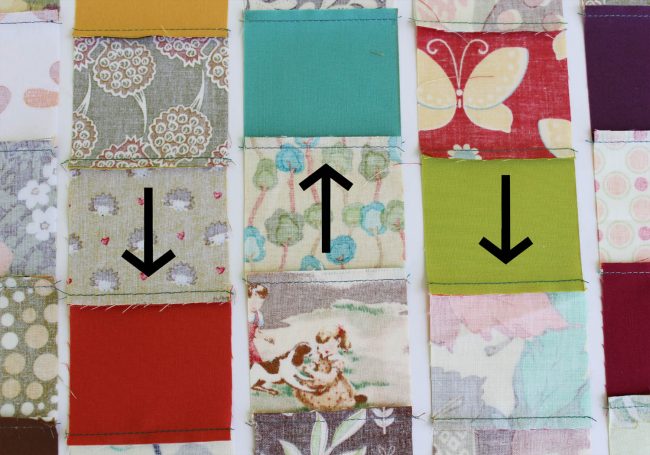
Step 11: Once your columns of 5 squares are sewn together, it is time to iron. Flip the columns over and press the seams to one side, either to the top or bottom. One column will go up, the next column will go down. This reduces bulk and allows for easy lining up of seams for the next step.
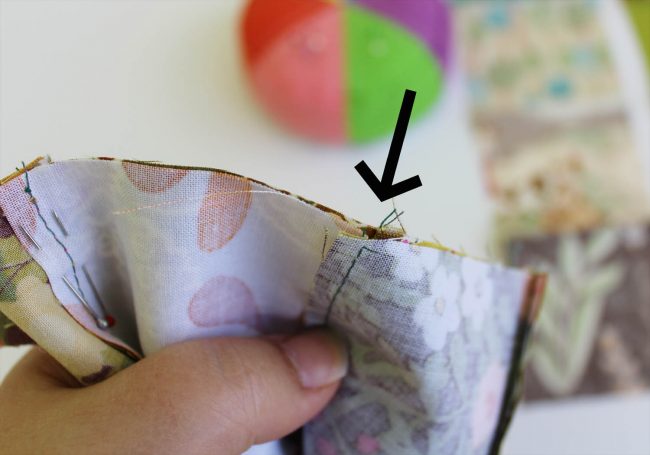
Step 12: Now let’s sew the columns together. Take the first two columns, right sides together and start by pinning at the top and bottom. At each square intersection the seams are pressed in opposite directions allowing the seams to “nest” together quite nicely. Pin these two seams. You can see to the left on the photo above how I have the seams pinned. One seam is on the top, one is on the bottom. Sew this seam with your chosen seam allowance.
Step 13: Once you are done, open up the seam and looking at the right side. Are you happy with how the intersections lined up? If you nested and pinned your seams correctly they should be pretty perfect (or very close.) Not happy? Is the patchwork not lined up, offset too much? Unpick the seam and try again. Only you can decide how perfect you want it to be. The rule is this: If it bothers you, unpick it now, if you don’t you will regret it later. Since we are sewing together short columns, there are only 4 intersections you have to worry with lining up making this easier for beginners.
I was happy with my intersections, so I kept sewing. A few weren’t perfect but since these are just placemats that will inevitably have food/drink spilled on it, I could live with some imperfections.
Feel free to iron as you wish once you have your columns sewn together. Press these seams open. When ironing take care not to stretch or pull the fabric. Lift the iron up and down, don’t slide it across the fabric. Once the whole placemat is sewn together, flip it over and iron it, it should be nice and flat.
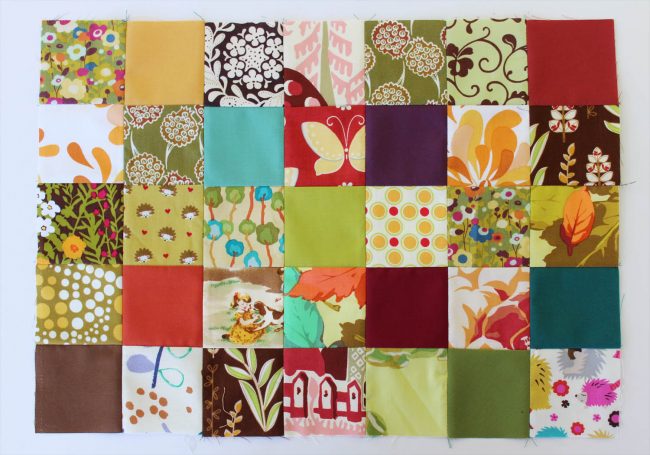
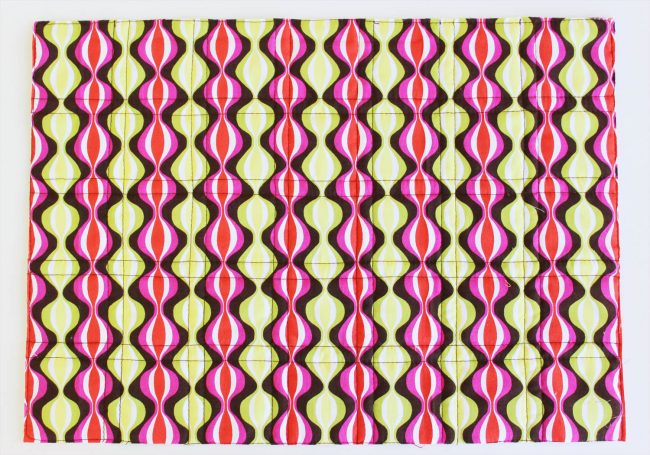
Congratulations! You now have a patchwork fabric top assembled and ready to baste. Depending on the seam allowance you chose, it should measure anywhere in between 13″ – 13.5″ x 18″ – 18.5″. Standard sized placemats are roughly this size.
Basting the Quilted Placemats
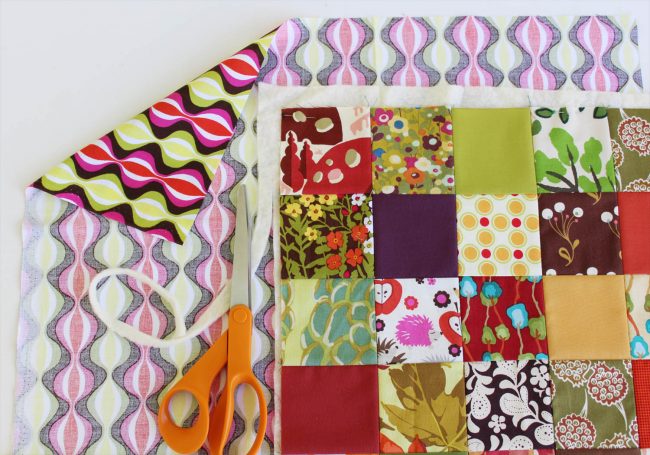
Step 14: Start by placing the finished patchwork top on top of the batting. I like to iron at this step, it smooths out the often wrinkled batting and gives a nice flat top. Using normal sewing pins, pin the four corners of the patchwork top to the batting. Trim the batting roughly 1/4″ – 3/8″ away from the patchwork. Take the backing fabric and iron it. It will be placed right side down on the next step.
Small projects like these placemats are easy to baste together. I like to use a surface that can be moved around, in the photo above I used the back of my cutting mat. If you don’t have a cutting mat that is large enough you can baste on a table or the floor. Keep in mind that you will be using safety pins to hold the layers together and they will scrape against the surface (don’t damage that antique table!)
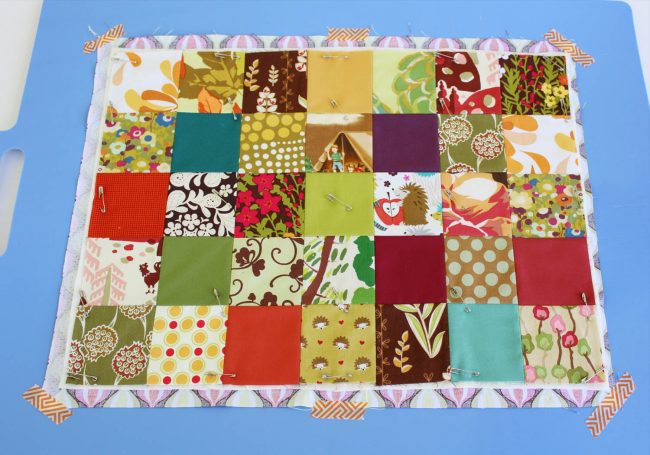
Step 15: Start with the backing fabric, right side down and tape it to your surface. I used washi tape, you can use masking tape as well. Pull the fabric taught but not tight. I taped the four corners and the centers of the long sides, as shown above.
Next take the top/batting that is pinned together and center it on the backing fabric. Smooth it with your hands and get it nice and flat. Using safety pins or quilt basting pins, start pinning in the center and work your way towards the edges of the placemats. This one placemat used 25 safety pins. Make sure you replace the regular pins with safety pins in the four corners when you are done.
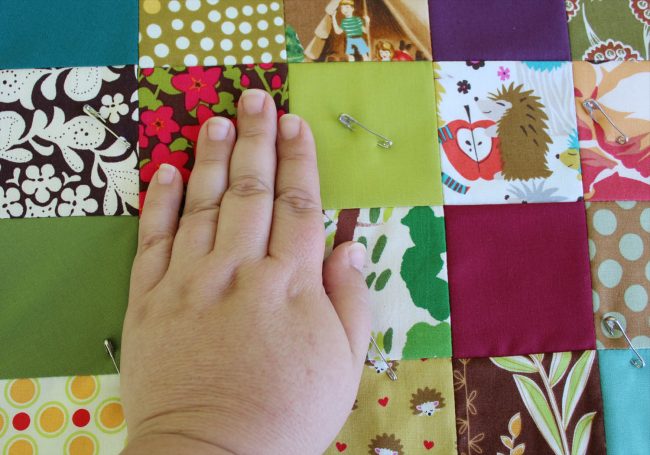
The rule for safety pin placement when basting a quilt is that the pins should be no further than a hands width away from each other. In the photo above you can see that I have four pins all around my hand. I have a small hand, so approximately every 3″ -4″ apart. You can use more pins if you prefer, but don’t use less. As you pin, make sure that you are pinning through all three layers and catching the backing fabric. Once all the pins are in and closed, remove the tape and your placemat is now basted together and ready for quilting.
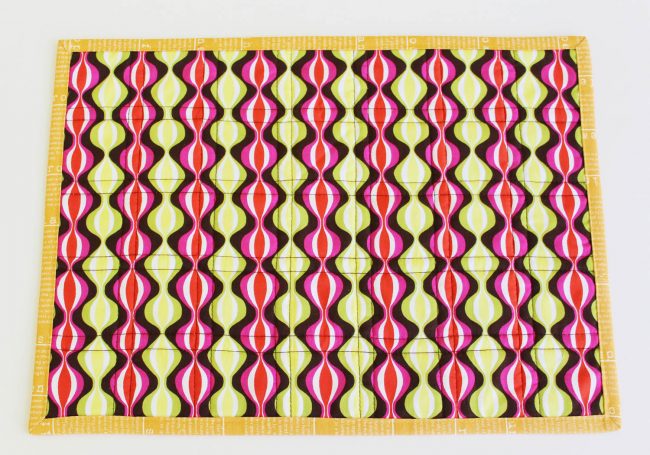
Machine Quilting Your Placemats
Step 16: Switch the sewing machine needle to a size 14. Decide on what type and color of thread you would like to use to quilt the placemats. I decided to use a poly/cotton blend “normal sewing” thread. You don’t have to use quilting thread, though you can if you want. I used three different thread colors, yellow, orange, and red. I started with the yellow in the middle and then the orange and lastly the red.
Brown-colored thread was in my bobbin, I wanted it to blend into the back and not stand out. I used “normal sewing” thread to demonstrate that there are no hard set rules when quilting, it really is up to you. A polyester thread is strong and resistant to breaking and works well for this project.
I used my regular sewing machine foot to quilt my placemats. I’m showing that you don’t have to have a walking foot, especially when quilting smaller items. Lengthen the stitch length to 3.5, other than that, I changed none of the settings on my machine. If you have a walking foot, use it. Straight line quilting is always easier and less problematic with one, but isn’t required.
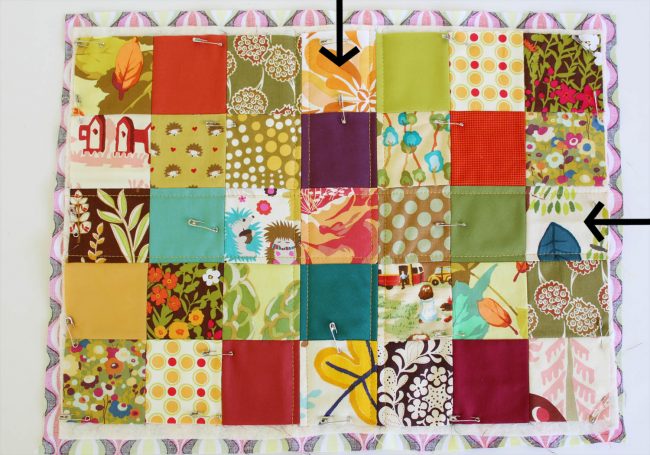
This is a beginner-friendly project, so I wanted to keep the quilting simple. Using the edge of the sewing machine foot as a guide on the side of the seam, start quilting at the top middle and sew down in a straight line until reaching the bottom. Cut the threads. Starting again at the top middle, quilt on the other side of the same seam, using the sewing machine foot as the spacing guide. Quilt from top to bottom, cut the threads, repeat.
The photo above shows that I started in the middle at the top and quilted 4 lines. Then I rotated the placemats 90 degrees and quilted 2 lines from top to bottom. You always want to quilt from the middle working out towards the edges. I then rotated the placemats back to the original position and quilted 4 more lines. Turn the placemats and quilt 2-4 more. Continue in this pattern until the whole placemat is quilted.
Whenever possible always quilt in one direction. Do not sew down one direction and then turn the quilt 180 degrees and sew back in the opposite direction. This will cause your quilted piece to distort. Only remove the safety pins if you are about to sew over them. Don’t hit the safety pins!
Step 17: After you finish quilting the middle section, you can remove the safety pins. I like to keep them in until each section is complete. Once you are done quilting, remove all of the remaining safety pins, if you haven’t done so already.
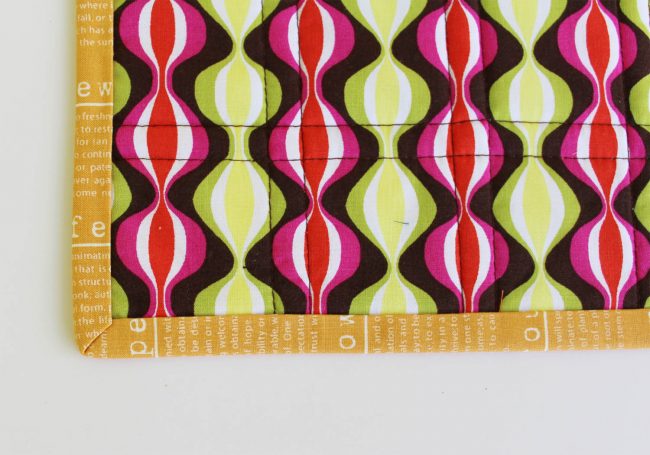
Once you are finished quilting, sew around the outer edge of the placemats 1/8″ from the raw edge. This makes trimming the placemats easier and the binding process go more smoothly. This edge stitching will be covered by binding and you will not see it in the finished product.
Step 18: Time to trim the placemats! Using the rotary cutter, cutting mat and quilting ruler, start by trimming off one of the short ends. Some of the squares will have been distorted slightly so you will end up cutting a bit off of some of them. This is ok. Once this one edge is trimmed off, lay the placemats on your cutting mat and proceed to line up this edge with the straight line markings on the cutting mat.
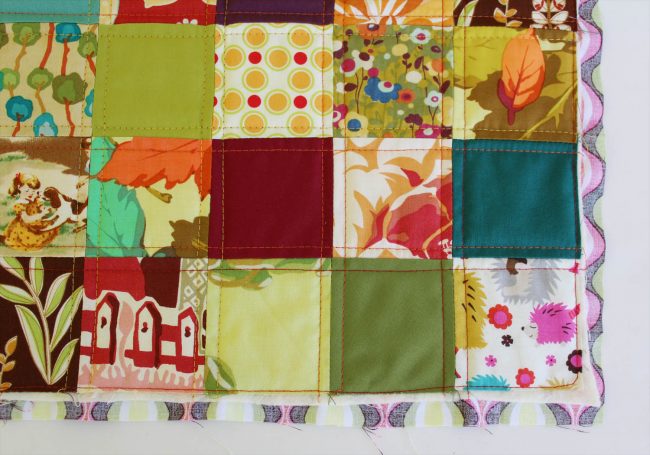
Using the markings on the cutting mat as a guide when trimming the rest of the placemats helps to keep your placemats nice and rectangular. After trimming, if a little bit of batting is still showing (or the fabric square is a little short) that is fine, binding covers this up. You are aiming to cut off batting and backing and as little as the patchwork top as possible.
This is the back side of my trimmed placemats. You can see that all four sides are nice and straight and overall it is a rectangle. I also included this photo to show that the brown thread I used for the quilting blends in nicely with the backing and doesn’t detract from the busy print. My placemats roughly measure 13.25″ x 18.25.” Yours should be somewhat in this same size range, a little bigger or smaller is just fine.
Binding
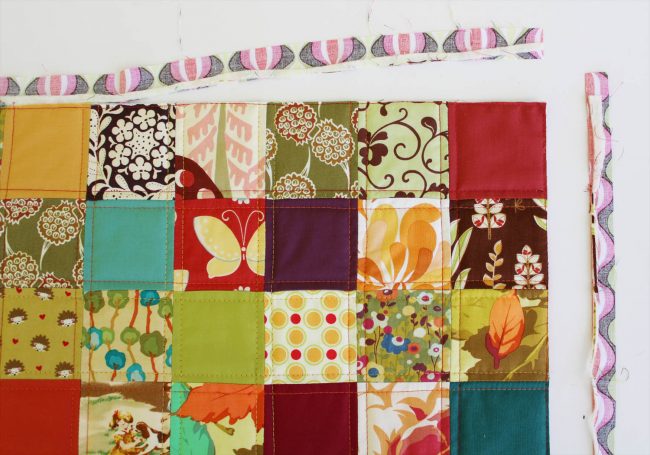
Step 19: The last step in a quilted project is binding, which is simply covering up the raw edge with fabric. This step is photo intensive so that I can really show how to achieve the best final result. Grab those 7 (2.5″ strips) that were cut earlier and let’s finish these placemats.
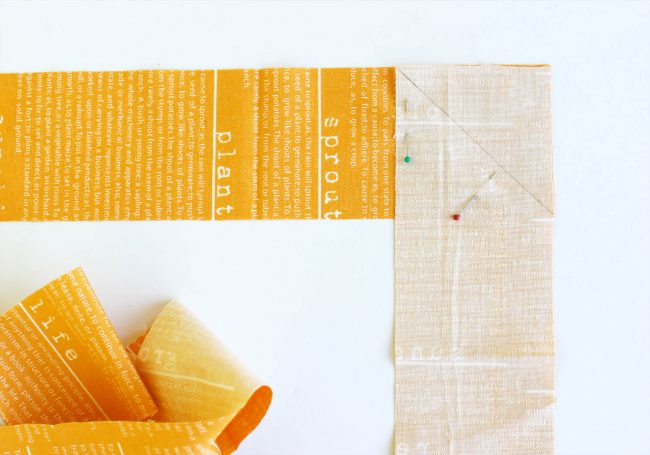
Take two of the 2.5″ strips and place the two ends perpendicular to each other, lining up raw edges, right sides together. Pin to hold them in place. Using a ruler and drawing device, draw a diagonal line from corner to corner as shown above.
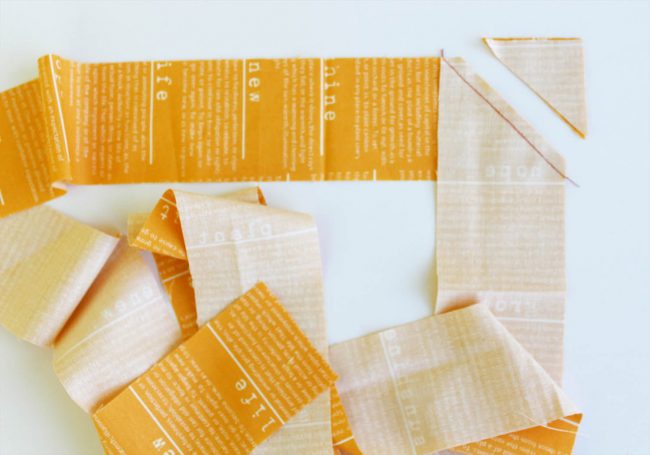
Sew on the line that you just drew using a 2.5 stitch length. Trim 1/4″ away from this seam. Discard the triangle scraps.
Step 20: Open up the seam and iron the diagonal seam open. Repeat these same steps for the remaining 5 strips until they are all attached together in one long strip. When you are done all 7 strips should be sewn together and seams ironed open.
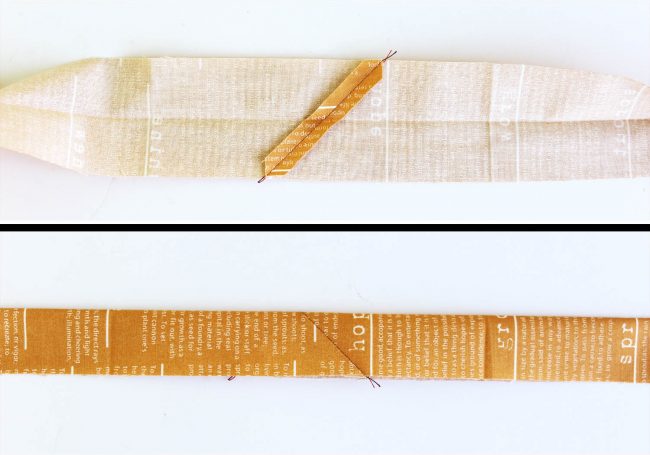
Take this long strip to the ironing board and fold it in half, wrong sides together. The strip will be very long, but now 1.25″ wide. Press and take care to line up the raw edges. This is your binding strip, shown at the bottom on the photo above.
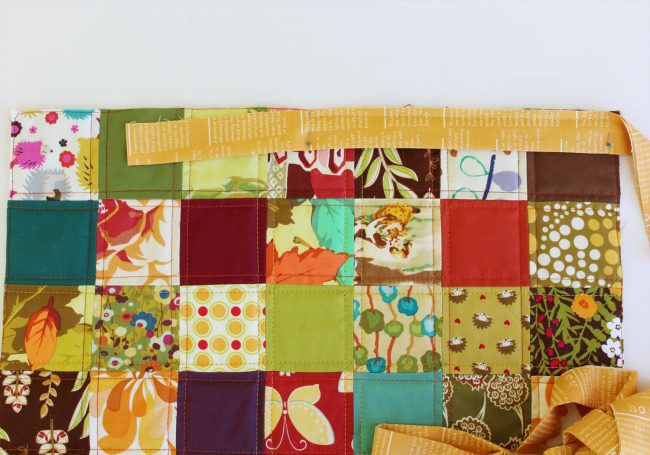
Step 21: Take one of your placemats and starting on one long side, line up the raw edge of the binding with the raw edge of the placemats. Start the binding roughly 3″ – 4″ from the edge of the placemats. Leave a 4″ tail of the binding free and pin. Then pulling the binding taught and not tight go all the way to the end of the placemats and put a pin 1/4″ from the edge. Lining up raw edges. Sew from pin to pin using a 2.5 stitch length, size 14 needle and matching thread. Backstitch at both ends. Make sure that you stop 1/4″ from the end, do not sew all the way to the end of the placemats. Remove pins.
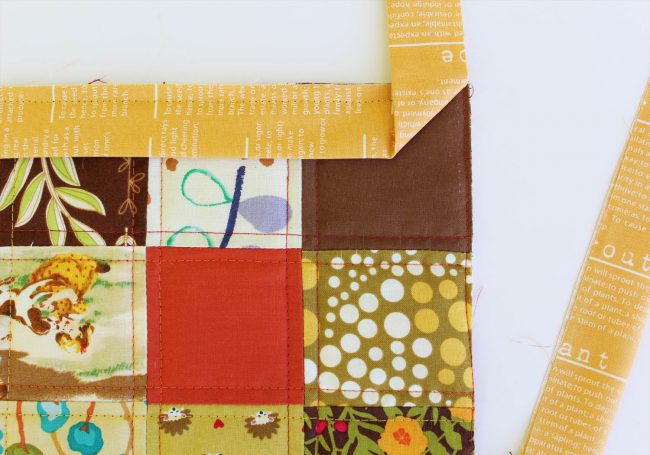
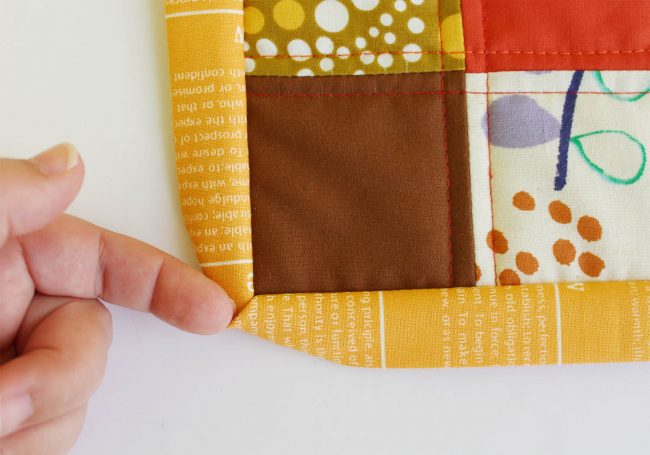
Grab the binding and fold it straight up, creating a 45-degree angle. Finger press.
Step 22: Now fold the binding back down, lining up raw edges. Place a pin at the 45 degree angle. You can see that this creates a triangle fold of fabric in the corner of the placemats. The folded edge of the binding triangle should be even with the raw edge of the placemats.
In the exact same manner as before, line up raw edges and pull the binding taught all the way to the end. Pin 1/4″ away from the edge of the placemats. Sew this seam from pin to pin. Stopping and starting 1/4″ away from both ends of the placemats, backstitching at both ends. Remove pins.
Continue this same process for the rest of the placemats, having triangle folds at each corner. Stop when you get to the last corner.
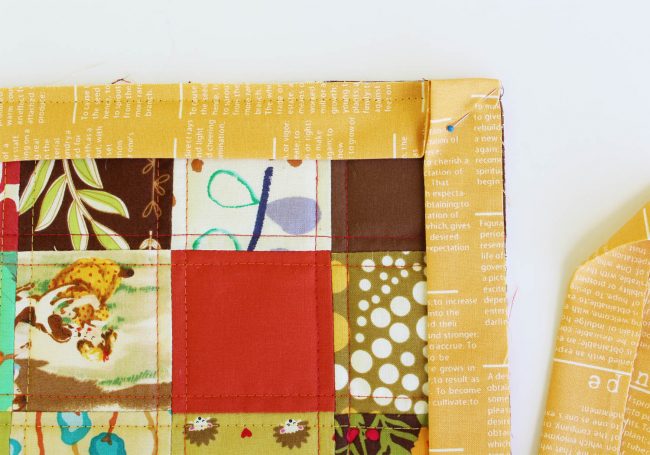
Step 23: Now that you have reached the last corner, create the triangle fold in the same manner and pin. We are back at the point where we started and have to join the binding strip together. Overlap the binding as shown above, place a pin in the top strip where the two meet. Then cut 1/2″ away from this pin marking. The binding should extend 1/2″ over the other binding end.

For this step I like to use a clip and pinch/fold the placemats together (taking the tension off the binding.) Open up the two ends of the binding and right sides together (don’t twist anything) pin the two ends together. Sew with a 1/4″ seam allowance. Remove pins.
Step 25: Take the clip off the placemats (if you put one) and iron the seam open or to the side. Test the fit of the binding on the placemats. If it is too loose, repeat the above process and sew another seam, making the binding a little tighter. If the binding is too tight, remove the initial seam and sew a scant 1/4″ seam. My binding was a little loose, so I sewed a second seam just in a hair from the original seam and pressed to the side. You can see I have two rows of stitching in brown above.
Finish sewing on the binding, sewing from the pinned triangle edge all the way to where you originally started sewing. Backstitch at both ends.
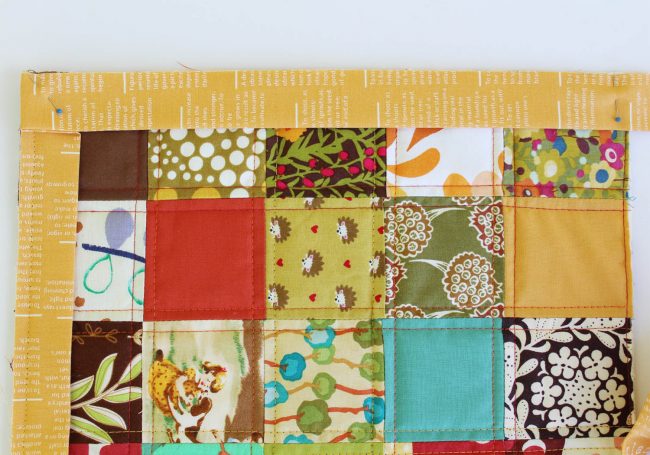
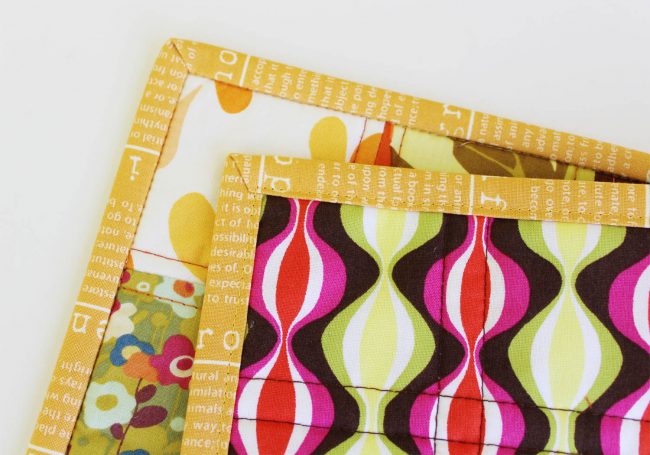
The placemats should now look like the photo above. All four sides have binding sewn on to them. The binding makes a complete loop. All four corners should have folded triangles that are little free flaps.
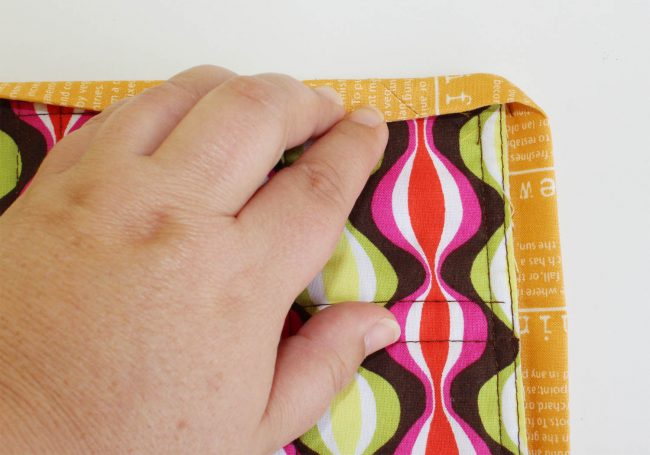
Step 26: Fold the binding out flat and iron. You have to sort of “flip” the corners out.
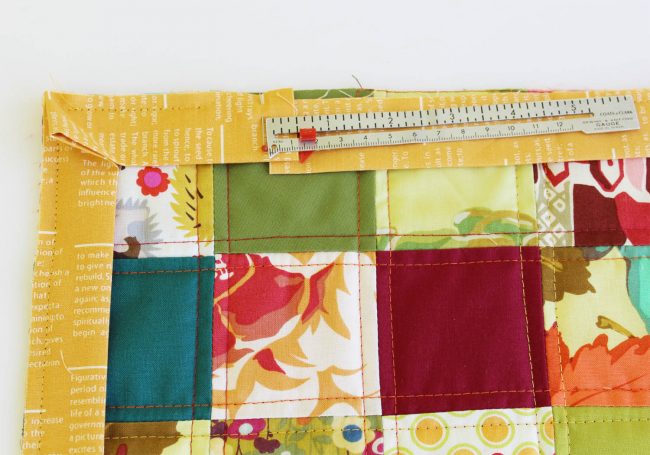
When you flip the corners out, you can use your finger (or fingernail) to carefully work the mitered corner into a perfect 45 degree angle. Now is the time to get the front mitered corners perfect, take your time. You can’t fix this step later.
Flip the placemats to the back and fold over the binding just so that it covers the stitching slightly. Iron all four sides. In the corners you will be creating a mitered corner. Working on one side/corner at a time, fold the binding over and make sure the fold continues onto the open side binding. This creates a slight 45 degree angle at the top corner, see the photo above.
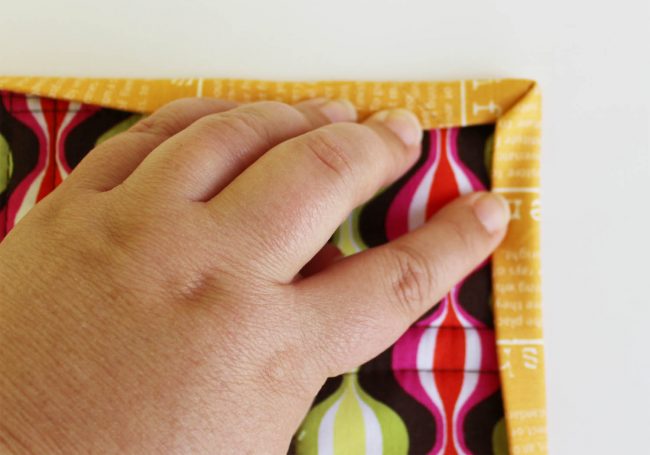
Now when you fold the side binding over, it creates the mitered corner. See how nice that looks. It takes some practice, but take your time and you can get it just right.
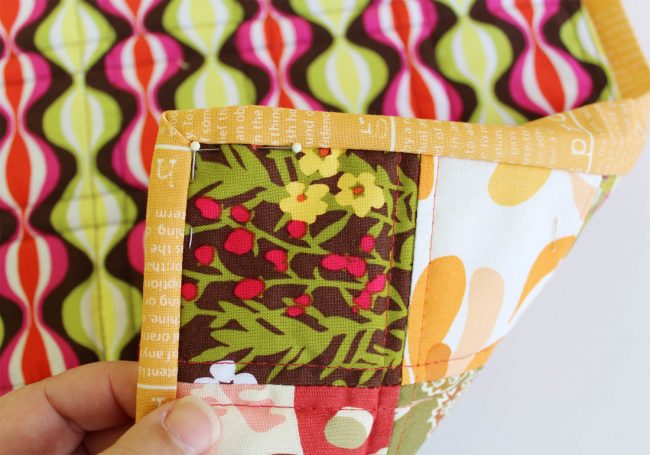
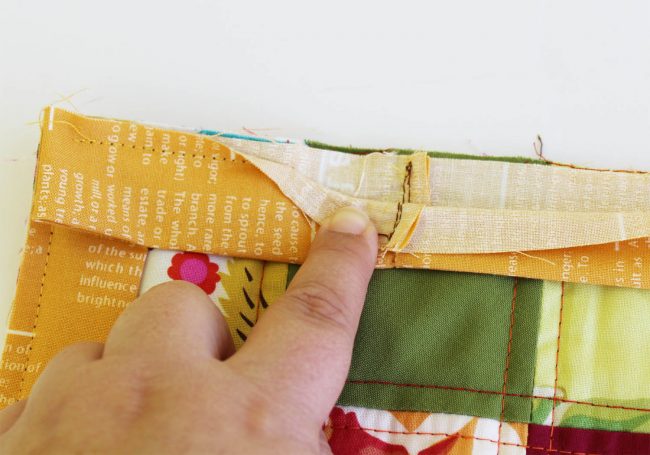
Step 27: Once you have your corner mitered just how you want it, put pins in from the front to hold it in place. Notice how I have the pins right next to the binding so that it catches the binding on the back. Iron from the back. You can continue to pin from the front, all four corners and then all four sides if you want to use pins to hold the binding in place.
My preferred method and what I think works best for beginners is to use Elmer’s washable school glue. Instead of using pins, run a tiny bead of glue right on the inside of the binding edge and then fold it over. Immediately iron it, which instantly dries the glue. Carefully glue the corners once you have them ironed how you like. The photo above shows my glued binding. It covers the rows of stitching and the corners are neat and mitered. No pins are used on the front.
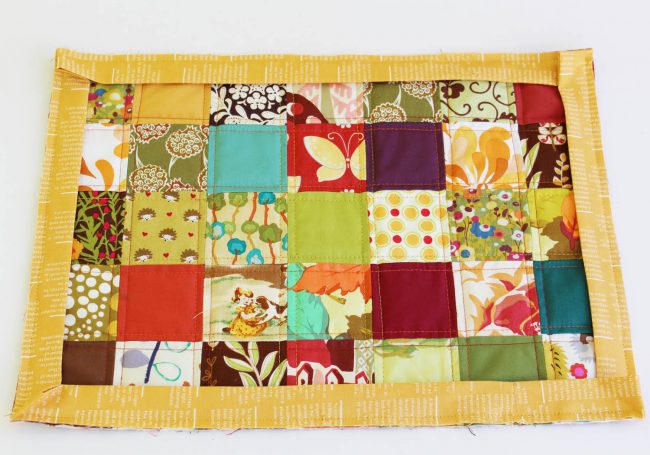
Step 28: Using thread that matches the binding in the bobbin and thread that blends in with the patchwork top on top. Flip the placemats over and begin sewing the binding from the top. Start in the middle of one of the sides and start sewing using a 3.0 stitch length right next to the binding. Sew as close to the binding as you can without sewing on top of the binding. Sew around the entire placemat, backstitching when you are finished. Flip the placemats over and make sure that you caught all of the binding in your stitching.
The photo above shows that you can barely see the stitching on the front of the placemats. On the back the matching thread blends into the binding and I caught all the binding all the way around. The glue held everything perfectly in place and nothing shifted.
Step 29: If you flip your placemats over and see that the stitching didn’t catch all of the binding, unpick those areas and try again. If you use pins, this may happen. No big deal, you just have to fix those spots that the stitching didn’t catch.
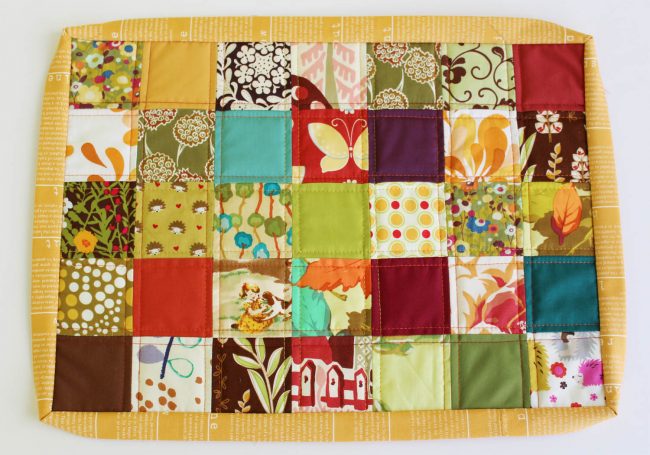
Congratulations! You have successfully finished creating your own placemats. Now that you have finished your quilted placemats you have all the building blocks needed to create many more quilted projects.
Thank you for joining us for our tutorial on how to make quilted placemats. Before you leave, make sure to follow us on Instagram or Pinterest and join our Facebook Group. Happy Sewing!