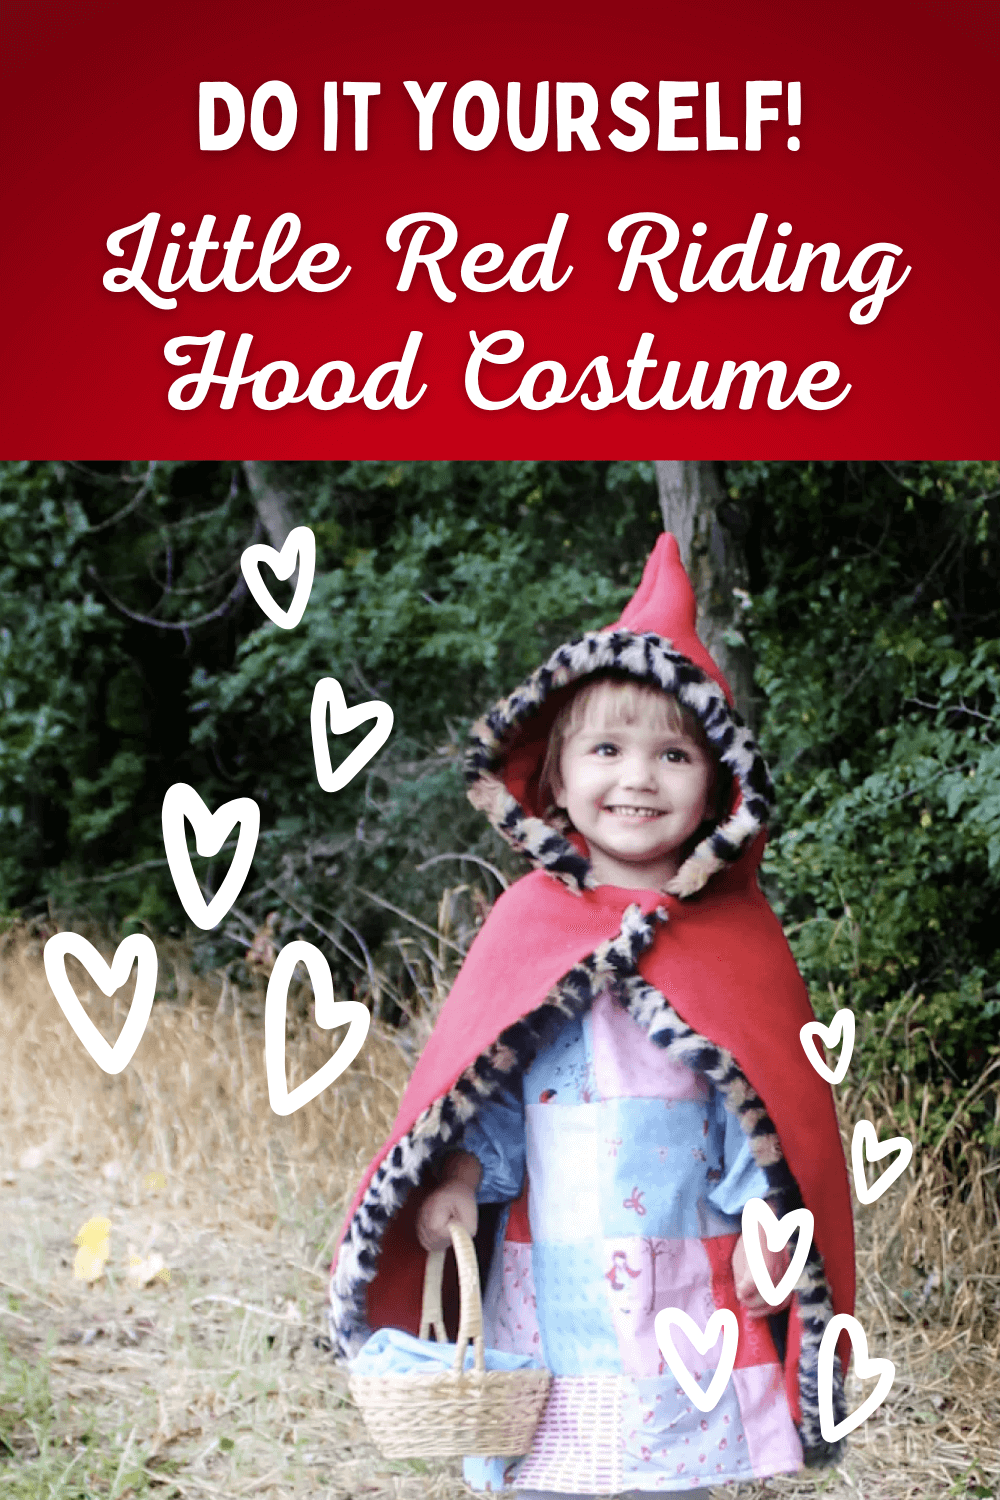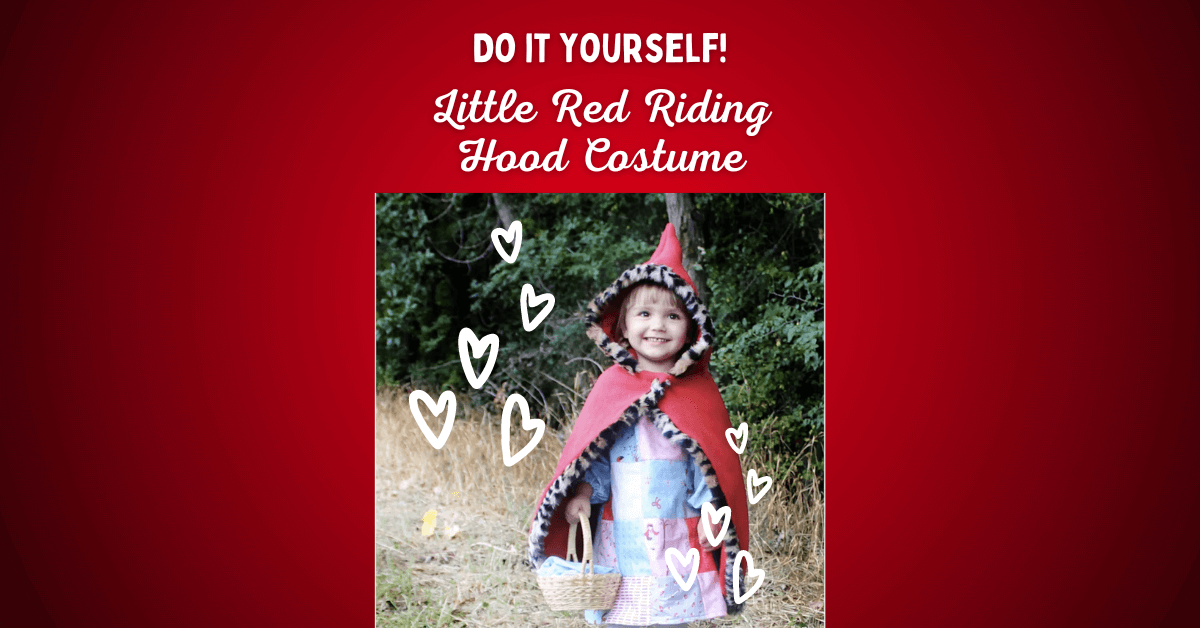
DIY Little Red Riding Hood Costume | Free Family Costume Tutorials
Today, I’m going to show you how to make a DIY Little Red Riding Hood Costume. Not only that but we’re going to turn this into a family costume and make Little Red Riding Hood inspired costumes for the entire family.
Let’s get started
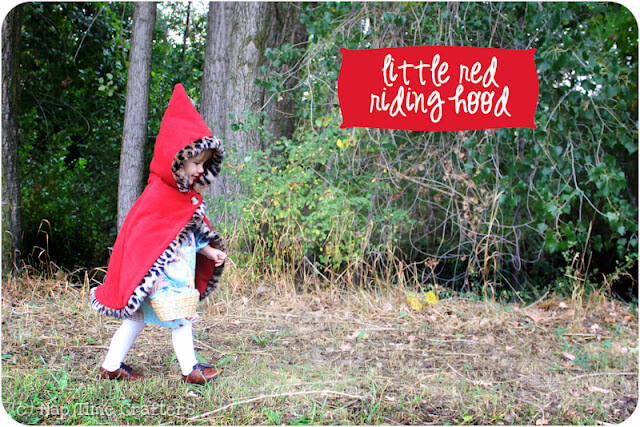
DIY Little Red Riding Hood Costumes | Family Costume Idea
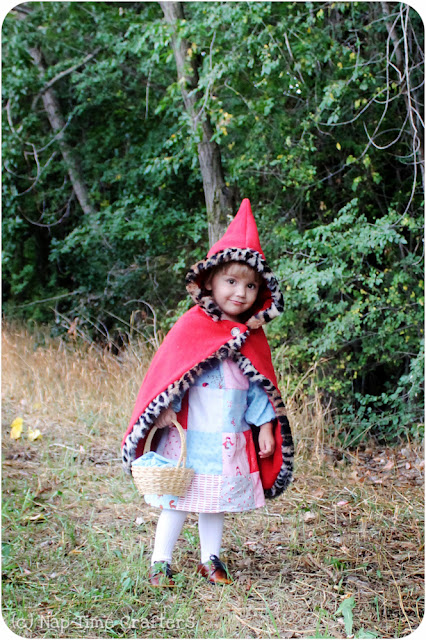
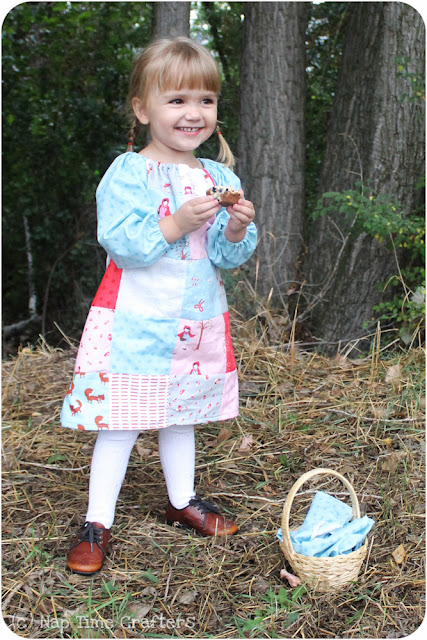
I have to admit that Anne didn’t even know who Little Red Riding Hood was but a quick trip to the library and she became an immediate fan. I did sugarcoat the part about the wolf eating grandma just a bit 🙂
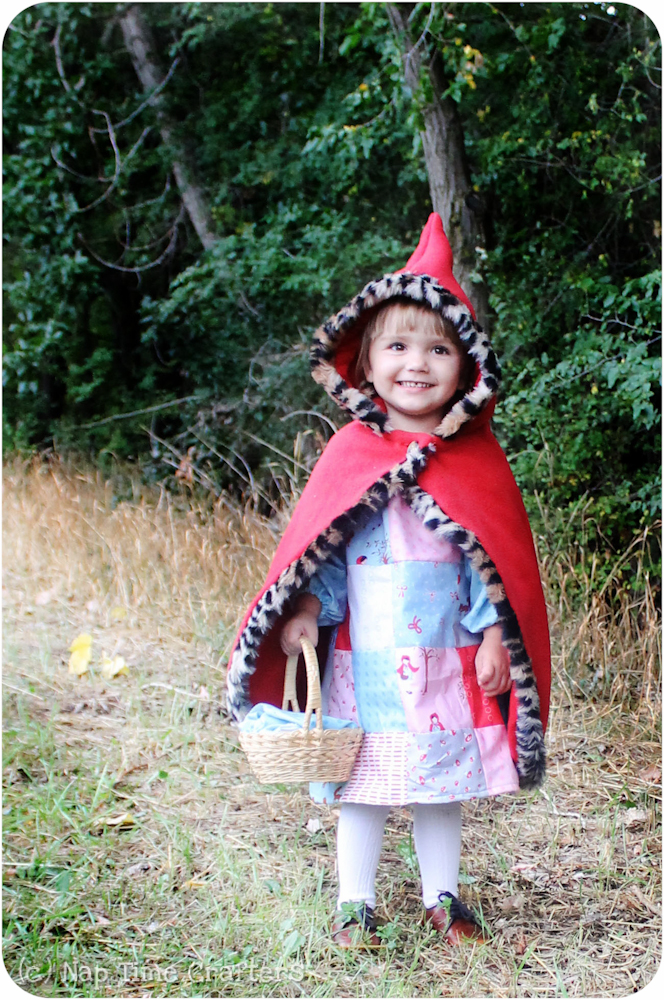
She was even more excited when she found out she got to carry a little basket filled with muffins!
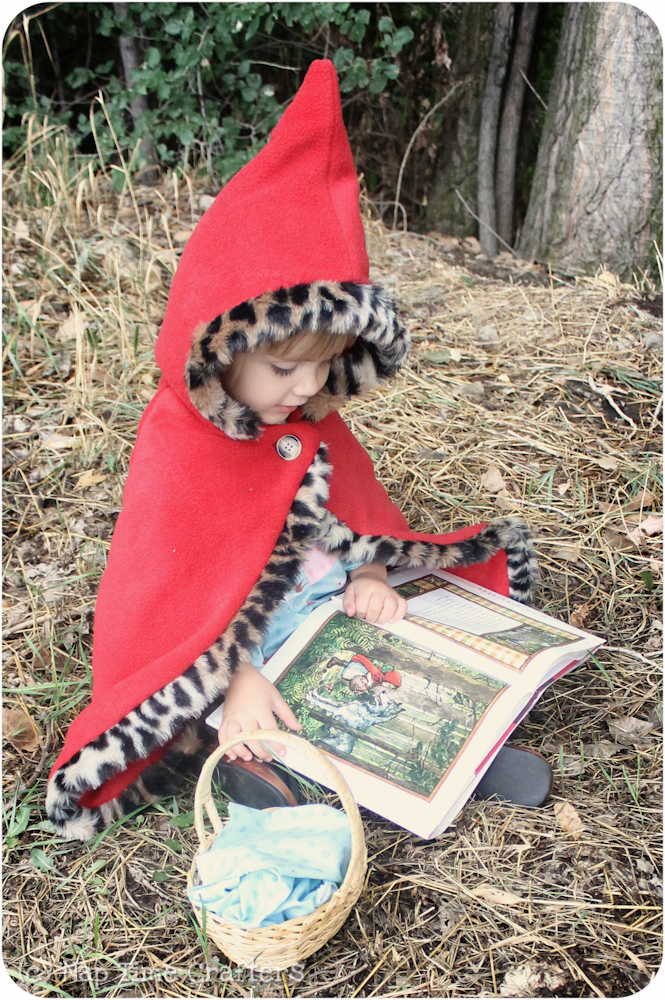
And I'm pretty obsessed with how cute she looks in this DIY Little Red Riding Hood Costume:)
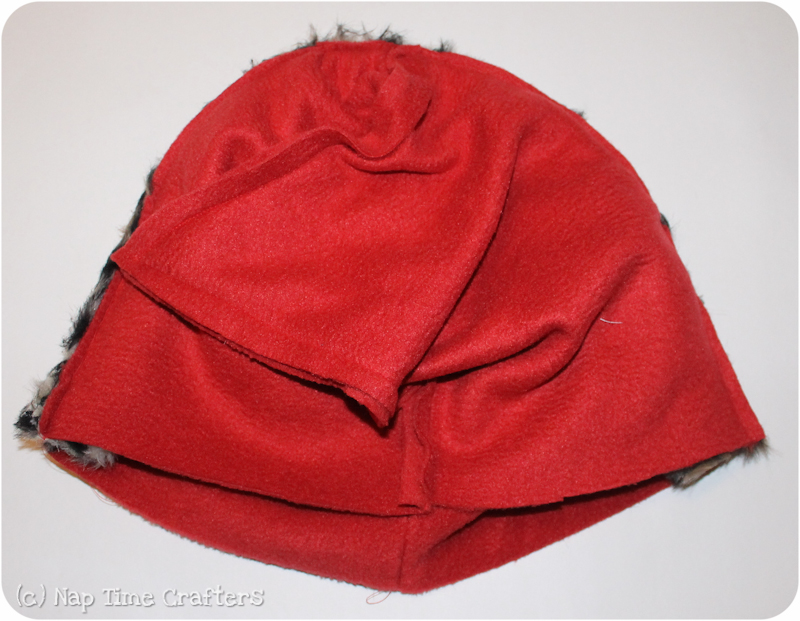
Since the cape is made from fleece it will be plenty warm for trick or treating. And I really couldn't resist adding a bit of fur trim just for fun. I think she appreciates it :)

Costume 1 | Little Red Riding Hood Costume Cape
Let’s start with the DIY little red riding hood costume cape!
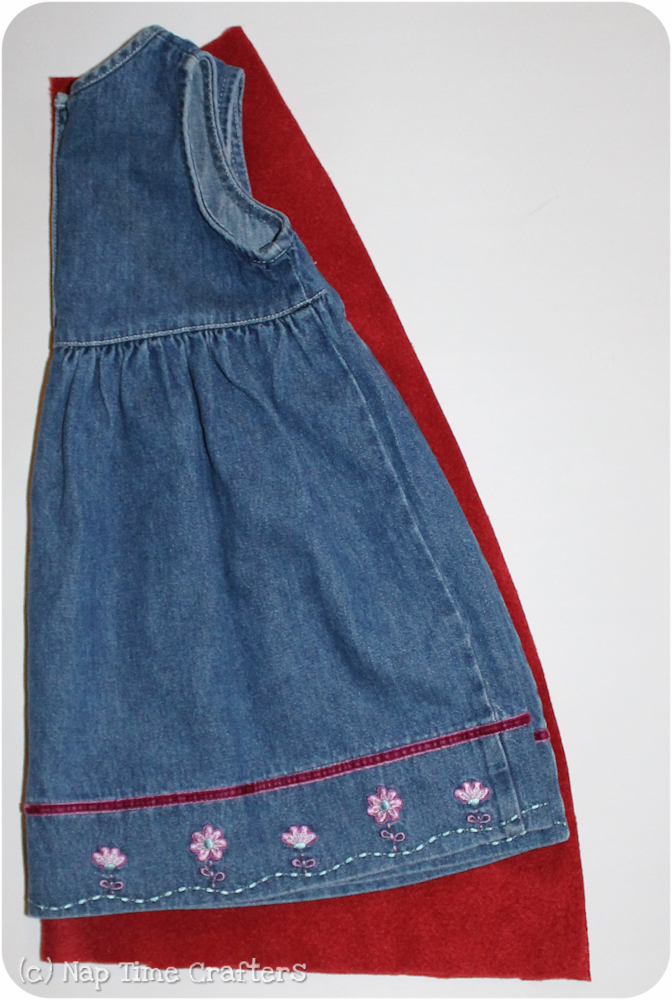
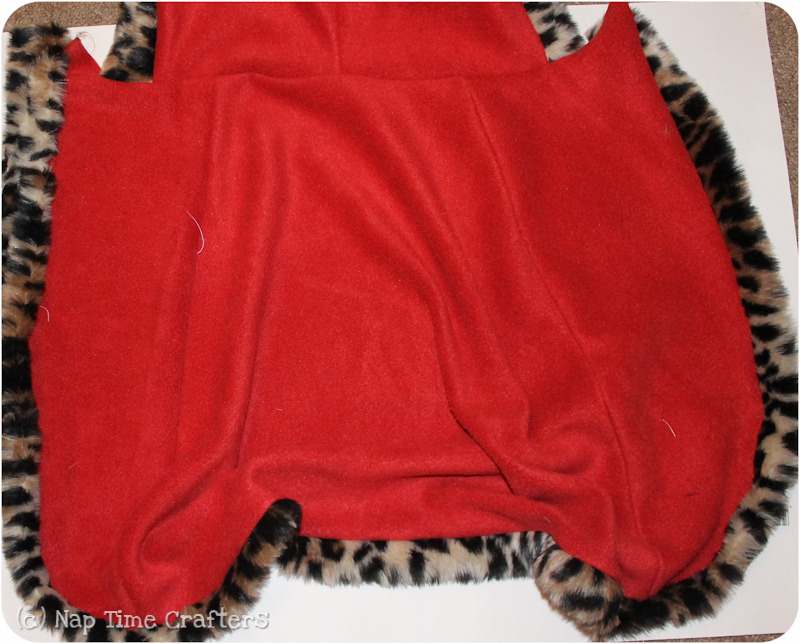
Cape Step 1: I wanted my cape to be nice and long so I used a dress as a guideline to cut out the back. I cut on the fold to make sure it was symmetrical. (*note- follow the curve of the dress. I went back and trimmed off that bit later). Since my cape has fur trim I made it fully lined and cut 2 of each piece.
Cape Step 2: I wanted the front pieces to overlap so they could button (much easier and no strangulation risk), but I still wanted her hands to be able to stick out fairly easily so I tapered the pieces so the cape is open in the front.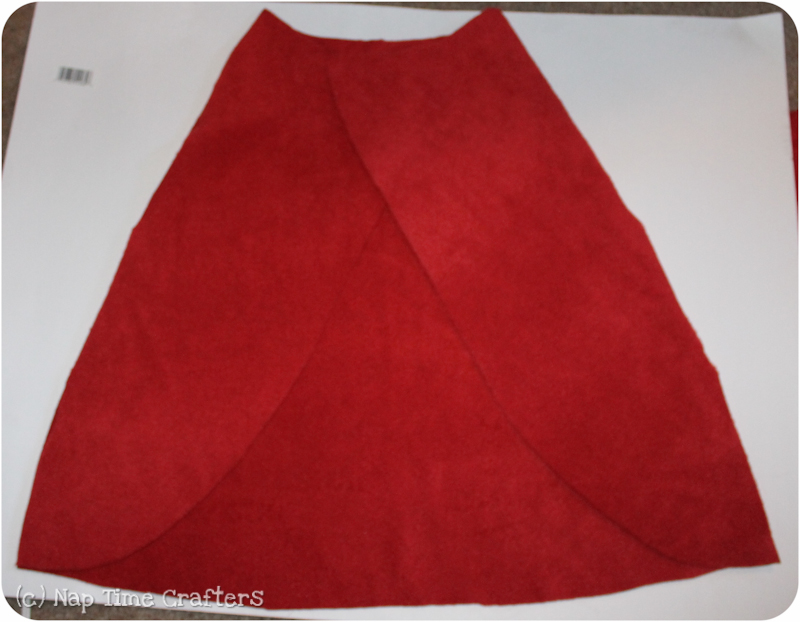
Cape Step 3: For the red riding "hood" I just used a sweatshirt hood as a guide and then made it a bit taller and pointier (I probably got a bit carried away, but I think it turned nice and fairytaleish...). You'll need pieces to form the hood (or 4 if you're lining it).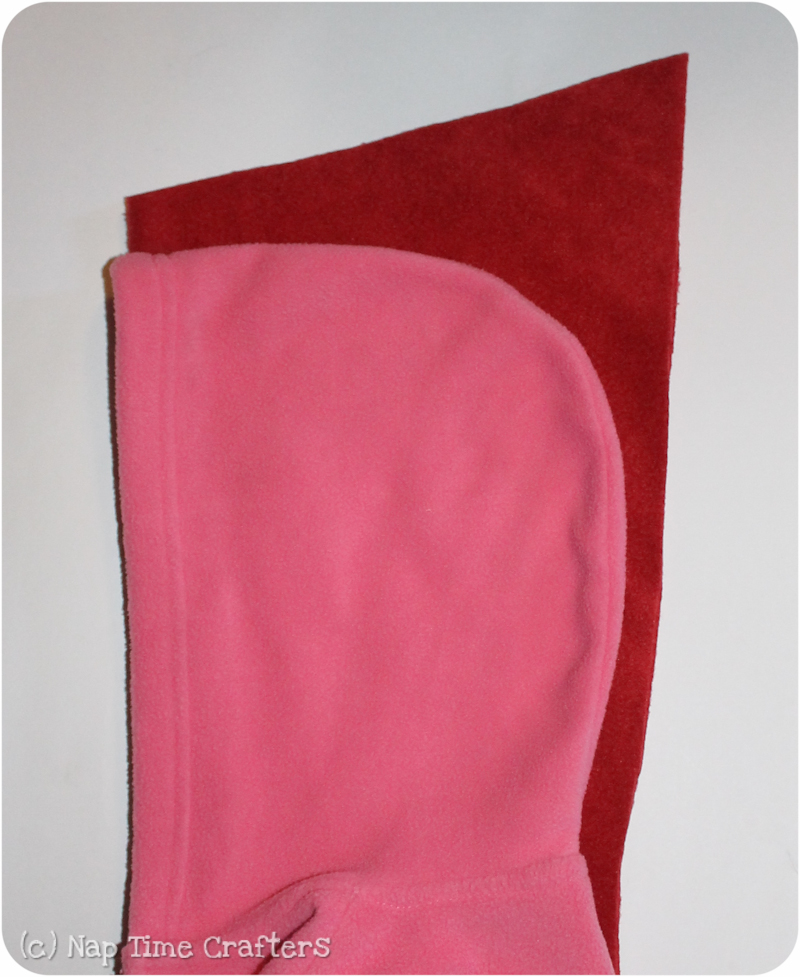
Cape Step 4: Sew the hood pieces together leaving it open along the front
Cape Step 5: Cut a piece of fur trim to twice your finished width plus seam allowances and the length of the front opening. Fold the trim in half with wrong sides together and baste the raw edges of the trim to the right side of the hood.
Cape Step 6: Slide your hood lining on top with right sides together and sew together along the front opening (the fur will be in-between our 2 layers). Turn right side out.
Cape Step 7: Sew the 2 front pieces to the back along the side seams.

Cape Step 8: With right sides together baste the hood to the neckline (you should have some extra cape where the pieces will overlap)

Cape Step 9: Baste fur trim to the sides and bottom of the cape on the right side of the cape
Cape Step 10: The trim should curve off the edge 1/2" before the neckline edge. Otherwise, your trim will get caught in the final seam.

Cape Step 11: Slide the two capes together (the trim and hood will be in-between the two capes) and sew together leaving a gap for turning along the top edge inside the hood portion.

Cape Step 12: Turn right side out and then hand stitch the gap shut

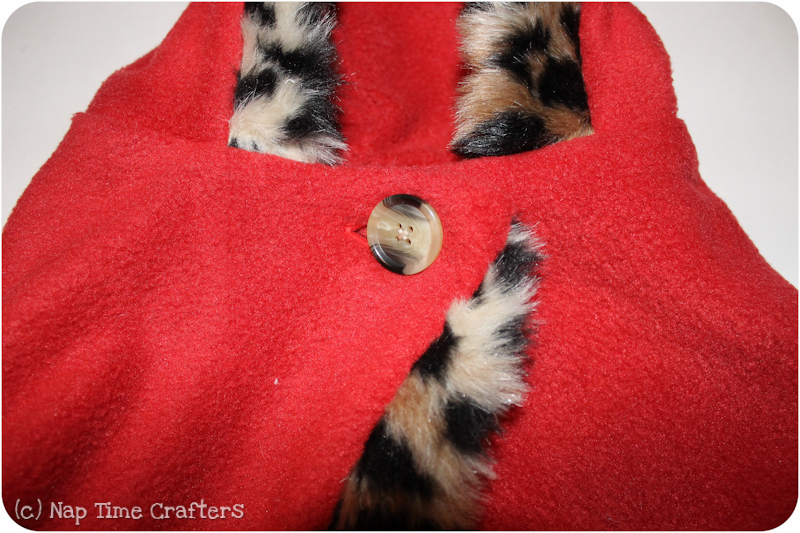
Red Riding Hood Cape Step 13: Sew on a button and buttonhole
And enjoy your finished DIY little red riding hood costume cape!
DIY Little Red Riding Hood Costume Instructions for the Dress
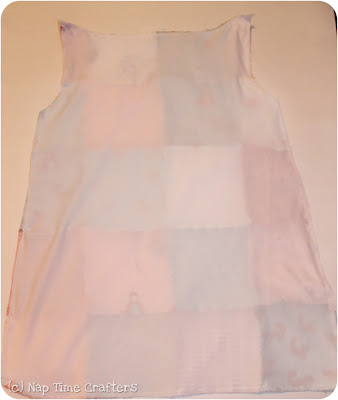
Dress Step 1: I used a charm pack so to start with I arranged my squares and then quilted them together. One 5×4 piece for the front and one for the back. I ended up with 2 extra squares and I’d say I made a size 3. I used a 1/2 yard for the sleeves and lining in the basket
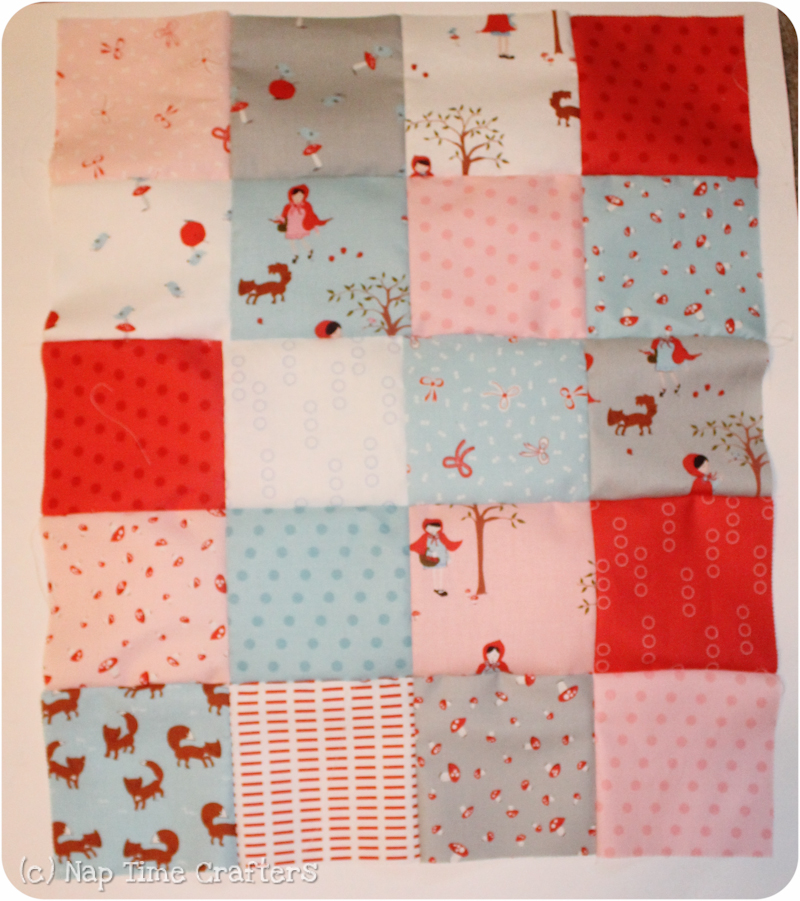
Step 2: Now that the fabric is quilted you can cut out your front and back.

Step 3: The sleeves follow the same curve as the armholes on the dress and have the same neckline curve as well
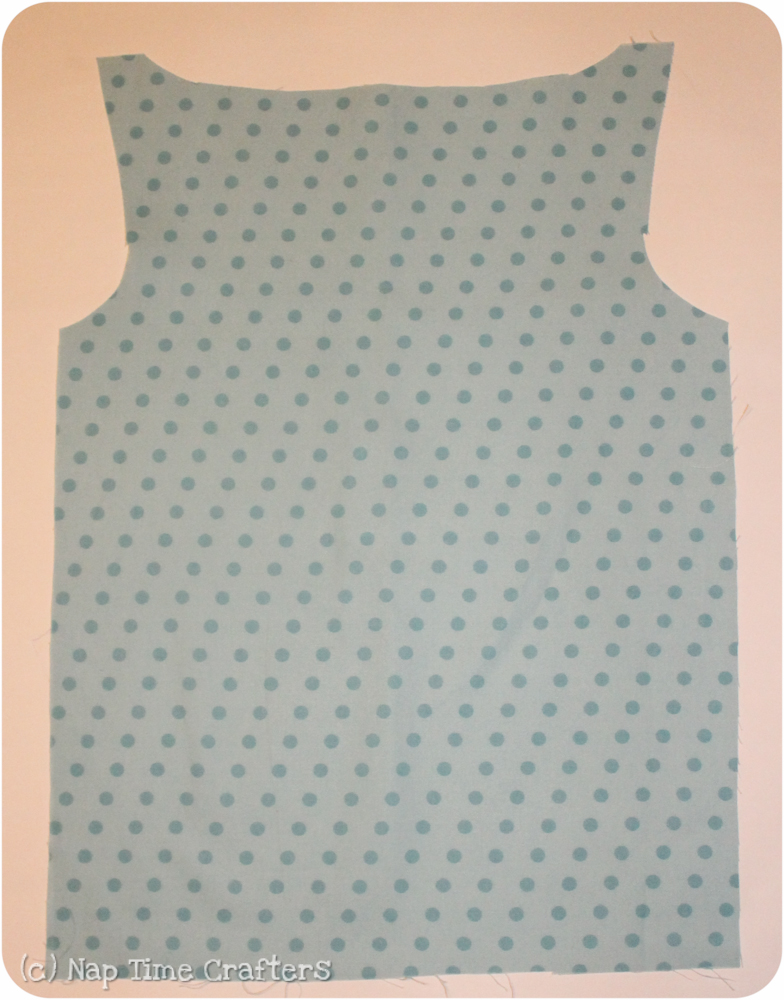
Step 4: To keep the dress from being itchy I basted a lightweight lining to the backside
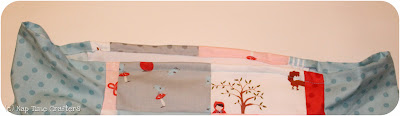
Step 5: With right sides together sew your sleeves to the front of the dress

Step 6: Then add the back (sorry no photo). Next sew up the side seams and arm inseams in one continuous seam.

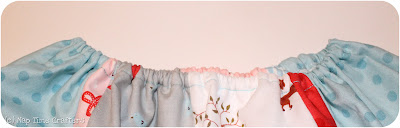
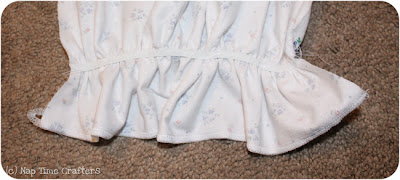
Step 7: Fold over the top edge of the neckline twice to form your casing. Topstitch along the bottom edge of the casing leaving a gap for the elastic
Step 8:Thread the elastic through and sew the gap in the casing shut to finish the neckline. You can repeat this for the sleeves or just hem the sleeves if you like them wide.
Costume 2 | Big Bad Wolf Costume
Look out red….he’s right behind you! Use This DIY Big Bad Wolf Costume Tutorial to Make the Big Bad Wolf to Your Little Red Riding Hood!…and what a ferocious little wolf he is!

Since Will is only 6 months old we went for a friendly approach 🙂 And I wanted the whole costume to be nice and warm for trick or treating so the whole thing is made from fleece. Yup he’s snug and warm! Oops forgot to find those little hands…

DIY Big Bad Wolf Costume Instructions
For the base of the costume, I made him a pair of Classic Zipper PJs which work well for starting off almost any costume. You can pick up a copy of the pattern in the shop and make a few alterations:

Wolf Costume Step 1: First I top stitched on a tail. For a walking kiddo, I would make a full-blown tail but since he’ll just be in a stroller or sitting on my lap I went with a flat version for comfort.
Wolf Costume Step 2: On the front pieces, I topstitched on a white tummy.
Wolf Costume Step 3: And I made the toe portions white with some little toenails stitched on.

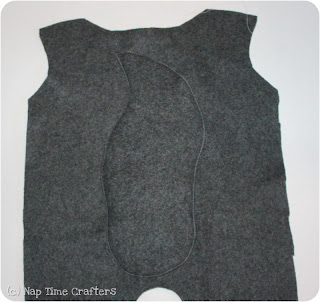
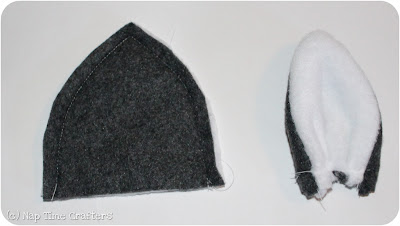
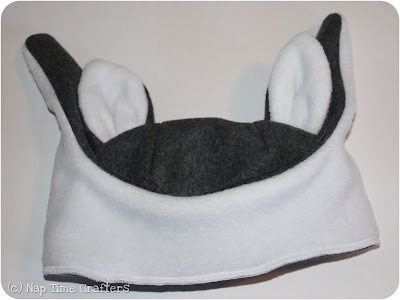
Wolf Costume Step 4: Now for the hat! And you could use this to make any animal. Or skip the ears and you just have a cute basic winter hat.
I cut 2 half circles for the top and then a band for the bottom and straps. The top pieces have a finished circumference just wider than his head circumference. Don’t forget your ears! You need to also cut a liner for each ear and the bottom piece.

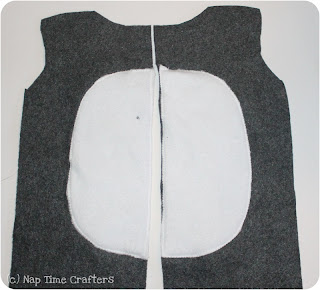
Wolf Costume Step 5: Sew the lining to the bottom piece around the bottom curved edge. Leave the 2 sides and top open.
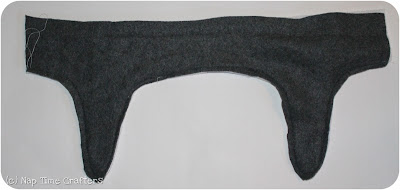
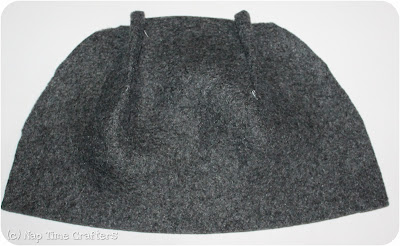
Wolf Costume Step 6: Turn right side out and then sew across the side seams.

Wolf Costume Step 7: You should now have this. If you want you can topstitch to help it lay flat.
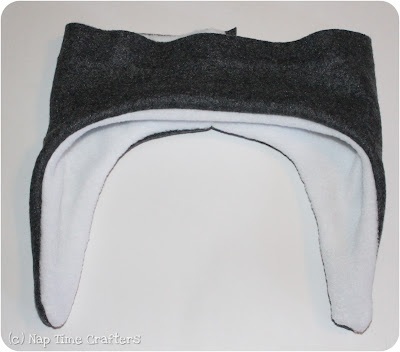
Wolf Costume Step 8: To make your ears sew together along the sides and then flip the right side out. Sew a basting stitch across the bottom and gather slightly to shape each ear.
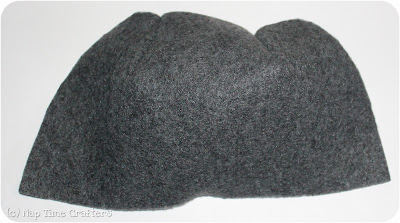
Wolf Costume Step 9: To help give the hat some shape sew 2-3 darts across the top.
Wolf Costume Step 10: It should now be rounded.
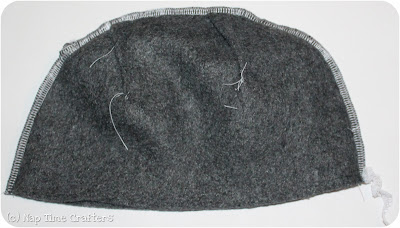
Wolf Costume Step 11: Baste the 2 ears to one side of the hat

Wolf Costume Step 12: With right sides together sew the 2 hat halves together
Wolf Costume Step 13: With the right sides together sew the bottom band on.
Wolf Costume Step 14: Topstitch on a face 🙂
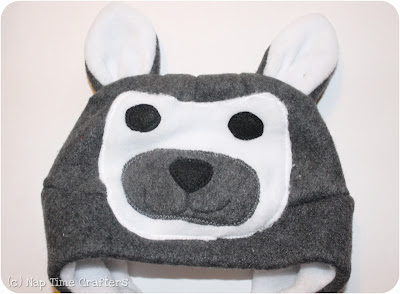
Wolf Costume Step 15: Add some velcro and you’re all set with the DIY Big Bad Wolf Costume!

Costume 3 | DIY Woodcutter Costume
To finish off our Red Riding Hood theme this year my husband is going as the woodcutter. The woodcutter costume is perfect for someone who would rather not dress up 🙂

Shirt and suspenders courtesy of my brother’s closet and I whipped up a quick hatchet using a paper towel tube, grey card stock and some tape. Easy peasy and didn’t cost a cent!
Costume 4 | DIY Granny Costume
Now we’re making a DIY Grannny Costume. Red Riding Hood wouldn’t be complete without a granny! So I volunteered to fill that spot. Something about getting to wear a nightgown was pretty appealing 🙂
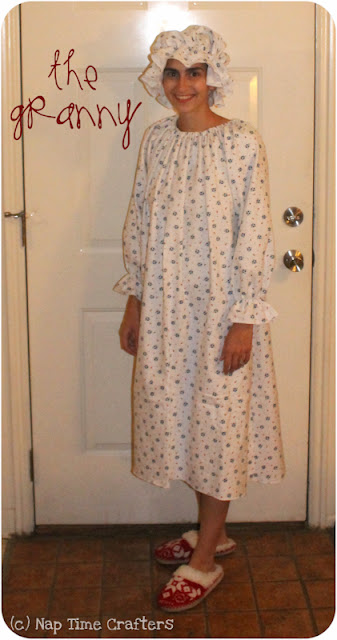 Now I hope you all love me lots and lots for posting one of the more embarrassing photos of me ever. Not to mention the very bad lighting in our basement apartment at night… If only the cuties had been awake they could have joined me for the photo.
DIY Grandma Costume Instructions
Oh well… on to the DIY grandma costume tutorial
For the cap, I cut a big circle (about 2 feet across) and serged the edges. I cut a piece of 1/4″ elastic to just smaller than my head circumference and marked it off in 1/4s. Next, I tacked it down at each 1/4 point in the circle a few inches in.
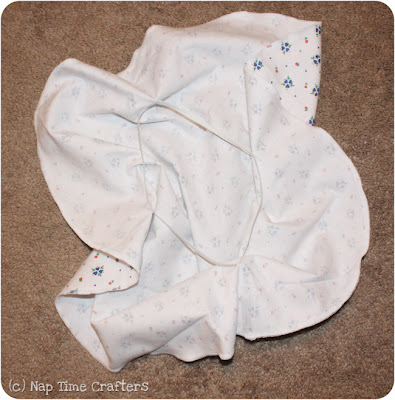
Then I stretched the elastic out and sewed over it with a zig-zag stitch all the way around. I couldn’t quite stretch it enough to go all the way around so I just made a few little tucks in the fabric as I sewed.

For the nightgown I used the same method as Red’s dress:
The only change I made was to zig-zag on a piece of elastic a few inches up for the end of each sleeve to create a nice ruffle. The ends of the sleeve are just serged.
 I would’ve liked to add a nice big ruffle to the bottom but I ran out of the fabric so I just left it as is.
Or you could just pick up something at the thrift store 🙂 That’s probably the route I would’ve taken but I had a ton of this granny flannel in my stash from who knows where that was crying out to be used. And the whole thing sewed up during the presidential debate so it wasn’t too long of a project.
Alright, well that wraps up our tutorials for the DIY Little Red Riding Hood costume. You should be able to get the whole family dressed up as Little Red now!
How can I add unique touches to my DIY Little Red Riding Hood costume?
Customize your DIY Little Red Riding Hood costume with embroidered details and lace trim on the cape. Add accessories like a wicker basket with faux flowers or a small stuffed animal to your dress for a whimsical touch.
Thank you for joining us for Little Red Riding Hood today! Make sure to visit our Costume Section for our other DIY costume tutorials. As always, be sure to join our sewing community in the Peek-a-Boo Pattern Shop Facebook Group.