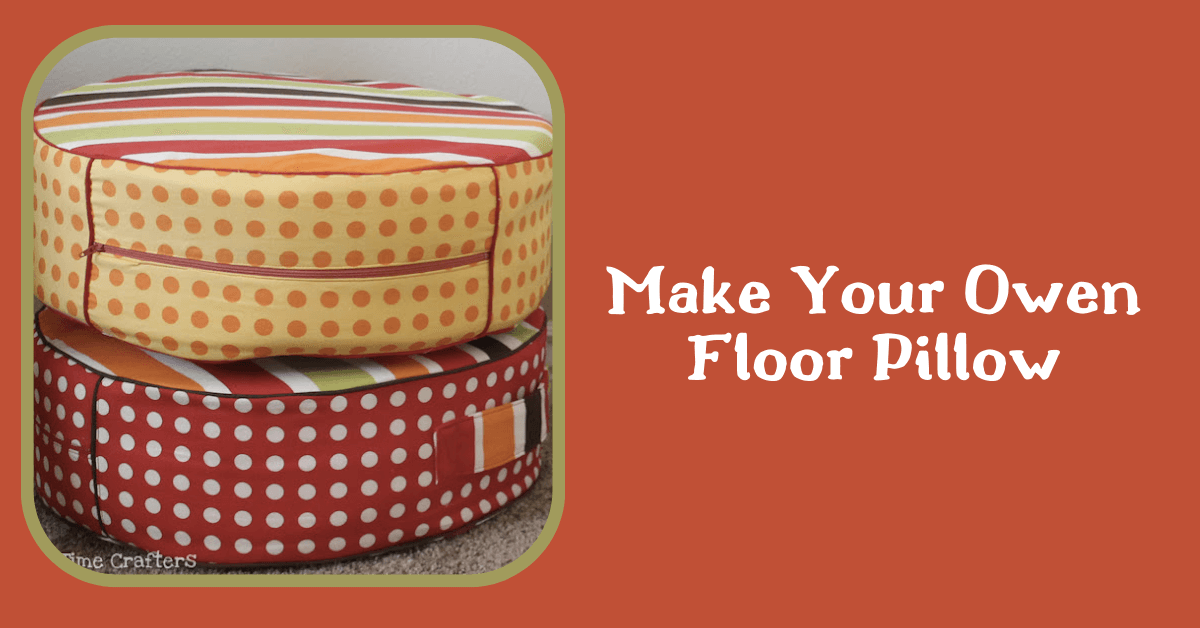
How to Make a Floor Pillow
Let's learn how to make a floor pillow. DIY floor pillows are a fun and easy addition to any playroom, tv room, or another area in your home that your little ones will surely love. Making them is a quick and easy process that requires minimal effort. These make great large floor cushions for a living room or family room and are a simple and easy DIY project. You can even add some decorative elements to personalize the pillows further, such as appliques or embroidery. Not only will these DIY floor pillows enhance the decor of your home, but they will also provide a comfortable spot for kids to lounge on while playing or watching TV.
We'll go through each step of this easy tutorial today. Let's get started!
How to Make a Floor Pillow
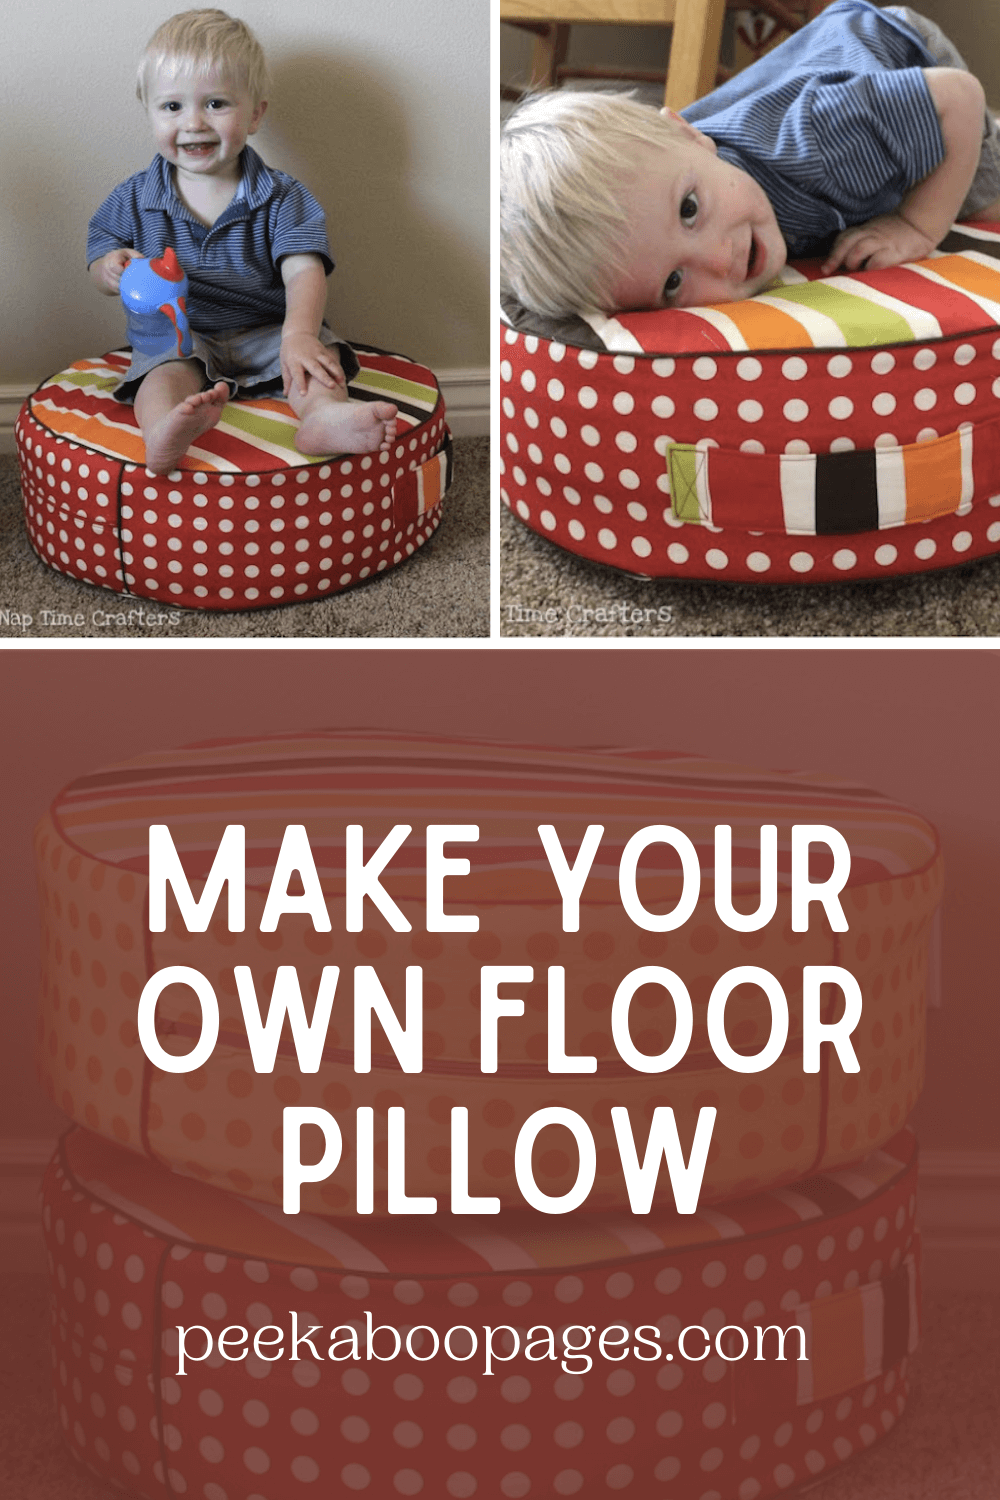
The DIY floor pillows are perfect for having a little snack break on…

Or having a little rest

Or if you have older kids these are also perfect for jumping! Anne loves jumping up and down on these without getting in trouble 🙂
They have a zipper so you can remove the stuffing if you need to wash them. Not that my toddlers ever spill on things 🙂 And a fun little handle for toting them around.

DIY Floor Pillow Materials & Fabric
Floor Pillow Fabric:
- 2/3 yard of fabric for the main part (this is the top, bottom and handle)
- 1/2 yard contrast fabric for side panels (my cushion was 6″ tall. For a lower cushion you could get away with 1/3 yard)
- 2 yards Medium or Heavyweight Interfacing: I added this too all of my pieces before starting
- 4 yards of piping (optional)
Floor Pillow Foam: This can be pricey at the craft store. I cut up an old mattress topper and I’ve heard you can also buy a big slab at Home Depot for $20 and which would give you enough for 2 cushions. You can find it in the camping section. Of course you could use a variety of other foams, fiberfill, etc.
Floor Pillow Zipper: I used the 14″ zippers for my DIY floor pillow and with my heavy-duty foam it was a bit of a squeeze so you may want to go a bit bigger.
What's the Best Fabric for a Floor Pillow?
When choosing fabric for a floor pillow, consider durability, comfort, and ease of maintenance. You could use a variety of different woven fabrics. Indoor outdoor fabric with a protective coating is a good choice for added protection from stains.
How to Make a Floor Pillow
Step 1: Cut out a top and bottom circle with a 20 inch diameter. I cut a string to 10″ and pinned it in the center and taped a pen to the other end to create a make shift compass (remember those???). I then folded it in quarters to make sure everything lined up well and cut them out. If you want to do piping baste that to the outer edge overlapping your 2 ends. I find it’s easiest to use my zipper foot for this step.

Step 2: For a 20″ circle your finished side panel needs to be 61.25″. I made my panels 7″ tall based on the height of the foam I was using (I wanted two 3″ layers in each cushion). If you get a nice long zipper you can go with two 31.5″ panels and use 1/2″ seam allowances to join them together. I’ll leave the rest of the math up to you based on your zipper size 🙂
The zipper panel needs to be 1″ taller than your other panels (mine was 8″) and 1″ longer than your zipper length. Cut the panel in half so you have 2 long skinny pieces and then with right sides together sew one side of the zipper to the 1st piece.
Step 3: Sew the other side of your zipper to the 2nd zipper panel with right sides together.
You’ll now have this…

Step 4: Flip it over and topstitch the zipper to the fabric right along the zipper edge
Step 5: For an extra pop you can add piping along both short edges of the zipper panel
Step 6: I cut my handles to 9 x 5″. Press all edges in 1/4″ and then fold in half with the long edges lined up and topstitch around all edges.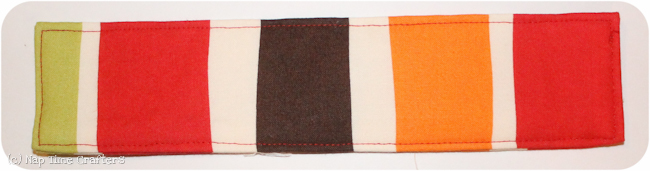
Step 7: Center the handle on the non-zipper pillow panel and topstitch each end in place with a barn door stitching pattern. You can either have the handle laying flat or you can scoot each end in a bit so the handle pops up. I think it’s a bit easier for little hands to grab if it’s sticking out some.
Step 8: With right sides together sew your panels together along the short edges.
Step 9: Topstitch next to the piping on each pillow case.
Step 10: Carefully pin your finished panel to the bottom piece. If it’s a bit too big or small you can adjust by changing your seam allowances from step 7. If you measured carefully you should be good to go 🙂 Sew together right along the piping edge (I ended up using a 1/4″ seam allowance).
Step 11: Unzip your pillow zipper at least 6″ and then sew on the top panel of the pillow. Turn the right side out through the zipper opening.
Step 12: Cut your foam for the pillows out using a serrated knife. I ended up using 2 layers of foam for each pillow cushion.
Step 13: Stuff the foam in the pillows and zip them shut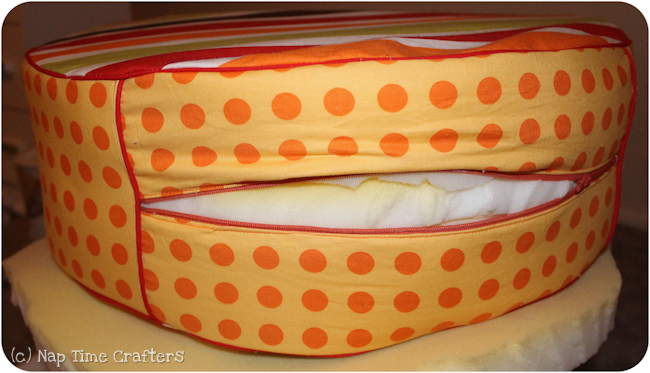
Now you know how to make a floor pillow! Making floor pillows can be a fun and rewarding DIY project that adds both comfort and style to your home decor. By following the steps outlined in this blog, you can learn how to sew your own cute pillows and customize them to fit your personal taste. Whether you're looking for extra seatin, or some unique throw pillows, these DIY floor pillows are a versatile addition to any space. So grab your sewing machine and make this your next sewing project.
Thanks again for joining us. Before you leave, come visit us in our Peek-a-Boo Pattern Shop Facebook Group to ask sewing-related questions and share what you make! You can also subscribe to our email newsletter below or follow us on Instagram. Happy Sewing!