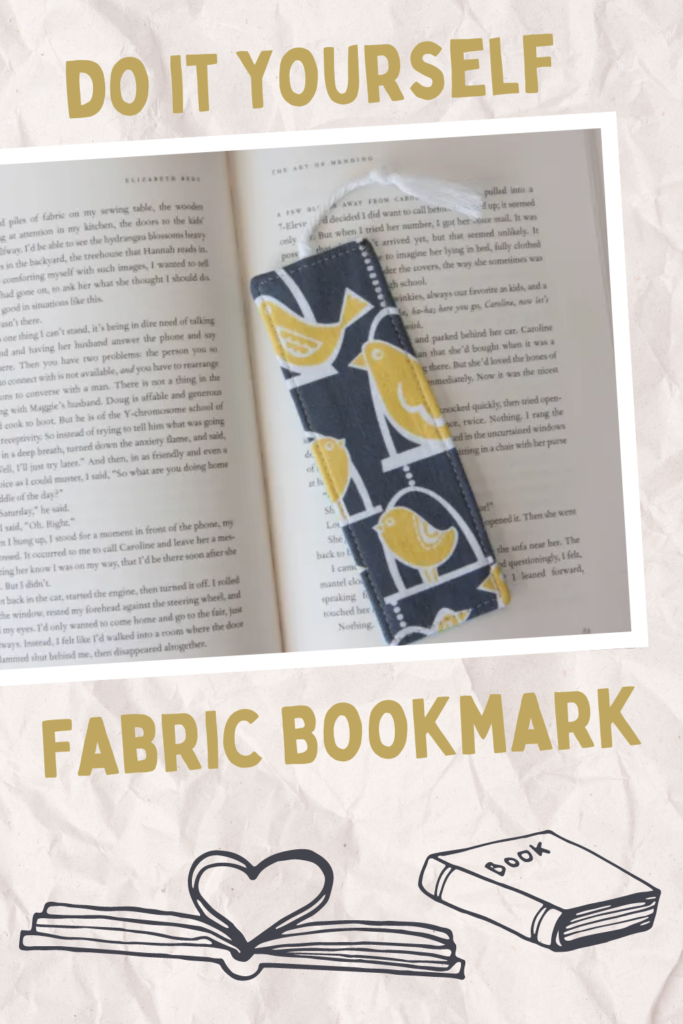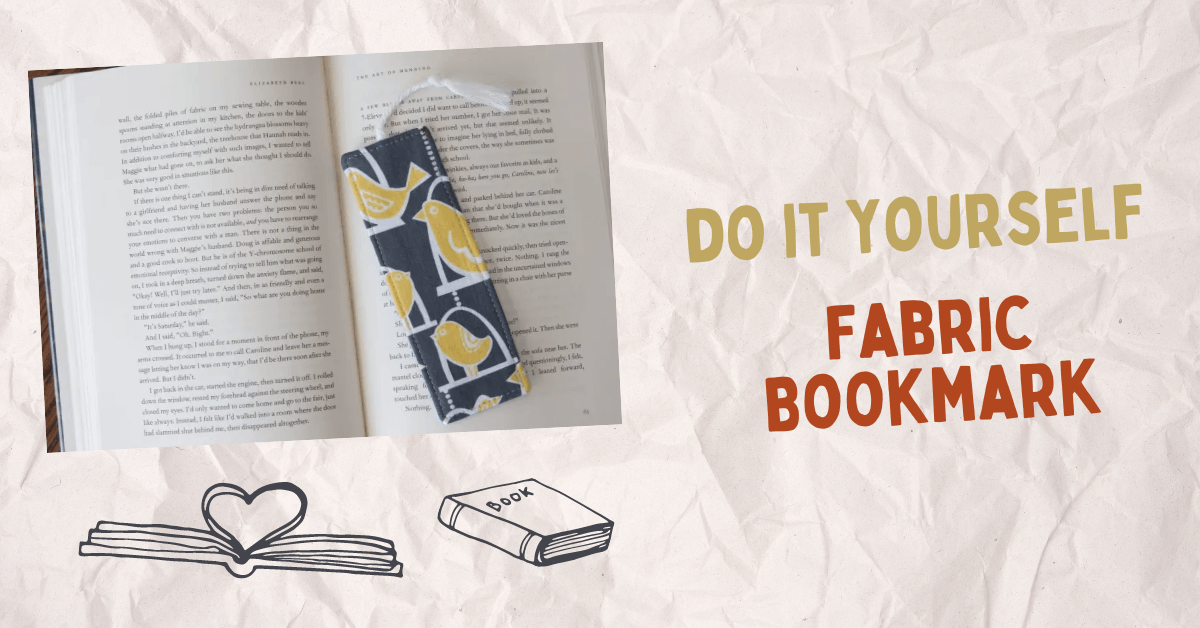
DIY Fabric Bookmark & Bug Felt and Fabric Bookmarks
Hi - this is Kelly from Handmade Boy here to give you a blog post on how to make a fabric bookmark. This DIY project is perfect for using up any scrap fabric you may have lying around. It's also a great opportunity to teach your child how to sew straight lines, making it an ideal beginner sewing project. With just a few sewing supplies and some simple instructions, you can create personalized bookmarks that will add a charming touch to your reading experience. Whether you're an avid reader or just looking for a creative way to use up your leftover fabrics, this tutorial is sure to inspire you!
DIY Fabric Bookmarks Sewing Tutorials
Can I use any type of fabric for a DIY fabric bookmark?
Yes, you can use any type of fabric for a DIY fabric bookmark. Cotton, linen, silk, and even felt are all great options. Just make sure the fabric is sturdy enough to hold its shape and won't easily fray or tear. Get creative with patterns and textures!
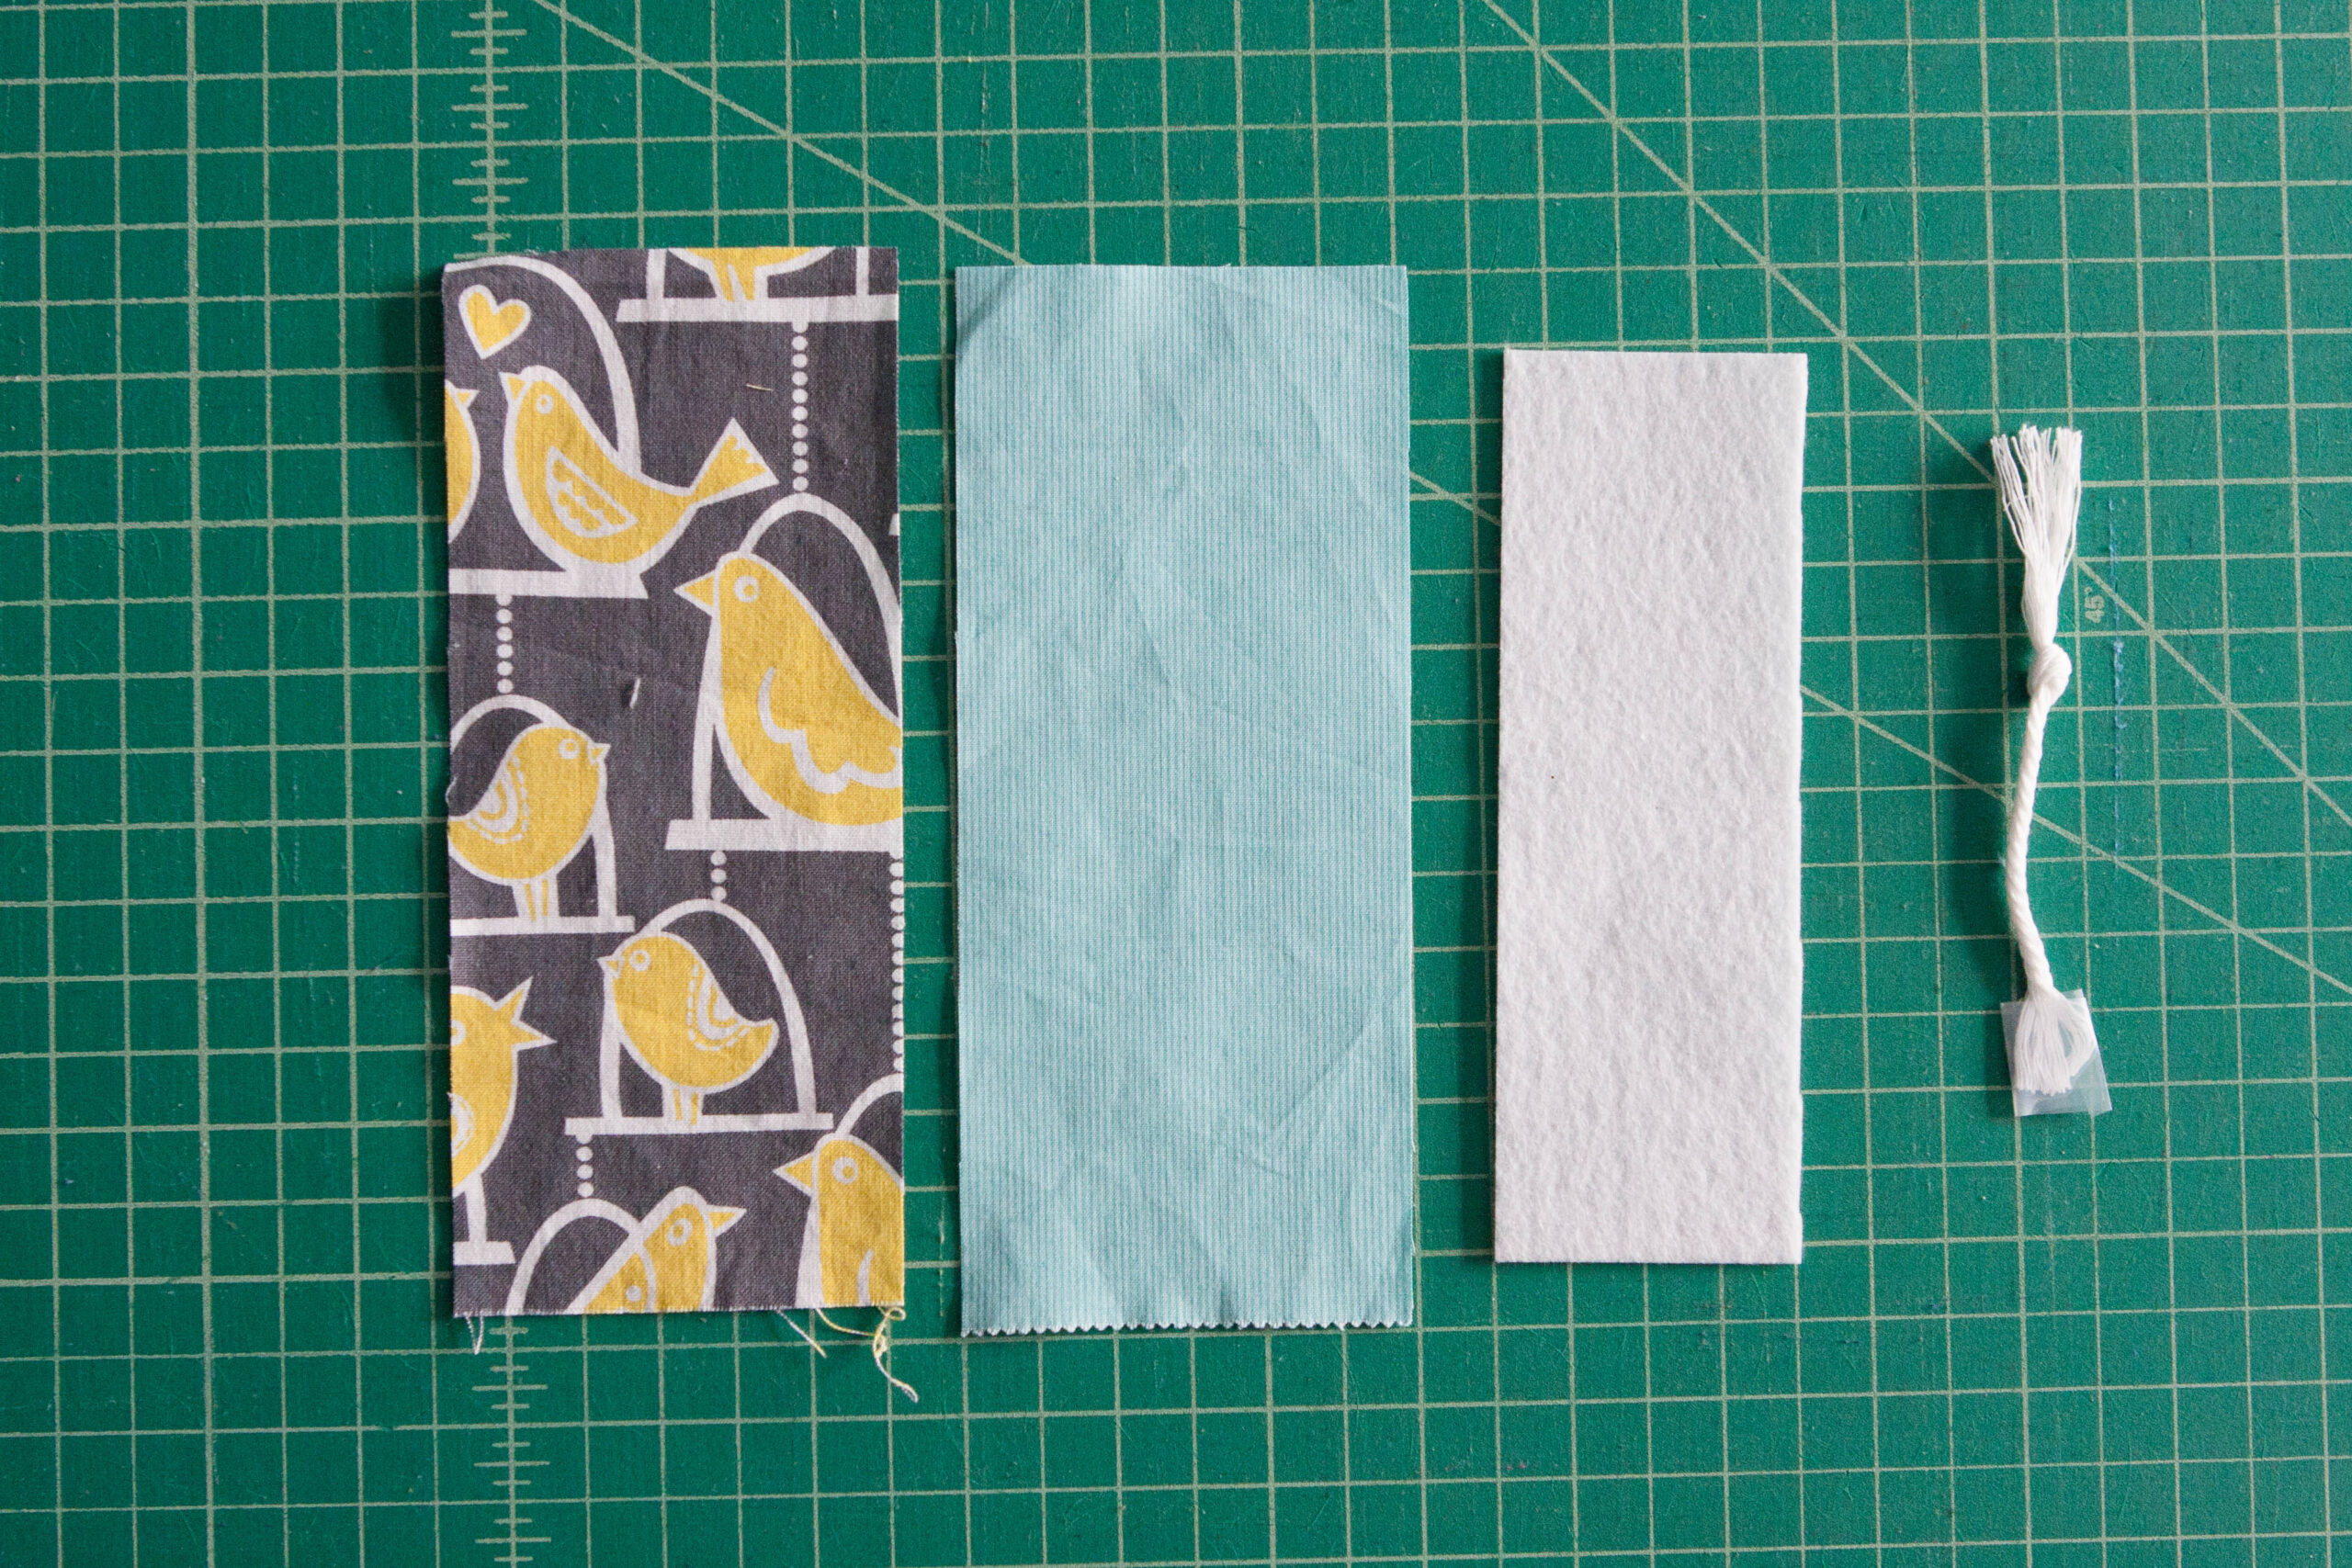
Fabric Bookmark Materials
For this project, you will need:
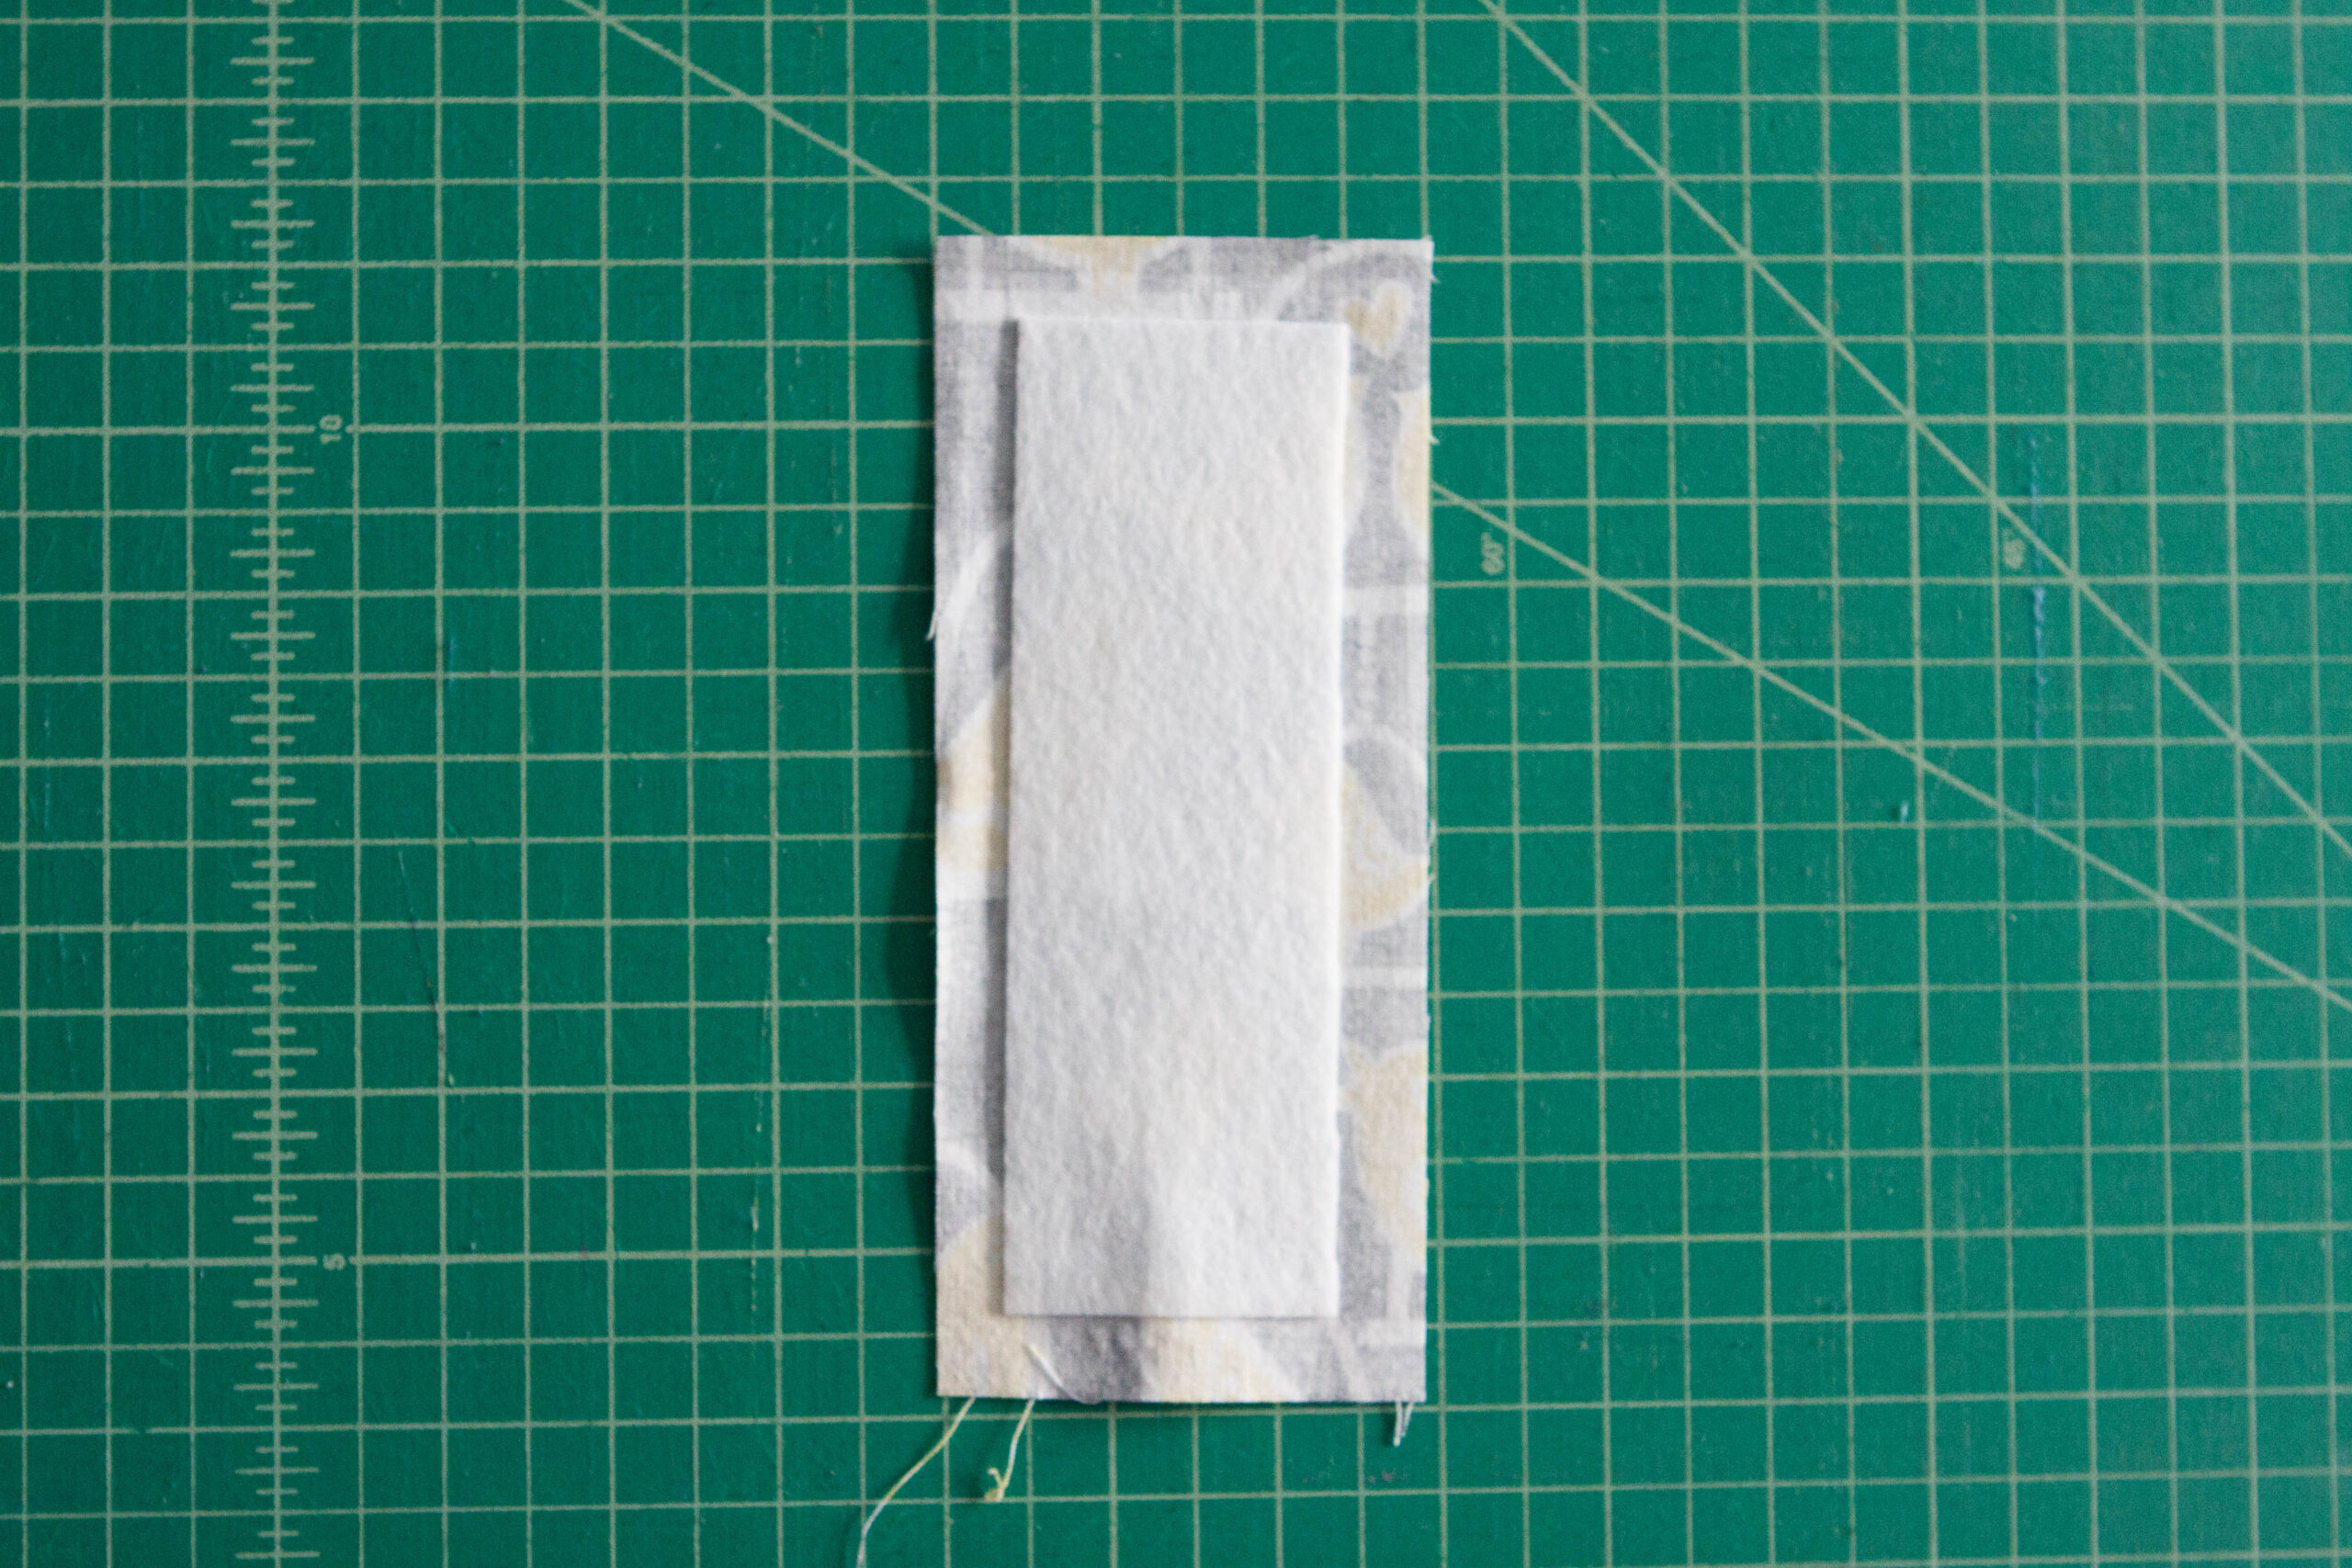
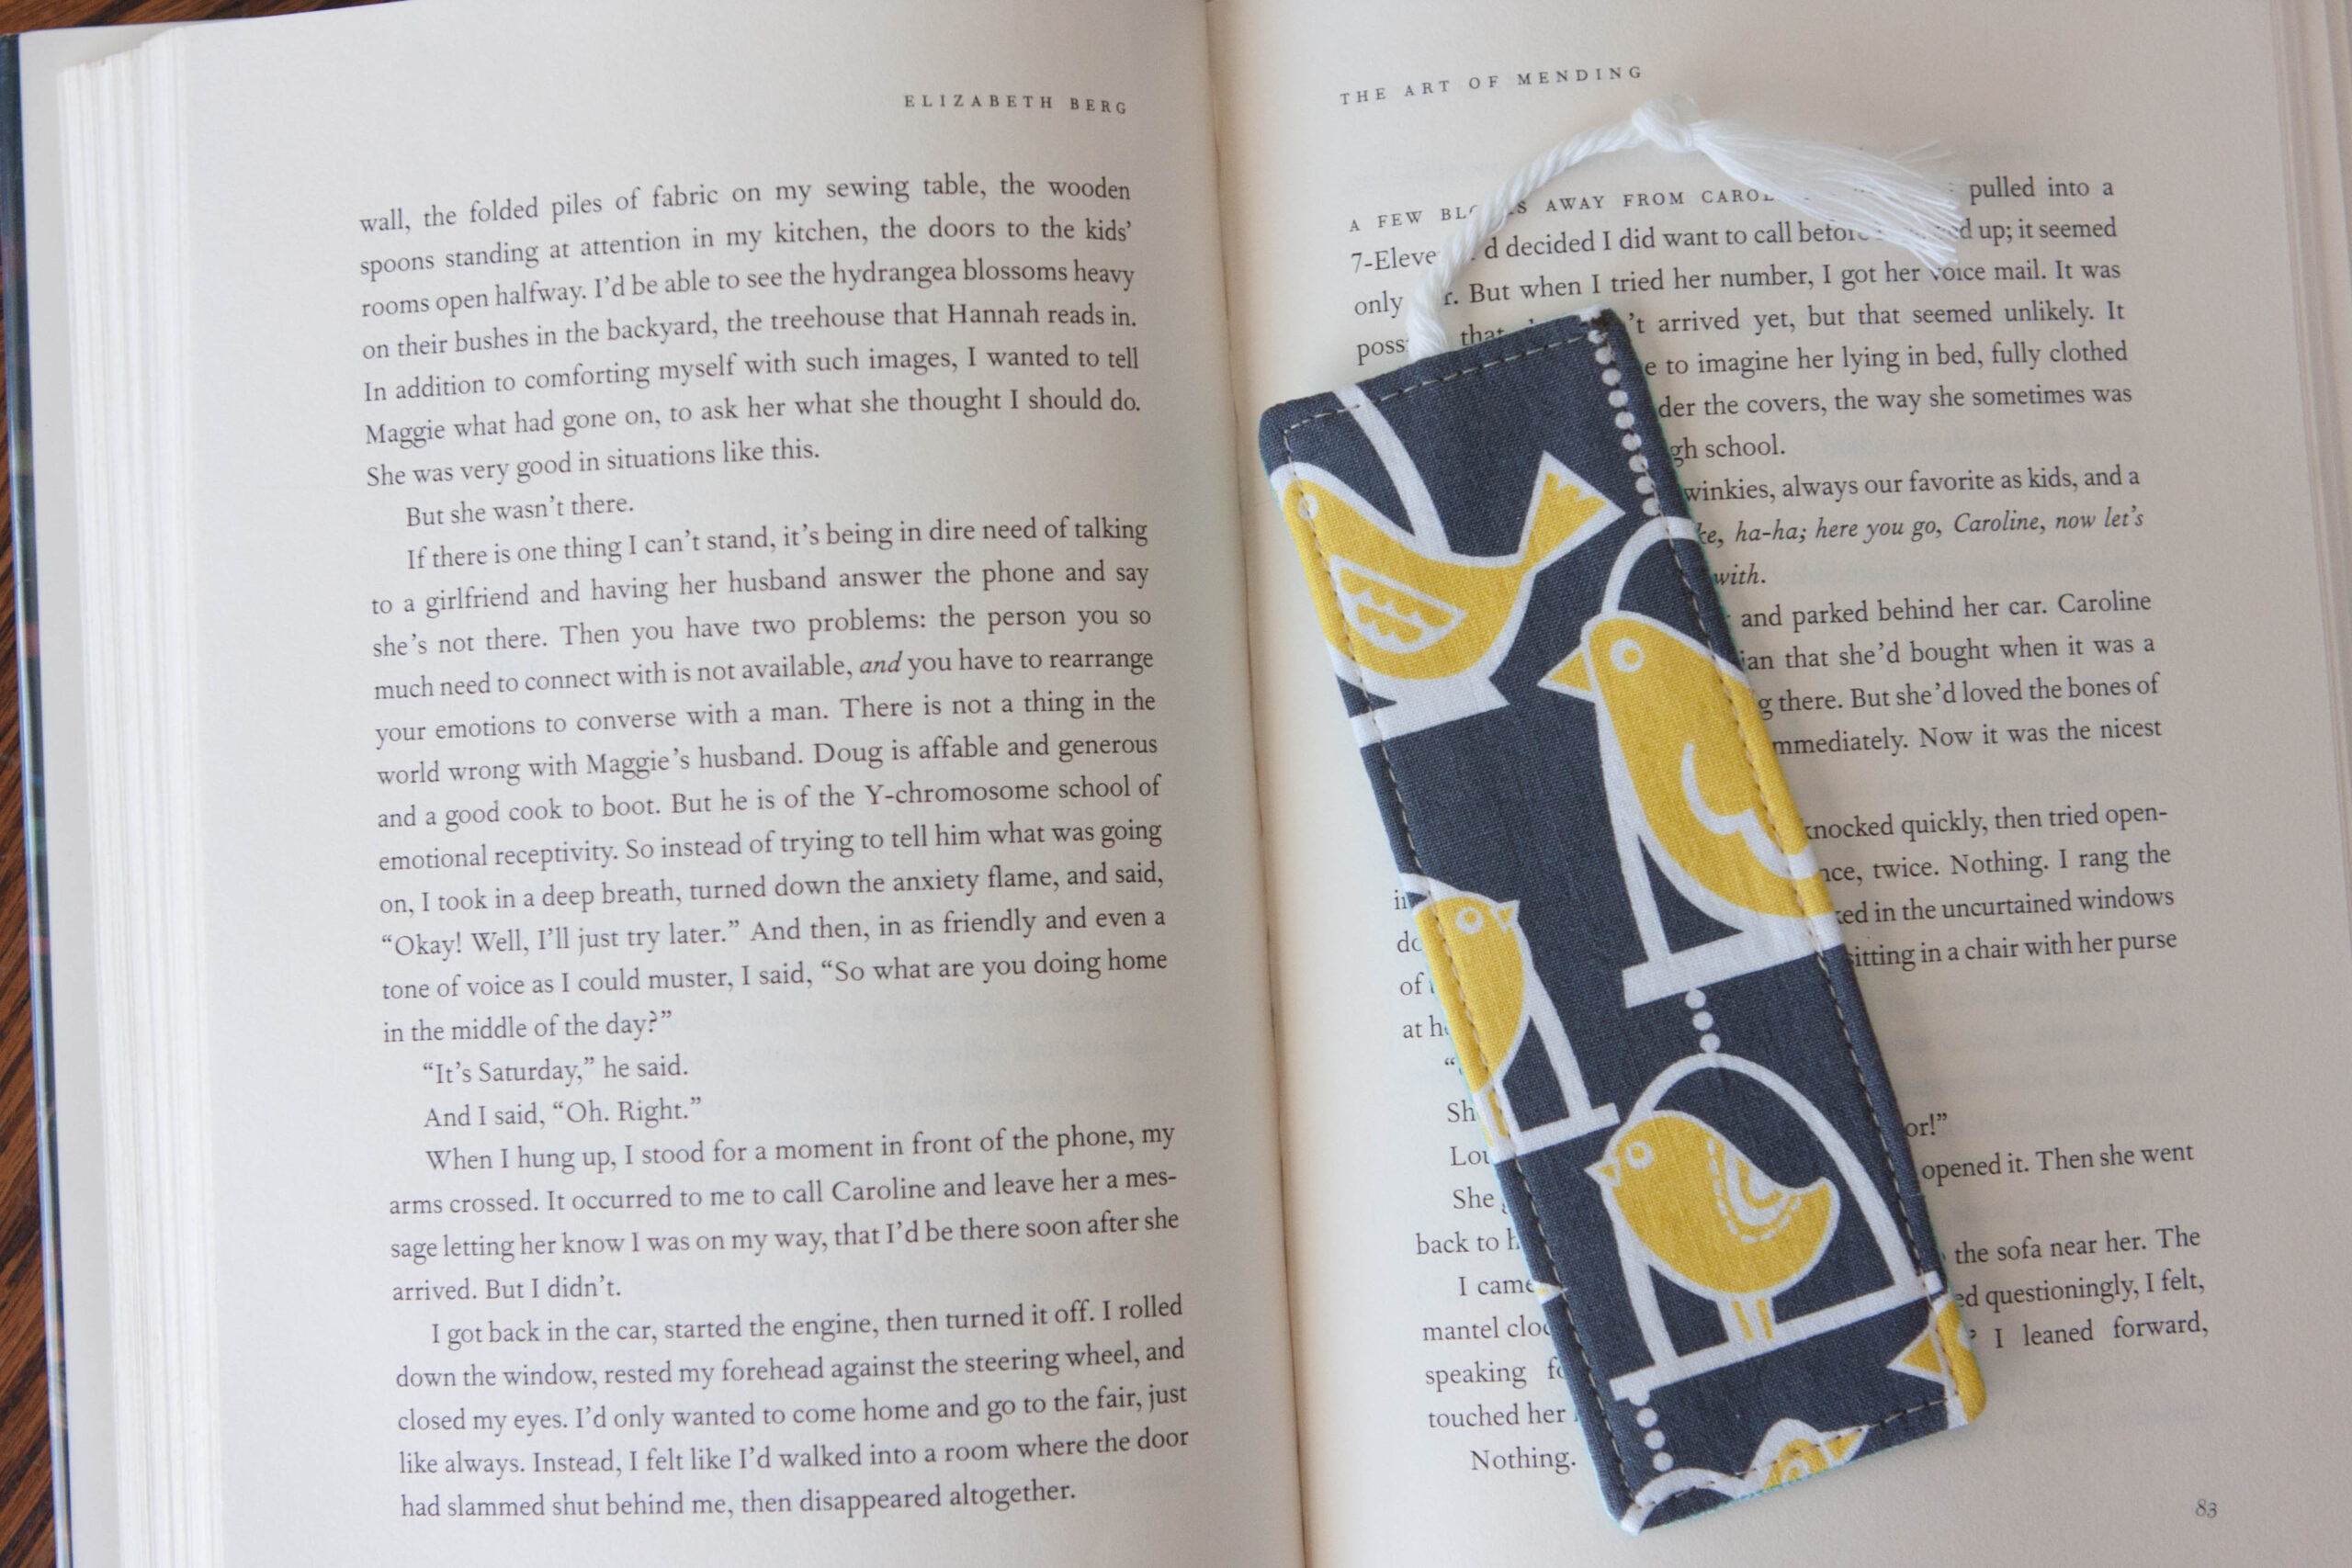
- Two scraps of fabric cut to 3″ wide by 7″ tall
- A piece of sturdy interfacing cut to 2″ by 6″. (I used Pellon 809.)
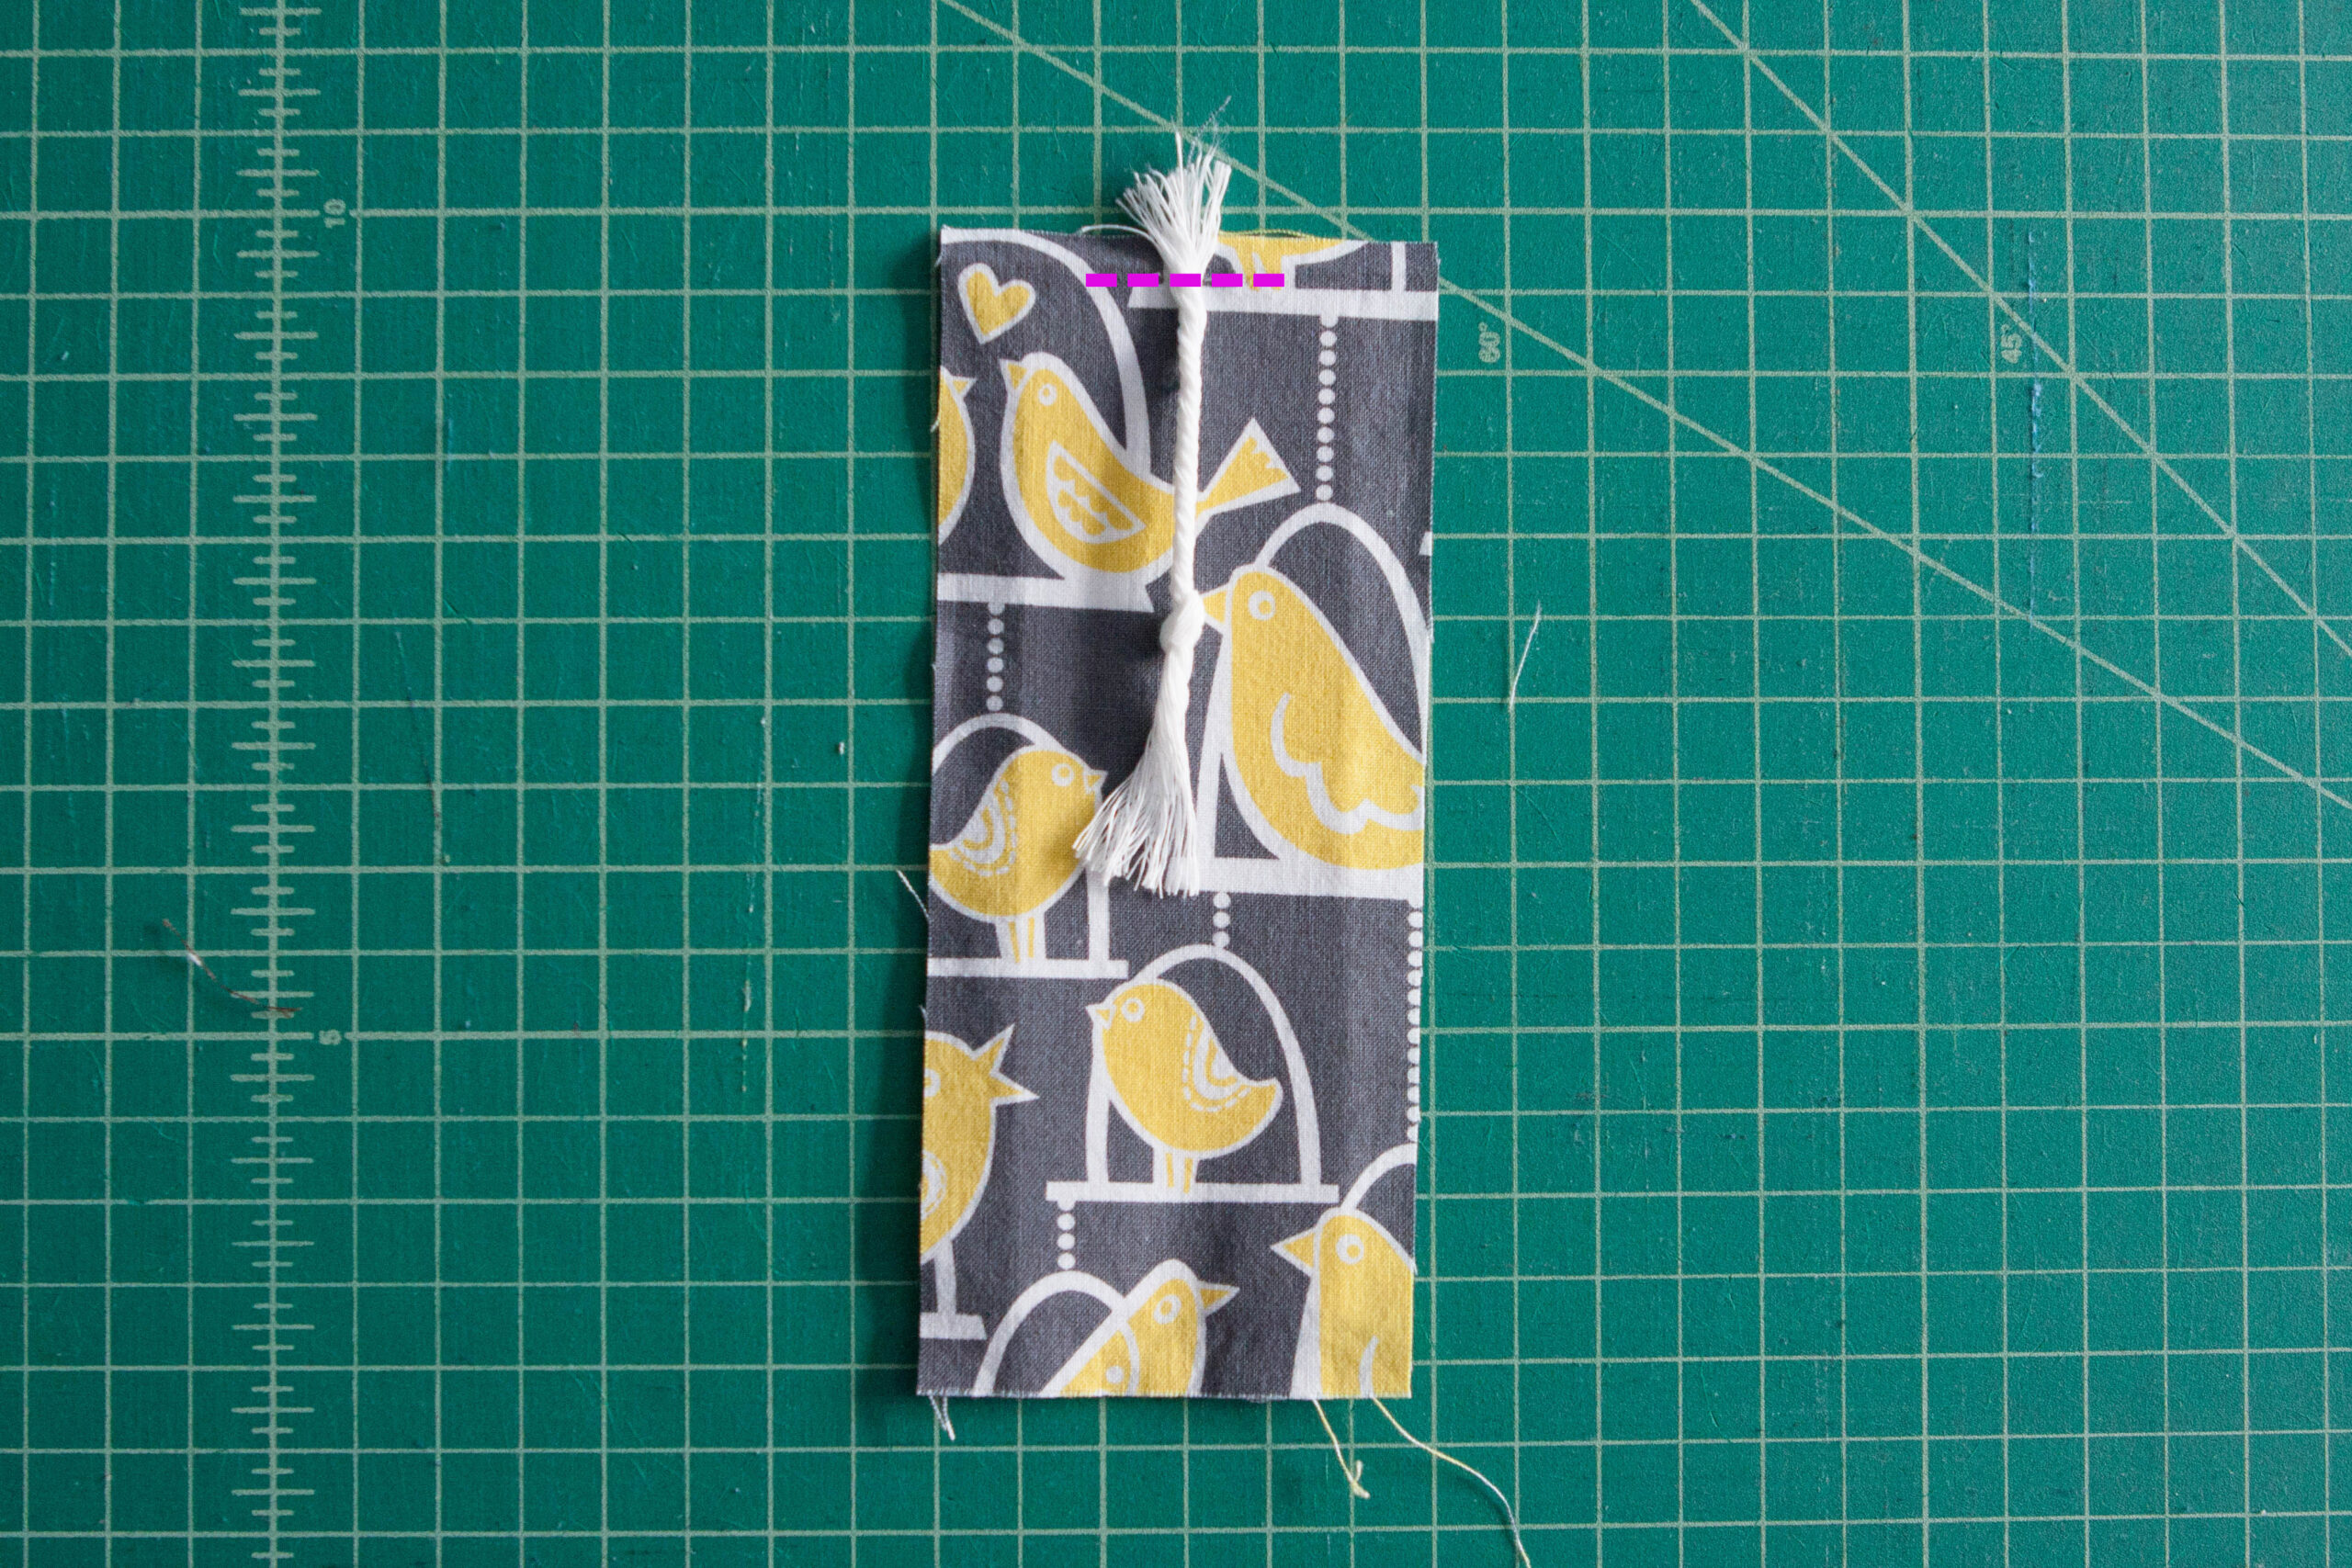
- If you would like a tassel, a scrap of cording or ribbon 3″-4″ in length.
How to Make Fabric Bookmarks
Step 1: Iron the interfacing onto the wrong side of one of your fabric pieces. Make sure it is centered.
Step 2: If you are attaching a tassel, baste it in place along the top of the bookmark. You want the part that will extend out the top pointing towards the bottom of the bookmark.
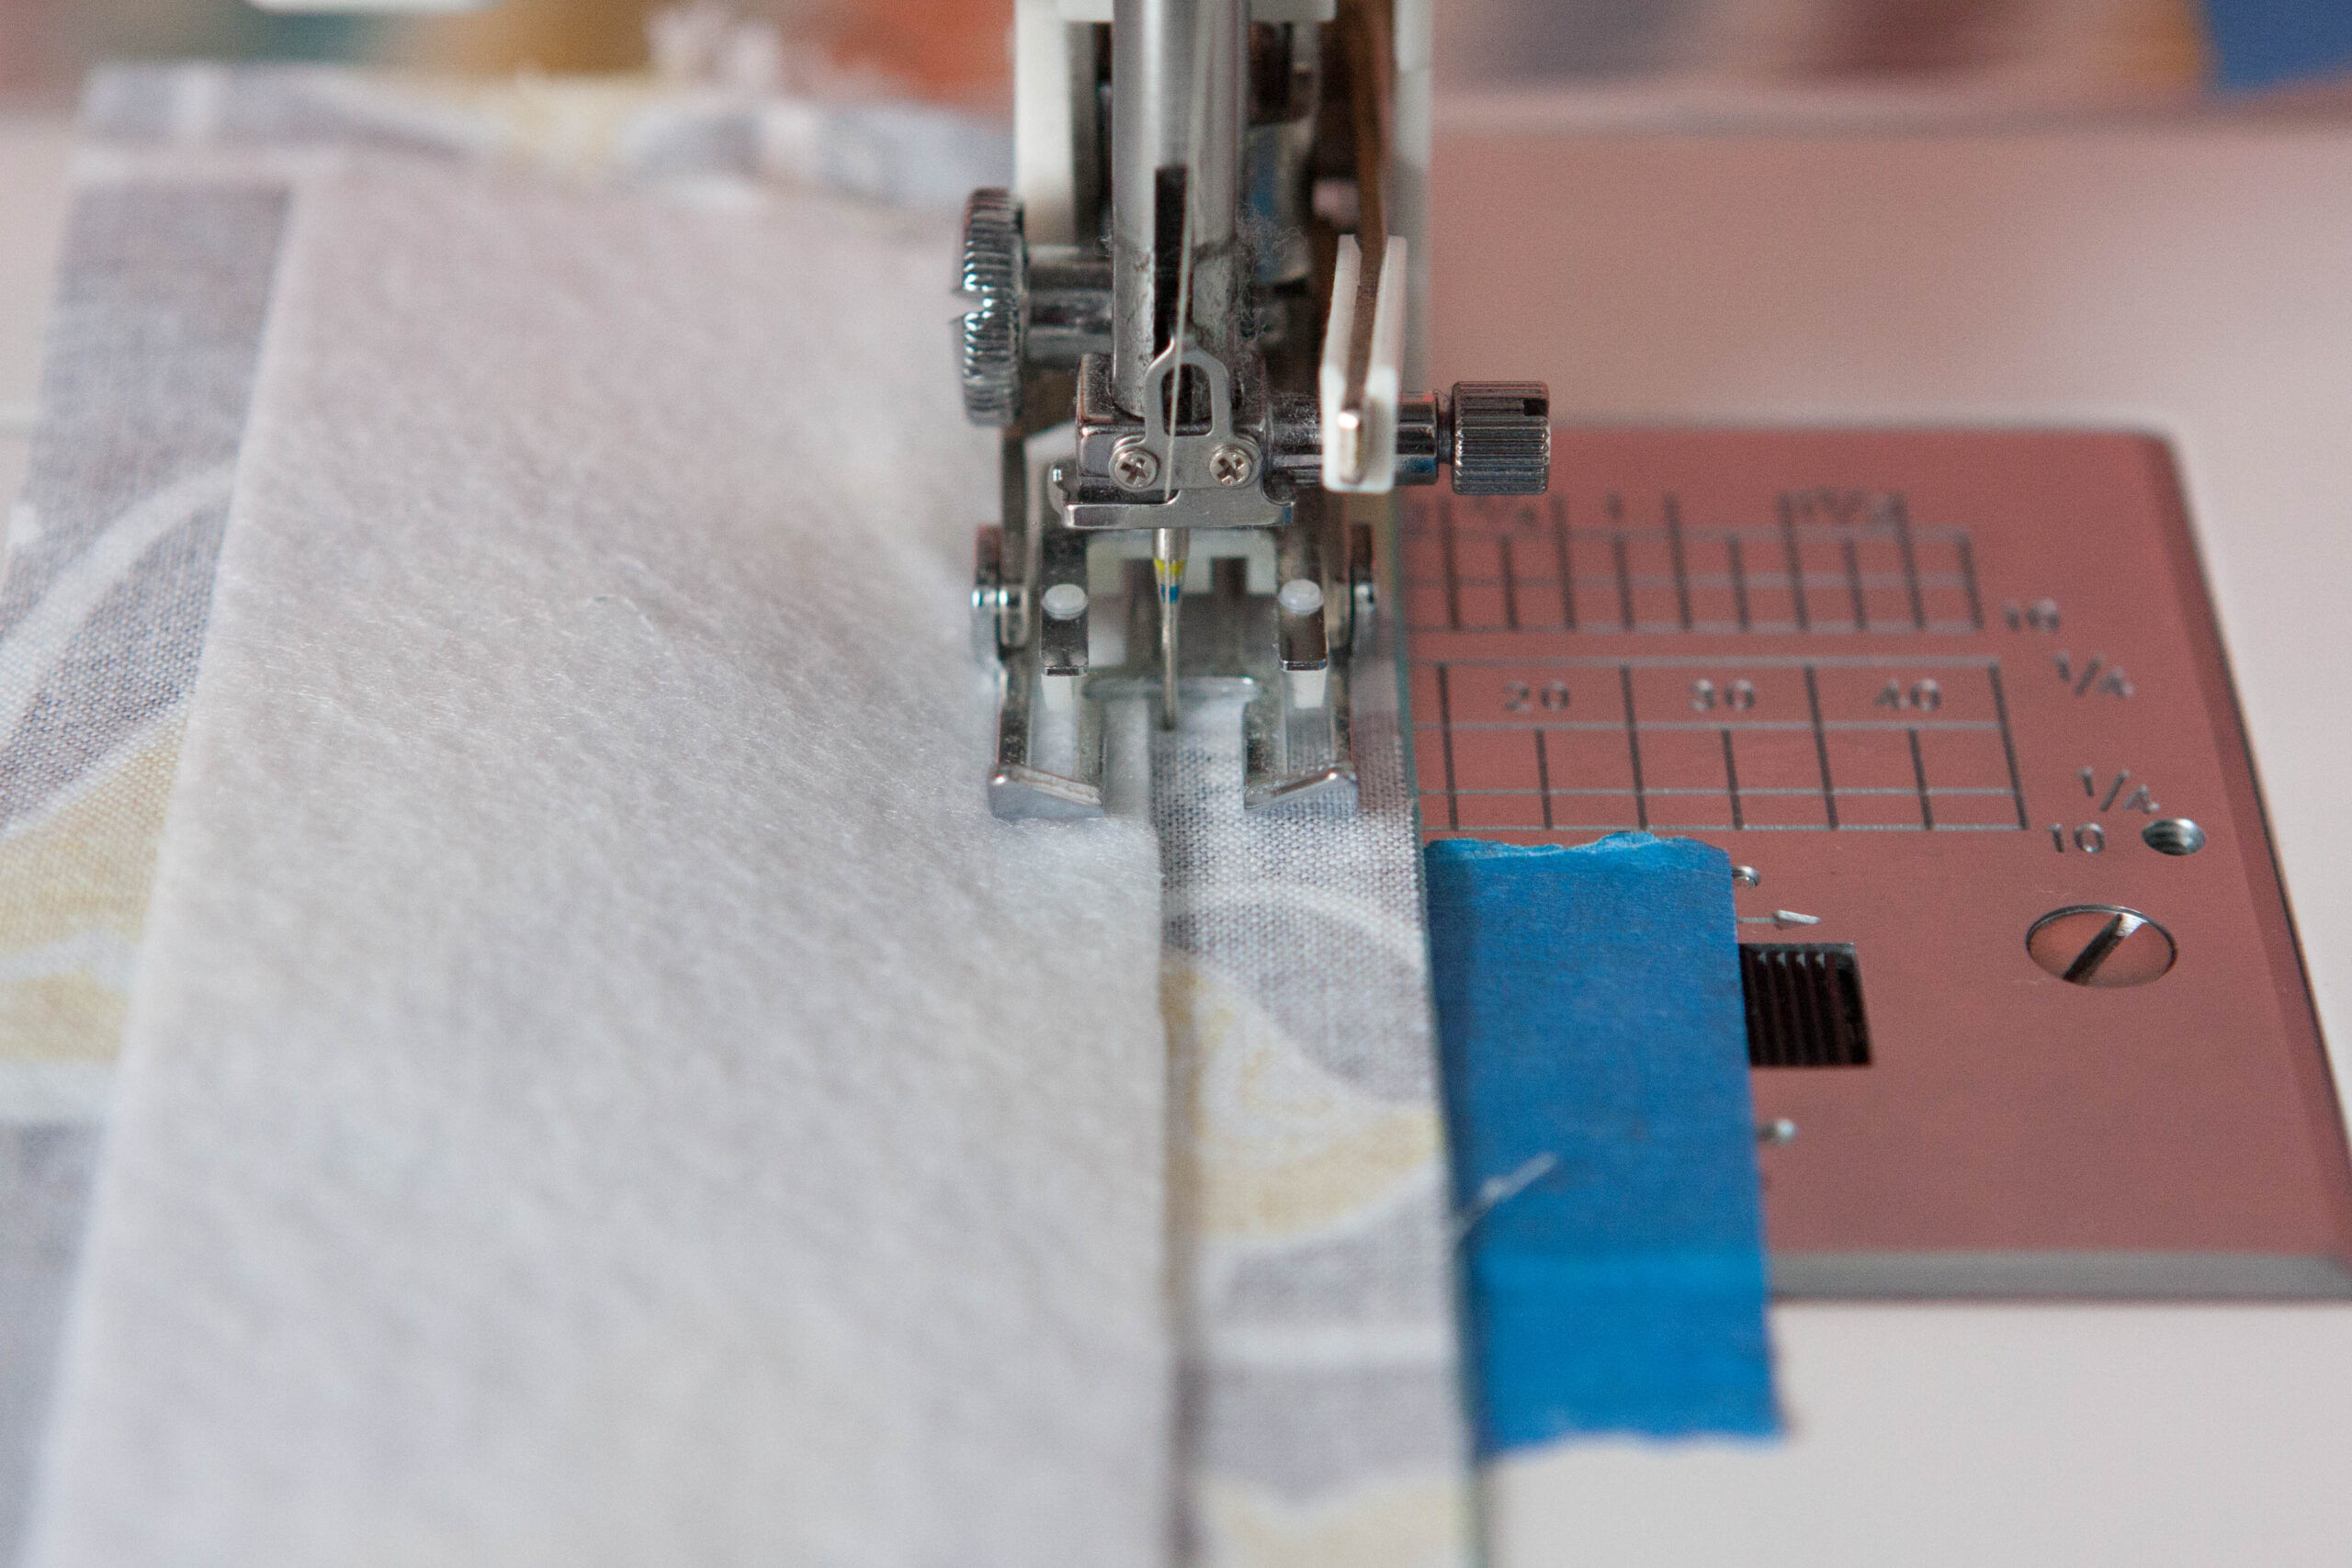
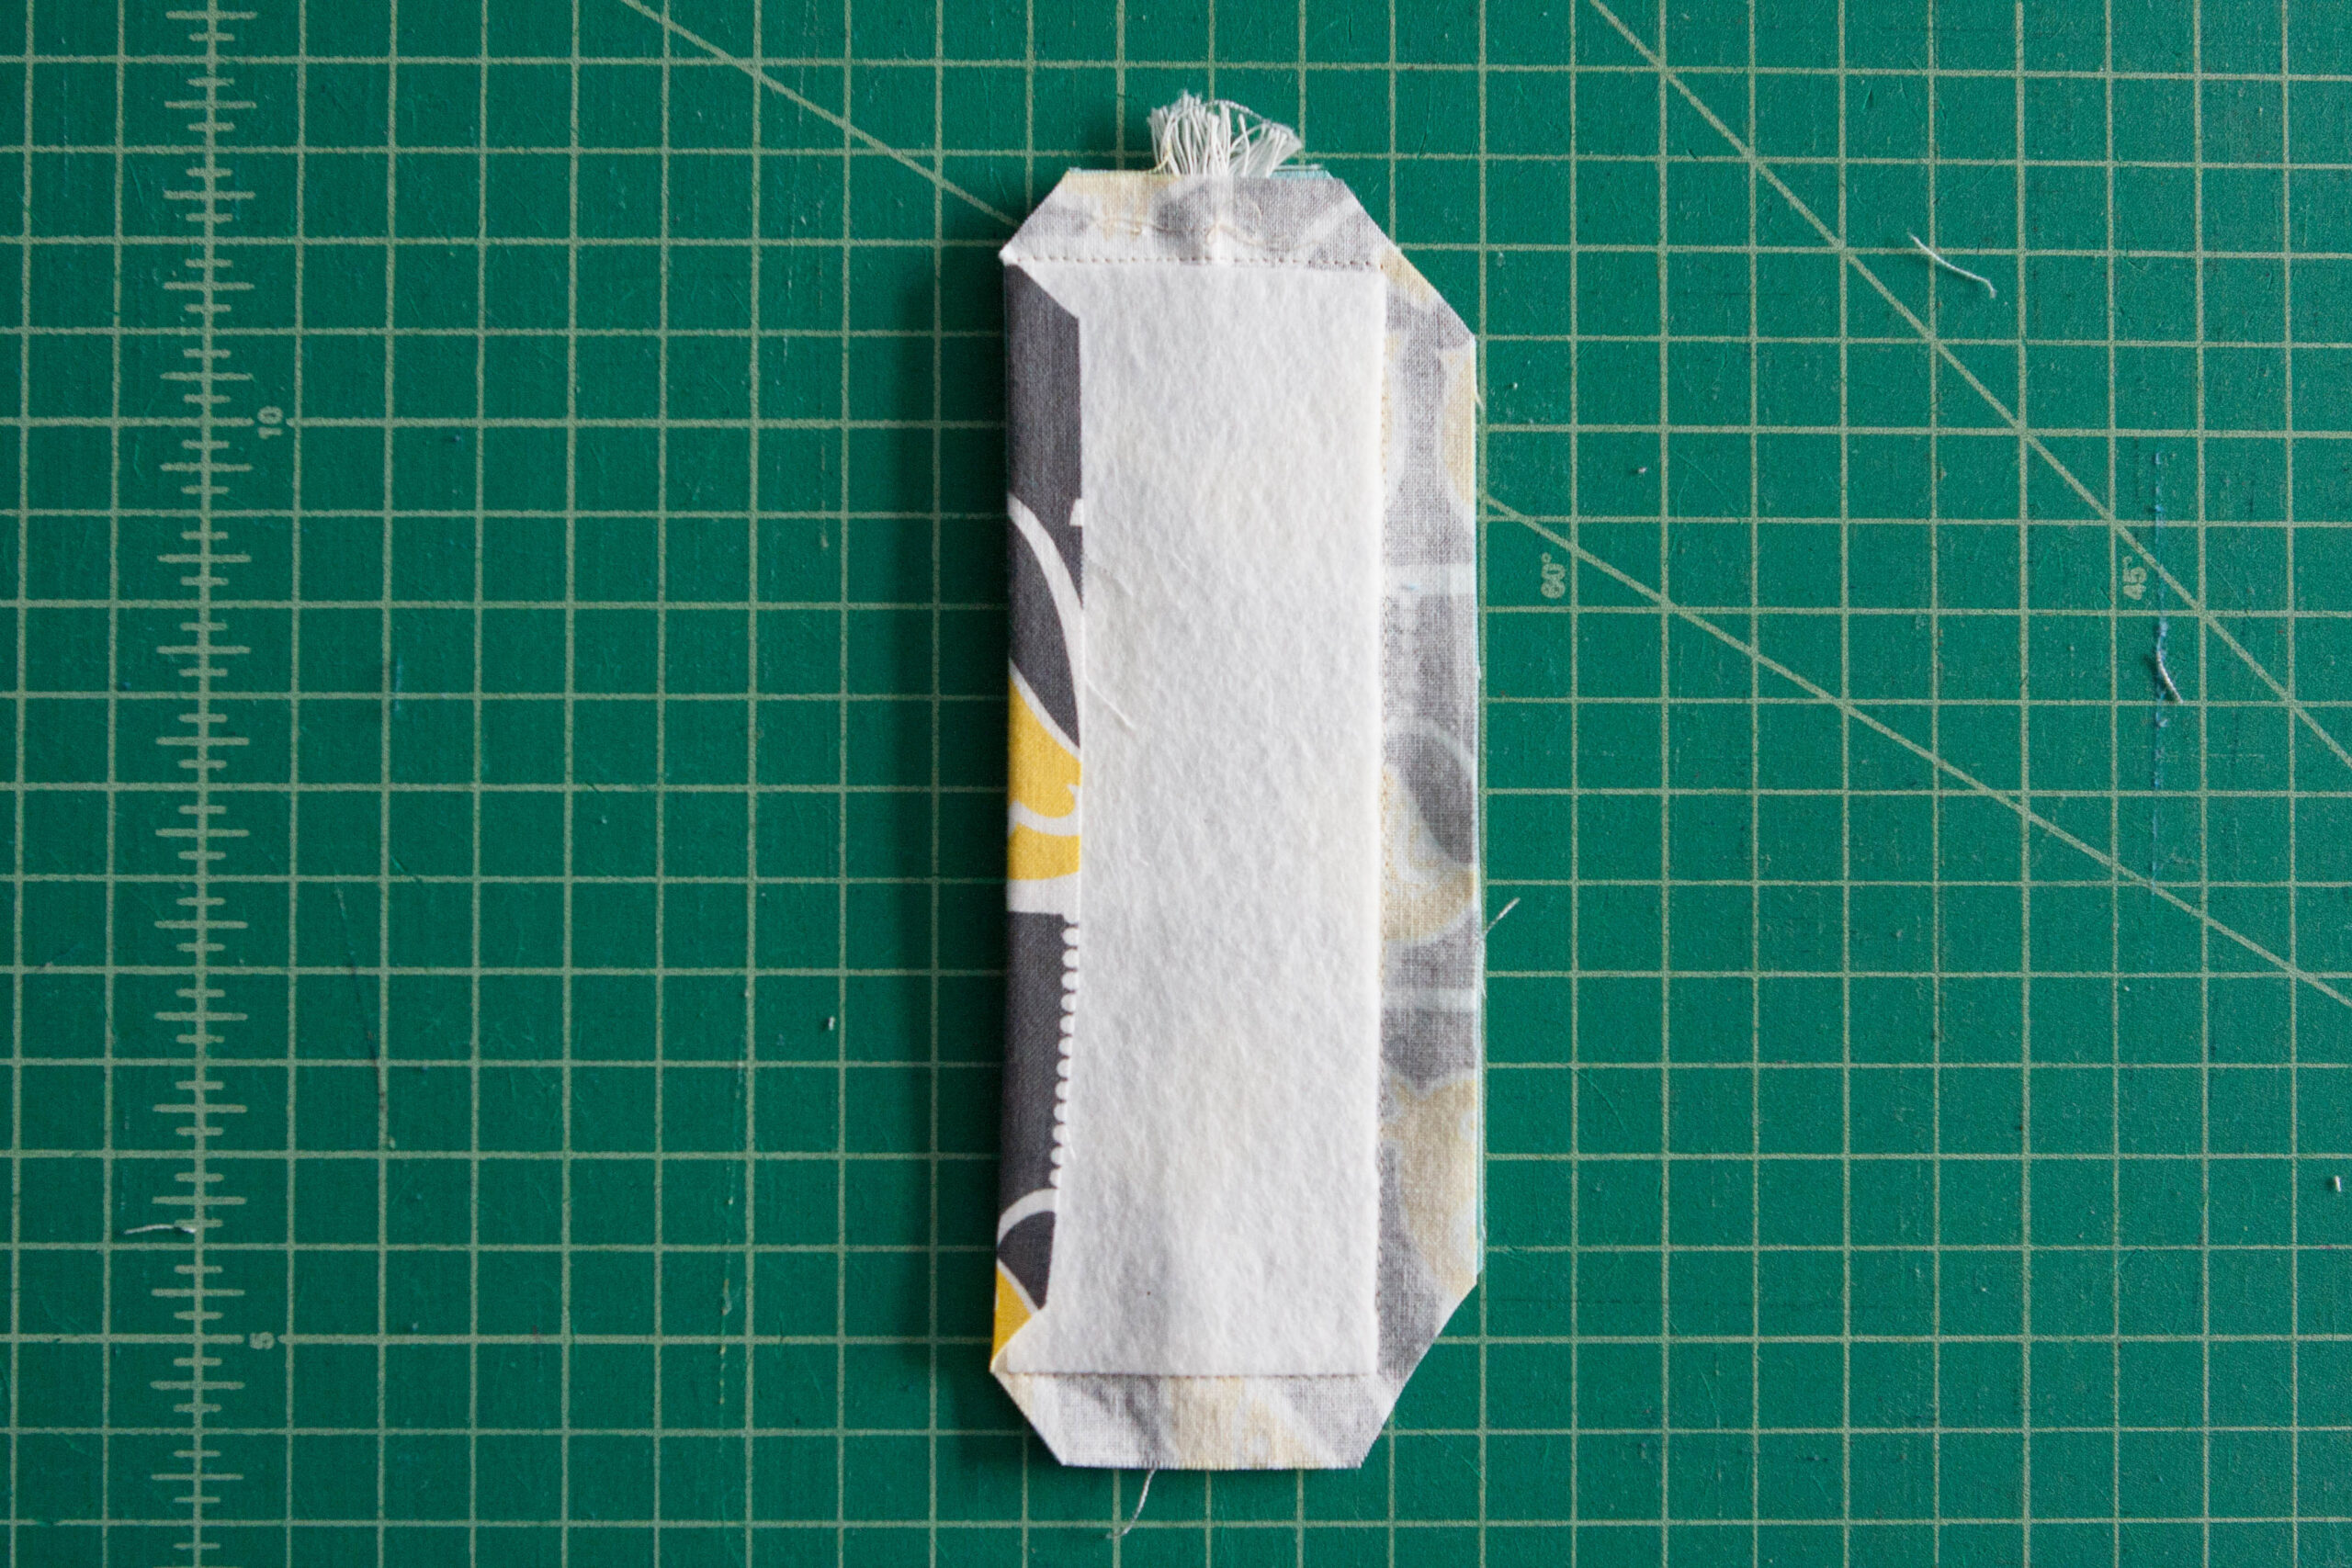
Step 3: Place your fabrics right sides together and stitch next to the edge of the interfacing. Leave a gap several inches long along one side for turning.
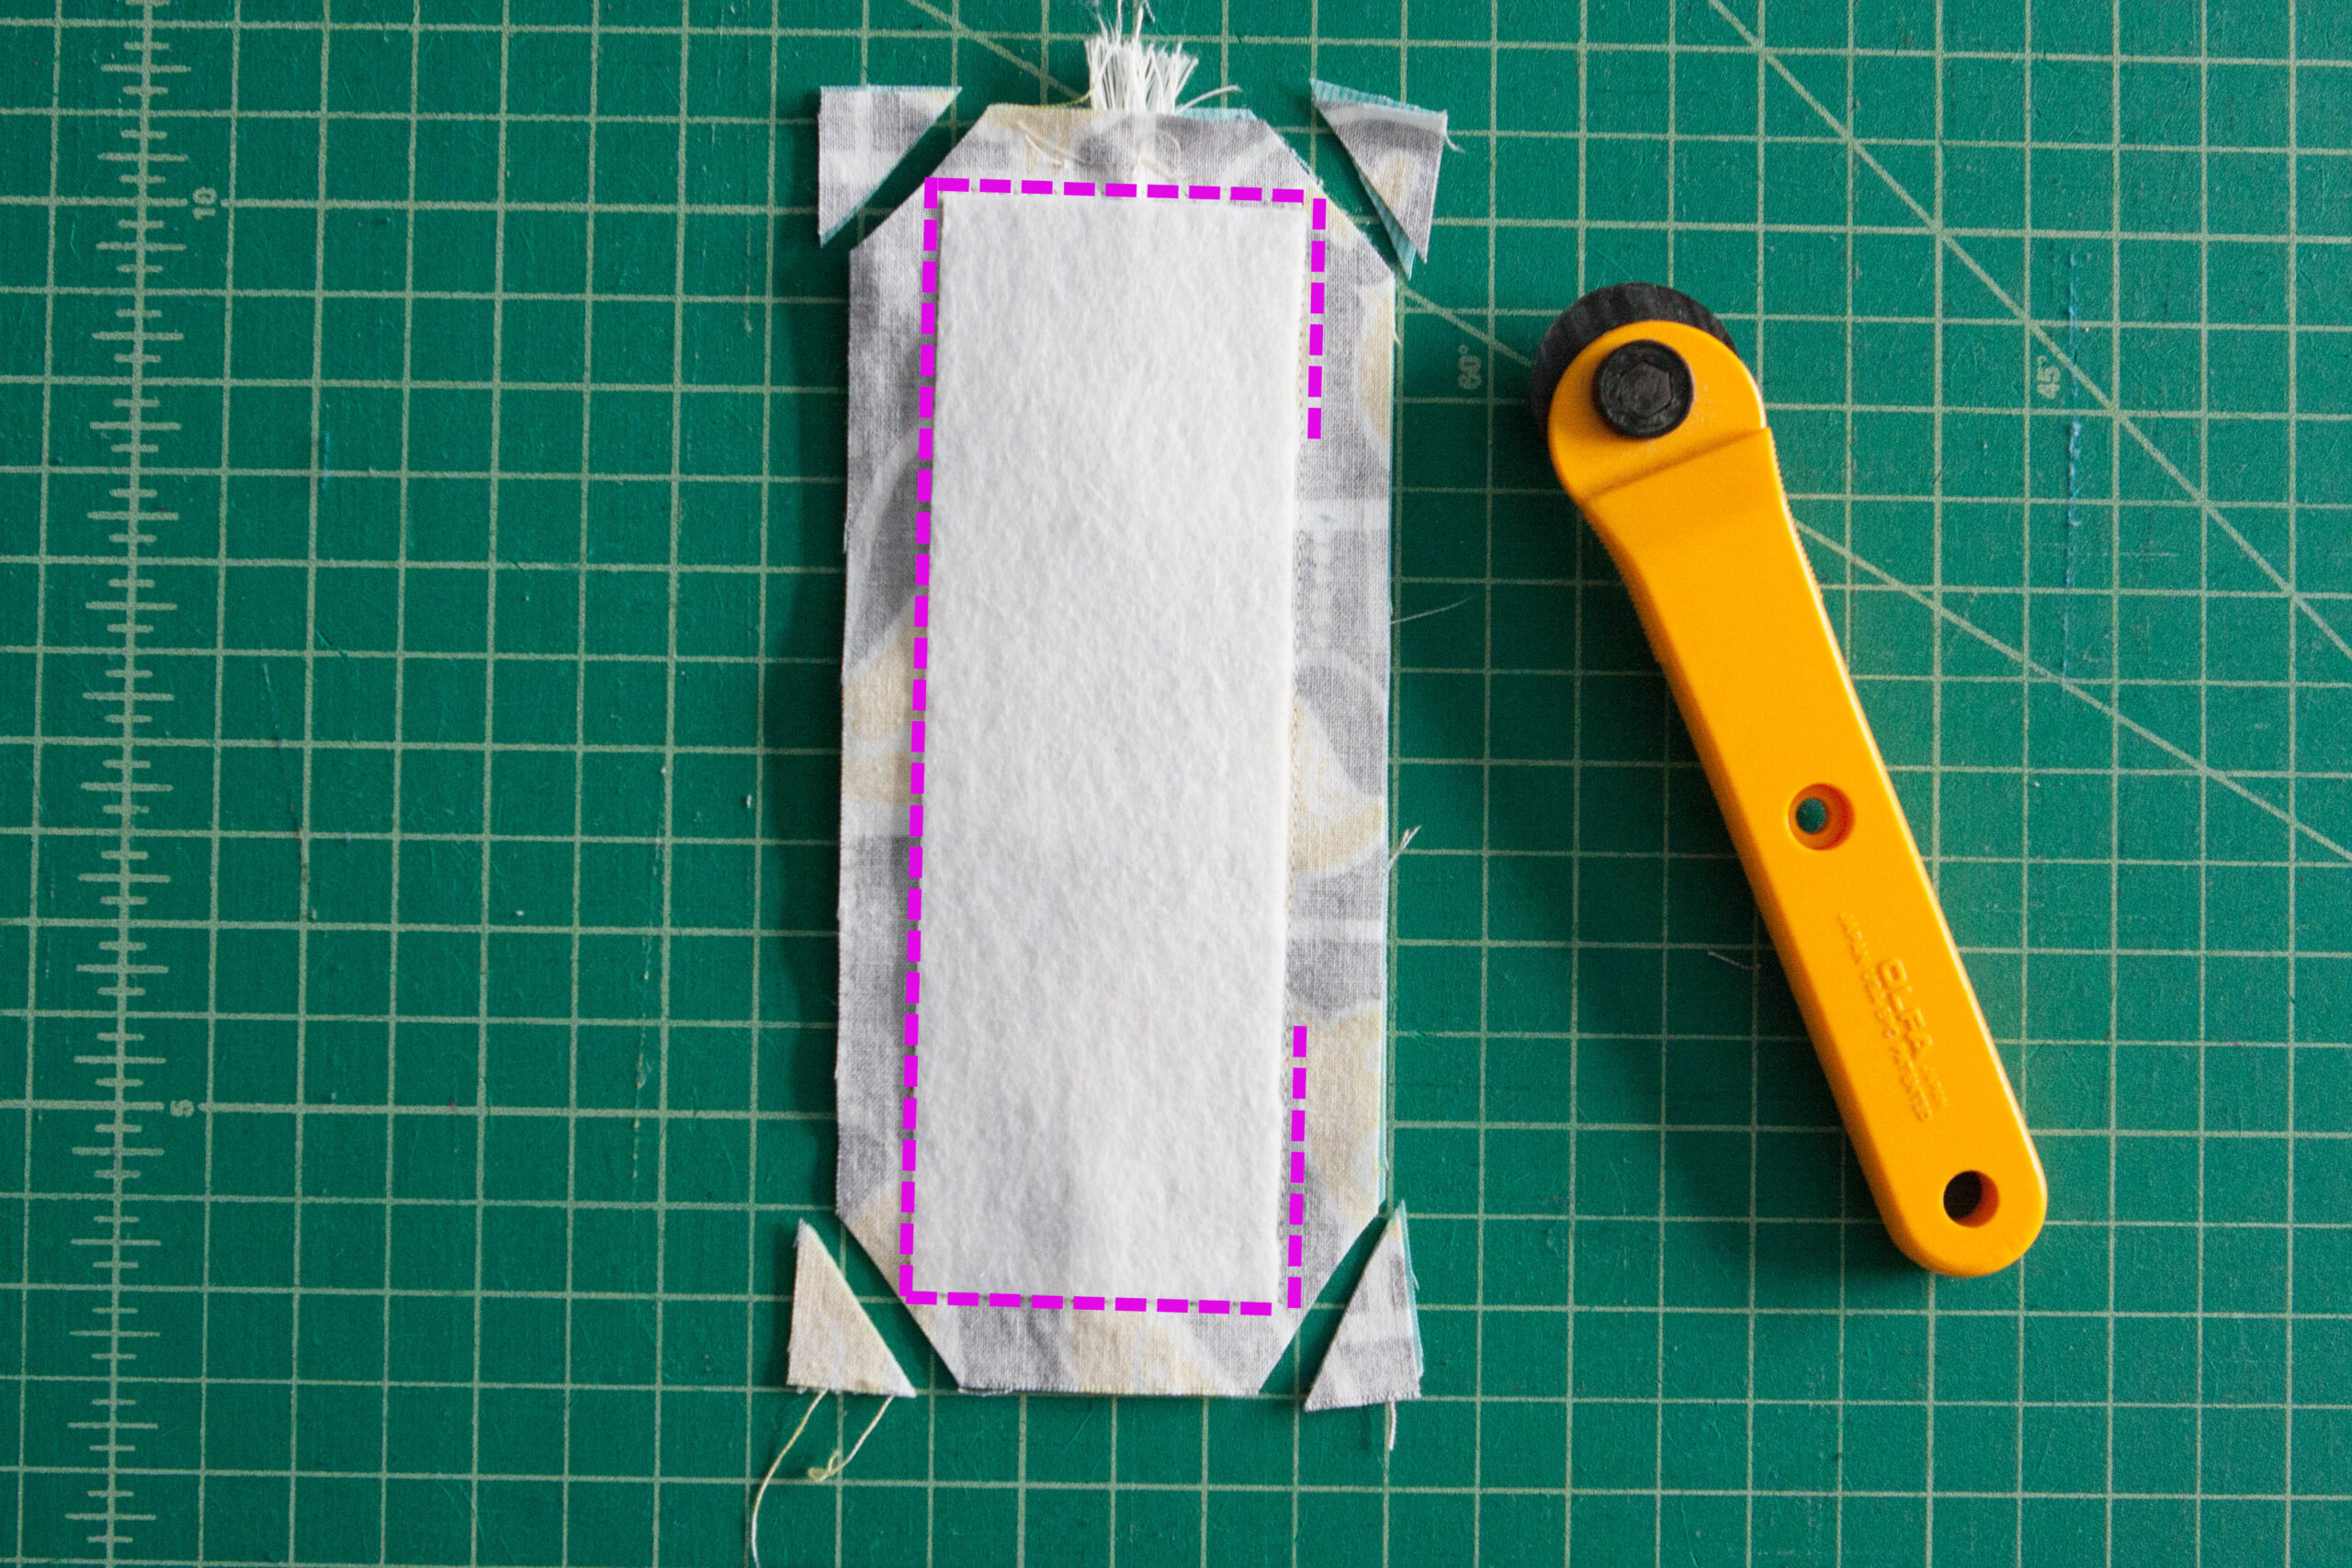
Step 4: Clip your corners.
Step 5: Press back the seam allowance along the side with the gap for turning. This will make topstitching the hole closed easier.
Step 6: Turn the bookmark right side. Use a chop stick, wooden knitting needle or something similar to push the corners out.
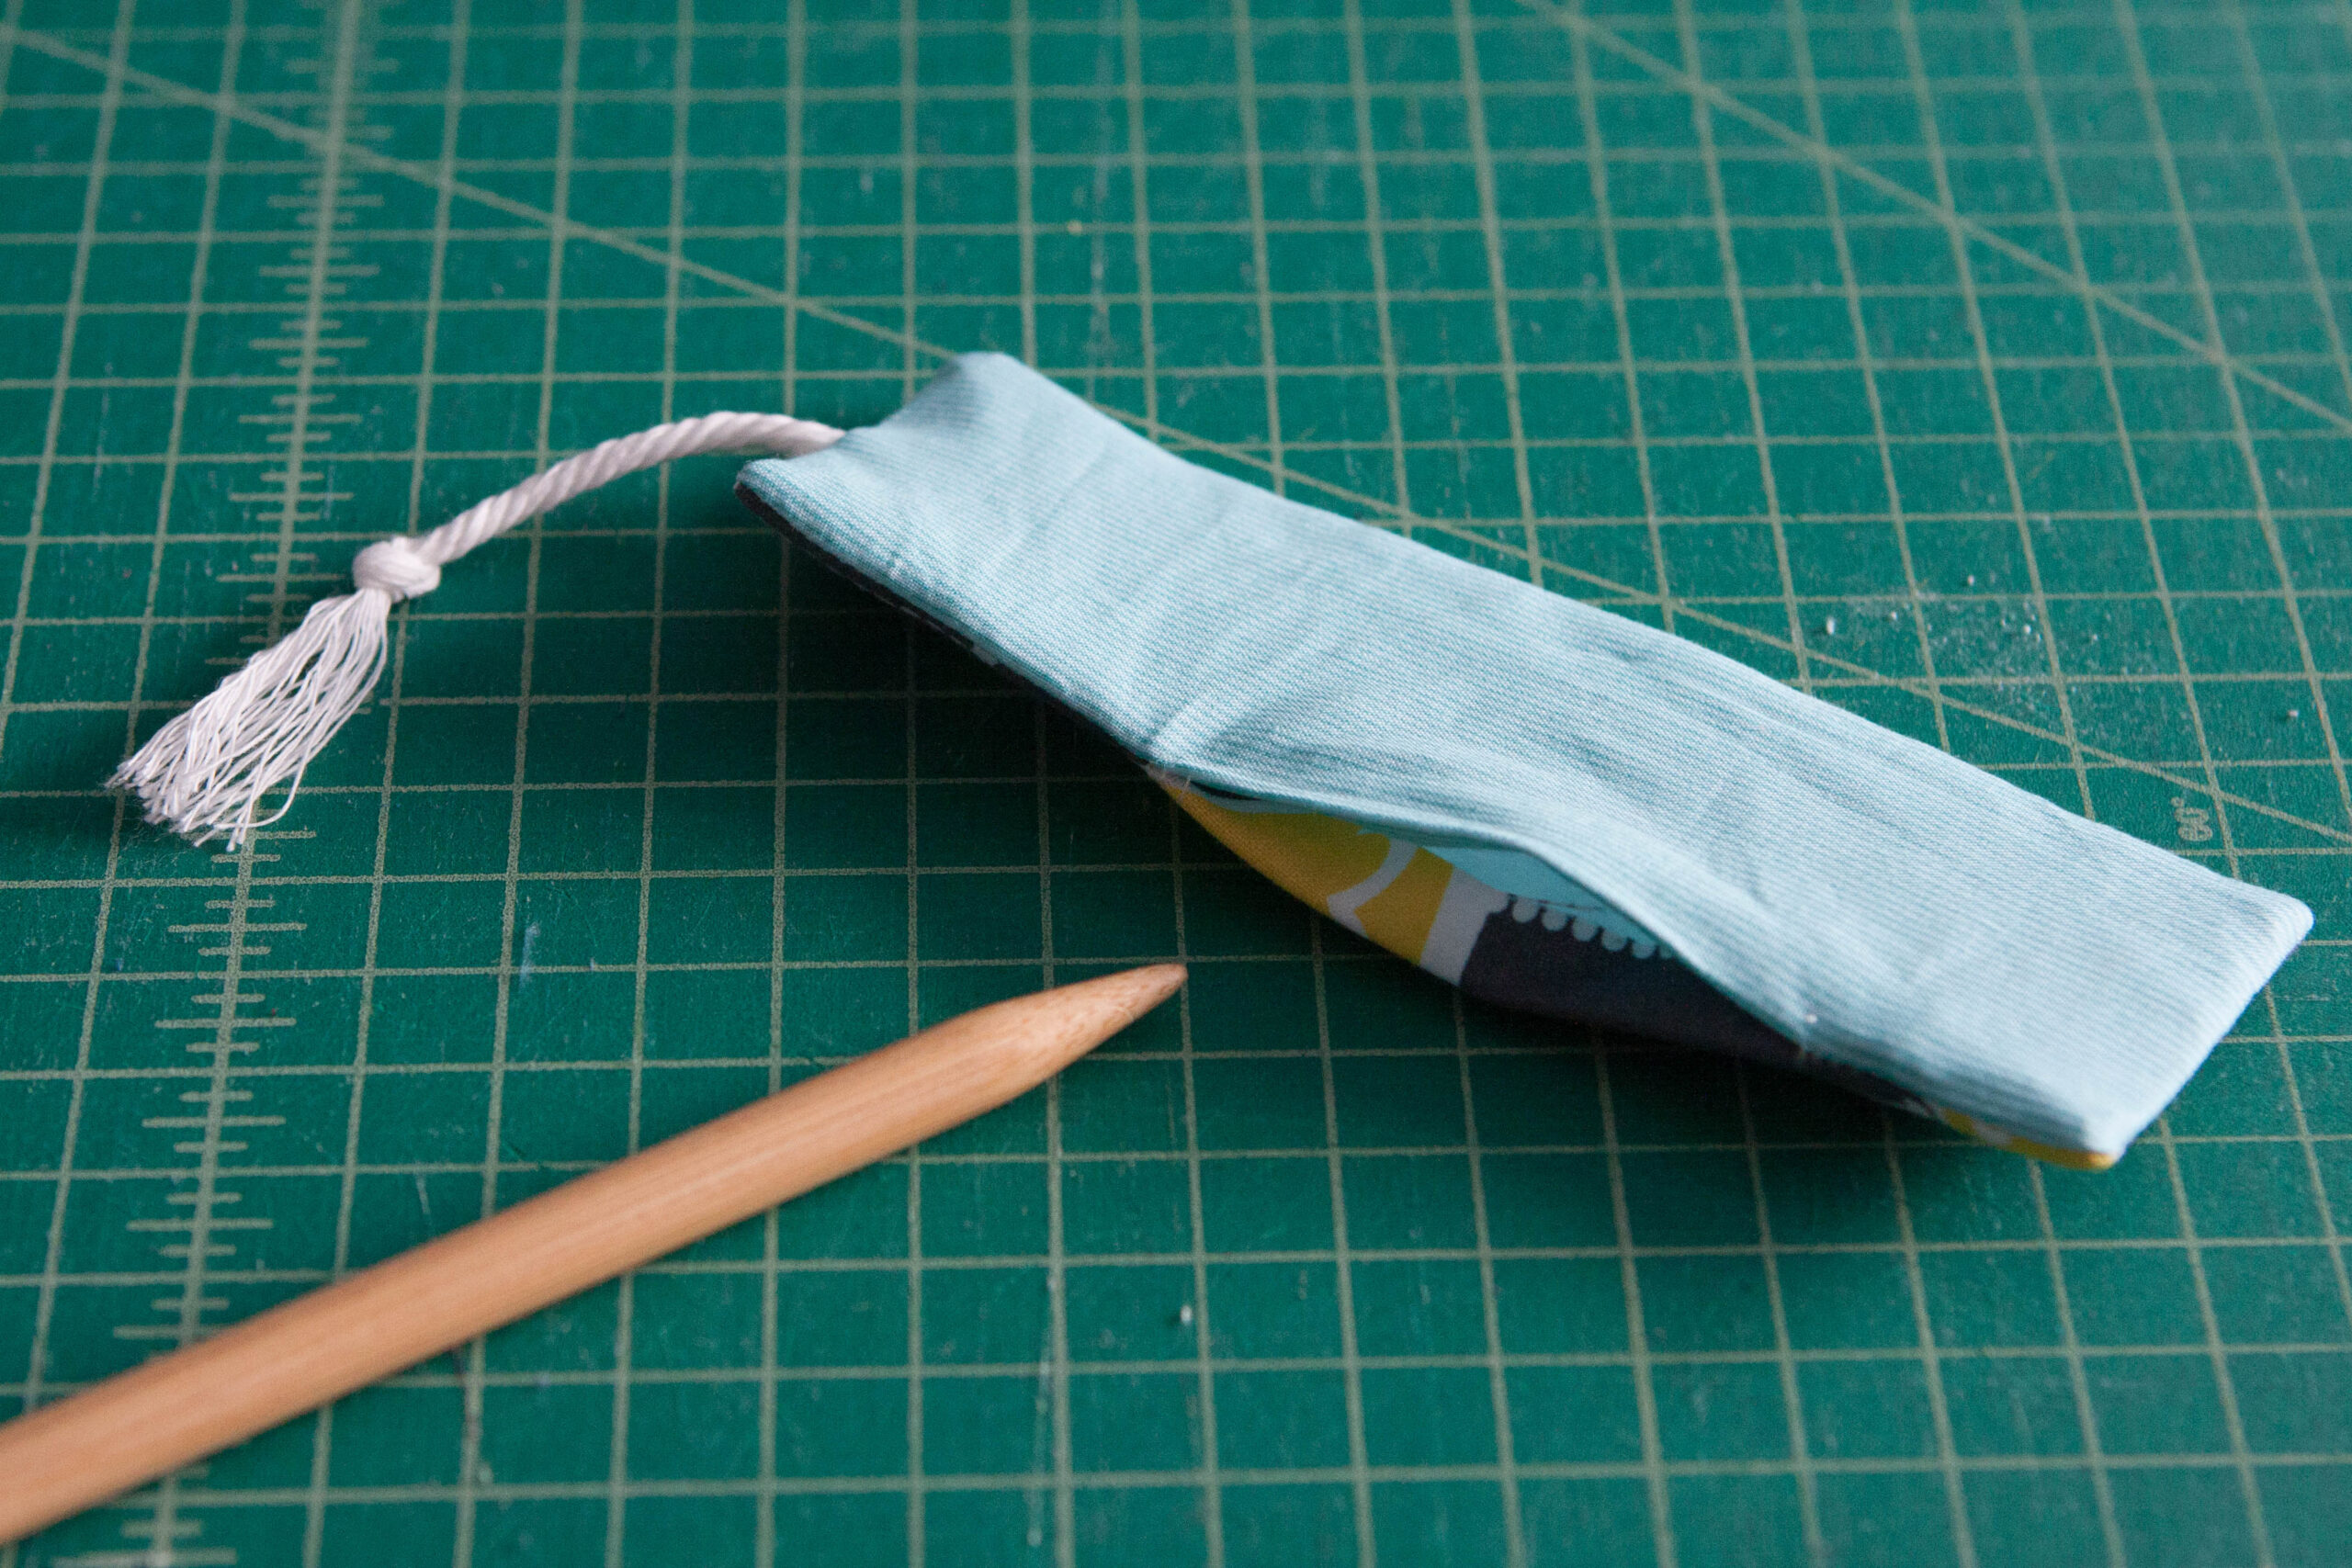
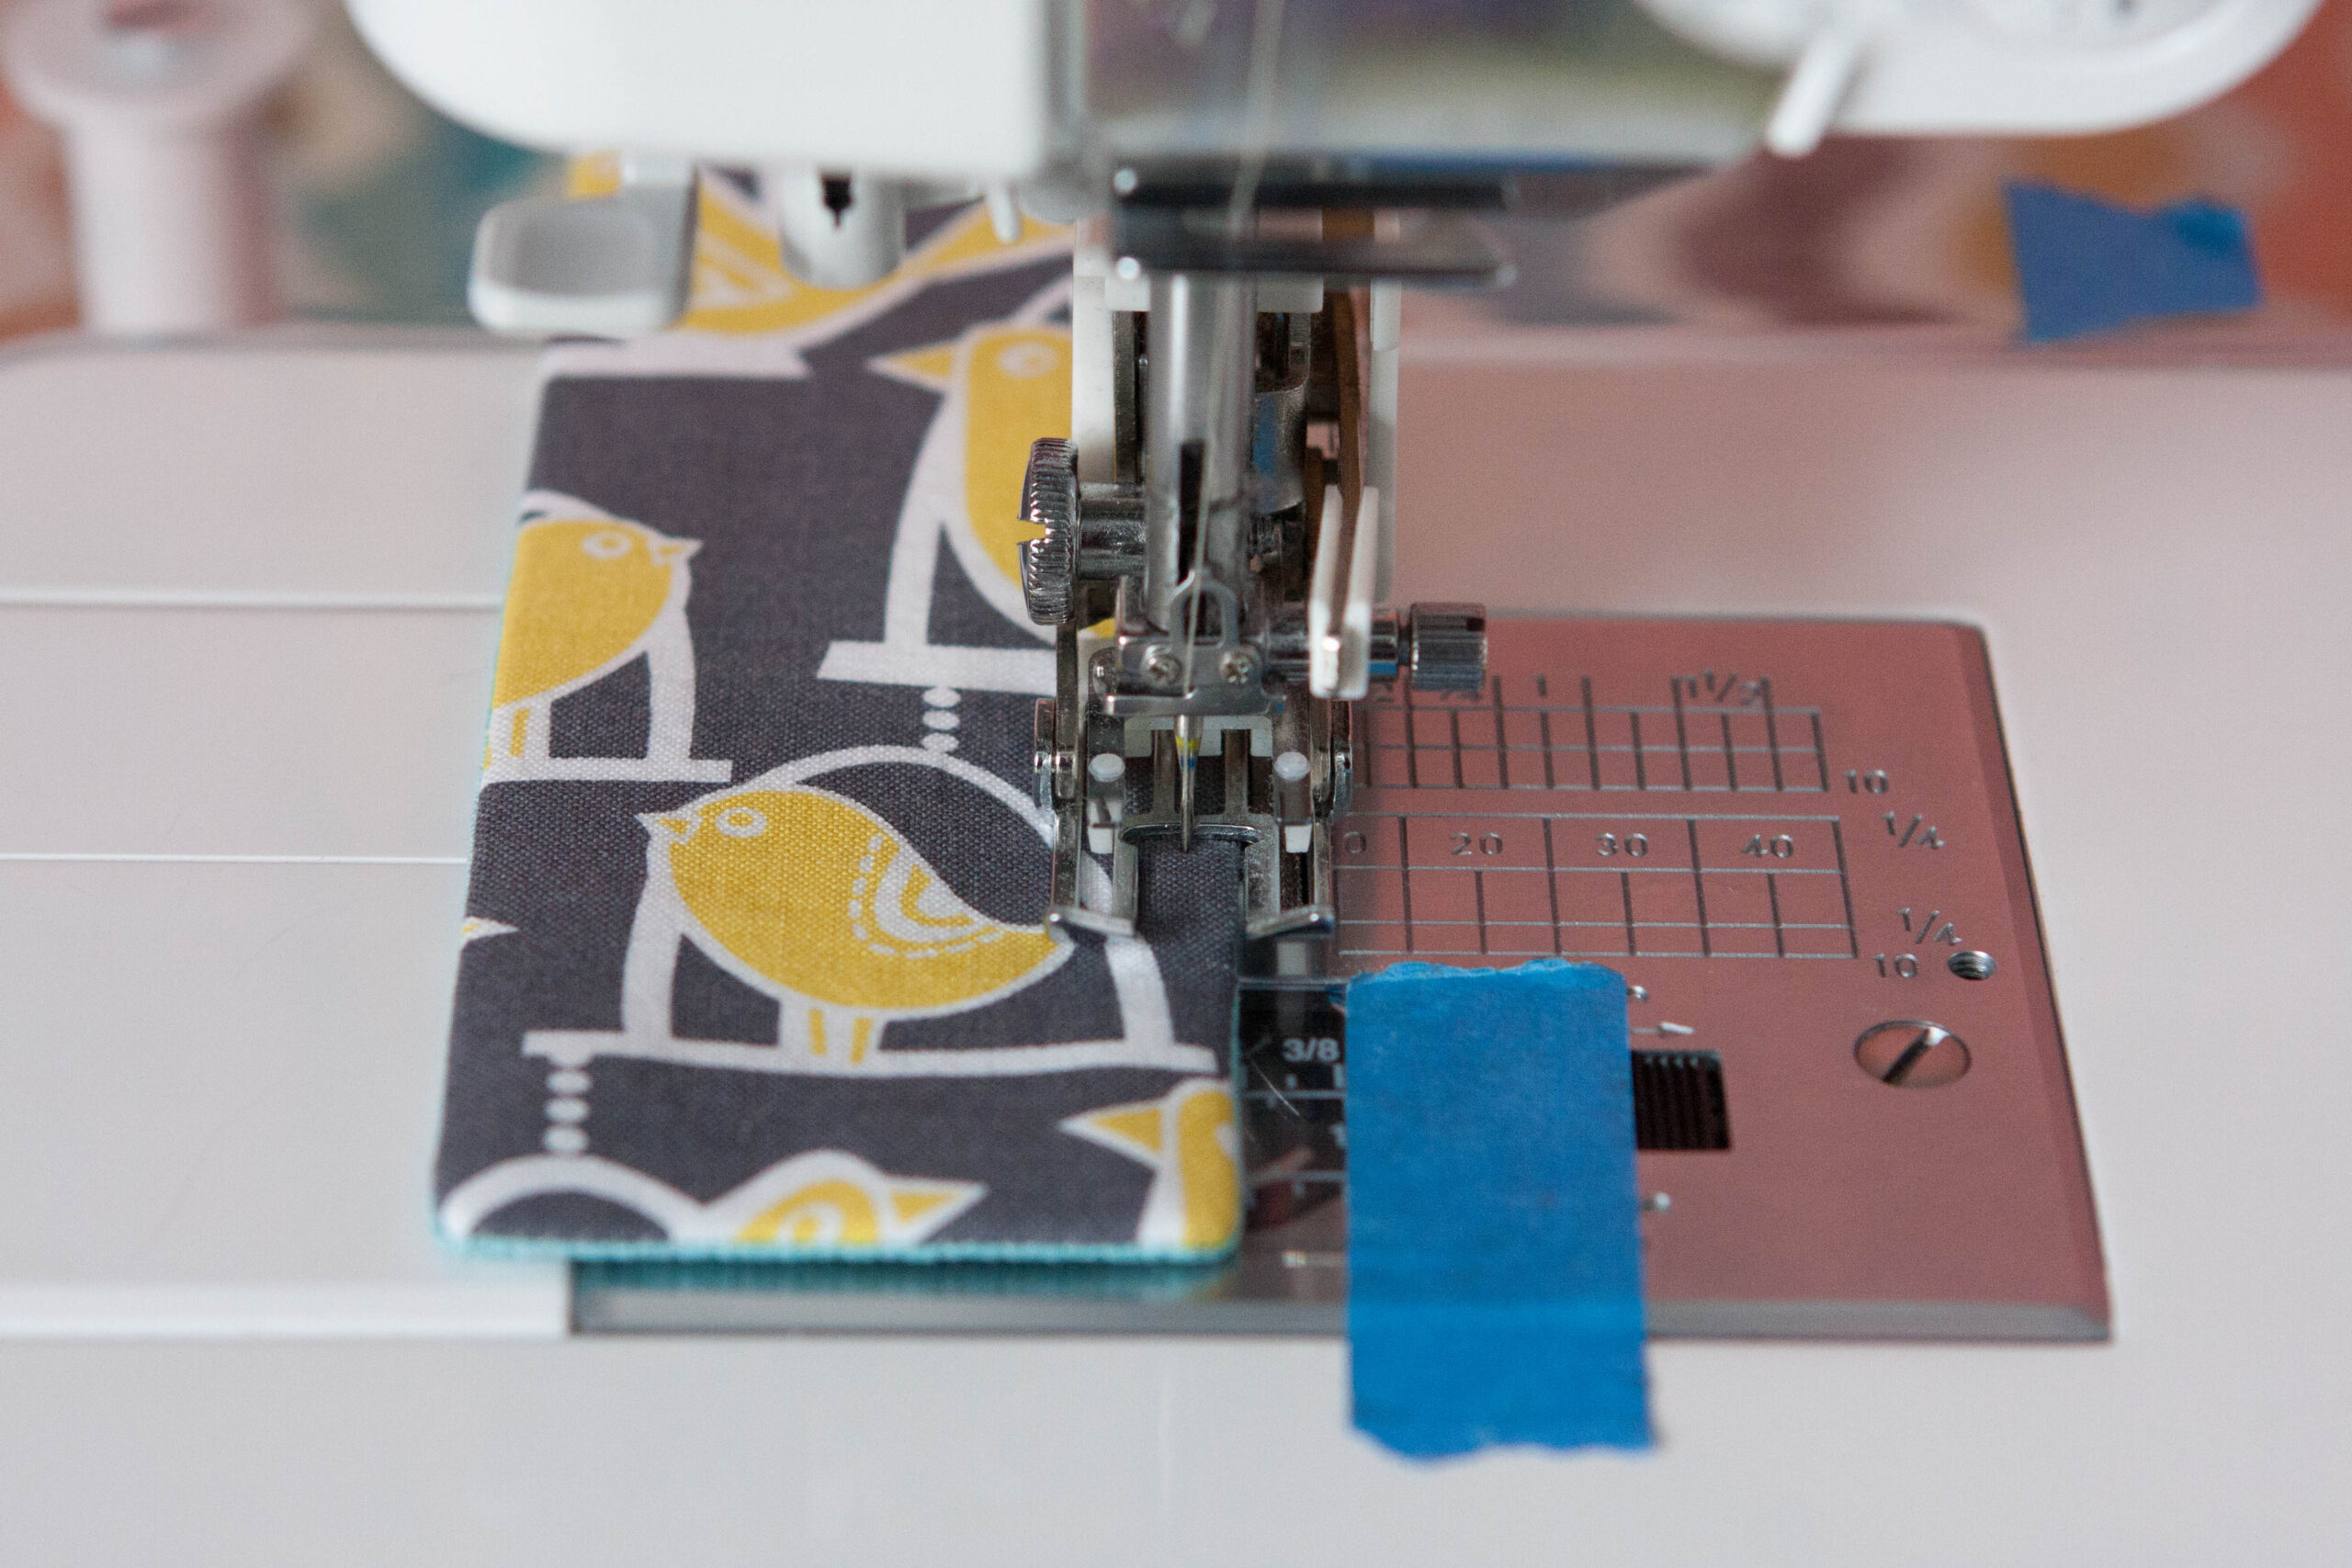
Step 7: Press your bookmark and then topstitch around all the edges with your sewing machine, closing the hole used for turning in the process.
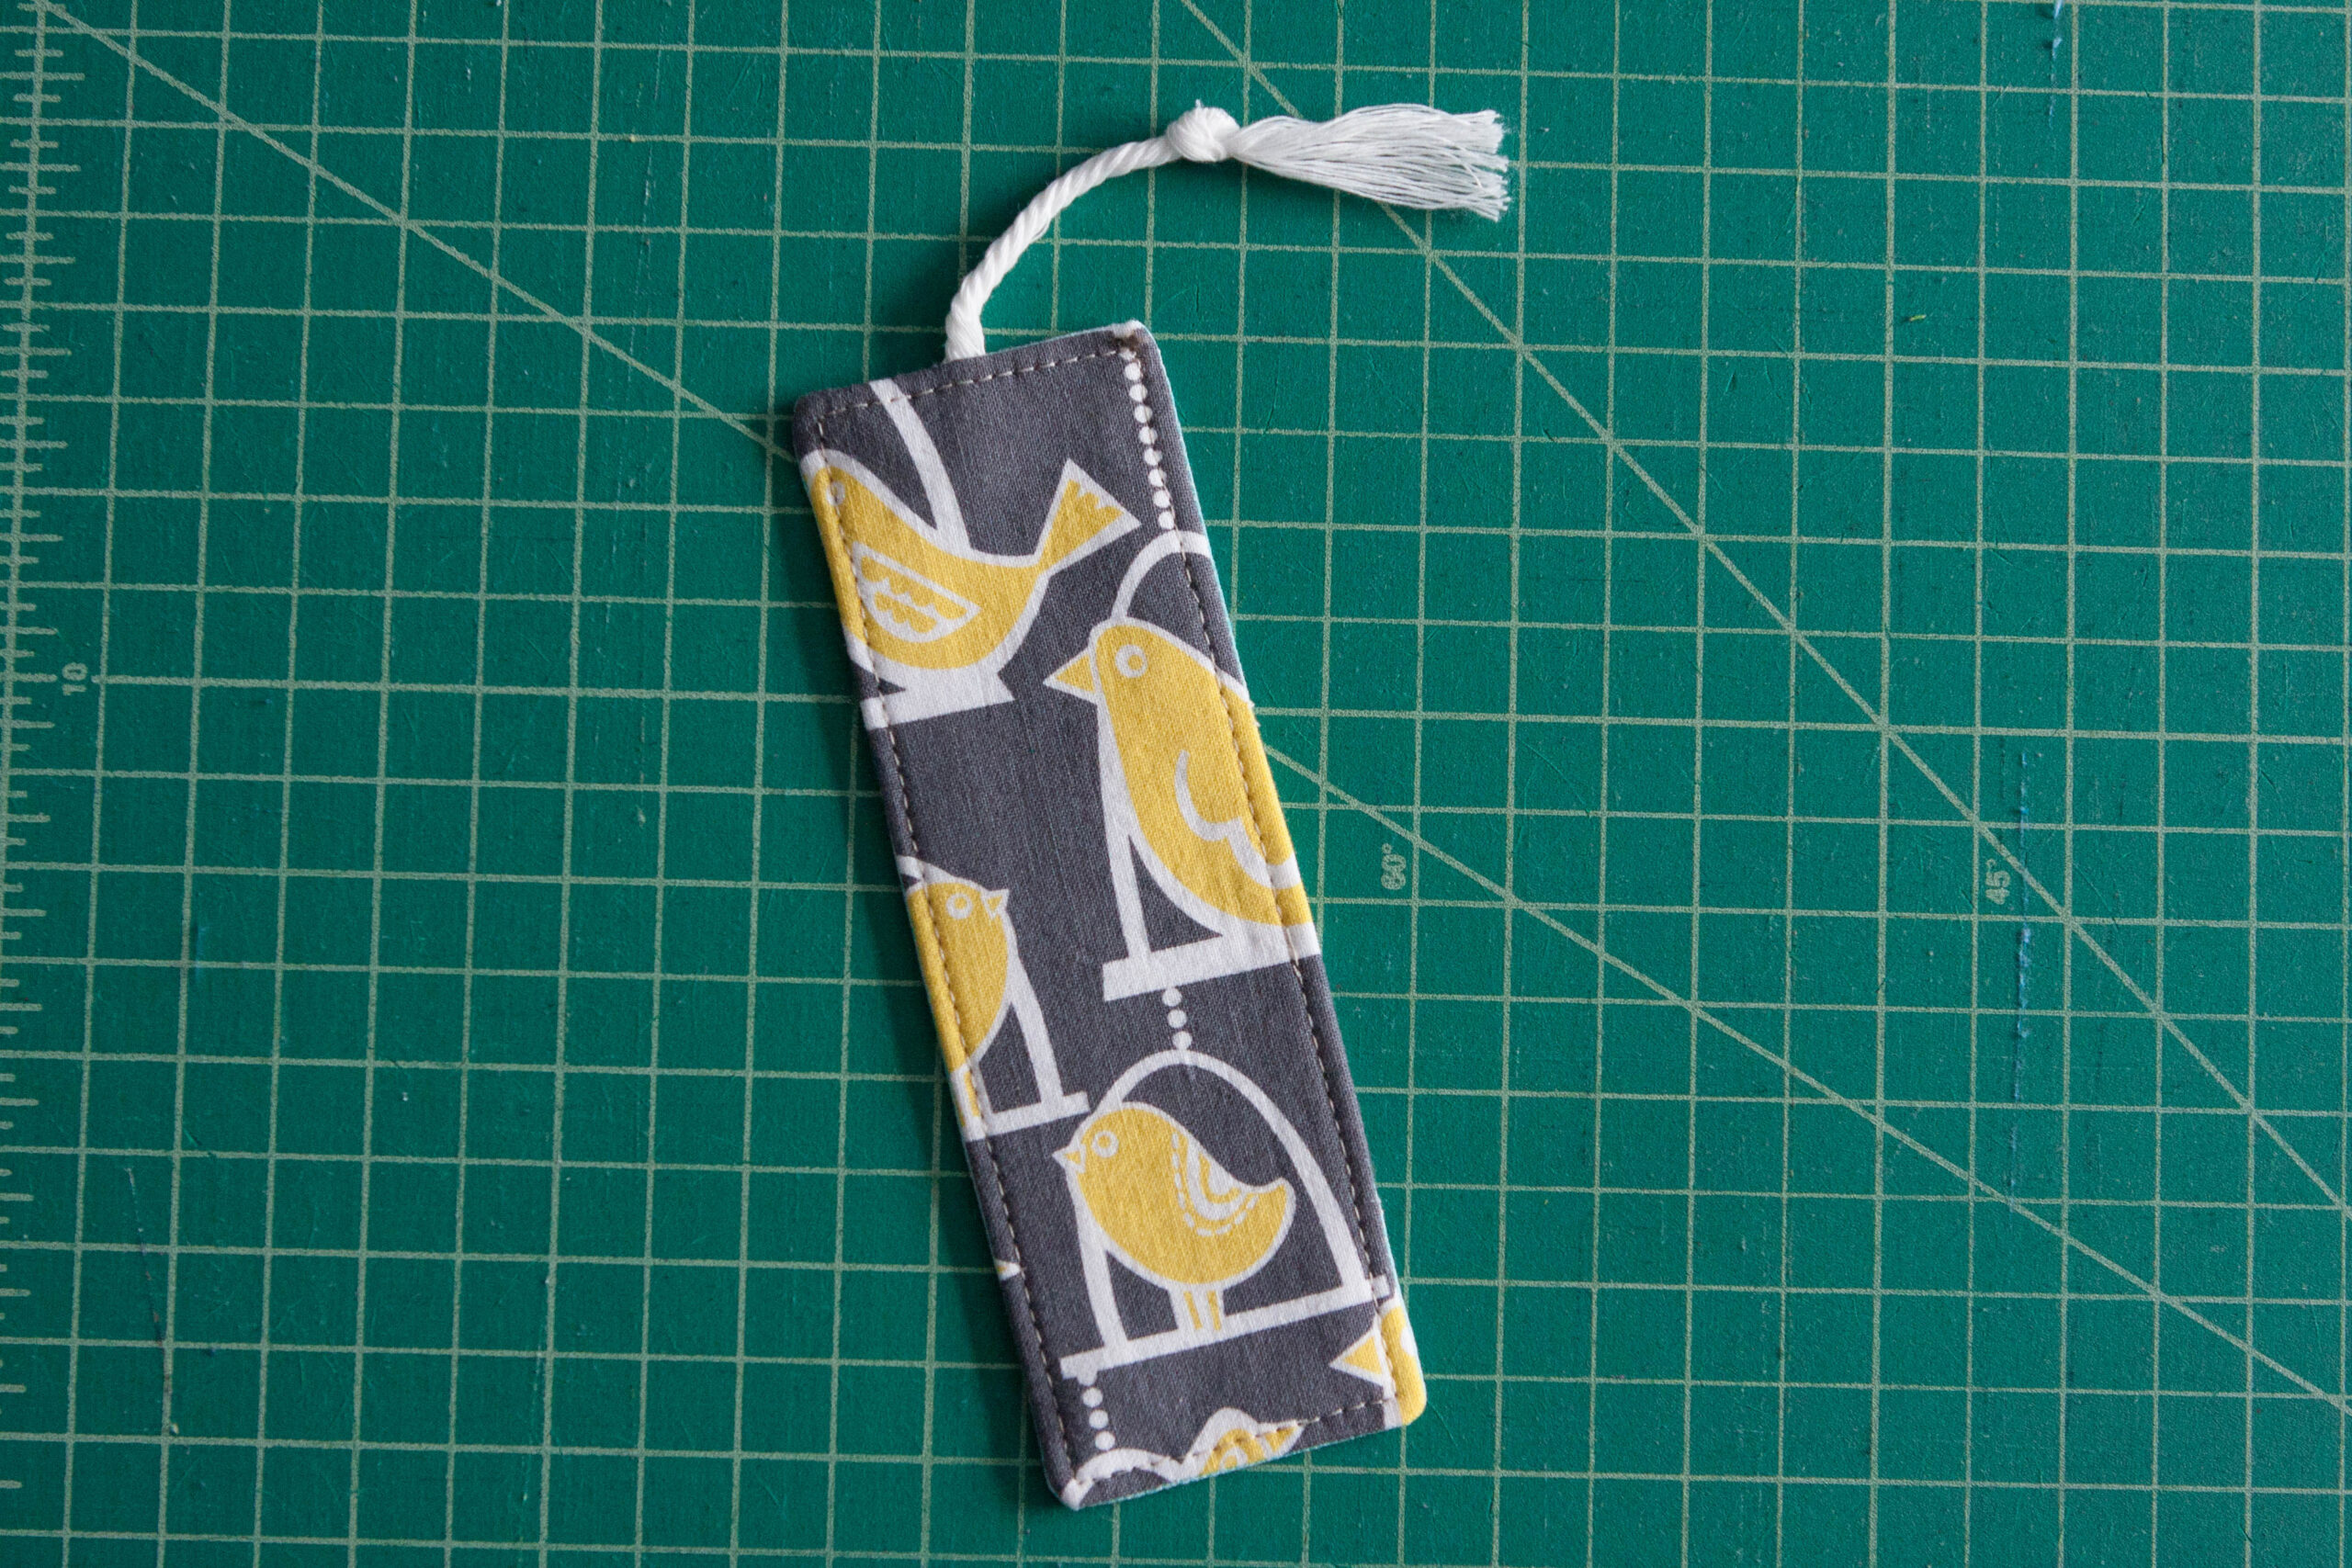
And you are done! Simple right!
If you have some great knit fabric you love, simply interface it with some SF101 and follow the same steps.
You can also sew smaller pieces of fabric together for a patched bookmark.

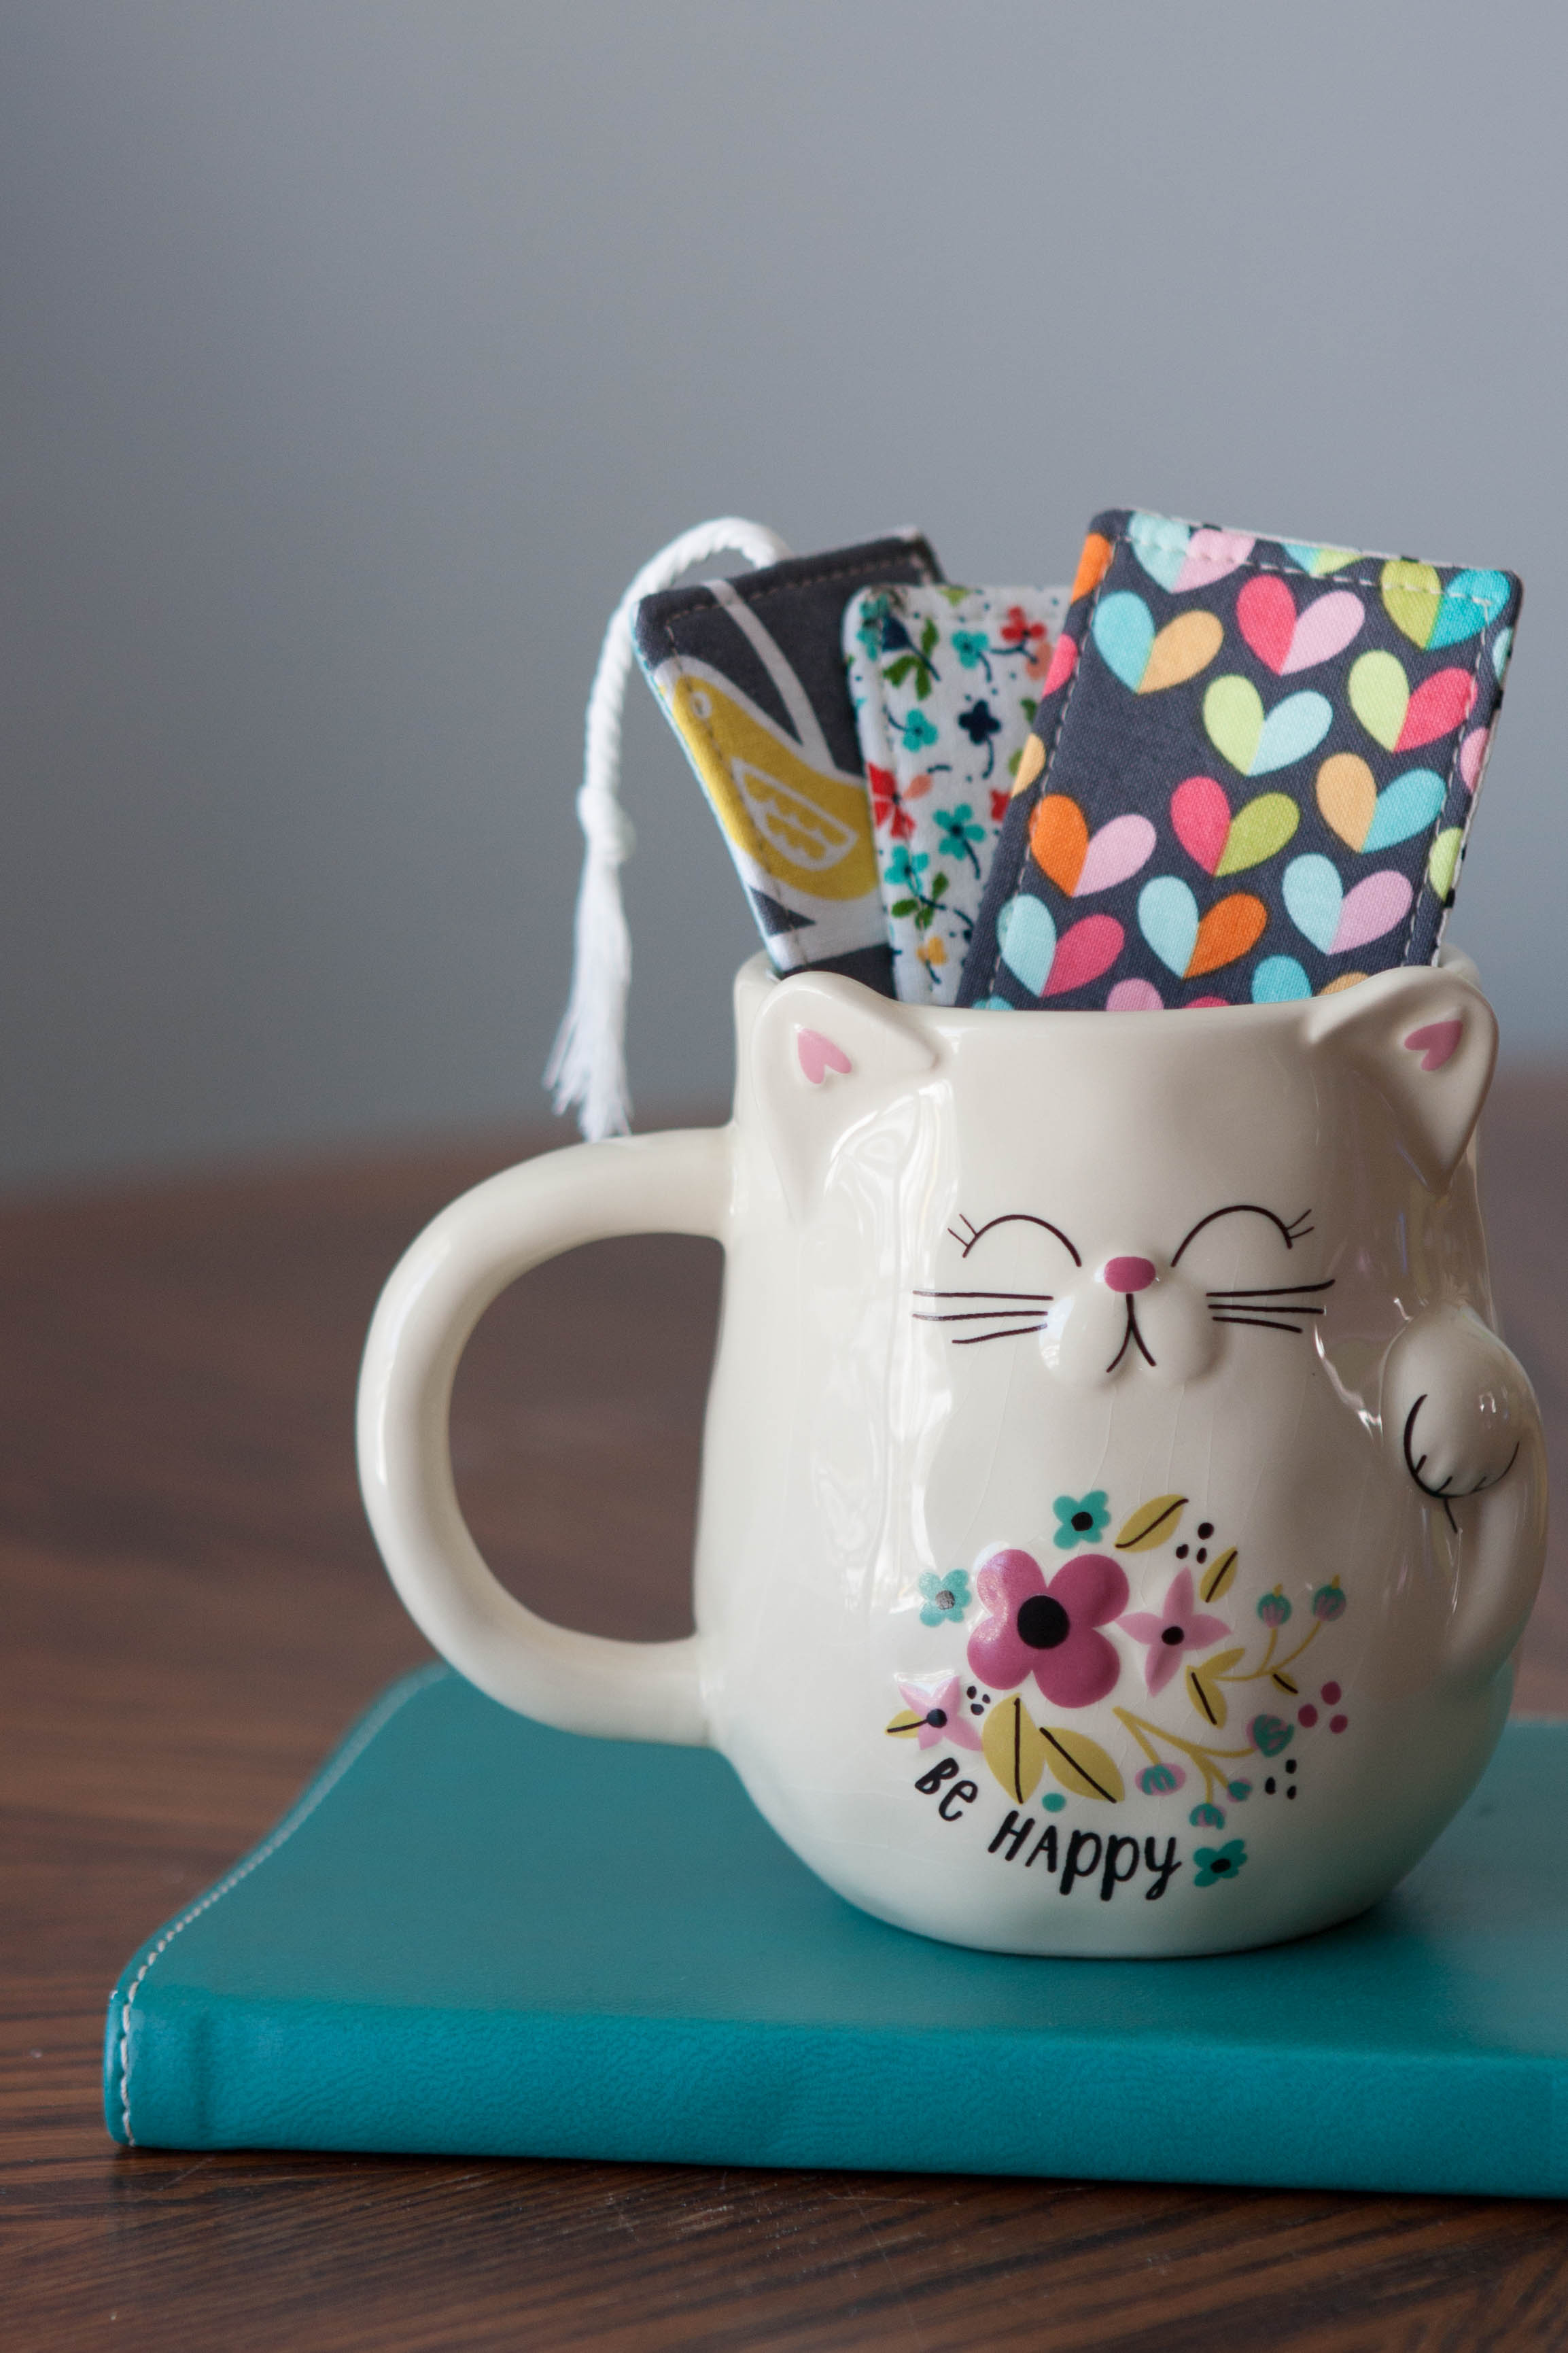
Sew up a kitty coffee cup full of them! These would make excellent teacher’s gifts, party favors, Mother’s Day gifts or a nice addition to any gifted book.
There you have it – the DIY Fabric Bookmark. Now go bust some scraps! Here's a couple other things to keep in mind:
Adding Embellishments or Decorations to Your Fabric Bookmark
Adding embellishments or decorations to your fabric bookmark is a fun and creative way to personalize your reading experience. Whether you're a fan of colorful ribbons, delicate lace, or shiny beads, there are endless possibilities for adding flair to your bookmark. One popular option is to stitch on small fabric appliques, such as flowers or animals, which can be easily sewn onto the fabric. Another idea is to use embroidery thread to create intricate designs or patterns on the bookmark. You could also try adding buttons, sequins, or charms for an extra touch of sparkle. Whatever embellishments you choose, they are sure to make your fabric bookmark unique and eye-catching. So go ahead and let your imagination run wild as you create a one-of-a-kind bookmark that reflects your personal style and enhances your reading experience.
Tips for Caring for Your Fabric Bookmark
Caring for your fabric bookmark is essential to ensure its longevity and maintain its appearance. Firstly, it is important to handle the bookmark with clean hands to avoid transferring dirt or oils onto the fabric. If the bookmark becomes soiled, gently spot clean it using a mild detergent and lukewarm water. Avoid rubbing or scrubbing vigorously as this can damage the fabric. Air drying is recommended to prevent any shrinkage or distortion of the bookmark. It is also advisable to store the fabric bookmark in a cool, dry place away from direct sunlight to prevent fading. By following these simple tips, you can enjoy your fabric bookmark for years to come while keeping it in pristine condition.
We’d like to thank Kelly for the Fabric Bookmark tutorial and Nienke for the Bug Bookmark Tutorial. If you enjoyed this tutorial, you might also enjoy our DIY Book Sleeve Tutorial.
Also, be sure to join our sewing community at the Peek-a-Boo Pattern Shop Facebook Group or join us on social media by following us on Instagram.