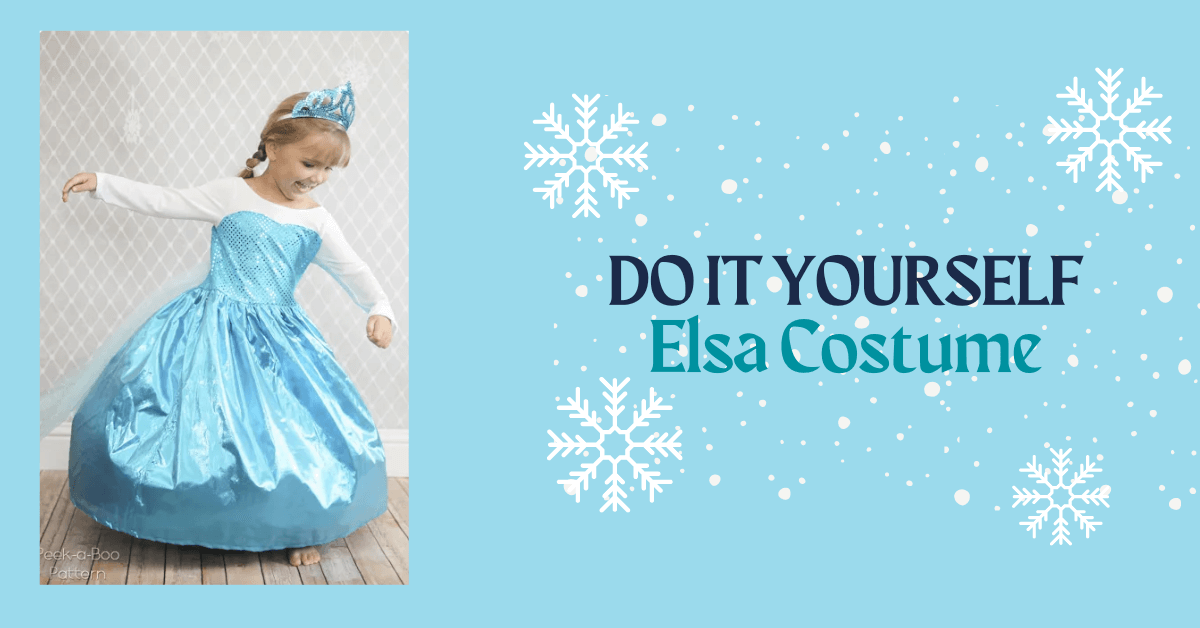
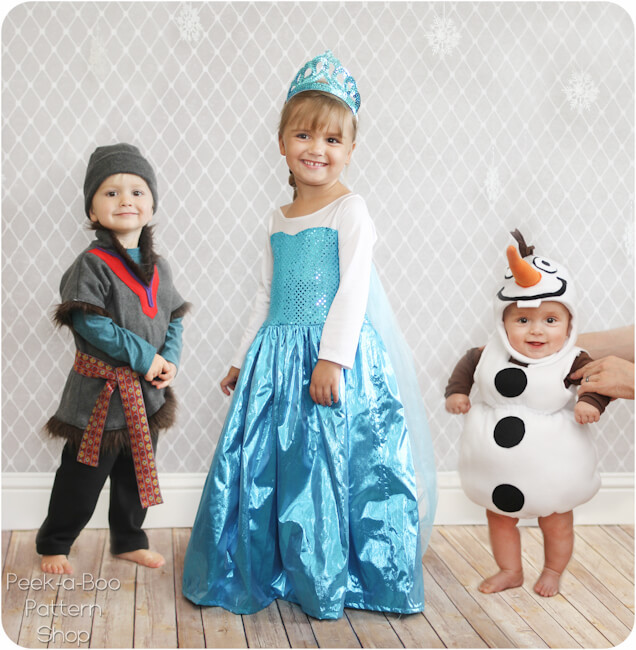
Make your little girl’s dreams come true with this DIY Elsa Costume. This Ice Queen was all the rage when my daughter was little and it keeps coming back. Elsa makes a perfect pair with our costumes for Kristoff and Elsa which we show you below. Now all you need is a reindeer…..or two girls so you can make Anna as well.
DIY Elsa Costume & Dress | DIY Frozen costumes
The Elsa Costume is long, sparkly and has a train…what’s not to love?!
And of course, the Elsa dress is perfect for twirling!
I was pleasantly surprised by how easy the Elsa Costume was and Anne adores her dress! It’s definitely going to get a ton of use and with the stretchy knit bodice it’s easy on/off and the costume will fit her for a couple of years.
Other Frozen Costumes
Don’t leave out the boys! Be sure to check out the tutorials/patterns inspired by Kristoff and Olaf. I think the Olaf costume is one of my all-time favorites. These costumes also have free patterns.
Let’s get started with the Elsa Costume!
Elsa Halloween Costume Materials:
- Download your FREE Pattern: The Elsa pattern is free when you Subscribe to our Newsletter or Join our Facebook Group. The Coupon Code is found in the New Subscriber E-mail and/or the first post in our Facebook Group. The pattern is roughly a size 4t but should fit ages 3-5 with some adjustments to the length
- 1/2 Yard knit fabric for the bodice: I used white spandex from the dancewear section
- 1/3 Yard blue stretch for bodice accents: I used confetti dot
- 3/4 Yard cape fabric: My cape is floor length. If you want an extra-long cape you’ll need more fabric. I used glitter tulle
- 1 1/3 Yards skirt fabric: I used tissue lame which I wouldn’t recommend. Costume satin would be a better choice
Elsa Dress Instructions
Dress Step 1: Print out your costume pattern at 100%. You will need to tape the bodice and sleeve pieces together along the dashed lines. Cut your frozen fabric out.
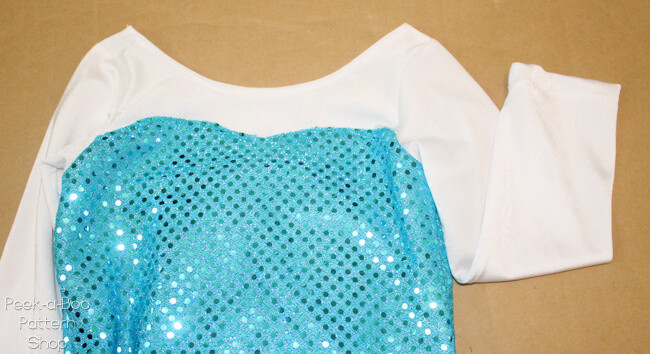
Dress Step 2: Lay the front bodice accent piece on top of one of the bodice pieces. Baste together along the sides and bottom edge and sew in place along the top edge (you can turn the edges under 1/4″ or just leave them raw).
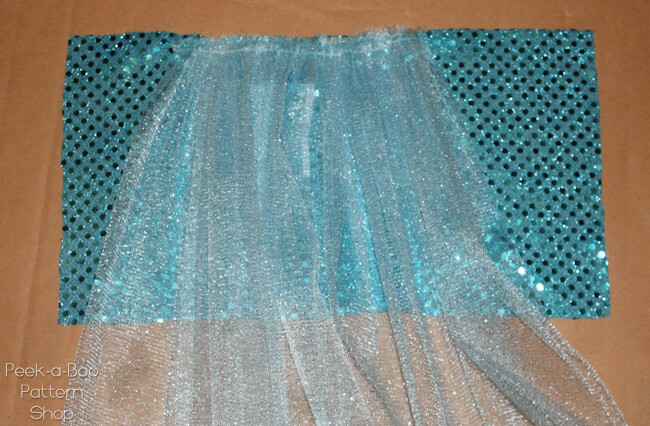
Dress Step 3: Fold the tulle fabric in half (it will now be 30″ wide and double thick). Sew a basting stitch across the top edge and gather. I left some room on each side so the cape wouldn’t end up right under her arms. Baste to the top of the back accent.
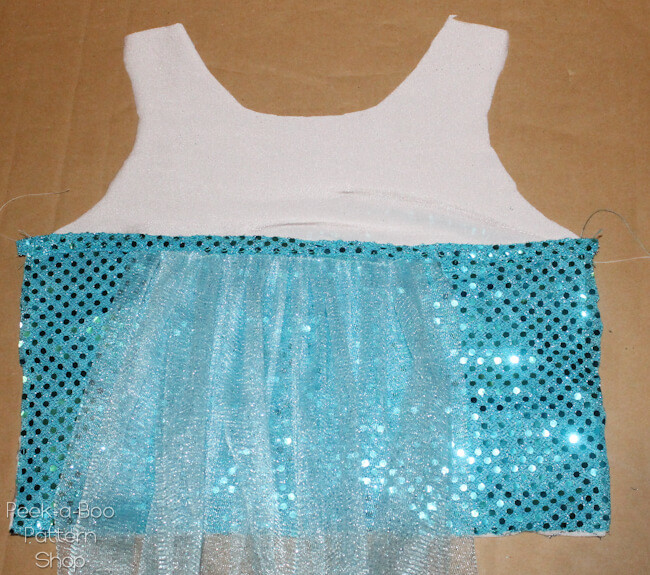
Dress Step 4: Cut a 1.5″ strip of confetti dot and sew to the top edge of the back accent piece with right sides together (RST)
Dress Step 5: Wrap the strip around to the front side and fold it down so it’s covering the raw edge of the cape. Lay the accent on top of the other bodice piece so the bottom edges are lined up. Tuck the raw edge of the strip under and topstitch in place. Baste the bodice accent to the bodice piece along the side seams and bottom edge (you’ll need to move the cape out of the way)
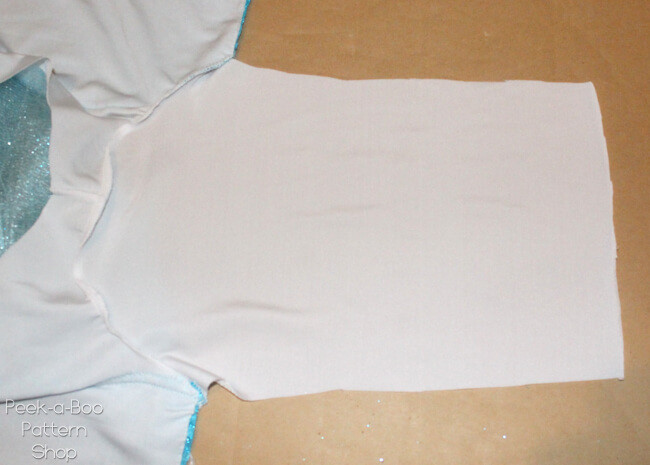
Dress Step 6: With RST sew the front and back together at the shoulder seams.
Dress Step 7: With RST sew the sleeves into the arm openings
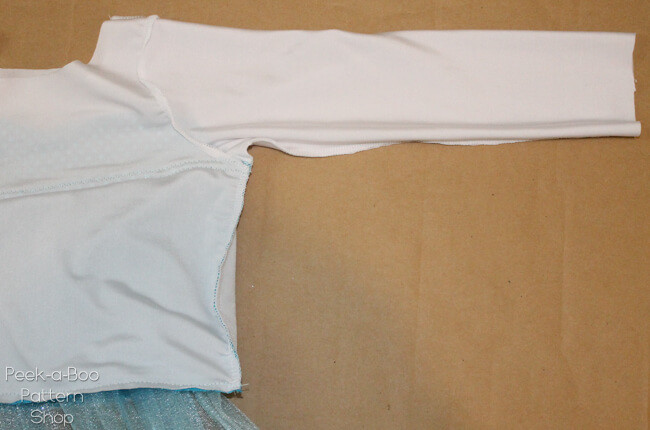
Dress Step 8: With RST sew up the sleeve inseam and bodice side seams
Dress Step 9: Turn the neckline edge under 1/4″ and topstitch with a zig-zag or double needle. Turn the sleeve ends up 3/4″ towards the wrong side and topstitch with a zig-zag or double needle.
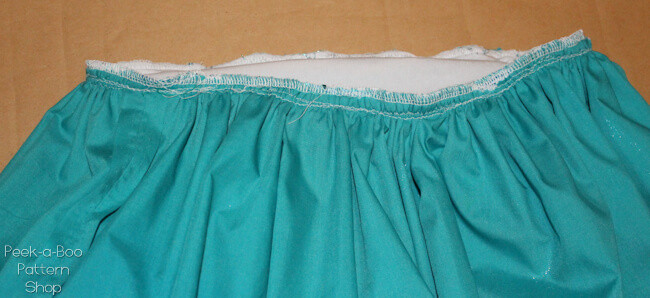
Dress Step 10: Now it’s time for the skirt. I didn’t take many pictures but it’s assembled the same way as any other skirt. Sew the pieces together along the side seams with RST, hem the bottom edge and gather the top edge to match the bodice. Then with RST sew the bodice and skirt together. Since I used tissue lame (which I wouldn’t recommend) I added a layer of broadcloth to my skirt to keep my fabric from tearing at the seam line.
And that’s it! A fun afternoon project that your little one is sure to appreciate it 🙂 Be sure to come to share your creations in our Peek-a-Boo Pattern Shop Facebook Group.
Other Costume Tutorials

46 Responses
Merci beaucoup pour les explications et le modèle
Amicalement
Thank you thank you for making this available. My 4 year old is in LOVE with this dress. It’s a perfect Halloween costume, much more durable than a store bought version. We’ve gotten so many compliments on it! She wears a 4/5 and this fits perfectly with a bit of length added to the skirt.
I made a bigger version of the Olaf suit, too, and it’s a winner as well. Thank you again!!
I made the dress for my 3 year old and the olaf costume for my one year old. It was the cutest thing ever!!! Lots of girls had an Elsa dress, but only my girl had a handmade dress all the way down to the floor AND a sidekick who walks in pretty much the same fashion as the real thing! It’s been a week and my girl insists on wearing it every single day. Thank you for an awesome pair of patterns and instructions!
Hello, beaut dress!how can i download the patern?
thanks you so very much for the free patterns. I can’t wait to start one for my grandbabies……I guess I should say I need to start several….. 11 grandbabies in all. I think I will start with the party pants. Have a beautiful Christmas .
I love this tutorial, I didn’t print out the pattern but used the instructions. I purchased a store bought t-shirt and took off the sleeves and slit the sides then added bodice material and reassembled. Thanks for the idea my granddaughter will love this!
I have to get these finished by tonight, because the two girls I’m making the dresses for are about to leave for Italy. I can’t for the life of me figure out how to STOP THE NECKLINES FROM SAGGING! I turned it over 1/4″ and did the zigzag stitch, but it sagged horribly. I also tried it with a regular straight stitch, and it still sagged. Does anyone have any advice?!?!? I’m desperate!!!
I know this was months ago but if I made it this way and was having this problem I would consider using Fold Over Elastic. Stretch it as you sew it on.
Thank you Amy, for the lovely pattern!
I was looking to make an elsa dress for my daughter, and i am a complete beginner, ( read never made a dress before :D) and i got your website… the pattern is so cute, and so easy to follow! i followed it to a ‘T’! and the results are amazing! myt little girl is so happy with her dress.. and i feel more confident to venture more into it! thanks a ton!
the size is perfect as well…
I’m so glad you enjoyed it! My daughter still wears her dress almost daily 🙂
Thank you so much for the pattern! I made the dress for a precious little girl that I babysit for her 5th birthday party. She didn’t like the store bought variety because they are too short on her and “Elsa’s dress is all the way to her feet!”
My daughter LOVES her new Elsa costume. When I call her all I hear is, “no mom, I’m Elsa!”
Thank you!!
I’m so glad she likes it!
Thank you so much for the free pattern, it’s so lovely when someone takes the time to help others. I had a go at this before christmas but struggled with the sequin fabric, I wasn’t particularly well either which didn’t help. My twin grand daughters turn 4 on Jan 14th so I am going to make them for their birthday. Happy new year!
Hi, thanks a lot for your pattern 😉 especially for this xmas period.
I am french and I do not understand what is RST ?
Is it the sewing machine or the elastic sewing thread ?
thanks in advance 🙂
RST means right sides together, or in other words, front sides of the fabric facing each other.
This is the first time I’ve used a free downloadable pattern from the web. Thank you for posting it! My daughter had her first princess party today and I was able to make it the morning of. It was fun to have the only homemade outfit:) Appreciate the post. Now the trick will be getting her to take it off for bedtime…
Thanks for this wonderfully easy pattern. I made it for my granddaughter and she loves to play in it. Look forward to more of your nice patterns.
How do I send you a photo? Lucy
Feel free to email me anytime: amy@peekaboopatternshop.com
I have looked and looked, but I may have missed it somewhere. I can’t tell if the pattern pieces include the seam allowance or if I should add 1/2″ around all. Please clarify – Thanks!
Seam allowances are included. I used a 1/2″ seam allowance
Hello,
The bodice piece #2 and sleeve piece #2, are these extended pieces – meaning to make them bigger? This is my first attempt at anything other than a skirt and following a pattern, so any further help would be appreciated!
Thanks!
Trudi
I went to my fabric store (Joann’s) to get some of the white spandex material. It seems like there are a few kinds and have a different percentage of spandex. Do you happen to know the exact name or have a better description of that material? The kind I was looking at said it was swimsuit lining. I don’t know if there was a dance wear section, I just saw a section that had different kinds of spandex. Thanks!
I made this today for my 4-year-old for her Halloween costume and it is a wonderful pattern! Thank you! I did have to make the torso wider by 1/2 an inch for my daughter after I made a “practice” top out of an old knit shirt, so I just cut the pattern straight down from the shoulder to the bottom and then taped it to a paper with the two pieces 1/2 an inch from each other, which worked great. If anyone is doing this don’t forget to also add that extra 1/2 inch also to the bodice accent piece.
Just one small thing to add to your tutorial, you didn’t mention the seam allowance–I did a really small one with it just at 1/4 inch or right on the presser foot, but what did you use?
Thank you again for such a helpful pattern and tutorial. I searched the internet for something simple for my daughter’s Halloween costume that actually looked cute but easy. This was wonderful and even easier than I had hoped.
I’m glad you enjoyed it! I’m pretty sure I used a 1/2″ seam allowance 🙂
Thank you so very much! I am going to have one very happy little granddaughter for Halloween!!
Thank you for sharing your pattern. I just made one for my daughter and it was so easy to follow. 🙂
Hi ! So far the pattern is going good , however the confetti dot fabric seems to gunk up the needle and it also shreds . Can’t stitch very far and tried a different machine .
Any tips on sewing with the stretch dot fabric to prevent this from happening ?
Thanks !!
I’ve sewed frequently with this material. Last outfit was in silver dot as chain mail for the son who wanted to be a knight in shining armor.
Anyway, stop your needled every five or six inches and just wipe it off with a bit of rubbing alcohol. You don’t have to unthread the needle for this. Just put the alcohol on the scrap cloth and rub it up and down your needle.
The little alcohol prep wipes would probably work as well and they might be easier as they come pre-moistened.
A worker at Joann’s told me to use something called “Sewer’s Aid” on the needle because that material would gunk it up. She said they didn’t sell it at their Joann’s anymore. Not sure if any other Joann’s carry it. I ended up buying some from Amazon because I have the Prime shipping. I haven’t sewn the costume yet to know how well it works.
I downloaded the pattern but am not seeing a pattern for the skirt or cape…am I missing something? please help…thanks!
oh wait, I think I see it now…are they just rectangles?
Yes they’re rectangles. It has measurements for them
I was disappointed with this tutorial, my daughter is 4 and after I started to sew the pieces together I realized it wouldn’t even be close to fitting her around the chest. I had to add an inch to each side for it to just barely fit and that meant adding to the sleeves as well 🙁 It could have been my fault but I double checked the pattern size was correct before I started. In the end I made it work and she will love it of course, I’m just disappointed it looks so pieced together.
Were you using a fabric with stretch? This is designed for stretch fabrics only. It fits my 4.5 year old great and she wears some 4t and some 5t. I know it’s fit several other little girls fine as well
Thanks for sharing! It is really cute. Can I ask where you got the crown? Thanks again!
They had it at joanns for $1!
Very cute! I may adapt this for my 12yo; she would love this. I like how you included the cape — very clever. BTW, it looks like step 4 should be WS to RS, not RS together. Thank you for sharing!
loving the pattern…thanks so much
Thanks for the pattern
the baby olaf is so stinkin cute!
oh, wait, there was a tutorial too, right?
Looks great, I gonna give it a try.
but oh my gosh, how cute is the baby olaf 😉
I have a question. I’m about to cut out the bodice accent piece, shouldn’t it be cut on the fold just like the main bodice piece?
Yes it should 🙂 Sorry about that!
I hope this doesn’t seem silly, but the rectangle that tapes to the bodice, does it also tape to the accent bodice. So should the bodice and accent be the same length?
eep so much cuteness!!!! She looks like she’s in heaven
Anne looks so happy! Ella definitely needs one of these for Halloween. Thanks for a great tutorial, Amy!