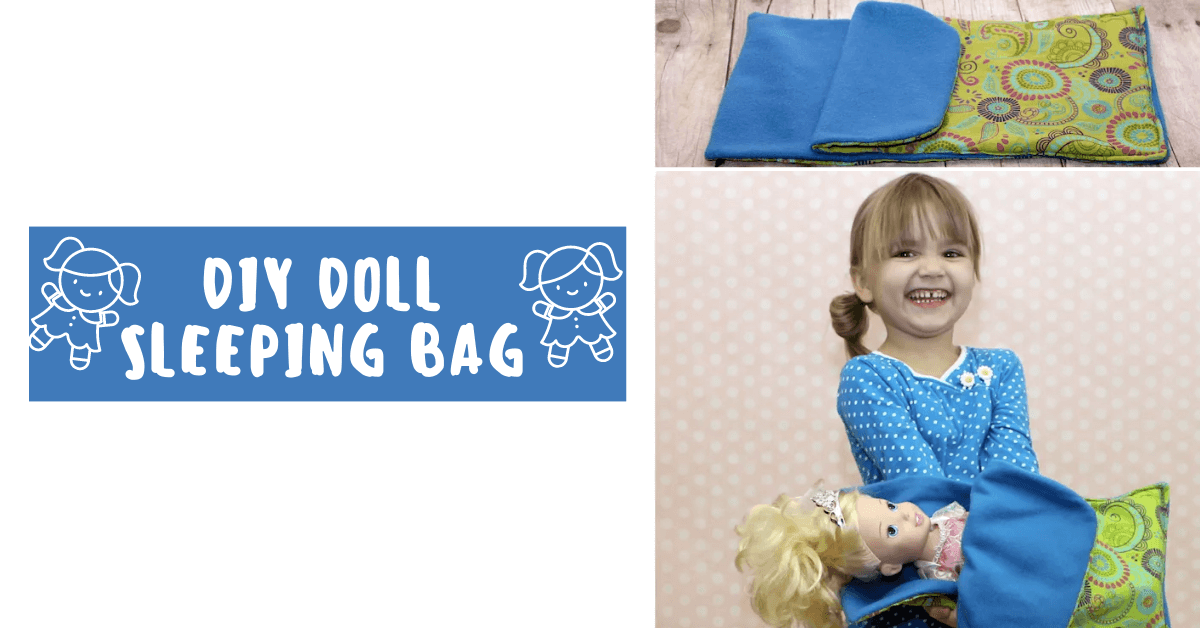
DIY Doll Sleeping Bag | Free Tutorial
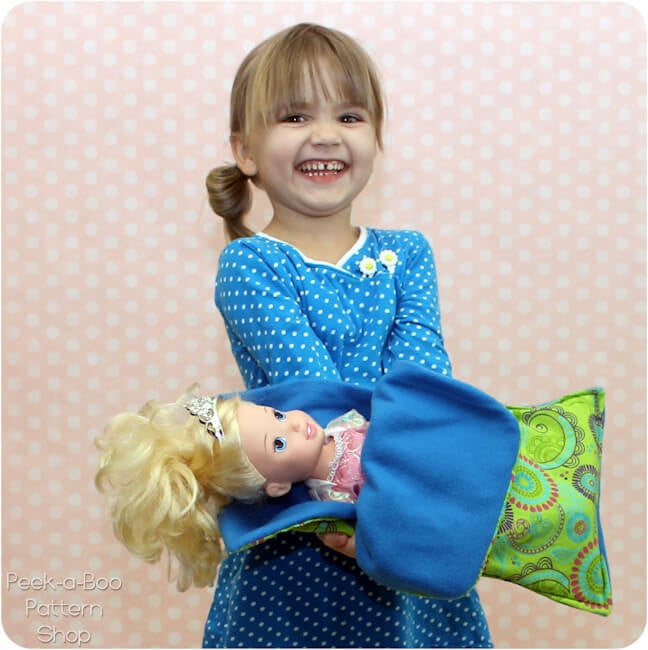
This week Anne and I made a quick and easy DIY Doll sleeping bag for her dolly. Since she was the one doing the sewing (yes my 4-year-old made this!) we really did keep it simple :) While you're here, be sure to check out our Doll Clothes Section for more fun tutorials for dolly.
DIY Doll Sleeping Bag Tutorial
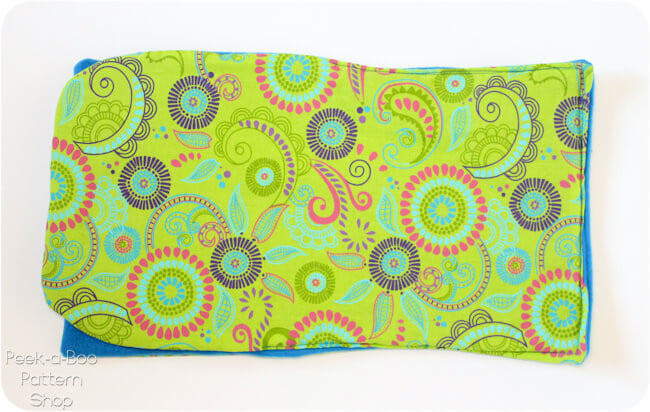
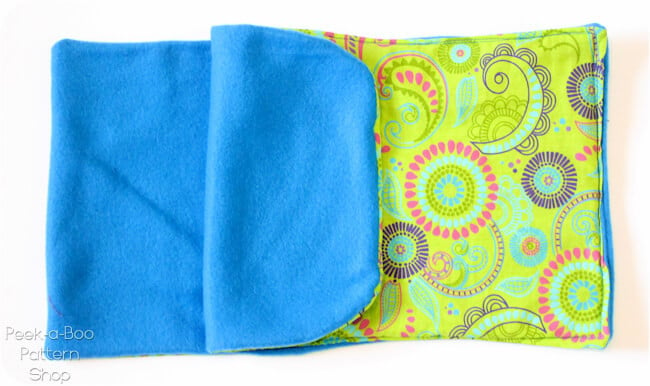
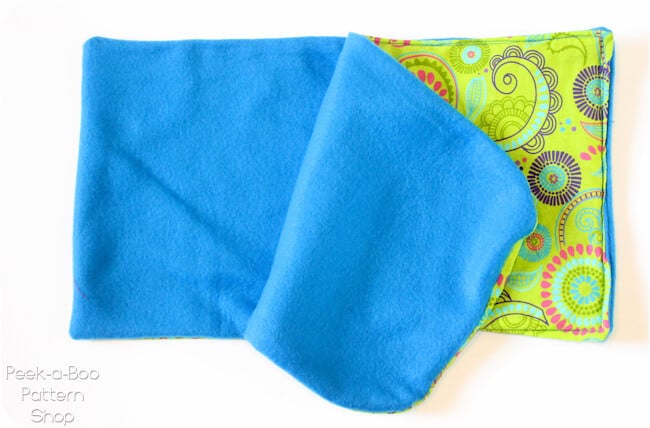
All you need is one fat quarter of fabric and some fleece to complete this doll sleeping bag tutorial. The top of the sleeping bag folds down so the doll's head can peek out the top.
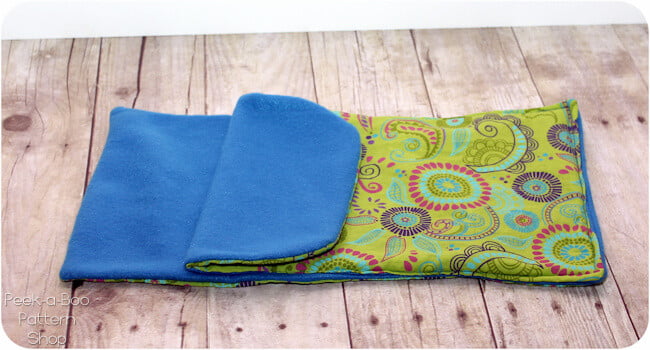
And one side flaps open so it's easy to get dolly in and out

This easy doll sleeping bag is sure to make any little girl happy! And since she made it herself she's even happier about it :)
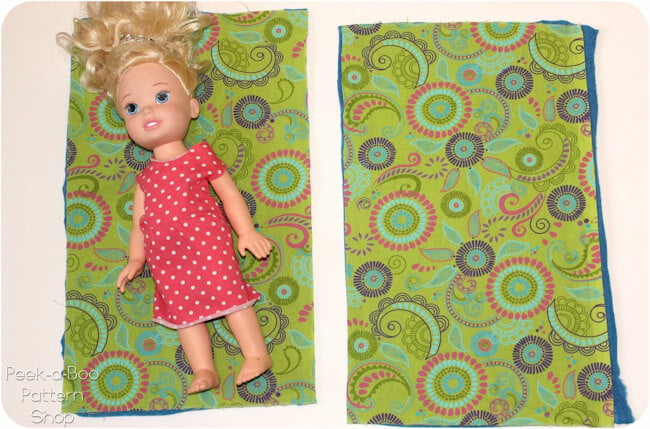
Step 1: Cut your FQ in half. This was the perfect size for a 15" Disney princess doll. Her 12" baby dolls fit well in it too. So we now have 2 pieces that are 18" tall by 11" wide. Then we cut 2 more from our fleece to make the sleeping bag extra cozy. To make this project even simpler you could skip the quilting cotton and just do a single layer of fleece.
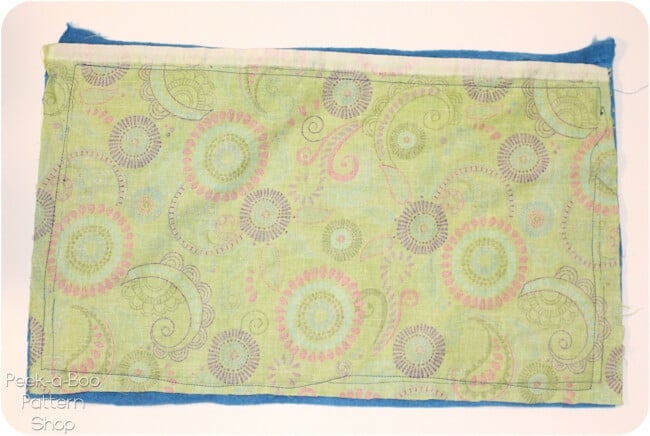
Step 2: With right sides together (RST) sew one layer of fabric to one layer of fleece, leaving a gap at the bottom. This gave Anne a great chance to practice pivoting around corners
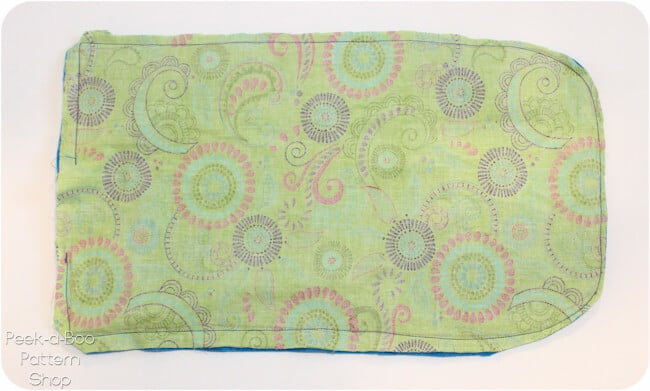
Step 3: We decided to round the corners of the other pieces and then sewed them together with RST and leaving a gap at the bottom. This is a great opportunity to practice sewing curves. I had to help her a bit but she was still able to do most of it.
Step 4: Now turn both pieces right side out. Make sure the raw edges are tucked in along the bottom and then topstitch all the layers together. To leave room for dolly's head we started 4" down from the top on one side and 6" down from the top on the other side to make it a bit easier to open.
And that's it! Quick, easy and a great introduction to sewing! Make sure to come join us in our Peek-a-Boo Pattern Shop Facebook Group.