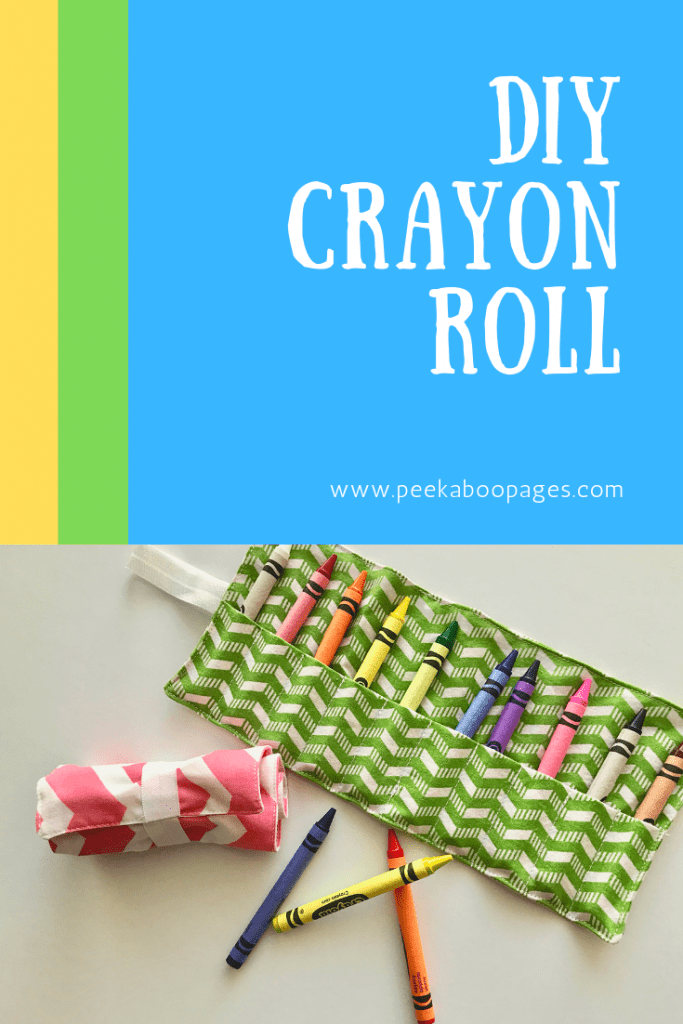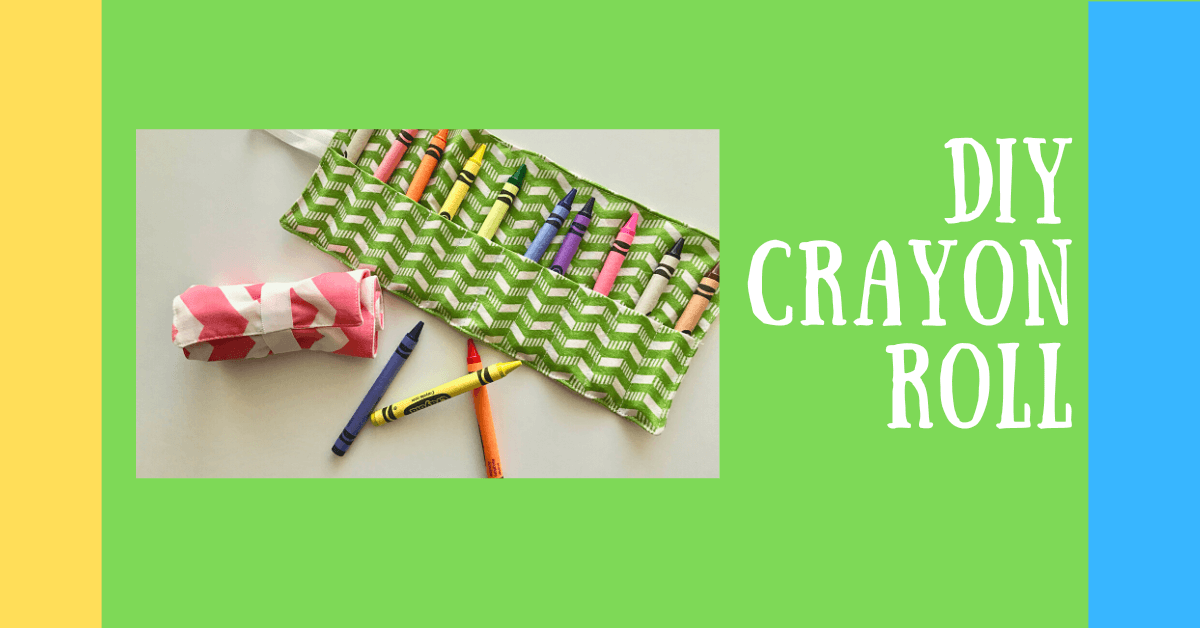
DIY Crayon Roll
DIY Crayon Roll: Step-by-Step Guide
I love a new box of crayons, but I don’t love how the box gets beat up and destroyed by my children in about 2 minutes. This cute little DIY crayon roll is hard to destroy, cute, and fun to make. If you're tired of finding crayons scattered around your house or want to keep them organized and in one place, then this crayon roll is the perfect solution.
In this blog post, we will take you through all the necessary steps required to make a crayon roll at home. We will start with gathering essential materials such as fabric, thread, and ribbons. Next, we will provide a pattern for the crayon roll that you can download and understand easily. Finally, we will guide you through the step-by-step sewing process so that even beginners can follow along.
DIY Crayon Roll | Tutorial on How to Make a Crayon Holder Roll
Seriously therapeutic to sit down and sew these in bulk. Plus-lining those crayons up in a rainbow makes my heart sing!
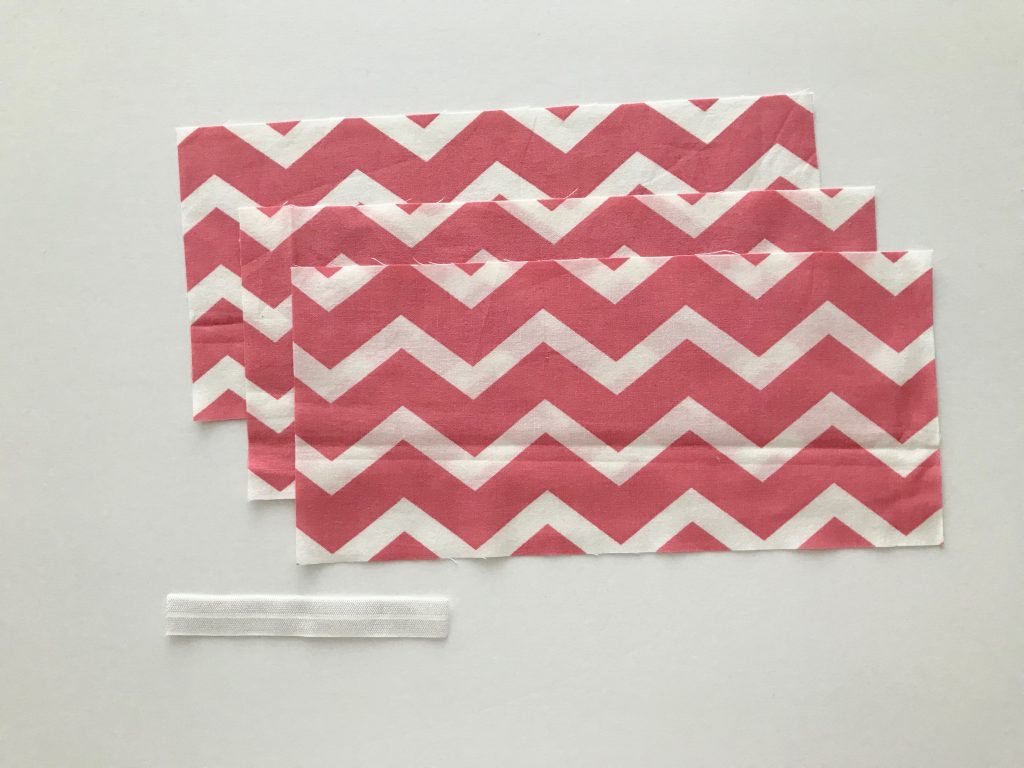
Materials:
- Three 10 1/2 x4 3/4 inch rectangles for main fabric
- 4 1/2 inches of elastic
- Sewing Machine / Rotary Cutter / Thread
- Crayons!
How to Make the Crayon Roll
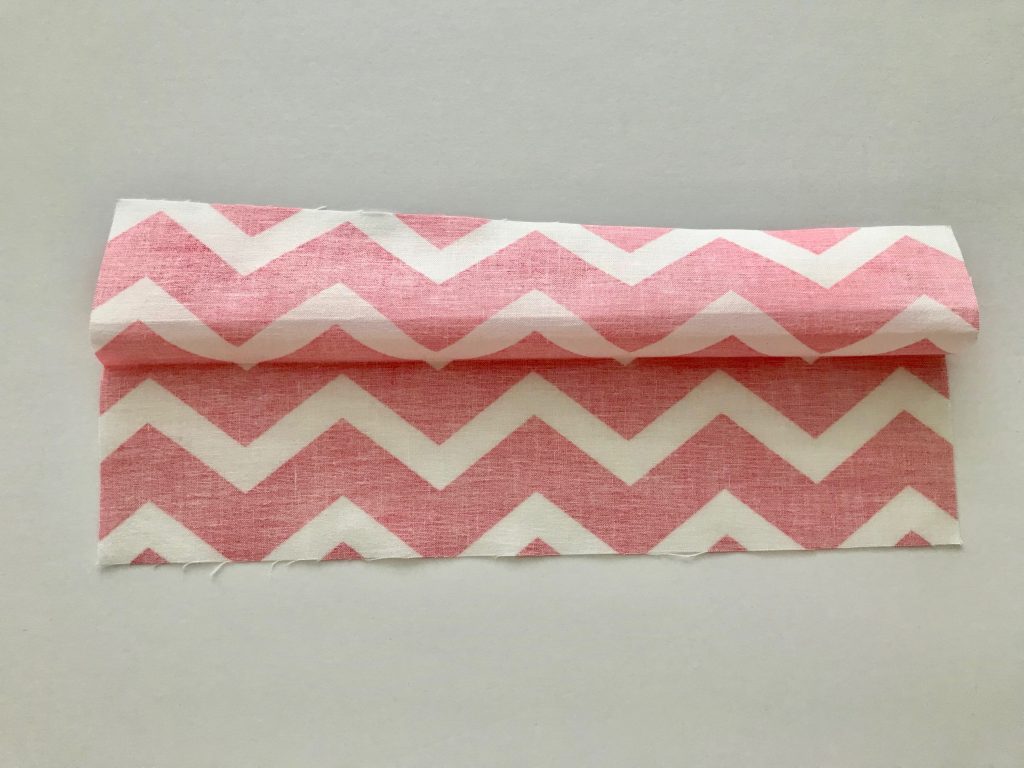
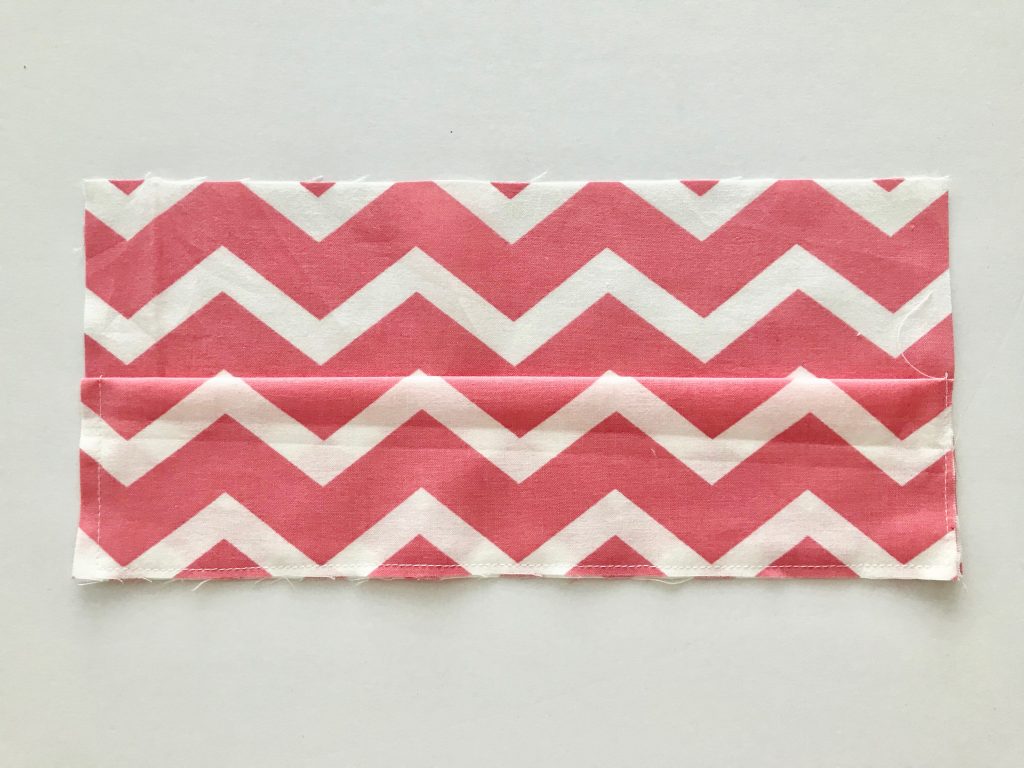
Step 1: Fold one of the rectangles in half, wrong sides together and press.
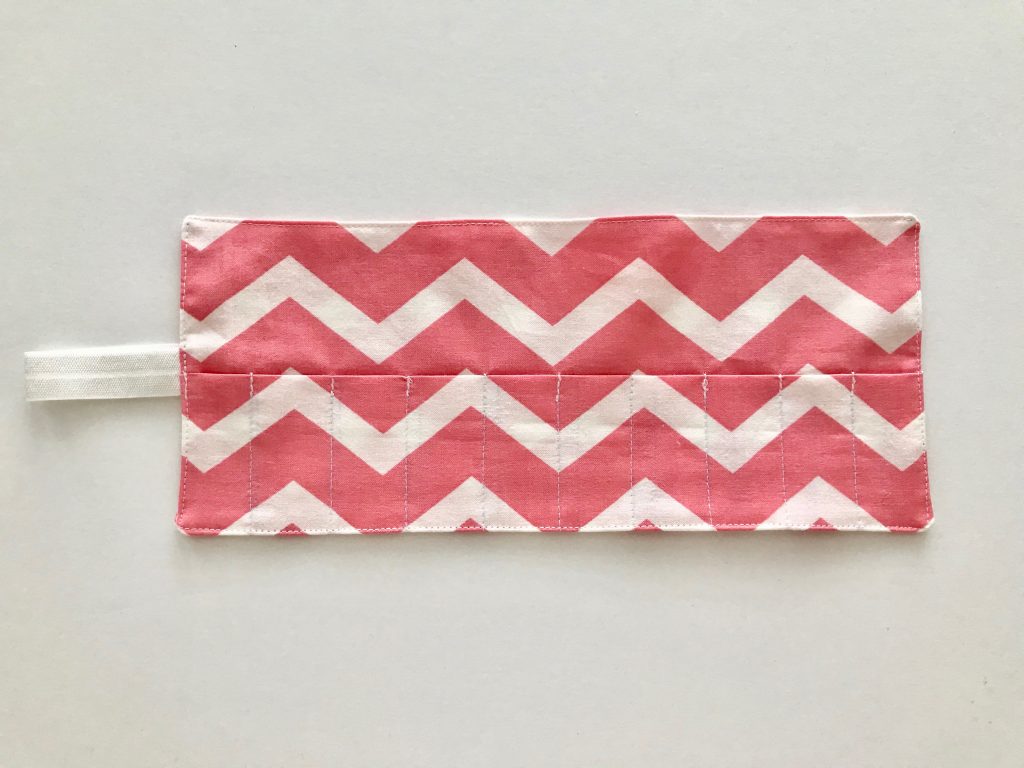
Step 2: Then place that folded rectangle piece of fabric on top of a second rectangle, right sides together, with the raw edges lined up. The folded edge of the short rectangle with be in the middle of the large rectangle. Baste along the raw edges of the folded rectangle.
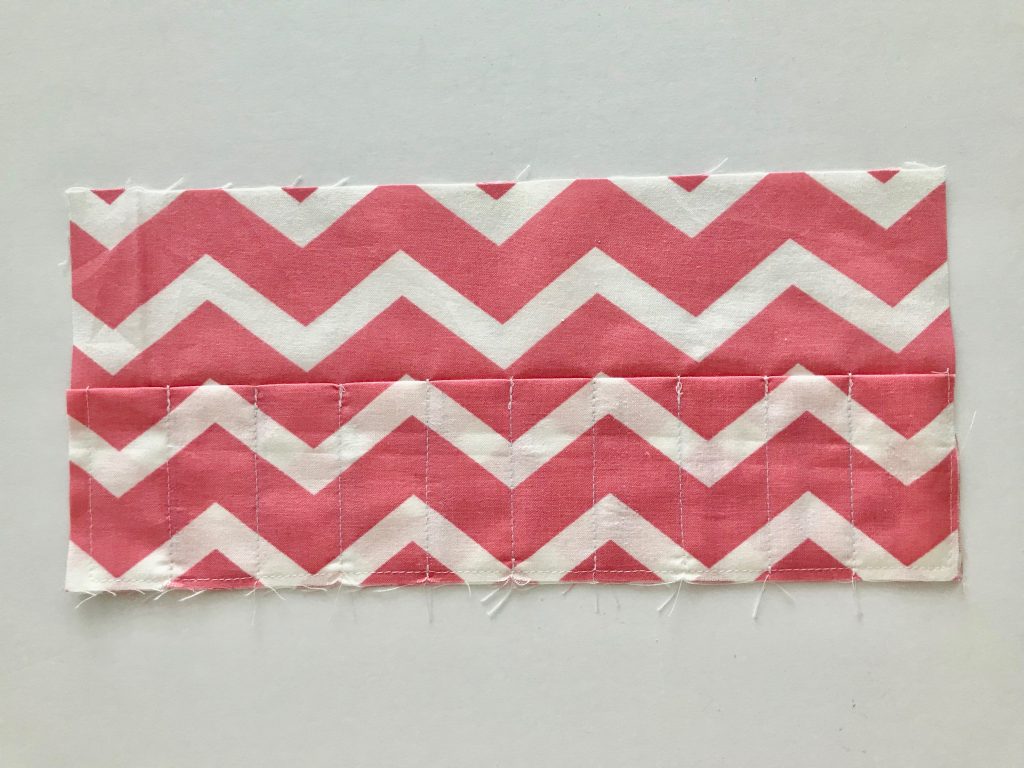
Step 3: Mark and sew lines parallel to the short sides from the top of the small rectangle down to the bottom. Space out the lines every 1 inch. I like to use a chalk marking pencil and my quilting ruler to draw my lines onto my fabric. It washes out with a bit of water and is barely visible if you don’t make that step too.
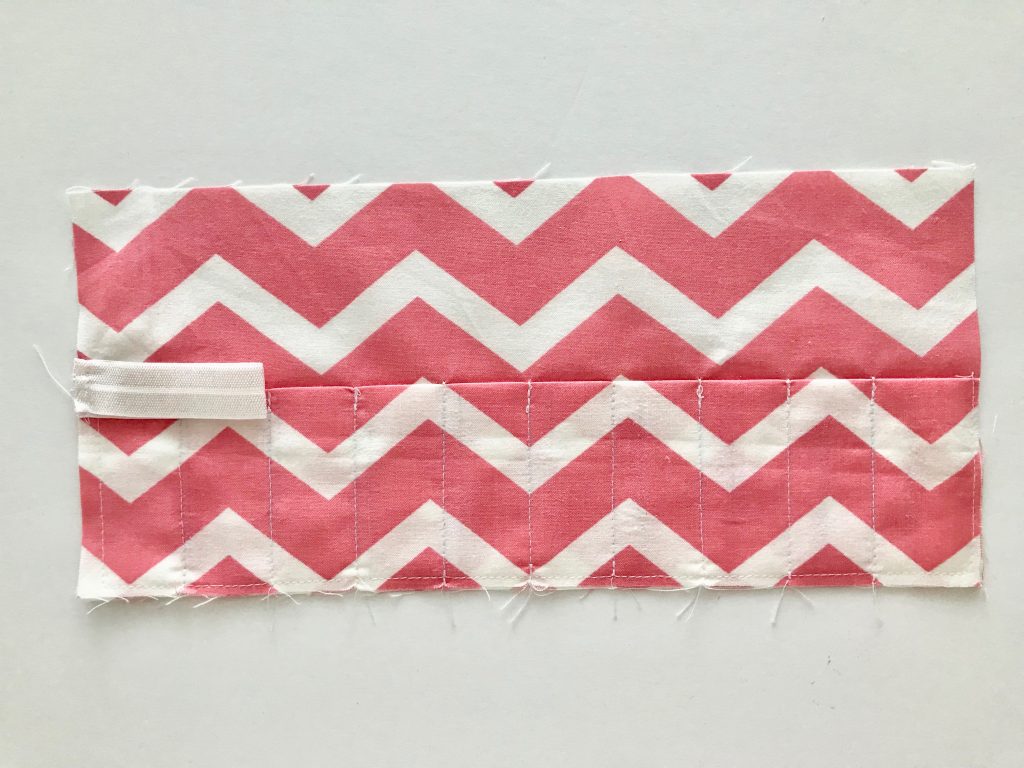
Step 4: Fold the elastic in half. Place the elastic in the middle of one of the large rectangle’s short sides. The fold will be pointing into the rectangle. Baste it in place.
Step 5: Lay the last rectangle on top of the other rectangles, right side down. The folded rectangle and elastic are now sandwiched between the large rectangles. Sew around the edge of the rectangle, leaving a 2″ opening for turning.
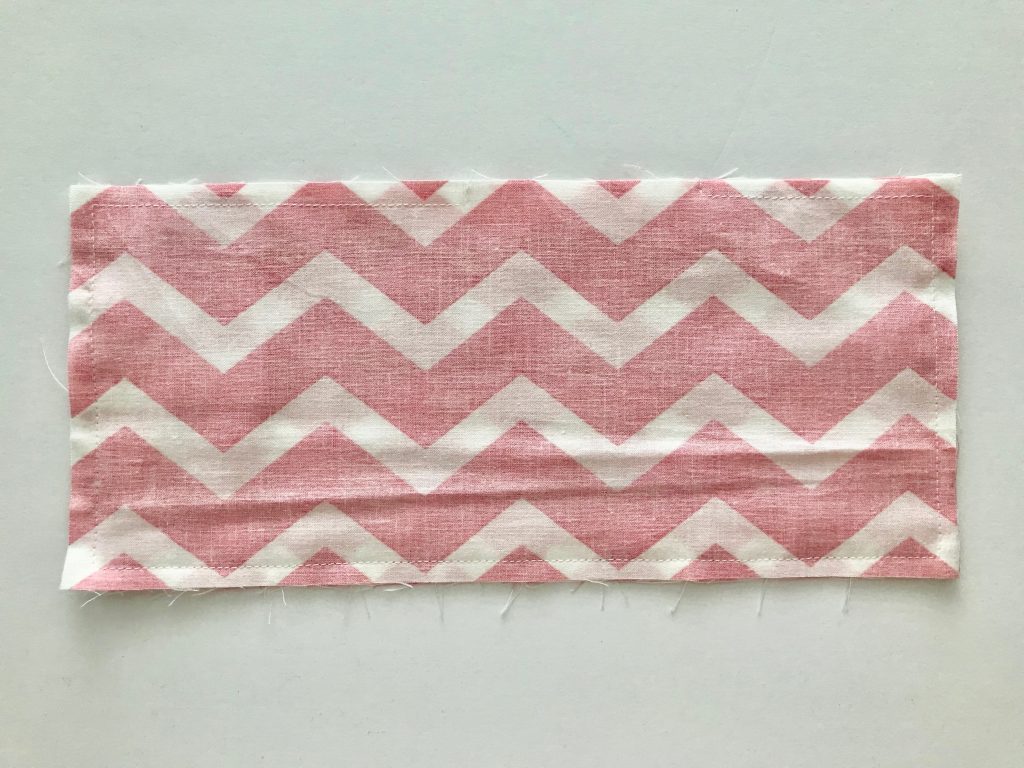
Step 6: Cut diagonally across the corners. Make sure you don’t cut through your stitching!
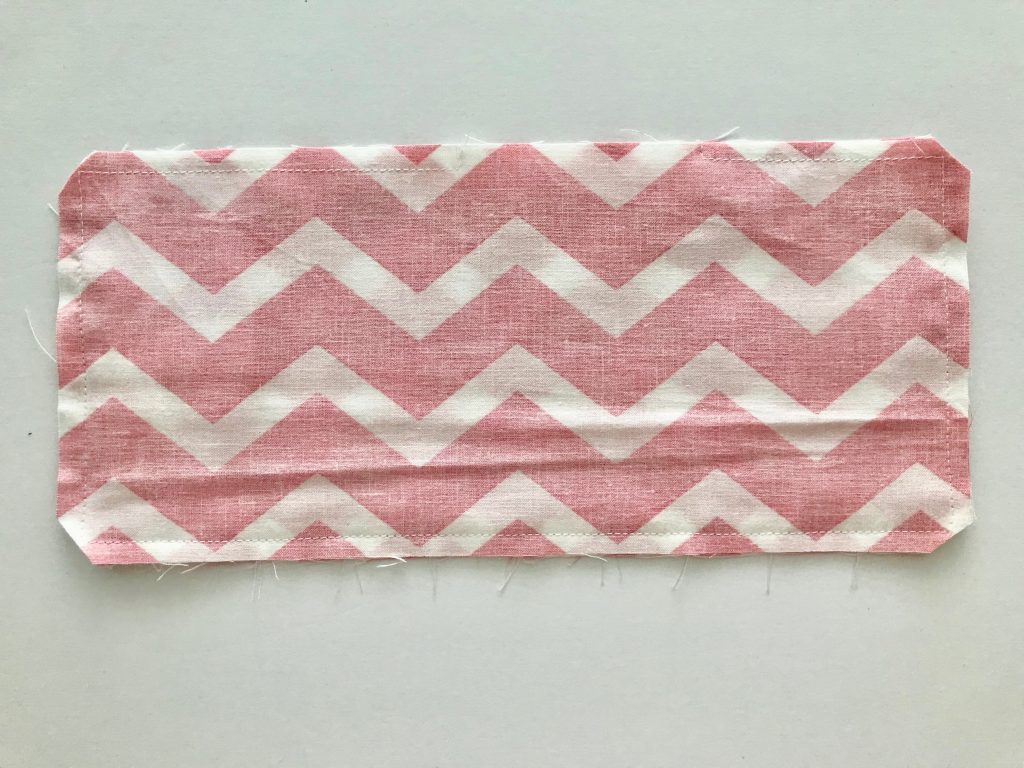
Step 7: Turn right side out and gently poke out the corners so they make sharp points. Topstitch all the way around the rectangle. This closes up the hole you used for turning and secures the ribbon/elastic.
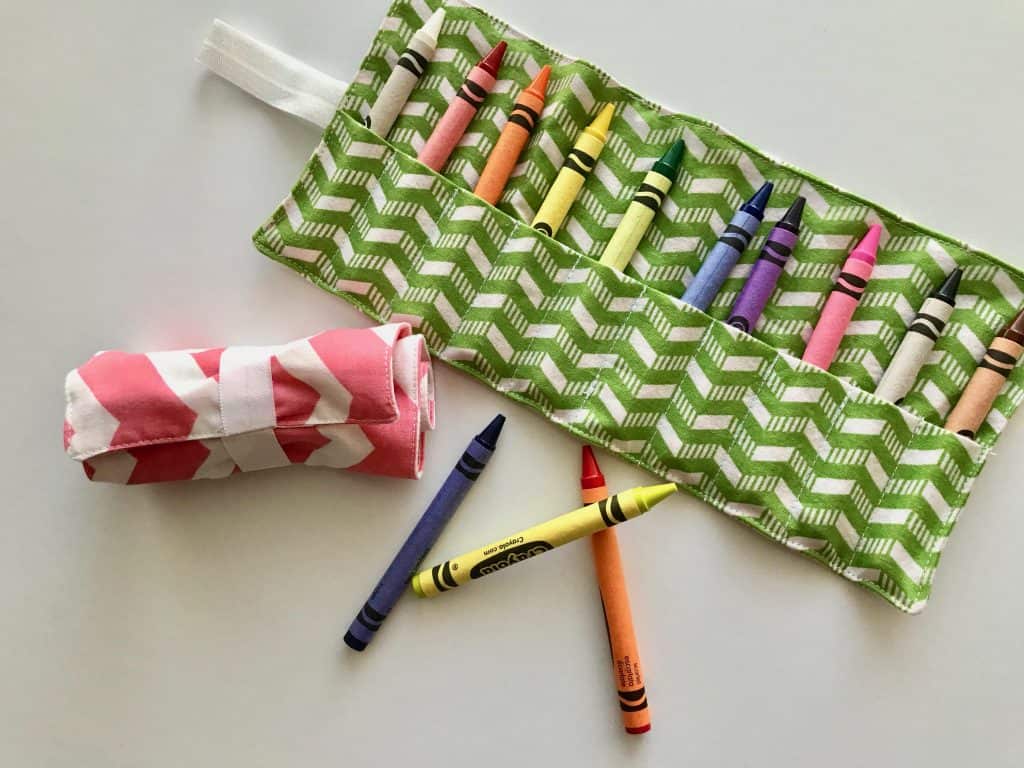
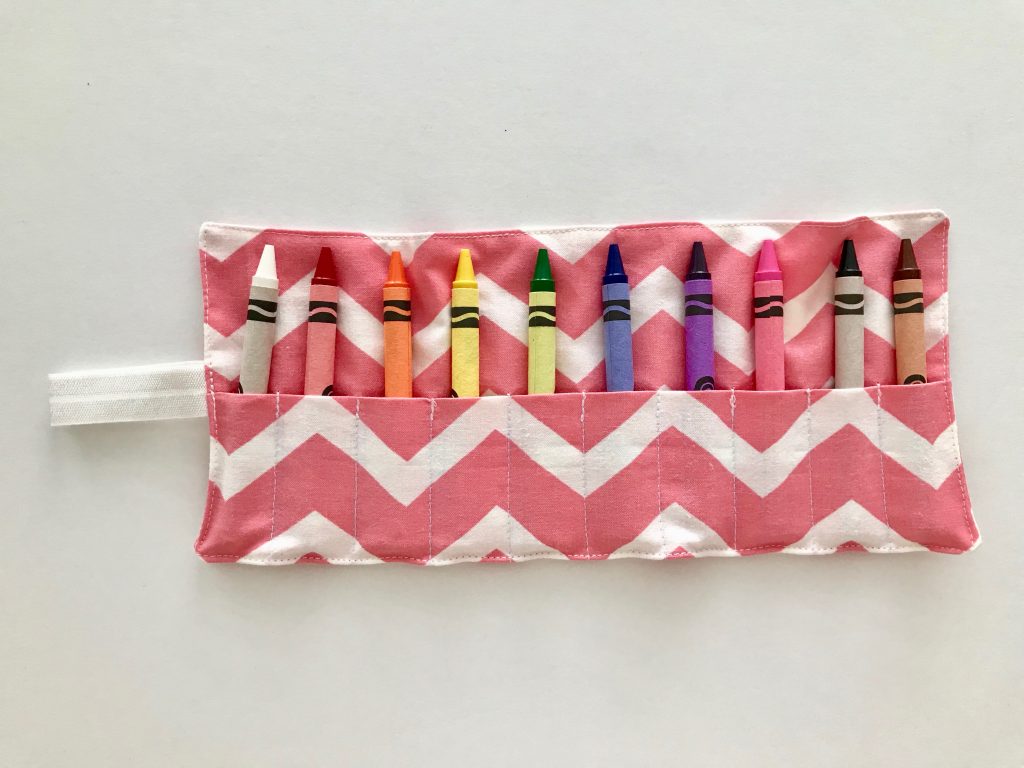
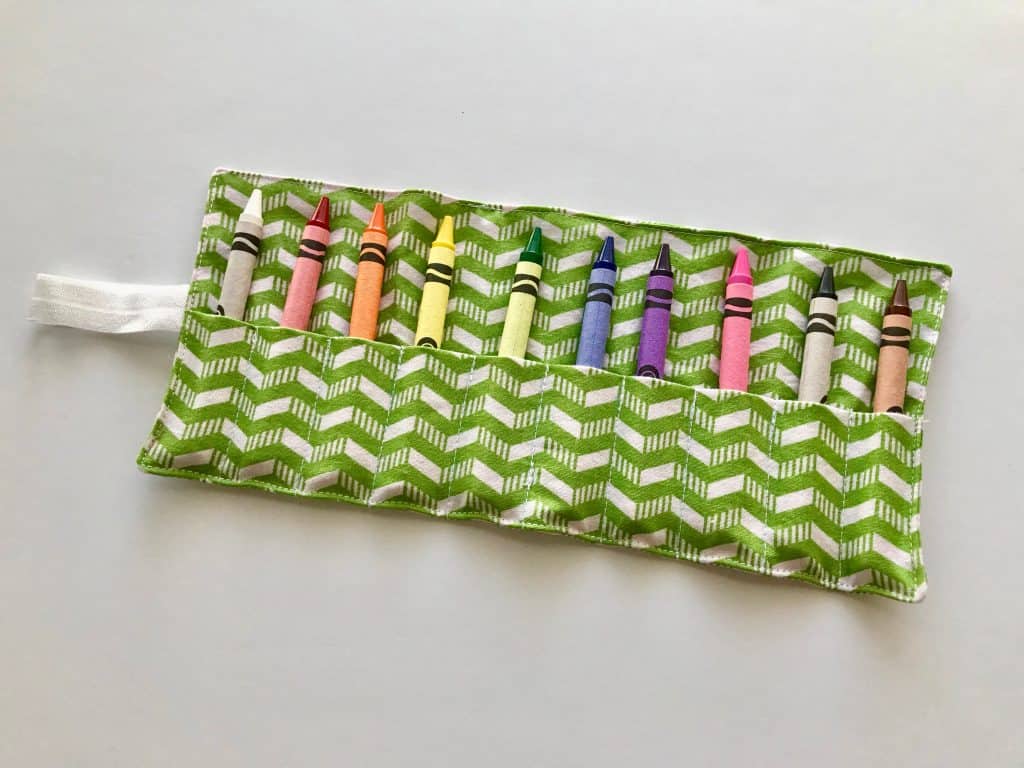
Step 8: Slide one crayon in each pocket. These should fit regular and thick crayons.
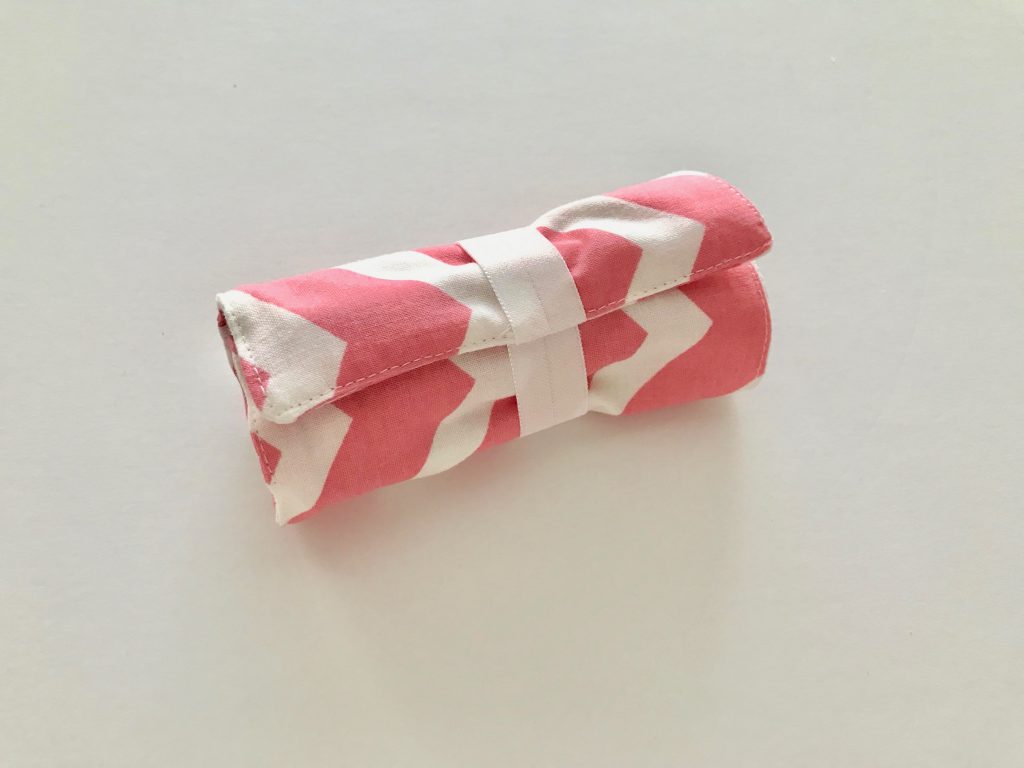
Step 9: Start rolling the rectangle up starting with the side that doesn’t have the elastic. Pull the elastic around the roll of crayons so the crayons are inside the loop of elastic. You’re finished!
Step 10: If you want to hold more than 10 crayons, add an inch to the rectangle widths for each additional crayon. You might need to also cut the elastic longer if you add lots of crayons.
A DIY Crayon Roll makes a great gift for kids (Easter Baskets or Stocking Stuffers) and are really nice to stash in your purse for those times when you need something last minute to occupy busy (or bored) children.
How Can I Make the Crayon Roll Sturdier?
Making the crayon roll sturdier is a relatively simple task that can be accomplished with a few adjustments. One option is to use a thicker fabric or lining piece or add fusible interfacing to the existing fabric to provide more structure and stability. Another option is to reinforce the seams by using double stitching or adding extra layers of fabric along the edges. ABy implementing these modifications, you can make your crayon roll more durable and long-lasting, ensuring it can withstand the demands of everyday use.
How Can I Customize the Crayon Roll?
You can easily customize your own crayon roll in a fun way for your school supplies. Make the crayon pockets for jumbo crayons. Customize the pocket fabric. Use a piece of interfacing to make it sturdier. There are lots of ways to customize these easy crayon rolls.
How to Tie the Ribbon on Your Crayon Roll Ups?
To tie the ribbon on your crayon roll, start by folding the ends of the ribbon to prevent fraying and then tie a neat bow. Trim the ends for a clean look, secure with a few stitches, and add a personalized touch with a fun tying style.
Conclusion
In conclusion, creating a DIY crayon roll is a fun and easy sewing project, even for a beginner. These make a great stocking stuffer for Christmas....or a fun way to keep crayons in your diaper bag for the kids. The possibilities are endless so get inspired and start sewing. Thank you for joining us today but make sure to keep in touch through social media. You can join our Facebook Group or follow us on Instagram or Pinterest. You can also sign-up for our newsletter below and get updates on all of our new patterns and tutorials.