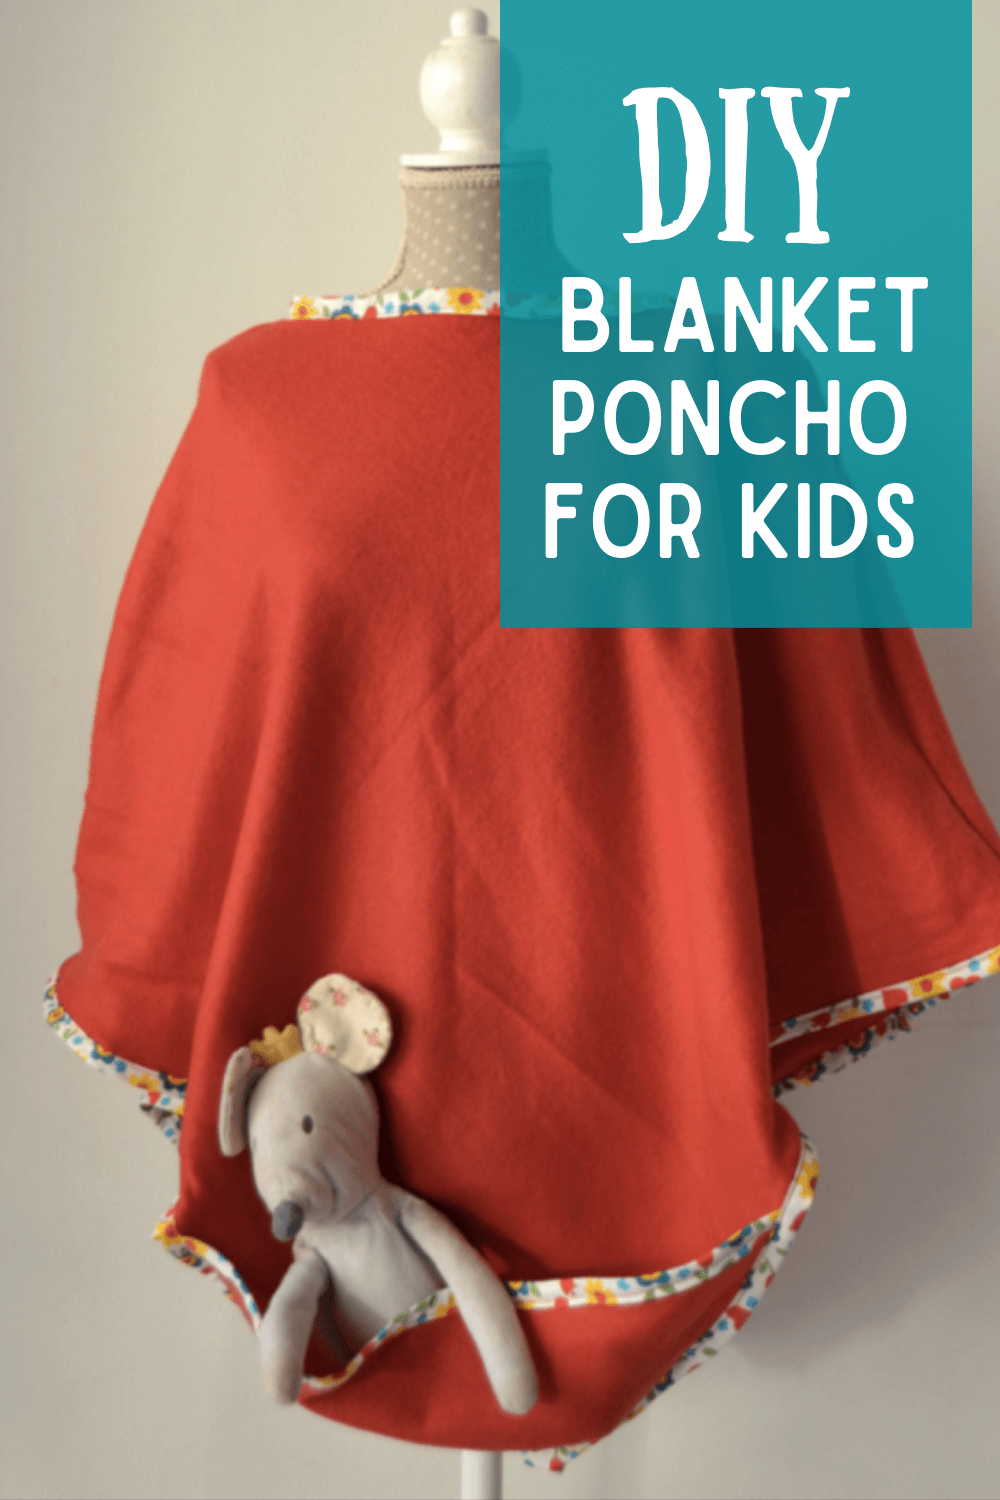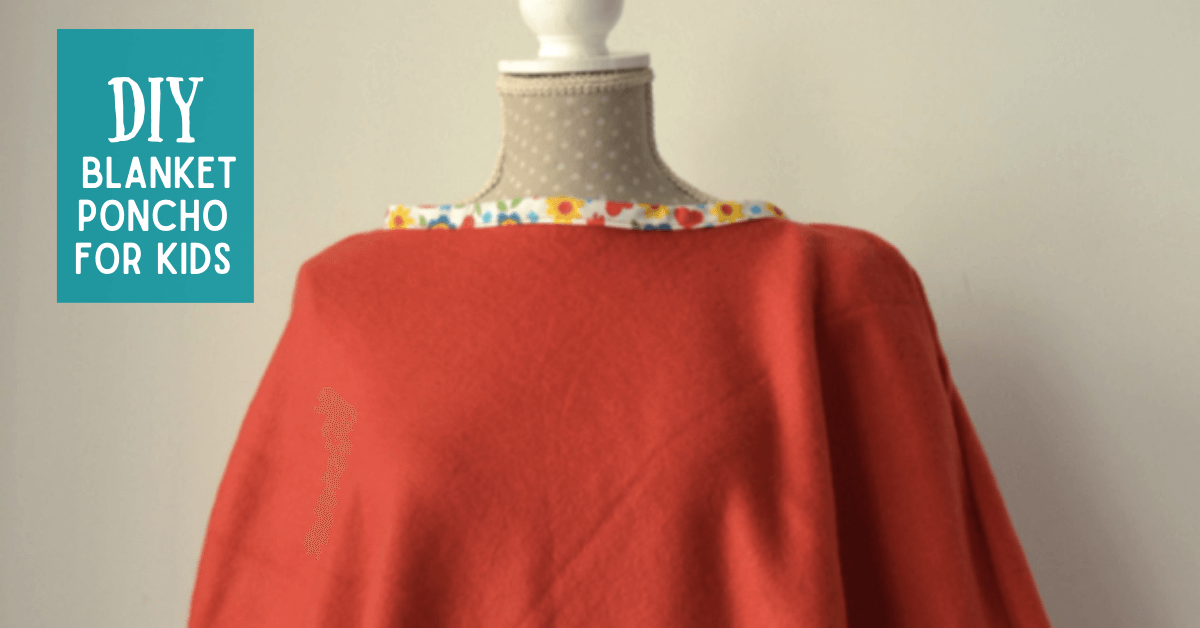
DIY Blanket Poncho for Kids
Sara, from Made by Sara, is here to show you how to make a DIY Blanket Poncho. This cozy and stylish project is perfect for the holiday season, which is Sara's favorite time of the year. She loves the warmth and comfort that come with this time of year and wants to share that feeling with everyone through this DIY project. With her step-by-step instructions and helpful tips, you can create your own blanket poncho in no time and enjoy the season to the fullest!
DIY Blanket Poncho
A few weeks ago, I was going through my kid’s last winter clothes to make a list of all the things I need to make them (or to buy them, because I love shopping almost as much as I love sewing). One of the things my kids needed was some sort of blanket they could wear at home.
I grabbed a few yards of fleece that had been lying on my fabric stash for a while (it was a couple of fleece blankets I got on a sale for an excellent price) and whipped up a quick & easy blanket poncho!
And what better than a blanket poncho? A blanket poncho with a toy pocket!
So, today I am sharing an easy tutorial on making a quick 2-seam kid’s poncho!
Poncho Materials / Tools
- 1 yard of fleece fabric
- 3.5 yards of bias tape
- Fabric Scissors / Tape Measure / Sewing Machine / Etc.
How to Make the Blanket Poncho
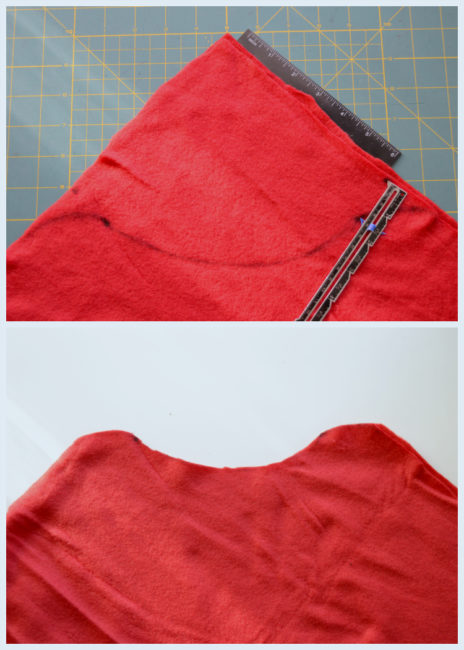
Step 1: Cut two 21”x21” squares of fleece. Place them on top of each other making sure to align all the edges. Draw a 6”x6” square in one of the corners (which will be the top part of the poncho). Mark 1 1/2” along the two lines of the square on the fabric edges. Draw a concave curve between those two marks to form the neck opening. Then draw two smaller convex curves on the sides, from the marks to the fabric edges, to form the shoulder line. Cut along the curves.
Alternative: If you find it easier just cut a straight line. Mark 5” (instead of 6”) on both sides of your upper corner and draw a straight line that goes from one to the other. Cut and you’re ready to go.
The harder part is done. Phew! Now let’s sew!
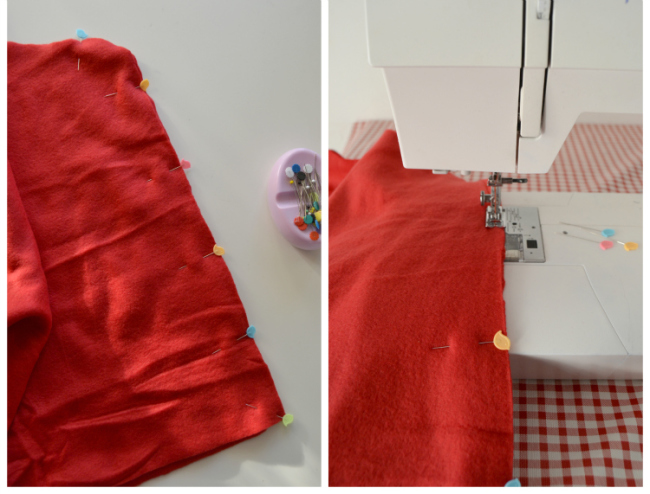
Step 2: Sew the two squares together with a straight stitch, right sides together, starting at the shoulder’s marks (the 1 1/2” marks) stitch along down the edge with a 3/8” seam allowance. Stop at the tip. Turn right sides out.
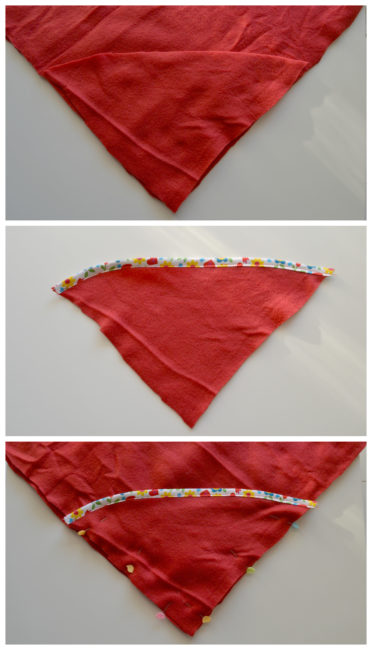
Step 3: Cut a triangle of fleece that is about 10 inches long on each outer side and 15 inches across. It has to match precisely your poncho’s bottom edges, so use it as a guide. Sew bias tape along the top edge of the triangle pocket piece. Now place that piece on top of the poncho’s front piece, matching the two edges, and baste it at 1/4”.
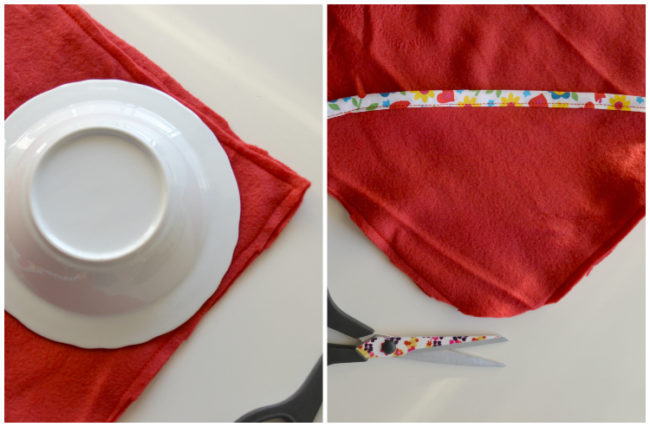
Tip: Use a round object, like a plate, to make the bottom corner of your poncho round. This will make it easier to stitch the bias binding later!
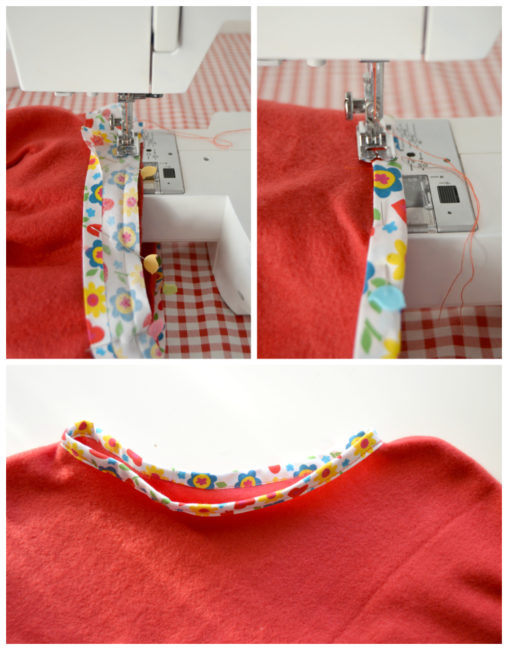
Step 4: Measure your neck opening all around and cut a strip of bias tape with the same measurement plus 1 inch (it should be about 21”).
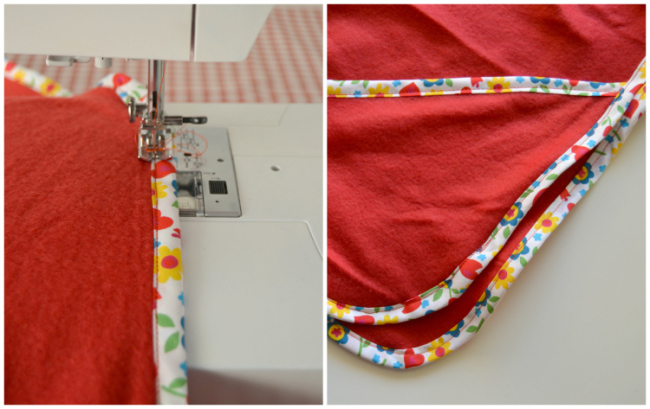
Step 5: Cut a 2.75” strip of bias tape. Stitch it all around the four edges.
You’re done with the DIY Poncho!
Tip: The two last steps are optional. You can skip adding bias tape to the neck opening and side edges as an embellishment. Fleece doesn’t fray so you don’t have to finish the edges. If you opt not to finish the edges with bias tape then make the pocket as follows: sew the pocket to the front piece (right side of the pocket piece with wrong side of the front piece) with a 3/8” seam allowance. Trim it to 1/4”. Turn the pocket piece to the right side. Top stitch.
This poncho fits kids with 4-6 years-old (average measurements). You can make them longer by adding the same amount of inches on For smaller sizes cut 19”x19” squares and for bigger sizes cut 23”x23” squares.
What are some variations on the classic DIY blanket poncho design?
Some variations on the classic DIY blanket poncho design include adding a hood, incorporating pockets for extra functionality, using different fabrics or patterns for a unique look, or adding decorative elements like fringe or buttons. Get creative and make it your own!
My kids loved their blanket ponchos! They look so cozy and warm in them. Creating your own blanket poncho is a fun and creative way to stay warm and stylish during the colder months. By following the steps outlined in this blog, you can easily make a cozy and fashionable poncho that reflects your personal style. Whether you prefer a bohemian look or a more minimalist design, there are endless possibilities for customizing your poncho to suit your taste. So grab your favorite blanket, get crafting, and enjoy the warmth and comfort of your homemade blanket poncho all season long.
Share your DIY blanket ponchos over Peek-a-Boo’s Pages Facebook group. Also,
Happy Thanksgiving!