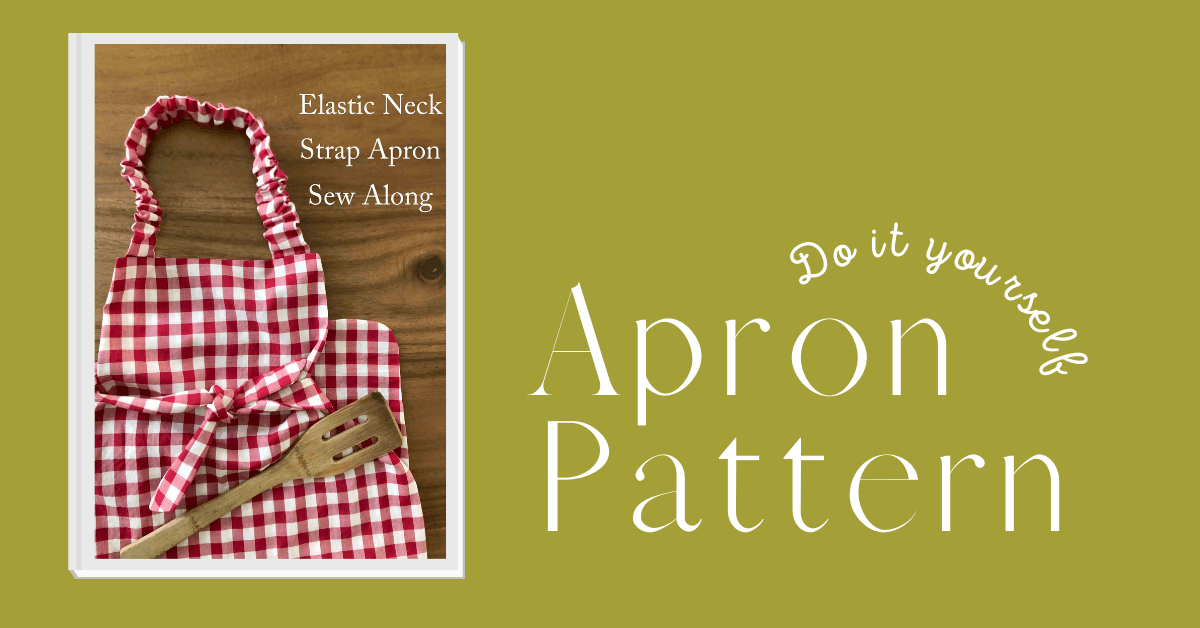
How to Sew an Apron: Easy Apron With Elastic Neckband
Today we're going to go over how to sew an apron. This is a fun and easy DIY apron tutorial, complete with an elastic waistband. This beginner-friendly project is perfect for anyone new to sewing or those who want to add a practical and stylish accessory to their kitchen. We also have a post dedicated to the Top 25 Free Apron Patterns if you're looking for adult apron patterns.
In this blog post, we will take you through the step-by-step process of creating an apron with an elastic neckband, including tips and tricks for creating your own pattern. We'll also answer some common questions about sewing aprons, such as whether they should be lined and how much fabric you'll need. So grab your materials and let's get started on this DIY adventure!
Preparing to Sew an Apron
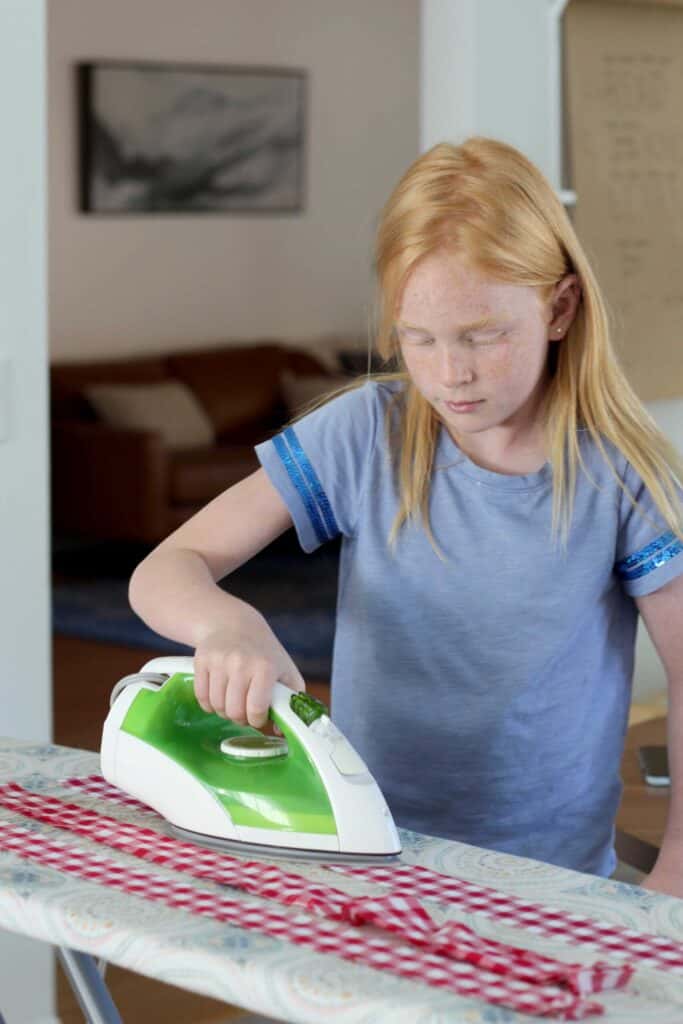
Before you start sewing your apron, it's important to prepare yourself and gather all the necessary supplies. Begin by collecting your sewing essentials such as fabric, scissors, and a sewing machine. Next, select an apron pattern that suits your style and needs. Measure your waist and determine the desired length of your apron for a perfect fit. Pre-wash your fabric to prevent any shrinkage that could occur after sewing. Don't forget to iron your fabric to ensure it's free from any wrinkles or creases before cutting. By following these preparation steps, you'll be ready to move on to the next stages of creating your DIY apron.

Choosing the Right Fabric
When it comes to choosing the right materials for your apron, there are a few key factors to consider. First and foremost, you'll want to select a durable fabric, such as quilting cotton, that will withstand frequent use and washing. Additionally, think about using fabric with fun patterns or colors to add a personal touch to your apron. It's also important to find fabric with the appropriate width to ensure a comfortable fit around your waist. And don't forget about practicality - opt for fabric that is easy to wash and maintain.
Apron Materials & Cutting List
From fabric cut:
- 2 body pieces of fabric (see below for cutting instructions)
- 4 waist tie strips cut to 25” x 1.75”
- 2 neck straps cut to 25” x 1.5”
From interfacing cut: – 2 strips 25″ x 1.75″ (you can use sew-in or fusible interfacing)
From 1″ elastic: 16″ of elastic for neck strap
Picking the Best Fabrics for Aprons
When it comes to picking the best fabrics for aprons, there are several options to consider. Cotton fabric is a popular choice for apron sewing projects due to its comfort and durability. Linen fabric can give your apron a sophisticated, rustic look, while denim fabric is sturdy and perfect for heavy-duty cooking or crafting. For a touch of elegance, silk fabric is a great choice. If you're on a budget, polyester fabric can be a cost-effective option, especially for beginners. Ultimately, the choice of fabric will depend on your personal preferences and the intended use of the apron.
How to Sew an Apron With an Elastic Neckband: Step-by-Step
Creating Your Own Pattern Pieces
Apron Pattern Pieces Step 1: Cut out your pattern and fabric. Tatum’s apron is based off of the free Tiny Chef Toddler Apron pdf pattern, with length added to the bottom and top. You can see my changes marked in the orange pen! I wanted the apron to come to her knee, so we added 6 inches to the bottom of the apron and about 1 inch to the top of the apron.
Another excellent way to make a simple apron pattern is to trace the body of an apron that currently fits.

Apron Pattern Pieces Step 2: The stretchy neckband makes this apron amazing since the child can easily get it over their head, and it still sits high enough to protect their clothing from food. For the neckband for my 8 year old, we cut a piece of 1” elastic to 16 inches, and two strips of casing fabric to 25 inches x 1.5” wide.
Creating the Elastic Neck Strap

Elastic Neck Strap Step 1: Cut out 4 side ties 25″ x 1.75″. Only two of those 4 pieces will need to be stabilized. I cut two strips of sew-in interfacing (fusible also works) 25” x 1.75″. If using fusible interfacing, be sure to iron it to the WRONG side of the fabric strip!
Prepping the Strap Pieces
Elastic Neck Strap Step 2: First, iron and interface your neck and waist strips. This is a great chance to go over ironing basics and safety if you are sewing with a child.
Elastic Neck Strap Step 3: If using fusible interfacing for the waist straps, now is the time to apply the interfacing to the wrong side of two of those waist straps. If using sew-in interfacing, simply lay the interfacing on top of the wrong side of the strip.
Time to Sew the Waist Ties and Neck Strap
Place the waist ties with Right Sides Together (RST), making sure that you are looking at the interfacing on one of the strips (when flipped inside out, the interfacing will be on the interior). For the waist ties, we sew two long edges and tapered one short edge for looks; for the neck strap, we only sewed the two long edges and left both short edges open.

Next, turn all of your fabric strips right side out so the seams are on the inside of the strips. Now, iron these well.
For the waist ties, flip these tubes right side out using a straw, a chopstick or an official fabric turning tool if you have it! If you created the tapered end of the waist strip, carefully pick out the corner with a pin or seam ripper, using care not to rip the seam!
Elastic Neck Strap for the Apron
For the neck strap, using a safety pin or bodkin, feed the elastic through the neck strip until it is lined up with one short edge of the strip. Pin that end so the elastic doesn’t shift! Next, bunch the fabric around the middle of the length of elastic until you can see the other end of the elastic lined up with the other short edge of the strip. Baste the elastic in place at each end to secure it.

Almost Done!
Lay the two main body pieces of your fabric RST and place your neck straps and side ties at the appropriate corners, with all ties and straps sandwiched inside the apron body pieces. When you flip the whole apron right side out, your straps will be securely sewn in with seams hidden. Note: Before pinning everything inside, Tatum and I pinned the end of the strap on the outside of the apron body to try it on for fit!


Finally, sew around the top edge, bottom edge, and entire side of the apron, leaving about a 3″- 4″ opening along the bottom straight edge so you can flip it right side out after sewing.
 Flip your apron right side out through the hole in the previous step. Press well! At this point you can either hand stitch or machine stitch that open section closed. Now try it on for size and get to work in the kitchen!

Additional Features for a More Stylish Apron
Consider enhancing your apron's functionality and style by incorporating additional features. Pockets are a practical and convenient addition, allowing you to keep small tools or essentials within reach while you work. Customize your apron with fabric appliques or embroidery, adding a personal touch that reflects your creativity. Experiment with different fabric patterns and colors to create a truly unique apron that stands out. Enhance the visual appeal by incorporating contrasting bias tape or trim. For added elegance and adjustability, consider adding a waistband or tie. These features can elevate your apron from simple to stylish while still maintaining its practicality.
How to Add Pockets to Your Apron
To add pockets to your apron, start by cutting pocket pieces of the desired size, ensuring straight edges. Position the pocket fabric right side up on the front of the apron and attach it by sewing along the bottom edge of the pocket. To ensure durability, secure the pocket fabric by stitching along the side edges. Lastly, reinforce the top of the pocket by sewing along the curved line of the pocket opening. By following these steps, you can easily add pockets to your apron, making it more practical and convenient for all your needs.
Where Did This Apron Pattern Come From?
This pattern was based off our Tiny Chef Apron Pattern shown below. This is an easy and free apron pattern that can be put together with basic sewing skills. As noted above, Stephanie customized it by adding some length to the bottom and the top.

Decorating Your Apron for a Personal Touch
To enhance the visual appeal of your apron, there are various ways to decorate it and add a personal touch. Fabric appliques can be used to incorporate decorative elements onto the fabric, giving it a unique and customized look. Embroidering your name, initials, or a pattern onto the fabric is another great option. If you prefer a more artistic approach, fabric paint or fabric markers can be utilized to create a personalized design. Adding buttons, ribbons, or bows as embellishments can also enhance the aesthetic appeal of your apron. Additionally, patchwork or quilting techniques can be employed to create a truly one-of-a-kind apron design.
Should an Apron be Lined?
Lining an apron is optional, but it can provide a more professional look and add durability. It prevents fabric from being see-through and adds warmth for colder climates. Ultimately, whether to line the apron or not depends on personal preference and its intended purpose.
Conclusion
In conclusion, sewing an apron can be fun and rewarding. It's one the many perfect beginner sewing projects. By following the steps outlined in this blog, you can create a stylish and functional apron with an elastic neckband. Remember to choose the right materials and fabrics for your apron, and pay attention to the skill level required for each step. Additionally, you can add extra features such as pockets or decorative elements to personalize your apron. If you have any questions about sewing an apron, refer to the answers provided in this blog.
Thanks again for joining us today. Before you leave, make sure to join our Facebook Group and follow us on Instagram. Happy sewing!