Color Blocking Fabric 101 – Add some fun to your clothes!
Color blocking fabric is a great way to add variety to your outfits with different colors of fabric. I’ve got two kids – a girl and a boy – and I like to sew for them pretty equally. The difference is that I’ve probably got at least 8 or 9 girly patterns for everyone, unisex or boyish one.
My little guy (who recently turned 3) wears jeans or shorts and a tee (short-sleeved or long, depending on the weather) most days, so his wardrobe can get pretty boring. It’s become a fun challenge for me to find some fun ways to keep his basic wardrobe staples fresh and exciting. This month I’d like to share a couple of easy ways of color-blocking fabric to add some interest to your favorite basic patterns, and I’ll show you the two main ways I like to color block fabric.
Color blocking fabric is great when you don't have enough fabric, want to use scraps, or want to make something with a great visual interest.
Different Ways of Color Blocking Fabric
Color Blocking Fabric Method 1: Cut the Pattern Pieces
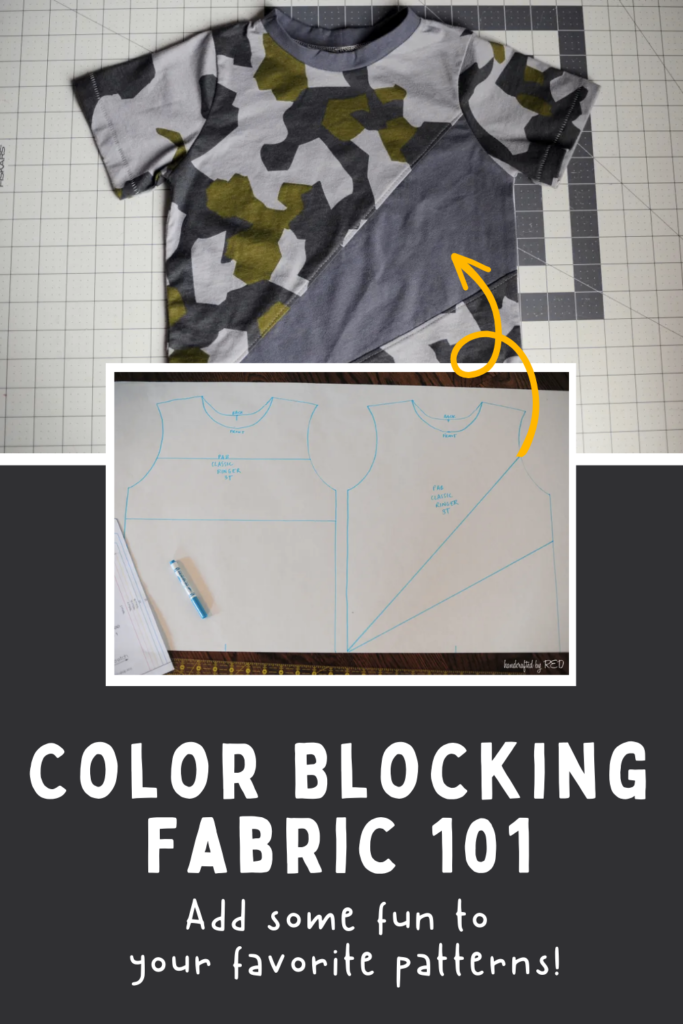
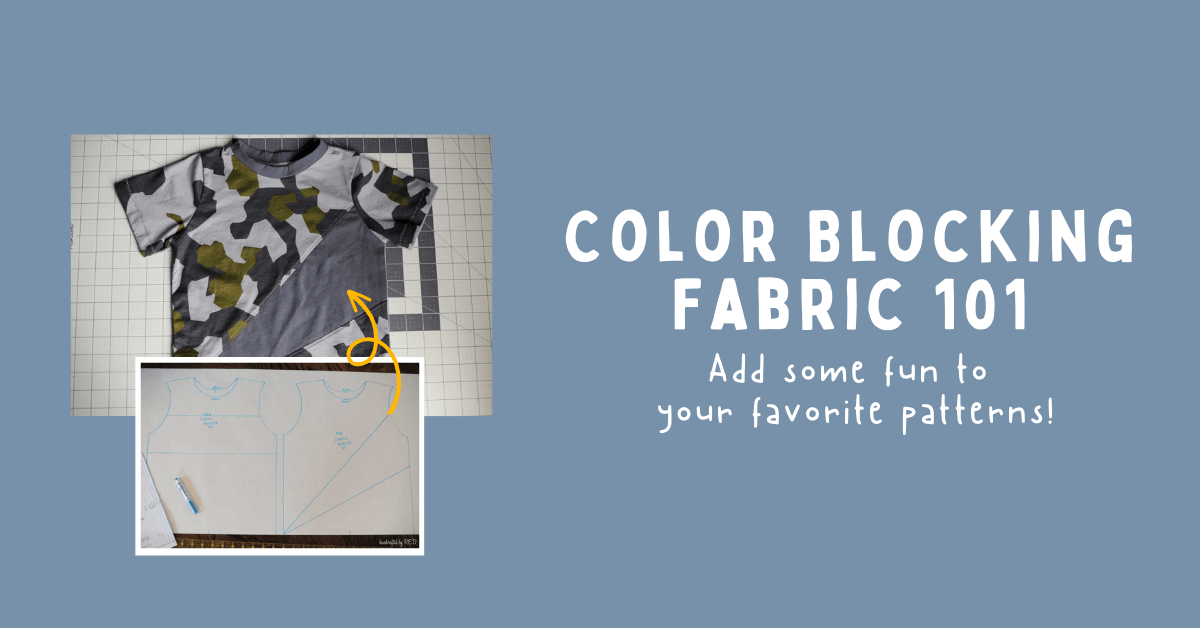
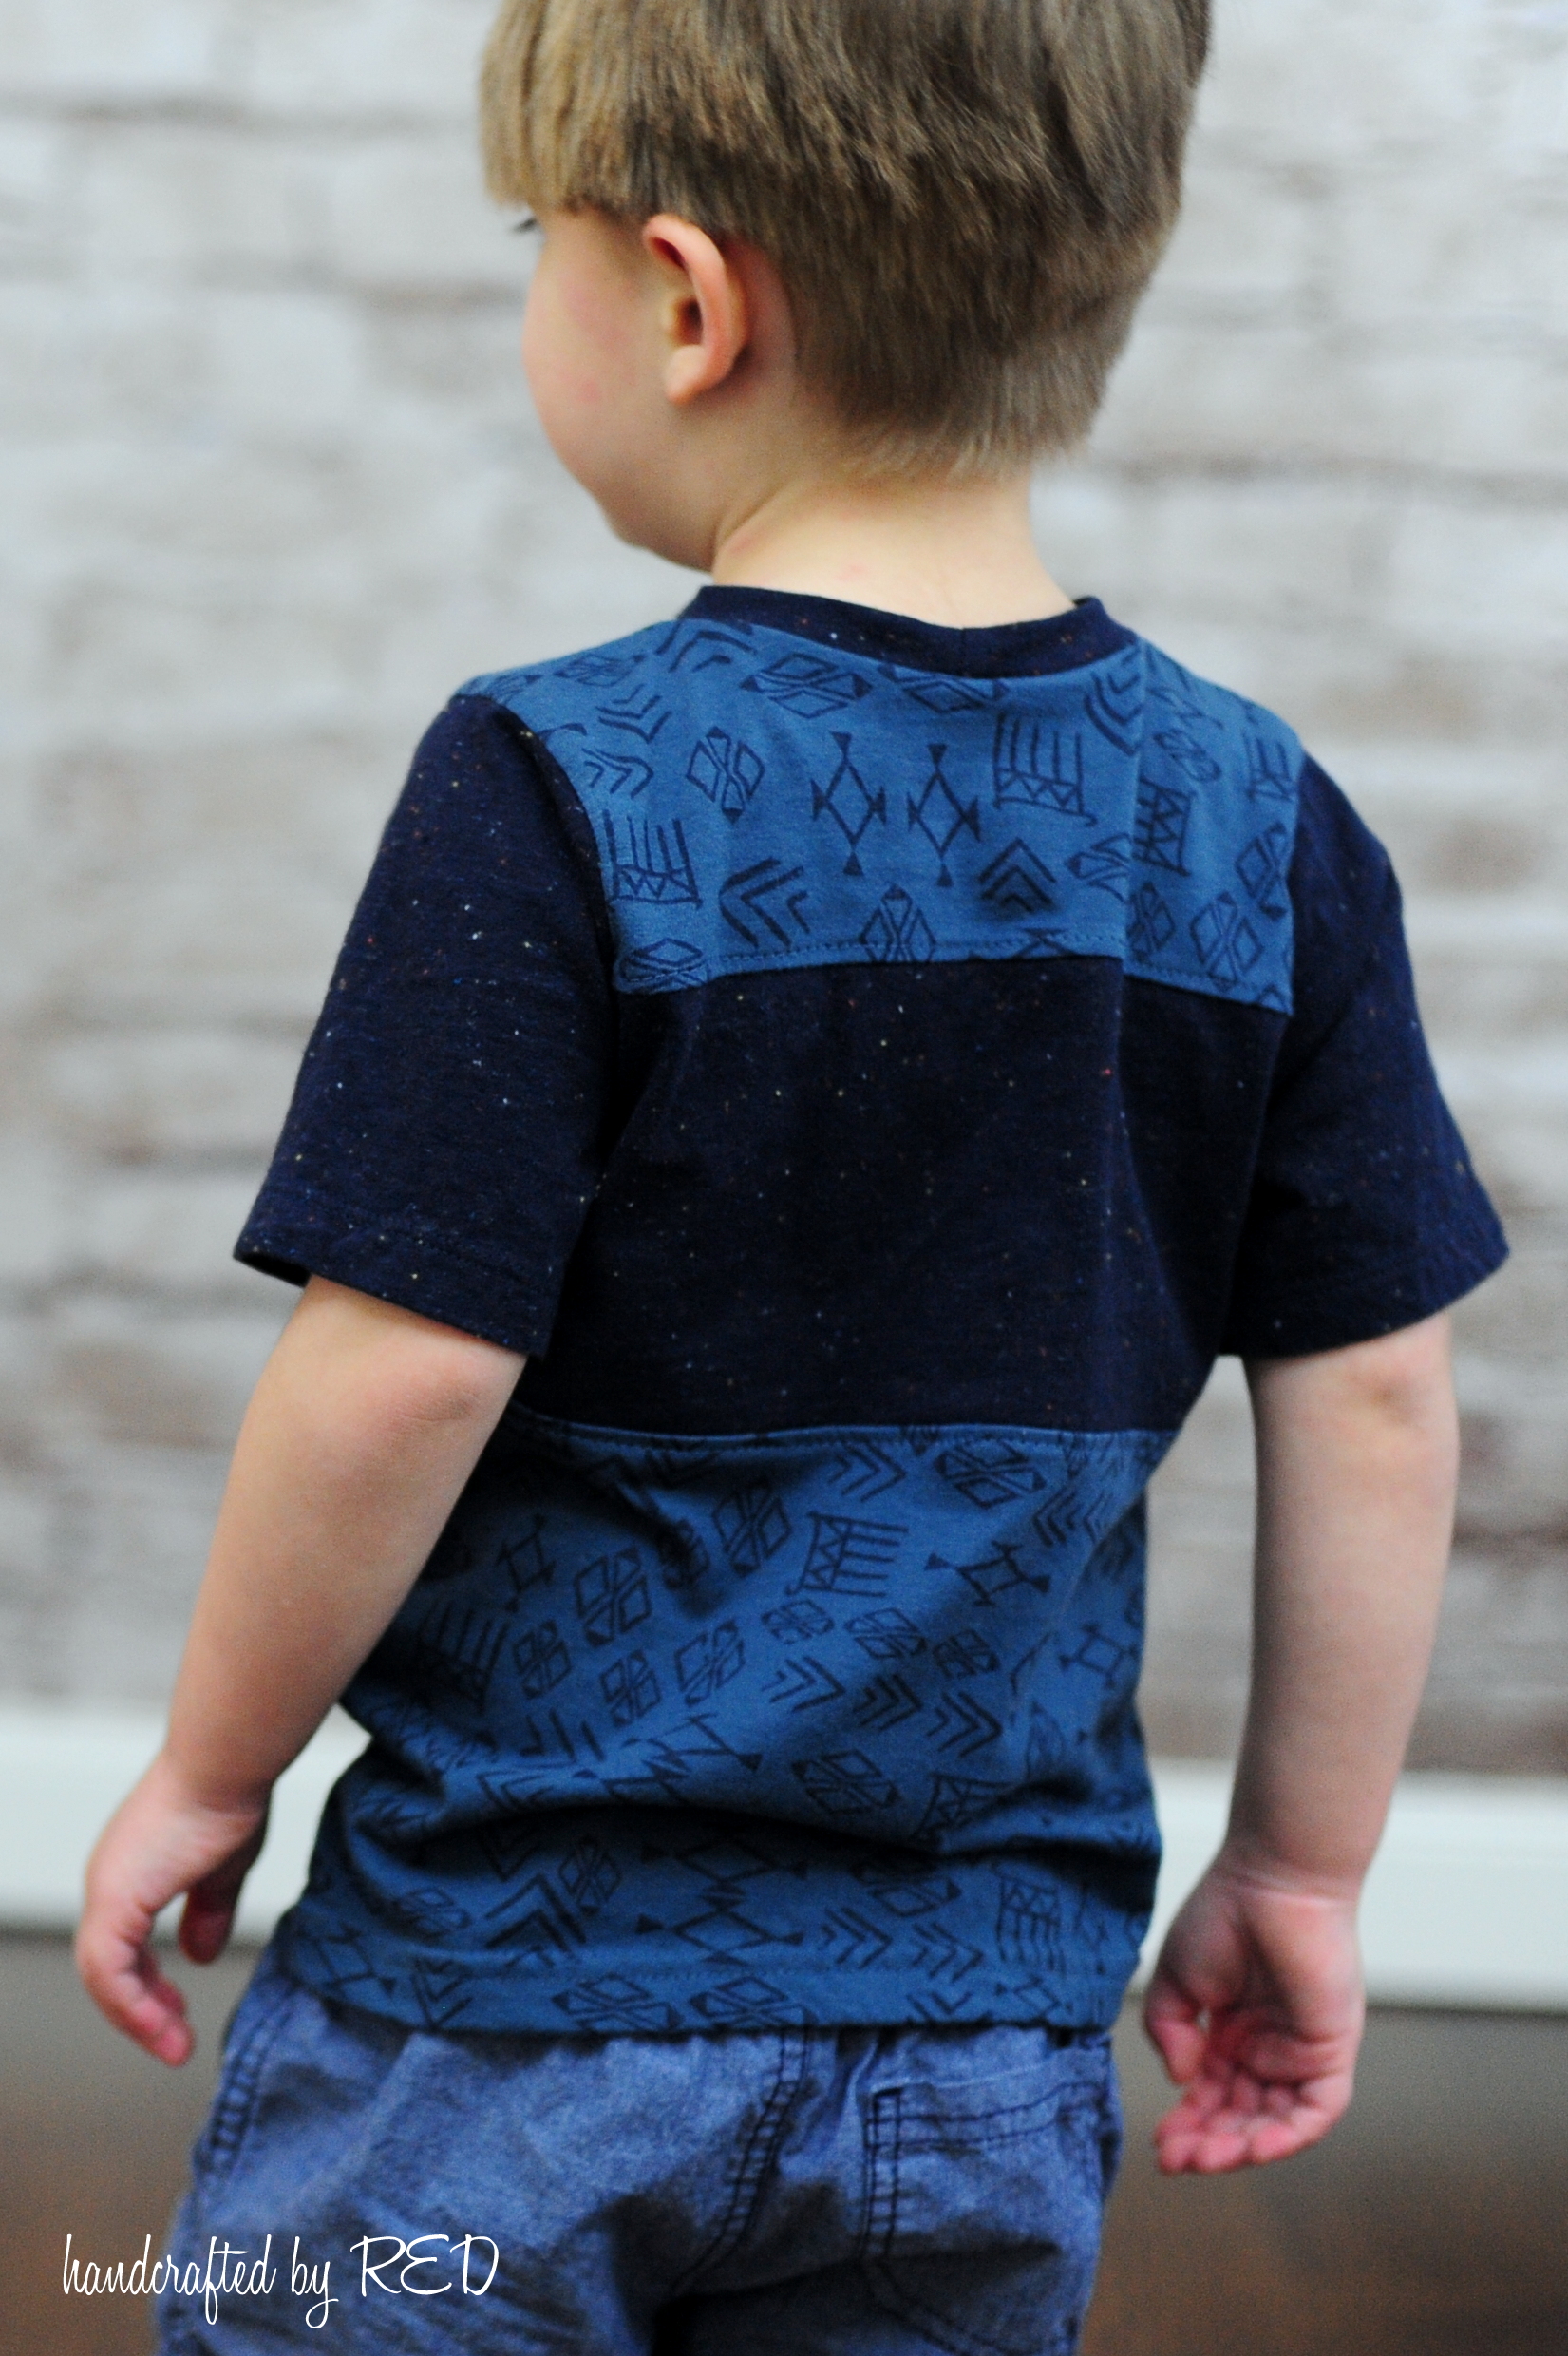
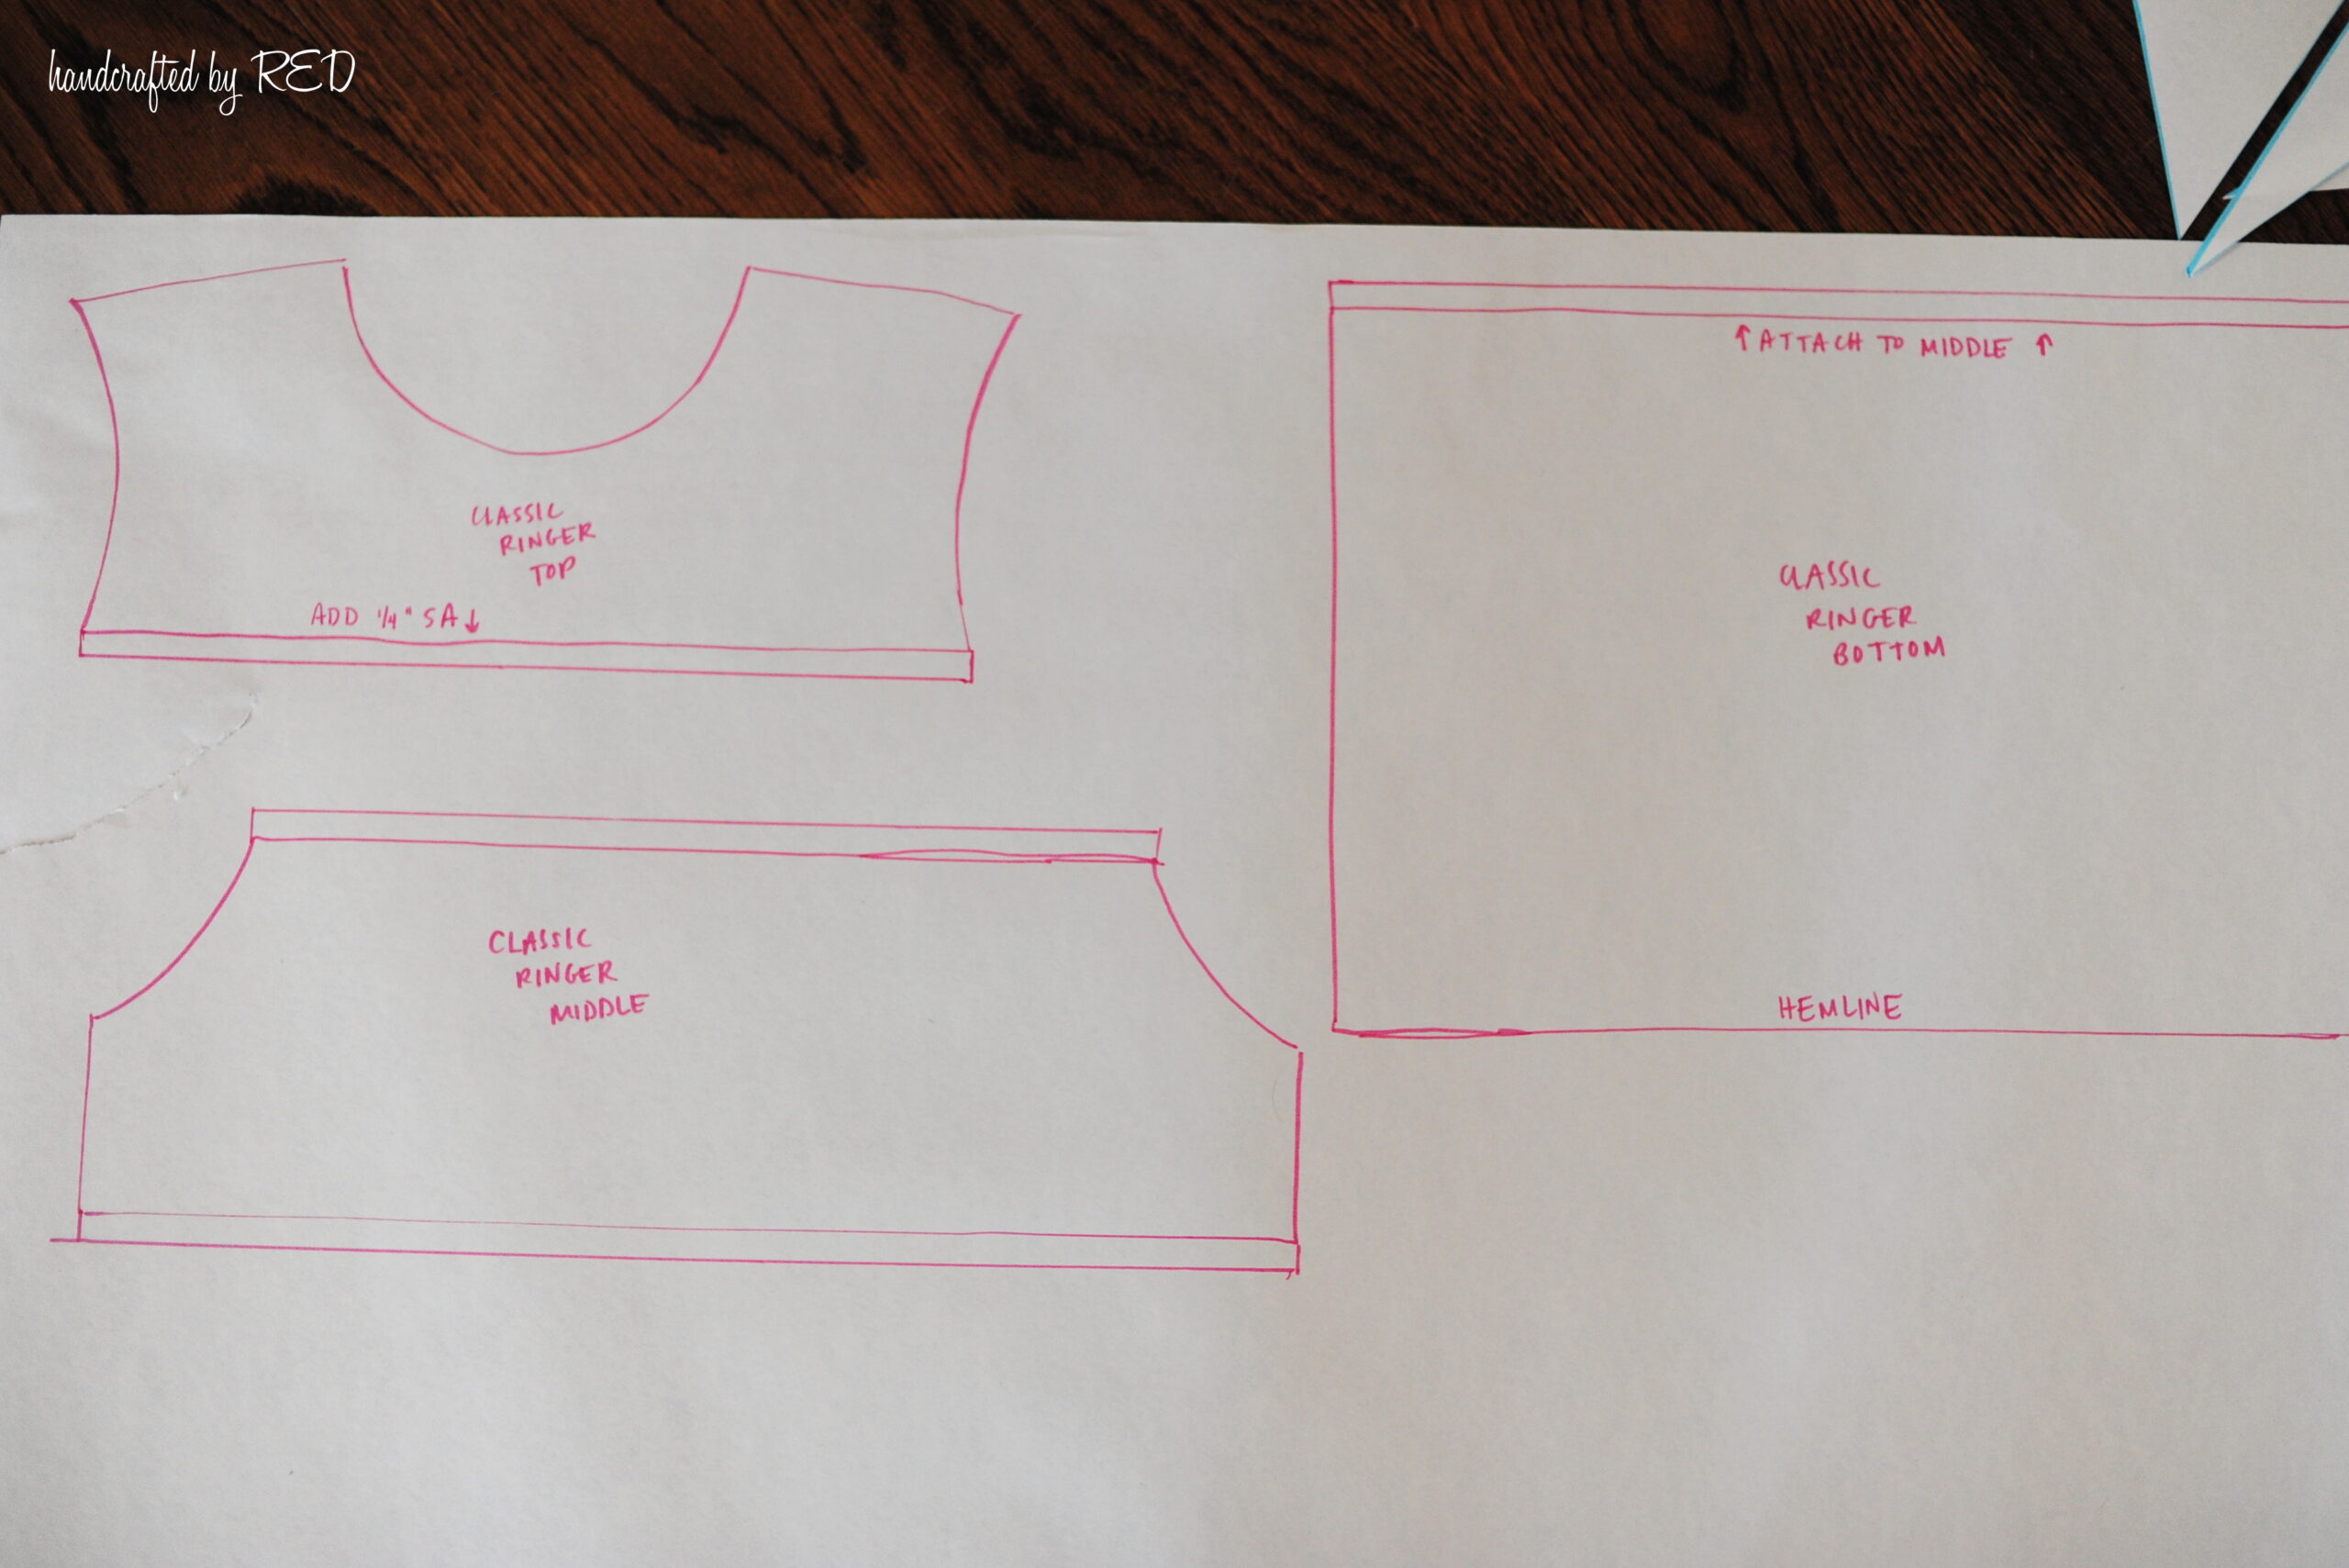
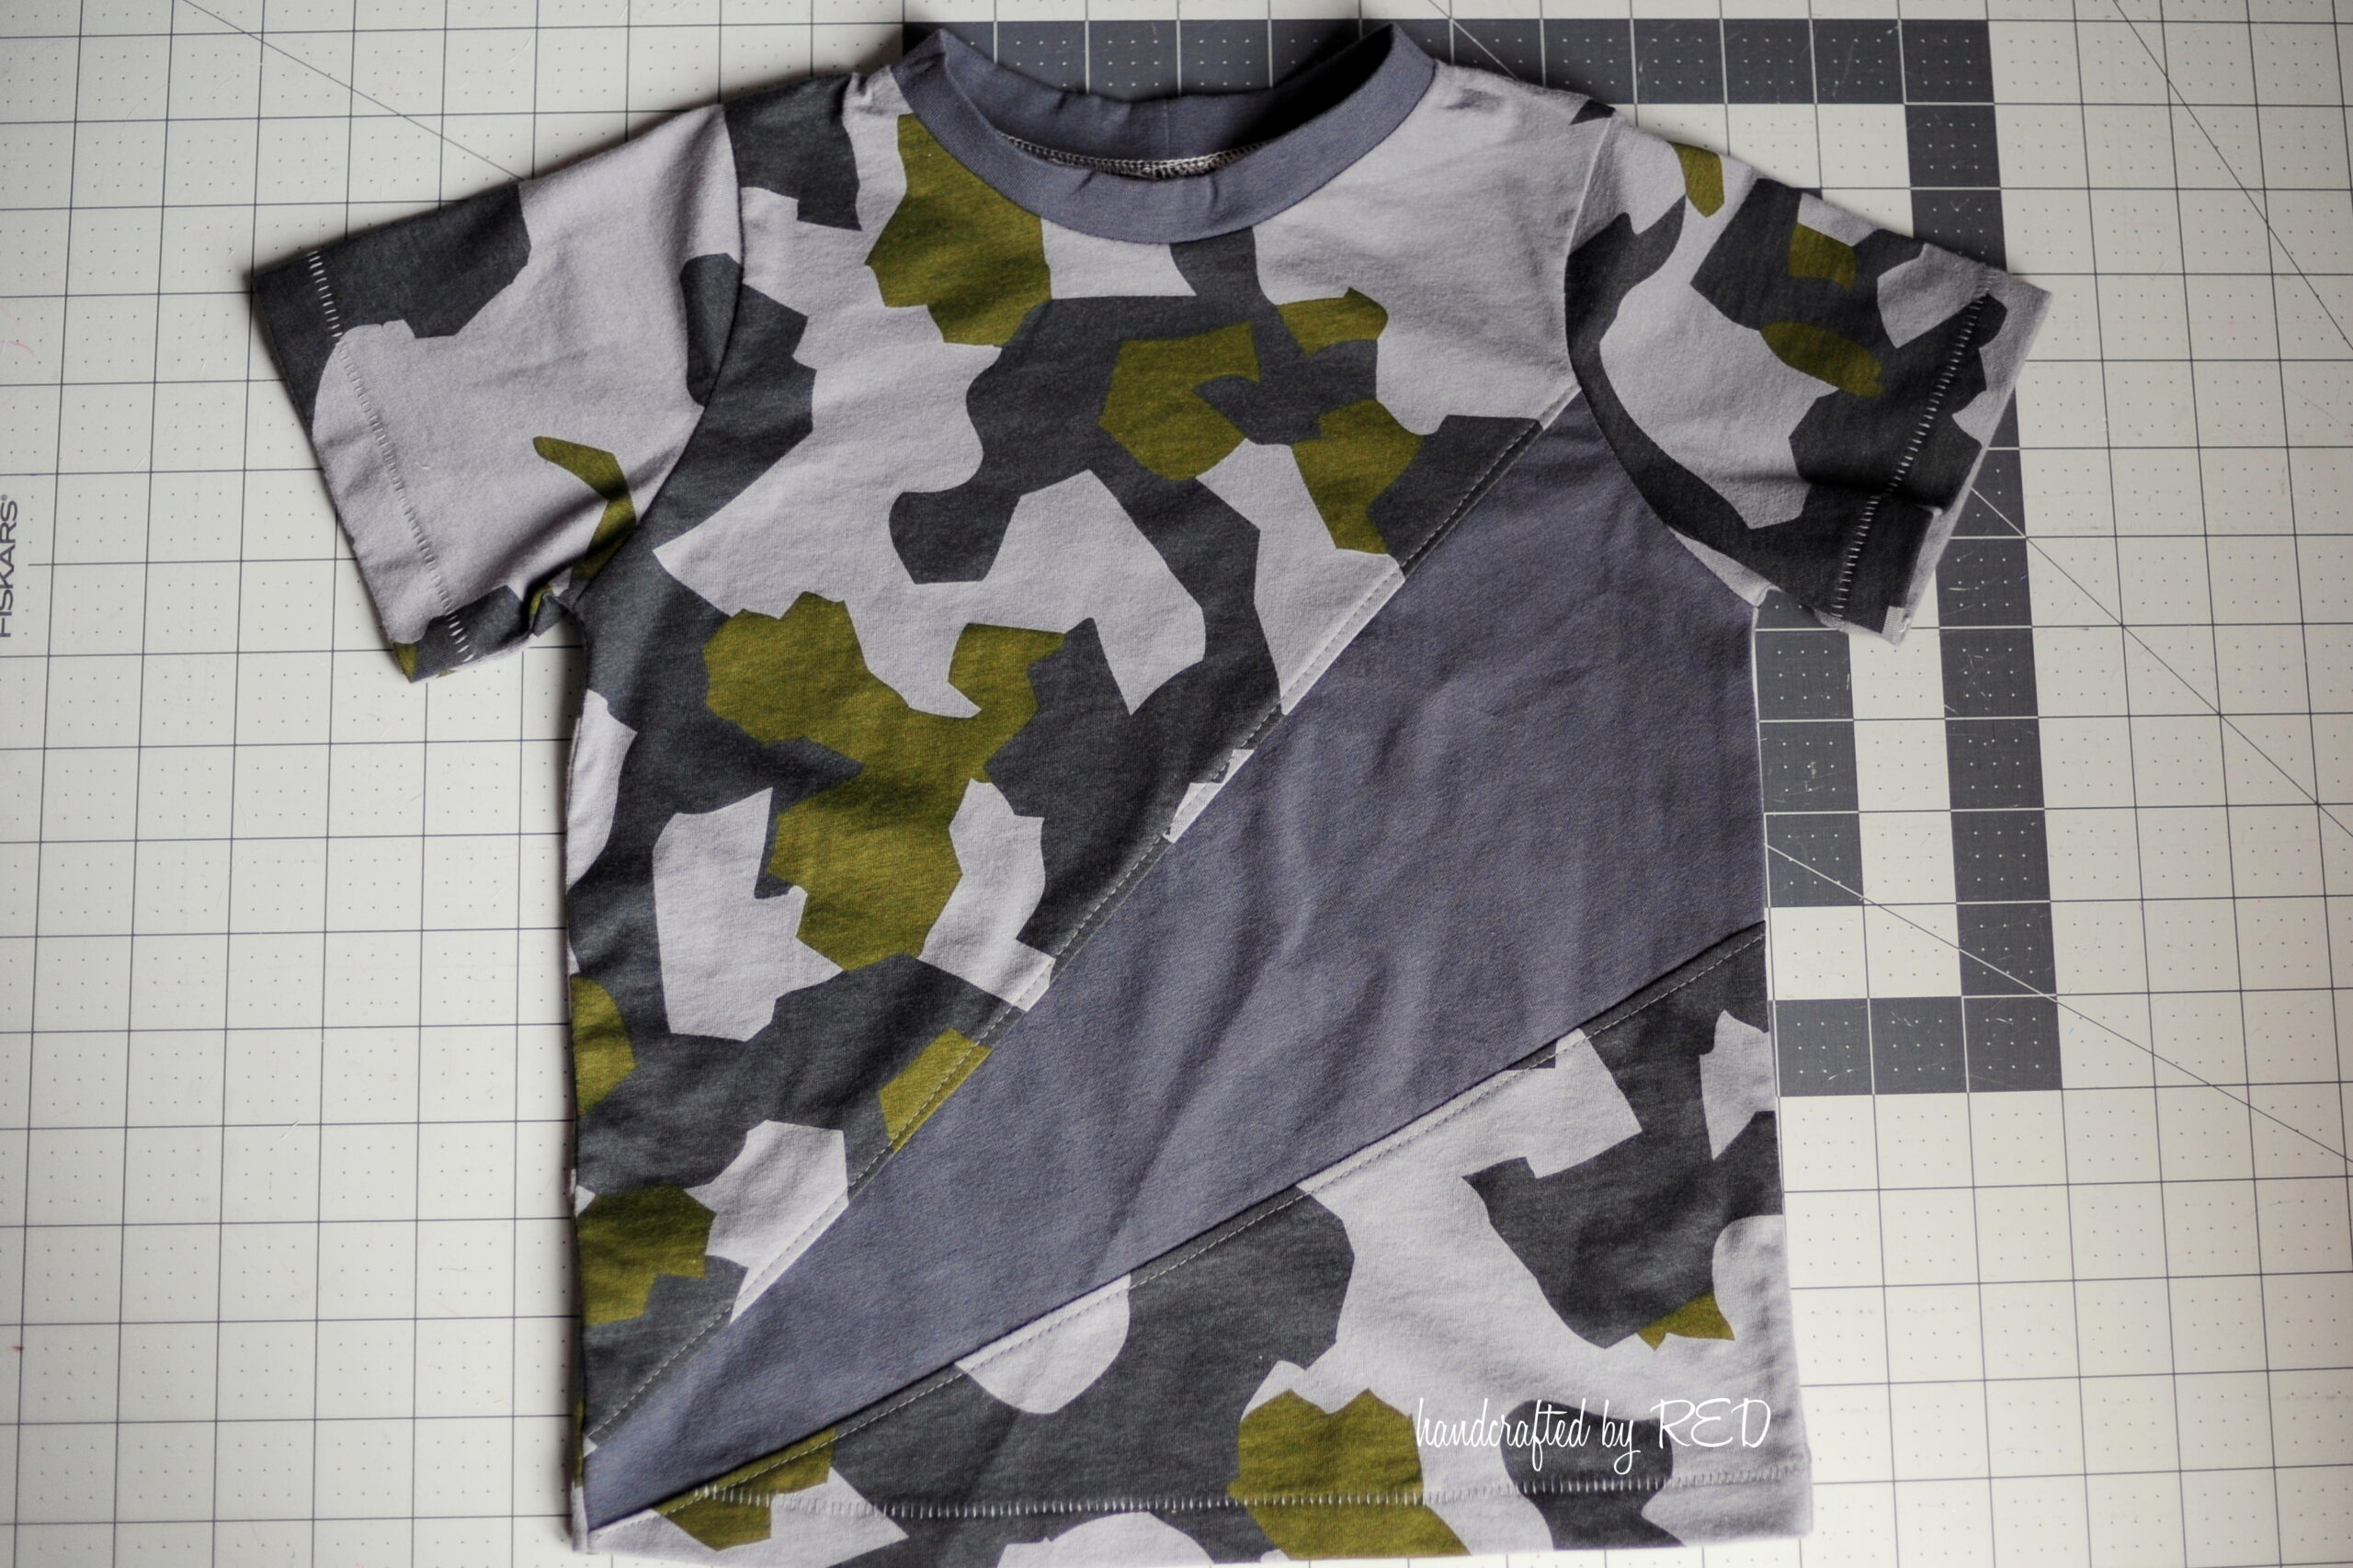
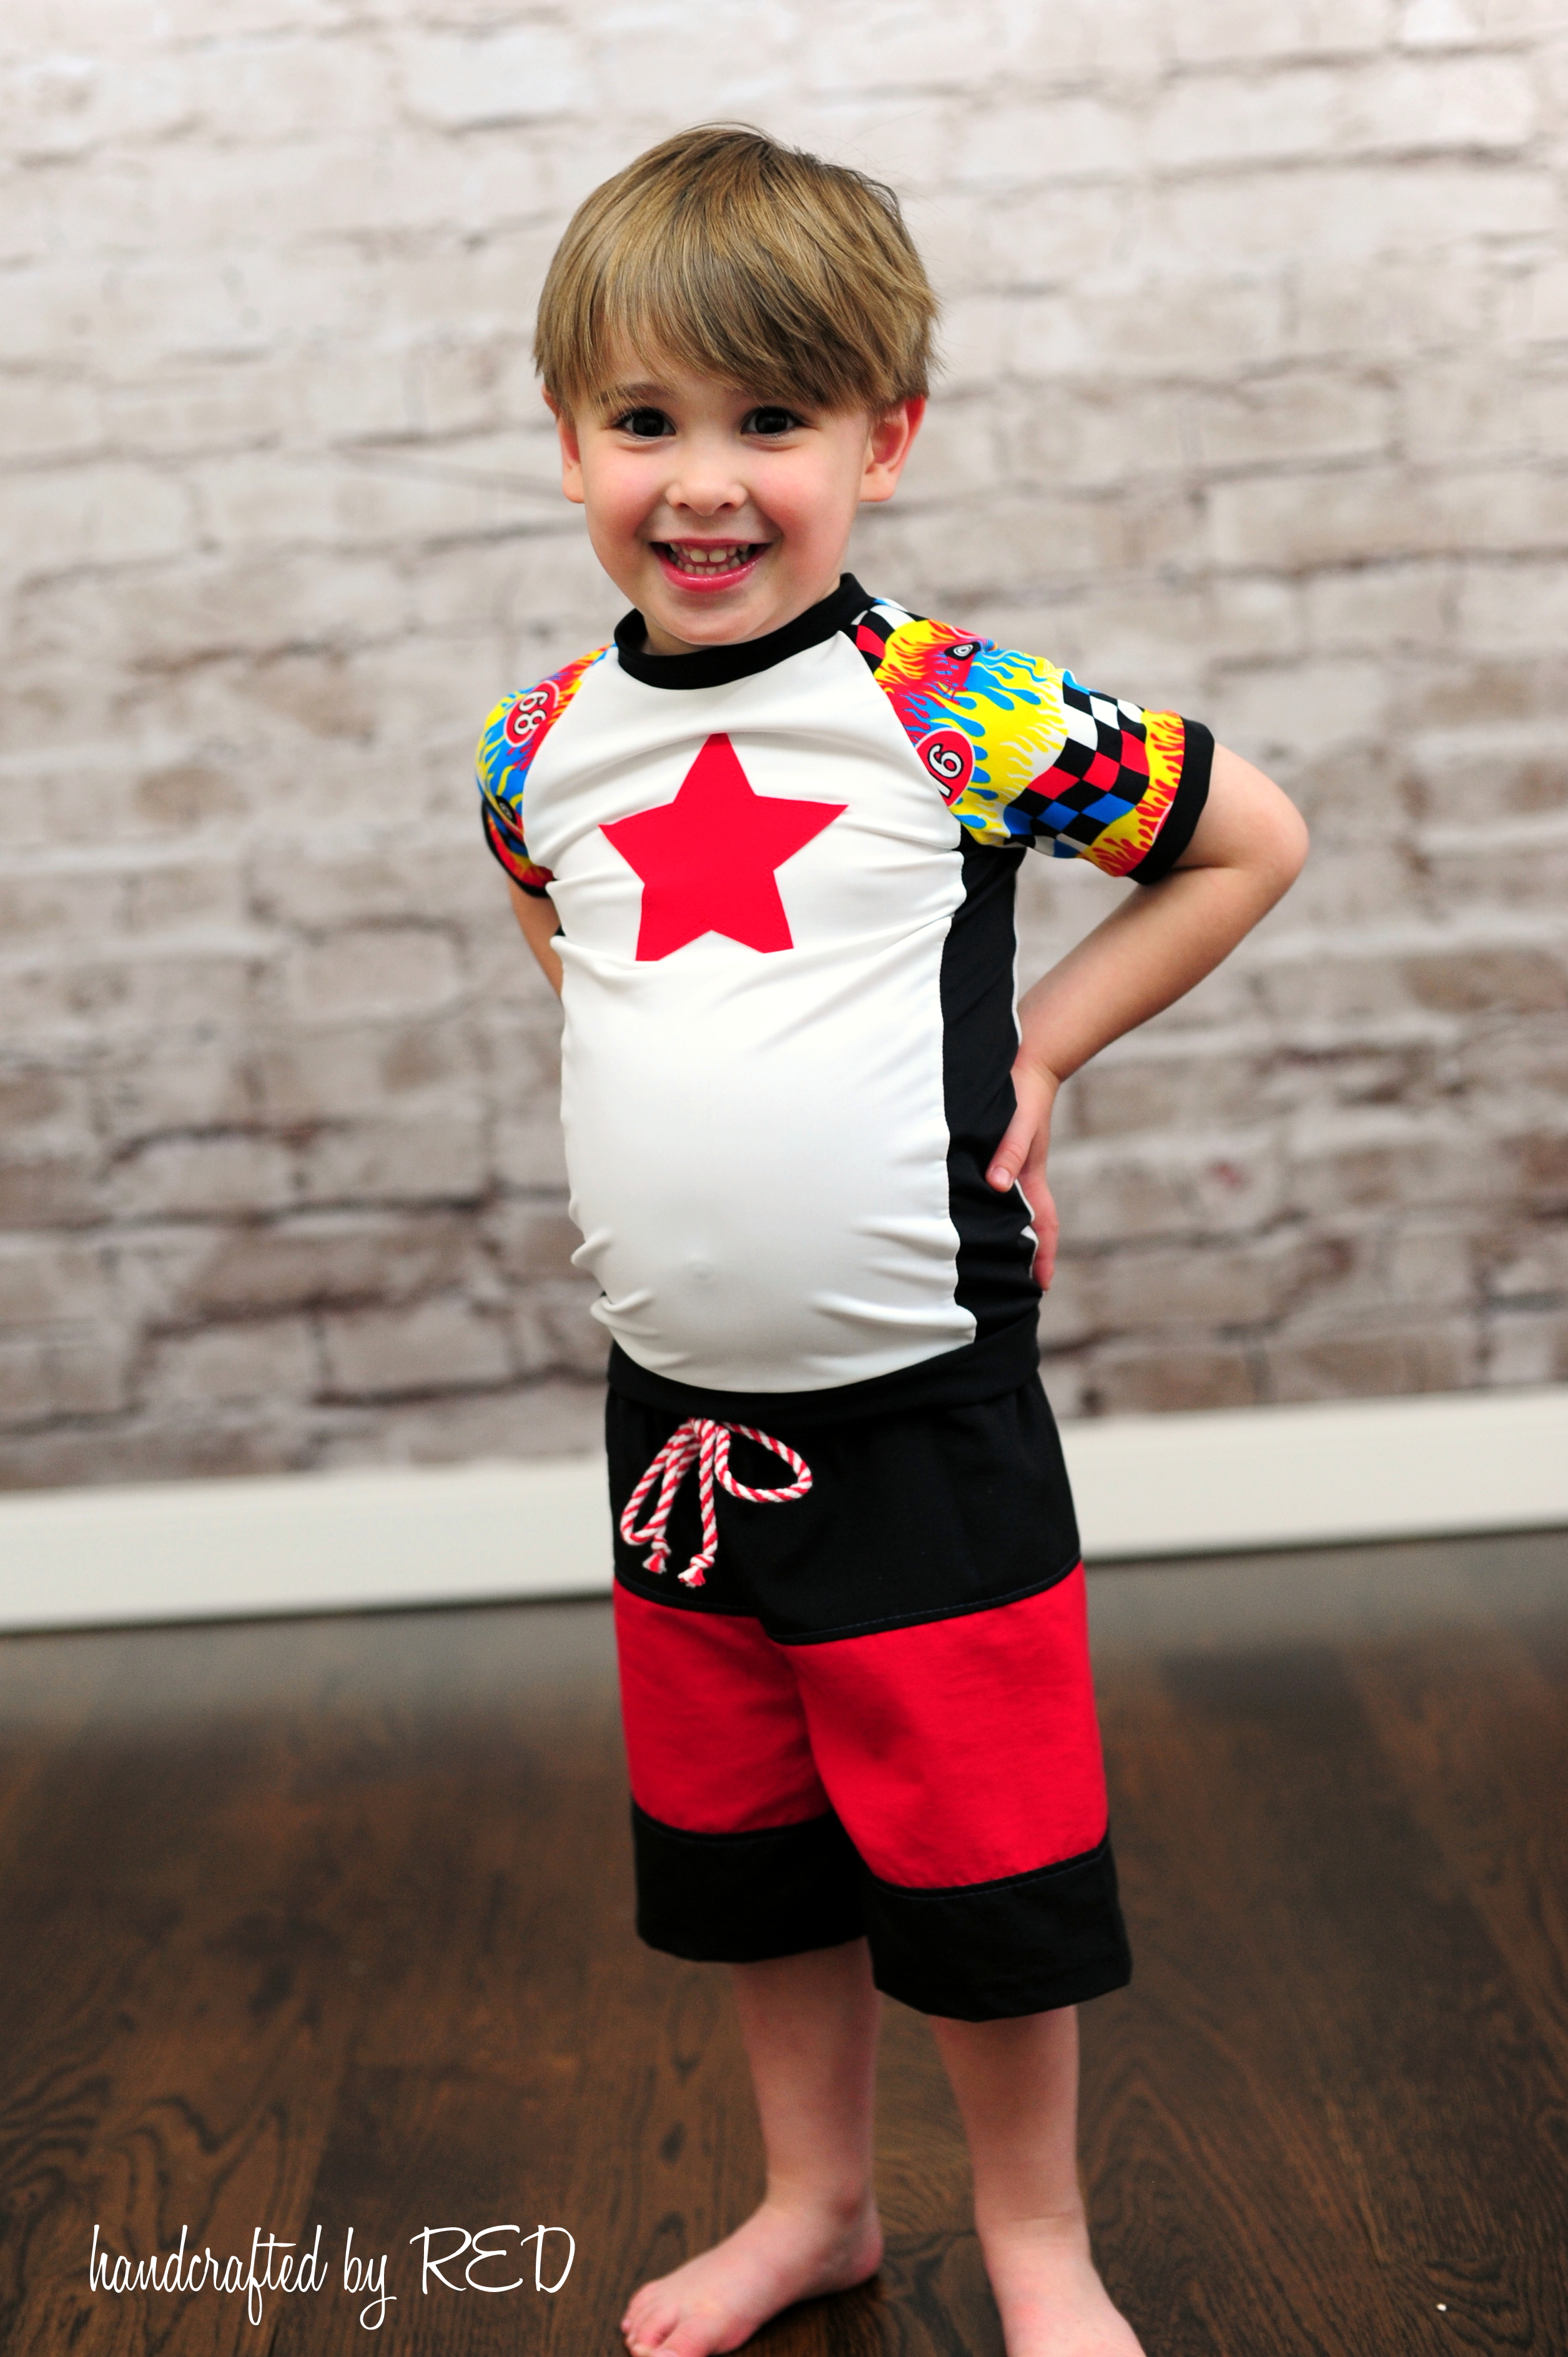
The first way I color block fabric to cut the pattern pieces themselves and then re-piece the cut fabrics to assemble the garment. In the pic above, my little guy is wearing a Classic Ringer tee that I’ve blocked into thirds. I used two mens tees for this one – one is from Old Navy and the other is from Target, my two favorite places to snag mens tees on clearance for upcycling. I actually colorblocked the back of this shirt, too:
Here’s how I did this one (and another design with the same pattern). I started by tracing my pattern so I had full pattern pieces to work with – no longer to be placed on the fold. I used my ruler to mark lines where I wanted my colorblocking to be, and then cut the pieces apart at those lines.
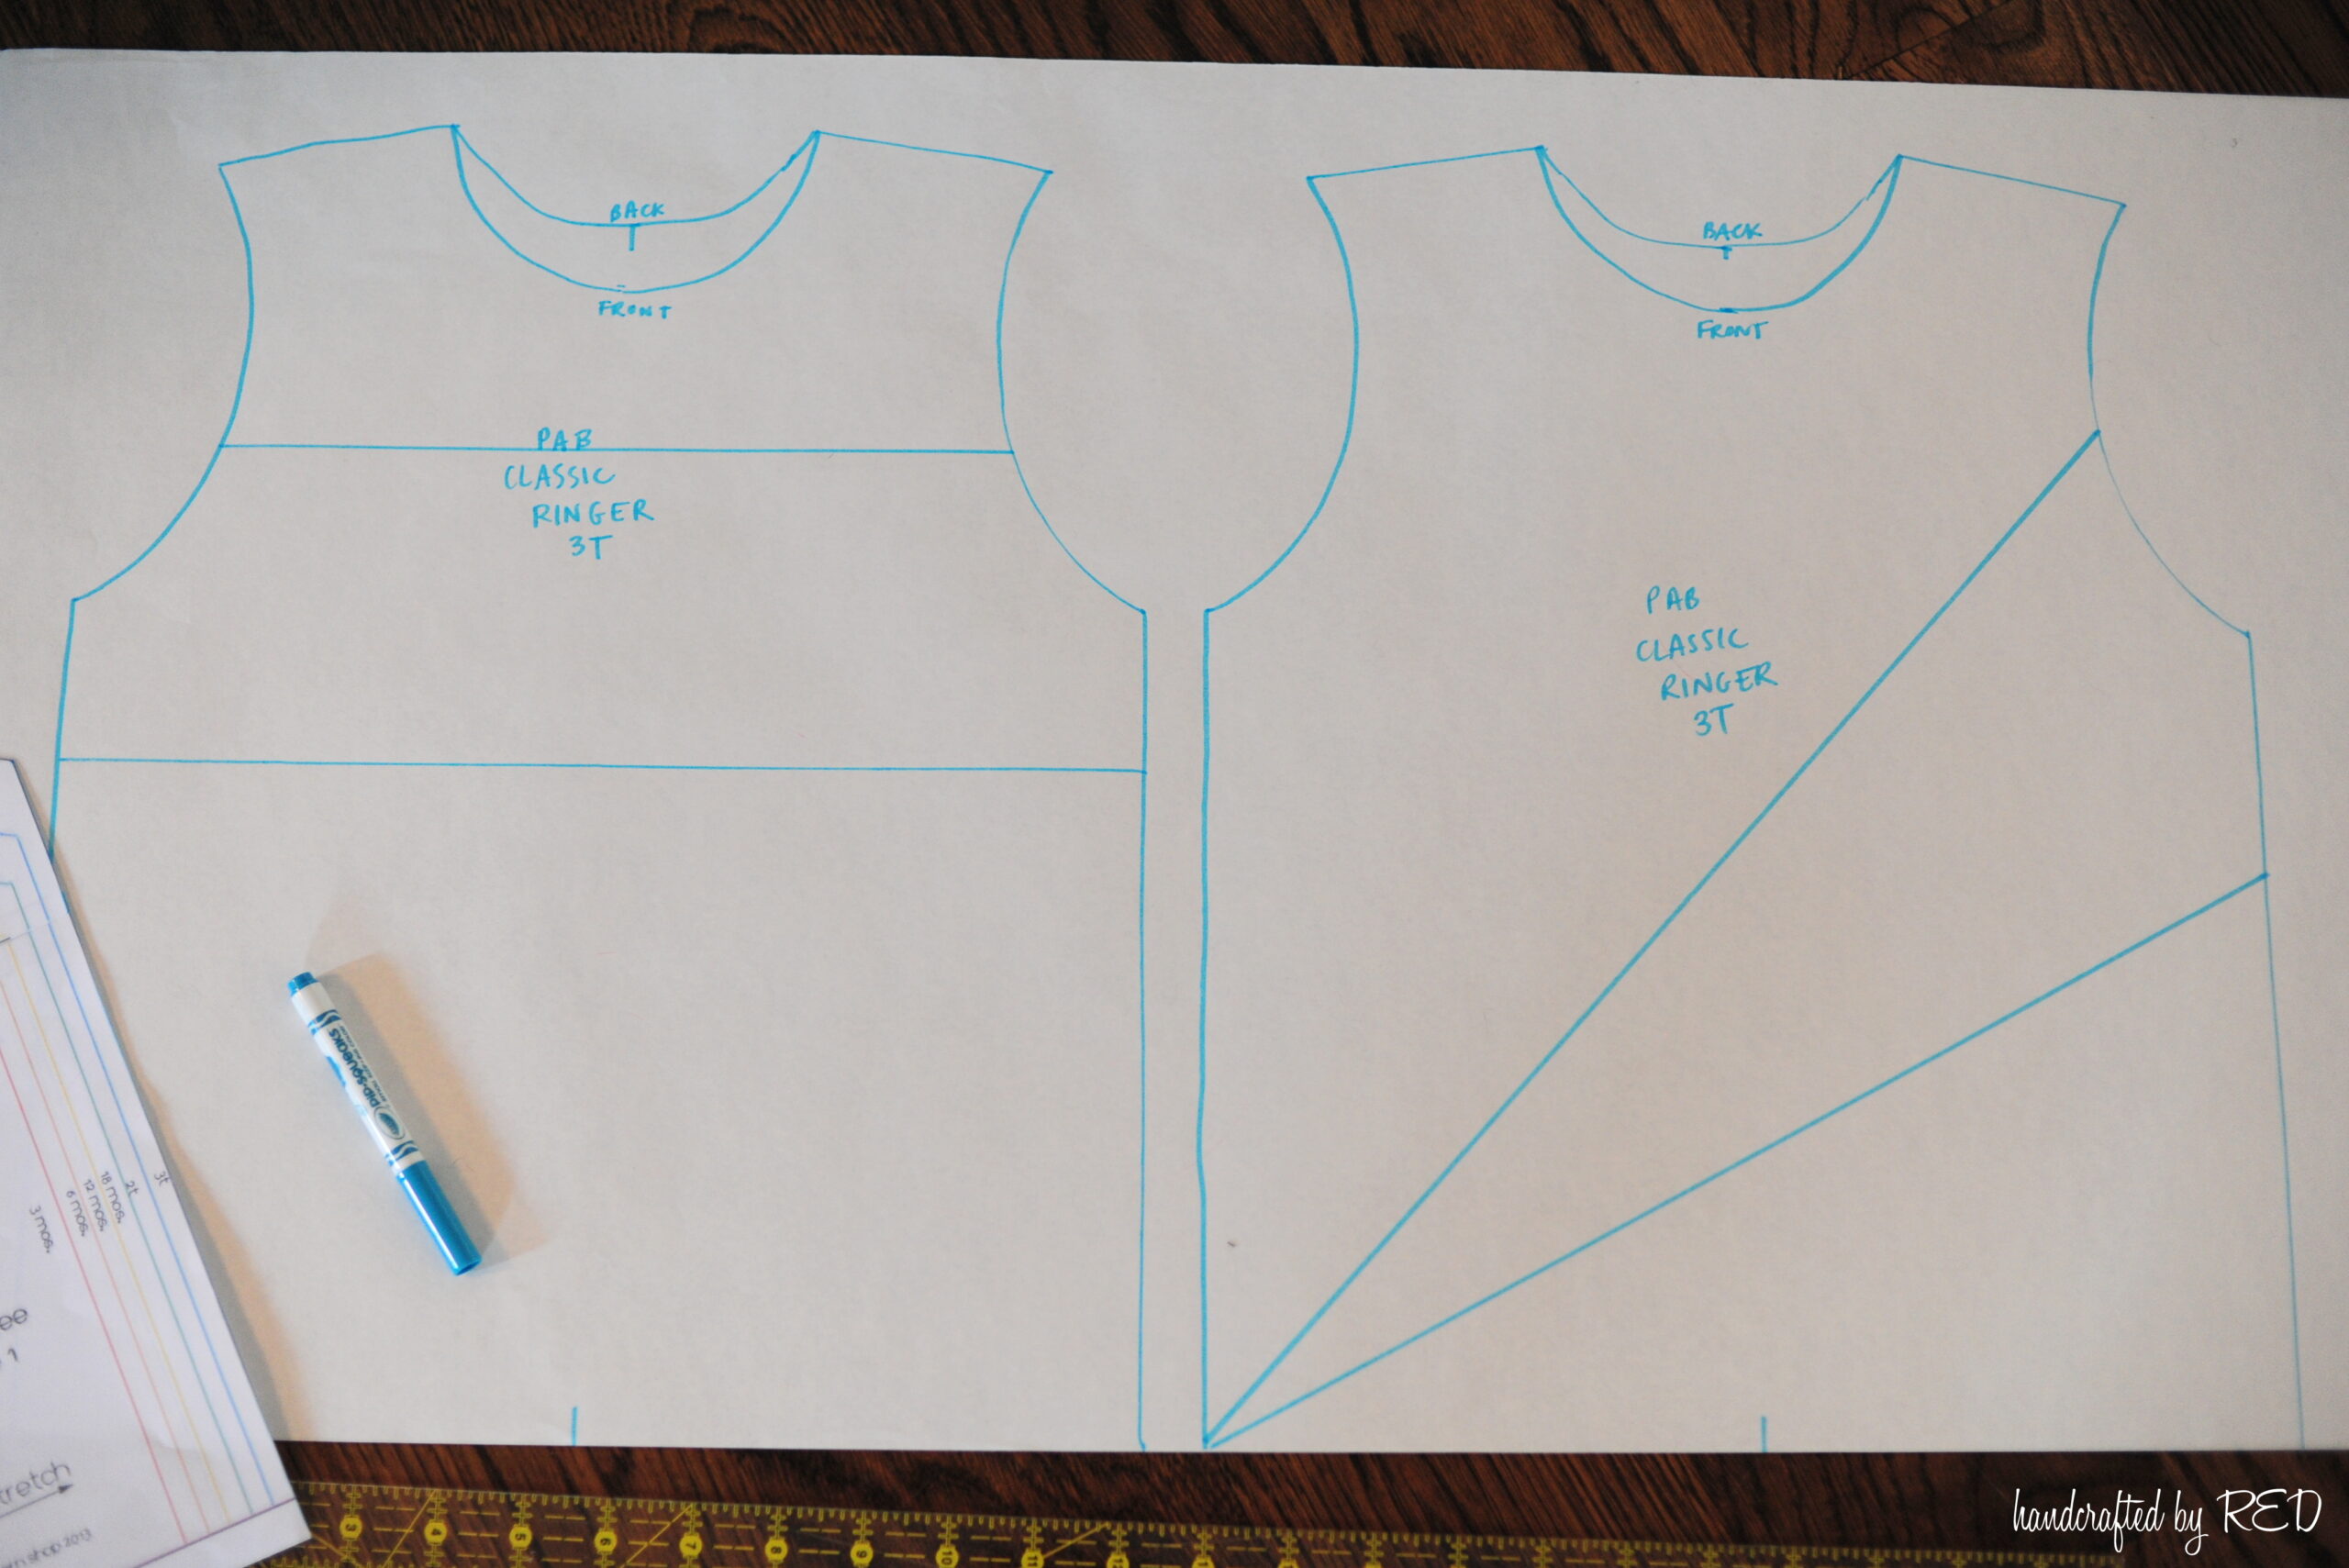
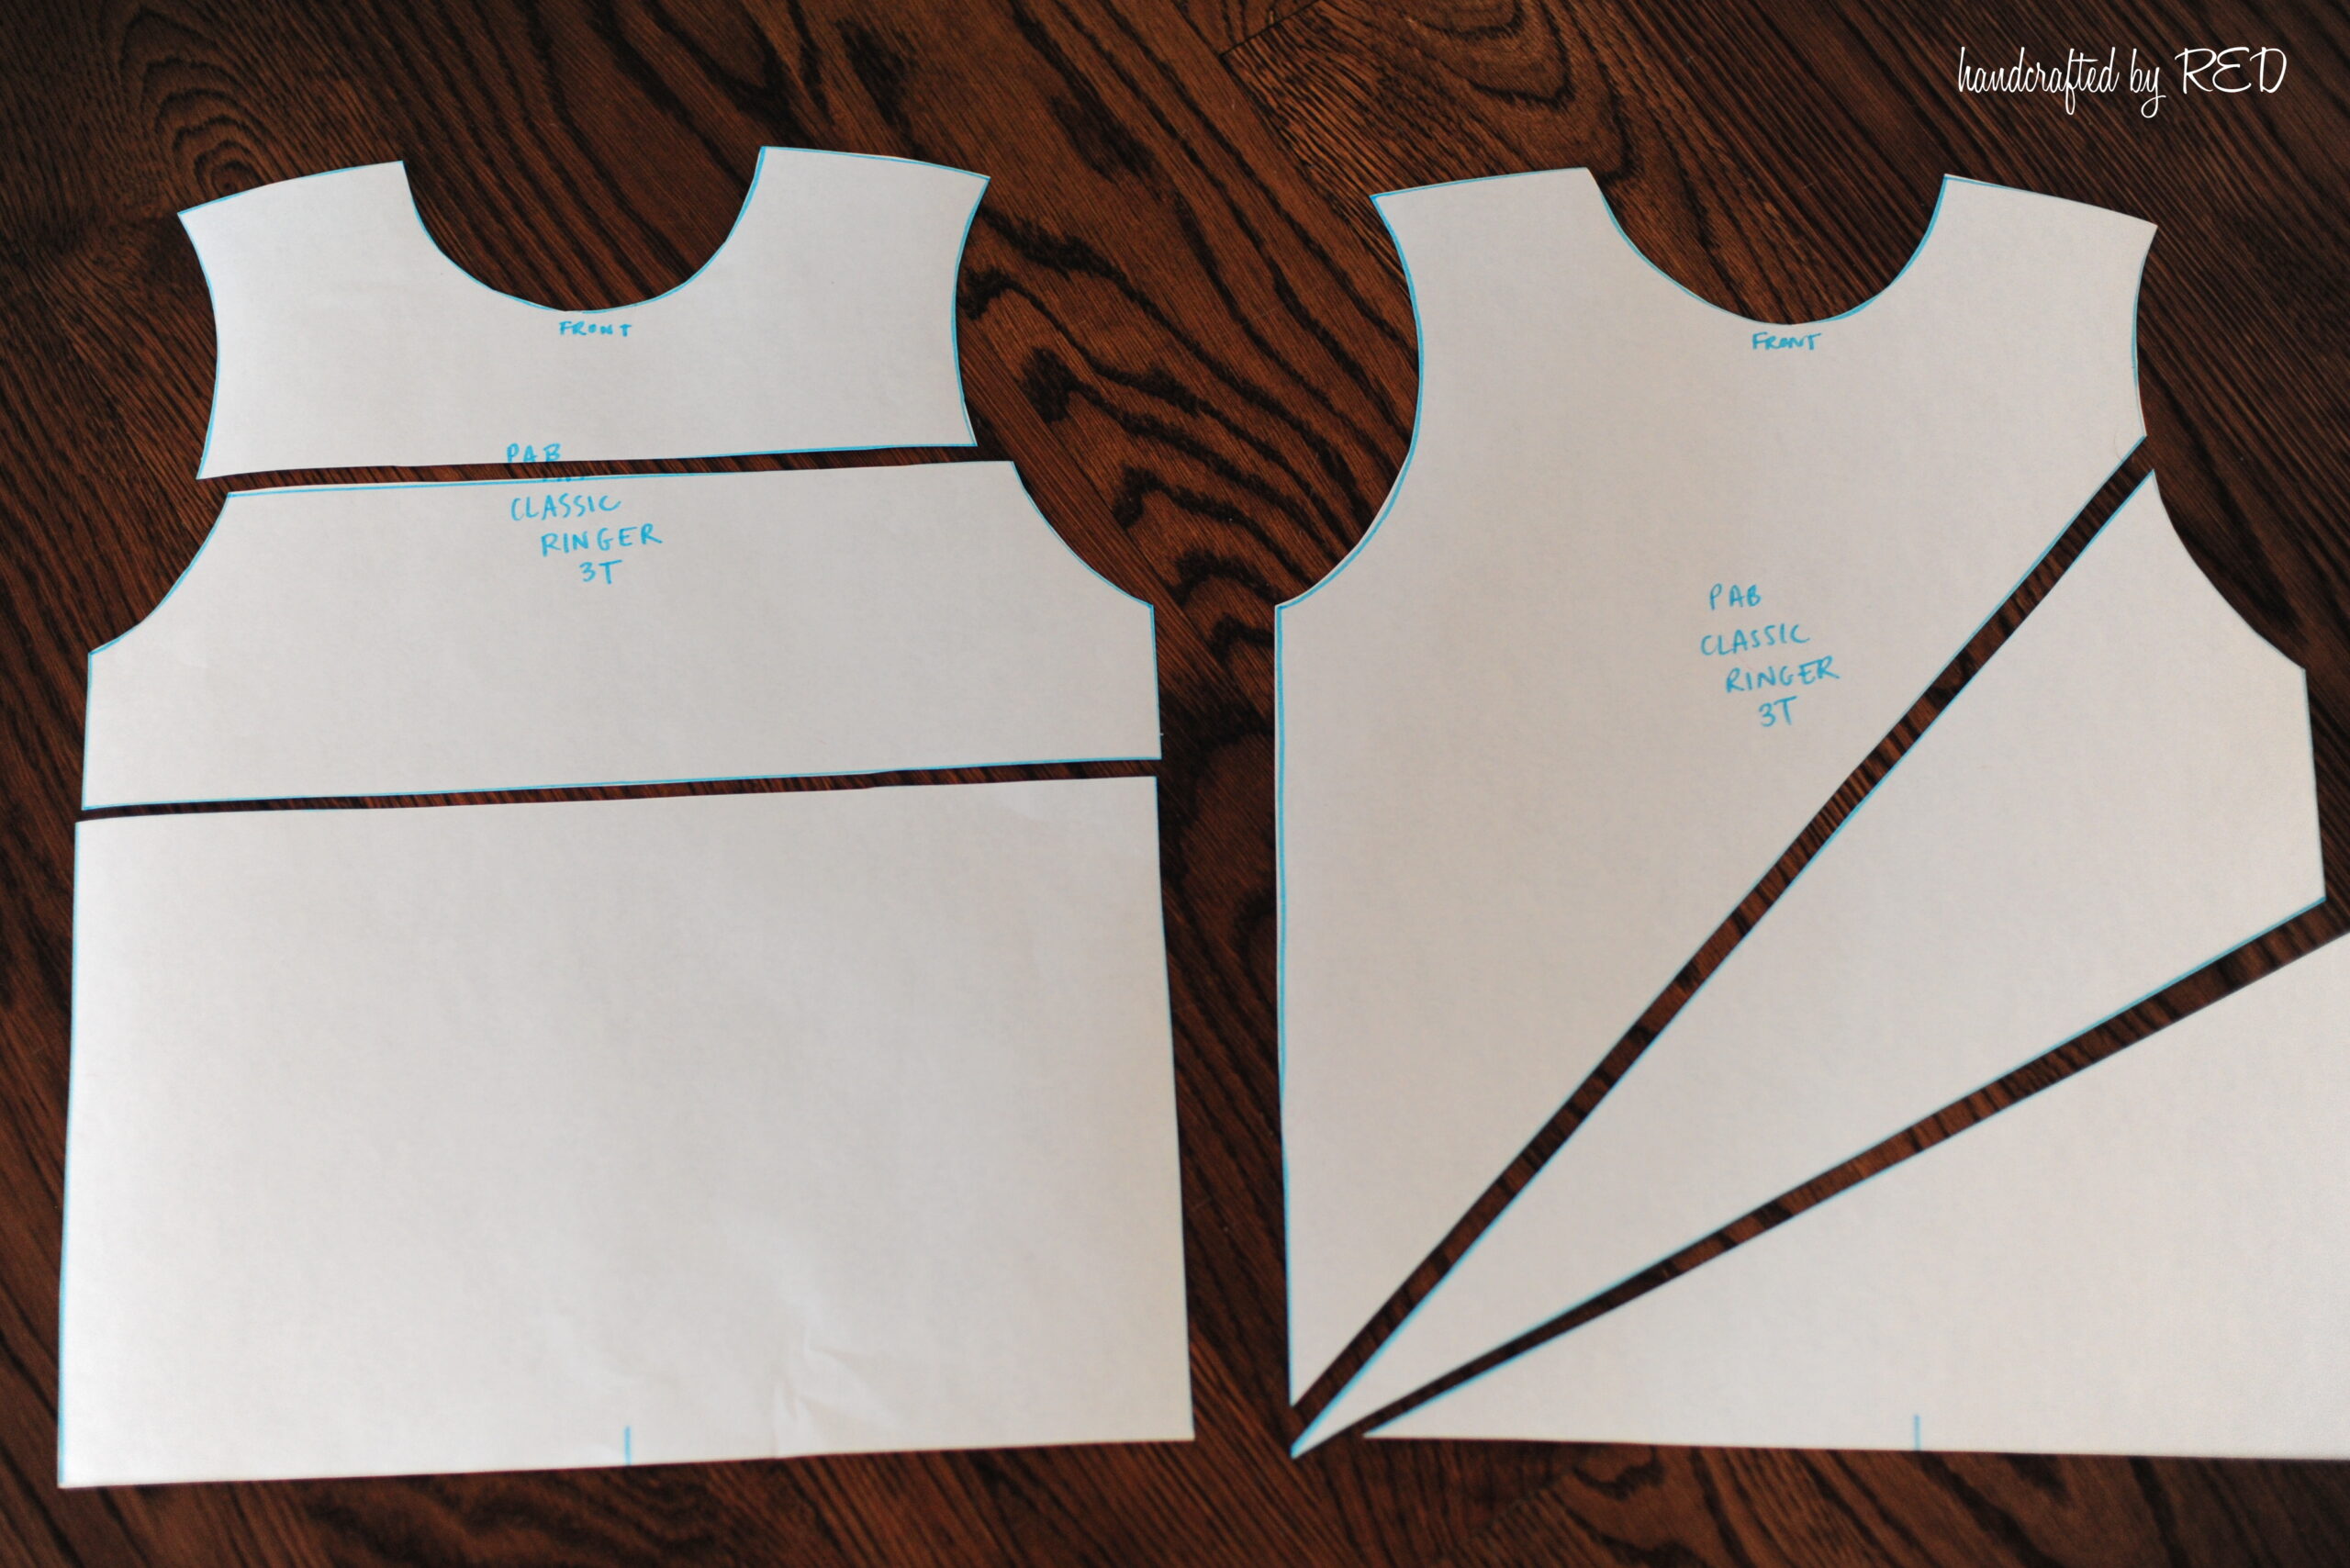
Next, I re-traced my cut pieces and added a seam allowance to each cut edge. There’s no need to add seam allowances along the original edges of the pattern, since they were already included in the pattern to begin with. I added 1/4″ to each of my cut edges for a seam allowance, but you can add as much as you’d like. Here’s what my new pieces looked like:
I used the pieces shown above to cut my fabric, assembled my front and back bodices, and then constructed the tee per the pattern instructions. It’s that easy! The triangle block looked like this when it was done (the camo-ish print was also an upcycle, and the grey was knit yardage from Purple Seamstress):
I also sewed up a couple of Grand Slam tees for my little guy by color blocking the sleeves – I did the same thing as shown above, by cutting the sleeve pattern piece in two and adding a small seam allowance to each cut edge before cutting my fabric and reassembling. These are my short and long sleeve versions, both cut in the same place on the sleeve (just below the underarm).
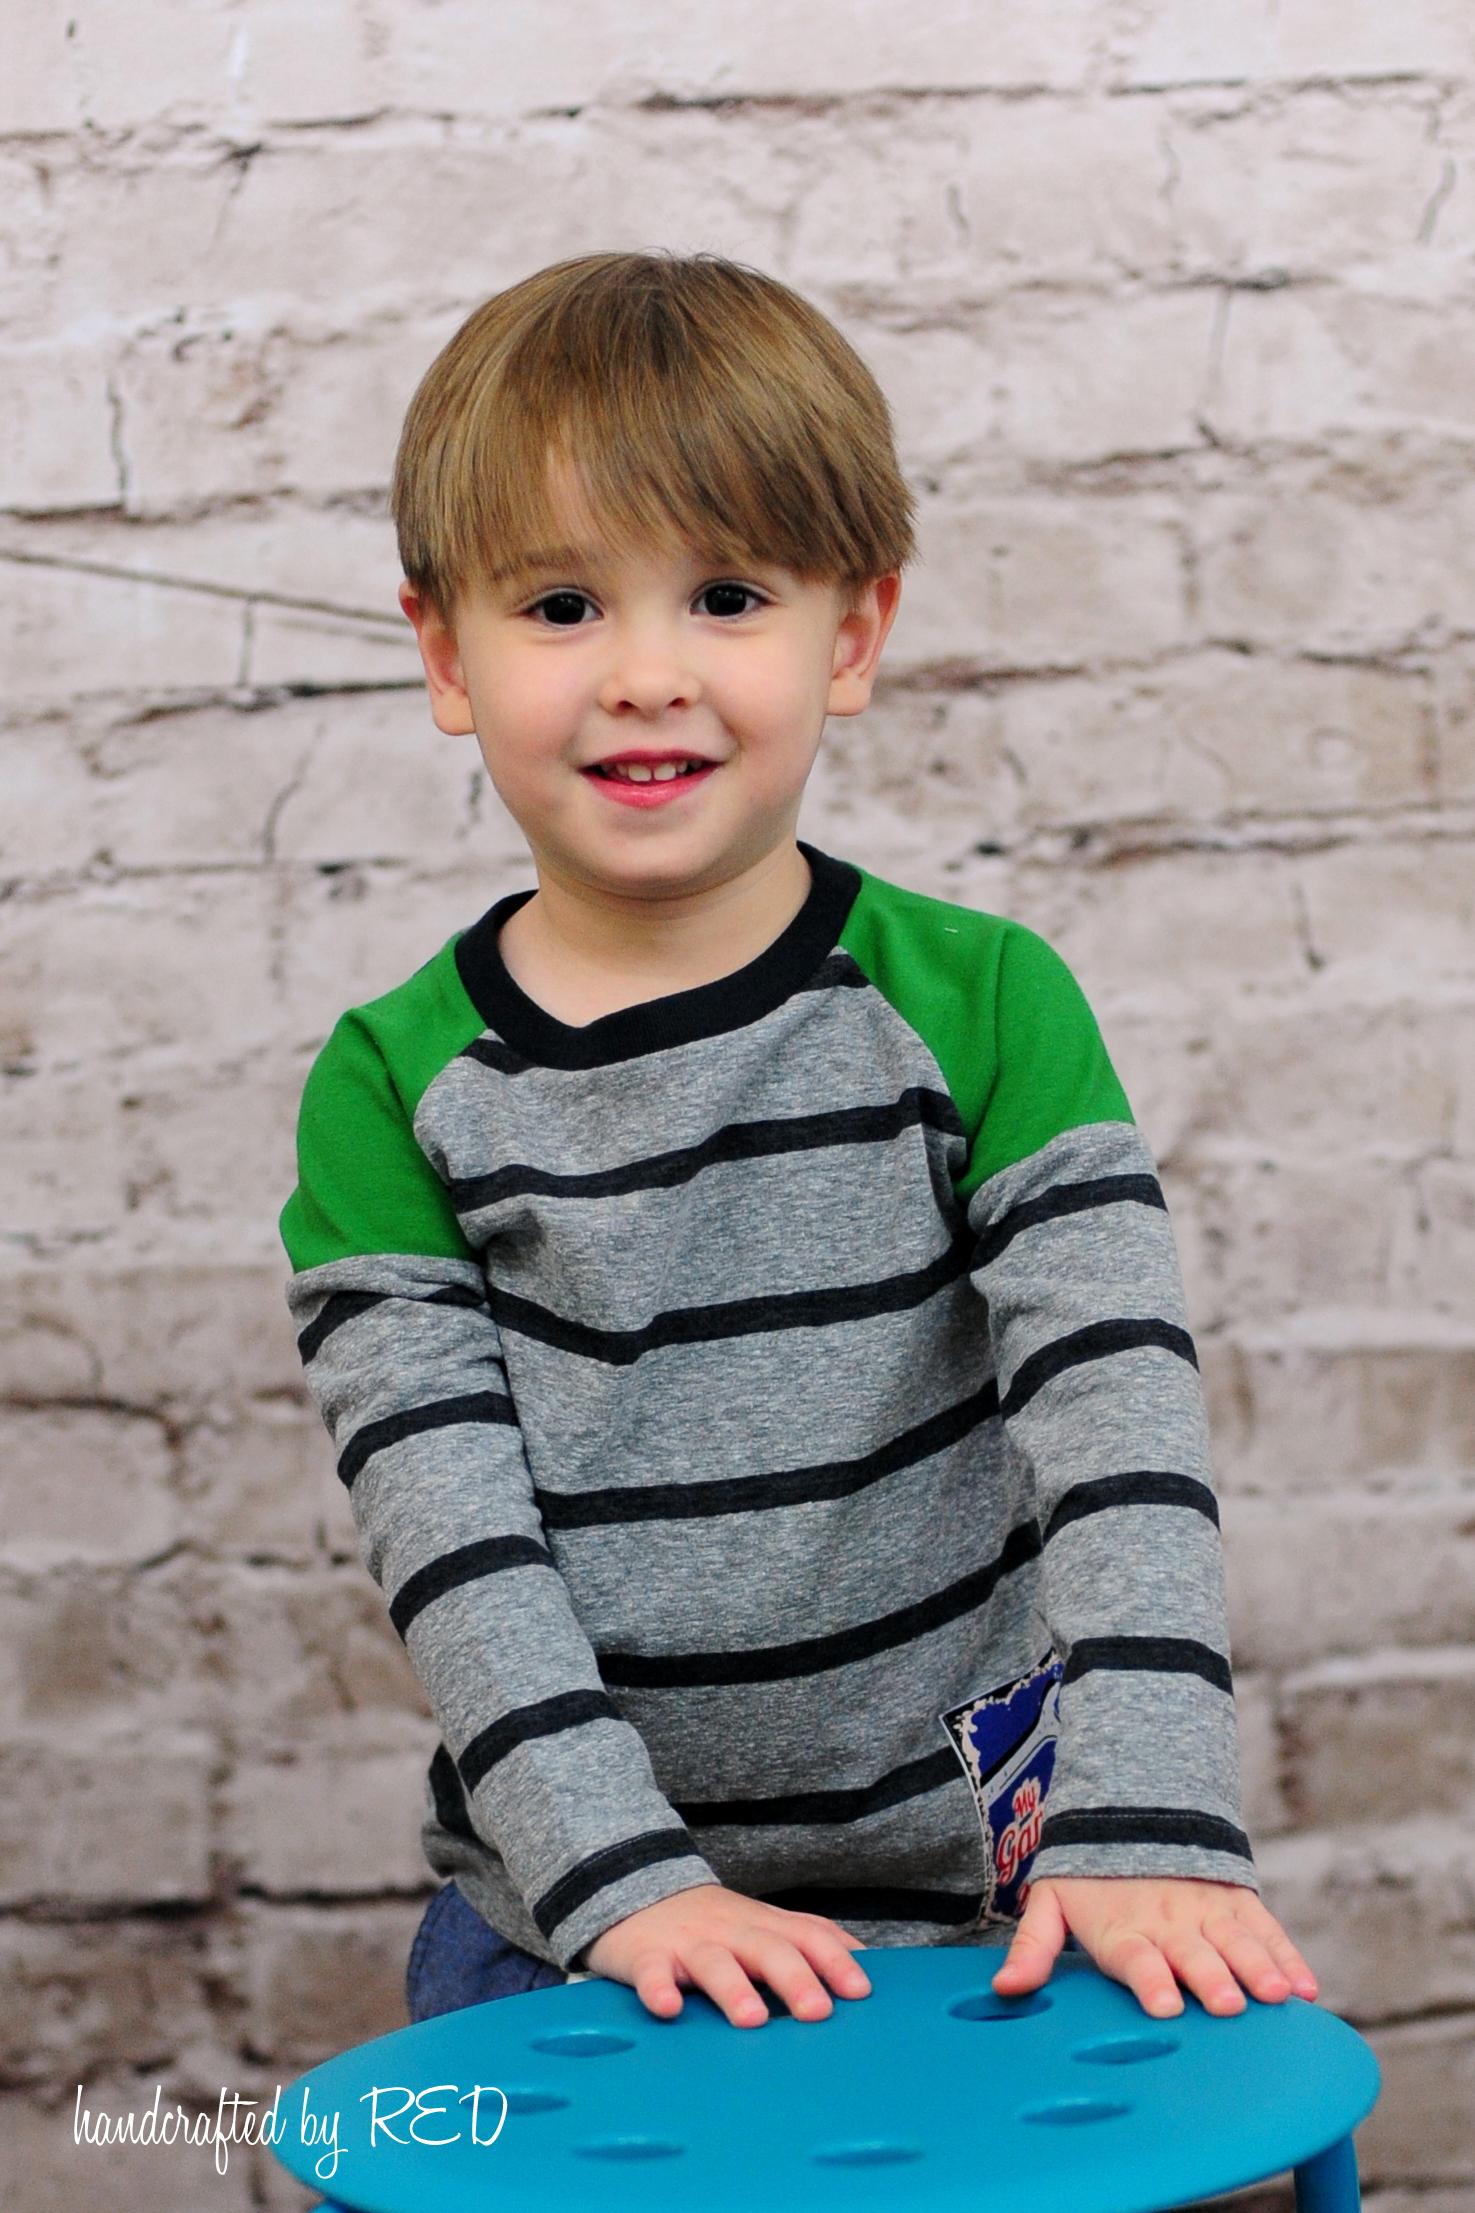
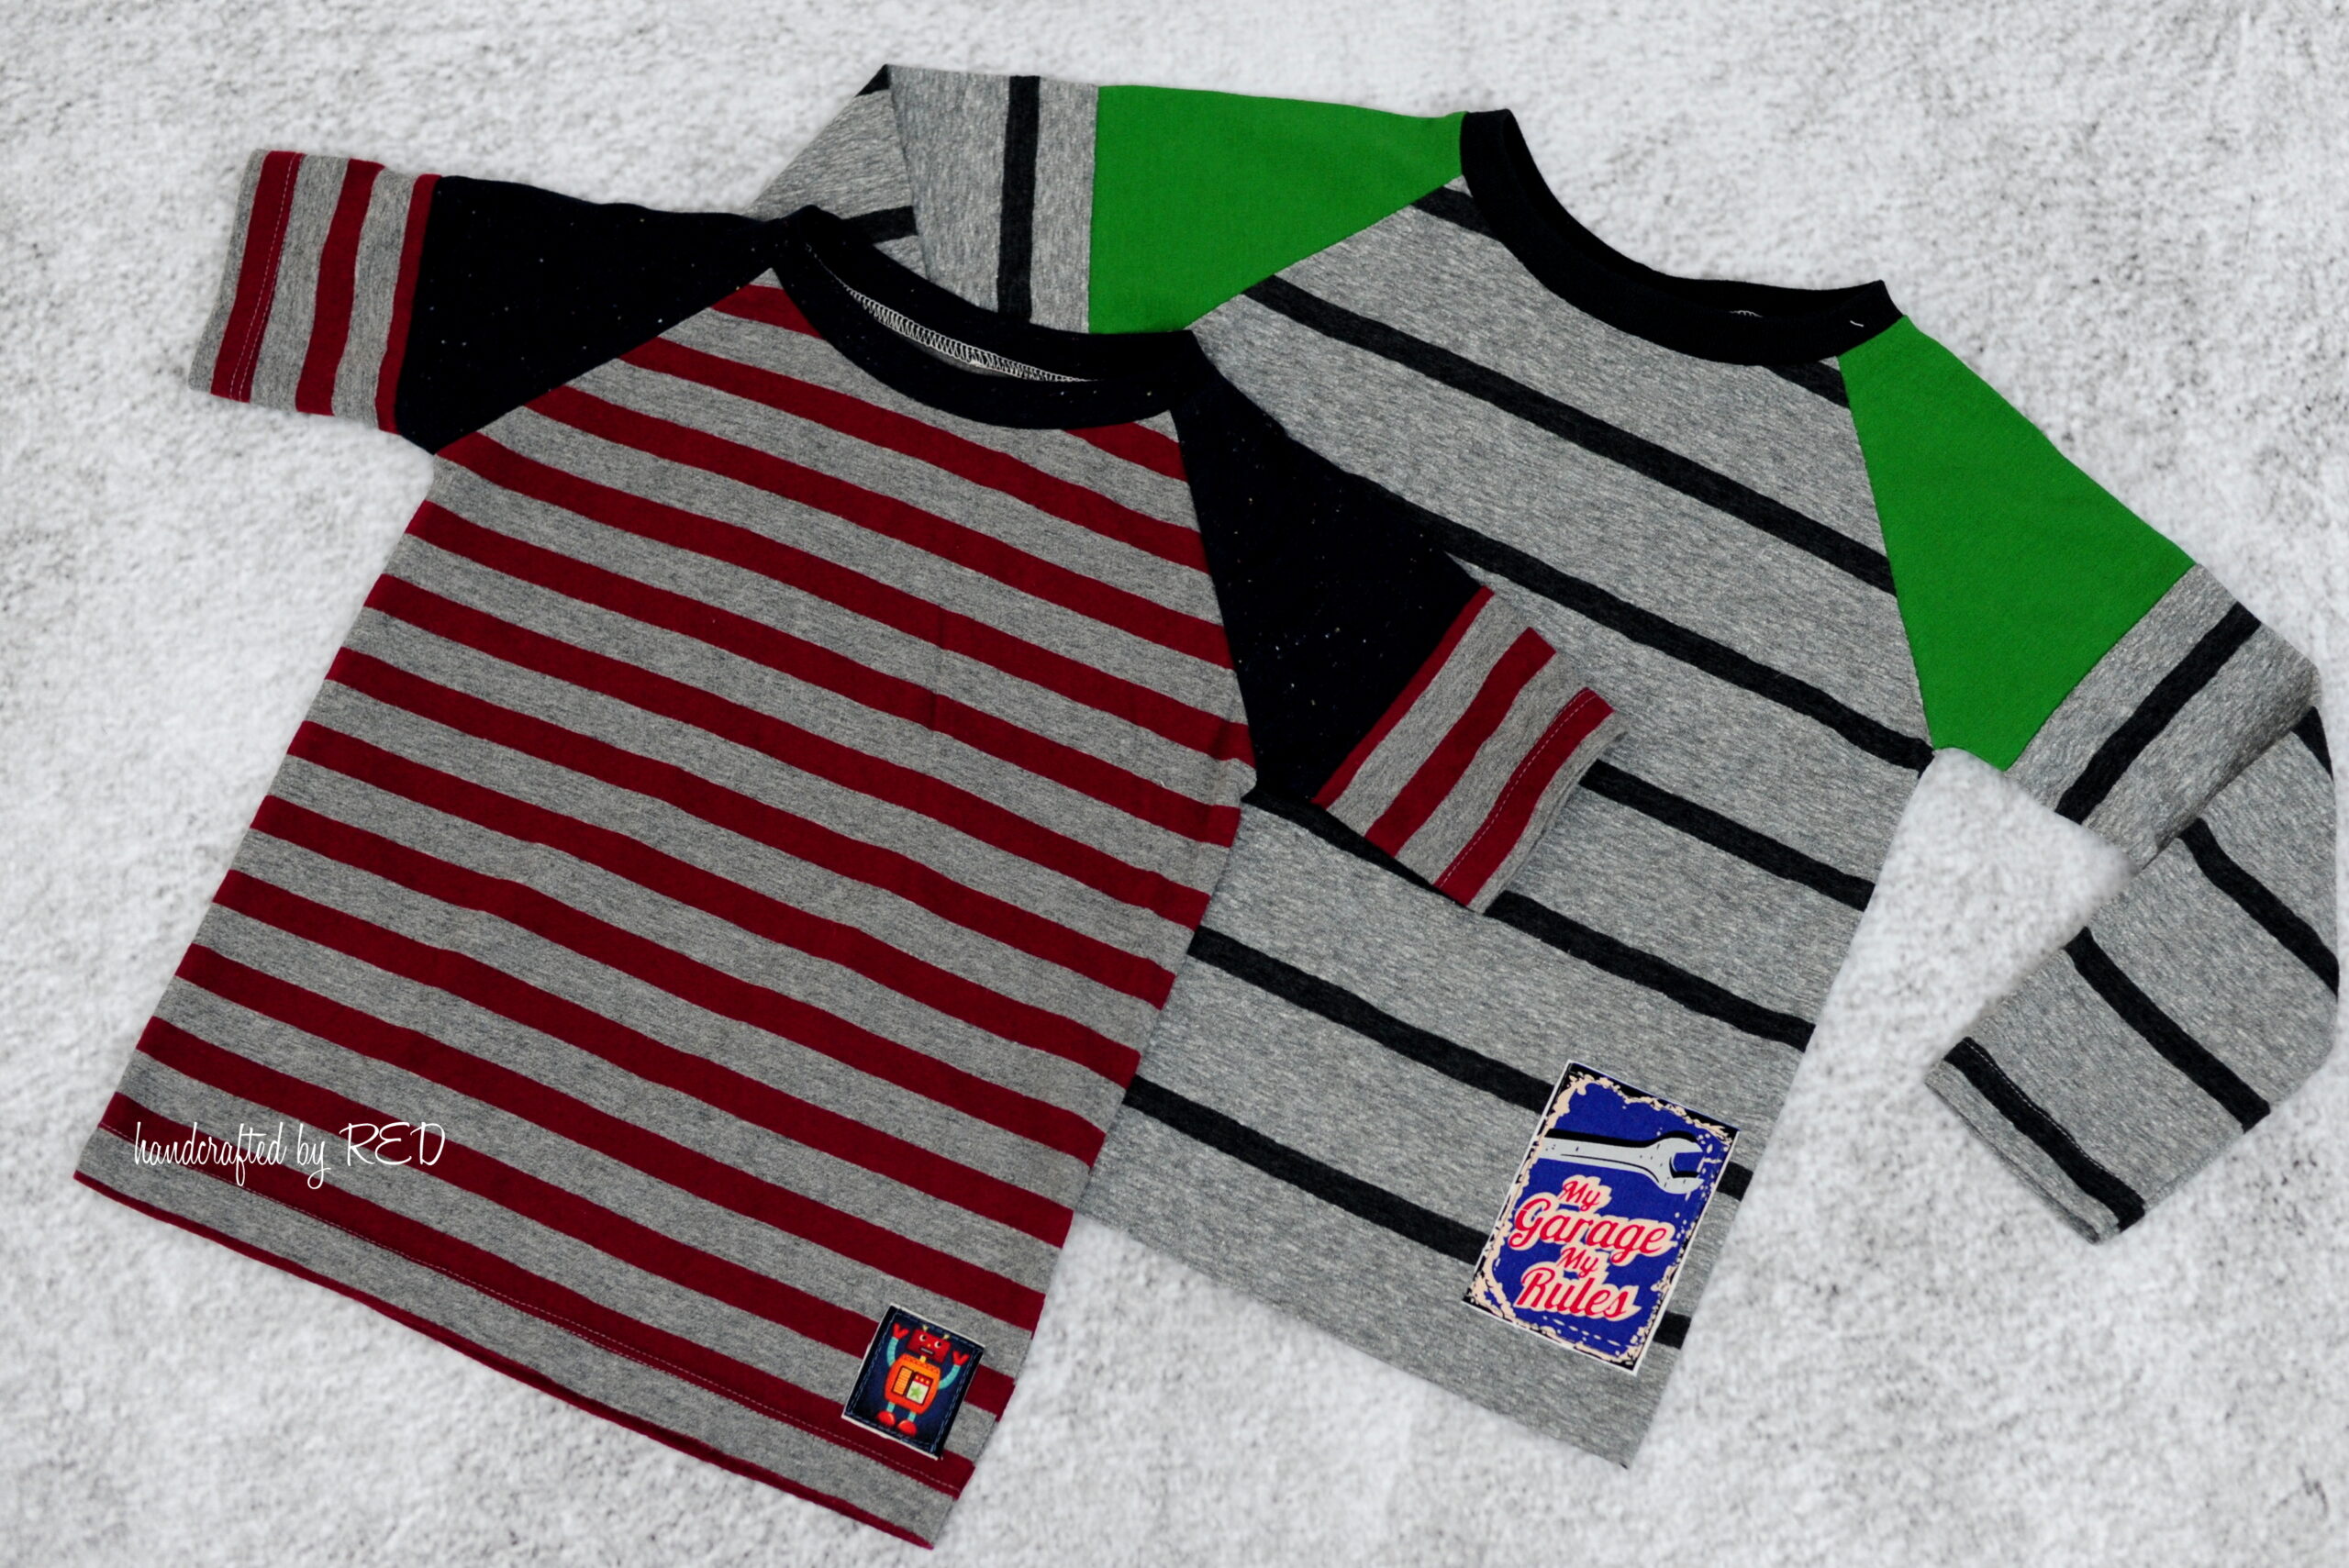
(I also added little fabric patches to these, just like in this tutorial from last fall.)
Color Blocking Fabric Method 2: Piece the Fabric Together First
The other method I use to color block is to actually piece the fabric together FIRST, and then cut my pattern pieces directly from the blocked fabric. It’s sometimes a little tricky to make sure everything is lined up in the right place to be symmetrical, but that’s the toughest part. Honest.
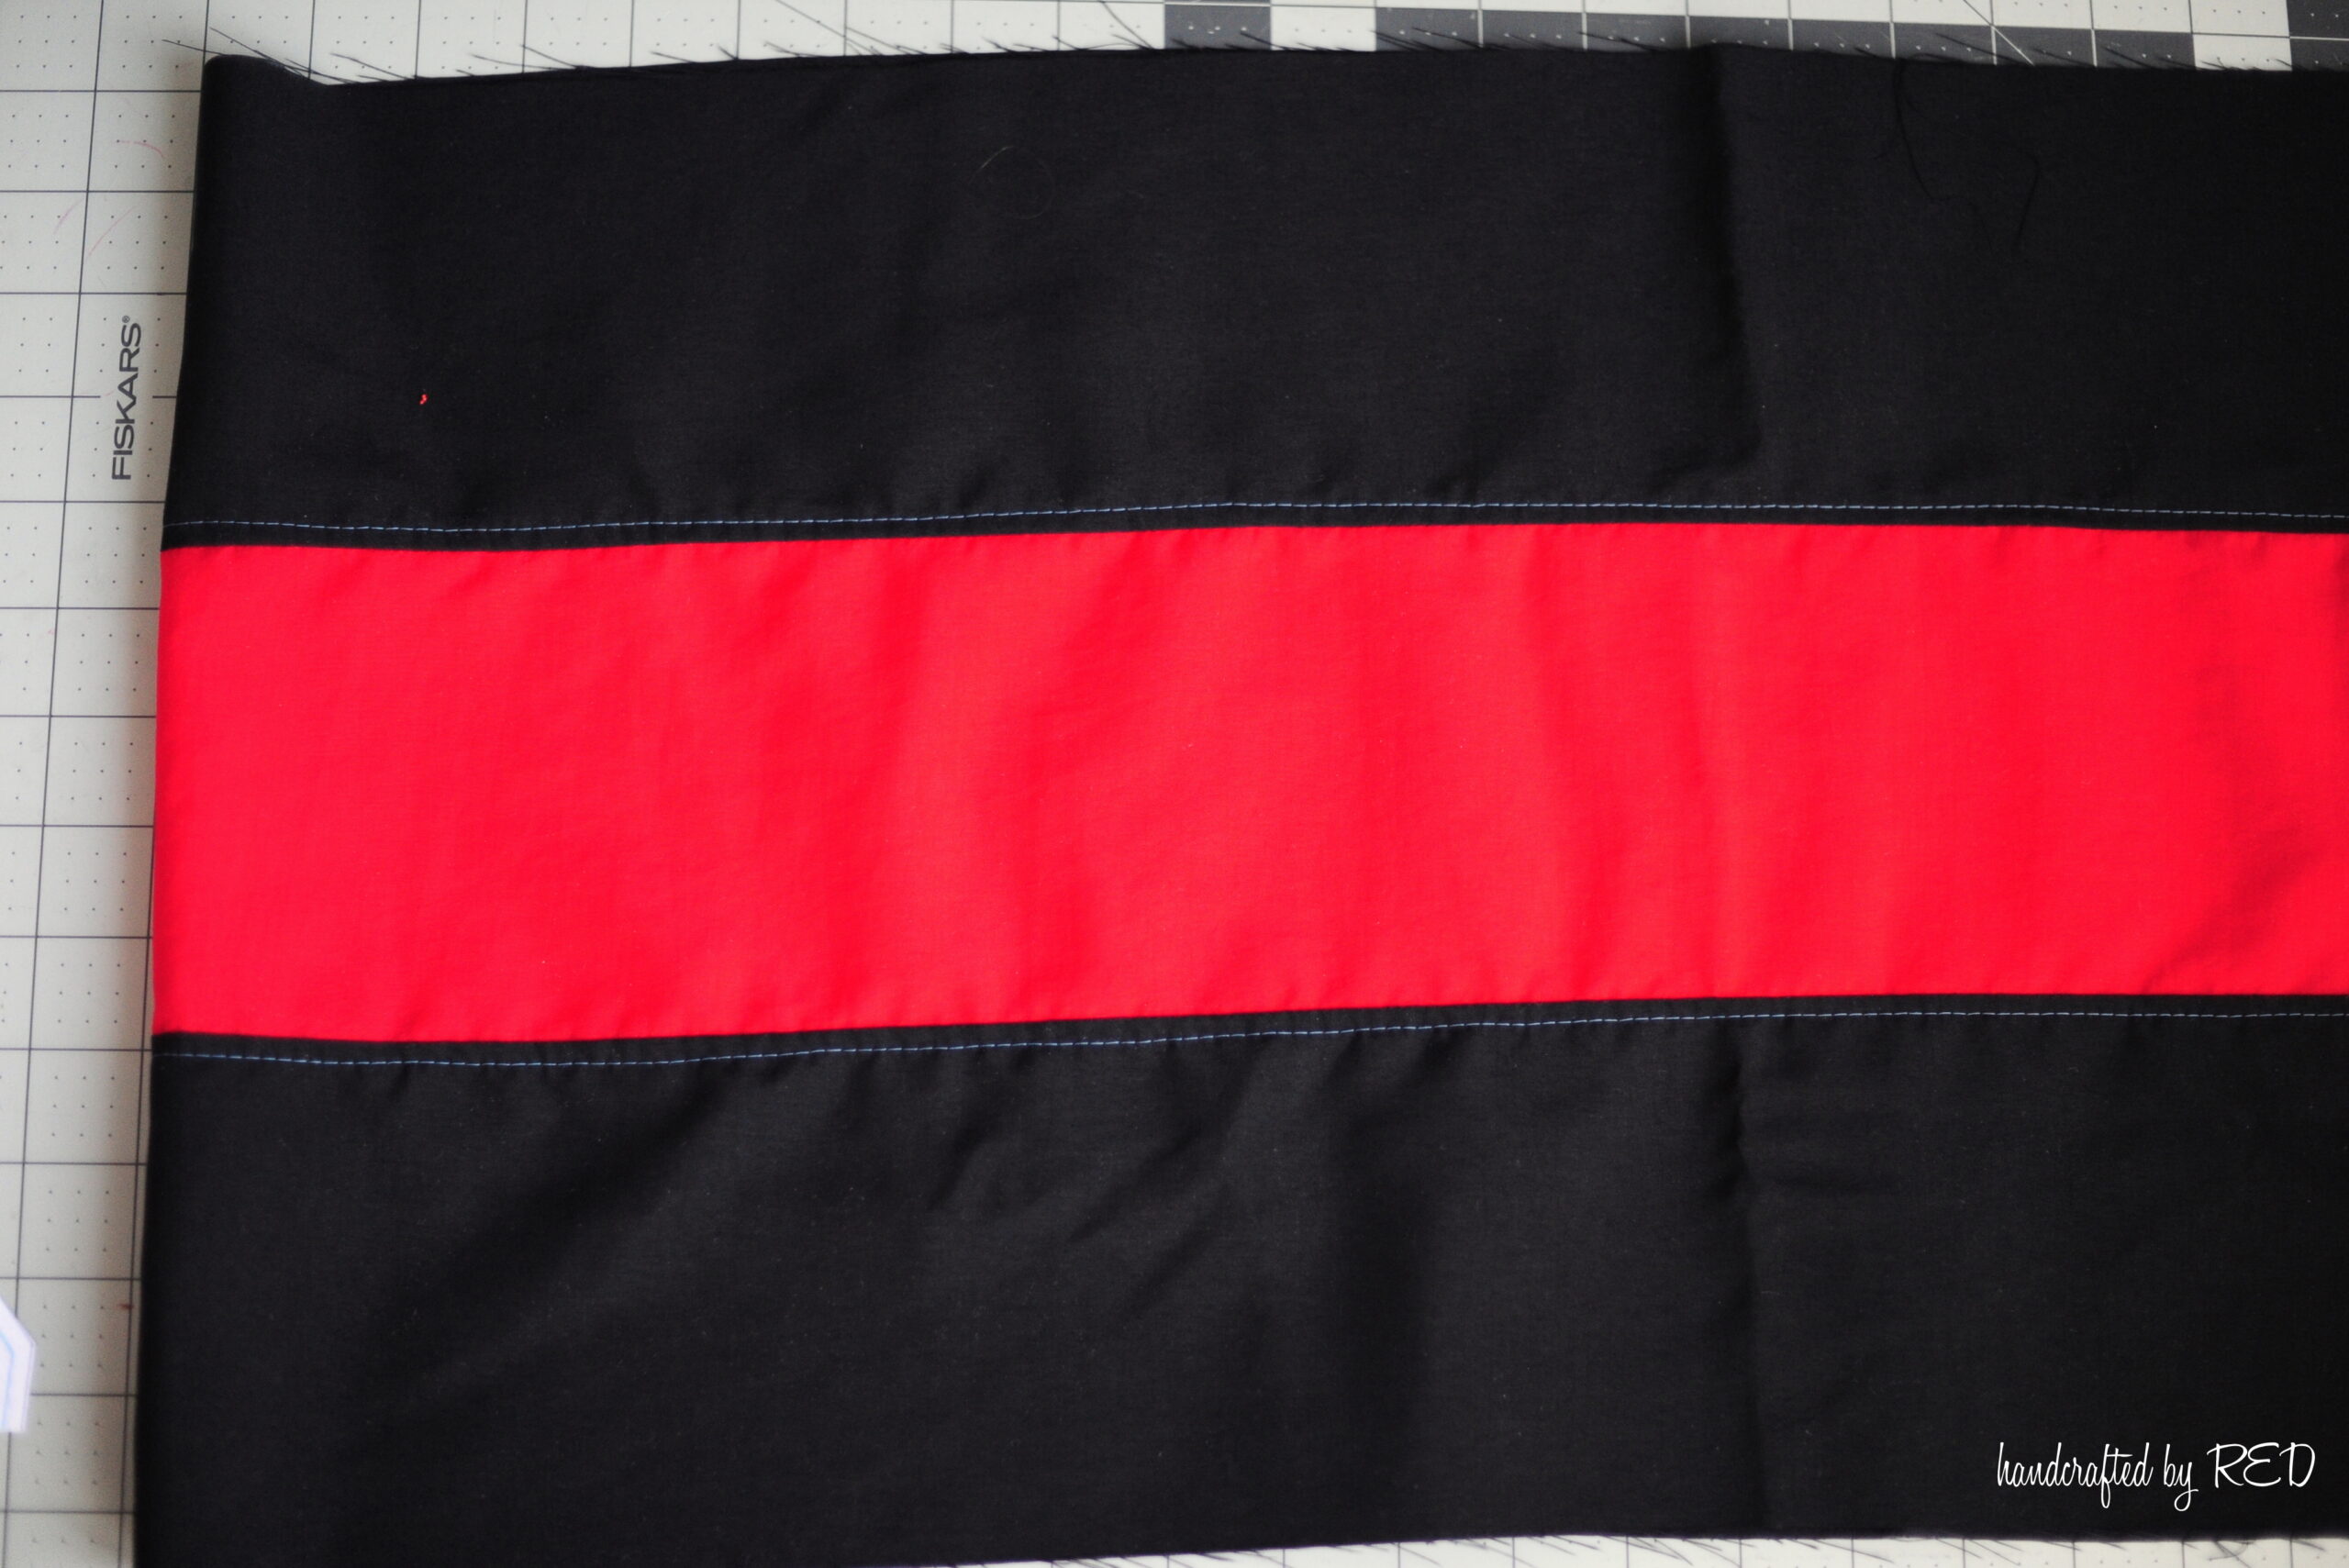
This black and red fabric was pieced together to become a pair of Surfs Up Board Shorts, also in a size 3T. I measured the height of my pattern pieces and then divided roughly by 3 to determine the finished height of each of my stripes. You’ll want to remember to add seam allowance here as well. I sewed and serged the strips together, and topstitched in place. If you have a kid who is sensitive to seams on the inside of his/her clothes, you’ll definitely want to topstitch when colorblocking, since it tends to add a number of additional seams to the garment.
Once my fabric was pieced together, I placed the pattern pieces down, making sure that the stripes would line up when constructing the legs of the shorts.
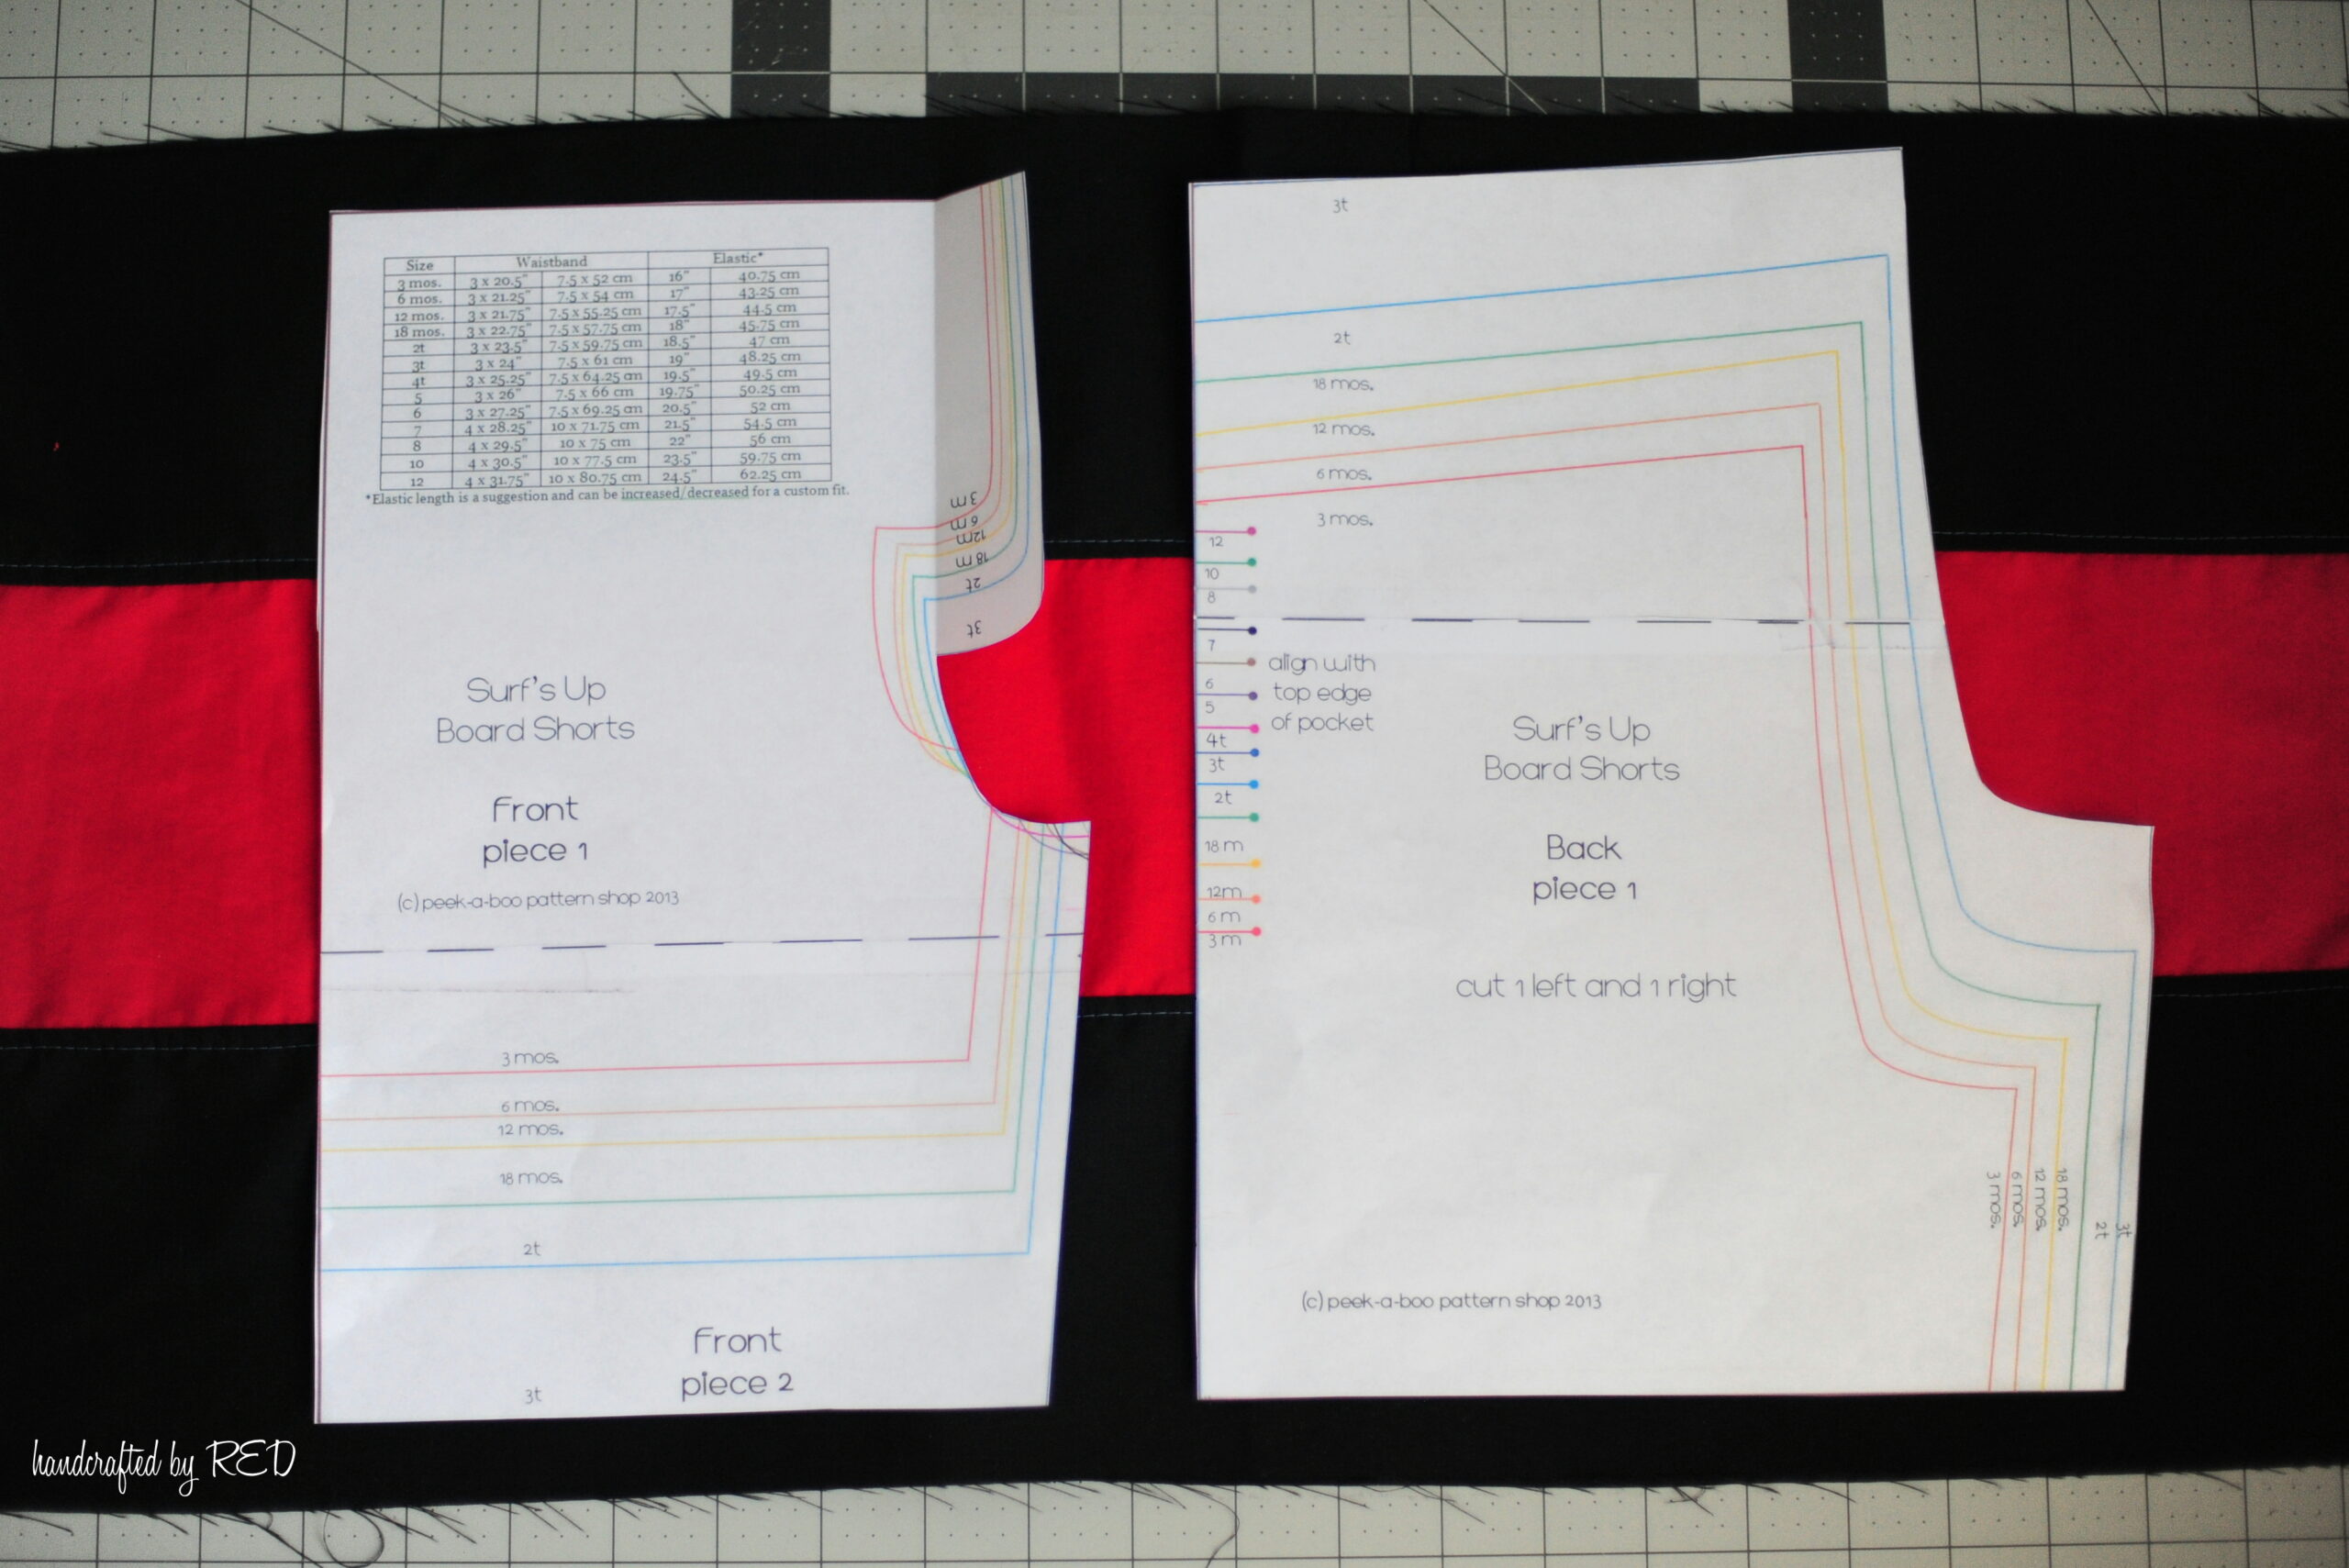
To that end, I decided it would be easier if I eliminated the side seam. I did that by overlapping the front and back pattern pieces to remove the seam allowance that was added when the pattern was drafted, as you can see below. If you look carefully, you can see how the pieces overlap in the middle by 1/2″. I also decided for the sake of simplicity to omit the faux fly, so I did that by simply folding the fly piece back and cutting the front rise along the curve that remained. You can see that in the image below as well, at the right side of the picture.
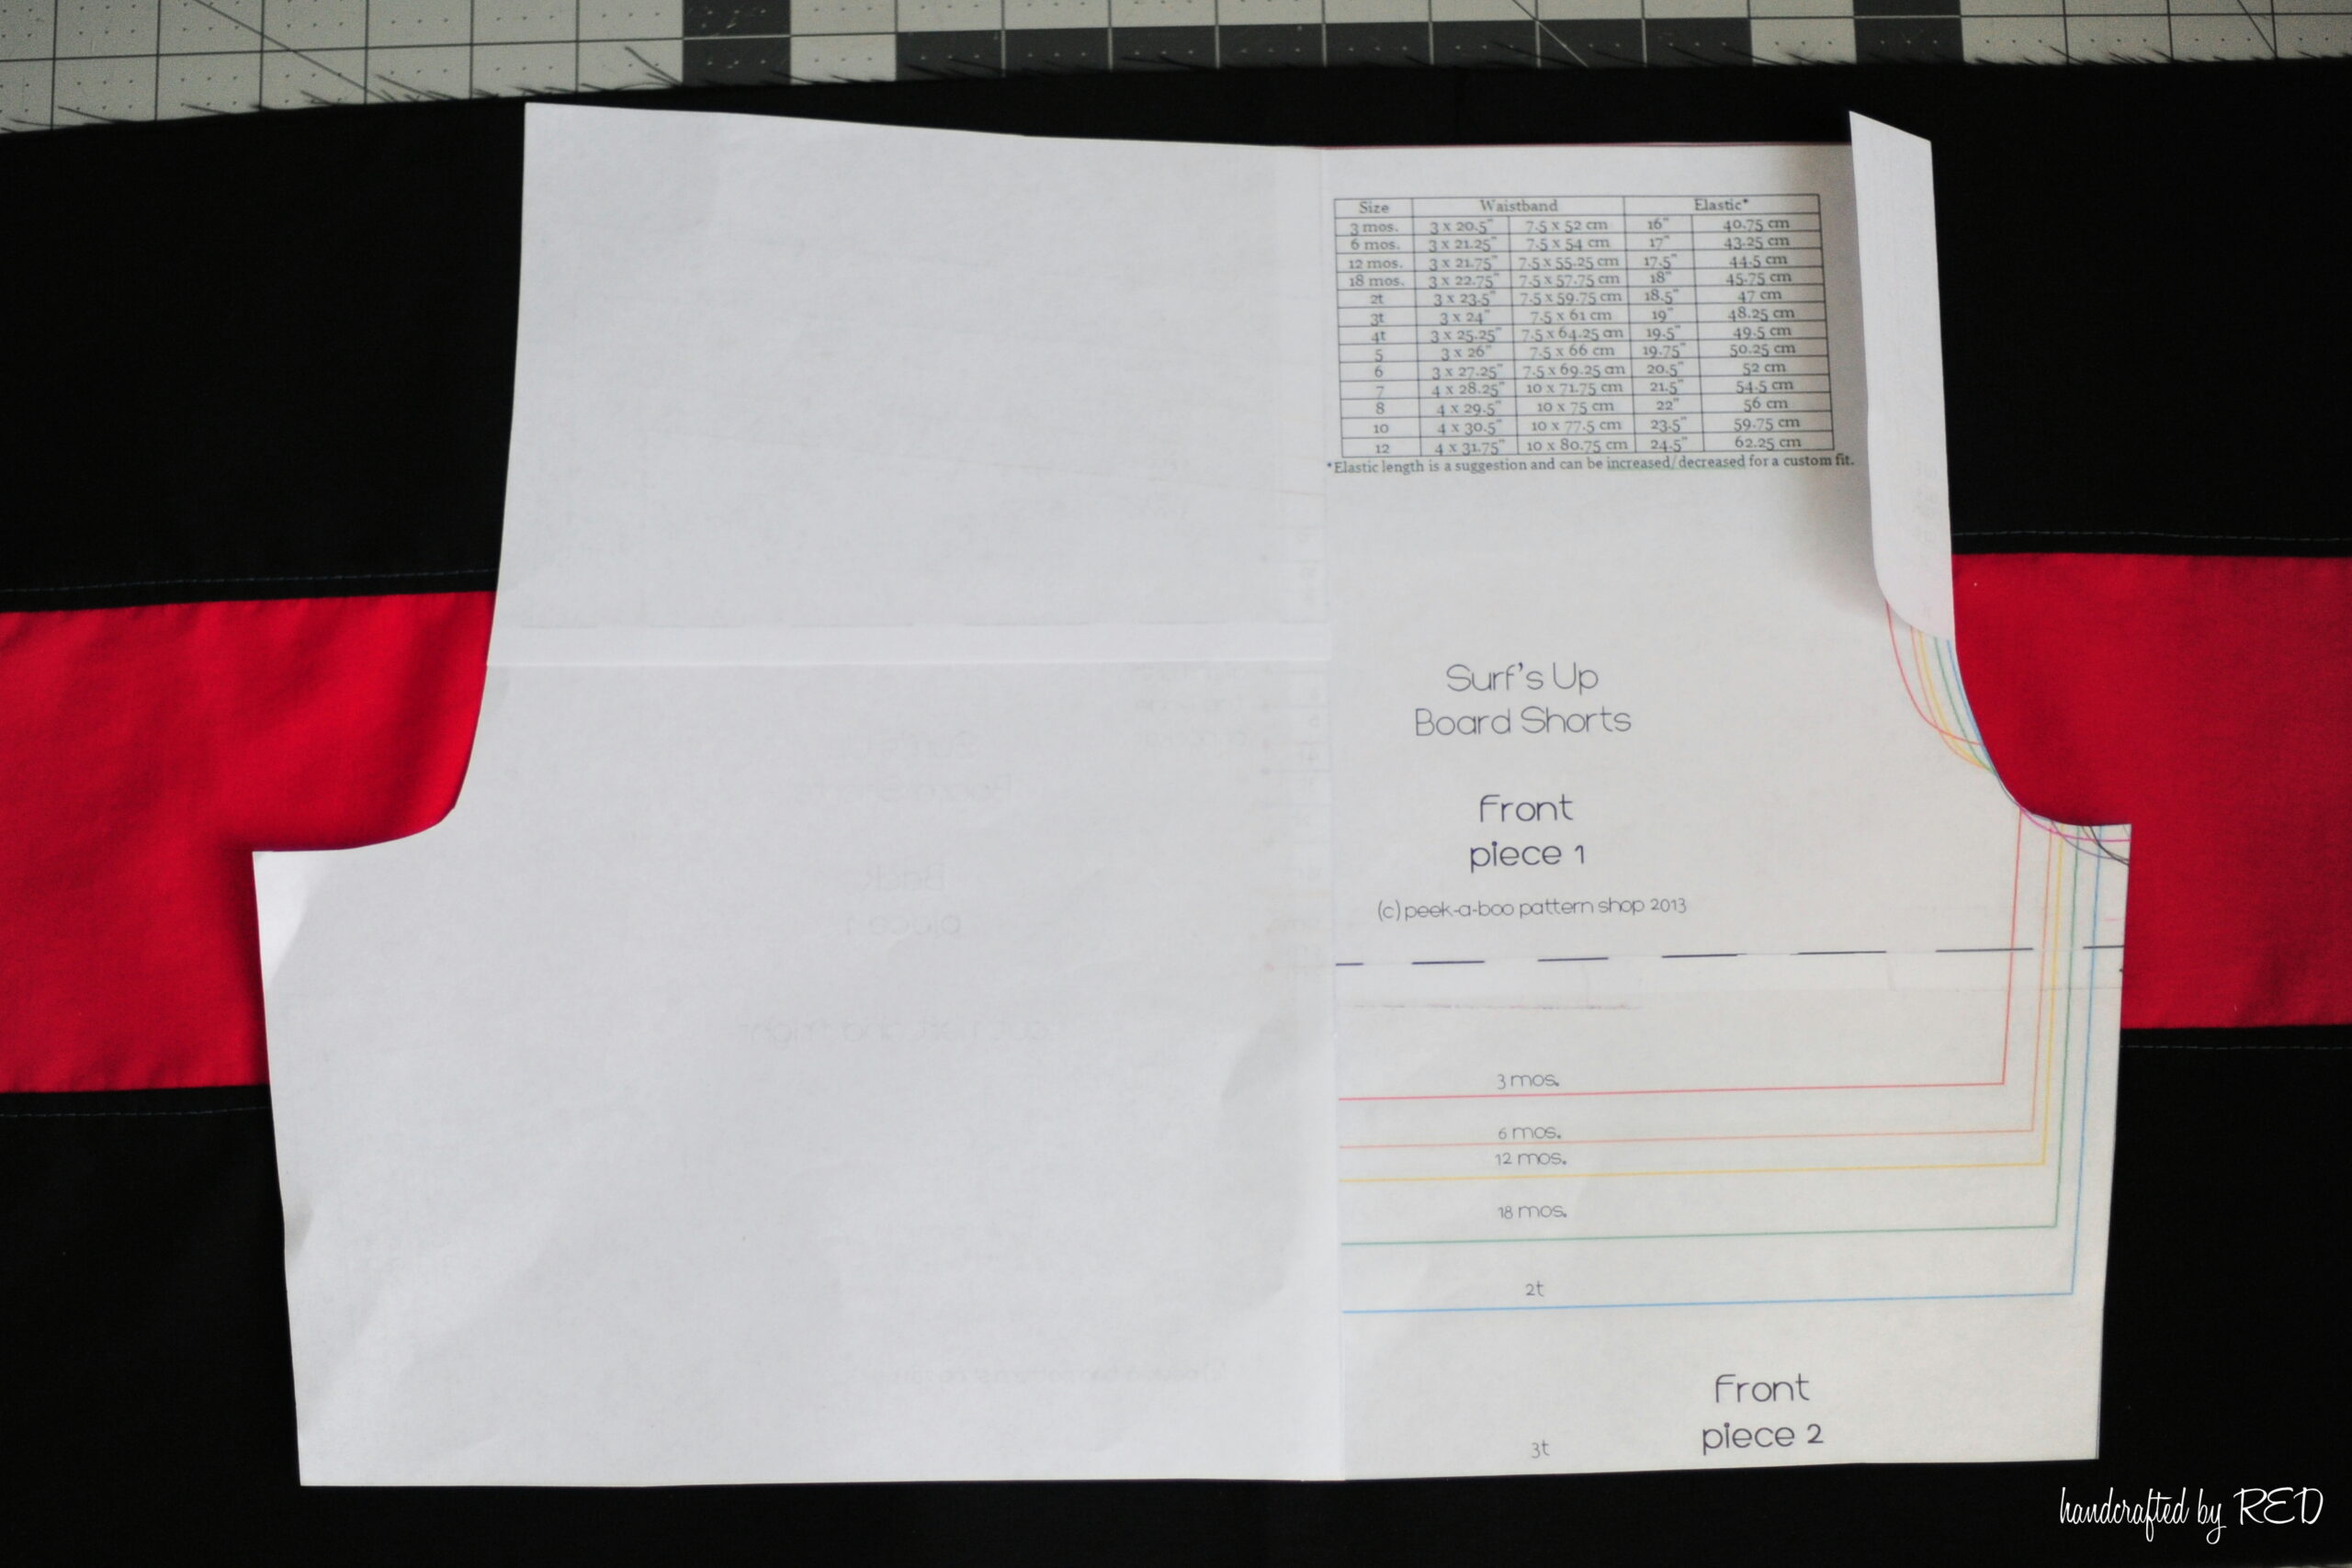
After cutting, you should have one piece for each leg – they’ll be the mirror image of each other.

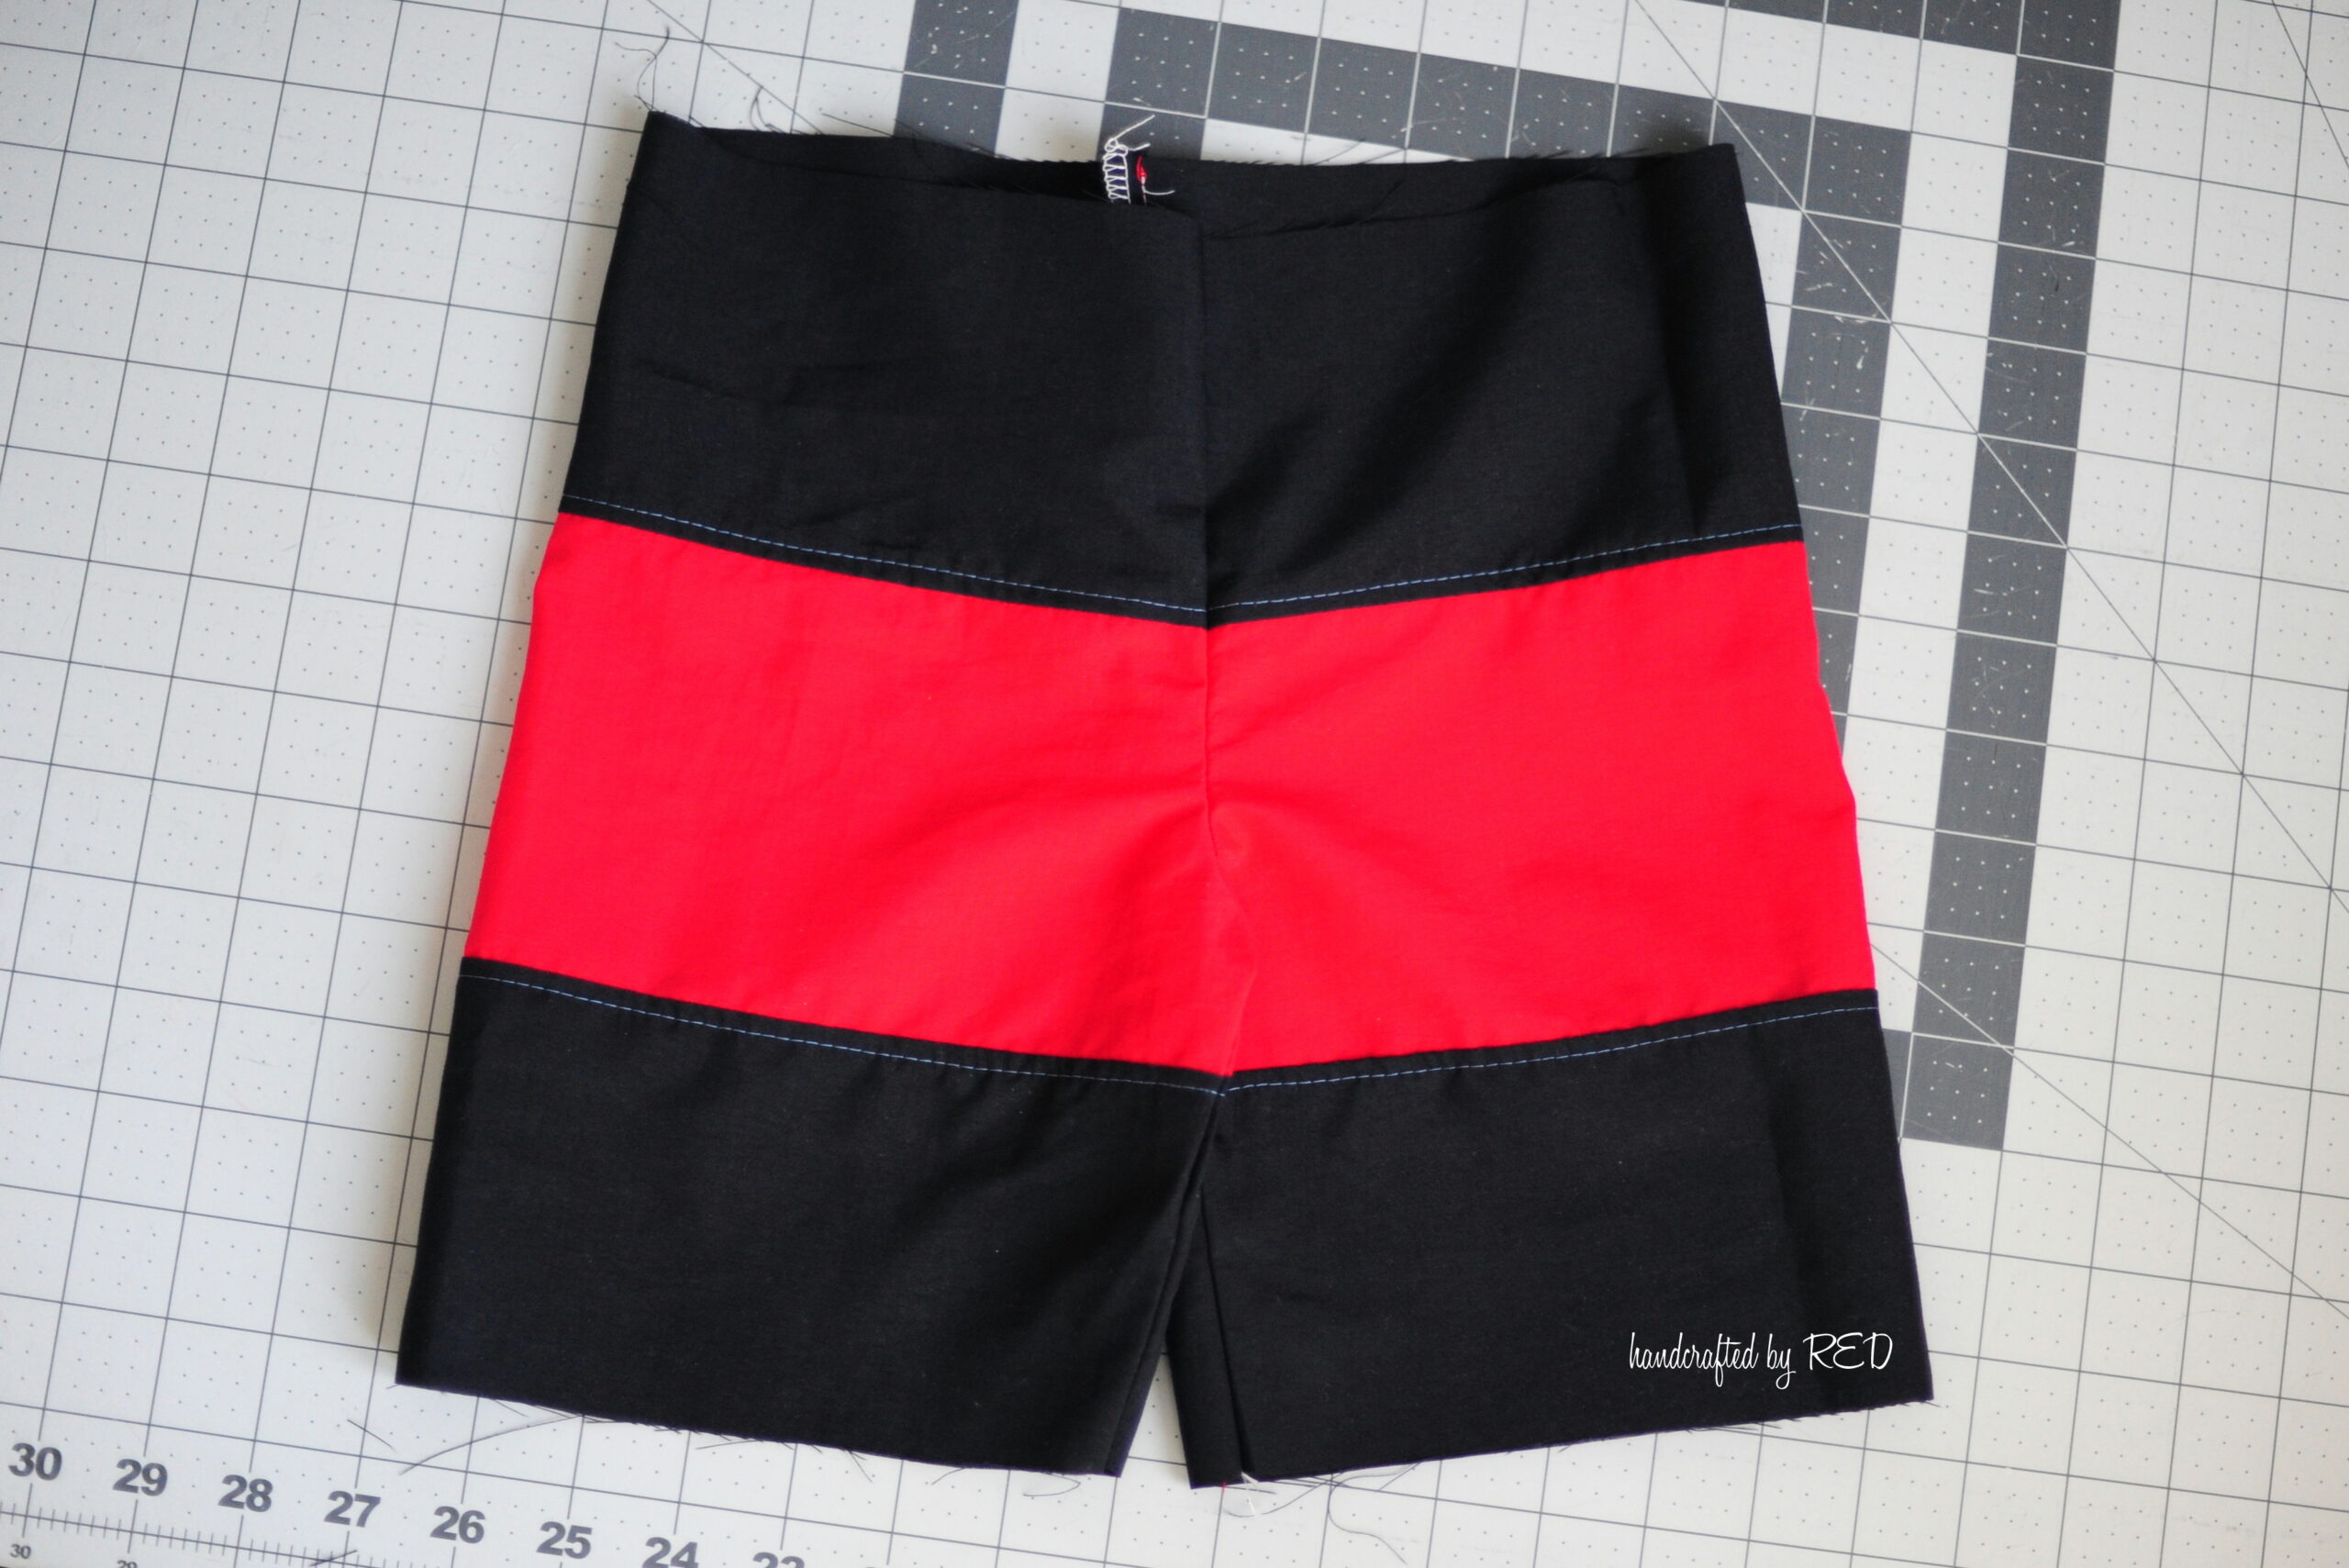
Again, you’ll want to take care when sewing the pieces together to make sure that all of your stripes are still aligned in the seams. Sometimes it helps to baste the pieces in place, check to be sure that the stripes are in place, and then sew over your basting line.
And here’s the finished product – shown with a (slightly too small) Hang Ten Rash Guard – this kid has been growing so fast lately, it’s hard to keep up! I added sleeve and hem cuffs to the rash guard to give it a little extra length, and it’ll make do until I get around to cutting the next size for him. 🙂
Sewing color blocked fabric into your wardrobe?
You can incorporate color blocking fabric into your wardrobe by using it to create statement pieces such as dresses, tops, or skirts. You can also add pops of color with color blocked accessories like scarves or bags. Experiment with different combinations to create unique and eye-catching looks.
I hope you’ll have some fun with these ideas and please make sure to share your color blocked (and other) sews with us over in the Peekaboo Patterns Facebook Group – we’d love to see what you’ve been working on! Also – make sure to follow us on Instagram and Pinterest and get great custom fabric with us over at KnitFabric.com.