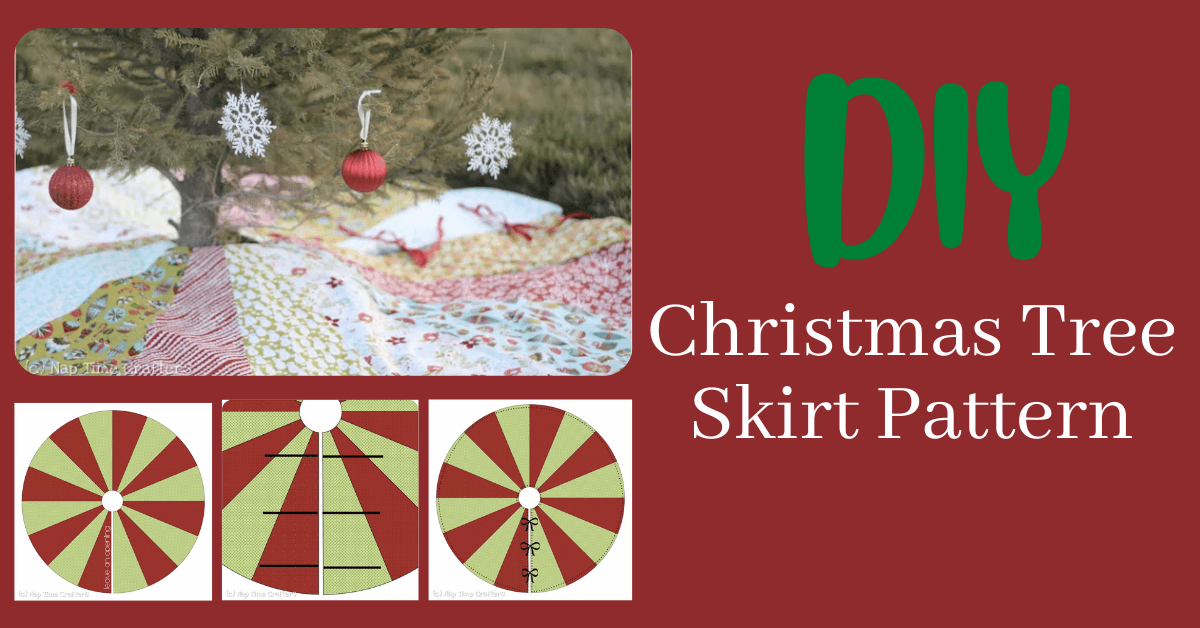
Christmas Tree Skirt Pattern: Step-by-Step Guide
Are you ready for our Christmas Tree Skirt Pattern? If you are tired of the same old store-bought Christmas tree skirts then why not try making your own DIY Christmas Tree Skirt this year? We don't even have our Christmas Tree up yet but Christmas is a special time of the year and putting up the tree is always a favorite activity. One way to make putting up the Christmas Tree even more special is to be able to get out a custom-made Christmas decoration when you set up the tree every year. You can add fun or meaningful fabrics to your tree skirt to make it even more unique. This is a great way to customize your Christmas with different colors, embroidery, and more.
In this step-by-step guide, we'll cover everything you need to know about creating a personalized Christmas tree skirt that will make your holiday decorations stand out. This includes our FREE Christmas Tree Skirt Pattern template as well as this tutorial where we'll walk through each step of the process. So, let's get started and make this holiday season even more special with a one-of-a-kind Christmas tree skirt!
Alright - let's get started!
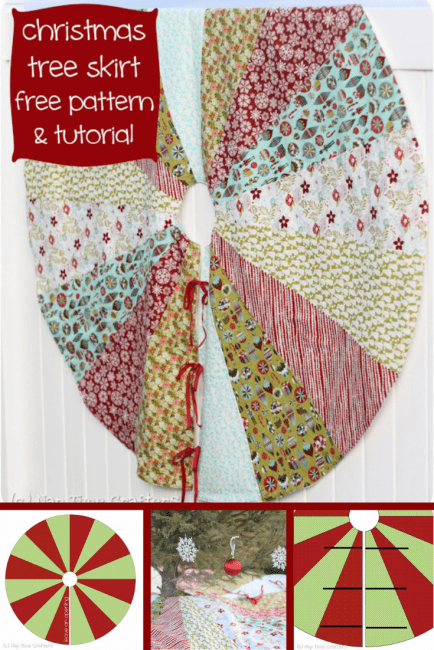
Christmas Tree Skirt Patterns | Patchwork Quilt Christmas Tree Skirt
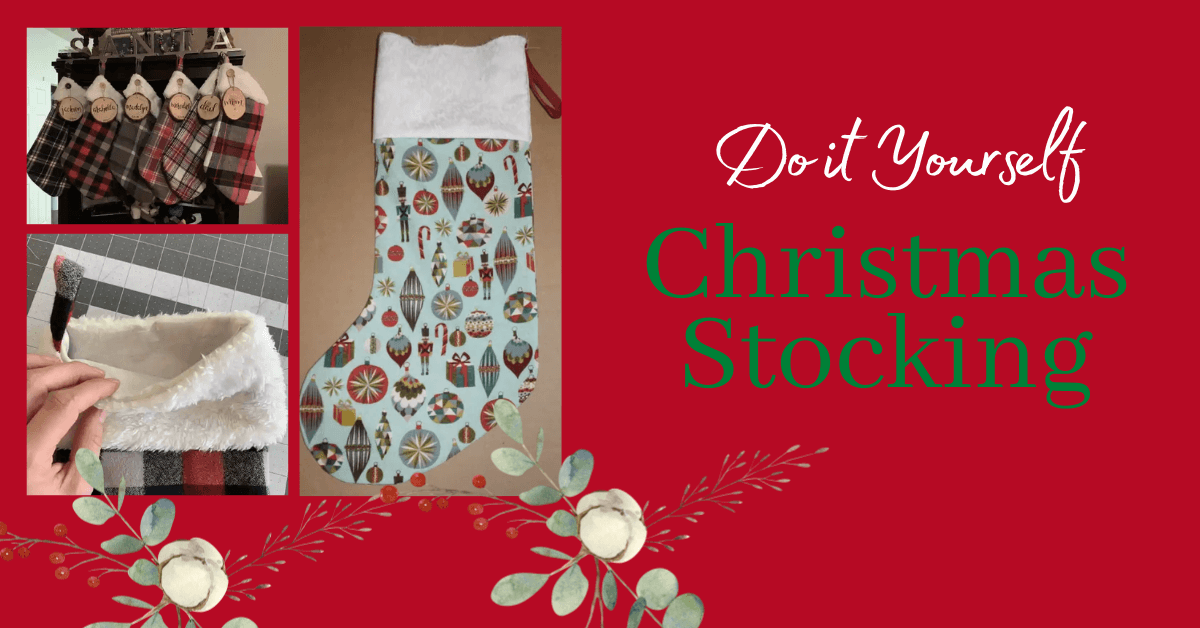
In case you missed it, check out my post for a free Christmas Stocking Pattern! And the good news is if you cut the tree skirt carefully you’ll have enough scraps leftover from this project to make a few stockings to store those Christmas presents. 🙂
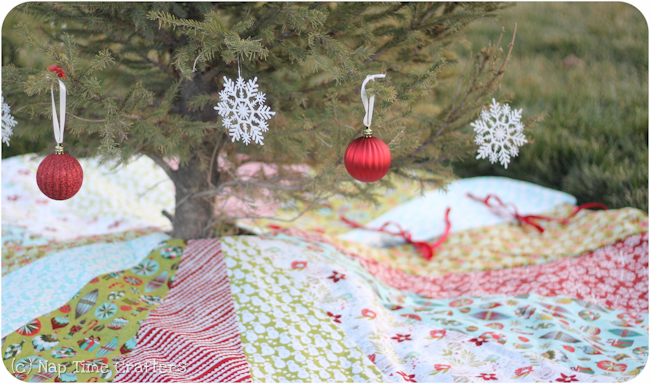
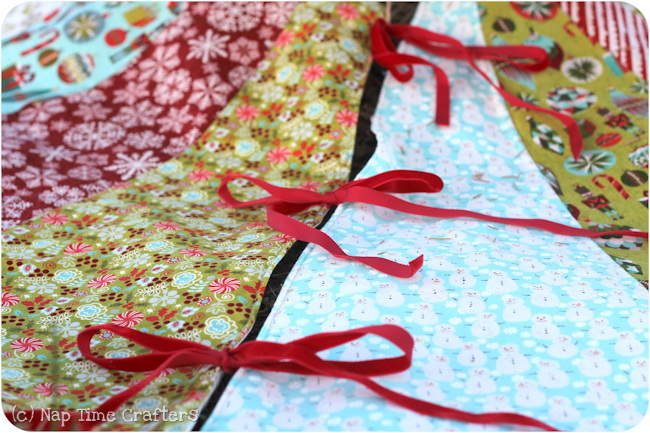
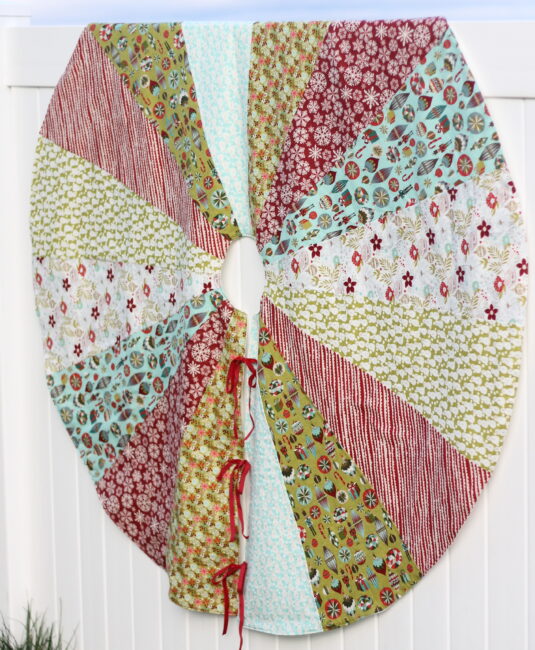
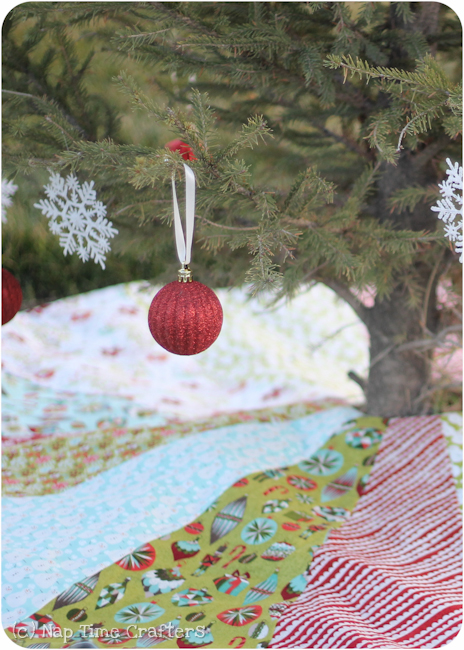
When I made this tree skirt, it was for our little family’s first Christmas in our own home. I was so excited to decorate and create some lasting memories around the Christmas tree! With so many darling prints to choose from I ended up doing a 16-panel skirt so I could show them all off.
The DIY Christmas Tree Skirt has a simple bow closure in back to hold everything in place.
Ready to get started sewing and quilting? All of my materials for this project were generously provided by The Ribbon Retreat.
Christmas Tree Skirt Materials:
- 3/4 yard cuts of fabric in 8 prints. If your prints are non-directional you could do 4 prints instead. The tree skirt has 16 panels so with 8 prints each print appears twice. If you do 4 you will need to cut 4 in each print instead of 2. I used the Aspen Frost line.
- 3 yards of muslin for the backing
- 3 yards of fusible fleece interfacing: this makes a huge difference in the finished product. You won’t want to skip it 🙂 If you cut super carefully and use all your scraps you can get away with 2 yards
- Ribbon for the ties. I used velvet
- Pattern: Make sure to download our great pattern for a beginners Christmas Tree Skirt.
Instructions to Sew the Christmas Tree Skirt
Step 1: Get the tree skirt pattern! The pattern is free when you Subscribe to our Newsletter or Join our Facebook Group. Coupon Code is found in New Subscriber E-mail and/or the first post in our Facebook Group.
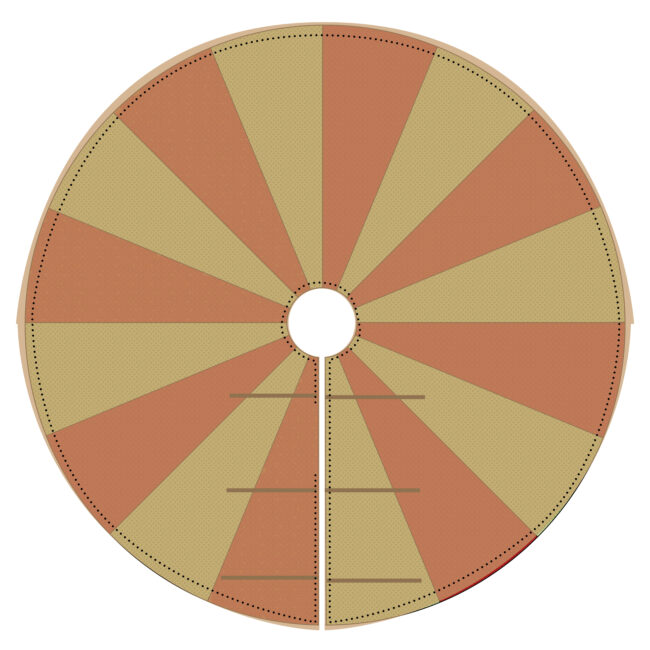
Download your FREE pattern and cut out your main skirt panels. You need 16 total. I did 2 of each print. The finished tree skirt is 60″ across. For a smaller skirt trim your pattern piece along the bottom edge.
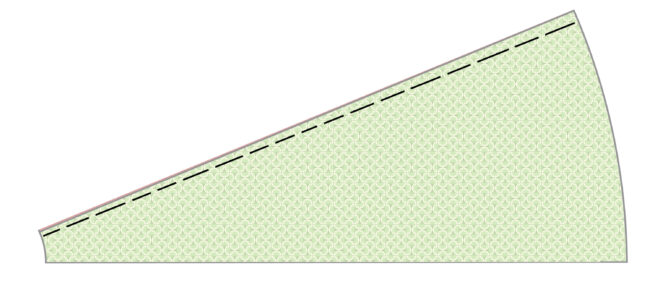
Step 2: Decide on a layout and then with right sides together (RST) sew the first 2 panels together along the long edge using a 1/4″ seam allowance.
Step 3: Continue adding your adding panels with RST until you have gone all the way around leaving an opening in back between the last 2.

Step 4: Baste the tails of your ribbon to each edge of the tree skirt opening. I did 3 ties and my ribbon segments were 12″ long.
Step 5: Press flat and then add your fusible fleece to the wrong side of the fabric. I found it easiest to lay my tree skirt upside down on the floor and cut the fusible fleece to size. Then a did a quick once over with the iron (while still on the floor) and flipped it over so it was right side up. Working from the right side I pressed it thoroughly to get the fleece fused on. I did this on the floor as well making sure to be extra careful with my iron 🙂
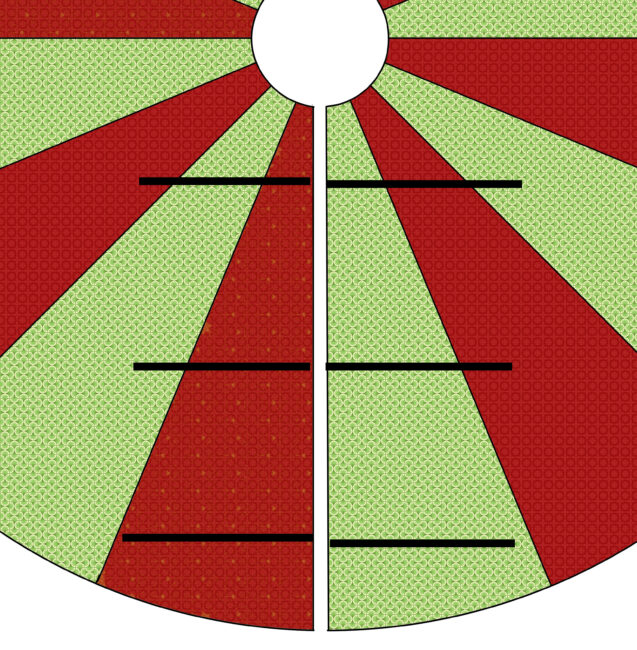
Step 6: Lay your muslin over the tree skirt and cut to size. I did one panel across the front half leaving room for a seam allowance along the straight edge and then 2 panels across the back half also leaving room for my seam allowance along the straight edge. The dashed lines in the diagram show where I pieced things together. If in doubt, a good rule of thumb is to leave a little extra around the edges and you can trim later. Sew your panels together with RST and then trim away any excess backing.
Step 7: With RST sew the backing to the main layer around all edges leaving a 6″ gap between 2 ribbon segments for turning. Clip the seam allowance along the inside seam allowance so it will lay well when turned.
Step 8: Turn right side out and press flat. Topstitch around all edges

There you have the DIY Christmas Tree Skirt. Enjoy!!
Sewing Embellishments, Decorations, and Embroidery to Your Christmas Tree Skirt
Adding embellishments and decorations to your Christmas tree skirt is a wonderful way to enhance the festive spirit and create a personalized touch for your holiday decor. From glittery ribbons and bows to embroidered snowflakes and jingle bells, there are endless options to choose from when it comes to adding that extra sparkle and charm to your tree skirt. Consider incorporating elements that complement your existing tree ornaments or match the overall theme of your holiday decorations.
Whether you prefer a traditional, rustic, or whimsical look, the key is to have fun with the process and let your creativity shine through. With a little bit of imagination and some carefully chosen embellishments, you can transform your Christmas tree skirt into a stunning centerpiece that will delight both family and friends throughout the holiday season.
How do I choose the right fabric for my tree skirt pattern?
When choosing fabric for your tree skirt pattern, consider factors such as durability, color, and texture. Opt for fabrics like cotton or polyester blends that are easy to work with and can withstand wear and tear. Choose colors and textures that complement your holiday decor theme.
Can I Make a DIY Christmas Tree Skirt without a pattern?
Certainly! Making a Christmas tree skirt without a pattern is not only possible but also a great way to showcase your creativity. By using simple measurements and basic sewing techniques, you can create a unique and personalized tree skirt that perfectly complements your holiday decor. Start by measuring the diameter of your Christmas tree stand and adding a few inches for a comfortable fit. Then, choose your favorite fabric and cut it into a circle using the measured dimensions.
Next, hem the edges of the fabric to create a finished look. If desired, you can further enhance your tree skirt by adding decorative elements such as trim, appliques, or embroidery. The beauty of making a tree skirt without a pattern is that you can experiment with different designs and styles, resulting in a one-of-a-kind piece that will be cherished for years to come. So go ahead and unleash your creativity this holiday season!
Beginners One-Piece Christmas Tree Skirt
To make a one-piece Christmas Tree Skirt you will need a large piece of fabric in your desired color or pattern. First, measure the diameter of your tree stand and add a few inches for overhang. Then, cut out a circle from the fabric using these measurements. Next, fold and hem the outer edge of the fabric to create a clean finish. If desired, you can also add decorative trim or ribbon along the hemline for an extra festive touch. Finally, place the skirt around the base of your Christmas tree and adjust as needed. With this easy technique, you can create a beautiful one-piece tree skirt that will complement any holiday decor style without the need for patchwork described above.
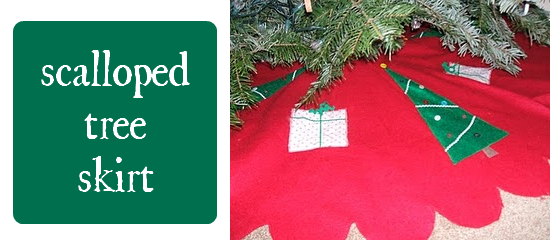
I made one of these myself early on in our marriage. This simple tree skirt was made out of felt. All I did was:
- Cut the Fabric: Make a Big Circle of Fabric with a hole in the center
- Cut Scallops Around the Edges: I folded it in half and then in half again and used a semi-circle template to cut the scallops.
- Added Fun Embellishments: I added Christmas trees and presents using felt, buttons, and ric rac.
Conclusion
Creating a beautiful Christmas tree skirt can add a touch of charm and personalization to your holiday decor. With Peek-a-Boo Pattern Shop's Christmas Tree Skirt Pattern, you can sew your unique and festive tree skirt that will be the perfect finishing touch for your Christmas tree. Whether you prefer a traditional design or something more modern and whimsical, this pattern provides endless possibilities for creating a skirt that reflects your style. So gather your sewing supplies and get ready to add some handmade magic to your Christmas celebrations. Sewing your own tree skirt is not only a fun and rewarding project, but it also allows you to create a cherished keepsake that can be enjoyed for years to come!
Thank you for joining us today to explore our Christmas Tree Skirt Pattern! Before you leave, make sure to join us in our Facebook Group to share what you make and see our new releases. You can also follow us on Instagram. Happy sewing!