Binding Knit Fabric | Easily Sew Knit Fabric
Todays project is to learn all about binding knit fabric. We'll go through a few different ways you can do it and things to keep in mind.
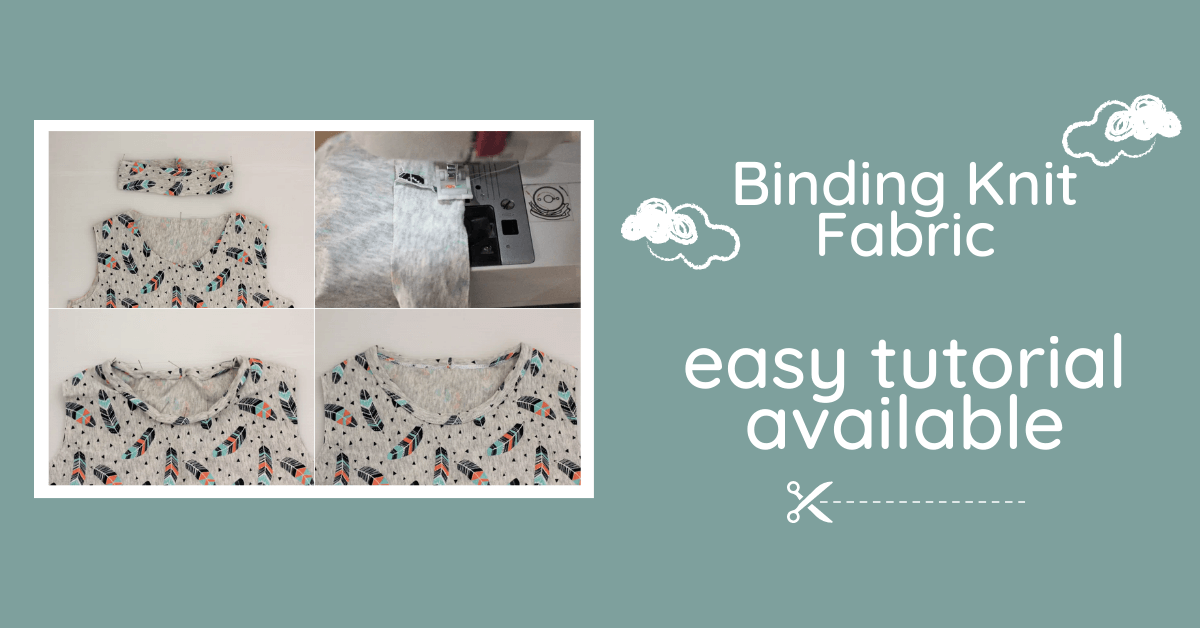
Binding Knit Fabric | Finishing Necklines and Armholes
Finishing a Shirt With Binding
There are a few ways to finish a neckline or armhole (for sleeveless shirt). One of my favorites is by binding knit fabric. Learning how to sew the binding on your knit shirt is an important key to having your project turn out well. I have to agree that I adore shirts or dresses with binding instead of using neckbands. The clean look from the binding is professional like a ready-made shirt.
I usually go for binding when I couldn’t find matching ribbing for the shirt or when the fabric is less stretchy. Keep in mind that if you do not wish to add a keyhole on your neckline, be sure the neckline can accommodate your head.
Length of the Binding
When using a binding, make sure the stretch direction follows the length of the binding. So I usually make the width of the binding between 1.5 inches to 1.75 inches depending on the project. As for the length, it is between 90 to 95% of the total neckline.
Step-by-Step Guide to Binding Knit Fabric
Don't fear for I will guide you step by step on how to sew the binding on your knit project. Here are my two favorite ways to sew the binding. The first one is traditional binding. You are going to sew it the same way you do with woven fabric. The second one is what I call flip neckband.
Option 1: Traditional knit binding band
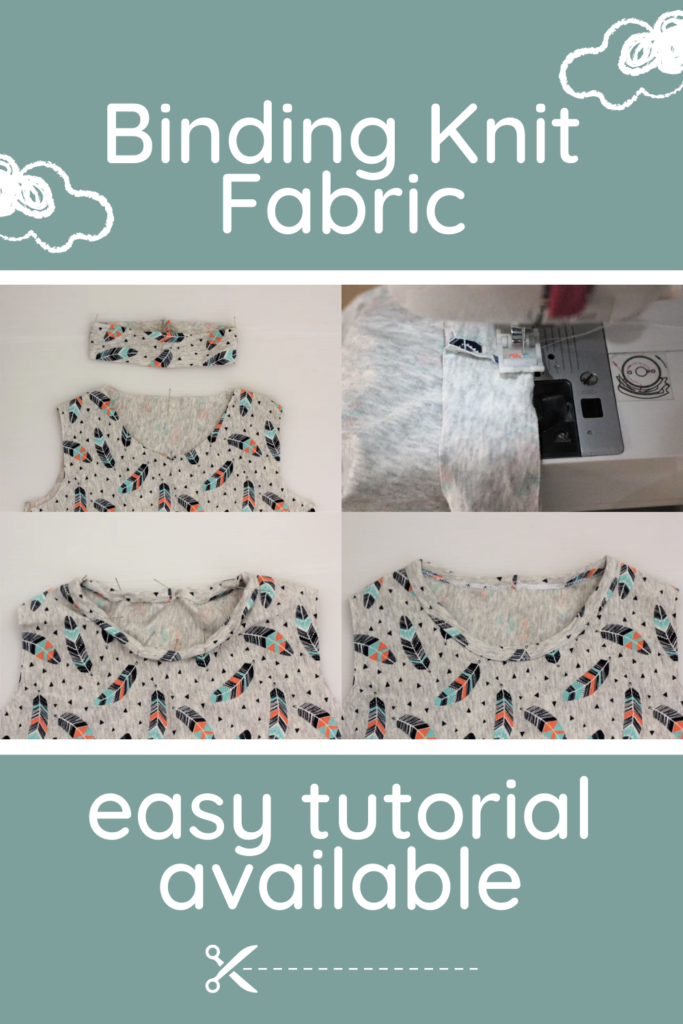
• Start with sewing at the shoulder seam. I usually finish the neckline before attaching the sleeves.

- Measure the neckline. For example in this picture, the neckline is 14.5 inches.

• For the binding, cut width 1.5 inches and length is 90% of the neckline opening. My fabric is cotton lycra so I can use 90% instead of 95%. If your fabric has less stretch then you can use 95%. In my case, the length is 13.05 inches, and don’t forget to add seam allowance because you are going to sew it into a loop

- Now sew the binding into a loop. I would recommend sewing using zigzag or stretch stitch and press the seam allowance. Using a serger will only result in bulkiness on the binding.

- Next, you will mark quarter points on the binding (mark at one edge only) and the neckline.

• Then line up the raw edge of the binding to the raw edge of the neckline. Make sure to place the right side of the binding facing the wrong side of the bodice, match the quarter point.


- After that, sew together while slightly stretching the binding using zigzag or stretch stitch at 3/8 seam allowance.


- Now fold the edge of the binding to edge of the neckline.

- Fold again to close the seam and pin


- Now that all raw edges are hidden, sew using your preferred method. I use coverstitch machine in this picture. Iron the neckline once you are finished sewing.


Option 2: Flip neckband Binding
- For this method, I increase the width for the ribbing to 1 5/8 inches. The length is the same as the traditional binding which is 90% of the neckline. Add seam allowance at the short ends of binding.
- Sew the binding into a loop and fold your bind together lengthwise. Mark quarter points on the band and the neckline.

- With the right side of the folded binding matching the wrong side of the bodice, match the quartered points and hold with pins.

- Slightly stretch the band when you sew into the raw edges of the neckline. Seam allowance is ¼ inches and you can use your serger.


- Flip the band over to the right side of the fabric to enclose the seam allowance. Make sure the band shows about 1/8 inches at the wrong side of the bodice.


- Then pin and topstitch using the appropriate stitch. I used a twin needle in this picture.

I also have a helpful YouTube video on sewing knit bindings:
I hope this has given you all the information you need on knit bindings. If you need further help with a sewing project, be sure to join our Peek-a-Boo Pattern Shop Facebook Group.
If you enjoyed learning about binding knit fabric, you might also be interested in some of these other articles: