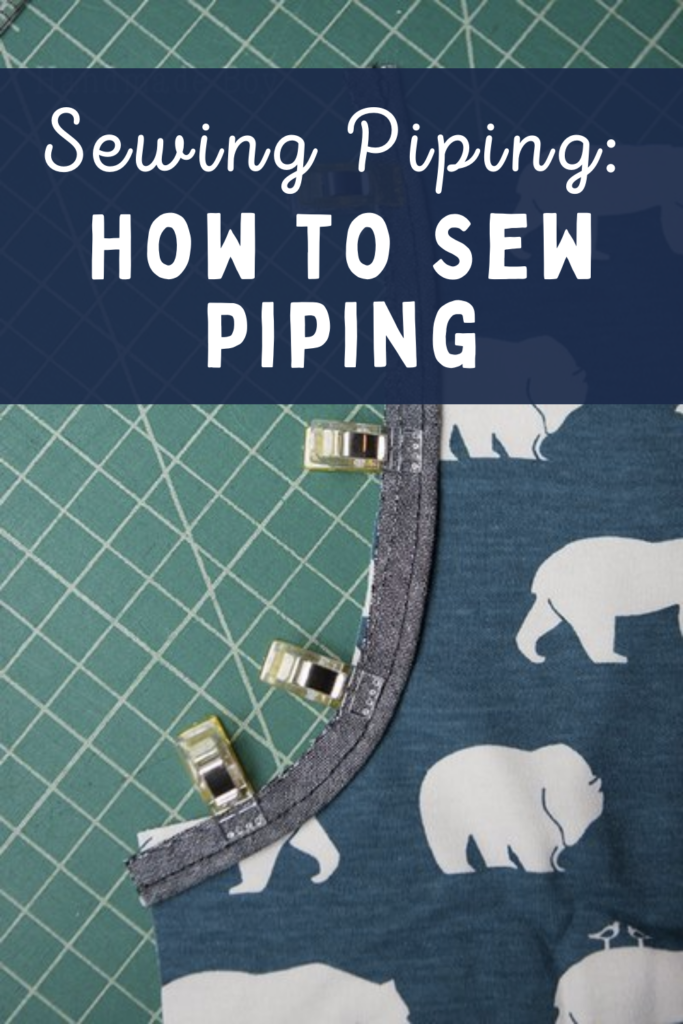
How to Sew Piping Like a Pro: Expert Tips and Tricks
Hello, Peek-a-Boo fans! It’s Kelly again, from Handmade Boy. Have you seen the cute piping details on the latest Peek-a-Boo Pattern release, the Beachcomber Shorts? Being the detail freak I am, I LOVE it! There was once a time that sewing piping intimidated me. But, I’ve learned some tricks over the years and sewing piping no longer freaks me out. And today, I’m going to share my tricks with you! Today, you will learn how to make piping and how to sew piping! Are you ready?
Sewing Piping | How to Sew Piping
Piping can be a fun way to add some interest to your finished product, especially for boy clothes! I mean, girls have ruffles, lace and ribbons and trims, and boys, well let’s just agree that we don’t usually find ruffles and lace on boy clothes. However, we can definitely add piping! And what better way to make it even more unique, than to make our own!
Different Types of Piping
When it comes to sewing piping, there are different types that you can choose from. Two common types are pre-made piping and self-made piping. Pre-made piping is a convenient option as it is readily available at fabric stores. On the other hand, self-made piping allows for more customization and control over the fabric choice. You can make piping from bias strips or fabric strips, depending on your preference. Another interesting aspect of piping is that you can use different fabrics to achieve various effects. So whether you opt for store-bought piping or decide to make your own, there are plenty of options to explore when it comes to adding piping to your sewing projects.
Making Piping for Sewing Projects
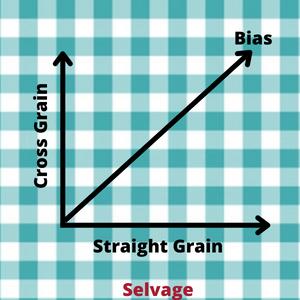
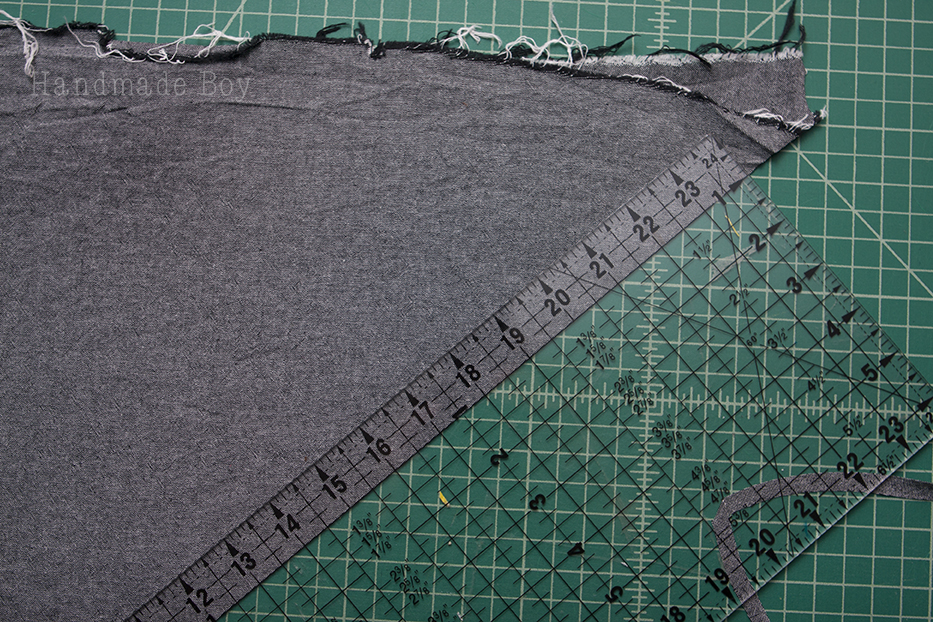
It’s incredibly easy and it doesn’t take long at all to make your own piping! Start with cutting 1″ wide strips of your fabric on the bias. It is very important to cut on the bias because this will allow your piping to go around curves smoothly. (If you fold your fabric over to cut two strips at once, be sure to trim off the fold before you begin.)
As a refresher, the bias in sewing is basically the diagonal cut of fabric. There’s a straight grain of the fabric that runs parallel to the selvage of the fabric. There’s also a cross-grain that runs perpendicular to that. The bias runs at a 45-degree angle between the cross grain and the straight grain. You cut on the bias because it’s more stretchy for things like piping or bias tape.
OK – so we’re cutting on the bias to make this piping in the example below.
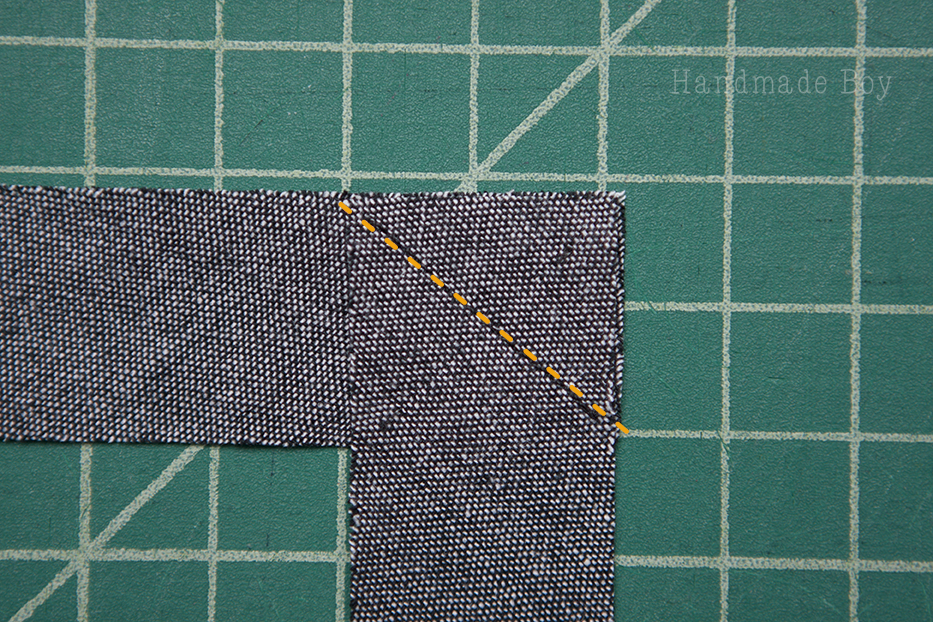
If you are working with scraps like I am, and need to create one long strip of piping, or you just want to make yards and yards to have on hand, you will have to join your strips. To do this, place your strips right sides together creating a right angle. And sew across the diagonal.
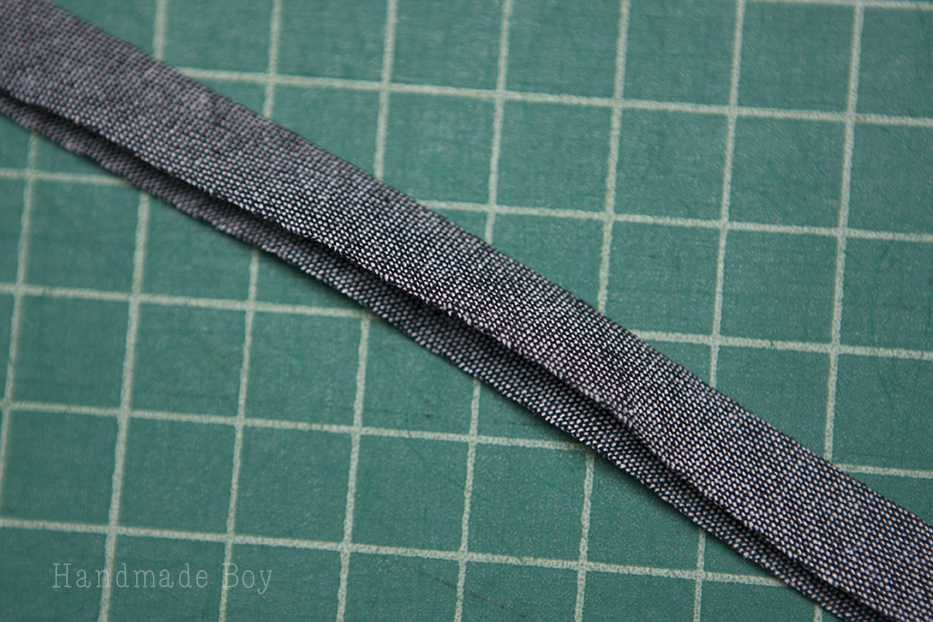
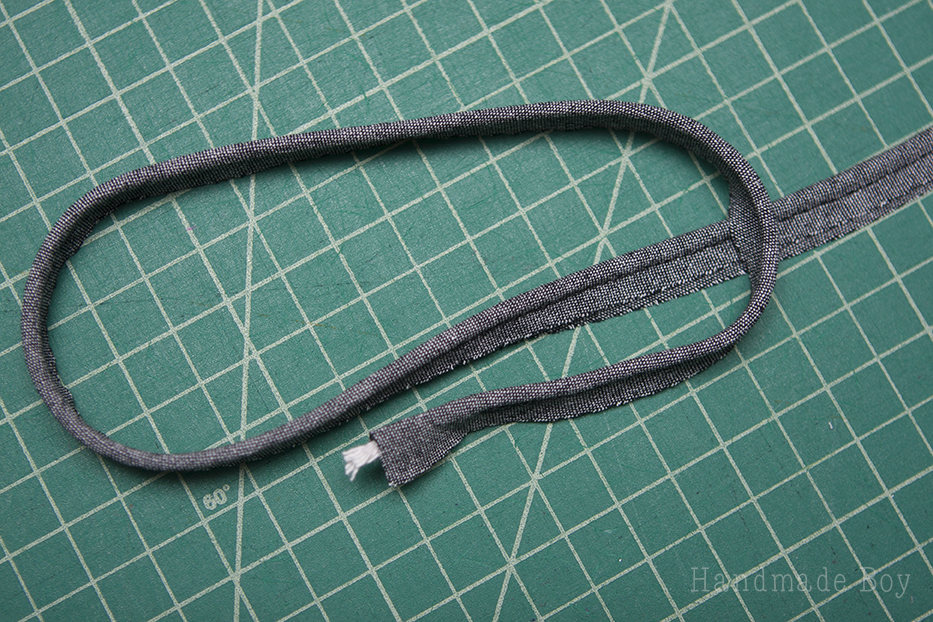
Trim the seam allowance down and press your seam open to reduce bulk. Press the strip in half, wrong sides together.
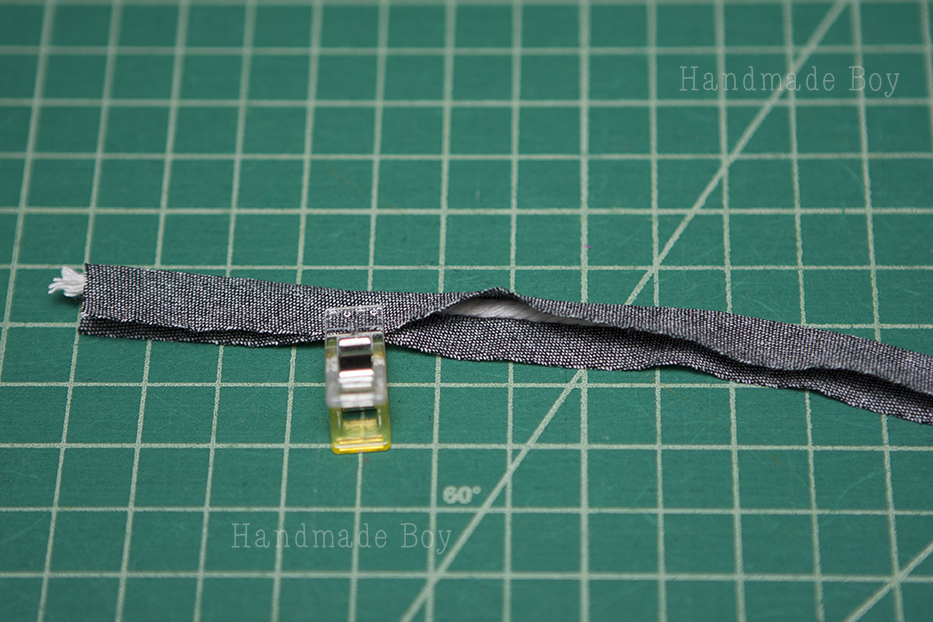
Now insert your cording into your strip, being sure to get it snugly into the fold. You can purchase 1/8″ cotton cording from the trim section of your local fabric store. You can also find it here.
Clip or pin your cording in place.
Using your zipper foot, sew your piping closed as close to the cording as possible. Start about an inch from the end so your fabric and cording doesn’t get pushed under the plate. Sew slowly, being careful not to stretch your fabric as you sew.
Tadah!! You just made piping! How easy was that?! Now, are you ready to begin sewing piping?
Sewing Piping: How to Sew Piping
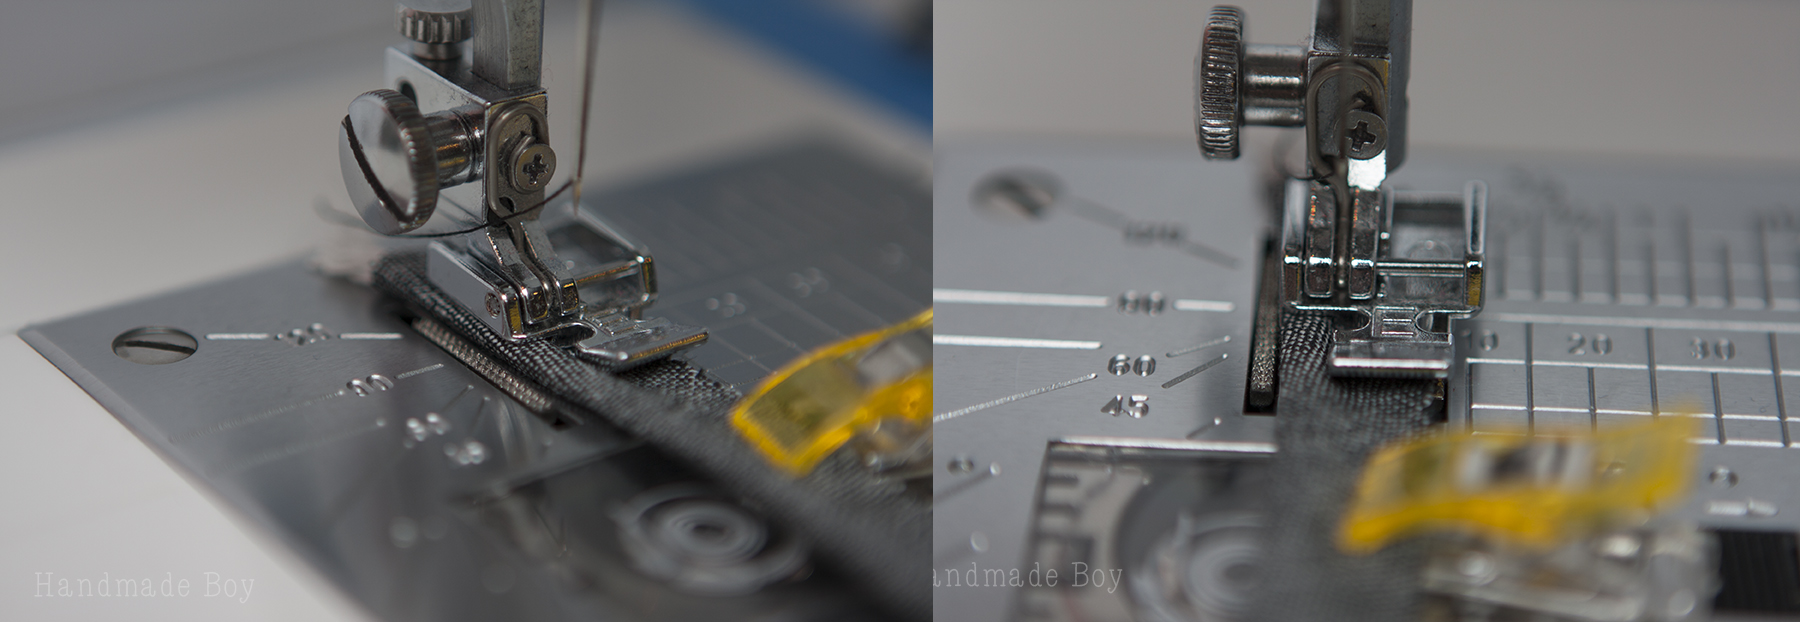
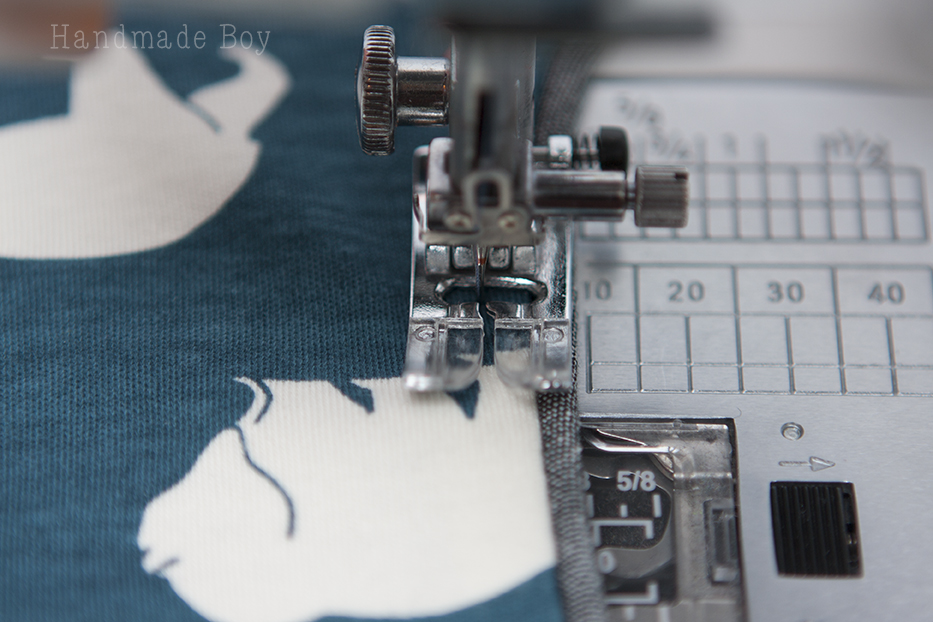
When sewing piping you will place the piping on the right side of the fabric, lining the raw edge of the piping up with the raw edge of the fabric. Clip/pin in place.
Using your zipper foot, attach the piping to the fabric. Try to sew as closely to the cording as you can, following along the stitching line on the piping.
Move the needle over to get really close if you need to.
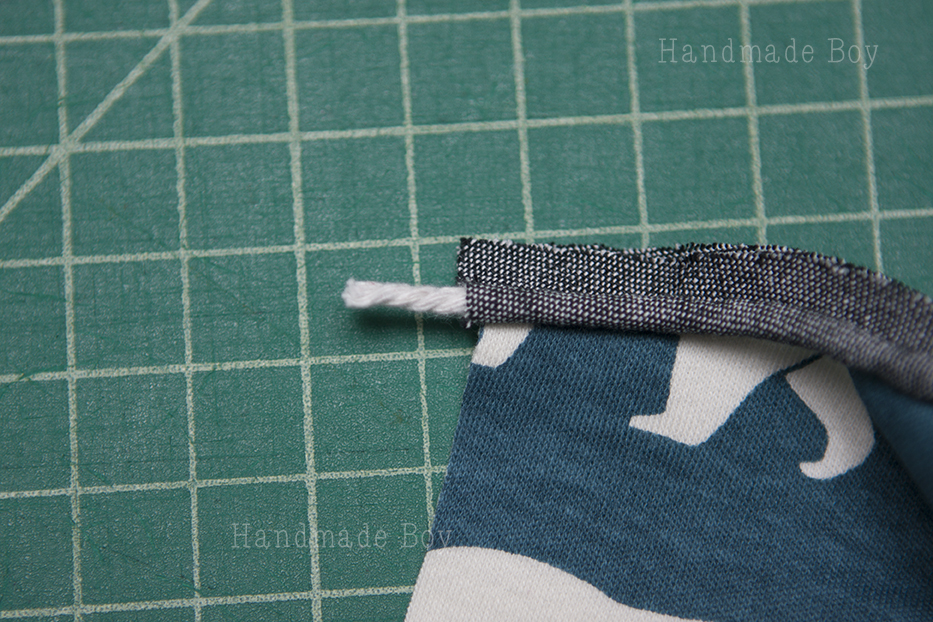
Now, to keep your seams from being bulky, gently pull the cording about 1/2″ out of the piping. (just pinch the end and gently pull it out) Just pull on the end of the piping to slip the cording back into place. You can also pick open the end of the piping and clip the cording before you attach it, but I find this way easier for me.
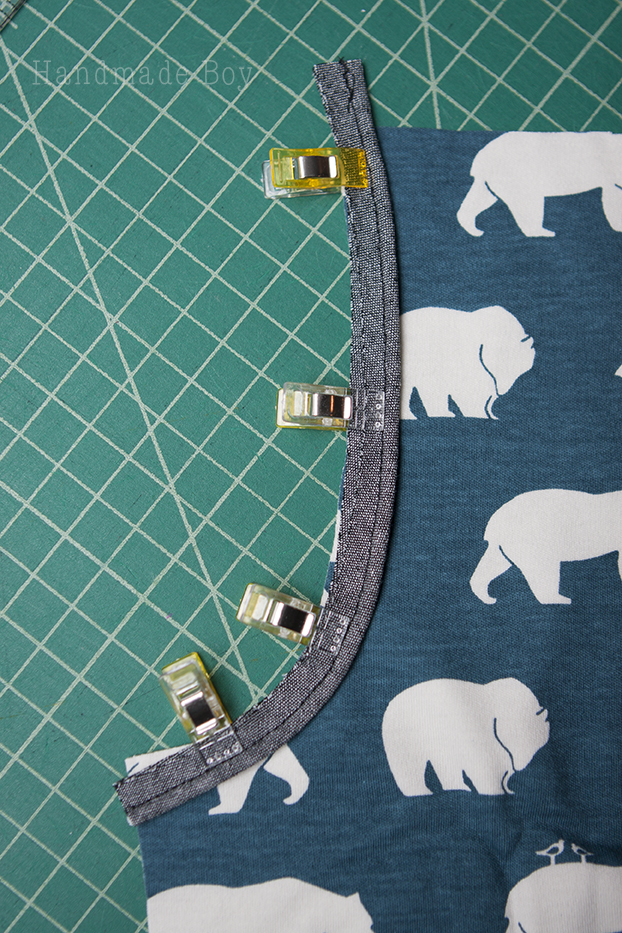
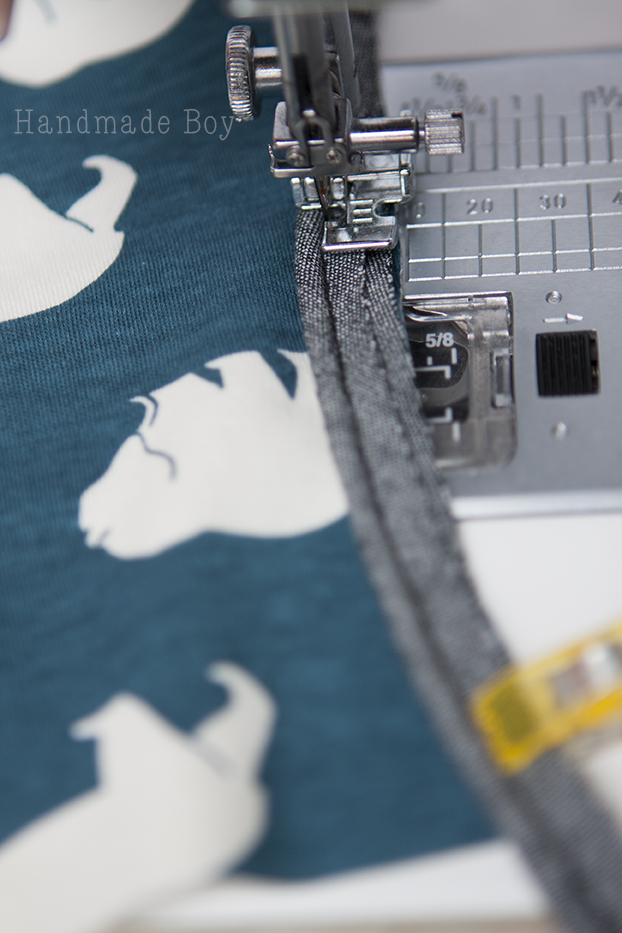
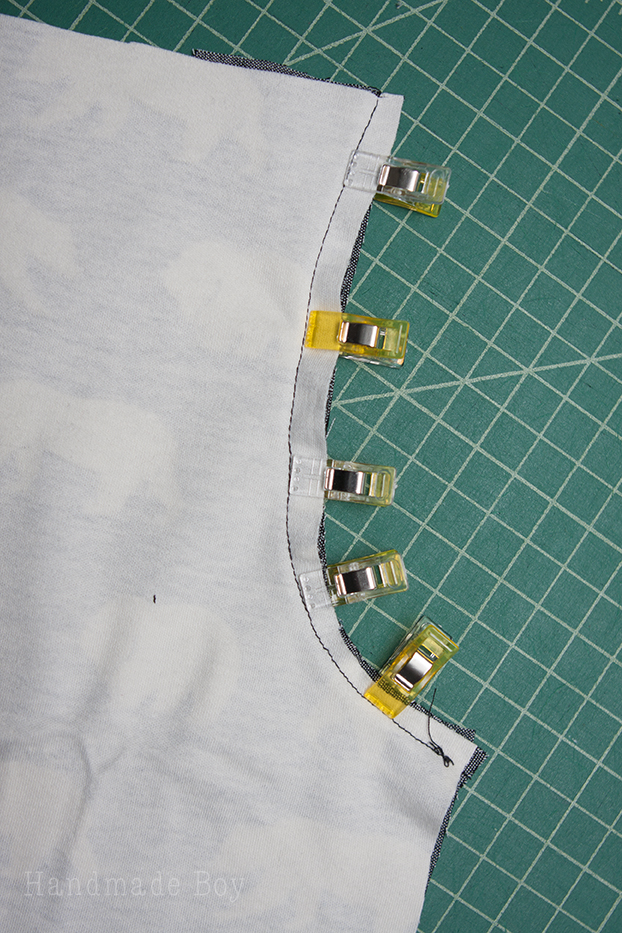
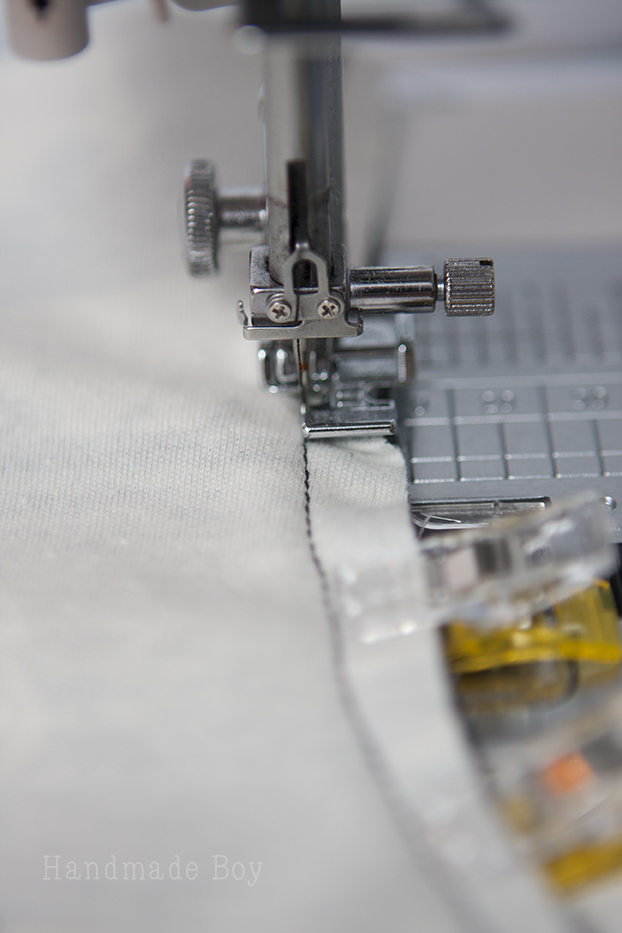
With right sides together and the piping sandwiched between your fabrics, line up your seam and clip it into place. Flip your piece over so that you can see the bobbin thread from attaching the piping. Follow this as a guide so you can once again, sew as close to the piping as possible.
Sew slowly and follow the bobbin thread closely. You will still be using your zipper foot.
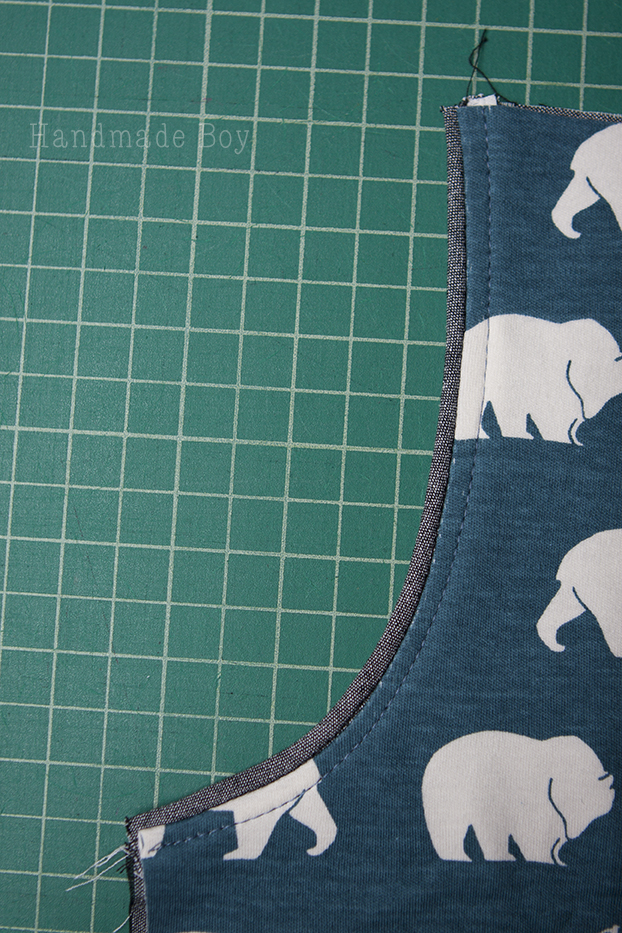
Because this is a curve, you now need to clip the seam allowance. Be careful to not clip into the stitching. This will allow the pocket curve to lay smooth. (Your piping will be sandwiched between the fabrics at this point, so your piping will not be visible like mine is.)
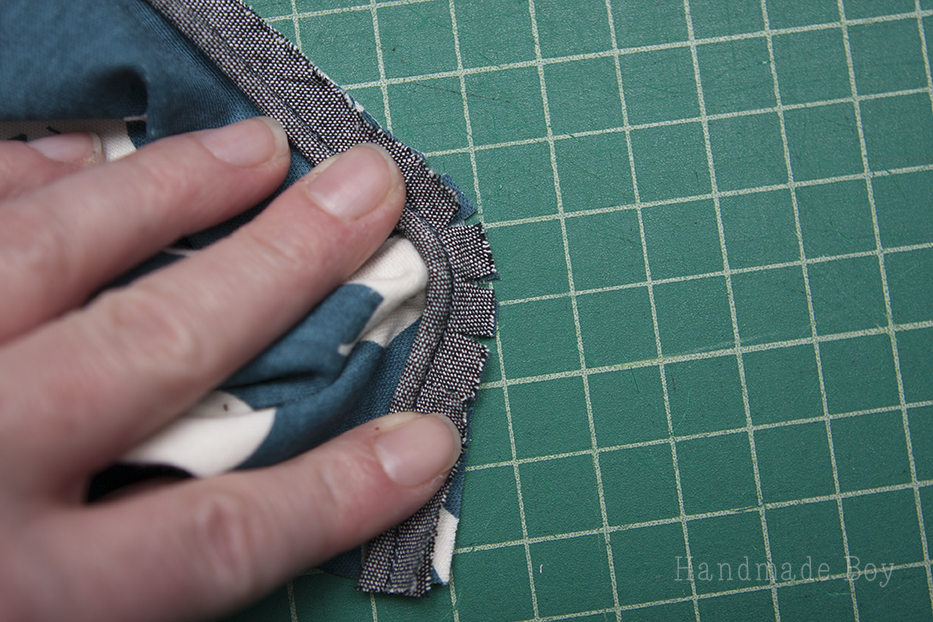
Turn the pocket to the wrong side and press well. Topstitch the seam down. (switch to your regular foot for this part)
That’s it! You just sewed gorgeous piping!
Sewing Piping in the Beachcomber Shorts Pattern
The pocket curve of the Beachcomber shorts has a very gradual curve. But, if you were working with something with a more severe curve to it, you would want to clip into the seam allowance of the piping BEFORE attaching it to the fabric. Like this,
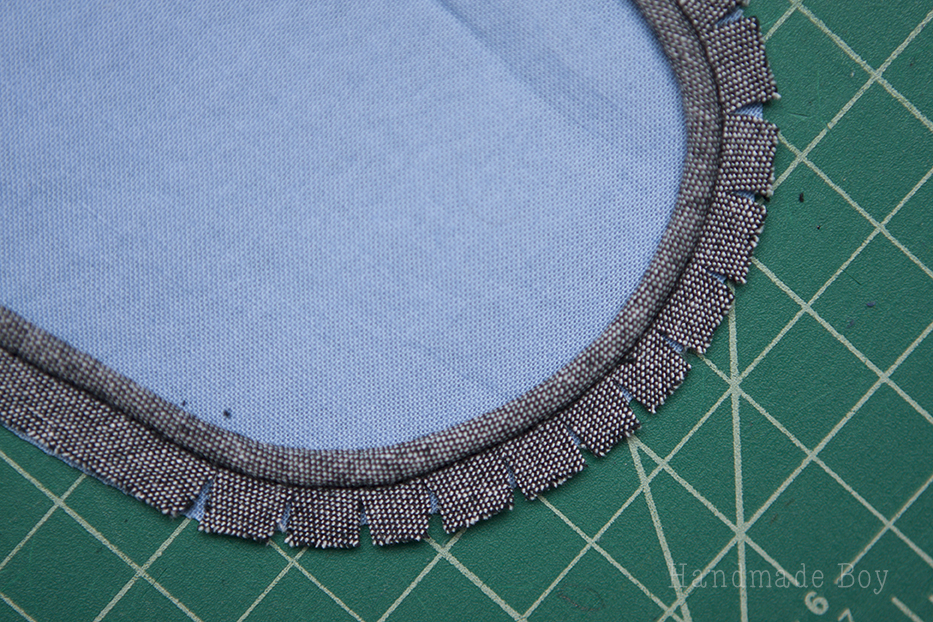
Now, what if you are attaching piping to something with a sharp corner, like a pillow? Not a problem! Just attach your piping like you did before, using your zipper foot and sewing close to the cording as possible. Then, when you get several inches from your turn, clip into the seam allowance of the piping 3/8″ from the edge of the fabric. You can make several clips along the corner, or just one. When you get to the corner, drop your needle and turn your fabric to create a clean corner. You will have to maneuver the piping into place. Just take your time. Sew the back piece on just as you did before, following along the bobbin thread so you can stay close to the cording.
Clip the corner and taper the edges leading up to it to reduce bulk. Then turn right side out.
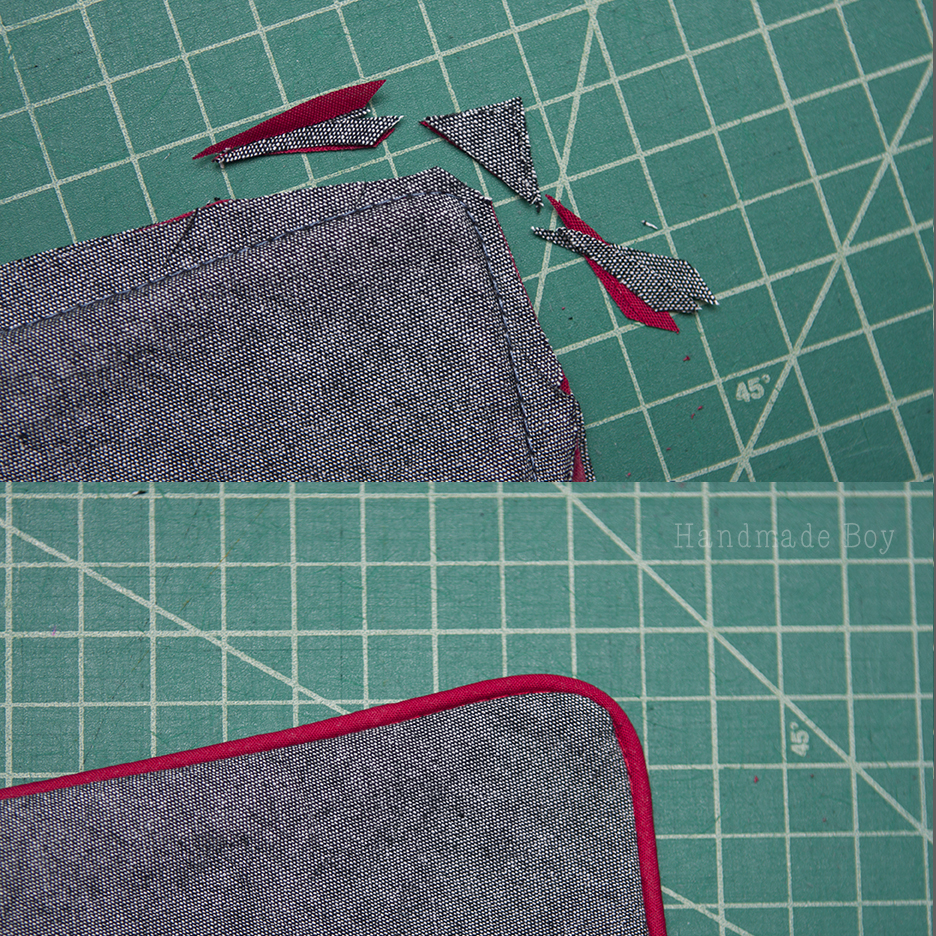
Look how gorgeous that is!
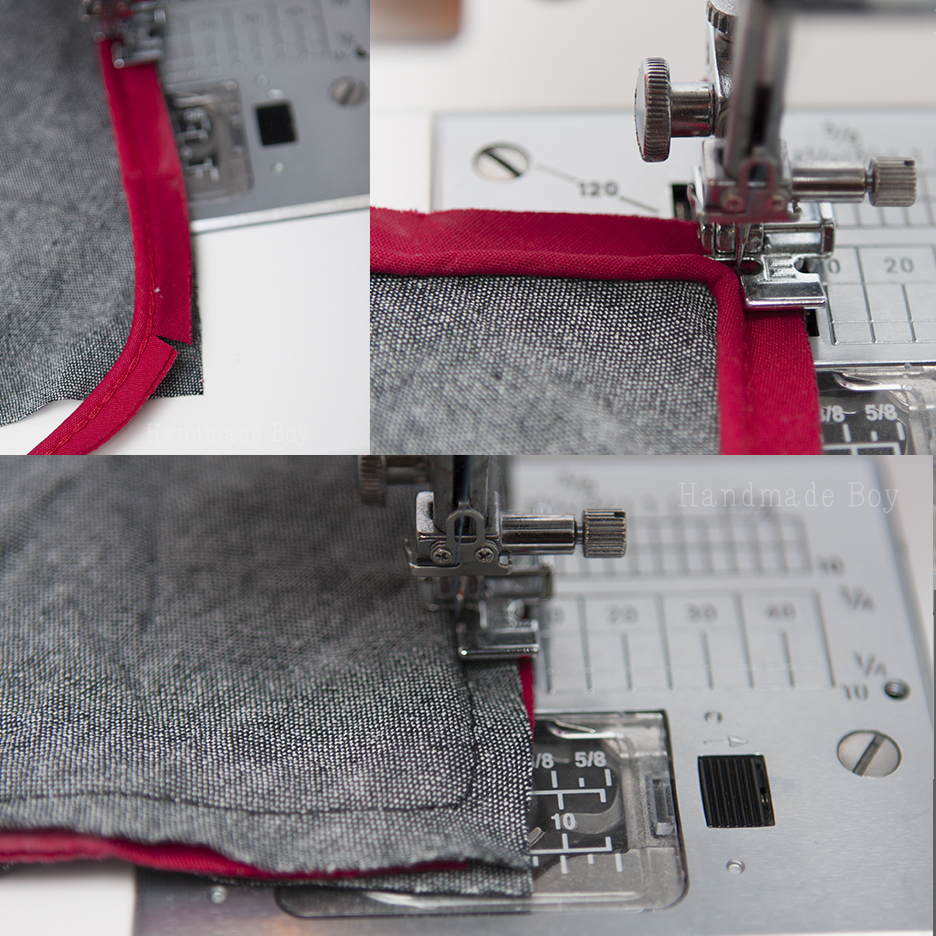
Joining two ends of piping for a clean finish is essential when making a pillow. Start attaching your piping several inches from the end and sew around your project until you get several inches from the other end. Cut your piping so it over laps by about an inch. Open up one end of piping and clip the cording so that both ends line up. Fold the raw edge of the piping under 1/2″ and line the piping up so it makes a continuous strip. Fold the piping back in half and sew in place.
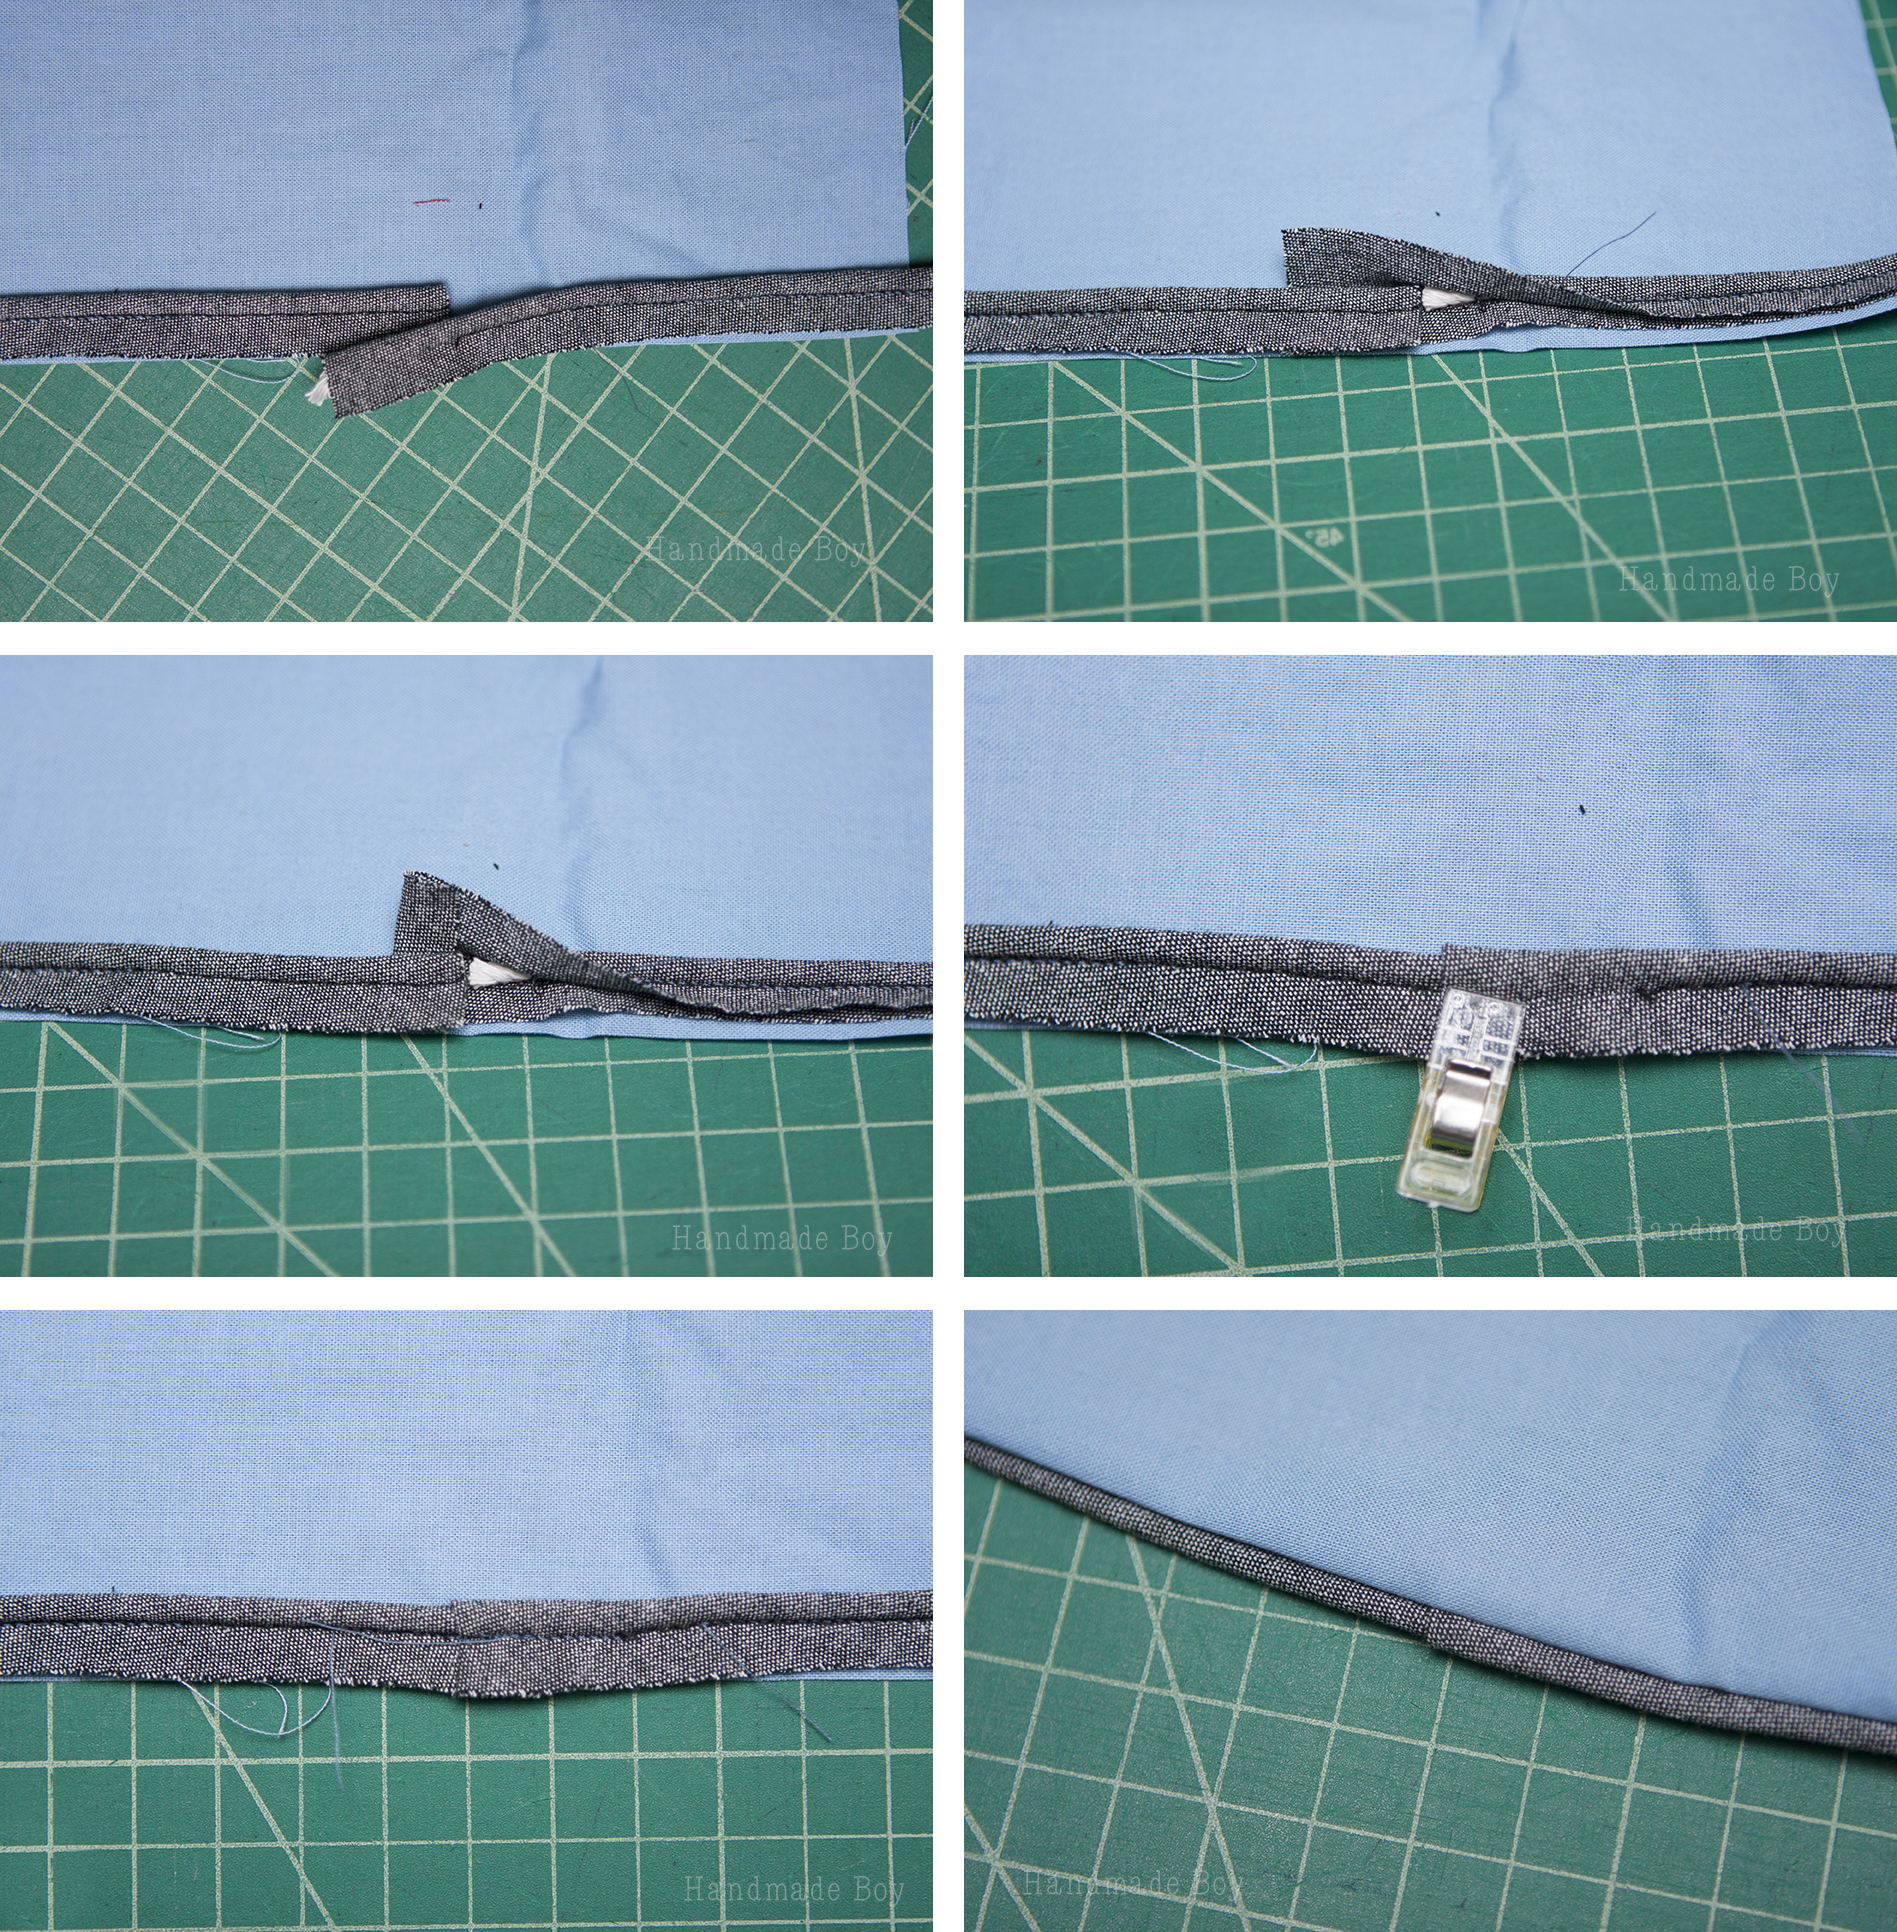
You are left with a nice, clean edge!
Now that you know how to sew piping, you can tackle all of the great Peek-a-Boo Patterns that have piping details with confidence and give your clothes that extra touch. And why not start with the newest pattern in the shop, the Beachcombers! I made this pair from some gorgeous Birch knit that you can find at KnitFabric.com.
Patterns For Sewing Piping
We’d like to thank Kelly for her help in teaching us how to make piping and how to sew piping. She went through the Beachcomber shorts as an excellent example of how and where to use piping. Let me point out some other Peek-a-Boo Pattern Shop patterns that will allow you to practice piping:
- Sweet Dreams Button-Up PJs: Sew Up these pajamas with piping accents
- Molly Schoolgirl Blouse: Accent Piping on the Collar and Sleeves
- Huckleberry Hoodie: Optional Piping Across the front
- Beachcomber Shorts: Optional Piping through the front of the dress
- Hyak Hoodie: Twin of the Huckleberry above for women. Optional piping along the front
- Pocketful of Posies Dress: Optional pockets and piping
What are the Common Mistakes when Sewing Piping?
Common mistakes when sewing piping include using the wrong foot, sewing too close to the cord, not basting or pinning the piping in place, forgetting to trim excess fabric, and overstretching the fabric. Avoid these errors for professional-looking results.
In conclusion, sewing piping adds a professional and polished touch to your garments and home decor projects. With the right tools and techniques, you can easily create and attach piping like a pro. Whether you're embellishing a pillow, adding a decorative trim to a garment, or creating a tailored look, piping can elevate your sewing projects to the next level. Remember to choose the appropriate type of piping and use the correct sewing machine foot for best results. Practice and patience are key to mastering the art of sewing piping, so don't be discouraged if it takes a few tries to get it just right. So go ahead, grab your fabric, piping, and sewing machine, and start sewing piping like a pro!
Thank you for joining us today. Before you leave, make sure to join our Facebook Group and follow us on Instagram. Happy sewing!