DIY Mitered Corner Napkins | Easy Tutorial
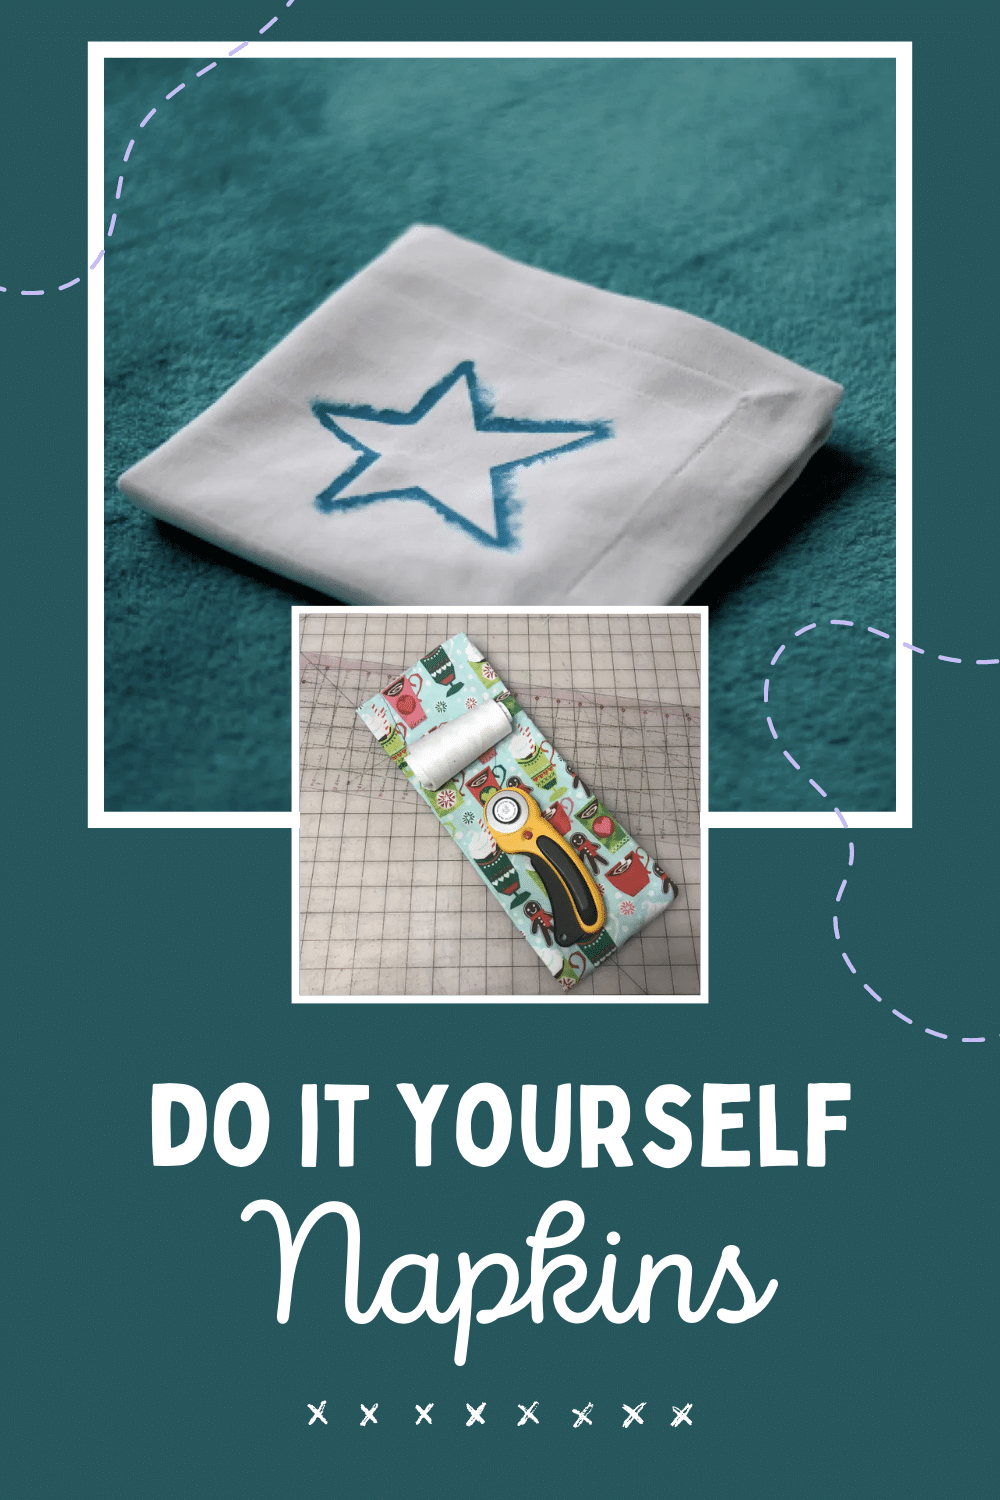
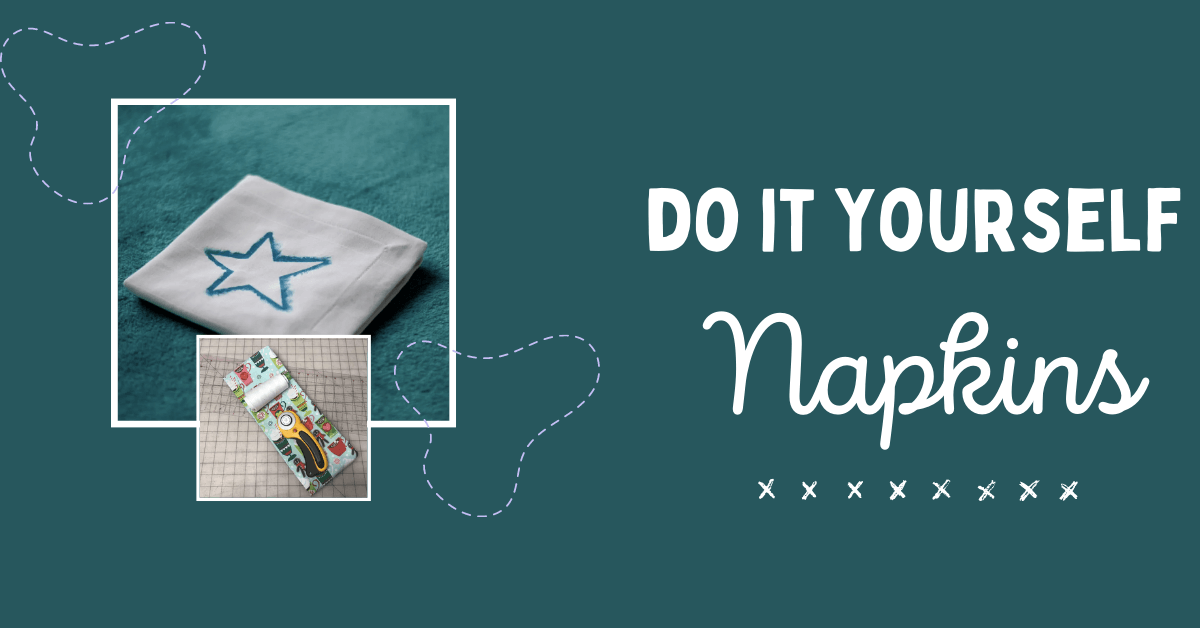
Hi, it’s Nienke again! Today I have a diy mitered corner napkins tutorial for you. Most napkin tutorials I found online use a tiny rolled hem, which is a great way to create napkins of course. However, I also like the look of wider hems, it can be a bit more luxurious. Therefore I made these with a wider hem and a mitered corner. Here’s my tutorial on how to make napkins with mitered corners!

This technique is very useful in dressmaking as well, for corner hems such as in an unlined cardigan or at the corner hem of a wrap skirt. I embellished my napkins with a stenciled star. Yet again I used freezer paper for stenciling explained in my tutorial a while ago, however, I used it in reverse this time!
Materials and Fabric For the DIY Mitered Corner Napkins:
- Napkin Fabric: I used plain white cotton, 17″x17″ per napkin.
- Fabric Paint and a Brush to Customize the Napkin
- Freezer Paper
- Regular Sewing Supplies: pins, Thread, Iron, Etc.
Instructions for Sewing Mitered Corner Napkins:
Step 1: Fold and press your hems: first 1/4″ inwards, then another 1/2″ inwards. Press firmly!

Step 2: Mark the place where both hems meet in the corner. Repeat for the other three corners.

Step 3: Fold back the hems once, so now the hem is folded in only once. At the photo above the marks are at the blue arrows.

Step 4: Turn your napkin over. Now the right side is on top.

Step 5: Fold your napkin so that the marks are on top of each other.

Step 6: Above another photo of how you should fold the napkin.

Step 7: Mark a line from the mark on the side to the point where your creases crossed eachother.

Step 8: Stitch along the line. Cut off the excess seam allowance of the corner. Repeat for the other corners.

Step 9: Turn the hem towards the wrong side of the fabric. Press.

Step 10: Topstitch the hem into place.

Make Designs to Add to Your Napkins
Napkins Step 11: Cut a star of freezer paper.

Napkins Step 12: Iron the freezer paper onto the napkin.

Napkins Step 13: Paint along the sides of the star shape.

Napkins Step 14: Let the paint dry and remove the freezer paper.

Napkins Step 15: Iron the embellishment to set the paint or check the instructions on your specific brand to see how you can set yours.

Now repeat for all the diy napkins you need to enjoy a family dinner! Thank you for joining us for our DIY mitered corner napkins tutorial. Before you leave, make sure to join our Facebook Group or follow us on Instagram. Happy Sewing!