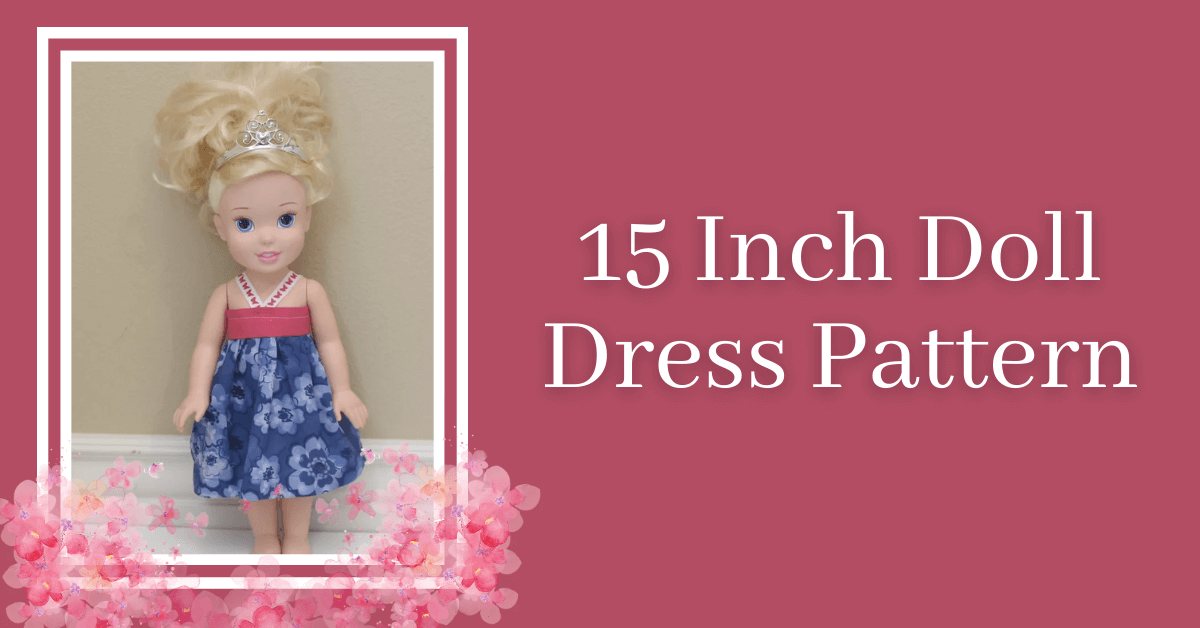
15 Inch Doll Dress Pattern | FREE Doll Dress Pattern
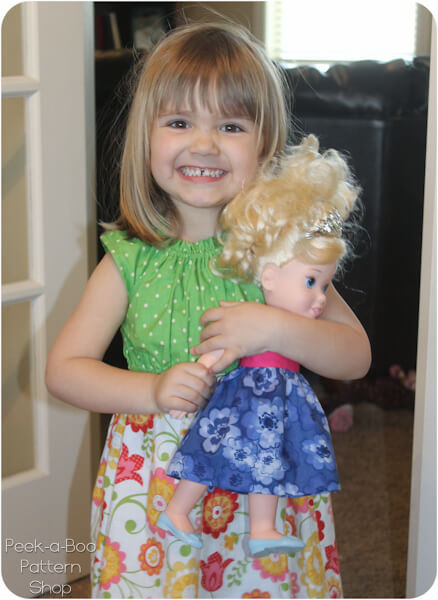
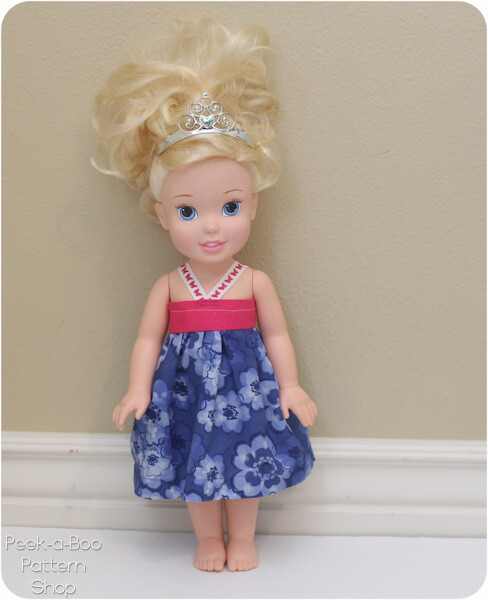
Today Anne and I have a 15 Inch Doll Dress Pattern to share with you! This cute little dress fits her Disney Princess dolls perfectly :)
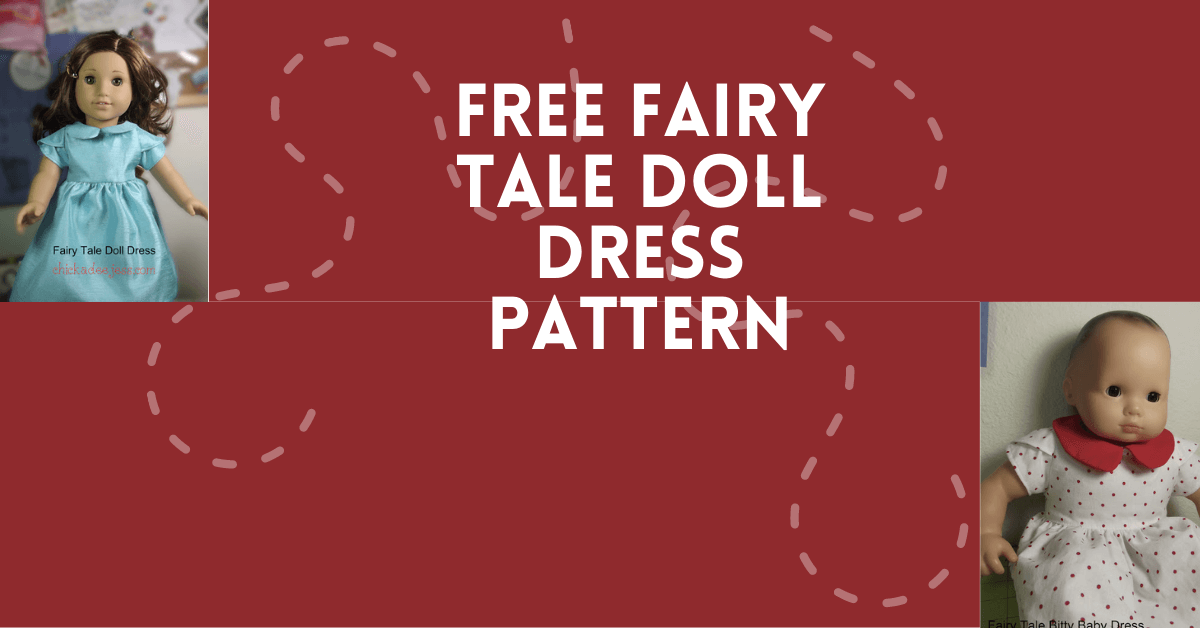
If you have an 18" Doll, then check out our Fairy Tail Dress Doll Pattern or our Doll T-Shirt Pattern for starters.
15-inch Doll Dress Pattern | Dress Pattern for Disney Princess Dolls

And the velcro closure in the back makes it easy for little hands to do by themselves. And even better she made it herself! If my 4-year-old can make it you can too!
15 Inch Doll Dress Pattern Instructions
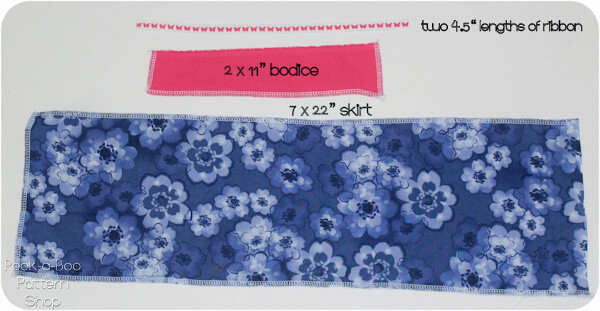
15 Inch Doll Dress Pattern Step 1: First let's get our pieces cut out. I draw out the dimensions on the fabric and then let Anne cut. A little unevenness here and there isn't a big deal :) After she was finished cutting I finished all of the raw edges so her pieces were ready to go.
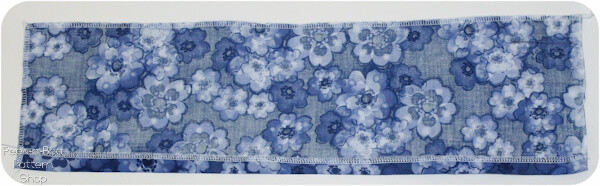
15 Inch Doll Dress Pattern Step 2: Hem the bottom of the skirt. She helped me press and then I had her sew with the wrong side facing up so she could see what she was doing. Our hem was roughly 3/4" which is a little large for a doll but was much easier for her to sew.
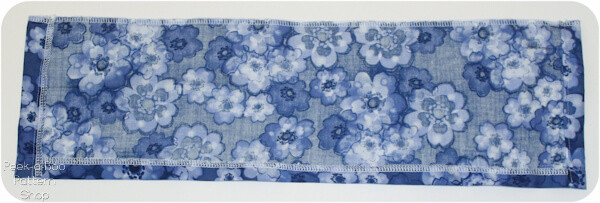
15 Inch Doll Dress Pattern Step 3: Fold both sides in 3/4" and topstitch
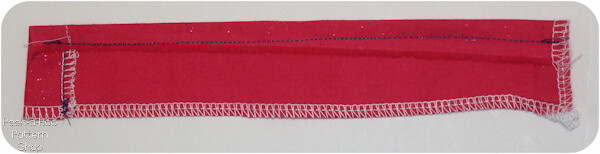
15 Inch Doll Dress Pattern Step 4: Fold the top edge of the bodice over 1/2" and hem. Fold each side in 3/4" and topstitch (I mis-measured so only 1 side is finished on our piece but you'll want to finish both)
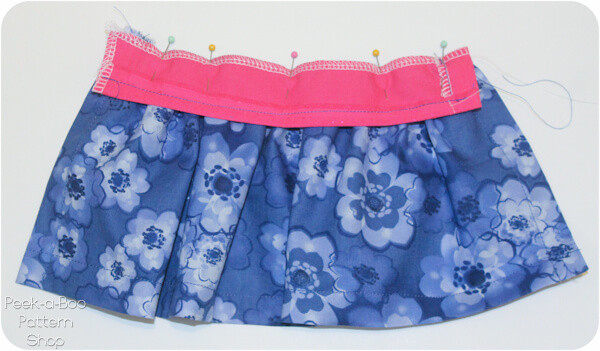
15 Inch Doll Dress Pattern Step 5: Gather the top edge of the skirt (Anne's favorite part!) and attach to the bottom edge of the bodice. Normally I would do this first and then finish the placket but for Anne I thought it might be easier to do the placket first but either way will work just fine :)
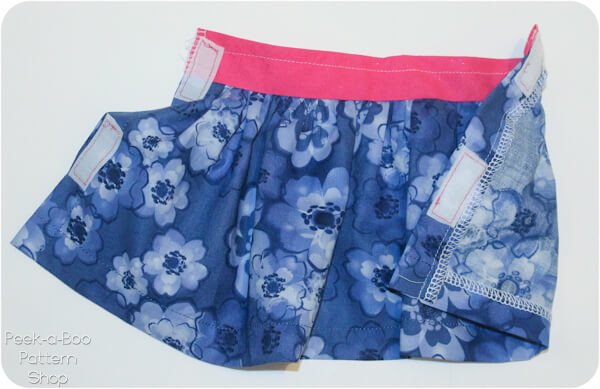
15 Inch Doll Dress Pattern Step 6: Add the velcro (a job for mommy)
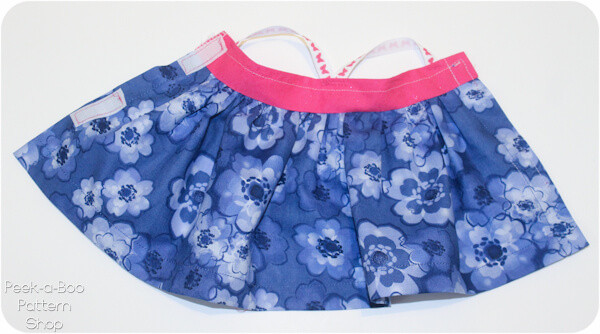
15 Inch Doll Dress Pattern Step 7: And add the ribbon (another job for mommy). The ribbon meets right in the center of the bodice and the tail ends go just outside the velcro on either edge.
This was a great afternoon project and we were able to complete it all in one sitting. Anne enjoyed helping me press and doing the gathers. It worked out really well that I was able to finish all the edges right at the beginning and then let her do the rest up until the very end.
If you enjoyed this post make sure you don't miss the rest of the Sewing with Kids posts :) Also, make sure to come join our Peek-a-Boo Pattern Shop Facebook Group.