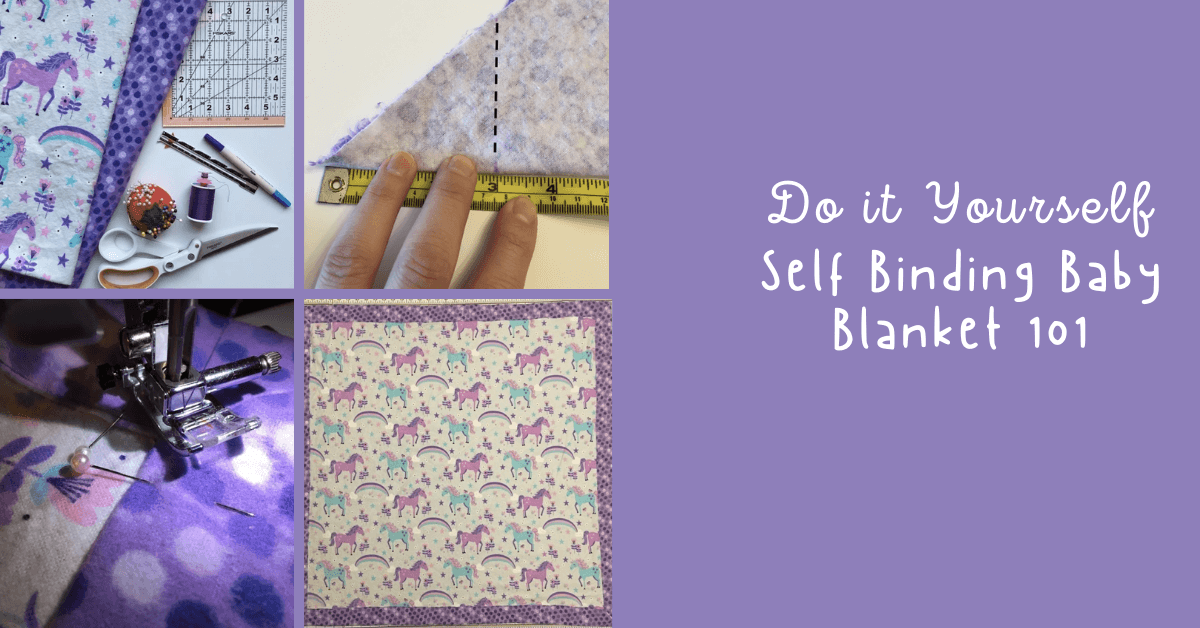
How to Make a Self Binding Baby Blanket Quickly
Hello! It’s Stephanie from Stephie B’s Designs here again today to walk you through how to make a self binding baby blanket. There are a couple of methods for making a DIY self-binding baby blanket floating around the web, but the one I’m discussing today has proven it’s successful on five different occasions, so it’s definitely the one I recommend the most. I call it the “sew and tuck” method for beginners.
If this is your first time making a blanket - you might find this easier than making a quilt or other more difficult blanket. My twin girls are arriving about a week before this tutorial will be posted, so what a great way to teach you a few things while making my new girls something special at the same time. I made two blankets at the same time while writing this blog, so if I can do that 35 weeks pregnant with twins, I think you’ll be just fine with this easy baby blanket. 🙂 As I always say, let’s get started!
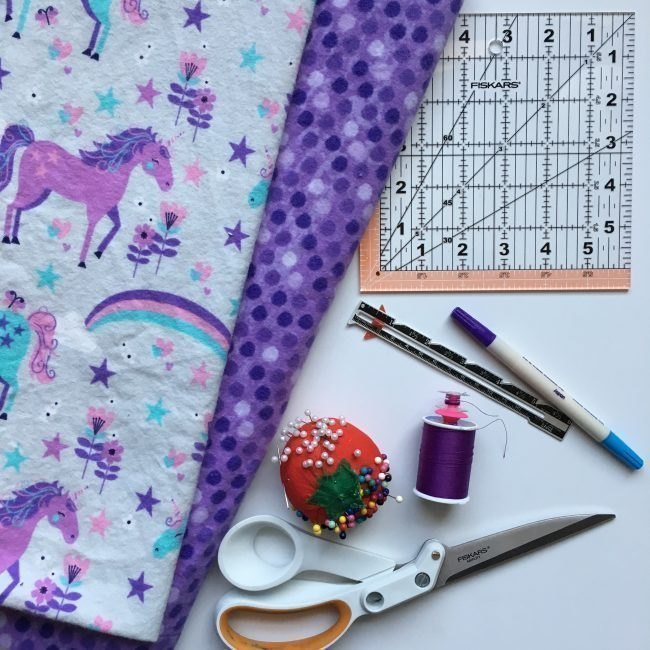
DIY Self-Binding Baby Blanket Materials:
- 1 to 1 ½ yard of main fabric for the center fabric front (you can use flannel, fleece, minky fabric, cuddle fabric, gauze, really anything you’d like) – I’ll discuss below how to figure out exactly how much fabric you need. For your fabric needs, come to KnitFabric.com.
- 1 to 1 ½ yard coordinating fabric for the back/borders (again, use what makes you happy)
- Seam Gauge
- Marking Pen/Tailor’s Chalk/Pencil
- Square Ruler (if you have one, otherwise a ruler or cloth tape measure will work)
- Scissors or a Rotary Cutter
- Pins
- Thread
- Optional: I recommend using a walking foot if you opt to use minky, knits, or other slippery fabric
How to Make a Self Binding Baby Blanket Step 1: Cut Your Fabric
For this sewing project, you’ll be cutting out two pieces of fabric. There’s one large square that will serve as the back piece and binding (aka border), and a second smaller square that will be the center front fabric portion.
If you read through my last tutorial, How to Make a T-Shirt Blanket, you may remember the blanket sizes chart I included. How much fabric you’ll need depends on how big or small you want your blanket. Here is that chart once again to help you gauge what size you may want your blanket. You can make these in lots of different sizes.
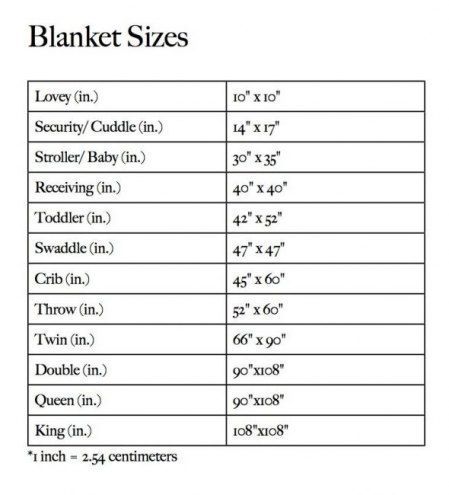
With all my self-binding blankets, I didn’t follow the chart. Instead I always chose to go rouge and make square blankets using my own dimensions. For this one, I decided to use the entire width of some lovely flannel that I purchased, so my back/border piece will be 42”x42″. I opted for a 2” border, so my finished blanket will be 37”x37”.
Wow, wait, go back… how in the world did I go from 42″ to 37″?? Great question! Here’s how:
Calculate the border + seam allowance x 2 (since there is a top/bottom and side/side), then subtract that total from the width of your fabric.
2″ border + 1/2 inch seam allowance x 2 = 5″ … then 42″ – 5″ = 37″
From that total, I subtracted 1″ from to determine the size of my second, main square… 36″x36″.
You can also use that formula to calculate how large to cut your pieces if you know what you want your finished blanket size to be. You’d add the border/seam allowance to the desired finish size to get the amount you’d need to cut for the large piece.
For example, if you want a 45″ square blanket with a 4″ border using a 1/2″ seam allowance, you would need a 54″x54″ square for the back/border and a 53″x53″ square for the main…
4″ border + 1/2″ seam allowance x 2 = 9″ … then 45″ + 9″ = 54″
Clear as mud?? Take it slow if you need any I promise you’ll get there.
Just remember, no matter how large you want your blanket, you’ll have to pay attention to the width of the fabric you choose to use and are restricted by that amount. Minky, fleece, and most knits are roughly 58” wide so you have a lot of room to play with, while flannel and other woven cottons are generally only 42” wide.
How to Make a Self Binding Baby Blanket Step 2: Prepare your back/binding piece for sewing
Here is another formula to determine where to place the cutting marks to make your mitered corners (who knew you’d have to do so much math for this project??!)
This one is easier, though, I promise. For a 1/2″ seam allowance, regardless of your desired border width, add 1″ (the math is 1/2″ x 2). Similarly, for 1/4″ seam allowance, add 1/2″. That’s it!
For my blanket, with my 2″ borders, I need to mark 3″ inward from the corner – not along the raw edge – as shown below. 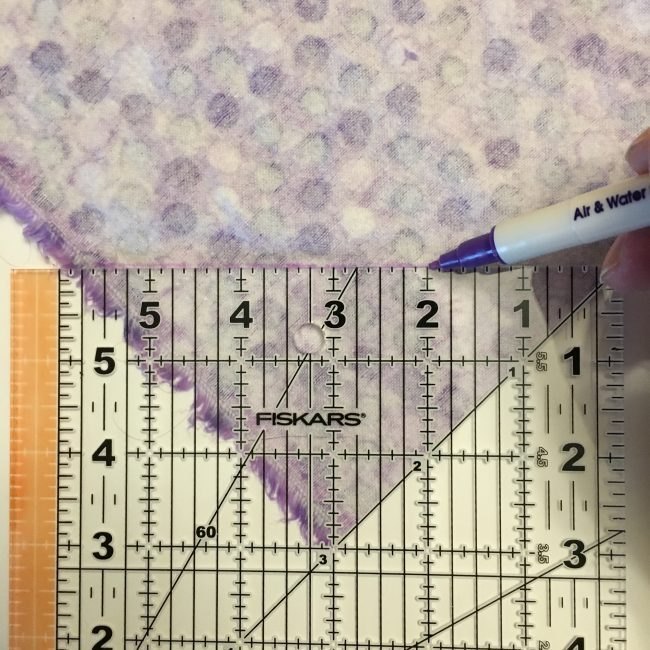 If you don’t have a square ruler, you can use what you have on hand.
For example, if you only have a measure tape, fold the two raw edges together with right sides together, and mark the 3″ (or whatever your total is) along the fold line. Extend that line 45′ from the fold to the raw edges and mark.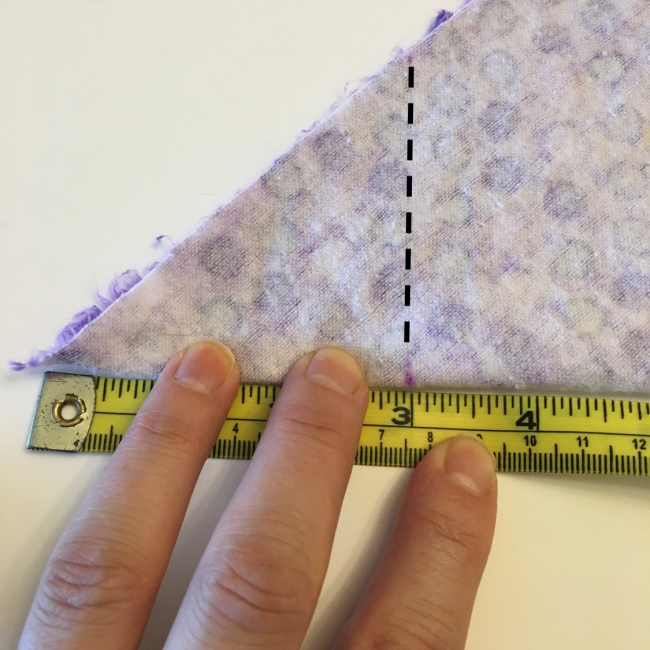 Unfold, and with the right side facing down, continue your marking line down the side that was previously folded under.
 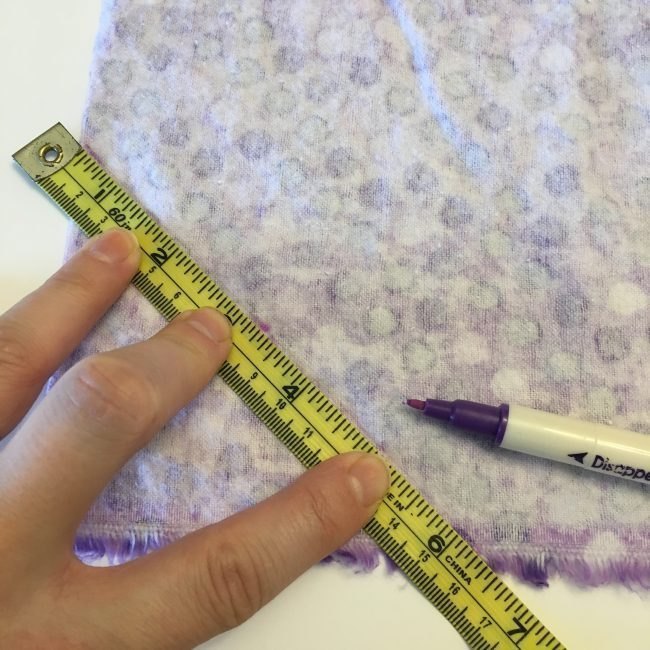 Next, no matter how to got here, trim that piece from your blanket.
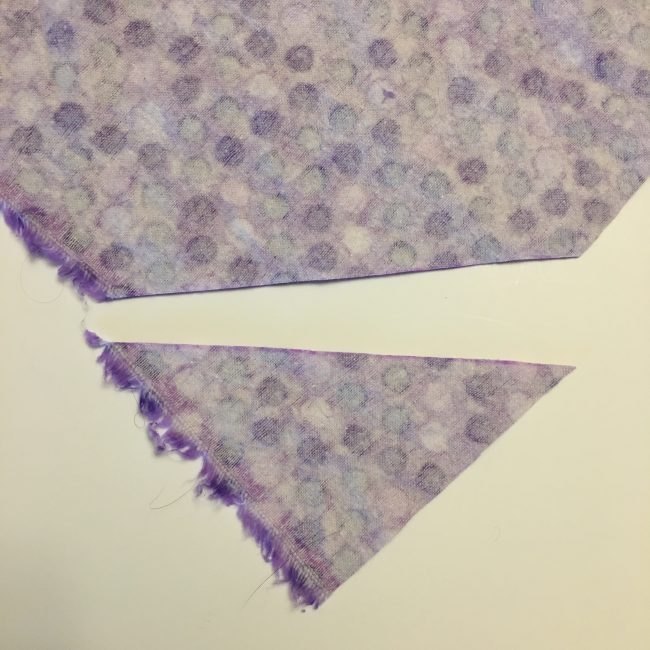
How to Make a Self-Binding Baby Blanket Step 3: Pin and sew the corners
With the right side of the fabric facing down, fold your seam allowance (mine is 1/2″) and pin. You only need to fold a few inches along your raw edges at this time, just enough to sew the two sides together.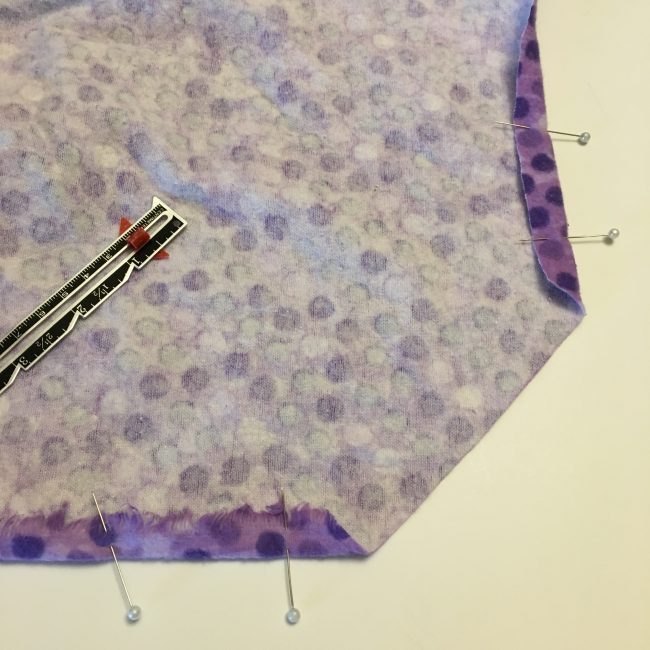 With right sides together, fold the two pinned sides together and pin again.
 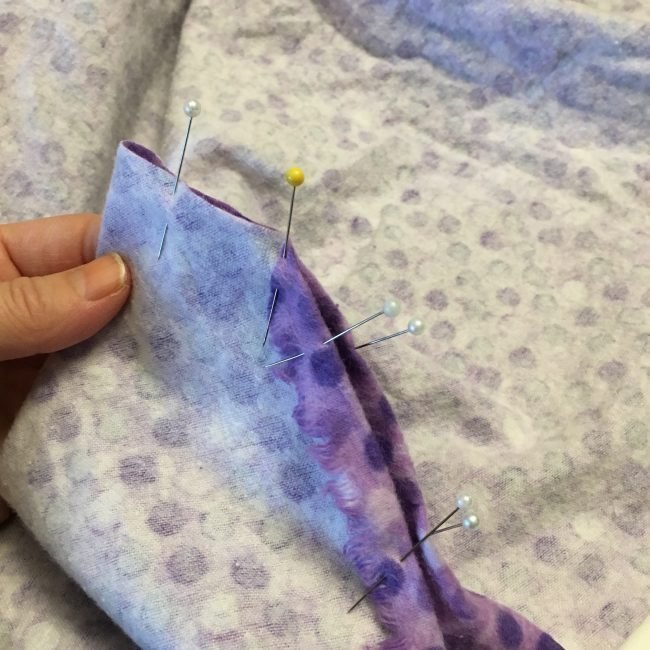 Sew the two sides together using your seam allowance and trim off the end.
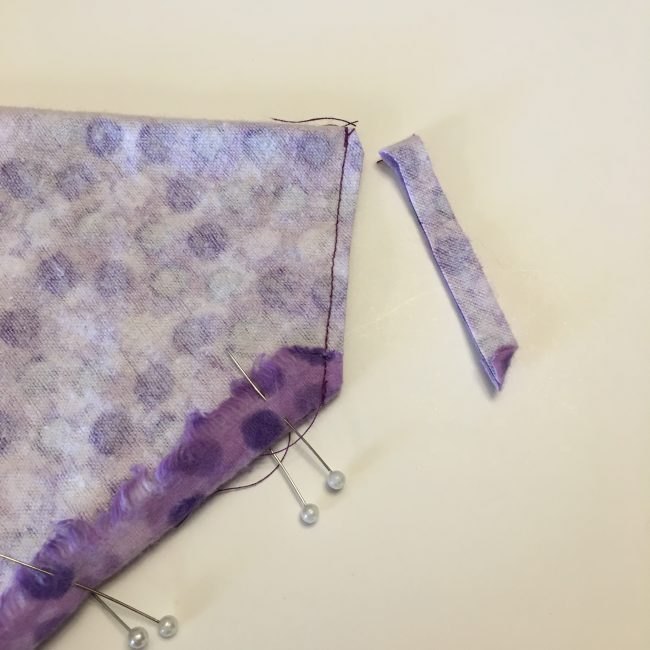 Unfold, lay flat, and press the seam allowance open. I also recommend pressing along the pinned portion of your border (if you can depending on your chosen fabric).
 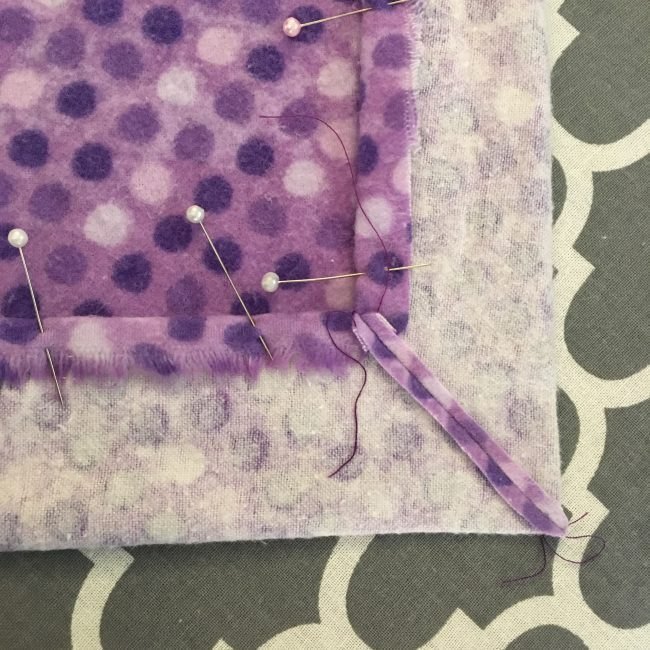 Repeat for all four corners, then flip the blanket right side out and flatten the borders. As you can see below, my border is pretty much right at 2″, exactly where I wanted it to be.
How to Make a Self Binding Baby Blanket Step 4: Continue pinning around the border
Fold under and pin the seam allowance along all sides of the blanket.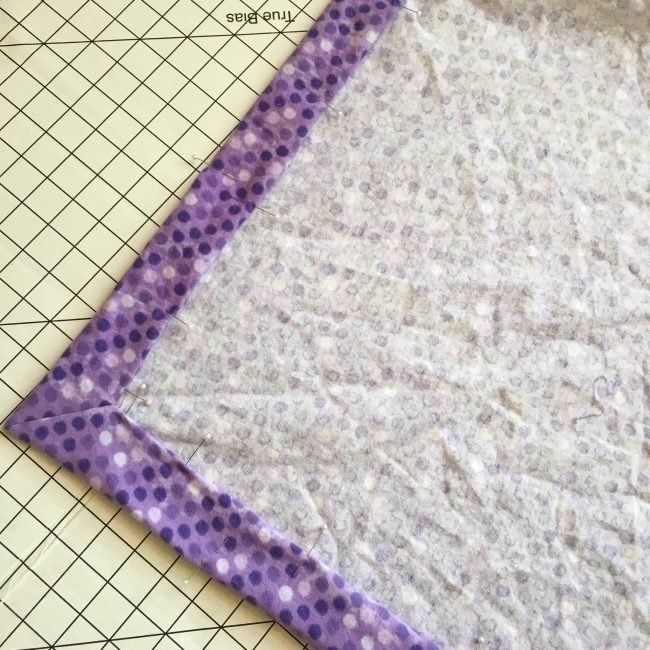 I personally didn’t check how much I had folded under before I pinned it – I’m sure my seam allowance went out the window here and there – instead I laid the blanket down as flat as I could, then measured for my 2″ border width and pinned every few inches.
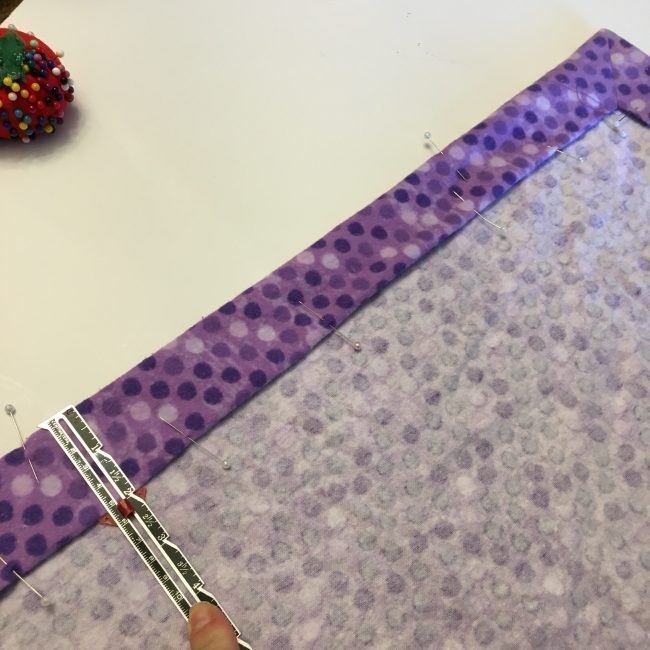 You can never use too many pins…
 If possible depending on your chosen fabric, press around the entire border. It will make the next step (sewing) a lot easier.
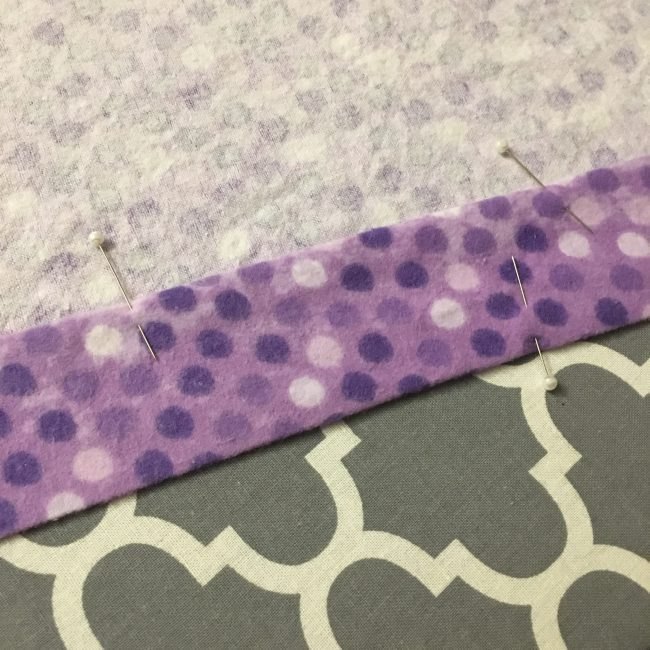
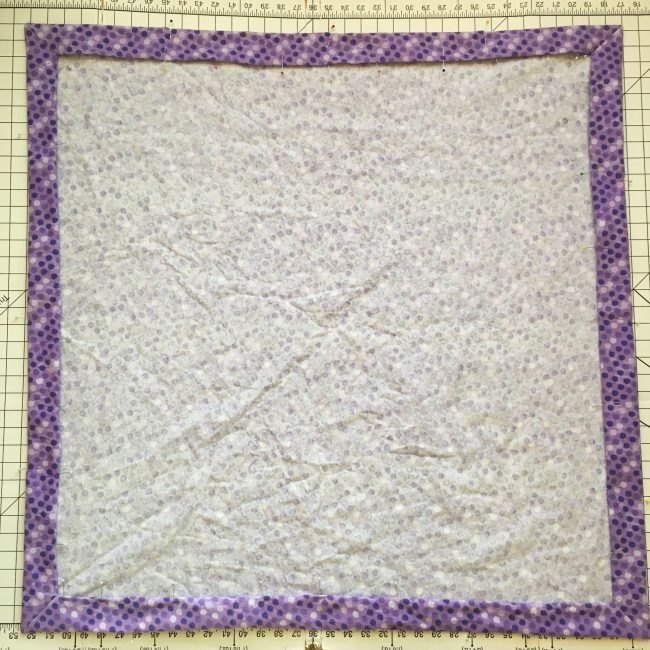
How to Make a Self Binding Baby Blanket Step 5: Tuck and sew (the fun part!)
With your prepared back/border still laying out flat with the back side of the blanket facing down, lay the main fabric over the top facing up. As you can see from the image below, the main piece doesn’t have to be cut beautifully and it can include the selvage since it’ll be tucked away.
Begin tucking the main fabric underneath the border, pinning in place as you go along. 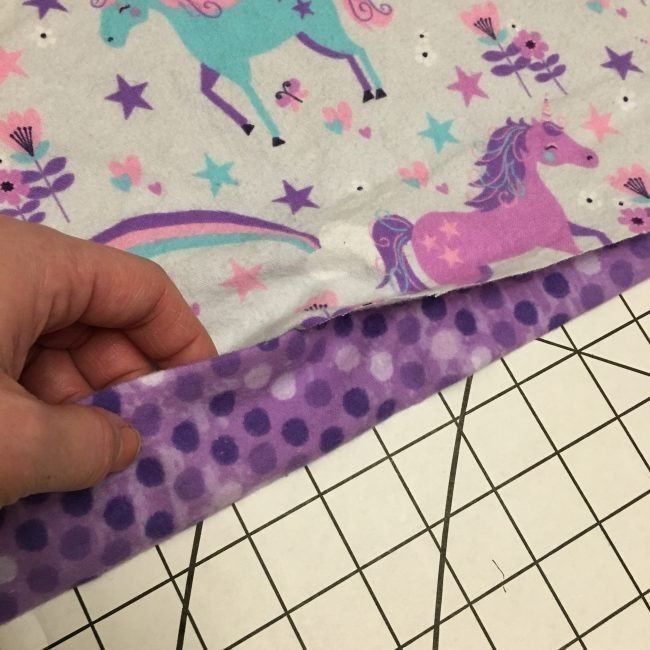
As always, you can never have too many pins. I ended up going back after the photo below below was taken and added a pin or two between my existing pins… just to make sure the layers would stay just where I wanted them as I sewed. 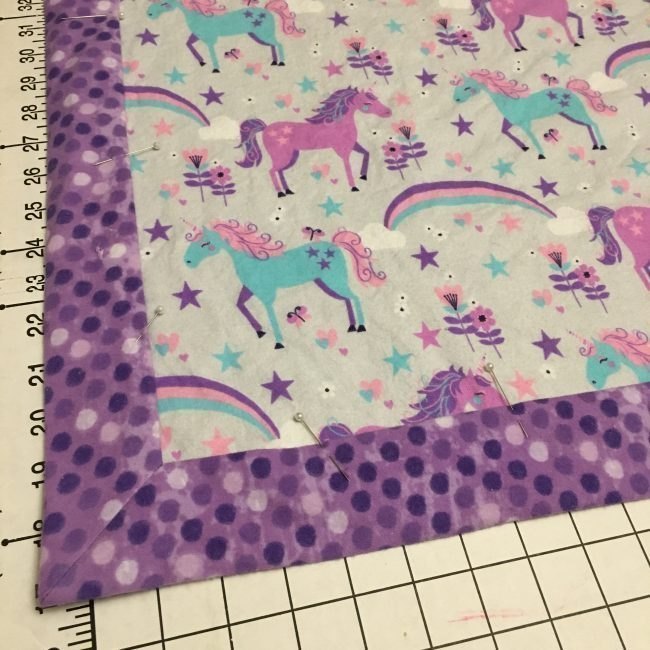
Topstitch all the way around the border to secure all layers of the blanket. 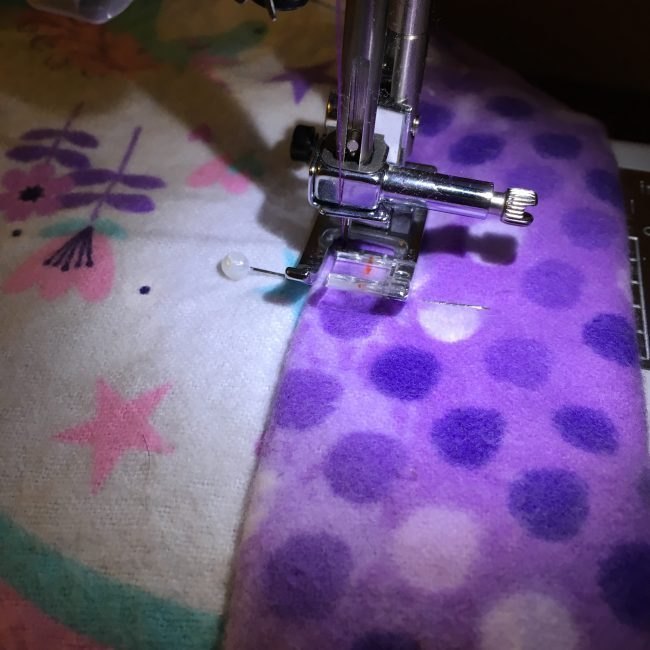
Hint: When your needle lands in the mitered corner (the seam at the corner), pivot to the next side.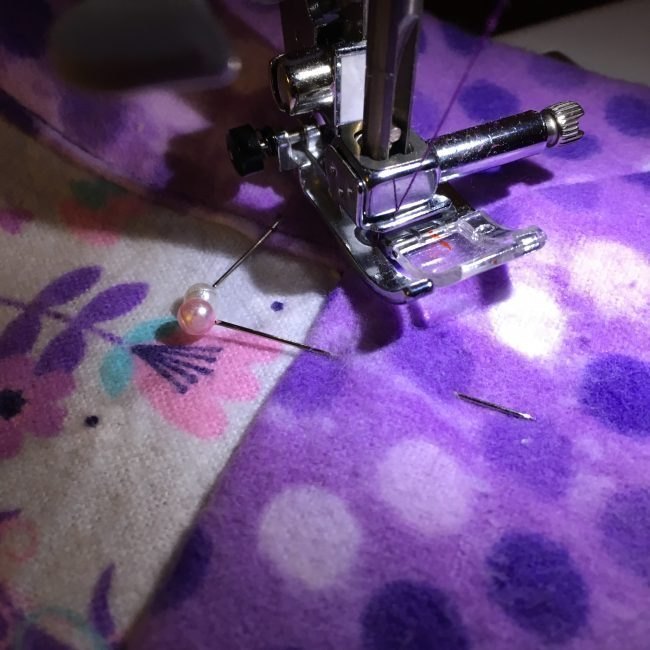
And that’s it!!! Stand back and fall in love with the lovely (and easy!) DIY self binding baby blanket you just made. 🙂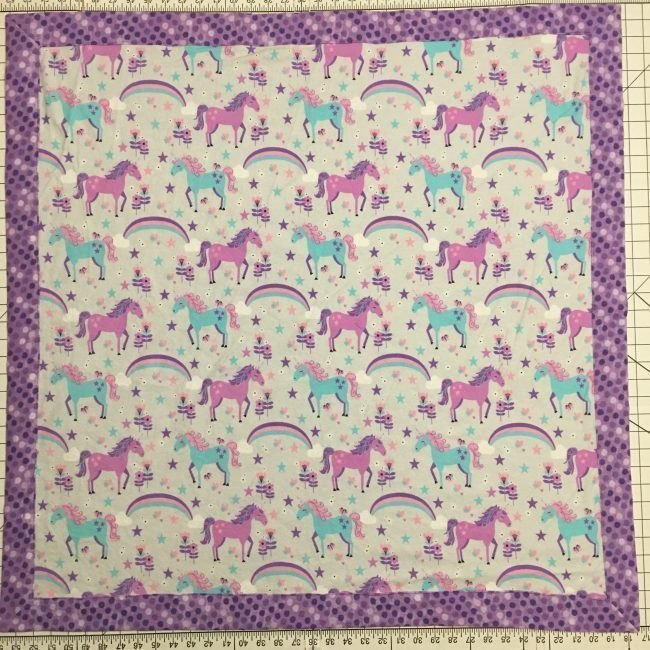
I hope you’ve enjoyed this tutorial and will make a self-binding blanket (or ten!) of your own. Please comment below if you have any questions, and I look forward to my next tutorial walking you through another fun How-To.
What are some tips for washing and caring for a self-binding baby blanket?
To wash a self-binding baby blanket, use a gentle cycle with cold water and mild detergent. Avoid using bleach or fabric softener. After washing, air-dry the blanket or tumble dry on low heat. To preserve its softness and shape, avoid over-drying or exposing it to high heat.
Big thanks to Stephanie for this excellent tutorial on how to make a self binding baby blanket. Before you leave, make sure to join us in our Facebook Group, join our E-mail Newsletter for 25+ Free Patterns, and follow us on Instagram and YouTube too for some excellent video tutorials. Happy sewing!