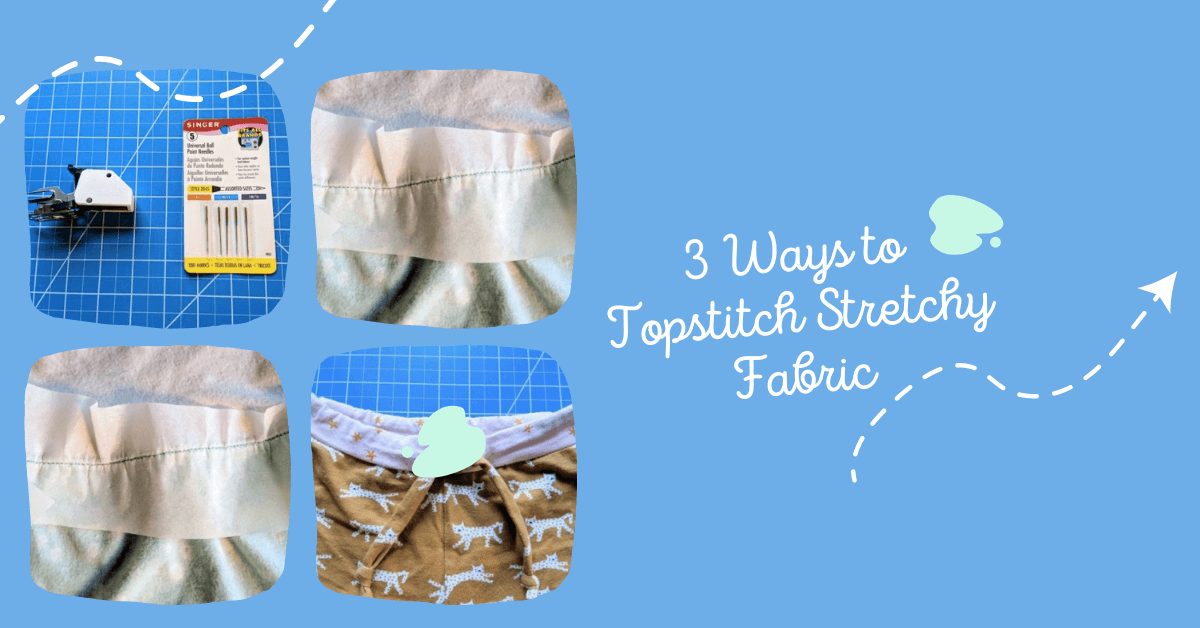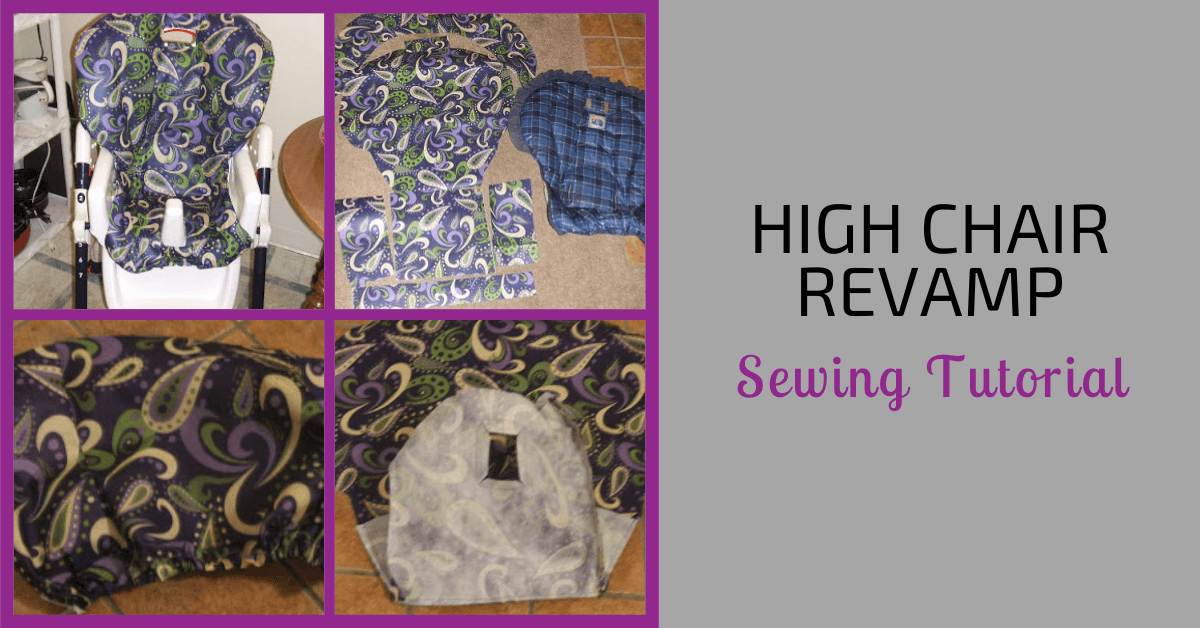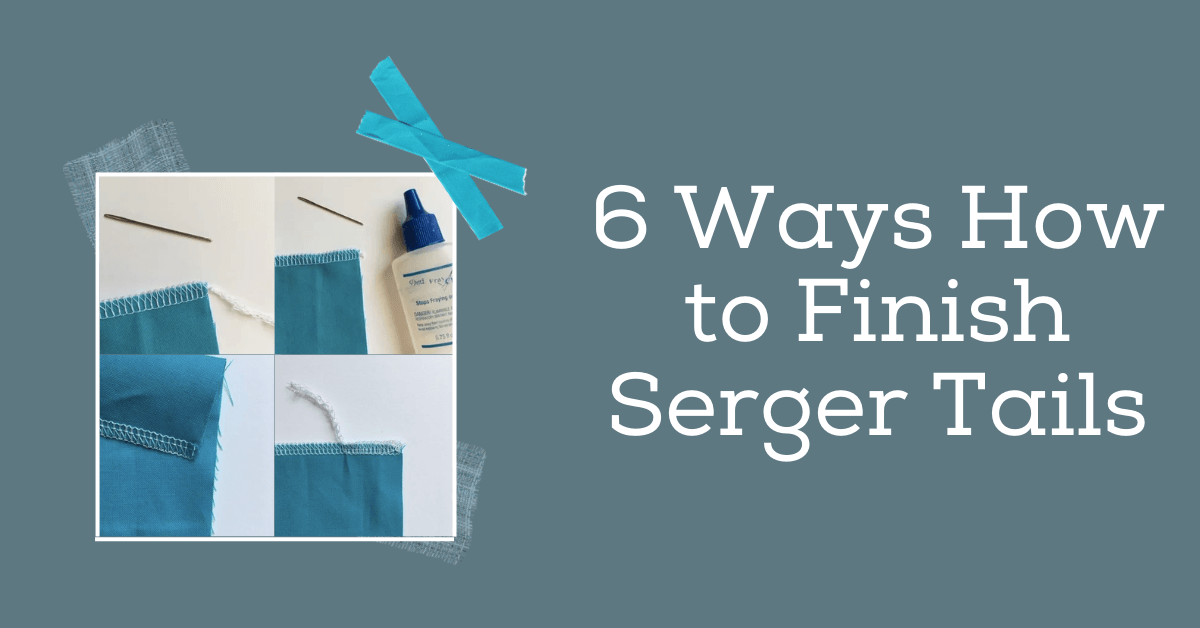
6 Ways How to Finish Serger Tails
Today, I'll show you how to finish serger tails. For those that use a serger, we are always faced with the same dilemma after each stitch… “what do I do with the chains at the beginning and end!?” Well, that’s what I’m here for!! In this blog I’m going to go over six ways you can use to finish your serger tails. Some are easy, others take more time but are tidier. Good luck and I hope you learn a little something new today!
6 Methods of How to Finish Serger Tails
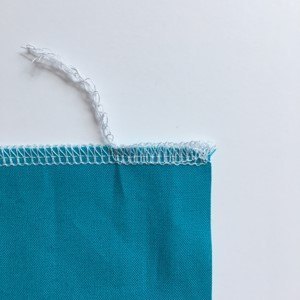
Finishing Serger Tails Method 1: Serging over existing tails.
I think I'm cheating by counting this as a method, but I’ll discuss it here because it’s probably the most common way to finish your tails. Many patterns finish tails this way just by going through the steps. For example, shoulder seams are generally finished using this method by the neckband or a hood on one side, and sleeves or armbands on the other.
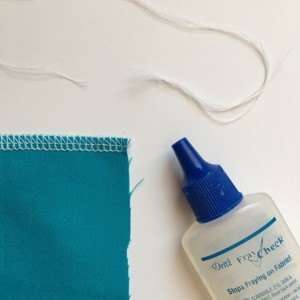
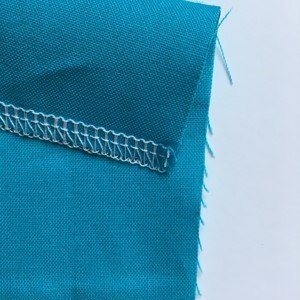
Finishing Serger Tails Method 2: Weaving the tails.
This is the most popular method, and is the one I use when my tails aren’t finished with Method 1. Although I find this the easiest way to finish my tails, it leaves a bit of bulk along the seams. Depending on what you’re sewing or where the seam is located, this may not be desired, so in those cases, I recommend using another method.
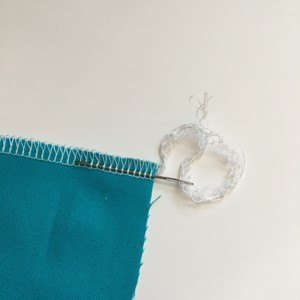
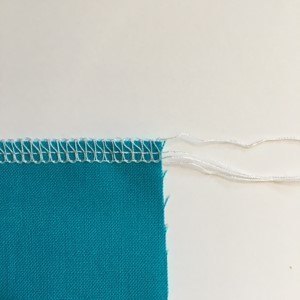
Once you’ve serged your seam, chain off your stitches 4”-6” by pulling your garment away from the machine with it still running to allow plenty of thread to work with. After the chain has been cut from the machine, I run my fingers gently over the remaining tail from the seam to the cut ends to lengthen the threads as much as they'll go, then trim them down to the same length. This makes threading them through a needle much easier. I recommend using an embroidery/hand-sewing/large-eye needle if you have one since you will be threading 3 or 4 threads through the eye.
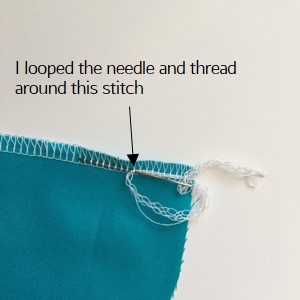
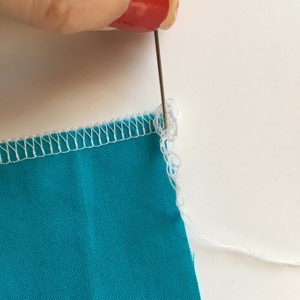
Starting at the edge of the seam, weave your needle and tail back through the stitches. I’ll generally go in about an inch, pull the needle and thread out, loop it around the last stitch it went under, then weave the needle back through another inch. I feel this secures the thread better with less chance of it working its way out over time.
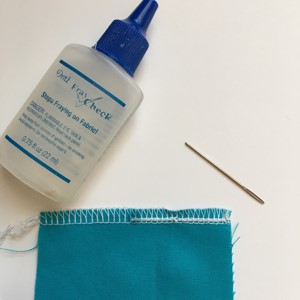
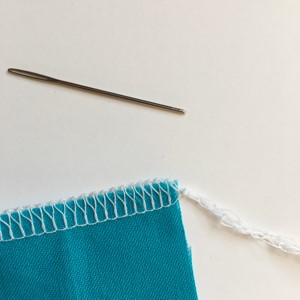
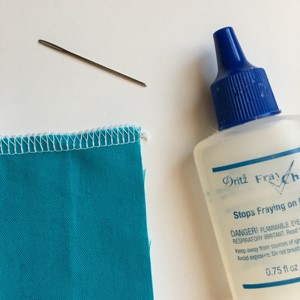
Pull your needle and thread all the way through, then carefully clip off the remaining tail. I add a dab of Fray Check (you can use clear fingernail polish or another form of adhesive as well) to the clipped portion to give it that added security. Done!!
Finishing Serger Tails Method 3: Unraveling and tying off the threads.
This is the first of two methods that involve tying off the ends. With this one, carefully unravel the tail at the end of the seam, separating them into 3 or 4 threads as applicable. Split them in half, (2 and 2, or 2 and 1), then tie them in to a double knot. Add a dab of Fray Check for safe keeping, and there you have it!
Finishing Serger Tails Method 4: Tying threads together.
The goal of this method is to tie all of the threads together as close to the edge of the seam as possible, without unraveling them as in the previous step. It’s not very easy knotting it off without an aid of some sort, so grab your embroidery needle (the one with the big-eye) or something similar to help.
Loop the tail around itself as though you are going to tie the knot, but before you pull it tight, place the needle inside the loop to anchor the threads and position the knot where you want it. Pull tight to knot and remove the needle.
Carefully cut off the excess thread, dab on some Fray Check, and you’re finished!
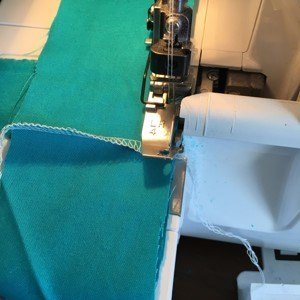
Finishing Serger Tails Method 5: Serging over the end.
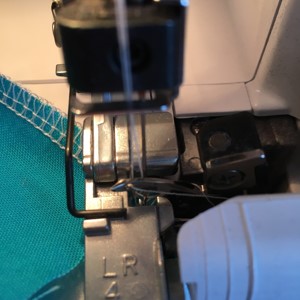
This method is a bit more difficult, and requires an attention to detail and practice to perfect. There are several steps (but I have pictures for you!)
(1) Serge until you reach the end of your seam, allowing maybe a stitch or two at the edge of the fabric.
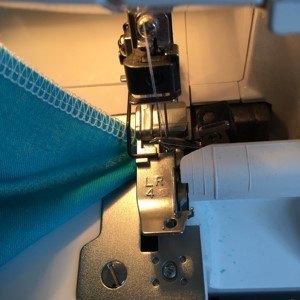
(2) Lift your foot, roll the serged seam towards you, and place it back under the foot, preparing to serge in the opposite direction. The serged seam will be directly alongside the knife.
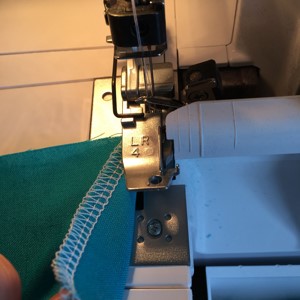
(3) Disengage the knife, then feed the garment back through, serging over the end about an inch or two.
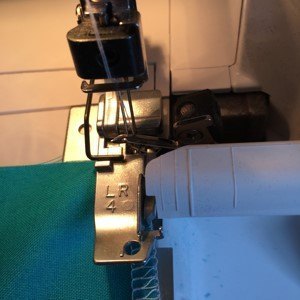
(4) Lift the foot and carefully pull your fabric away from the foot/needles.
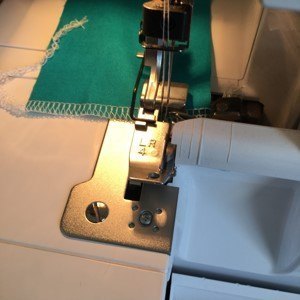
(5) Carefully trim the excess tail. All done! (Don't forget to re-engage your knife before your next seam!)
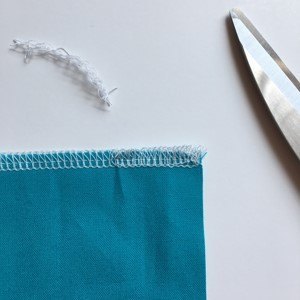
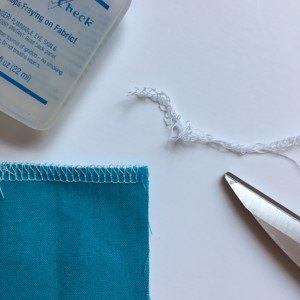
Finishing Serger Tails Method 6: Cut off the excess.
This last step takes the least amount of time, but requires Fray Check to secure.
With this method, simply clip the tail at the edge of the fabric and secure with adhesive. I don’t believe this technique is totally effective – with nothing by adhesive to secure it, it may unravel after a few washes.
And there you have it! Hopefully one or two of these methods of how to finish serger tails proves useful to you.
Do you use a method other than the ones I described above? I'd love to learn something new, so please share it if so!
-Steph
Other Tutorials
Before you leave, make sure to join our Facebook Group. Happy Sewing!