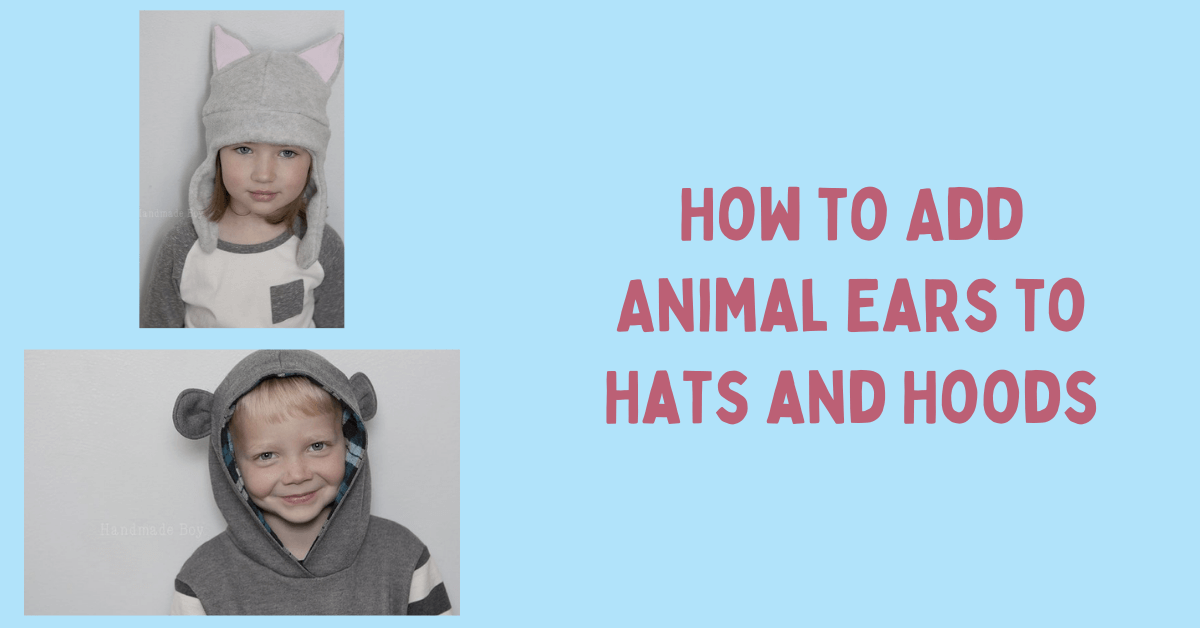
How to Add Animal Ears to Hats and Hoods
Hello, Peek-a-Boo fans! It’s Kelly from Handmade Boy and I’m back this month with a tutorial on how to add animal ears to hats and hoods. Specifically, to the Snow Days Hat or any hood like in the Classic Hoodie. Perfect for Halloween costumes or just to make a super cute hat for winter or a cozy and adorable hoodie for chilly days.
How to Add Animal Ears to Hats and Hoods
How to add ears to the Snow Days Hat.
Start with your desired ear shape. They are easy to free hand. Be sure to remember to add seam allowance. Here, I am using cat ears. Cut 4, 2 in the main fabric and 2 in the lining fabric. You can cut your lining 1/4″ smaller on the sides like I did. (Picture 1)
This will allow your ear to roll in towards the lining. (2) With right sides together, sew around the sides of the ear leaving the bottom open. If you cut your lining smaller, you will have to pull it a bit to get the edges to line up. (3) After you sew around the sides, trim the seam allowance and (4) turn right side out. Topstitch around the sides if desired.

After you have completed step one of the Snow Days Hat pattern, position the ears on the half hat piece with the inner ear facing against the right side of the hat. Your ear placement will depend on the animal you are making. For the cat on a toddler size hat, my ears are about an inch from the center seam. Baste ears in place and then continue on with step 2 of the hat pattern, sandwiching the ears between the pieces of the hat.

That’s it!! How easy was that!!?? And super cute!

To add ears to a hood is just as easy!

Construct your ears in the same manor above. This time I am using bear ears and my inner ear is the same size and the same fabric as my outer ear.
I did a little fold in the middle to give the bear ears some shape. To do this, after your ears are constructed, fold them in half inner ears together. Stitch along the bottom, near the fold for about 1/2″ to secure. Then open the ear and smush the fold flat with your fingers. (I know I get really technically and fancy sometimes.)

After you have sewn the middle seam of your hood together, try it on your child (if possible) and determine placement. No child handy? I tried on my son’s hood (size 6) myself and guessed at the placement. I ended up with his ears approx 3″ from the front and 4″ from the top on a size 6 hood.
(1) Make a slit through both sides of the hood approx 3/4 the length of the base of the ear. (2) Place ear in slit so right side of hood is touching right side of ear.
Be sure ear is facing forward. (3) Stitch ear into place. Go over it a few times to secure it well. Repeat with the other side. 🙂

That’s it! Now, finish out the pattern as instructed.

Now go add ears to ALL the hats and hoods!

Thank you for joining us to learn about how to add ears to hats and hoods. Before you leave, make sure to join our Facebook Group and also check out some of our other posts: