Lace Pocket Denim Skirt Tutorial | Beginner DIY Skirt
It's skirt week - and today we have the lace pocket denim skirt tutorial. Are you as excited as Anne and I are???
It's my turn to share today and I choose to do a fun up-cycle project with just a touch of lace in one pocket. It adds the perfect amount of girly :) Not to mention up-cycling is so much faster than working from scratch and you get lots of fun details like zippers and rivets.

Seriously Anne....this gal is developing a bit of sass :)

Denim Skirt Tutorial
Grab a pair of jeans and let's get started!
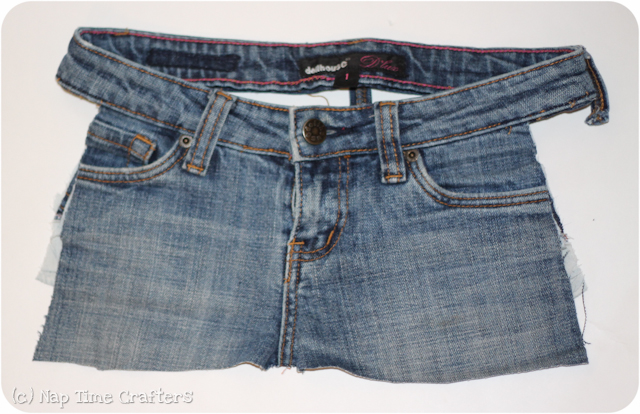
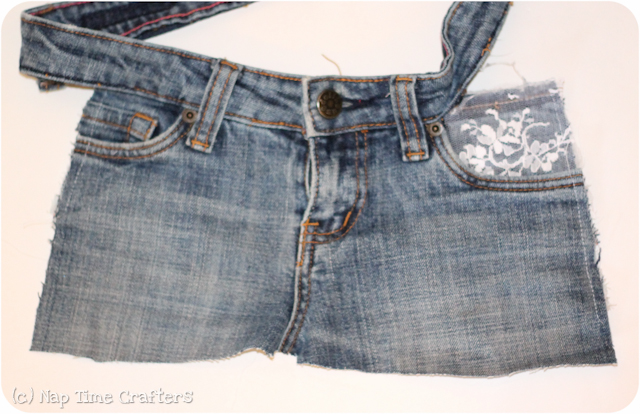
Denim Skirt Tutorial 1: I started with a size 1 pair of women's jeans. You want something with a fairly short fly if you're making these for a toddler.

Denim Skirt Tutorial 2: Unpick the jeans from the waistband (this was actually super fast to do) and then trim down the front piece using another skirt as a guideline on how wide you want it. I did a slight A-line shape. Remember you need a seam allowance on each side. I left the belt loops attached to the top half of the waistband.
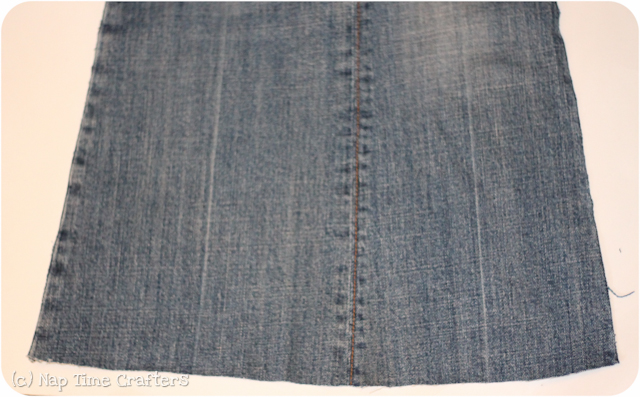
Denim Skirt Tutorial 3: Cut another piece for the back (I used a chunk of one leg in the upper thigh). I didn't think to do this but some back pockets would be really cute :)
Denim Skirt Tutorial 4: If you want a ruffle on the bottom (Anne mandated the ruffle) you can make one from contrasting fabric or use the hem of your existing jeans. I had just barely enough width to get a slight ruffle.

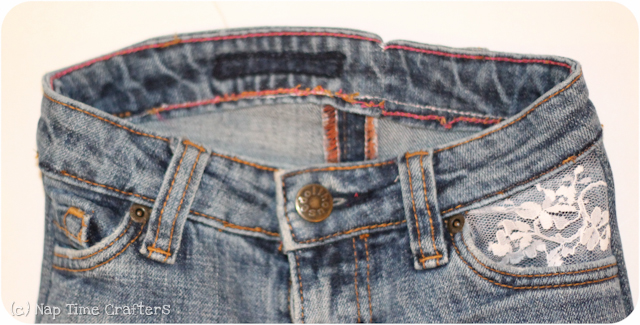
Denim Skirt Tutorial 5: Cut a scrap of lace and tuck it inside one pocket. Baste it to the outside edges of your pocket and tack it down on the inside edge of the pocket by the waistband. Hand sew the bottom edge of the lace to the pocket lining working from the inside of the skirt.
Denim Skirt Tutorial 6: With right sides together sew up the side seams and then finish the seam allowance.
sorry about the blurry photo...

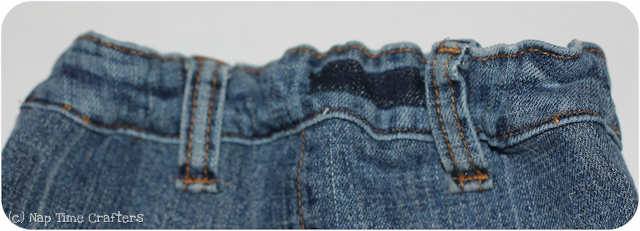
Denim Skirt Tutorial 7: Figure out how long you need the waistband to be and then cut it apart in the back. Pay attention to where the belt loops are if you want to keep those

Denim Skirt Tutorial 8: Open up the waistband and sew the short ends together.

Denim Skirt Tutorial 9: Refold the waistband and slide it over the back edge of the skirt. Topstitch in place along the back edge leaving a gap at each side seam.
Denim Skirt Tutorial 10: Slide some elastic through the back half (I had to rip off a tag first to get it to go through), tack it down at each side seam and then sew down the gaps you left in the waistband and reattach the bottom edge of the belt loops.
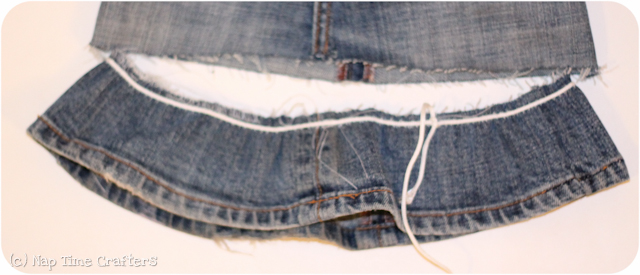
Denim Skirt Tutorial 11: At this point you can be finished and have a cute mini or you can continue and add a ruffle...
Sew the short ends of the ruffle pieces together. I unpicked a portion of the hem, sewed my seam and then refolded and stitched the hemline.

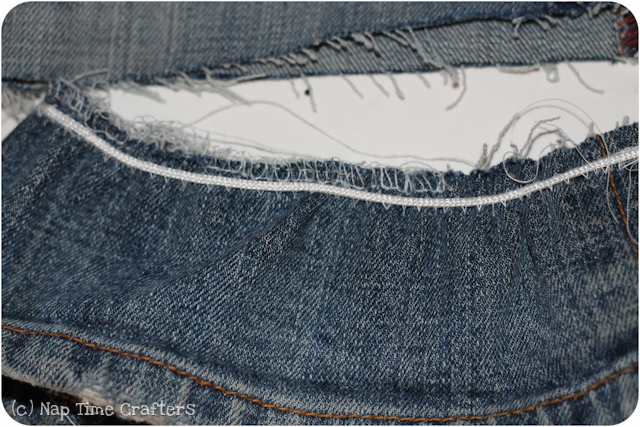
Denim Skirt Tutorial 12: Gather the ruffle to match the bottom edge of your skirt
I found the only way to make it gather was to zig-zag over some fine cording and then pull on the cording. It gathered right up ;)
Denim Skirt Tutorial 13: With right sides together attach it to the bottom edge of the skirt. For my skirt I had some slight wonkiness in the center front and I just folded the fabric under a bit to get it to lay flat and it worked out great

Finished!

Happy Sewing :) Thanks for joining us for this denim skirt tutorial. Before you leave, make sure to join our Facebook Group and follow us on Instagram. Happy sewing!